


Budget-Friendly Bathroom Makeovers with Peel & Stick Tiles
You look at your bathroom and sigh. The drab, dated tiles are a daily reminder of a space that doesn’t feel like yours. You want a chic, modern spa vibe, but your landlord says no permanent remodeling. What if $200 and a weekend could change everything? What if the secret to a high-style, low-cost refresh was as simple as peel and stick?
This is the reality for millions of renters and budget-conscious homeowners. You’re stuck between a tight budget and strict rental agreements. But the desire for a beautiful, personal space remains. This is where peel and stick bathroom design ideas come in. They are the perfect solution for this exact dilemma.
This article is your complete guide to a stunning DIY bathroom makeover with peel and stick tiles. We’ll show you real-life transformations achieved for under $200. You'll get renter-proof installation hacks, discover 2025 design trends, and see inspiring before-and-afters that prove a dream bathroom is closer than you think.
Why Peel & Stick Tiles Are a Game-Changer for Renters
For anyone in a rental, the words "no permanent changes" can feel like a creative dead end. You're stuck with whatever design choices were made a decade ago. Traditional tile work is expensive, messy, and absolutely out of the question. This is precisely why peel and stick tiles are such a revolutionary product for renters.
Think of them like removable wallpaper for your floors and walls. They offer the visual impact of a full renovation without the commitment. A recent survey found that nearly 70% of renters are unhappy with their bathroom's appearance but feel powerless to change it. Peel and stick tiles directly solve this pain point, offering freedom and flexibility.
They close the gap between high-end design and affordability. The average cost for a professional tiler to redo a small bathroom can easily exceed $3,000. In stark contrast, a stunning budget-friendly bathroom makeover with peel and stick tiles can often be completed for less than $200, making it an accessible project for almost everyone.
For those navigating the challenges of temporary living, understanding which products are truly safe and effective is crucial. To get a complete overview tailored for tenants, explore our guide on Renter-Friendly Bathroom Upgrades with Peel & Stick Tiles, which provides landlord-safe hacks and easy removal tips.
Before & After Case Study: A $175 Bathroom Refresh
It's one thing to talk about possibilities; it's another to see them. Let’s look at a real-world example. One renter, tired of her cold and clinical bathroom, decided to take action with a small budget and a free Saturday.
The "Before"
The bathroom was functional but uninspired. It featured plain, off-white floor tiles and bare walls, giving it a sterile and dated feel. The space lacked personality and warmth, feeling more like a temporary stop than a part of a home.
The Transformation
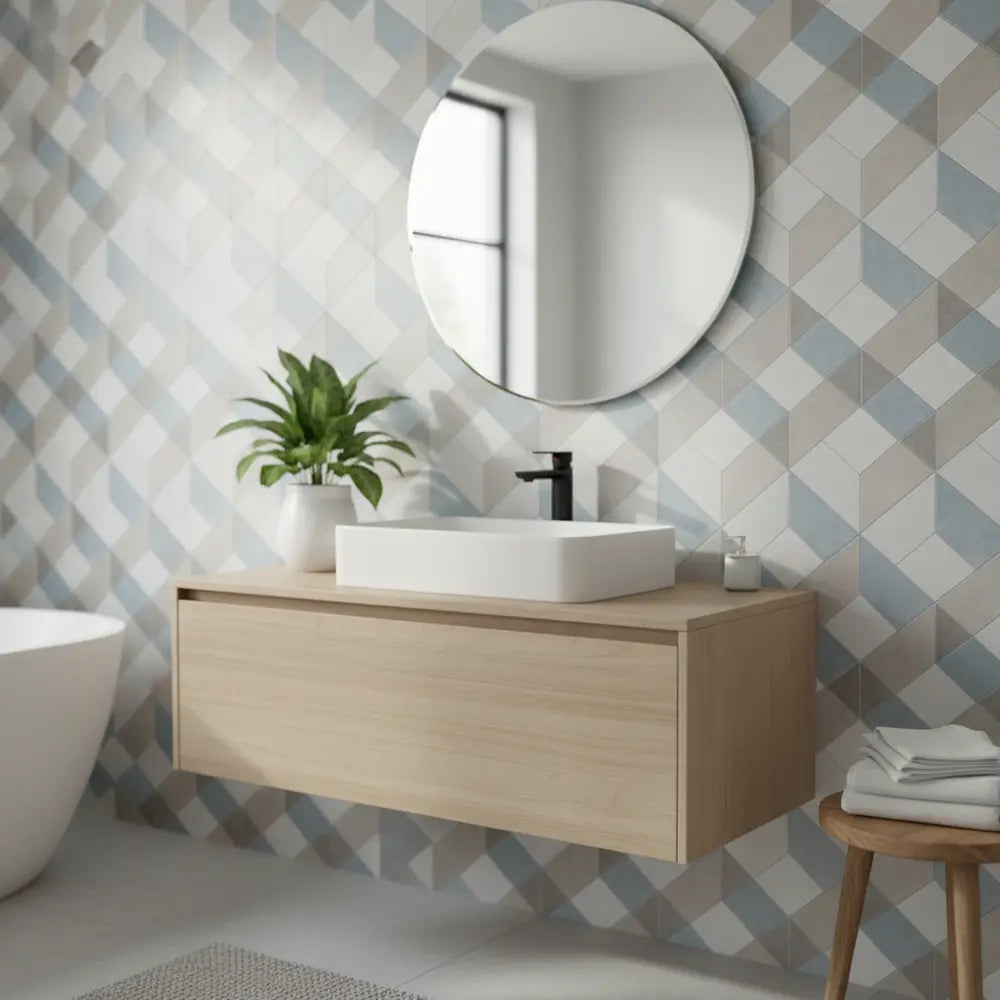
Using high-quality peel and stick marble look shower tiles for an accent wall and complementary patterned tiles for the floor, the entire mood of the room shifted. The marble-look tiles added a touch of luxury, while the geometric floor pattern introduced modern character. The project took just five hours from start to finish.
Budget Breakdown
- Peel & Stick Marble Tiles (Accent Wall): $85
- Peel & Stick Patterned Floor Tiles: $50
- New Shower Curtain & Bath Mat: $25
- Small Faux Plant: $15
- Total Cost: $175
The result is a bathroom that looks professionally designed but was achieved for the price of a nice dinner out. This case study proves that a limited budget doesn't have to limit your style.
Types of Peel & Stick Tiles: Choosing the Right Style
Feeling inspired to start your own project? The next step is choosing the right tile. The market has exploded with options, moving far beyond simple vinyl squares. Modern peel and stick tiles offer texture, durability, and sophisticated designs that mimic expensive materials.
Faux Stone Tiles
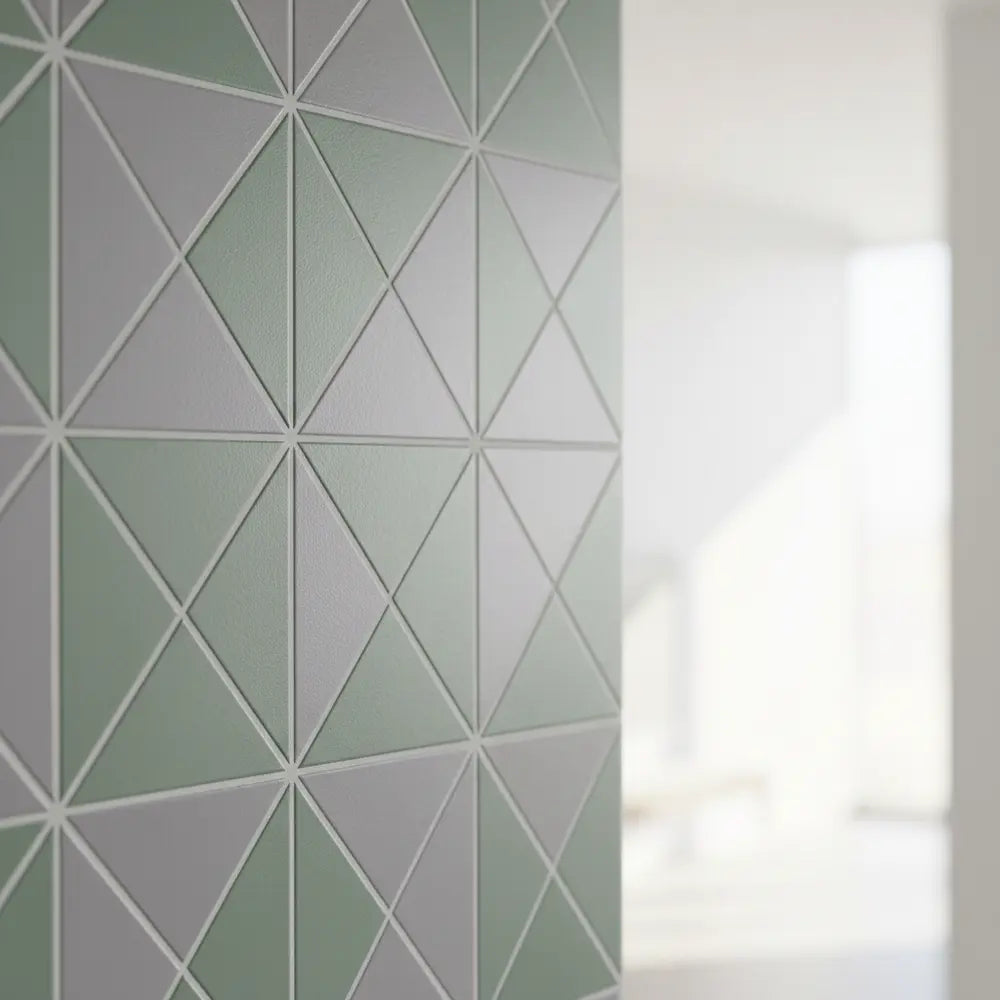
These tiles are perfect for adding an organic, earthy feel. They often feature textured surfaces that look and feel remarkably like real slate, travertine, or other natural stones.
- +Pros: Excellent at hiding minor subfloor imperfections. Adds warmth and texture.
- -Cons: Darker stone styles might make a very small bathroom feel smaller.
Marble-Look Options
For a touch of timeless elegance, peel and stick marble look shower tiles are a top choice. They deliver the luxurious feel of Carrara or Calacatta marble without the high cost and difficult maintenance. This style aligns perfectly with the "quiet luxury" trend for 2025.
- +Pros: Brightens a space. Looks incredibly high-end.
- -Cons: The pattern needs to be carefully aligned for a seamless look.
Eco-Friendly Choices
A growing number of brands offer tiles made from recycled materials or sustainable composites. These are a great option for the environmentally conscious decorator. They often come in bold colors and unique patterns, fitting the "dopamine decor" trend.
- +Pros: Sustainable materials. Often come in unique, artistic designs.
- -Cons: Can sometimes be slightly more expensive than standard vinyl options.
A common misconception is that all peel and stick tiles are flimsy. Today's best options are thick, rigid, and specifically designed for longevity. For a deeper look at the most durable and stylish options, the go-to resource is our comprehensive guide on the Top Waterproof Peel and Stick Shower Tiles for 2025.
Installation Tips for Peel and Stick Shower Tiles
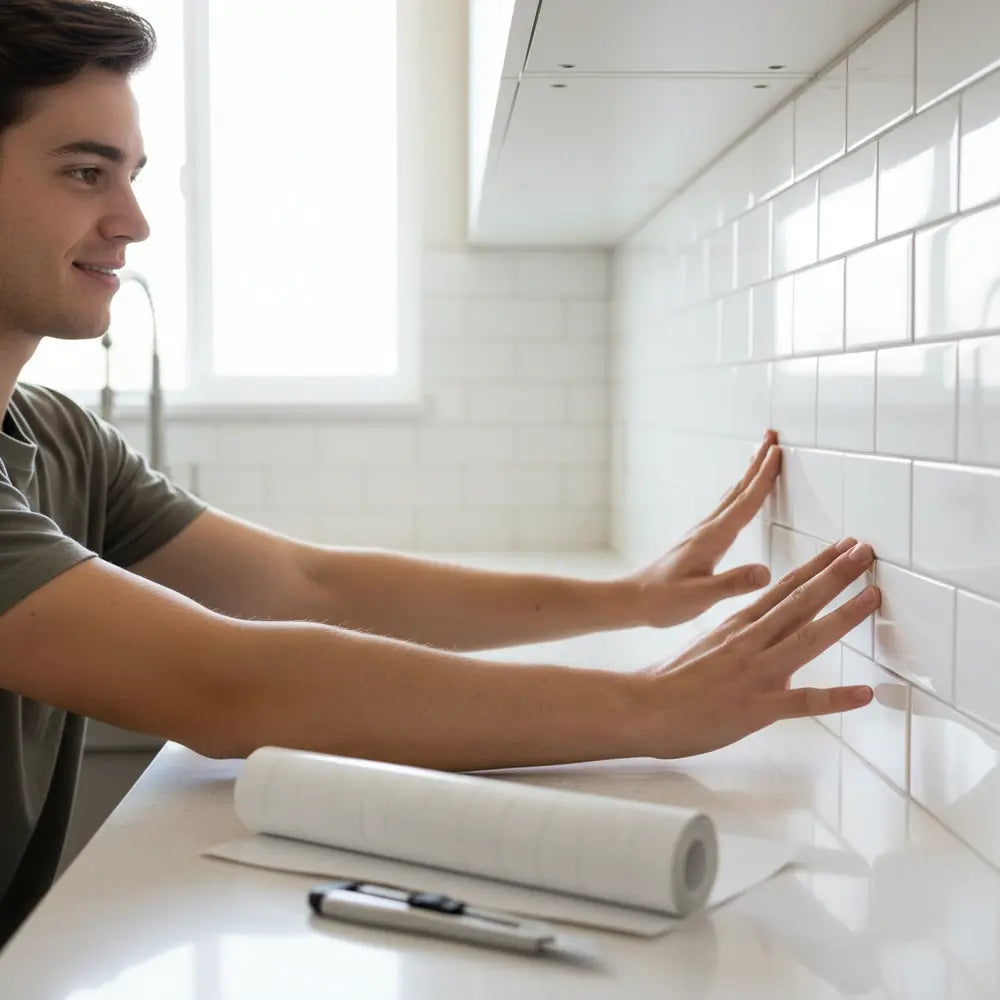
The success of your DIY bathroom makeover with peel and stick tiles hinges on proper installation. While the process is beginner-friendly, skipping key steps can lead to peeling corners and a less-than-professional finish. Don't worry—we're here to ensure you get it right the first time.
Think of preparing your wall or floor like a painter primes a canvas. It is the most critical step for a lasting result. The surface must be perfectly clean, dry, and smooth. Any lingering dust, grease, or moisture will compromise the adhesive.
Get Your Free Installation Checklist
Don't miss a single step. Download our printable checklist to guide you through a flawless installation process, from surface prep to the finishing touches.
Download ChecklistYour Step-by-Step Installation Checklist
- 1 Deep Clean the Surface: Start by scrubbing the existing tiles or wall with a strong degreasing cleaner. A trisodium phosphate (TSP) substitute works wonders. This removes soap scum and grime. Rinse thoroughly and let it dry completely—at least 24 hours.
- 2 Level and Plan: Do not start your first tile in a corner. Find the center of your main wall or floor and draw level horizontal and vertical lines to guide you. A laser level is a pro-level tool that makes this incredibly easy. A dry layout (placing tiles without peeling the back) helps you visualize the final look.
- 3 The First Tile is Key: Your first tile sets the standard for the entire project. Peel the backing, carefully align it with your guidelines, and press it firmly into place. Work from the center of the tile outwards to push out any air bubbles.
- 4 Use Pressure for a Strong Bond: Your hands aren't enough. Use a J-roller or a small wallpaper smoother to apply even pressure across the entire surface of every tile. This simple tool is essential for activating the pressure-sensitive adhesive and ensuring a strong, permanent bond.
- 5 Seal the Edges for a Watertight Finish: This is a crucial pro-tip that many people miss. For the best peel and stick tiles for shower walls, apply a thin bead of 100% silicone kitchen and bath caulk around all exposed edges where the tiles meet the tub, floor, or corner. This provides an extra layer of protection against moisture.
A common myth is that you can just stick these tiles over any surface. While they are versatile, they won't adhere well to heavily textured or uneven walls. If your surface is rough, a quick skim coat of drywall compound can create the smooth canvas you need. For a full visual walkthrough and more in-depth advice on achieving that perfect finish, our guide on How to Install Peel and Stick Tiles & Best Designs 2025 provides an excellent step-by-step tutorial.
Maintenance & Longevity: Do Peel & Stick Tiles Last?
One of the biggest questions people have is about durability. Will your beautiful new bathroom start peeling after a few steamy showers? The answer depends on two things: the quality of the tile and the quality of your installation. With the right approach, your makeover can look great for years.
High-quality peel and stick tiles are specifically engineered to handle the humidity and temperature changes of a bathroom. Their lifespan is impressive; with proper care, many homeowners report their tiles looking brand new for over 5 years. The key is avoiding common pitfalls like improper cleaning or installation on a damp surface.
Simple Maintenance Hacks for Lasting Beauty
To fully understand how to protect your investment and ensure your tiles look great for years, the definitive resource is our Peel and Stick Tile Maintenance Guide 2025. It offers a complete checklist for keeping your new space pristine.
Peel & Stick vs. Ceramic: A Maintenance Snapshot
| Feature | Peel & Stick Tiles | Ceramic Tiles |
|---|---|---|
| Cleaning | Easy; requires mild, non-abrasive cleaners. | Easy; can handle stronger chemicals. |
| Grout | None; no grout lines to stain or scrub. | Requires regular grout cleaning and sealing. |
| Repair | Simple; just heat, lift, and replace a single damaged tile. | Difficult and messy; requires breaking out old tile. |
| Longevity | 5-10 years with good care. | 20+ years, but grout can discolor. |
Budget Breakdown: Makeover Ideas Under $200
Let's prove just how accessible these budget-friendly bathroom makeovers can be. You don't need a huge budget to make a massive impact. The key is to spend smart and focus on changes that provide the most visual bang for your buck. Here's another real-world scenario to inspire you.
Case Study: The $150 Rustic Modern Refresh
A homeowner wanted to update a small guest bathroom with a "rustic modern" aesthetic, blending natural textures with clean lines. The goal was to do it for less than the cost of a weekend trip.
- Before: The bathroom had a basic, builder-grade vanity and a plain mirror, with a dated linoleum floor.
- After: By using faux stone peel and stick tiles on the floor, the space was instantly grounded with natural texture. The vanity was painted a deep charcoal gray, and the old hardware was swapped for sleek matte black knobs.
The Budget
- Faux Stone Peel & Stick Floor Tiles: $70
- Vanity Paint (Sample Pot): $8
- Matte Black Cabinet Knobs: $15
- New Towel Bar & Toilet Paper Holder: $40
- DIY Wood-Framed Mirror (using trim): $17
- Total Cost: $150
Hidden Cost Savers
This approach shows that a thoughtful, targeted DIY bathroom makeover with peel and stick tiles can completely redefine a space without draining your bank account. Curious about whether you can install new tiles directly over your old ones? Get the definitive answer and see more inspiring transformations in our guide, How to Transform Your Bathroom with Peel and Stick Tiles 2025.
Bathroom Hacks with Peel & Stick Tiles (2025 Trends)
Ready to think outside the box? Peel and stick tiles are more versatile than you might imagine. They aren't just for floors or full shower walls. You can use them in smaller, creative ways to inject personality and style into your bathroom, aligning with the top home decor trends for 2025.
Which Style Is Yours?
Hack 1: The Statement Accent Wall
Instead of tiling the entire room, create a high-impact focal point by tiling just one wall. The wall behind your vanity mirror or toilet is the perfect candidate. This is where you can be bold with a colorful pattern or a rich texture, like a deep green subway tile or a dramatic black marble. This technique is a cornerstone of peel and stick bathroom design ideas.
Hack 2: The Faux Wainscoting
For a classic, sophisticated look, create a "tile wainscoting" effect. Apply peel and stick tiles only to the bottom third or half of your bathroom walls. Top it off with a thin piece of painted trim for a clean, finished edge. This adds architectural interest and protects the walls from splashes, making it both beautiful and practical.
Hack 3: The Vanity Backsplash Upgrade
Is your vanity pushed right up against a plain, painted wall? You can create a custom backsplash in under an hour. A few rows of removable wall tiles between the countertop and the mirror will make the whole vanity area look more polished and intentional. This is a perfect project for using up leftover tiles from a larger job.
These hacks are especially powerful for renters because they are easily reversible. For more inspiration on using tiles for smaller accents, check out the creative concepts in our Peel Stick Backsplash Kitchen Ideas 2025 guide—the design principles translate perfectly to bathrooms. They allow for a significant aesthetic upgrade without a major commitment of time or money.
Peel & Stick vs. Ceramic Tiles: Which is Right for You?
The choice between peel and stick and traditional ceramic tile ultimately comes down to your specific situation, budget, and long-term goals. There's no single "best" answer, only what's best for you. Let's break down the peel and stick shower tiles vs ceramic tiles debate.
Imagine two friends, Maria and Leo. Maria just bought her forever home and plans to live there for 20 years. For Maria, investing in ceramic tile makes sense. The higher upfront cost is justified by its extreme durability and permanence, adding long-term value to her property.
For Leo, ceramic tile is a non-starter. He needs a renter bathroom makeover solution that is affordable, stylish, and removable. Peel and stick is the obvious winner. He can get a modern look for a few hundred dollars and a weekend of work, knowing he can remove it without losing his security deposit. To fully understand the options available for managing moisture in these temporary setups, Leo should explore a detailed analysis of Peel Stick Bathroom Tile for Moisture, which is essential for any wet area.
A Head-to-Head Comparison
A great pro-tip for homeowners on a budget: use peel and stick as a "Phase 1" renovation. You can enjoy a beautiful, updated bathroom *now* while you save up for a larger, more permanent renovation down the road. It’s the perfect bridge solution.
A stunning bathroom doesn't have to be a far-off dream or a major financial investment. As you've seen, the power of peel and stick tiles puts creative control directly in your hands. They offer the perfect blend of affordability, style, and simplicity, making them the ultimate tool for any renter bathroom makeover.
You can finally say goodbye to that dated bathroom and hello to a space that feels fresh, modern, and uniquely you. You have the power to create a high-impact transformation in a single weekend, all without risking your security deposit. Your dream bathroom is just a peel away.
Ready for more inspiration? Explore our complete collection of Bathroom Makeover TransformationsFrequently Asked Questions
1. Can you really use peel and stick tiles on shower walls?
Yes, but it's crucial to choose the right product. Look for tiles explicitly labeled as "waterproof," "for shower use," or made from vinyl or composite materials that don't absorb water. Proper wall preparation and sealing the edges with silicone caulk are non-negotiable steps for a durable, water-tight finish.
2. How do I remove peel and stick tiles without damaging the wall underneath?
The key is heat and patience. Gently warm the surface of a tile with a hairdryer. This softens the adhesive, allowing you to slowly lift a corner with a putty knife and peel the tile back. Work slowly and keep the heat moving. Any remaining sticky residue can typically be removed with a gentle adhesive remover.
3. How much does a DIY peel and stick bathroom makeover really cost?
For a small to medium-sized bathroom, you can achieve a dramatic transformation for between $100 and $300. This typically covers enough tiles for the floor or a large accent wall. The final cost depends on the size of your space and the price of the specific tiles you choose, but it consistently remains thousands of dollars cheaper than a traditional renovation.
4. Will peel and stick tiles look cheap in my bathroom?
Not at all! Modern peel and stick tiles have come a long way. High-quality options feature realistic textures, sophisticated patterns like marble and stone, and even faux grout lines that make them nearly indistinguishable from ceramic once installed. The key is to choose a quality product and install it with care.

Leave a comment
This site is protected by hCaptcha and the hCaptcha Privacy Policy and Terms of Service apply.