


Why Peel and Stick Backsplashes Are Trending in 2025
The surge in popularity for peel and stick backsplashes isn't a coincidence. It’s a direct response to the needs of modern homeowners and renters. As renovation costs continue to rise, DIY enthusiasts are seeking smarter ways to add value and personality to their spaces. A traditional ceramic tile backsplash can easily cost over $1,500 with labor, while a premium peel and stick alternative can achieve a similar look for under $300.
This trend is also fueled by massive leaps in material science. Early versions of these tiles often failed in the high-moisture, high-heat environment of a kitchen. But the peel and stick backsplash tiles 2025 market is different. Manufacturers now use advanced adhesives and durable materials like vinyl, PVC, and even metal composites that are specifically designed for longevity.
Consider the classic renter's dilemma. You want to personalize your space, but any permanent change risks your security deposit. A high-quality, removable backsplash allows a complete transformation. One renter in a small city apartment used faux subway tiles to turn a drab, beige kitchen wall into a bright, clean-looking cooking space, then easily removed them two years later, leaving no trace. This flexibility is a key driver of the trend.

Factors to Consider Before Buying Peel and Stick Tiles
Choosing the right tile is about more than just picking a pretty pattern. A kitchen backsplash is a functional surface that must withstand daily use. A common mistake is buying a tile based on looks alone, only to see it warp behind the stove or peel near the sink. To avoid this, you must evaluate each option against a few critical criteria.
Heat and Water Resistance
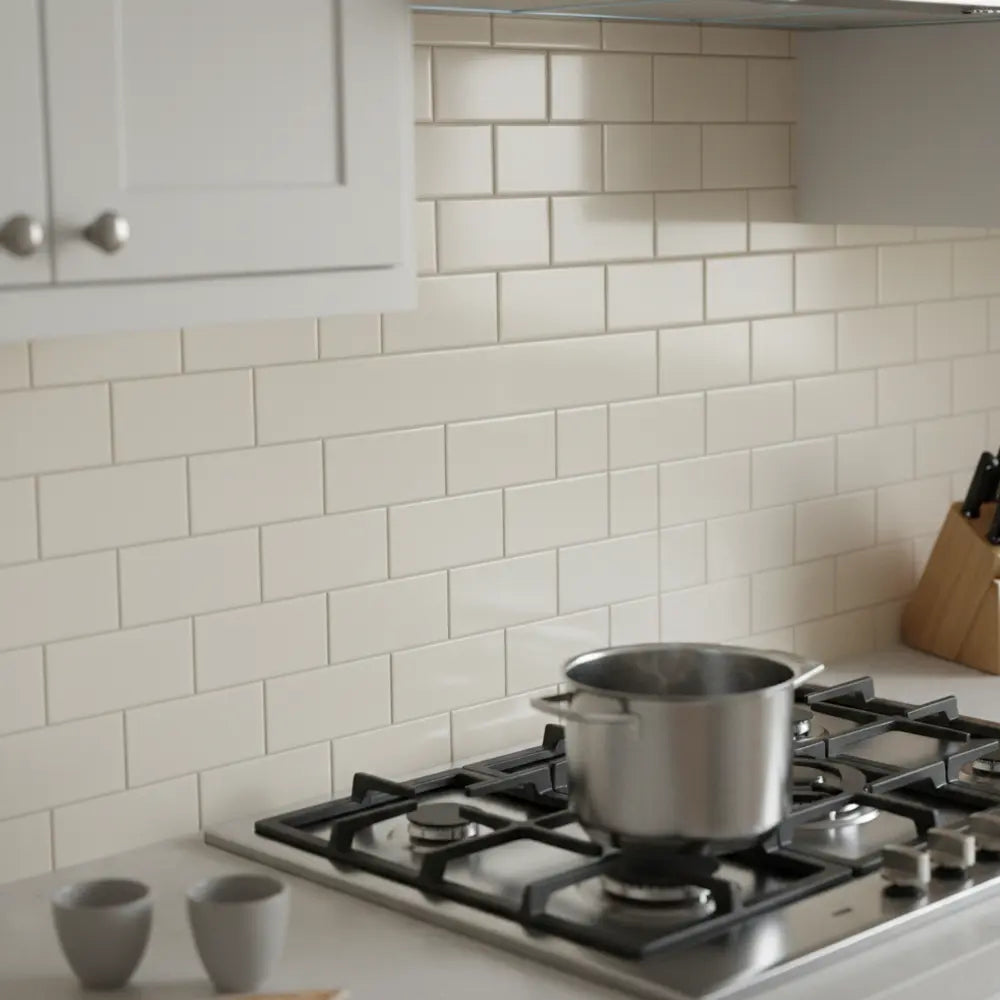
These are the two most important factors for a kitchen application. Look for products explicitly labeled as heat resistant peel and stick kitchen tiles. These are often made from materials like aluminum composites or specialized vinyl that won't deform or discolor from the ambient heat of a stovetop. A good rule of thumb is to maintain a clearance of 8-10 inches between the burner and the tile.
For moisture, seek out waterproof stick on wall tiles for kitchens. While most are water-resistant, a truly waterproof tile will prevent any moisture from seeping behind to the wall, which could cause mold or adhesive failure. Sealing the edges with a thin bead of clear silicone caulk is a pro-level tip for creating a bulletproof barrier.
Design Options and Styles
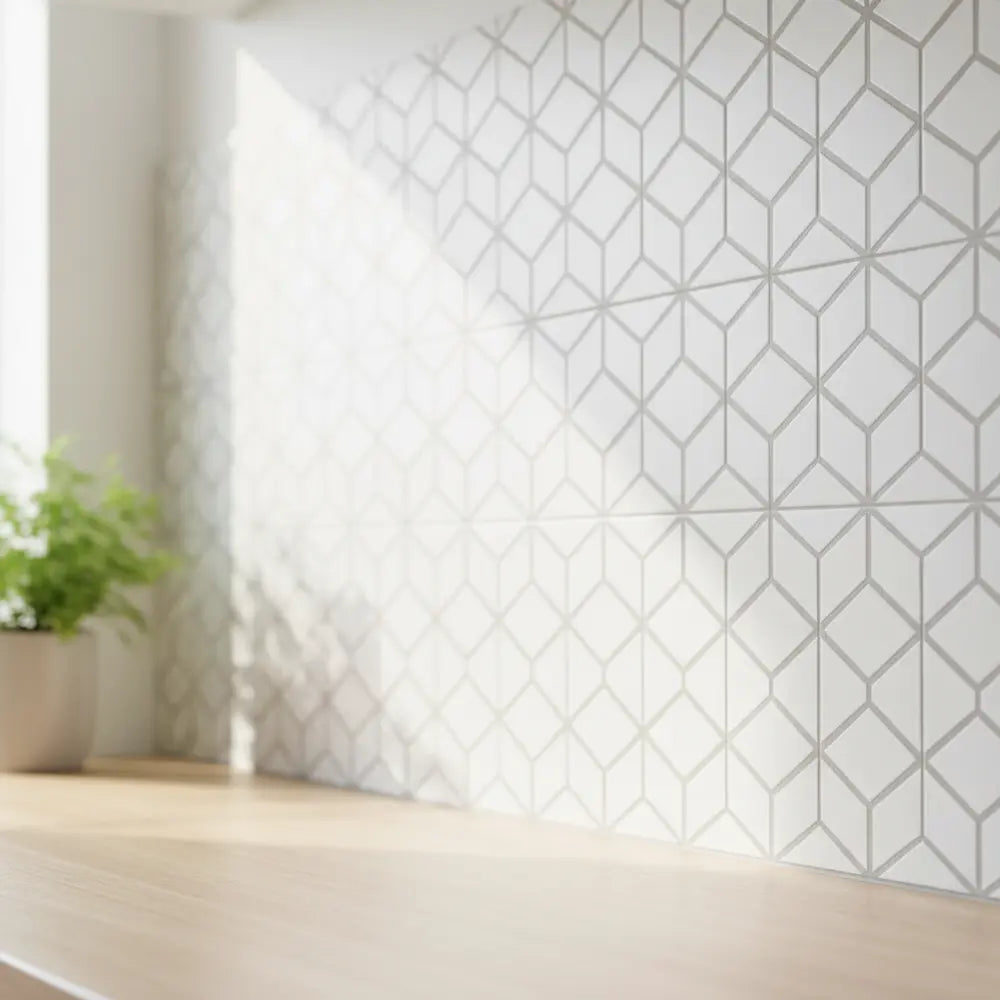
The design variety is now virtually limitless. You can find everything from timeless faux subway peel and stick backsplash tiles to intricate self-adhesive mosaic kitchen tiles. For a high-end look, consider options that mimic natural stone, marble, or even brushed metal.
A key design consideration is the tile format. Some products come in individual tiles, while others are large sheets. Sheets often provide a more seamless look and are faster to install, but individual tiles can offer more flexibility for complex layouts. For more inspiration on what's new, our guide on the Top Peel & Stick Tile Patterns for 2025 is the go-to resource for exploring fresh aesthetic possibilities.
Ease of Installation and Removal
The primary appeal of these tiles is their DIY-friendly nature. Most require just a few basic tools: a measuring tape, a level, and a utility knife. However, some materials are easier to cut than others. Gel and vinyl tiles are typically simple to trim, while metal or stone composite tiles may require more effort and a stronger blade.
If you are a renter, ease of removal is paramount. Look for products marketed as removable peel and stick backsplash ideas. These use adhesives that release cleanly when heated with a hairdryer, preventing wall damage. Always perform a patch test on a small, hidden area if you're concerned about your wall surface.

Best Peel and Stick Tiles for Kitchen Backsplash in 2025: Our Top Picks
After reviewing dozens of products, testing for durability, and analyzing consumer feedback, we've identified the top performers for 2025. These selections balance style, durability, and value, offering a reliable choice for any kitchen project.
| Product Category | Material | Heat Resistance | Style Focus | Price | Best For |
|---|---|---|---|---|---|
| The Durability Champion | PVC & Vinyl Composite | High | Classic & Modern | $$ | High-traffic kitchens, behind stoves |
| The Style Icon | Gel & Faux Stone | Medium-High | Luxury & Mosaic | $$$ | Statement backsplashes, low-splatter areas |
| The Budget Hero | Thin Vinyl | Medium | Subway & Geometric | $ | Quick refreshes, rental kitchens |
| The Eco-Warrior | Recycled Materials | Medium-High | Natural & Textured | $$ | Environmentally conscious homeowners |
1. The Durability Champion: 3D Vinyl Composite Tiles
These tiles represent the new guard of peel and stick technology. Made from a thicker, multi-layered PVC and vinyl composite, they have a rigid structure that mimics real ceramic. Their 3D texture adds depth, and the robust material offers excellent heat and water resistance, making them a safe choice for placement behind most cooktops. They are the workhorse tile for a busy family kitchen.
2. The Style Icon: Faux Marble Gel Mosaic
For those who want a luxury look without the luxury price tag, these gel-based tiles are a perfect choice. They have a glossy, resinous surface that convincingly replicates the look of polished marble or high-end glass mosaics. The gel construction gives them a cushioned feel and a brilliant shine that bounces light around the room, making your kitchen feel brighter and more expensive.
3. The Budget Hero: Classic Vinyl Subway Tiles
Sometimes, simple is best. The classic subway tile is a timeless choice that fits nearly any decor style, from modern farmhouse to industrial chic. These affordable vinyl sheets are incredibly easy to install and offer solid water resistance. While they may have lower heat resistance than composite options, they are a fantastic solution for updating a kitchen on a tight budget.
4. The Eco-Warrior: Recycled Material Tiles
As sustainability becomes a greater priority, eco-friendly peel and stick tiles for kitchens are gaining traction. These products are often made from recycled materials and use non-toxic adhesives. They offer unique, earthy textures and patterns you won't find elsewhere, allowing you to make a design statement that is also a responsible choice.
When you're ready to explore a wider variety, the definitive resource is our comprehensive list of the Best Peel and Stick Kitchen Tiles 2025: Stylish & Durable Picks. It's the ideal place to compare top-rated options side-by-side.
Best Options for Specific Needs
Not every kitchen has the same demands. The right tile for a homeowner planning to stay for a decade might be different from what a renter needs for a two-year lease. Here’s how to choose the best option for your specific goals.
For Rental Kitchens
The number one priority for renters is removability. You need durable peel and stick tiles for rental kitchens that will peel off cleanly at the end of your lease. Choose high-quality vinyl or gel-based tiles known for their gentle adhesives. A successful renter-friendly makeover focuses on covering an old, dated backsplash to instantly modernize the space without leaving a mark.
For a Luxury Look Without the Cost
To replicate the feel of a high-end custom kitchen, look for tiles with convincing texture and finish. Faux marble sheets with realistic veining, mother-of-pearl mosaics that shimmer in the light, or brushed metal tiles can create a powerful focal point. The trick is to choose designs with subtle color variations, as this mimics the natural imperfections of real stone or metal.
For Small Kitchen Spaces
In a smaller kitchen, the backsplash can be a secret weapon for creating an illusion of space. Opt for tiles with a reflective or glossy finish, such as polished subway tiles or light-colored mosaics. These surfaces bounce light around, making the room feel larger and brighter. Lighter colors like white, light gray, or soft pastels work best. Vertically oriented patterns can also draw the eye upward, making ceilings feel higher.
For more visual examples, seeing how others have succeeded is incredibly powerful. Our gallery of kitchen transformations using peel and stick tiles provides fantastic before-and-after inspiration.

Step-by-Step: How to Install Peel and Stick Backsplash in Your Kitchen
The beauty of a peel and stick backsplash is its simplicity. With careful preparation and a bit of patience, you can achieve a professional-looking result in just a few hours. Think of this process not as construction, but as a craft project for your kitchen.
Phase 1: Preparation is Everything
This is the most critical phase. A clean, smooth surface is essential for proper adhesion. Rushing this step is the number one cause of tile failure.
- 1.Clean the Wall: The wall must be completely free of grease, dust, and grime. Use a degreasing cleaner like TSP (Trisodium Phosphate) or a simple mixture of vinegar and water. Scrub the surface thoroughly and then rinse with a clean, damp cloth.
- 2.Let it Dry Completely: The wall must be bone dry before you apply any tiles. We recommend waiting at least 24 hours after cleaning. Any trapped moisture will compromise the adhesive. This is a common mistake people make in their excitement to get started.
- 3.Measure and Mark: Measure the height and width of your backsplash area. Use a level to draw a perfectly straight guideline on the wall where your first row of tiles will sit. Do not assume your countertop or cabinets are level—they rarely are! This line is your anchor for the entire project.
Phase 2: The Application Process
Now for the fun part. Work with one tile or sheet at a time to maintain control.
- 1.The First Tile is Key: Start in the most visible corner. Peel back only a couple of inches of the backing from the top of the tile. Align the top edge of the tile with your level guideline. Do not press firmly yet.
- 2.Align and Smooth: Once the top is aligned, slowly peel away the rest of the backing while smoothing the tile onto the wall with your hand or a plastic smoother. Work from the center outwards to push out any air bubbles.
- 3.Overlap as Directed: Most peel and stick tiles are designed with a small overlapping edge to create a seamless, waterproof grout line. Pay close attention to the manufacturer's instructions to ensure you align this overlap correctly on each subsequent tile.
- 4.Cutting Around Obstacles: For outlets or windows, create a paper template of the tile. Hold it up to the wall, trace the shape of the outlet, and cut the template. Place the template on your tile, trace the cutout, and carefully slice it out with a sharp utility knife *before* you peel the backing.
To become an installation expert, see our complete guide on How to Install Peel and Stick Tiles & Best Designs 2025 for even more pro tips.
Phase 3: Finishing Touches
A few final steps will ensure your new backsplash lasts for years.
- 1.Apply Firm Pressure: Once all tiles are in place, go over the entire surface with a J-roller or a soft cloth, applying firm, even pressure. This fully activates the pressure-sensitive adhesive and ensures a strong bond.
- 2.Wait Before Exposing to Heat/Moisture: The adhesive needs time to cure. Most manufacturers recommend waiting 24-48 hours before exposing the tiles to significant heat, steam, or water.
- 3.Seal the Edges (Optional but Recommended): For the ultimate protection, apply a thin, clear line of kitchen and bath caulk along the bottom edge where the backsplash meets the countertop and along any exposed outer edges. This creates a waterproof seal that looks clean and professional.
Want to take your project to the next level? Our guide to a complete DIY Peel and Stick Kitchen in 2025 shows how to combine your new backsplash with other simple decor techniques for a total transformation.
Design Inspiration: Stylish Peel and Stick Backsplash Trends for 2025
Your backsplash is a chance to inject personality into your kitchen. It can be a subtle backdrop or a bold statement piece. For 2025, the trends are moving toward styles that blend timeless appeal with modern sensibilities.
Modern Farmhouse Styles
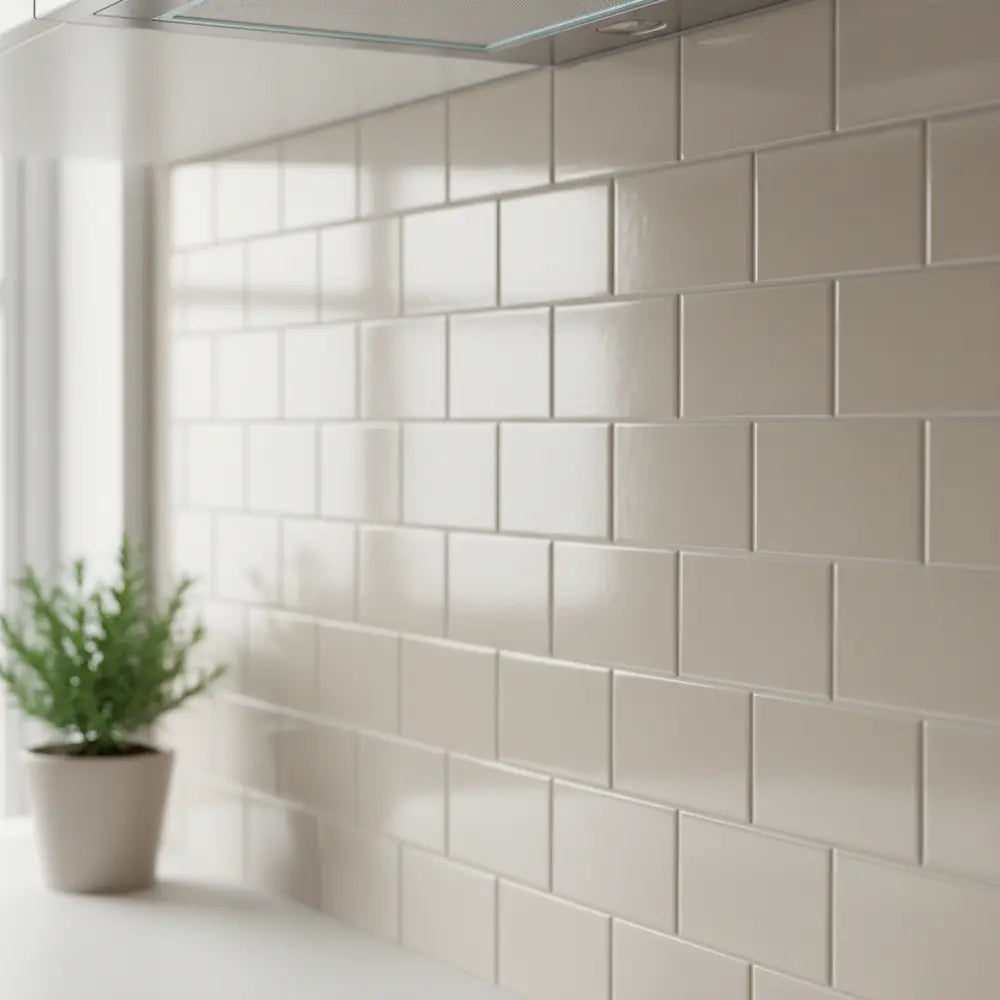
The beloved farmhouse look continues to evolve. For 2025, it’s less about rustic cliché and more about clean lines and texture. A modern farmhouse peel and stick backsplash might feature matte white subway tiles, tiles with a subtle crackle finish, or even shiplap-style patterns in soft, neutral tones. The goal is a space that feels warm, inviting, and effortlessly chic.
Understated Luxury and Marble-Inspired Designs
Homeowners are craving the look of luxury materials without the maintenance or cost. Large-format peel and stick sheets that mimic slabs of Calacatta or Carrara marble are incredibly popular. These create a seamless, high-end look that’s perfect for a dramatic focal wall. Also trending are self-adhesive mosaic kitchen tiles with hints of brushed gold, brass, or dark bronze for a touch of glamour.
Eco-Friendly and Recycled Options
Conscious consumerism is shaping design choices. Tiles made from recycled materials or sustainable composites are no longer a niche market. These eco-friendly peel and stick tiles for kitchens often feature unique textures and earthy color palettes inspired by nature. Think terracotta tones, slate-like textures, and patterns that celebrate organic imperfection. They bring a sense of warmth and authenticity to the kitchen. For more ideas on how to achieve these looks, check out these Peel Stick Backsplash Kitchen Ideas 2025.
Which backsplash style do you love most?
How to Remove Peel and Stick Tiles Without Damage
The promise of easy, damage-free removal is a major selling point, especially for renters or those who like to frequently change their decor. The process is straightforward, but technique matters. Follow these steps for a clean slate.

Step 1: The Gentle Heat Method
The adhesive used on quality peel and stick tiles is designed to release when warmed. Take a standard hairdryer and set it to a medium or high heat setting. Hold it about 6-8 inches from the tile surface, moving it back and forth over one tile for about 30-60 seconds. This will soften the glue without scorching the tile or the wall.
Step 2: The Peeling Technique
Start at a top corner of the heated tile. Use a putty knife or your fingernail to gently lift the edge. Once you have a good grip, peel the tile downward, pulling slowly and at a sharp angle (close to the wall). Avoid pulling it straight out, as this creates more tension on the wall's surface. The tile should come off with minimal resistance. Repeat this process tile by tile.
Step 3: Cleaning Up and Wall Repair
After all the tiles are removed, you may find a small amount of sticky residue left behind. This is normal. A citrus-based cleaner or a product like Goo Gone applied to a soft cloth will typically remove it easily. If any paint does peel (this can happen on poorly prepped or older painted surfaces), a tiny dab of spackle and a touch-up with matching paint is a quick fix.
Final Thoughts: Is Peel and Stick Backsplash Right for Your Kitchen?
Peel and stick backsplash tiles have evolved from a questionable shortcut into a genuinely smart and stylish solution for modern kitchens. The quality available in 2025 offers remarkable durability and aesthetic appeal that can rival traditional materials, all at a fraction of the cost and effort.
They are an almost perfect solution for renters, budget-conscious renovators, and DIYers who want an immediate, high-impact change. For homeowners, they offer a way to test-drive a trendy style or simply refresh a tired space while saving money for larger projects.
The primary consideration remains longevity. While a high-quality product can last for many years, it won't have the multi-decade lifespan of professionally installed ceramic or stone. However, for many, the flexibility and affordability are a worthy trade-off. By choosing a quality, heat resistant peel and stick kitchen backsplash, you are investing in a durable and beautiful upgrade.
Your next step is to explore the possibilities for your own space. Compare our top picks, get inspired by different kitchen styles, and decide if this is the right project for you. For a complete overview of all your options, our definitive Kitchen Backsplash Tile Guide can help you make an informed choice.
Frequently Asked Questions (FAQ)
1. How long do peel and stick backsplashes actually last in a kitchen?
With proper surface preparation and installation, a high-quality peel and stick backsplash can last for 5-10 years or even longer. The lifespan depends on the quality of the tile's material and adhesive, as well as the conditions in your kitchen. Choosing a product specifically rated for heat and moisture is key to maximizing its durability.
2. Can I put peel and stick tiles directly over my existing tile backsplash?
Yes, in many cases you can. The existing tiles must be smooth (no heavy texture), clean, and degreased. You should fill in the grout lines with a filler to create a completely flat surface before applying the new tiles. Applying directly over textured or uneven tiles will result in poor adhesion and an uneven finish.
3. Are all peel and stick kitchen tiles heat resistant enough for behind a stove?
No, not all tiles are created equal. It is crucial to choose tiles that are explicitly labeled as "heat resistant." These are typically made from vinyl composite, aluminum, or other materials that can withstand the ambient heat from a cooktop. Always check the manufacturer's specifications and maintain the recommended clearance from open flames or burners.
4. What's the best way to clean waterproof stick on wall tiles for kitchens?
Cleaning is simple. Use a soft cloth or sponge with a mild, non-abrasive cleaner and water. Avoid using harsh chemical solvents, bleach, or abrasive scouring pads, as they can scratch the surface or damage the finish of the tiles. Gently wipe them down and dry with a clean cloth to prevent water spots.

Leave a comment
This site is protected by hCaptcha and the hCaptcha Privacy Policy and Terms of Service apply.