


Removable Kitchen Tiles: Peel & Stick Backsplash Guide
Tired of staring at that boring, beige kitchen wall in your apartment? You dream of a stylish upgrade, but the fear of losing your security deposit holds you back. It’s a classic renter’s dilemma: you want a home that feels like yours, but you’re stuck with landlord-grade everything and strict rules against permanent changes.
What if you could completely transform your kitchen in an afternoon, with no damage, and for less than the cost of a fancy dinner out?
The Short AnswerYes, removable kitchen tiles are the perfect solution for renters. High-quality peel and stick backsplashes are designed to be temporary, damage-free, and easy to install. They are heat and moisture-resistant, come in thousands of styles, and can be removed safely with a little heat, leaving your walls clean and your security deposit intact.
This guide is your new best friend for a renter-friendly kitchen makeover. We’ll walk you through everything, step-by-step. You'll learn why these tiles are a game-changer, how to pick the best ones, and the exact process for installing and removing them without leaving a trace. Let’s get you that dream kitchen.

Why Are Peel and Stick Tiles Perfect for Renters?
The Question: "I want to personalize my kitchen, but I'm terrified of doing anything that might cost me my security deposit. Are these tiles really safe for rentals?"The Promise: This section explains why peel and stick tiles are the ultimate damage-free, affordable, and trendy solution specifically designed for the modern renter's needs.
As a brand that works with home decor transformations every day, we see the hesitation renters feel. The fear of that final walkthrough with the landlord is real. But peel and stick tiles were practically made to solve this exact problem. They offer a powerful combination of style, affordability, and, most importantly, peace of mind.
They Are a Truly Damage-Free Decor Solution
The biggest win for any renter is finding a decor hack that makes a huge impact without leaving a mark. High-quality peel and stick tiles use a specially formulated adhesive that is strong enough to last for years but gentle enough to be removed without peeling paint or damaging the wall surface.
Think of it like a high-tech Post-it note for your wall. It stays put as long as you need it to, but when it’s time to move, it comes off cleanly. This is the core of their design and why they’ve become a staple for temporary living situations.
They Offer Major Style on a Minor Budget
A traditional tile backsplash can cost thousands of dollars when you factor in materials, tools, and professional labor. For a renter, that kind of investment is simply not an option. Peel and stick tiles deliver a similar high-end look for a fraction of the cost.
You can often cover an entire standard backsplash area for under $100. This affordability means you can experiment with trends without financial regret. According to recent renter reports from Apartment Therapy, the ability to make "reversible, non-structural cosmetic changes" is a top priority, and these tiles fit that need perfectly.
You Can Keep Up with the Latest Trends
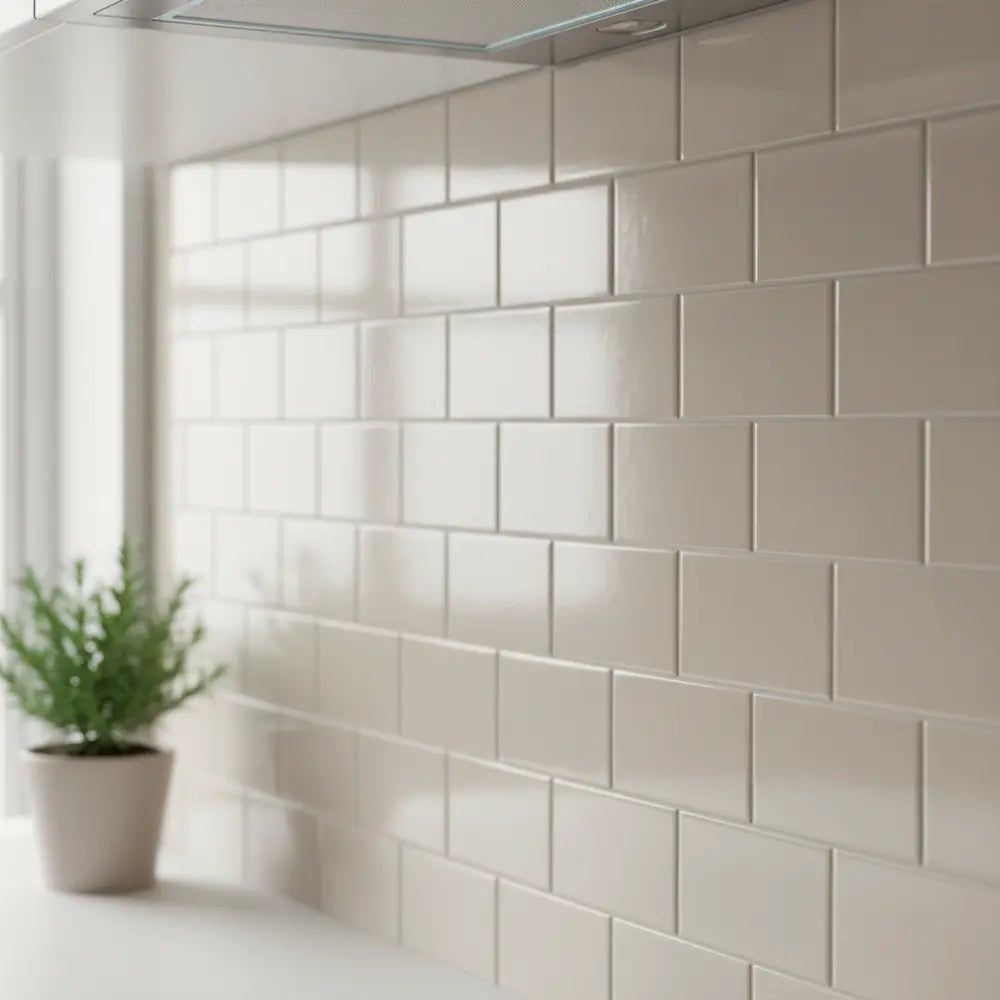
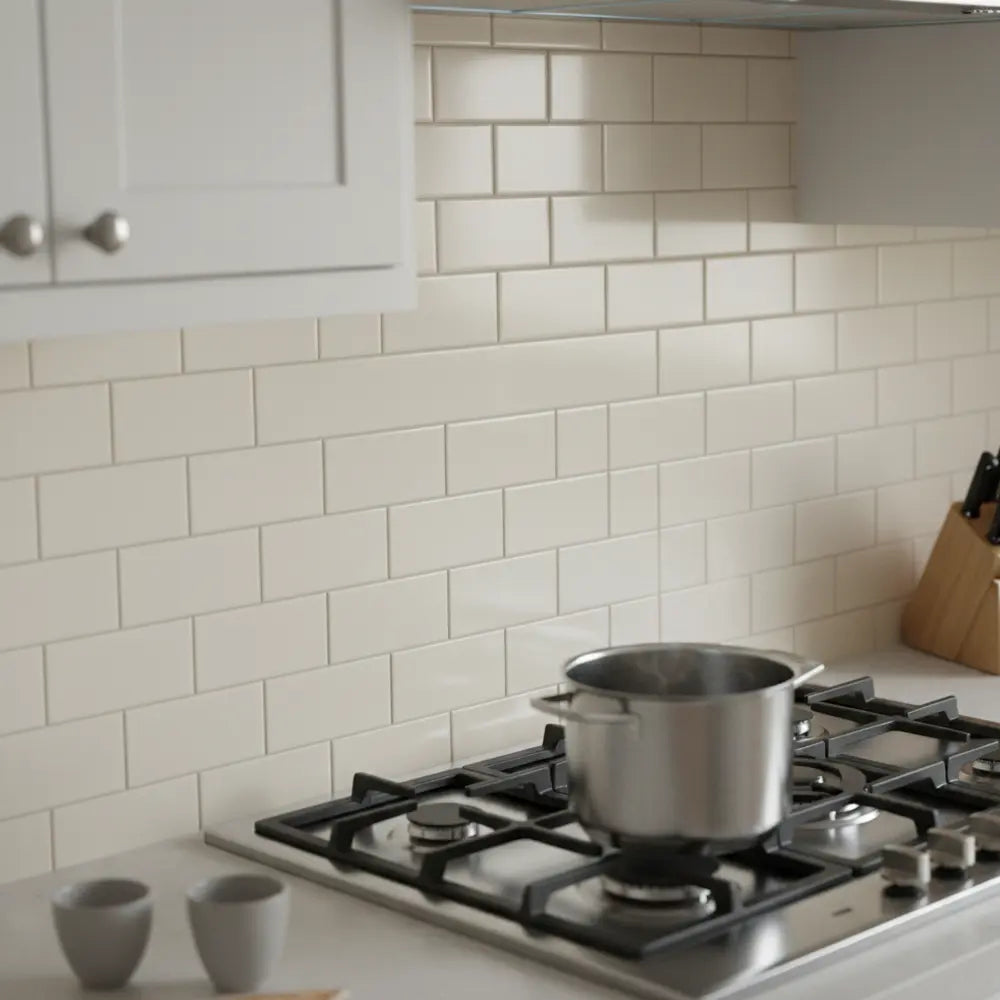
Rental kitchens can often feel dated. Peel and stick tiles give you the power to instantly modernize your space. Browse TikTok or Instagram for a minute, and you'll see countless "glow-up" videos of renters transforming their kitchens from drab to fab with designs like classic white subway tile, modern matte black hexagons, or warm faux marble.
These aren't the shiny, plastic-looking vinyl decals from decades ago. Today’s luxury peel and stick backsplashes have realistic textures, grout lines, and finishes that convincingly mimic real ceramic, stone, and glass. For a complete overview of the latest styles, our guide to Peel Stick Backsplash Kitchen Ideas 2025 is the perfect place to find inspiration.
How Do I Choose the Best Peel and Stick Kitchen Tiles?
The Question: "There are so many options online... how do I know which ones won't look cheap or fall off in a month? What should I even be looking for?"The Promise: Here, we'll break down the different materials, features to look for, and how to select a durable, high-quality tile that fits your kitchen's needs and your personal style.
Walking into the world of peel and stick tiles can feel a bit overwhelming. The key is to know what separates a quality product from a disappointing one. It comes down to three things: the material it's made from, its durability features, and the reputation of the brand.
What Are the Main Material Types?
Not all tiles are created equal. The material directly impacts the look, feel, and longevity of your backsplash. Here’s a quick rundown of the most common options you'll encounter.
| Material Type | Best For | Key Features | Average Cost |
|---|---|---|---|
| Vinyl/PVC | All-around use, high-traffic areas, budget projects | Most common, durable, waterproof, easy to clean, huge variety of designs. | $ - $$ |
| Gel-Coated | A realistic, 3D look that mimics real tile | Has a glossy, gel layer that creates depth and shine. Brands like Smart Tiles are famous for this. | $$ - $$$ |
| Metal | Modern, industrial, or contemporary kitchens | Often made of thin aluminum, providing a sleek, metallic finish. Can be more expensive. | $$$ |
| Natural/Eco-Friendly | Eco-conscious renters seeking unique textures | Made from materials like cork or reclaimed wood. Offers a warm, natural aesthetic. | $$$ - $$$$ |
For most renters starting out, high-quality vinyl or gel-coated tiles offer the best balance of affordability, style, and durability.
To see how different materials can completely change the look of a space, our guide can help you visualize the possibilities. Explore our full article to see five incredible before-and-after kitchen projects. Learn How to Transform Your Kitchen with Peel and Stick Tiles and find the perfect material for your makeover.
What Durability Features Should I Look For?
Your kitchen is a workhorse, so your backsplash needs to be able to handle the heat and humidity. When shopping, look for these specific keywords in the product description.
- Heat-Resistant: This is non-negotiable for a backsplash behind a stove. The product should explicitly state it's safe for this use. A common mistake is buying a simple decorative decal not rated for heat, which can warp or melt.
- Humidity & Water-Resistant: Essential for areas behind the sink. This ensures the tiles won't peel or bubble when they get splashed. Most kitchen-specific tiles have this feature.
- Stain-Resistant: Look for this if you’re a messy cook! A quality tile will have a protective top layer that allows you to easily wipe away splatters from sauces, oils, and spices.
What Are the Best Brands for Renters in 2025?
While many brands exist, a few have consistently earned trust for their quality and renter-friendly designs. Based on our experience and countless user reviews, these are solid starting points:
- •Smart Tiles: Often considered the premium choice, known for their realistic 3D gel-coated finish and strong, reliable adhesive.
- •Tic Tac Tiles: A popular and highly-rated option offering a vast range of styles, from classic subway to intricate mosaics. They are praised for their durability.
- •RoomMates: A great budget-friendly brand that offers stylish designs. They are known for being particularly easy to remove, making them a safe bet for anxious renters.
Making the right choice is the first step in a successful project. To learn more about how a simple tile selection can change your whole room, check out our guide on How to Upgrade Kitchens with Peel and Stick Tiles.
What Tools and Prep Do I Need Before Installation?
The Question: "Okay, I've picked my tiles. Can I just start sticking them on the wall, or is there something I need to do first? I don't want to mess this up."The Promise: This section provides a simple, foolproof checklist for preparing your walls and gathering the right tools to ensure your tiles stick properly and look professionally installed.
I can't stress this enough: a great installation is 90% preparation. Taking just 30 minutes to prep your space will be the difference between a backsplash that lasts for years and one that starts peeling at the corners in a week. Don't skip these steps!
Your Essential Tool Kit

The All-Important Wall Cleaning Routine
A common misconception is that a quick wipe with a paper towel is enough. Dust, grease, and grime are the enemies of adhesion. You need a perfectly clean surface for the tiles to bond correctly.
Wall Cleaning Checklist
- Start with a Degreaser: Use a spray cleaner like TSP substitute or a simple mixture of dish soap and warm water.
- Scrub the Area: Gently scrub the entire backsplash area with a sponge, paying extra attention to the area behind the stove where grease builds up.
- Rinse Thoroughly: Wipe the wall down with a clean, damp cloth to remove any soap residue.
- Let It Dry Completely: This is crucial. Wait at least an hour, or even longer, until the wall is 100% dry to the touch. Any lingering moisture will prevent the tiles from sticking.

Now that your surface is prepped and your tools are ready, you're set for a smooth installation. Watching a quick video can make the process even clearer. For an expert walkthrough covering everything from the first tile to the last, explore our comprehensive video guide. It’s the perfect companion to ensure your project is a success. Dive into the details with our full guide on How to Install Peel and Stick Tiles & Best Designs for 2025.
Which Surfaces Can I Install On?
Peel and stick tiles are versatile, but they have their limits. They adhere best to surfaces that are smooth, flat, and non-porous.
- •Ideal Surfaces: Painted drywall (wait at least 3 weeks after painting), existing smooth ceramic tile, glass, and laminate.
- •Challenging Surfaces: Textured walls (like orange peel or knockdown finishes) are tricky. The tiles may not get enough surface area to stick properly. Some people have success by first sanding the texture down or applying a thin, smooth panel.
- •Surfaces to Avoid: Unpainted drywall, brick, plaster, or any porous or uneven surface.
For a complete visual walkthrough of the process, our Easy Guide: Install Peel & Stick Subway Tiles is the go-to resource for beginners.
How Do I Safely Remove Peel and Stick Tiles Without Damage?
The Question: "This all sounds great, but I'm still nervous about move-out day. What's the secret to getting these off without ripping off the paint?"The Promise: We'll give you the simple, stress-free, step-by-step method for removing your tiles, ensuring your walls look exactly as they did before and your deposit is safe.
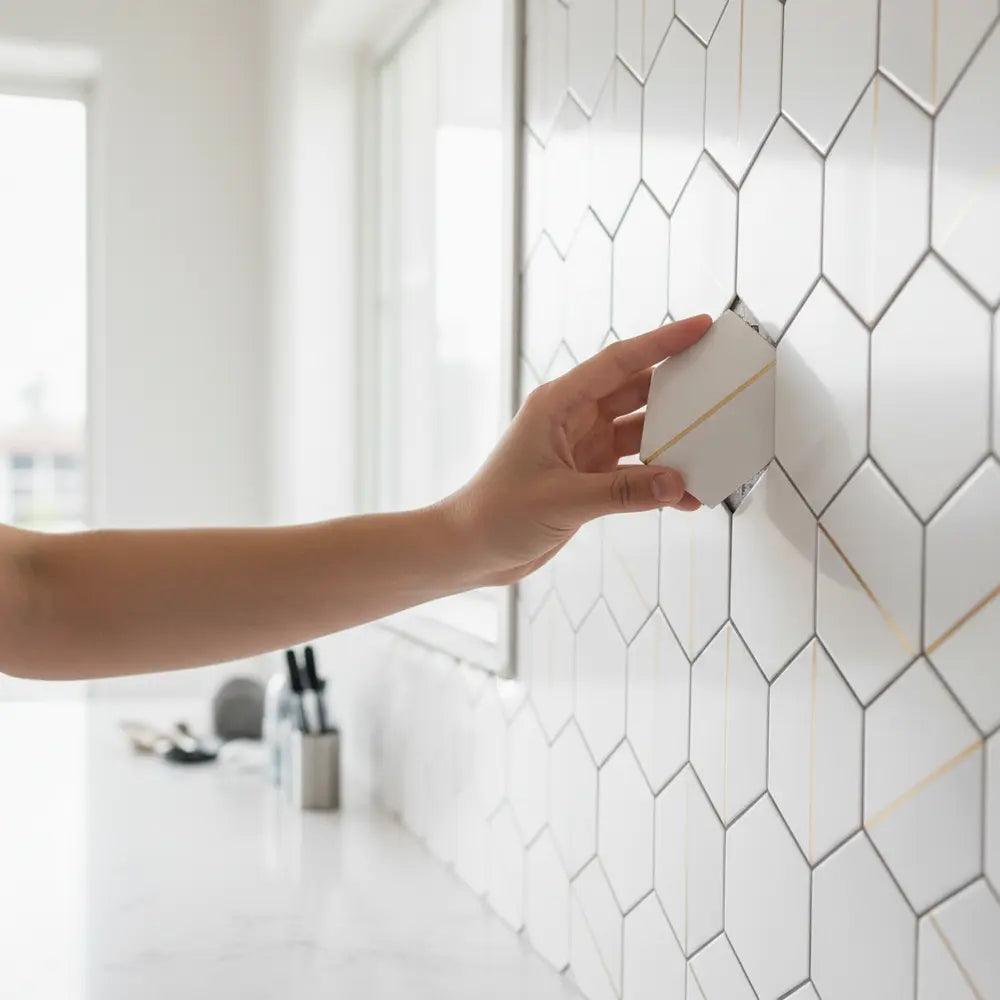
This is the moment of truth for any renter. The good news is that removing quality peel and stick tiles is surprisingly easy and gentle on your walls when you do it correctly. The secret weapon? A common household hairdryer.
Step 1: Apply Gentle Heat
The adhesive is designed to release when warmed up. Set your hairdryer to a low or medium heat setting. Hold it about 6-8 inches away from the wall and warm up the first tile you plan to remove. Move the hairdryer back and forth across the tile for about 30-60 seconds. You want to warm the tile and the adhesive underneath, not overheat it to the point of melting. The tile should feel warm to the touch.
Step 2: Peel Slowly from a Corner
Once the tile is warm, use your fingernail or a plastic putty knife (never metal, which can gouge the wall) to lift one of the corners. Once you have a good grip, begin to peel the tile back. The key here is to pull slowly and steadily. Pull the tile down at a sharp angle, almost back on itself, rather than straight out from the wall. This minimizes the tension on the paint underneath. If you feel resistance, apply a little more heat to that spot.
Step 3: Clean Up Any Residue
Most high-quality tiles will come off cleanly, but sometimes a bit of sticky residue can be left behind, especially if the tiles have been up for a long time. Don't panic and don't start scraping. Simply use a citrus-based cleaner (like Goo Gone) or even a bit of rubbing alcohol on a soft cloth. Apply it to the residue, let it sit for a minute to dissolve the adhesive, and then wipe it away gently.
Step 4: Final Wall Cleaning
After all the tiles and residue are gone, give the entire wall a final wipe-down with a damp cloth to remove any cleaning solution. Let it dry, and your wall will be back to its original state, ready for your landlord's inspection.

For an even more in-depth look at this process, the go-to resource is our article, Transform & Remove Renters Peel and Stick Tiles Safely. It offers the most comprehensive guide to ensuring a damage-free removal.
What Are Some Peel and Stick Tile Ideas and Renter Hacks?
The Question: "I want to do more than just a basic backsplash. Are there other creative ways I can use these tiles to make my rental kitchen look amazing?"The Promise: This section is packed with creative inspiration and clever hacks, showing you how to use peel and stick tiles to create custom, high-impact looks that are still 100% renter-friendly.
Your creativity doesn't have to stop at the space between your counter and cabinets. Peel and stick tiles are an incredibly versatile medium for adding personality throughout your kitchen. It’s time to think outside the box.
Go Beyond the Backsplash
- The Kitchen Island Makeover: Is the front of your kitchen island or breakfast bar a boring, scuffed-up panel? Covering it with peel and stick tiles is a fantastic way to turn it into a statement piece. A bold pattern or a pop of color can completely change the room's focal point.
- Create a Mini Accent Wall: You don't have to tile a whole wall to make an impact. Consider creating a small accent area around a coffee bar, open shelving, or in a breakfast nook. It defines the space and adds a custom touch.
- Faux-Tiled Pantry or Shelves: Line the back of your pantry or open kitchen shelving with a fun tile pattern. It’s a delightful surprise every time you open the doors or reach for a plate, adding a layer of professional design to your storage.
TikTok-Inspired Designs and Budget Hacks
The "DIY Renter" community on social media is a goldmine of brilliant ideas. We've seen renters create stunning kitchens using clever, budget-friendly techniques.
- •The "Mix and Match" Method: Don't be afraid to combine two or three different but complementary tile patterns to create a unique mosaic. This works especially well for eclectic or bohemian styles.
- •The Frame Hack: For those who are extra cautious, some renters first apply the tiles to a thin, custom-cut piece of hardboard or plexiglass. They then mount that panel to the wall using removable Command Strips. It gives you a full backsplash look with zero direct contact with the wall.
- •Green is the New Neutral: A huge trend we're seeing is the use of rich green tiles to bring life and color into sterile, all-white rental kitchens. Our collection of Renter-Friendly Green Peel & Stick Backsplash Ideas shows just how transformative this color can be.
Poll: Which backsplash style fits your vibe?
The best part about these projects is that they are low-risk, high-reward. You get to express your style, and when you move, you simply reverse the process.
Final Thoughts: Your Stylish, Damage-Free Kitchen Awaits
You don't have to live with a kitchen that doesn't inspire you. Removable peel and stick tiles give you the power to create a space you love—affordably, easily, and without risking your security deposit. They are the ultimate renter's tool for turning a temporary house into a home.
From choosing the perfect material to mastering the simple installation and stress-free removal, you now have the knowledge to take on this project with confidence. The entire process is designed to be forgiving for beginners.
If you're feeling inspired but still a little hesitant, start small. Try tiling a small section behind your coffee maker or sink. Once you see how easy it is and how great it looks, you'll be ready to tackle the whole kitchen. Your dream kitchen is just a peel and a stick away. To master the basics and see the latest design trends, our complete guide is the perfect place to start. Discover everything you need to know with our article on DIY Peel and Stick Tiles: Your Easy Kitchen Upgrade.
For more renter-friendly DIY projects and weekly inspiration, subscribe to our newsletter and follow us on TikTok!
Frequently Asked Questions
Can I really put peel and stick tiles behind my stove?
Yes, but you must choose the right product. Look for tiles specifically labeled "heat-resistant." These are made to withstand the indirect heat from a stovetop. As a rule of thumb, there should be at least 8-10 inches of space between the open flame or burner and the tiles. Never use tiles not rated for heat in this area.
How long do peel and stick tiles last?
With proper wall preparation and installation, high-quality peel and stick tiles can last for many years. Most brands guarantee their adhesive for at least 3-5 years, but we’ve seen many installations look perfect for a decade or longer. Their lifespan depends on the quality of the tile and the environment.
Will they look fake or cheap?
This was a valid concern years ago, but technology has come a long way. Premium brands now use 3D gel-coating, realistic textures, and high-definition printing to create tiles that convincingly mimic real ceramic, stone, and glass. The key is to order samples first to see and feel the quality for yourself.
What if my rental has textured walls?
This is a common challenge. Peel and stick tiles need a smooth surface to adhere properly. Installing directly onto a textured wall (like "orange peel") will likely fail. The best renter-friendly solution is to either sand the texture down (with your landlord's permission) or apply the tiles to a thin, smooth board and mount that panel to the wall with removable strips.

Leave a comment
This site is protected by hCaptcha and the hCaptcha Privacy Policy and Terms of Service apply.