





















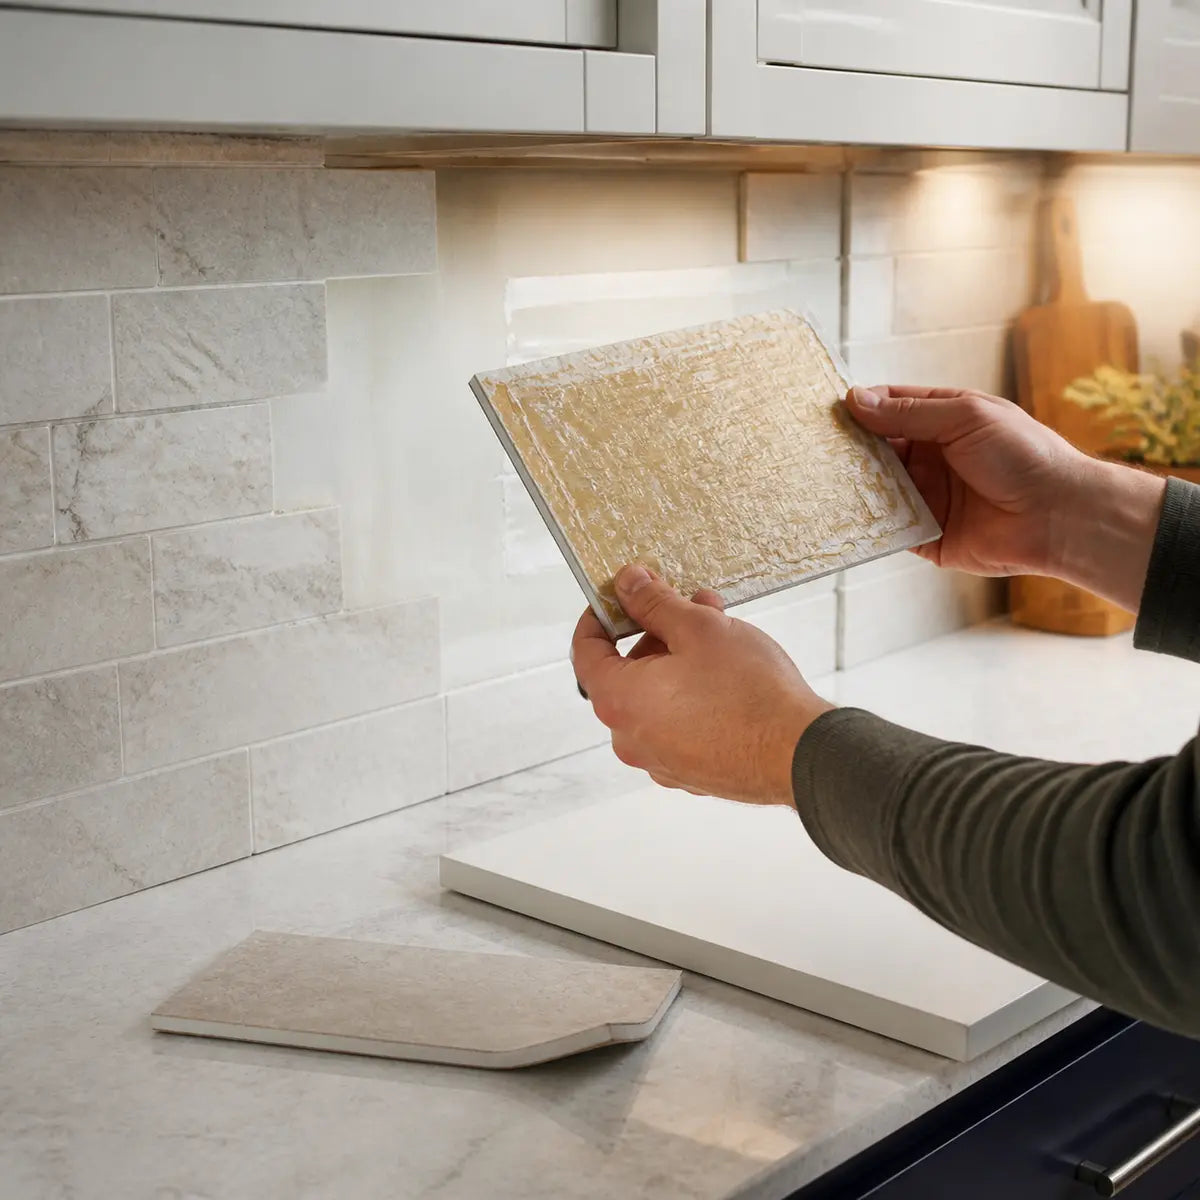
Some peel-and-stick tiles can be reapplied after removal, but coming off in one piece does not make a tile reusable. A second installation is reasonable only when the exact product instructions allow it, the tile remains flat and undamaged, the adhesive side is clean and continuous, the receiving surface is compatible, and a limited adhesion check shows stable contact without lifting, slipping, or distortion.
Explore this guide
That answer is conditional because “peel-and-stick tile” covers very different constructions. A thin decorative wall sheet, a dimensional backsplash panel, and a resilient floor tile may all use pressure-sensitive adhesive, yet respond differently to removal. Their backings have different stiffness, stretch behavior, edge profiles, and adhesive systems. A technique that works for one product may damage another.
Reuse also asks more of a tile than removal. Removal asks, “Can I separate this material from the first surface?” Reuse asks several harder questions: Did the tile keep its dimensions? Is enough uncontaminated adhesive still available? Will the second surface accept that adhesive? Can the tile lie flat? Will its edges remain secure after the initial press? Is the result suitable for the room and the consequences of failure?
Treat every removed tile as an individual specimen rather than assuming an entire batch is reusable. Inspect it, classify it, and test it in a low-consequence location before committing to a full second installation.
Can Peel-and-Stick Tiles Be Reused After Removal?
Yes, some may be reusable, but there is no reliable category-wide promise. The answer depends on the product’s instructions, construction, condition after removal, adhesive contamination, storage history, receiving surface, and intended use.
A tile is a plausible candidate for reapplication only when all of these conditions are met:
If one of these conditions is unknown, the tile belongs in the “possibly reusable after testing” category, not the “likely reusable” category. If it is damaged, contaminated, incompatible with the new surface, prohibited from reuse, or unstable during a trial, do not reuse it.
This distinction matters because adhesive that feels sticky to a fingertip may still make poor contact across the full back of a tile. A corner can feel tacky while dust covers the center. The adhesive may grab immediately but release later as the tile tries to return to a curled or stretched shape. A floor tile may remain down in the center while a raised edge becomes a trip point.
The practical answer to “can you reuse peel-and-stick tiles?” is therefore: sometimes, as a controlled and product-specific experiment, but never on appearance or hand tack alone.

What Do Removable, Repositionable, and Reusable Mean?
Removable, repositionable, and reusable describe different stages of a product’s life. Unless the manufacturer explicitly connects those terms, do not treat them as synonyms.
Removable generally means the installed product is intended to be separated from a surface under defined conditions. It does not automatically promise that the tile will remain undamaged, that the original surface will be residue-free, or that the adhesive will support a second installation.
Repositionable usually refers to adjustment during installation. A tile may allow light placement, lifting, and realignment before firm pressure is applied. That is different from removing it after days, months, or years of service. Pressure, dwell time, temperature, surface texture, and environmental exposure may all change the bond after installation.
Reusable is the strongest claim. It means the removed piece can be installed again within stated limits. A meaningful reuse instruction should identify the permitted surface, removal procedure, storage method, reapplication process, and any limit on the number of cycles. A bare statement that a product is “removable” is not enough.
There is another term worth knowing: pressure-sensitive adhesive, often shortened to PSA. This is an adhesive intended to form contact when pressure brings it against a suitable surface. Pressure helps the adhesive reach surface irregularities and create broader contact. The resulting bond is affected by the adhesive formulation, backing, surface condition, application pressure, environment, and time in contact.
That is why a lightly placed tile may be adjustable while a fully pressed and aged tile is much harder to remove. It is also why “it still feels sticky” is an incomplete assessment. Initial tack, resistance to edge peeling, resistance to sliding, and long-term dimensional stability are separate behaviors.
Before buying or installing a product with future removal in mind, review the exact package instructions and the broader peel-and-stick tile planning guide. Keep the product name, lot information, instructions, and release liners if the manufacturer says they may be needed. Future reuse is much harder to evaluate when the tile’s identity and approved conditions are unknown.
Do Peel-and-Stick Tiles Lose Adhesion When Removed?
They can lose effective adhesion even if the exposed adhesive still feels tacky. Removal may contaminate the adhesive, transfer part of it to the first surface, disturb its uniformity, or leave the tile under stress from stretching and curling.
Four adhesive properties help explain the problem:
- Tack is the immediate grab you feel when the adhesive touches a surface.
- Peel resistance describes resistance to an edge being lifted and pulled away.
- Shear resistance describes resistance to sliding while the tile remains parallel to the surface.
- Full-surface contact is the amount of the tile back that actually touches the receiving surface without gaps, debris, bubbles, or raised areas.
A fingertip check mainly tells you that some tack remains at one small point. It does not show whether the center of the tile can contact the wall, whether a curled corner will overpower the adhesive, or whether the tile will creep on a vertical surface.
Adhesion can become less dependable in several ways.
Adhesive transfer
Some adhesive may stay on the original wall or floor instead of remaining evenly attached to the tile. The removed tile can still feel sticky where adhesive remains, but bare, thin, or irregular areas reduce usable contact.
Look across the entire back under clear light. Patchy gloss, bare spots, ridges, torn adhesive foam, or material left on the substrate are more informative than a touch test.
Contamination
Exposed adhesive collects dust, hair, lint, drywall fibers, paint flakes, grit, oils, and loose particles quickly. These materials act as a barrier between the adhesive and the new surface.
Contamination does not need to cover the whole tile to matter. Debris near a corner or edge may create a starting point for lift. A hard particle can also hold a thin tile away from the surface, producing a visible bump.
Do not assume contamination can be washed away. Water, detergent, solvents, oils, abrasives, and adhesive-remover products can interact differently with different adhesive systems. Unless the tile manufacturer provides a procedure for cleaning the exposed adhesive, attempting to restore it chemically may make the result less predictable.
Changed adhesive geometry
Removal may pull the adhesive into strings, ridges, clumps, or thin areas. Even if the adhesive chemistry has not changed, its shape and distribution may no longer support uniform contact.
A tile with an uneven adhesive layer may attach firmly at several high points while leaving unsupported areas between them. On a wall, those gaps may appear as bubbles or drummy areas. On a floor, traffic can repeatedly flex unsupported sections.
A different receiving surface
The second surface may be smoother, rougher, more porous, more textured, less clean, or less compatible than the first. Surface texture changes the real area available for adhesive contact. Dust, grease, uncured paint, loose coatings, grout lines, and surface treatments can interfere further.
For a household decision, you do not need to reproduce a laboratory test. You do need to avoid treating hand tack as proof. Inspect the whole adhesive surface, use the specified receiving surface, apply the tile as directed, and watch its edges and face over time.
What Distortion Makes a Removed Tile Unsuitable for Reuse?
Any permanent change that prevents the tile from lying naturally flat and aligning without force should count against reuse. Adhesion and shape must be evaluated separately because a sticky tile can still be dimensionally unusable.
Distortion can take several forms:
- Stretching: One area becomes longer or wider during removal.
- Necking: A narrow section elongates and becomes thinner.
- Curling: An edge or corner rises when the tile rests on a flat surface.
- Creasing: The backing develops a sharp fold or hinge line.
- Buckling: The face forms a wave because different areas no longer lie in one plane.
- Edge compression: An edge becomes wrinkled, thickened, or pushed inward.
- Delamination: The decorative face, structural layer, foam, mesh, or adhesive layer separates.
- Tearing or cracking: The tile loses structural continuity, even if the damage seems small.
- Pattern distortion: Printed grout lines, geometric features, or interlocking edges no longer align.
Lay the removed tile on a clean, flat surface without tape, weights, or hand pressure. View it from the side and from each corner. If it rocks, bridges over the surface, lifts at the edges, or must be stretched to match its original dimensions, the adhesive will have to fight that stored shape during the second installation.
That conflict is easy to miss. Pressing can temporarily flatten a curled tile, creating the impression that it has bonded successfully. Once pressure is removed, the backing may continue pulling upward. The first visible symptom is often a corner or seam that rises repeatedly after being pressed down.
Dimensional stability is distinct enough that flooring standards treat it separately from adhesive behavior. The ISO 23999 dimensional stability and curling standard specifies methods for measuring dimensional change and vertical deformation in resilient floor coverings after heat exposure and reconditioning. It does not test damage caused by tile removal, but it supports the underlying principle: size change and curl are separate measurable outcomes and should not be hidden inside a general statement that a tile “still sticks.”
No universal household threshold defines how many millimeters of curl or dimensional change are acceptable for reuse. Product construction, tile size, location, edge design, and use all matter. The conservative rule is simpler: if the tile will not lie naturally in position, do not rely on extra pressure or improvised adhesive to force it into service.
Floor applications deserve stricter judgment than low-contact decorative wall areas. A slightly raised wall corner may be a visual defect. A raised floor edge can catch footwear, collect water or dirt, and worsen under repeated traffic.

Use the Three-Part Reuse Verdict
Classify each removed tile as likely reusable, possibly reusable after testing, or do not reuse. This is a conservative decision guide, not an ASTM or ISO standard, and it does not supply numeric acceptance thresholds.
| Verdict | Conditions | What to do next |
|---|---|---|
| Likely reusable | The exact manufacturer documentation authorizes the proposed reuse; the tile is undamaged, flat, clean, correctly stored, and compatible with the receiving surface; documented product testing or a controlled trial supports stable reapplication. | Follow the manufacturer’s reapplication instructions exactly. Inspect during installation and through the stated observation period. |
| Possibly reusable after testing | Reuse is not prohibited, but authorization or performance evidence is limited; the tile appears flat and intact; the adhesive is substantially continuous and visibly clean; the receiving surface is permitted or confirmed compatible. | Test one tile or a small representative group in a low-consequence area. Do not scale up until contact, edge behavior, alignment, and surface effects remain acceptable. |
| Do not reuse | Instructions prohibit reuse; product identity is unknown; the tile is torn, creased, stretched, curled, cracked, delaminated, heavily contaminated, or missing adhesive; the new surface is incompatible; a trial lifts, slips, bubbles, transfers material, or creates a hazard. | Replace the tile or select another approved finish. Do not attempt to rescue it with unapproved cleaners, heat, or extra adhesive. |
The “likely reusable” category has a high bar. A clean-looking tile is not enough. There should be explicit product authorization or documented evidence from the same tile construction under relevant conditions.
Most uncertain household cases belong in the middle category. That does not mean the tile will work. It means the tile is intact enough to justify a limited check before money or time is committed to a larger installation.
Use this decision sequence for one tile at a time:
- Do the exact instructions prohibit reuse? If yes, do not reuse.
- Is the tile physically damaged or unable to lie flat? If yes, do not reuse.
- Is the adhesive contaminated, patchy, transferred, wet, chemically treated, or covered with fibers? If yes, do not reuse unless the manufacturer provides a specific restoration procedure.
- Is the receiving surface outside the permitted applications? If yes, do not reuse there.
- Is reuse explicitly authorized and supported by a relevant procedure? If yes, the tile may be likely reusable, subject to inspection and installation compliance.
- Are the instructions silent, but the tile remains clean, flat, intact, and compatible? Classify it as possibly reusable after testing.
- Does the limited trial show lifting, slipping, distortion, bubbles, substrate damage, or poor alignment? Stop and do not reuse the remaining tiles under those conditions.
Before applying that matrix to a named product, read its current instructions rather than relying on general category language. For example, readers considering a store product can review the Subway Magic product information and stated applications, then confirm any removal or reuse question against the instructions supplied with the exact product. The word “removable” should never be expanded into a reuse promise without supporting product language.

How Should You Remove Peel-and-Stick Tile for Possible Reuse?
Start with the manufacturer’s removal instructions and treat preservation as a secondary goal to safety and substrate protection. No single peel angle, speed, tool, or temperature has been established as the best reuse-preserving method for every tile construction.
A cautious process begins before the first corner is lifted.
Identify the product and substrate
Record the product name, tile type, installation date if known, and original surface. Note whether the tile is on painted drywall, plaster, existing ceramic tile, glass, metal, laminate, sealed wood, concrete, resilient flooring, or another material.
Inspect an exposed edge, outlet opening, transition, or spare tile to understand the construction. A thin flexible sheet needs different handling from a rigid or layered tile. If you cannot identify the product, you cannot reliably confirm its permitted removal technique, heat tolerance, cleaning chemistry, or reuse status.
For wall projects, review the relevant peel-and-stick installation and removal guide and compare it with the instructions packaged with your exact tile. Renters should also confirm lease requirements and review the renter-focused removable tile planning guide before disturbing a large area.
Begin with a small observation area
Choose an inconspicuous edge where you can see how the tile, adhesive, and substrate respond. The goal is to gather information, not prove that the entire installation will release the same way.
Stop if you see:
- Paint, drywall paper, plaster, wood fibers, grout, or substrate material coming away.
- The tile face whitening, cracking, wrinkling, or separating from its backing.
- A narrow section stretching as the rest remains bonded.
- Adhesive tearing into uneven patches or transferring heavily to the substrate.
- A corner forming a permanent crease.
- A brittle floor layer breaking or producing questionable dust or fragments.
One intact corner does not guarantee an intact full tile. Bond strength and substrate condition may vary across the installation because of pressure, cleaning, moisture, repairs, heat exposure, or surface texture.
Keep the tile supported
If the product instructions permit removal, avoid allowing the detached portion to hang under its own weight. Support the loose section so it does not fold, stretch, contact the floor, or stick to itself.
This is a handling precaution, not a proven universal method for preserving adhesion. The backing’s stiffness and the tile’s dimensions determine how much stress the unsupported section experiences.
Avoid sharp pulling, jerking, rolling the tile into a tight tube, or folding adhesive against adhesive. Once two exposed adhesive areas bond to each other, separating them may tear the adhesive or distort the tile.
Use tools only as authorized
A hard or sharp scraper may cut the tile, gouge the substrate, or direct force into a small area. A tool that helps remove one rigid floor product could damage a thin wall panel.
The same product-specific rule applies to heat. Some manufacturers authorize limited warming for a named removal or repair procedure. That does not establish heat as a general reuse method. Heat can soften an adhesive, but it may also soften, stretch, warp, discolor, or delaminate the tile. Do not use a hair dryer, heat gun, steam, hot water, or another heat source unless the exact manufacturer permits it for the tile, surface, and removal task.
Readers focused on painted walls can use the guide to removing tile without lifting paint as a planning resource, while still treating the current product instructions as the controlling document.
Label the removed tile immediately
If a tile remains a reuse candidate, label its original location, orientation, and removal order without marking or contaminating the adhesive. Photograph the face and back.
Location matters when tiles were cut around outlets, corners, cabinets, plumbing, or irregular edges. It also helps reveal dimensional change. A tile that no longer fits the opening from which it came may have stretched, shrunk, or changed shape.
Do not stack exposed adhesive surfaces directly against decorative faces or against each other. Do not set them on dusty floors, fabric, cardboard, or paper. If the manufacturer does not specify a temporary protective liner, avoid inventing one and assuming it will release cleanly.

How Should Removed Peel-and-Stick Tiles Be Stored?
Use only a storage method authorized for the exact product. There is no universal evidence that wax paper, parchment, ordinary plastic film, cardboard, or another improvised backing will protect every pressure-sensitive adhesive without transferring material or altering tack.
The original release liner may seem like the obvious answer, but even that should be retained and reused only if the manufacturer permits it. Release liners have specific surface coatings. A liner may become dirty, creased, reversed, or damaged during the first installation. Some products use separate adhesive films, mesh layers, or backing systems that change what should be stored.
A suitable product-specific storage instruction should answer four questions:
- What material may contact the exposed adhesive?
- Should the tile be stored flat, rolled, hung, or separated?
- What temperature and humidity range is permitted?
- How long may the tile remain stored before reapplication?
Without those answers, prolonged storage introduces another uncontrolled variable. The tile may curl under its own weight, block to an adjacent surface, collect contamination around the edges, transfer adhesive, or change shape with temperature.
If no approved storage method is available, the conservative options are to conduct the limited reapplication check promptly or replace the tile. Avoid presenting an improvised liner as a reliable preservation technique merely because it releases from one sample immediately. Short-term release does not establish compatibility after days or months.
For installed tiles that are staying in place, follow the surface-care guidance in the peel-and-stick tile maintenance guide. Cleaning the decorative face during service is different from cleaning an exposed adhesive after removal; do not transfer face-cleaning instructions to the adhesive layer.

How Do You Reapply Peel-and-Stick Tile Without Guessing?
Treat reapplication as a small controlled trial before attempting a full second installation. The purpose is to see whether this tile, in its present condition, can maintain contact on this receiving surface under the intended conditions.
Verify the proposed application
Confirm that the tile is approved for the room, surface, orientation, and exposure. Wall and floor products are not interchangeable. A decorative wall panel should not be placed on a floor simply because it remains sticky. A dry accent wall result does not predict performance behind a stove, in a wet area, on a shower surface, or across a high-traffic floor.
Check whether the manufacturer permits installation over the receiving material. Existing ceramic tile, painted drywall, plaster, sealed wood, laminate, glass, metal, and concrete have different textures and surface conditions. Grout joints, embossed finishes, loose paint, moisture, grease, and unevenness can prevent full contact.
Use the DIY peel-and-stick tile project guide to plan layout and surface checks, then follow the exact tile instructions for cleaning, drying, priming, pressure, temperature, and edge treatment.
Select a representative test location
A useful trial needs a receiving surface that represents the proposed installation. Testing on clean glass does not tell you how the tile will behave on painted drywall. Testing on a horizontal board does not reproduce the load on a vertical wall.
Choose a low-consequence area where failure will be visible and removable without creating a walking hazard, water-entry point, electrical issue, or costly surface repair. For a floor project, a loose sample board prepared with the intended surface may be safer than placing an uncertain reused tile in a traffic path.
Record:
- Tile identity and original location.
- Original substrate.
- Time installed before removal, if known.
- Visible adhesive condition.
- Distortion or edge condition.
- Storage history.
- Receiving substrate and preparation.
- Room conditions.
- Application procedure and pressure.
- Immediate observations.
- Later edge, face, alignment, and substrate observations.
This record prevents a vague “it seemed fine” judgment. It also helps separate adhesive failure from a surface-preparation error or a physically distorted tile.
Dry-position the tile first
Place the tile without exposing or contacting the adhesive more than necessary. Check its dimensions, cuts, pattern alignment, seams, and natural flatness.
Do not stretch it to meet a neighboring grout line. Do not pull one corner into place while holding the opposite edge. If the tile needs sustained force to align, its shape has changed or the new layout is incompatible.
For interlocking, overlapping, or faux-grout designs, small distortions can accumulate. One reused tile may look acceptable alone yet create a widening pattern error across several rows.
Apply it according to the original instructions
If the tile remains eligible, use the manufacturer’s specified application pressure, direction, tools, temperature range, and surface preparation. Do not assume extra pressure can compensate for contamination or missing adhesive.
Pressure can improve contact where sound adhesive is present. It cannot recreate adhesive that transferred to the first wall, restore a torn foam layer, remove embedded dust, or permanently flatten a creased backing.
Avoid repeated lift-and-reset cycles unless the product explicitly allows them. Every cycle creates another opportunity for contamination, adhesive transfer, stretching, or edge damage.
Inspect more than immediate tack
A newly pressed tile can look secure because application pressure is still holding it flat. Recheck after it has been left undisturbed for a product-relevant observation period.
Look for:
- Corners or edges beginning to rise.
- A lifted area growing outward from a seam.
- Bubbles returning after smoothing.
- Downward slip on a vertical surface.
- Gaps appearing between tiles.
- Pattern lines moving out of alignment.
- A curled or creased area telegraphing through the face.
- Adhesive squeezing beyond an edge.
- Paint, coating, or substrate material transferring during correction.
- Movement under ordinary contact or light service.
There is no validated category-wide number of hours, peel force, curl height, or percentage of contact that guarantees successful reuse. Use the manufacturer’s stated evaluation or cure period when one exists. In its absence, the lack of immediate failure should be treated as an early observation, not proof of long-term performance.
Scale up slowly
If the trial remains stable, install a small group before committing to a whole room. A multi-tile group reveals seam alignment, cumulative dimensional error, and edge interactions that a single tile cannot show.
Continue recording observations. Stop if the second-use group performs differently from the first sample or if failures cluster near heat, moisture, texture, transitions, outlets, floor traffic, or cut edges.
A broader peel-and-stick tile review can help frame appearance and project fit, but a general product review cannot replace a second-use check on the actual removed tiles.

Do Not “Fix” a Failed Adhesive Without Authorization
Do not wash, solvent-clean, abrade, heat, or coat the exposed adhesive unless the exact manufacturer provides that procedure. A treatment that makes the surface feel stickier may still weaken the system, damage the backing, create residue, or make future removal less predictable.
Several tempting fixes deserve caution.
Washing the adhesive
Dust may look washable, but an exposed adhesive is not the same as the decorative face or receiving substrate. Water can carry debris deeper into a textured adhesive layer. Detergent may leave a film. Rubbing may roll the adhesive into clumps or remove it from high areas.
Without tile-specific instructions, there is no sound basis for saying that soap, water, alcohol, adhesive remover, household cleaner, or another chemical will restore the original bond.
Using solvent or adhesive remover
A solvent may dissolve surface contamination while also swelling, softening, redistributing, or extracting parts of the adhesive. It may attack foam, printed layers, plasticizers, coatings, or edge finishes.
A clean-looking result is not proof that the adhesive has returned to its original condition. Solvent residue may also interfere with the receiving surface.
Adding spray adhesive, construction adhesive, or caulk
Extra adhesive changes the installation system. It may create hard ridges, visible bumps, trapped solvent, staining, incompatibility, or a bond that is much more permanent than intended. It can also make later removal harder and may conflict with product instructions or warranty terms.
If the original pressure-sensitive layer cannot hold the tile under approved conditions, the tile has failed the second-use check. Replacing it is usually more predictable than creating an undocumented hybrid adhesive system.
Heating a curled tile flat
Heat can make some materials more flexible temporarily. It can also create permanent deformation, shrinkage, surface changes, or layer separation. A tile that must be thermally reshaped before it lies flat is not an ordinary reuse candidate unless the manufacturer supplies a specific reconditioning procedure.
Holding edges with tape or trim
Trim may be part of an approved installation, but it should not conceal an adhesive failure. Tape, caulk, or edge molding can hold one area while the tile continues lifting behind it. On floors, a mechanically restrained edge does not resolve unsupported or moving areas farther inside the tile.
Use accessories for their intended design function, not as evidence that a failing tile has become reusable.
What Safety Checks Matter Before Removal or Reapplication?
Stop the project when removal may disturb hazardous legacy materials, electrical components, unstable coatings, or a floor surface that could create a trip hazard. Saving a tile is never more important than controlling exposure or protecting the underlying building material.
Painted walls in older homes
If removing tile may disturb paint in a U.S. home built before 1978, check lead-paint requirements and safe-work practices before continuing. The EPA lead-safe renovation guidance for consumers explains that pre-1978 homes are more likely to contain lead-based paint and advises homeowners to use lead-safe practices or qualified contractors when work disturbs painted surfaces.
The construction date does not prove that a particular coating contains lead. It is a reason to assess the surface before producing chips or dust. If tile removal pulls paint, drywall paper, or plaster, pause rather than escalating to harder scraping, sanding, or uncontrolled heat.
Older resilient flooring and mastic
Legacy floor tile, backing, or mastic may require an asbestos assessment before it is disturbed. Do not sand, grind, chip, or aggressively scrape questionable flooring based on a general DIY removal tip.
Older resilient flooring, backing or mastic can require an asbestos assessment before disturbance. Do not sand, grind or aggressively scrape unknown legacy materials. Obtain guidance appropriate to the property, material and jurisdiction before continuing.
If the age or identity of a floor layer is uncertain, obtain appropriate local guidance before disturbing it.
Heat, outlets, and appliances
Do not use heat around damaged cords, wet areas, combustible materials, gas connections, or energized electrical components. Remove outlet and switch covers only under appropriate electrical safety procedures. Tile should not overlap electrical boxes or interfere with device mounting.
Around stoves, fireplaces, heaters, and other hot surfaces, verify the tile’s specified temperature and clearance limits. A reused tile with reduced or uncertain adhesion deserves greater caution in an area where heat could soften the adhesive or accelerate edge movement.
Wet and high-consequence areas
Do not infer water resistance from a glossy face. Seams, edges, backing layers, and the receiving surface may respond differently to water. A second-use tile with imperfect edge contact may create routes for moisture or cleaning water.
For floors, reject any tile that rocks, shifts, or lifts at an edge. A floor test should never place an uncertain tile in a doorway, stair landing, exit path, or other location where failure could cause a fall.
What Would a Credible Peel-and-Stick Tile Reuse Test Record?
A credible test must identify the exact tile and document the full first-use, removal, storage, and second-use sequence. A statement such as “we removed it and it still stuck” leaves too many variables unknown to support a product-level conclusion.
A useful specimen record should include the following fields.
| Test field | What should be recorded | Why it matters |
|---|---|---|
| Product identity | Brand, exact SKU, lot or batch, dimensions, wall or floor classification | Results from one construction cannot automatically be applied to another. |
| Tile construction | Face material, backing layers, thickness, rigidity, foam or mesh, adhesive format | Backing stiffness, stretch behavior, and adhesive design affect removal and peel behavior. |
| Sample count | Number of reused specimens, unused controls, and failed or excluded pieces | A single successful tile cannot show variation across a batch. |
| Original substrate | Material, texture, coating, age, condition, and preparation | The first surface affects adhesive transfer, contamination, and removal damage. |
| First installation | Application pressure, tools, temperature, humidity, and installation date | Contact conditions and dwell time can change removal behavior. |
| Service exposure | Heat, moisture, cleaning, traffic, grease, sunlight, and repairs | Service conditions may affect the face, backing, adhesive, and edges. |
| Removal | Authorized tools or heat, observed angle and rate, support method, and failures | Removal conditions must be known before they can be compared. |
| Post-removal condition | Tears, creases, curl, dimensional change, adhesive transfer, contamination, and substrate damage | Physical condition and adhesion are separate outcomes. |
| Storage | Approved liner or separator, orientation, duration, temperature, and humidity | Storage can add curl, contamination, blocking, or adhesive transfer. |
| Receiving substrate | Material, texture, preparation, coating age, and compatibility | Second-use results are specific to the new surface. |
| Reapplication | Pressure, tool, number of placement attempts, room conditions, and alignment | Application differences can mask or exaggerate second-use performance. |
| Immediate observations | Initial tack, full contact, bubbles, slip, edge behavior, and fit | Immediate grab is useful but incomplete. |
| Follow-up observations | Edge lift, curl, creep, gaps, bubbles, transfer, and failure time | Delayed behavior determines whether the initial bond remained stable. |
| Comparison basis | Matching unused tile or documented first-use result under the same conditions | A second-use value has little meaning without a suitable comparison. |
If peel force is measured, the protocol should state the peel geometry, rate, specimen width, receiving surface, pressure, conditioning, and dwell time. An adapted ASTM method should be described as an adaptation, not presented as an official tile-reuse certification.
Dimensions and curl should be recorded separately. Measure the tile before installation, after removal, after storage, and after conditioning for reapplication. Photograph each edge against a flat reference. Record creases, waves, corner height, and pattern alignment even if the adhesive result appears acceptable.
The record must also include failures. Excluding torn, contaminated, or curled tiles can make a reuse trial look stronger than the actual removal outcome. Readers need to know how many tiles survived removal in usable condition, not merely how well the best survivor performed.
Most important, the conclusion must stay inside the tested boundary. A result from one tile construction on one painted panel does not establish reuse on ceramic tile, textured plaster, laminate, concrete, or a floor. A short observation does not establish years of service. A successful repositioning during installation does not establish reuse after long-term installation.
Reuse is a designed property, not a side effect of retained tack
Research on pressure-sensitive adhesives shows why reuse cannot be inferred from stickiness alone. In a 2026 study, researchers created a specially engineered optical-device adhesive with movable and chemical cross-links that could support stretch-induced debonding and thermal remolding. That result is notable precisely because the chemistry was designed for controlled removal and reuse. It does not establish that ordinary decorative tile adhesive can be cleaned and reused after service.
Use that distinction when reading product claims. Repositionable may mean adjustment during installation. Removable may mean designed end-of-life separation. Reusable is stronger and should be supported by instructions for removal, storage, receiving surfaces and reapplication. If those conditions are absent, treat second use as uncertain rather than as an automatic sustainability benefit.
Record the tiles that fail during removal, not only the survivors
A reuse trial becomes misleading if torn, stretched, contaminated or curled pieces are discarded from the record and only the best intact tile is evaluated. Count the total number removed, the number physically intact, the number with clean continuous adhesive, the number distorted and the number that pass a representative second-use observation.
This simple denominator matters. If ten pieces are removed and only two remain suitable for a low-consequence trial, a successful reapplication of one survivor does not mean the installation was generally reusable. Describe the complete removal outcome.
Choose disposal or replacement when uncertainty becomes costly
Reuse can save material, but it can also create more labor, wall repair or a hazardous floor edge when a compromised piece fails. For a decorative wall in a low-consequence location, a small representative trial may be reasonable when the manufacturer allows it. For floors, wet areas, heat zones or places where edge lift could create a safety problem, the threshold for replacement should be stricter.
Keep the decision proportional to the value of the saved tile. Do not add solvents, spray adhesive, heat or mechanical restraint merely to preserve a piece whose original system is no longer intact. A fresh piece with known adhesive condition is often the more predictable repair.
Frequently Asked Questions
Do peel-and-stick tiles still stick after removal?
They may retain some tack, but retained tack does not prove that they can support a second installation. Inspect adhesive continuity, contamination, tile flatness, receiving-surface compatibility, and delayed edge behavior.
If the tile feels sticky but has embedded dust, missing adhesive, curl, or a crease, it should not be treated as reusable. A small representative reapplication check provides more useful information than pressing a finger against one corner.
Can I clean dust from the adhesive side?
Do not clean the exposed adhesive unless the exact manufacturer provides a compatible procedure. Washing, wiping, solvents, abrasion, and adhesive removers can alter the adhesive or leave a bond-inhibiting residue.
If debris can be removed without touching or disturbing the adhesive, reassess the tile afterward. If contamination is embedded across the bond area or concentrated at important edges, replacement is the conservative choice.
Can I add new adhesive to a removed peel-and-stick tile?
Only if the manufacturer approves the exact adhesive, surface, and application. Adding adhesive changes the system and may affect appearance, removal, substrate damage, drying, chemical compatibility, and warranty coverage.
A tile that needs improvised adhesive has not passed a normal second-use check. For most decorative DIY projects, a fresh tile is more predictable.
Can I reuse peel-and-stick tiles in another apartment?
Possibly, but moving introduces removal, handling, storage, transport, and a new substrate. Each stage can reduce the chance of a reliable second installation.
Confirm that the product permits reuse, preserve it according to approved instructions, and test it on a representative low-consequence area in the new space. Get the property owner’s approval before applying it. The new wall may have a different paint type, cure time, texture, or surface strength from the original wall.
Are wall tiles easier to reuse than floor tiles?
Wall and floor tiles face different loads, so reuse should not be judged by a single rule. A decorative wall tile may avoid foot traffic, but gravity, heat, steam, grease, and vertical slip still matter. A floor tile experiences repeated traffic, rolling loads, cleaning water, transitions, and direct edge contact.
Because raised or moving floor edges can create a trip hazard, the discard threshold should be stricter for flooring. Use only products approved for floors and reject reused pieces that lift, rock, slide, or fail to lie flat.
The Practical Verdict
A removed peel-and-stick tile is reusable only when its instructions, physical condition, adhesive condition, receiving surface, and trial behavior all support a second installation. Removal without tearing is encouraging, but it is only the first checkpoint.
Classify the tile conservatively. Reserve “likely reusable” for a product with explicit reuse authorization or relevant documented testing. Use “possibly reusable after testing” for an intact, flat, clean tile whose second-use performance remains uncertain. Choose “do not reuse” when instructions prohibit it, the product is unidentified, the tile is distorted or contaminated, or the trial shows lifting, slipping, bubbling, poor alignment, substrate transfer, or another unsafe result.
Check the current instructions for the exact tile. Prepare the receiving surface as specified. Run a small, representative adhesion check before expanding the installation. Stop when the tile must be forced flat, cleaned with an unapproved chemical, supplemented with an unapproved adhesive, or trusted despite progressive edge movement.
That approach may rule out some tiles that could have held temporarily. It also avoids turning a material-saving idea into a failing wall finish, damaged substrate, or hazardous floor edge.
Sources and scope
- ASTM D3330/D3330M public scope — Controlled tape peel-method scope; not a purchased standard or a tile-reuse certification.
- Kosaba et al. 2026: Removable PSA with stretch-induced debonding — Specially engineered optical-device adhesive can be remolded and reused; demonstrates that reuse requires designed chemistry, not that ordinary tile adhesive is reusable.
- US EPA: Lead-Safe Renovations for DIYers — Precautions for disturbing painted surfaces in older US homes; not a diagnosis of a particular wall.


Leave a comment
This site is protected by hCaptcha and the hCaptcha Privacy Policy and Terms of Service apply.