





















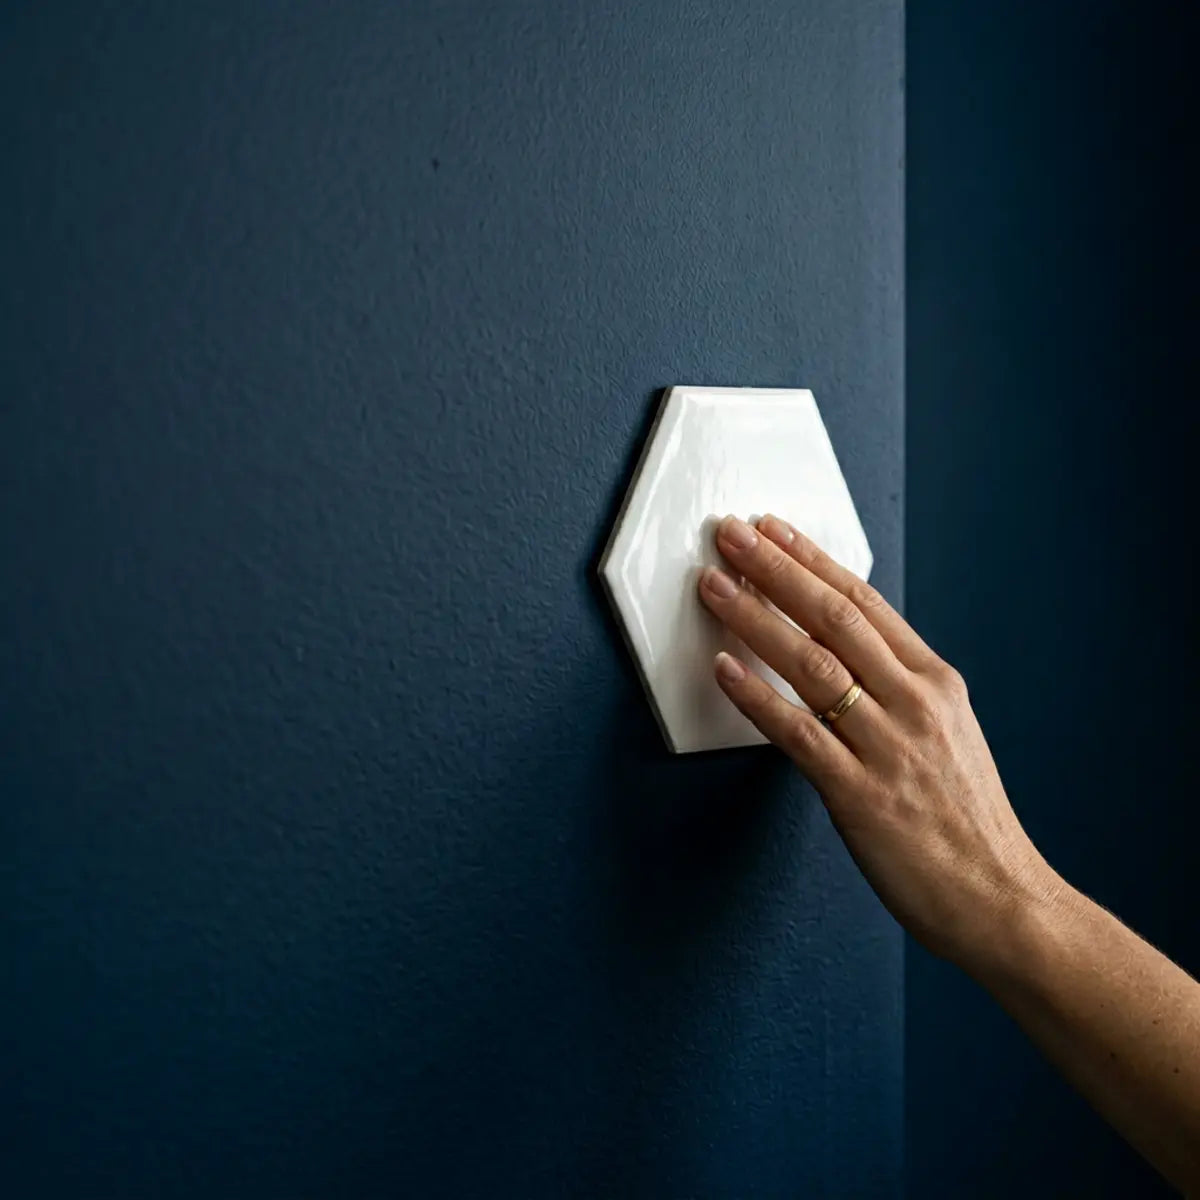
Dark wall paint can show through some light or partially translucent peel-and-stick tiles, but wall color alone does not tell you whether primer is required. The useful test is the actual tile over the actual wall under the room’s real lighting. Tile construction, backing color, printed opacity, wall sheen and light direction all affect what you see.
This guide replaces automatic-primer rules, synthetic opacity rankings and fictional recovery stories with a controlled process: inspect the wall, sample the exact tile, separate visual show-through from adhesion, check whether the product permits primer or a barrier layer, and prepare only as much as the wall and tile system actually require.
Why dark paint can be visible through a light tile
Some decorative wall tiles have an opaque structural core; others use thinner polymer layers, printed films or light-colored surfaces that can transmit or scatter some light. When the backing is not fully opaque, a high-contrast substrate can influence the apparent color from the front.
This is an optical issue before it is an adhesion issue. A white tile can appear slightly gray, blue or uneven over a saturated navy or black wall even when the adhesive bond is perfectly sound. Conversely, a fully opaque tile can hide dark paint without any special color-blocking layer.
Use the exact product sample instead of a universal opacity rule
Place the actual tile or approved sample against the real painted wall before removing the backing. View it in daylight, ceiling light and any under-cabinet or vanity lighting that will hit the finished surface. Check the sample straight on and from an angle.
If the backing or release liner changes the visual result, create a representative test on a removable sample board prepared to match the wall color rather than peeling a sellable piece prematurely. The goal is to reproduce the visible contrast without creating an irreversible test on the wall.
Compare several pieces, not only one center sample
A single piece may be more or less opaque than the design appears when repeated. Seams, printed grout lines, overlaps and edges can show the dark substrate differently from the center of the tile. Join several pieces as instructed and inspect the complete small field.
Strong side lighting can reveal substrate contrast at edges even when the center face looks opaque. A pattern with dark veining or relief may hide minor contrast that would be obvious through a uniform white surface.
Lighting can create apparent show-through
A tile may look uniform under diffuse light and show shadows or backing variation under grazing light. Under-cabinet LEDs can exaggerate relief, seams and slight thickness differences. That does not always mean the wall color is physically transmitting through the face.
The U.S. Department of Energy’s color and spectrum resources provide useful context for why material appearance changes under different lighting spectra. The project-level lesson is to test the tile under the lights that will actually illuminate it.
Wall sheen can affect the visual and adhesive starting point
A glossy dark wall can reflect light differently from a flat dark wall, and its surface chemistry may also differ. But “glossy” does not automatically mean “sand it.” The tile manufacturer may have specific guidance for gloss, cured paint or primer.
Before abrading paint, check the product instructions and the wall condition. If the wall is older and significant sanding or scraping is being considered, lead-safety requirements may matter in U.S. pre-1978 housing. EPA’s lead-safe renovation guidance for DIYers explains why older paint should not be disturbed casually.
Opacity and adhesion need separate tests
A primer can improve visual hiding without necessarily improving the adhesive system, and a surface treatment that improves adhesion can still leave a dark color visible through a translucent product. Do not collapse the two questions into one synthetic rating.
First ask: does the final color look acceptable? Then ask: is the wall surface compatible with the adhesive product? A successful project needs both answers, but the correct remedy for one is not automatically the remedy for the other.
When a primer may be appropriate
A compatible primer can make sense when the tile instructions allow it, the paint surface needs an approved preparation layer, or the sample shows unacceptable dark-wall influence and the primer is intended to create a uniform lighter background. The exact primer and cure requirements should come from the coating and tile systems, not from a generic “dark walls always need shellac” rule.
Choose the primer for the real purpose. A stain-blocking product, a high-hiding primer and an adhesion-promoting primer solve different problems. Do not assume the strongest odor or fastest dry time means the product is best for peel-and-stick tile.
Do not force a shellac, oil or water-based hierarchy
Primer chemistry affects compatibility, odor, drying, cure and topcoat behavior. A shellac-based product may be useful for certain stain-blocking tasks, while acrylic or other primers may be appropriate for different walls. None should be treated as the universal answer to dark paint.
Read the primer technical data, the wall-paint condition and the tile instructions together. If the primer manufacturer excludes the existing coating or the tile manufacturer excludes the prepared surface, change the plan rather than layering incompatible products.
Dry-to-touch is not the same as ready for an adhesive covering
A freshly primed wall can feel dry before the coating has reached the condition required for another layer or an adhesive finish. Cure and recoat guidance varies by product, temperature, humidity and film thickness.
Use the actual primer and paint manufacturer’s timing plus the tile manufacturer’s surface guidance. Do not impose a universal 24-, 48- or 72-hour wait across all products. If the documentation is unclear, ask the manufacturer rather than using an internet countdown.
Pressure-sensitive adhesive still needs a compatible surface
Even when opacity is solved, adhesion depends on the prepared surface. 3M’s general pressure-sensitive adhesive preparation guidance illustrates why clean, dry compatible surfaces and application pressure matter, although the exact tile may use a different adhesive.
Remove dust, grease and incompatible residue according to the product instructions. A visually perfect white barrier that is chalky, oily or weakly bonded to the drywall is not a good adhesive substrate.
Do not make TSP or another strong cleaner the default
A dark kitchen wall may have grease, but the cleaning method should match the wall coating and tile instructions. Strong alkaline cleaners can change some paint films or leave residue if not handled correctly. Use a compatible cleaner that removes the contamination actually present.
If the wall is clean and in a dry low-soil room, aggressive degreasing may be unnecessary. Surface preparation should respond to the wall, not to the color of the paint.
A white wall is not automatically a better substrate
Color does not tell you whether the paint is sound. A white wall with loose flat paint can be a worse substrate than a dark wall with a stable cured coating. Inspect for chalking, peeling, softness, water damage, patched areas and uncured paint regardless of color.
Do not let opacity concerns distract from structural surface condition. If the coating is failing, repair the wall before deciding how to hide the color.
Texture can matter more than color
A dark wall with heavy orange-peel, knockdown or other texture can affect how a thin tile contacts the surface and how the texture appears through the finished face. A rigid or thicker product may visually bridge some shallow variation, but it does not create a universal structural bridge over deep texture.
Check the exact product’s texture limits. If the wall needs smoothing, use a compatible repair method. Do not assume sanding is always appropriate, particularly on older painted surfaces.
Do not use “rigid tile” as the automatic answer
A thicker composite or rigid product may be more opaque than a thin vinyl product, but construction alone does not prove better adhesion, heat resistance, wet-area suitability or easier removal. A rigid tile can still fail on grease, weak paint or moisture.
Choose a more opaque product when opacity is the problem, but still check the complete product documentation for the room and substrate.
Use the product gallery to identify likely opacity risk
Light-colored tiles with a thin printed face, translucent edges or very pale backing deserve a sample check over a high-contrast wall. Darker colors, dense printed patterns and opaque cores may be less visually influenced by the substrate, but photographs cannot prove opacity.
Ask the seller for a sample or a photo of the back and edge when construction is unclear. The best evidence is still the actual product placed over a representative dark substrate.
Do not rely on a flashlight torture test
Holding a tile in a dark room against a bright flashlight can reveal that some light passes through the material, but it does not reproduce the illumination geometry of a wall. A product can transmit light under a flashlight and still look fully opaque when installed against a painted wall.
Use the actual wall and room light as the primary visual test. A flashlight can be a curiosity, not the deciding benchmark.
Build a simple opacity comparison record
Photograph the sample over the dark wall in daylight, ceiling light and the strongest side/task light. Note whether you see overall darkening, localized edge shadow, print change, seam show-through or no meaningful difference.
Repeat the same observations after any approved barrier or primer sample. This creates a useful project record without converting visual judgment into a synthetic numerical rating.
What if the tile is already installed and the dark wall shows through?
First decide whether the issue is visual or structural. If the tile is fully adhered and the only problem is a gray cast or visible contrast, adding more pressure or random adhesive will not change the opacity. The solution may require accepting the appearance, replacing the tile with a more opaque product, or removing and preparing the wall with an approved barrier.
Do not paint or coat over the installed tile unless the tile manufacturer explicitly supports that finish. A new topcoat can change gloss, print, flexibility, cleanability and seam appearance.
Remove a test area before committing to a full redo
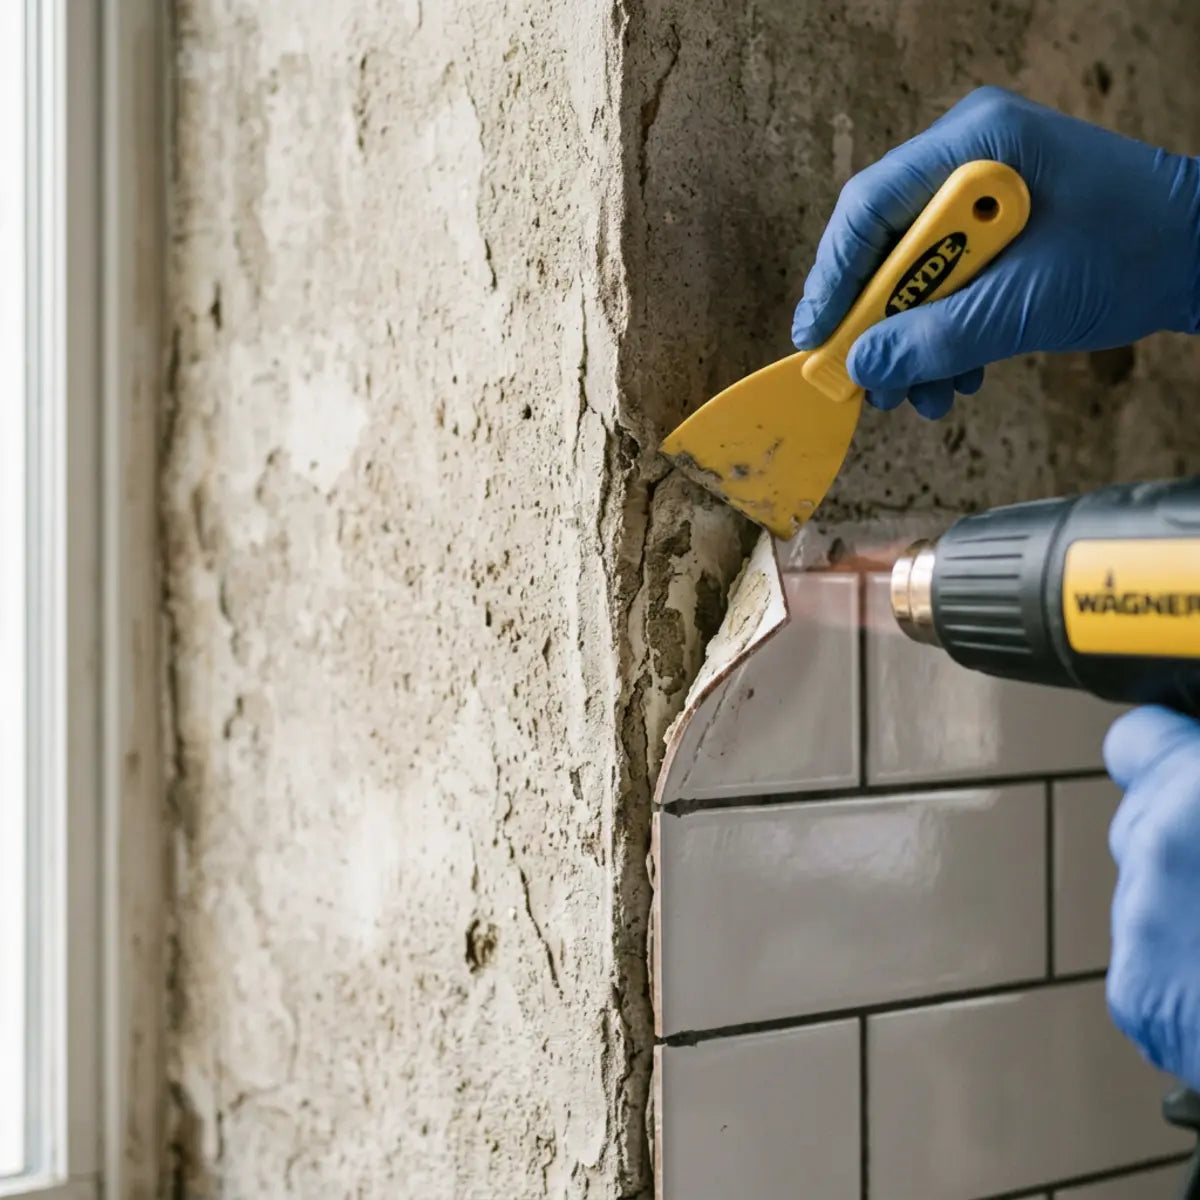
If replacement is being considered, start with a small manageable area and follow the product’s removal guidance. Observe the wall coating and substrate. If paint lifts, drywall paper tears or the coating softens, stop and reassess before removing an entire backsplash.
For rentals, check permission before priming or repainting a dark wall. The repair path can become more permanent than the original peel-and-stick installation, so restoration expectations should be clear.
Do not use heat as a universal removal method
Some manufacturers may permit controlled warming during removal, but there is no universal hairdryer temperature, distance or duration that protects every paint or adhesive. Heat can soften coatings or change adhesives as well as the tile.
Use the exact product instructions and stop if the wall coating begins to fail. A removal test that damages a hidden area is a reason to change the plan, not to increase the heat.
Renters should separate opacity from deposit risk
A dark landlord-painted wall can tempt a renter to apply primer for better hiding. Primer permanently changes the wall appearance and may violate lease conditions even if the tile itself was intended as a temporary finish.
If opacity requires repainting or priming, compare that requirement with the lease and restoration plan. A darker or more opaque tile may be a lower-change option, but it still needs wall compatibility and removal planning.
Use a removable sample board when wall testing is not permitted
If you cannot alter a rental wall, paint a small removable board with a color and sheen similar to the wall, let it cure according to the coating instructions and use that board for visual comparison. This does not perfectly reproduce the wall, but it lets you compare tile opacity without applying a sample directly to the property.
Keep the board as a reference when ordering. If several products are being compared, photograph them over the same board and lighting so the visual difference is easier to judge.
Wall color can show more strongly at exposed cut edges
Even an opaque tile face can reveal the dark substrate where a cut is slightly short or an edge is visible. Plan exposed terminations and outlet cuts carefully. A dark line at the perimeter may be a cut/edge issue rather than translucency through the face.
Dry-fit trim, cabinet edges and cover plates before final installation. Do not use a heavy bead of sealant merely to hide inaccurate cuts unless the tile system calls for that sealant in that location.
Outlet and switch openings need clean coverage
Turn off power before removing cover plates and use appropriate electrical safety practices. Cut the tile so the finished cover sits properly without exposing a dark halo or trapping the device.
If the electrical box or device itself is damaged or improperly fitted, use the appropriate qualified trade. A decorative tile should not be used to hide an electrical problem.
Seams can create contrast even when the tile is opaque
A straight-edge seam can expose a hairline of dark wall if the pieces are not aligned or if the wall is uneven. Overlap or interlocking systems can behave differently. Follow the exact joining method and inspect several connected pieces before the full installation.
Use a level reference line and avoid stretching flexible material to force alignment. A seam problem and an opacity problem can look similar from several feet away but need different fixes.
Do not judge opacity from one online review
A reviewer may have installed the same tile over white paint while your wall is navy, charcoal or forest green. Lighting, product batch and wall sheen can also differ. Use reviews to identify questions, then verify the exact product over your representative substrate.
If several reviewers mention show-through on dark walls, that is a reason to order a sample—not proof that every installation needs the same primer.
When should you choose a different tile instead of changing the wall?
If the tile is too translucent and the wall cannot be primed or repainted, select a product with a more opaque backing or construction. This can be simpler and more reversible than adding multiple preparation layers.
Compare thickness, backing color, sample opacity, room suitability, cutting and removal. Do not choose opacity at the expense of heat, wet-area or substrate compatibility.
When should you change the wall instead?
If the wall already needs repair or repainting for reasons unrelated to the tile, creating a uniform suitable background can make sense. Finish the wall correctly, allow coatings to reach the condition required by their manufacturers, then re-evaluate the tile system.
Do not repaint a sound wall solely because an internet article says all dark paint is incompatible with peel-and-stick products. Let the actual sample and manufacturer guidance justify the extra work.
A practical dark-wall decision tree
- Inspect the wall: stable, dry, cured and within the tile’s surface limits?
- Test opacity: place the exact sample over the real dark wall under real room lighting.
- Check seams and edges: is the issue center-face show-through or perimeter contrast?
- Review product guidance: are primer, painted surfaces and the planned room supported?
- If appearance is acceptable: proceed with product-specific preparation.
- If appearance is unacceptable: compare an approved lighter barrier versus a more opaque tile.
- If the wall is a rental or older painted surface: resolve permission and safety before changing the wall.
Kitchen dark-wall scenario
Imagine a navy semi-gloss backsplash wall with light subway-style peel-and-stick tile. First inspect grease, paint stability and appliance/sink placement. Then hold several connected samples against the wall under daylight and under-cabinet lighting. If the face looks acceptably opaque, do not add primer merely because the wall is navy.
If the sample looks gray or the seams reveal the dark substrate, compare two solutions: an approved lighter wall-preparation layer or a more opaque tile. The better choice depends on lease status, product compatibility, wall condition and the amount of permanent wall change you are willing to make.
Bathroom dark-wall scenario
A dark vanity wall adds a second question: moisture exposure. Even if a white tile hides the wall perfectly, the exact product must still be suitable for the splash zone. Do not choose a primer, liner or adhesive barrier solely for opacity if the wall is repeatedly damp or the product is outside its wet-area guidance.
If the wall shows staining, softness or recurring condensation, solve the moisture condition before testing opacity. A lighter visual background does not make a wet substrate suitable.
Rental dark-wall scenario
In a rental, priming a dark wall may be a bigger alteration than installing the decorative tile. Check the lease and restoration expectations first. If the tile needs a permanent white barrier to look acceptable, a more opaque product may be the lower-change option.
Keep photographs of the original wall and product instructions. At removal, follow the exact method and stop if paint or drywall paper begins releasing. The same dark wall that created an opacity question can also make touch-up color matching important at move-out.
Keep a simple sample record
For each candidate tile, record the product name, wall color, wall sheen, room lighting and three observations: center-face opacity, seam/edge visibility and overall color shift. Add a photo in daylight and one under the strongest artificial light.
If you test an approved primer or barrier, repeat the same photos after the coating has reached the manufacturer’s required condition. This keeps the comparison factual and makes it easier to explain why one preparation method was chosen without inventing a laboratory-style rating.
Do not let opacity testing replace room-fit testing
A tile can hide the dark wall beautifully and still be wrong for the project because of heat, water, cleaning or removal limits. Keep opacity as one decision criterion. Surface compatibility, room placement, dimensions, seams and future repair remain separate.
When comparing Stickwoll designs, browse the actual product color, shape and dimensions in the Stickwoll wall-tile collection, then use the installation and care guide for surface and placement planning.
When no extra color-blocking layer is needed
If the sample is visually opaque on the actual dark wall, the paint is stable and cured, and the tile manufacturer approves the existing surface, extra primer or liner may add work without solving a real problem. Proceed with the product-specific cleaning, layout and application method instead of adding layers merely because the wall is dark.
This is why the sample step belongs before the shopping list for primers and barriers. The simplest compatible assembly is usually easier to document, maintain and later remove than a stack of unnecessary materials.
Keep the successful sample with the project record. If the wall is later repaired or another pack is ordered, the sample provides a reference for the original opacity, color and construction instead of forcing you to reconstruct the decision from memory.
Frequently asked questions
Do I always need primer over dark paint?
No. Use the actual tile sample and product instructions. A fully opaque product may not need a color-blocking layer, while a translucent light product may benefit from an approved lighter background.
What color primer should I use?
Do not choose by color alone. Use a primer compatible with the existing wall coating and the tile system. A lighter uniform background can help visual opacity, but adhesion and cure requirements still matter.
How long should primer cure before peel-and-stick tile?
Use the exact primer, paint and tile manufacturer guidance. There is no universal 24-, 48- or 72-hour rule that applies to every coating and room condition.
Will a white tile always show dark paint?
No. Some white products are fully opaque; others are not. Backing construction, print, thickness, seams and lighting all affect the result. Test the exact product.
Should I sand glossy dark paint?
Only when the wall and tile/coating instructions call for that preparation. Do not sand older paint casually; lead-safety requirements can apply in pre-1978 U.S. housing.
Can I use wallpaper liner as a temporary barrier?
Only if the liner, its attachment method, the wall and the tile are all compatible and the lease permits the change. A liner creates another adhesive interface and another removal step; it is not automatically the safest renter solution.
Can I just add more adhesive to stop edge show-through?
No. Extra adhesive does not fix translucency and can complicate removal. Diagnose whether the issue is opacity, seam alignment, wall unevenness or actual bond failure.
Bottom line
Dark paint is a visual variable, not an automatic primer requirement. The correct sequence is to inspect the wall, test the exact tile over the exact color under real lighting, separate opacity from adhesion, and use only preparation methods supported by the wall coating and tile system.
If the sample looks good, do not add unnecessary layers. If it looks too translucent, compare an approved lighter background with a more opaque tile. For rentals and older painted walls, permission and safe surface preparation come before color correction. This approach replaces automatic formulas with evidence from the actual project.


Leave a comment
This site is protected by hCaptcha and the hCaptcha Privacy Policy and Terms of Service apply.