












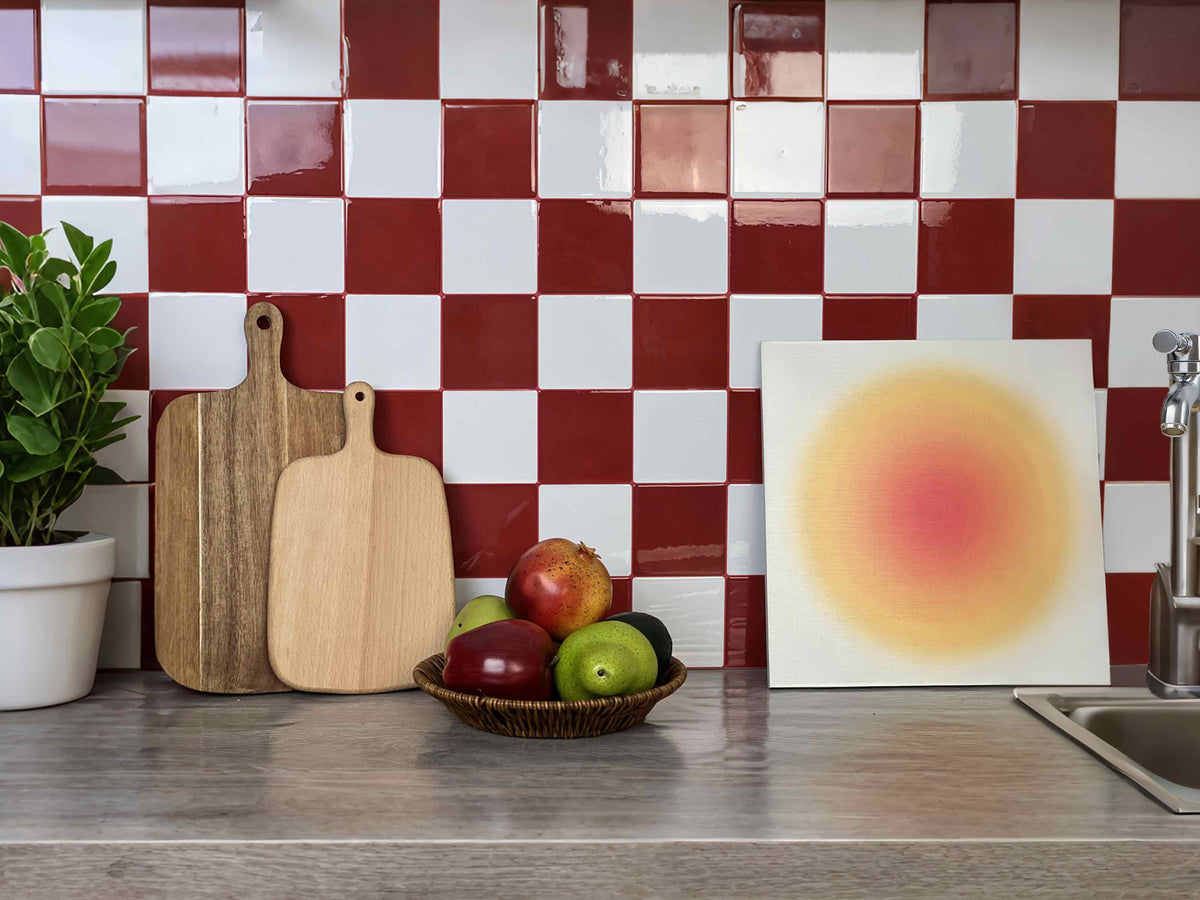
Modern Peel and Stick Tiles: Accent Walls & Patterns
Are you ready to give your living room a swift makeover without the mess? Modern peel and stick tiles are your answer! With their fuss-free application and wide range of designs, you can create a stunning accent wall or revamp any space. In this guide, I’ll dive into the world of peel and stick tiles, revealing tips on selecting the latest patterns and step-by-step instructions for your DIY project. Let’s get creative!
Explore this guide
Understanding Modern Peel and Stick Tiles
What are Peel and Stick Tiles?
Peel and stick tiles are a versatile, easy-to-use solution for home improvements. They are self-adhesive tiles that can be applied to walls and floors without the need for grout or mortar. Their simplicity makes them a popular choice for quick renovations.
- Easy to install: No special tools or skills needed.
- Variety of designs: From classic to contemporary styles.
- Affordable: Cost-effective compared to traditional tiles.
Peel and stick tiles are perfect for renters or those looking for a temporary change, as they can be easily removed without damaging surfaces. This flexibility is a game-changer in home decor.
Why Choose Peel and Stick Tiles?
The benefits of peel and stick tiles go beyond easy installation. They offer a quick, mess-free solution that traditional tiling can’t match.
- Versatile: Use them in almost any room, including bathrooms and kitchens.
- Time-saving: Complete projects in a fraction of the time.
- Minimal cleanup: No need for adhesive, grout, or heavy-duty tools.
Peel-and-stick wall products can create an accent wall or backsplash when the exact product is suitable for that surface and exposure. Bathroom use requires a separate moisture-zone check rather than a generic waterproof assumption.
Common Misconceptions Debunked
Despite their popularity, there are still some misconceptions about peel and stick tiles that need clearing up.
- Not long-lasting: Many fear they won’t last, but quality tiles can endure for years.
- Limited to walls: While popular on walls, they can also be used on floors.
- Look cheap: Advances in materials mean they can mimic high-end finishes like marble.
I recommend checking out our Peel and Stick Tile Review to explore the durability and design quality.
Choosing the Right Peel and Stick Tile Patterns
What are the Latest Design Trends for 2025?
Staying ahead in design trends is crucial for creating a modern, stylish home. Let’s explore what’s hot in peel and stick tiles for 2025.
- Nature-inspired patterns: Think floral designs and organic shapes.
- Bold colors: Vibrant hues like emerald green or deep blues.
- Geometric shapes: Adding a contemporary edge with hexagons and triangles.
These trends focus on blending aesthetics with functionality. By incorporating nature-inspired patterns, you can achieve a calming yet stylish space. And bold colors are perfect for those wanting to make a strong design statement.
How to Select Colors and Materials?
Choosing the right colors and materials can make or break your design. Here’s how to ensure you’re picking the best for your space.
- Coordinate with existing decor: Consider your current color palette.
- Consider the room’s purpose: Lighter shades for bathrooms, darker for lounges.
- Experiment with texture: Use tiles that mimic stone or wood for a unique finish.
For a cohesive look, always consider how new tiles will interact with existing decor. Our Tile Color Selection Guide can assist you in making the right choice.
Tips for Coordinating Tiles with Existing Decor
Integrating new tiles into your existing decor requires a bit of planning. Here are some tips to help you match them seamlessly.
- Accent colors: Choose tiles that complement or contrast well.
- Mix textures: Combine different textures for depth.
- Balance patterns: Avoid overwhelming the space with too many patterns.
Creating a harmonious look involves carefully selecting colors and textures. Consider your accent wall ideas and how they fit with your current style. By coordinating effectively, you can achieve a stunning living room upgrade.
Creating an Accent Wall with Peel and Stick Tiles
Step-by-Step Guide to Installing Tiles
Transforming a wall into an accent piece is easier than you might think. Here’s how to do it step-by-step.
- Prepare the surface: Make sure it’s clean and dry.
- Plan your layout: Decide on the tile pattern and direction.
- Start from the bottom: Align the first tile at the bottom edge.
- Apply pressure: Firmly press each tile to ensure it’s adhered properly.
- Trim excess: Cut tiles to fit around edges and outlets.
This process ensures a smooth application and a professional finish. For more detailed instructions, refer to our Step-by-step Tile Guide.
Tools and Materials Needed
Before starting, gather all necessary tools and materials. Here’s what you’ll need:
- Level and measuring tape: For precise alignment.
- Utility knife: To cut and trim tiles.
- Cleaning supplies: Clean the wall before starting.
- Safety gear: Gloves and goggles, especially when cutting tiles.
Having the appropriate tools and a prepared workspace can make installation easier to control. Use the tools specified for the exact material and treat a clean setup as part of the process, not a guarantee of a flawless result.
Maintenance and Care Tips
Keeping your new accent wall looking fresh doesn’t require much effort. Here are some care tips.
- Regular cleaning: Use a damp cloth for regular dusting.
- Avoid harsh chemicals: Gentle cleaners are best.
- Inspect for peeling: Reapply any loose tiles promptly.
Proper maintenance ensures your peel and stick tiles remain vibrant and securely attached. Refer to our Tile Maintenance Guide for more tips.
DIY Tips for Living Room Transformation
How to Measure and Plan Your Space
Proper planning is key to a successful DIY project. Here’s how to measure and plan your space effectively.
- Measure the wall area: Height and width are crucial.
- Calculate tile quantity: Add a few extra in case of mistakes.
- Plan tile placement: Sketch out your design before starting.
Having a precise plan in place will make your installation smoother and more efficient. This step helps avoid common mistakes and ensures a well-executed project.
Creative Layout Ideas
Explore creative layouts to make the most of your tiles. Here are some ideas to consider.
- Diagonal layout: Adds dynamic movement to the space.
- Checkerboard pattern: Classic and timeless.
- Feature strip: Use a single row as a feature element.
These creative layouts can elevate your design, transforming an ordinary wall into an artistic statement. For more inspiration, our Creative Tile Layouts will guide you.
Common Mistakes to Avoid
Avoid these pitfalls to ensure your project goes off without a hitch.
- Skipping surface prep: Can lead to poor adhesion.
- Misalignment: Always double-check your placements.
- Rushing the process: Take your time for best results.
By being mindful of these common mistakes, your DIY home design will meet your expectations. Taking the time to plan and execute carefully is the key to success.
Inspiration for Stylish Living Spaces
Popular Themes and Aesthetics
Choosing the right theme for your living space can set the mood. Here are some popular aesthetics to consider.
- Minimalist style: Clean lines and neutral colors.
- Industrial chic: Exposed brick and metal accents.
- Scandinavian design: Light, airy, and functional.
These styles offer diverse options for personalizing your home. Whether you prefer the simplicity of minimalist tiles or the edginess of industrial chic, there’s something to suit every taste.
Examples of Successful Transformations
Real-world examples can offer inspiration and ideas for your project. Here are a few success stories.
- Brightened up a dark room: Used white tiles to reflect more light.
- Added character to a bland wall: Used patterned tiles for a focal point.
- Transformed a rental space: Used removable tiles for a temporary update.
These examples showcase the versatility and impact of peel and stick tiles. For more inspiration, visit our Living Space Inspiration.
Expert Advice on Personalizing Your Design
Personalizing your space ensures it reflects your unique style. Here’s some expert advice.
- Mix patterns cautiously: Balance bold patterns with solid colors.
- Use tiles as art: Create a mural or feature piece.
- Consider room function: Choose designs that suit the room’s purpose.
Following these tips will help you create a space that feels personal and inviting. For more insights, our blog on Personalized Home Spaces offers valuable guidance.
Frequently Asked Questions
1. Can I use peel and stick tiles in the bathroom?
Yes, many peel and stick tiles are waterproof and suitable for bathrooms. They offer a quick way to update your bathroom walls without professional help. Our article on Peel and Stick Tiles for Bathrooms provides more details on choosing the right tiles for moisture-prone areas.
2. Are peel and stick tiles durable?
Quality peel and stick tiles can last for years if properly installed and maintained. For durability features, our blog on PVC Peel and Stick Tiles highlights robust options available.
3. How do I remove peel and stick tiles?
Removing peel and stick tiles is generally straightforward. Gently heat the tiles with a hairdryer to soften the adhesive, then carefully peel them off. This feature is perfect for renters, as explained in our Removable Tiles for Renters blog.
4. Do peel and stick tiles damage walls?
Removal outcome depends on the adhesive, paint, repairs, time in service and method. A removable product can still lift weak coatings, so plan restoration instead of promising damage-free removal.
In conclusion, modern peel and stick tiles provide a versatile, easy-to-install option for transforming any living space. Whether you’re creating an accent wall, refreshing a bathroom, or simply adding a splash of color, these tiles offer endless possibilities. By following the tips and ideas shared here, you can effortlessly achieve a quick home makeover that reflects your personal style. Don’t forget to explore our recommended products like the Stickwoll Timberline Checks and Stickwoll Crimson Horizon for top-quality options to start your next project.
Start with the actual wall product, not the pattern name
Modern is a visual description, not a material specification. Before comparing herringbone, stone-look, metallic or geometric patterns, identify the exact wall product you are considering: its face material, backing, adhesive, intended surfaces, room restrictions, cleaning instructions and removal guidance. Two products can look nearly identical in a photo while requiring different preparation or carrying different limits around sinks, heat or textured paint. Save the current instructions with the product name so the project is based on the item you will actually install.
Separate appearance questions from installation questions. A loose sample can tell you whether the color and texture work with the sofa, cabinetry or flooring. It cannot establish long-term adhesion, wet-area suitability or damage-free removal. If the product allows a concealed wall sample, use it only to answer the narrower questions the sample can reveal, such as an obvious incompatibility with the paint or an unexpected surface reaction.
Use room scale and sight lines to choose a pattern
An accent wall should be planned from the places people actually see it. Stand at the room entrance, main seating position and nearby hallway, then mark where furniture, doors, shelves and windows interrupt the surface. A large repeating pattern may look calm on a broad wall but feel fragmented when most of it disappears behind a television or bookcase. A small pattern can create detail without automatically making the room look smaller; test the real repeat at full scale rather than relying on a cropped product image.
Lay several uninstalled pieces or printed mockups across the planned width and photograph the arrangement from normal viewing positions. Check whether the repeat creates unintended stripes, obvious mirrored motifs or a focal point that lands behind furniture. Rotate the sample only when the manufacturer permits more than one orientation. This planning step is about composition, not a claim that one direction universally makes a ceiling appear taller or a room wider.
Judge color under the lighting you really use
A color name such as sage, warm white or charcoal is only a starting point. The US Department of Energy distinguishes light-source color appearance from color rendition, and materials can look different under sources that share a similar nominal color temperature. Compare the actual tile beside the existing paint, flooring and furniture in daylight and under the lamps used at night. Photographing the sample can help you remember the comparison, but a phone camera is not a color-measurement instrument.
Gloss and texture also change perception. A raised clear coat can create highlights even when the printed color is muted, while a matte relief pattern can cast small shadows that make one color appear to contain several tones. Check the sample from oblique angles and with task or accent lights switched on. If glare is distracting from a common viewing position, change the finish, light position or layout rather than assuming the installed wall will look like the front-facing catalog image.
Inspect the painted wall before planning installation
The adhesive is only one layer in the attachment. If paint is loose, chalky, damp or poorly bonded to the wall, a strong adhesive can still remove that weak coating. Clean and repair the surface according to the exact product and coating instructions. Do not automatically sand every glossy wall or use a strong degreaser on every paint; preparation needs to be compatible with both the existing finish and the selected tile.
Look closely at patched areas, heavy texture, old adhesive residue and corners that have previously shown moisture. A decorative covering should not be used to hide an active leak, recurring condensation or unstable drywall paper. EPA moisture guidance emphasizes fixing the water source first. When the wall history is uncertain, record what is known and keep the project reversible until the surface question is resolved.
Dry-layout the wall before exposing adhesive
Establish a level or plumb reference independent of furniture and trim that may not be straight. Measure the usable wall, major openings and the width of the pattern repeat. Dry-layout enough pieces to see the first and last cuts before peeling any liner. Moving the starting point by part of a tile can avoid a narrow sliver at a visible edge or keep a strong motif centered on the wall.
Treat outlets, switches and trim as service details rather than decorative obstacles. Keep required covers removable and do not use the wall covering to support shelves, hooks or heavy art. If electrical work is needed, use suitable qualified help. A neat pattern does not justify covering a service screw, reducing an electrical box opening or attaching a load to a decorative adhesive finish.
Plan removal and repair before a renter project
Removable does not mean guaranteed damage-free. Paint age, wall repairs, adhesive chemistry, time in service and the removal method can all change the result. Check the lease, obtain any required permission and photograph the wall before installation. Keep the product instructions and a small restoration allowance in the project budget. A short concealed sample can reveal an immediate paint problem but cannot guarantee what will happen after a long tenancy.
Store spare material with the product label and pattern direction so a future local repair is easier to plan. If a piece lifts or is damaged, identify the cause before replacing it. Repeated lifting in one location may point to wall condition, moisture, tension or an unsuitable exposure rather than a single defective tile. A useful accent wall is one that can be inspected, cleaned and repaired without turning every change into a full-room replacement.
Estimate quantity from the real layout, not a generic waste rule
Break the wall into rectangles, subtract openings only when that matches how the product is actually cut, and use the pack’s stated usable coverage. Then inspect the layout to decide how much extra material is justified by cuts, pattern matching and a repair reserve. There is no universal ten-percent allowance that fits every repeat. A narrow wall with many outlets can waste more material than a wide uninterrupted wall, while a simple geometric layout may need less.
For example, a hypothetical 9-foot-wide by 8-foot-high feature wall has 72 square feet before openings. If a door occupies 21 square feet, the remaining face is 51 square feet. If the selected pack covers 5 square feet and the layout study shows you need roughly 8 percent extra, the planning quantity is 55.08 square feet, which rounds up to 12 packs. Those numbers illustrate arithmetic only; use the actual pack and layout for the purchase.
Create a maintenance handover for the finished wall
Write down the exact cleaner and tool permitted for the finish, where spare pieces are stored and any edge or seam that should be watched. Keep furniture from repeatedly striking exposed corners, and maintain access to outlets or service panels. If the room use changes—for example, a dry accent wall becomes the background for a humidifier or coffee station—review the new exposure instead of assuming the original decision still applies.
A good design article should help you make a wall that stays understandable after installation. Record product identity, batch or lot information if available, wall preparation, installation date and any later repair. This does not create a performance guarantee; it simply gives you enough context to investigate a change instead of guessing. The result is a modern accent wall chosen for the real room, not just a trend photograph.
Coordinate furniture and trim with the finished wall
Furniture placement should be part of the layout rather than an afterthought. Mark the top of a sofa, console, desk or media cabinet and decide which part of the pattern will remain visible above it. A strong motif that disappears behind furniture can make the remaining fragments look accidental. If the room will change often, a quieter repeat or a smaller feature area may be easier to reuse with future arrangements.
Check baseboards, crown molding, door casings and window trim before ordering. A decorative wall panel should meet those elements cleanly without forcing trim to act as a structural support. Dry-fit the last row and exposed side edge, and decide whether the product uses a finished edge, compatible trim or a carefully planned cut. The most convincing accent wall is often the one whose boundaries look deliberate from normal viewing distance.
Review the room again after a normal week of use
Before covering the full wall, observe how the room is actually used for several days. Note where bags, chairs, pets, plants, humidifiers or cleaning tools contact the surface. A location that looks quiet in an empty photograph may receive repeated impact or moisture in daily life. Use those observations to adjust the covered area or choose a finish whose care instructions match the real routine.
After installation, make the same observation again. Photograph exposed edges and any high-contact areas so future changes are easy to identify. If the wall remains dry and stable, ordinary maintenance may be all that is needed. If a repeated behavior creates lifting or wear, change the room setup or repair the cause rather than assuming every piece on the wall must fail. This creates a practical feedback loop without inventing a laboratory durability score.
Keep a one-page project record
Write the selected product, wall type, cleaning method, layout direction, pack count and any known restrictions on one page. Add a photograph of the starting wall and another after installation. This simple record helps future maintenance, repair and removal without requiring anyone to reconstruct the project from memory.
If another household member later changes the cleaner, moves a humidifier or installs furniture against the wall, update the record. The purpose is not bureaucracy; it is to preserve the context needed to understand a later stain, lifted edge or removal decision.
Set a clear stop rule before installation
Decide in advance which findings would stop or change the project: loose paint, dampness, a prohibited surface, a heat-zone conflict, an unmanageable cut around an outlet or an unacceptable removal result on a permitted sample. A stop rule prevents enthusiasm for the pattern from overriding a technical problem discovered late in planning.
If a stop condition appears, document it and choose the next action—repair the wall, reduce the covered area, move the feature wall or select another finish. This keeps the design process flexible and avoids treating sunk material cost as a reason to proceed with an unsuitable installation.
Compare a full-size mockup with the digital preview
A digital room visualizer can be helpful for narrowing color and pattern options, but it cannot reproduce exact sheen, relief, joint visibility or scale on every display. Print or assemble a full-size mockup of at least several repeats when the pattern is bold. Place it on the wall with a non-damaging temporary method that does not interfere with the later adhesive surface.
View the mockup in morning light, evening light and with the room’s normal lamps. Step back to the doorway and sit in the primary seating position. Note whether the pattern competes with artwork, window treatments or flooring. The goal is not to find a universally modern look; it is to confirm that the selected repeat, contrast and finish work in this specific room before permanent decisions are made.
Sources and scope
- US DOE: Color and Spectrum — Lighting and color-rendering context; not a material-performance rating.
- 3M: Applying VHB Pressure-Sensitive Tape — Surface-preparation and pressure-sensitive-adhesive principles for named 3M tapes; not Stickwoll specifications.
- US EPA: A Brief Guide to Mold, Moisture and Your Home — Moisture-control guidance; not product approval.


Leave a comment
This site is protected by hCaptcha and the hCaptcha Privacy Policy and Terms of Service apply.