





















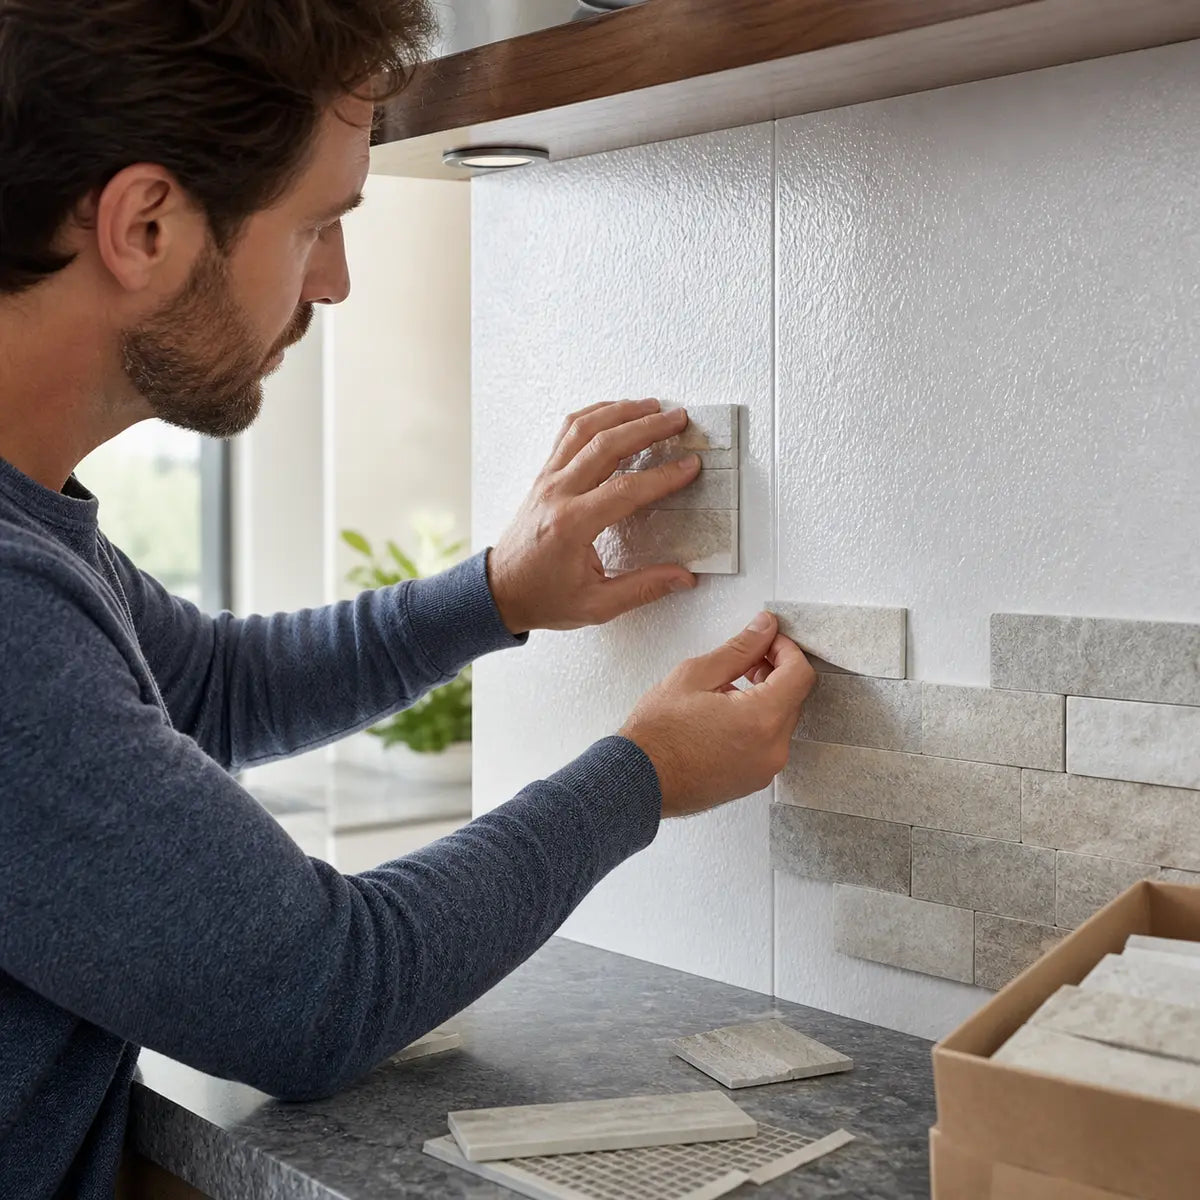
A peel-and-stick tile can grab an FRP panel immediately and still fail later. Initial tack—the adhesive’s first grip—is not the same as durable adhesion, which means the bond remains stable after time, temperature changes, moisture exposure, and normal use. Initial tack is only the first checkpoint; the Peel-and-Stick Tile Guide helps you connect the bond test with room exposure, layout, edge finishing, and maintenance.
Quick answer: sometimes, but FRP is not a universal yes/no substrate. Confirm the exact panel and tile instructions, check whether the FRP surface is clean and stable, account for seams and moisture exposure, and test a representative area before committing to the whole wall.
Do not treat immediate tack as proof of long-term compatibility. Use the surface and installation guide to compare the tile-side requirements, and only compare wall-tile options after the substrate passes the product-specific checks.
Explore this guide
FRP means fiberglass reinforced plastic. Peel-and-stick tile may be considered over FRP only after the exact tile, panel finish, surface condition, environment, and manufacturer requirements have been checked.
The planned comparison of untreated, cleaned, and manufacturer-permitted scuffed FRP has not started. No test result or universal verdict is available yet. Until timed observations are documented, an immediate “it sticks” result should not be treated as approval to cover a wall.
Current case-study status: Test not started. Material identifiers, preparation instructions, environmental conditions, timed observations, and removal effects have not yet been supplied. Results must remain pending until those records are complete.
You may be able to install peel-and-stick tile over FRP, but only conditionally. The safest decision depends on manufacturer approval, a sound and dry substrate, and a delayed small-area adhesion test using the exact materials planned for the project.
A clean-looking FRP wall is not automatically suitable. Its finish may be glossy, textured, chemically resistant, worn, contaminated, or coated with residue. Each condition changes how the tile adhesive contacts the surface.
Direct application should not proceed if either manufacturer prohibits the combination. It should also stop if the FRP is loose, wet behind the panel, damaged, heavily textured, or contaminated with material that cannot be safely removed.
What makes the answer conditional?
“FRP” describes a broad material category, not one consistent bonding surface. Two panels may both be fiberglass reinforced plastic while differing in texture, gloss, surface treatment, age, chemical exposure, and cleaning history.
The tile adhesive introduces another variable. Self-adhesive products use different adhesive formulations and may have specific requirements for:
- Substrate type
- Surface smoothness
- Porosity
- Cleaning products
- Application temperature
- Service temperature
- Moisture exposure
- Primer or deglossing
- Required pressure
- Cure or conditioning time
A method that works with one tile and panel pairing may fail with another. This result would apply only to the tested materials and conditions.
The environment matters too. A dry accent wall does not face the same risks as a wall exposed to steam, grease, splashing, harsh cleaning, or repeated temperature changes.
The broader wall-tile room and surface guide can help screen for moisture, heat, room use, and removal risk. It does not replace FRP-specific manufacturer approval or a test patch.
Which checks should come before installation?
Start by identifying the exact system rather than asking whether tile sticks to FRP in general.
Record these details before purchasing material for the full wall:
- FRP manufacturer and product identifier
- FRP finish, such as glossy, matte, embossed, or textured
- Tile manufacturer and product identifier
- Tile installation instructions and technical data
- FRP cleaning, abrasion, and coating restrictions
- Cleaner name and dilution instructions
- Primer or intermediary system, if expressly approved
- Room temperature, humidity, moisture, and heat conditions
- Existing damage, loose areas, open seams, or failed joints
- A planned inspection schedule for the test patch
Material safety data sheets, often called SDS documents, explain hazards and handling requirements. Technical data sheets, or TDS documents, usually describe application limits and compatible surfaces. Both should be checked where available, but neither should be treated as approval unless it addresses the intended use.
Use this three-part readiness screen:
| Readiness question | Evidence needed | Stop condition |
|---|---|---|
| Is the tile permitted on this FRP surface? | Exact tile and FRP instructions or written manufacturer guidance | Either manufacturer excludes the application |
| Is the existing wall suitable for an overlay? | Dry, secure, clean, stable panel with no unresolved damage | Loose, wet, damaged, contaminated, or unstable FRP |
| Does the exact pairing remain bonded? | Documented small-area test observed over time | Lift, movement, bubbles, damage, or uncertain results |
A “yes” in only one column is not enough. Approval, substrate condition, and test evidence should support the same decision.

Why does the FRP surface affect adhesive bonding?
Adhesive needs consistent contact with a stable, compatible surface. Gloss, texture, moisture, cleaner residue, grease, and panel damage can reduce that contact or create a weak layer between the tile and FRP.
Think of the bond as a stack:
- Tile face
- Tile adhesive
- FRP surface
- FRP panel
- Adhesive or fasteners holding the FRP
- Wall behind the panel
A finished installation is only as dependable as the weakest layer. Strong tile adhesive cannot correct loose FRP, moisture behind the panel, or a surface film that separates from the panel.
How do gloss, texture, and contamination matter?
Glossy FRP is often smooth and nonporous. A nonporous surface does not absorb adhesive, so bonding depends heavily on direct surface contact and chemical compatibility.
Gloss alone does not prove failure. It does mean that generic advice written for porous drywall should not be transferred to FRP without verification.
Textured FRP creates a different problem. High areas may touch the adhesive while low areas remain unsupported. This can reduce contact and leave channels where bubbles, movement, or edge lift develop.
Surface contamination can be visible or invisible. Common possibilities include:
- Grease and cooking residue
- Soap or detergent film
- Silicone-containing polish
- Wax
- Dust
- Adhesive residue
- Aerosol overspray
- Cleaning chemicals
- Moisture or condensation
- Residue left by an improperly rinsed cleaner
A strong cleaner is not automatically a better cleaner. It may leave residue, dull the panel, soften a coating, discolor the finish, or conflict with the tile adhesive. Cleaning instructions for both products should be followed.
Panel condition also matters. Cracks, gouges, open seams, loose edges, delamination, and movement should be resolved before any decorative overlay is considered. Tile may hide the symptom while leaving the underlying failure active.
Why is initial tack not durable adhesion?
Initial tack is what you feel when the adhesive first contacts the wall. Durable adhesion is the bond’s ability to remain stable over the required service period.
Immediate grab answers only one question: did the adhesive make enough contact to hold at that moment?
It does not show whether the tile will:
- Slip under its own weight
- Lift at corners or seams
- Form bubbles
- Release after temperature changes
- Fail after moisture exposure
- Pull away with repeated cleaning
- Damage the FRP during removal
- Expose a weak bond between the FRP and wall
This is why a quick press-and-pull check is insufficient. It may reveal an obvious incompatibility, but it cannot establish long-term performance.
The same distinction applies to other nonporous surfaces. Stickwoll’s epoxy-paint bond-test guide uses documented 24-hour, 72-hour, and optional seven-day checks. Those intervals are useful planning references, but the correct FRP schedule must follow the exact product instructions and test plan.
How should an FRP adhesion test be conducted?
A useful FRP test compares clearly labeled samples under controlled conditions. At minimum, it should include untreated, cleaned, and cleaned-plus-scuffed samples, but scuffing belongs in the test only if the manufacturers permit it.
The samples should use the same FRP and tile intended for the project. Changing the tile, panel, cleaner, pressure, or environment means the result no longer represents the planned installation.

Which variables and controls must be recorded?
A control is a sample kept under a defined condition so it can be compared fairly with prepared samples. Here, the untreated FRP sample acts as the baseline unless manufacturer instructions prohibit applying tile to an uncleaned surface.
The test record should capture:
Materials
- FRP manufacturer
- FRP product name or identifier
- Finish and texture
- FRP age, if known
- Tile manufacturer
- Tile product name or identifier
- Batch or lot information, if available
- Cleaner and dilution
- Rinse method
- Abrasive type and grade, if permitted
- Primer identifier, if permitted
Sample setup
- Sample dimensions
- Tile-piece dimensions
- Distance between samples
- Edge and seam locations
- Orientation on the wall
- Number of repeated samples
- Application pressure
- Tool used to apply pressure
- Duration and method of pressure
Environmental conditions
- Date and time of preparation
- Date and time of application
- Temperature
- Relative humidity
- Recent moisture exposure
- Heat sources
- Ventilation conditions
- Whether the FRP is a detached sample or an installed panel
Observations
- Initial tack
- Edge or corner lift
- Downward or sideways movement
- Bubbles or voids
- Changes in tile shape
- Changes in FRP finish
- Odor or softening
- Removal force or behavior
- Adhesive residue
- Damage to FRP
- Movement of the FRP itself
If a value was not recorded, mark it “not recorded.” Do not estimate it later from memory.
What should the three-sample matrix include?
The core comparison should isolate preparation as much as practical.
| Sample | FRP preparation | Purpose | Current result |
|---|---|---|---|
| A | Untreated control | Establish baseline behavior | Pending—test not started |
| B | Manufacturer-approved cleaning and full drying | Measure the effect of contamination removal | Pending—test not started |
| C | Same cleaning and drying, then permitted scuffing | Measure whether approved abrasion changes bonding | Pending—test not started |
If primer is approved for both materials, create a separate sample rather than adding primer to Sample C. Combining scuffing and primer in one sample makes it difficult to identify which change affected the result.
Repeated samples are preferable to a single patch because an isolated result may be affected by a local defect or inconsistent pressure. The number of repeats should be chosen and recorded before testing begins.
When should each sample be inspected?
Set the inspection schedule before applying the tile. This reduces the temptation to stop observing as soon as a sample appears successful.
The exact schedule must follow manufacturer instructions. If the manufacturers do not supply one, the test plan may include clearly labeled initial and delayed observations, such as:
- Immediately after application
- Early follow-up
- Later follow-up
- After seven days
- After any approved moisture, cleaning, or temperature exposure
- At a longer interval suited to the intended use
These intervals are a documentation framework, not proof of a product’s service life. Passing a seven-day patch does not establish years of performance.
At every interval, photograph each sample from the same distance and angle. Include a scale or ruler. Capture the center, all edges, and any visible defect.
Do not repeatedly peel a sample back during observation. That changes the bond being studied. If removal behavior needs evaluation, reserve separate specimens for destructive checks.
What do the preparation comparisons actually show?
At present, they show nothing because the test has not started. Untreated, cleaned, and permitted scuffed samples have no documented observations, so no preparation method can be named successful or unsuccessful.
This evidence boundary matters. Publishing a winner based on expected behavior would turn a planned comparison into unsupported advice.
How did each sample change over time?
No elapsed-time changes have been recorded. Every field should remain pending until an observation is completed and dated.
| Observation interval | Untreated | Cleaned | Cleaned and permitted scuffed |
|---|---|---|---|
| Initial tack | Pending | Pending | Pending |
| Edge condition | Pending | Pending | Pending |
| Movement | Pending | Pending | Pending |
| Bubbles or voids | Pending | Pending | Pending |
| 24-hour condition | Pending | Pending | Pending |
| 72-hour condition | Pending | Pending | Pending |
| Seven-day condition | Pending | Pending | Pending |
| Removal behavior | Pending | Pending | Pending |
| FRP surface effects | Pending | Pending | Pending |
Once testing begins, observations and interpretation should remain separate.
An observation might read: “The lower-right corner lifted 3 mm at 72 hours.” Interpretation might read: “This sample did not meet the predetermined edge-stability requirement.”
The first statement records what happened. The second applies a decision rule. Keeping them separate makes the report easier to audit.
Which observations support or reject installation?
A sample should support further consideration only if it meets every preselected requirement. One strong feature should not cancel a serious defect.
Potential acceptance signs include:
- No visible edge or corner lift
- No measurable movement
- No new bubbles
- Stable contact across the tile
- No FRP discoloration, softening, or surface damage
- No failure within or behind the FRP assembly
- Results that remain stable through every completed interval
- Compliance with both manufacturers’ instructions
Potential rejection signs include:
- Growing edge lift
- Downward slipping
- Bubbles that appear or enlarge
- Adhesive transferring unevenly
- FRP finish damage
- Cleaner or primer reaction
- Moisture behind the panel
- FRP movement or delamination
- Failure during an approved service-condition check
- Conflicting manufacturer requirements
Removal behavior deserves careful interpretation. A tile that is difficult to remove may have strong adhesion, but it may also damage the FRP. A tile that releases cleanly may reduce removal damage, yet the bond may be too weak for service.
Do not combine lift, movement, bubbles, removal behavior and substrate effects into one score without a validated method. Lift, movement, bubbles, removal behavior, and substrate effects should be reported as separate measurements rather than blended into an invented rating.
Update log
- Test record status: Not started
- Material identifiers: Not supplied
- Manufacturer instructions and TDS/SDS records: Not supplied
- Environmental measurements: Not supplied
- Initial and delayed observations: Pending
- Installation verdict: Withheld until testing is complete
How should you prepare FRP for a small-area test?
Prepare FRP by inspecting the assembly, verifying manufacturer instructions, cleaning with an approved method, allowing full drying, applying consistent pressure, and observing the patch over predetermined intervals.
Do not scuff, sand, prime, or use a solvent based only on generic online advice. Those steps can alter FRP and may invalidate a product warranty or create a surface the adhesive manufacturer has not approved.

How should FRP be cleaned and dried?
Use the cleaning method permitted by the FRP manufacturer and accepted by the tile manufacturer. If their directions conflict, pause and request written clarification rather than choosing one instruction over the other.
A controlled cleaning process should follow this order:
- Inspect the wall. Check seams, fasteners, edges, cracks, moisture, movement, and surface damage.
- Identify prior contamination. Record grease, soap, silicone, wax, adhesive, or unknown residue.
- Test the cleaner discreetly. Check for gloss change, softening, color transfer, or other damage.
- Measure and mix correctly. Follow the cleaner’s stated dilution and handling requirements.
- Use clean applicators. Dirty cloths can spread grease or chemical residue.
- Rinse if required. A cleaner film can become the weakest layer.
- Allow complete drying. A surface can feel dry while seams or textured recesses retain moisture.
- Protect the test area. Avoid touching it with bare hands before applying the tile.
Do not claim that a surface is contaminant-free simply because it looks clean. Record the process used and any uncertainty that remains.
Consistency matters more than aggressive cleaning. Samples cannot be compared fairly if one receives repeated scrubbing while another receives a quick wipe.
When is scuffing or primer permissible?
Scuffing is permissible only when the FRP manufacturer allows abrasion and the tile manufacturer accepts the resulting surface. The abrasive type, grade, direction, number of passes, and cleanup method should be recorded.
Abrasion can change the surface, but it does not establish compatibility and may conflict with the FRP or tile instructions. It can also:
- Scratch through a surface layer
- Create uneven texture
- Expose fibers
- Leave abrasive dust
- Trap contamination in scratches
- Change appearance outside the tiled area
- Make later restoration difficult
Stop if abrasion exposes fibers, creates fuzzing, removes a protective finish, or produces damage outside the approved method.
Primer requires the same caution. There is no universal primer for every FRP panel and tile adhesive. A primer adds another bond line, so the test must consider adhesion between:
- Tile adhesive and primer
- Primer and FRP
- FRP and the wall assembly
Use primer only when its manufacturer identifies the intended substrate and the tile manufacturer accepts the primed surface. Record the product identifier, application amount, drying time, environmental conditions, and recoat window.
When should you troubleshoot, use an alternative, or remove FRP?
Troubleshoot only when the cause can be identified without hiding a failed substrate. Use an approved intermediary system or remove the FRP when direct application lacks manufacturer support, the panel is unstable, or test failures create unacceptable rework risk.
Trying more adhesive, stronger cleaner, heavier pressure, or an unverified primer can make later removal harder without solving the real problem.
What causes lift, slipping, bubbles, or telegraphing?
Different symptoms point to different possible causes. They are clues, not diagnoses.
| Symptom | Possible causes | Appropriate response |
|---|---|---|
| Edge or corner lift | Low contact, contamination, surface incompatibility, insufficient approved pressure | Stop and inspect the bond line; do not seal over the edge |
| Tile slips downward | Weak initial hold, excessive tile weight, heat, contamination | Remove the test piece and reassess compatibility |
| Bubbles appear | Trapped air, uneven texture, moisture, adhesive movement | Mark and measure the area; check whether it grows |
| Texture shows through | Embossed FRP, thin tile, uneven contact | Consider a manufacturer-approved flat backer system |
| FRP moves with the tile | Loose panel or weak attachment to the wall | Correct or remove the FRP before decorating |
| FRP finish changes | Cleaner, abrasion, primer, or adhesive reaction | Stop the test and document the surface effect |
| Tile releases cleanly | Low bond or intentionally removable behavior | Compare with the product’s required performance |
| FRP tears or delaminates | Bond exceeds the panel surface strength or panel is degraded | Reject direct application and assess substrate repair |
Do not press lifted edges back repeatedly and call the test successful. That changes the sample and hides the time at which failure began.
For comparison, Stickwoll’s steel adhesion test guide also uses a 24-to-72-hour patch process and screens for heat and grease. FRP requires its own compatibility decision because steel and fiberglass reinforced plastic are different substrates.
When is direct application the wrong choice?
Direct application is the wrong choice when the wall fails any critical approval, condition, or evidence check.
Stop or select another approach if:
- The tile manufacturer excludes FRP
- The FRP manufacturer prohibits the required preparation
- Product instructions conflict
- The panel is loose, cracked, delaminated, or wet
- Moisture is entering behind the FRP
- Texture prevents consistent adhesive contact
- Contamination cannot be identified or safely removed
- Scuffing exposes fibers or damages the finish
- Primer compatibility is unverified
- Test samples lift, slip, bubble, or damage the panel
- Long-term observations remain incomplete
- Removal consequences are unacceptable
An alternative may involve a manufacturer-approved intermediary layer, a flat backer, another wall-panel system, or removal of the FRP. The correct choice depends on the wall assembly, room conditions, applicable requirements, and the manufacturers’ written guidance.
Removing FRP is not automatically safer. Removal can damage the wall behind it or reveal moisture, adhesive, fastener, and substrate problems. Investigate how the panel is attached before beginning demolition.
How should you make the final proceed-or-stop decision?
Use four possible outcomes rather than forcing every project into a yes-or-no answer.
- Proceed with the tested system only if manufacturer requirements, panel condition, and every completed observation support installation.
- Test further if observations are incomplete, variable, or limited to initial tack.
- Use an approved system if direct application is unsupported but the manufacturers accept a specific primer, backer, or intermediary layer.
- Remove or repair the FRP if the panel is damaged, unstable, wet, incompatible, or harmed by preparation.
Before covering the wall, complete this checklist:
- ☐ Exact FRP product identified
- ☐ Exact tile product identified
- ☐ Both sets of instructions reviewed
- ☐ TDS and SDS documents collected where available
- ☐ Intended room conditions recorded
- ☐ FRP is secure, dry, and undamaged
- ☐ Cleaning method is approved
- ☐ Scuffing is omitted unless expressly permitted
- ☐ Primer is omitted unless expressly permitted
- ☐ Untreated control labeled
- ☐ Cleaned sample labeled
- ☐ Permitted scuffed sample labeled
- ☐ Sample dimensions recorded
- ☐ Application pressure kept consistent
- ☐ Temperature and humidity recorded
- ☐ Inspection intervals chosen in advance
- ☐ Edges, movement, and bubbles photographed
- ☐ Removal behavior checked on a separate specimen
- ☐ FRP surface effects documented
- ☐ No full-wall installation started before delayed review
Peel-and-stick tile over FRP panels should be judged by the exact manufacturer requirements, the condition of the existing wall, and delayed evidence from a controlled test. Immediate grab alone cannot establish durable adhesion.
The comparison described here has not been completed, so it does not support an installation verdict. Complete the small-area compatibility checklist, retain dated observations, and proceed only if the documented evidence supports the exact tile-and-FRP system you plan to use.
FRP is a system, not just a smooth plastic-looking face
Fiberglass-reinforced plastic wall panels vary by resin, texture, coating, backing and installation system. Crane Composites, for example, publishes separate instructions for traditional FRP panels and for GLASBOND self-adhered FRP. Those documents include specific substrate preparation, expansion spacing, rolling and seam details. The existence of a self-adhered FRP product does not prove that an unrelated peel-and-stick tile is compatible with an installed FRP panel.
Traditional FRP instructions also preserve expansion space and warn about additions that restrict panel movement. That matters when considering another finish on top. A decorative layer could bridge joints, restrict movement or hide panel fasteners and service details. Evaluate the complete wall rather than only whether a small sample initially sticks to the glossy face.
Do not sand FRP automatically
Abrasion can change gloss and surface energy, but it can also damage a finish, remove a protective layer, create fiberglass dust or conflict with the panel warranty. Identify the exact FRP and ask what preparation is allowed before scuffing. The tile manufacturer must also accept the prepared surface.
If a representative sample is permitted, record the preparation, temperature, tile product, pressure method and observed edge behavior. Use early and later follow-ups as observations, not universal 24- and 72-hour pass criteria. A sample that stays flat for several days does not establish years of performance or approval for a wet commercial environment.
Plan seams and penetrations before covering FRP
FRP installations often rely on trims, gaps, fasteners or sealant details. Do not bury a joint that needs to move or remain inspectable. Around pipes, outlets and fixtures, preserve required clearance and service access. In a moisture-resistant FRP assembly, adding a second finish can also change how water paths are inspected and repaired.
The conservative route is written compatibility for the exact panel and tile. When that cannot be obtained, consider leaving the FRP exposed, using a system designed for that substrate, or creating a separate removable decorative panel rather than converting the existing wall into an undocumented layered assembly.
Sources and scope
- Crane Composites: FRP Wall and Ceiling Panel Installation Guide — FRP installation, expansion spacing, seams and rolling for Crane systems; not approval to cover FRP with another adhesive tile.
- VALTO: GLASBOND Self-Adhered FRP Installation Resources — Current manufacturer installation resources for GLASBOND; specific to that FRP system and not approval to cover arbitrary FRP with another adhesive tile.
- 3M: Applying VHB Pressure-Sensitive Tape — Explains surface preparation, pressure and bond development for specified 3M tapes; not a Stickwoll pressure specification.



Leave a comment
This site is protected by hCaptcha and the hCaptcha Privacy Policy and Terms of Service apply.