


Direct Answer: Yes, you can successfully tile around a wall-mounted pot filler using rigid peel-and-stick composite panels. This requires ensuring the wall is suitable and the product is rated for high-heat stove locations. You must measure outward from the pipe centerline before cutting. The cleanest result stems from a template-first installation that leaves a small, trim-covered expansion gap. You must dry-fit every panel and seal all splash-prone seams with appropriate finishing materials.
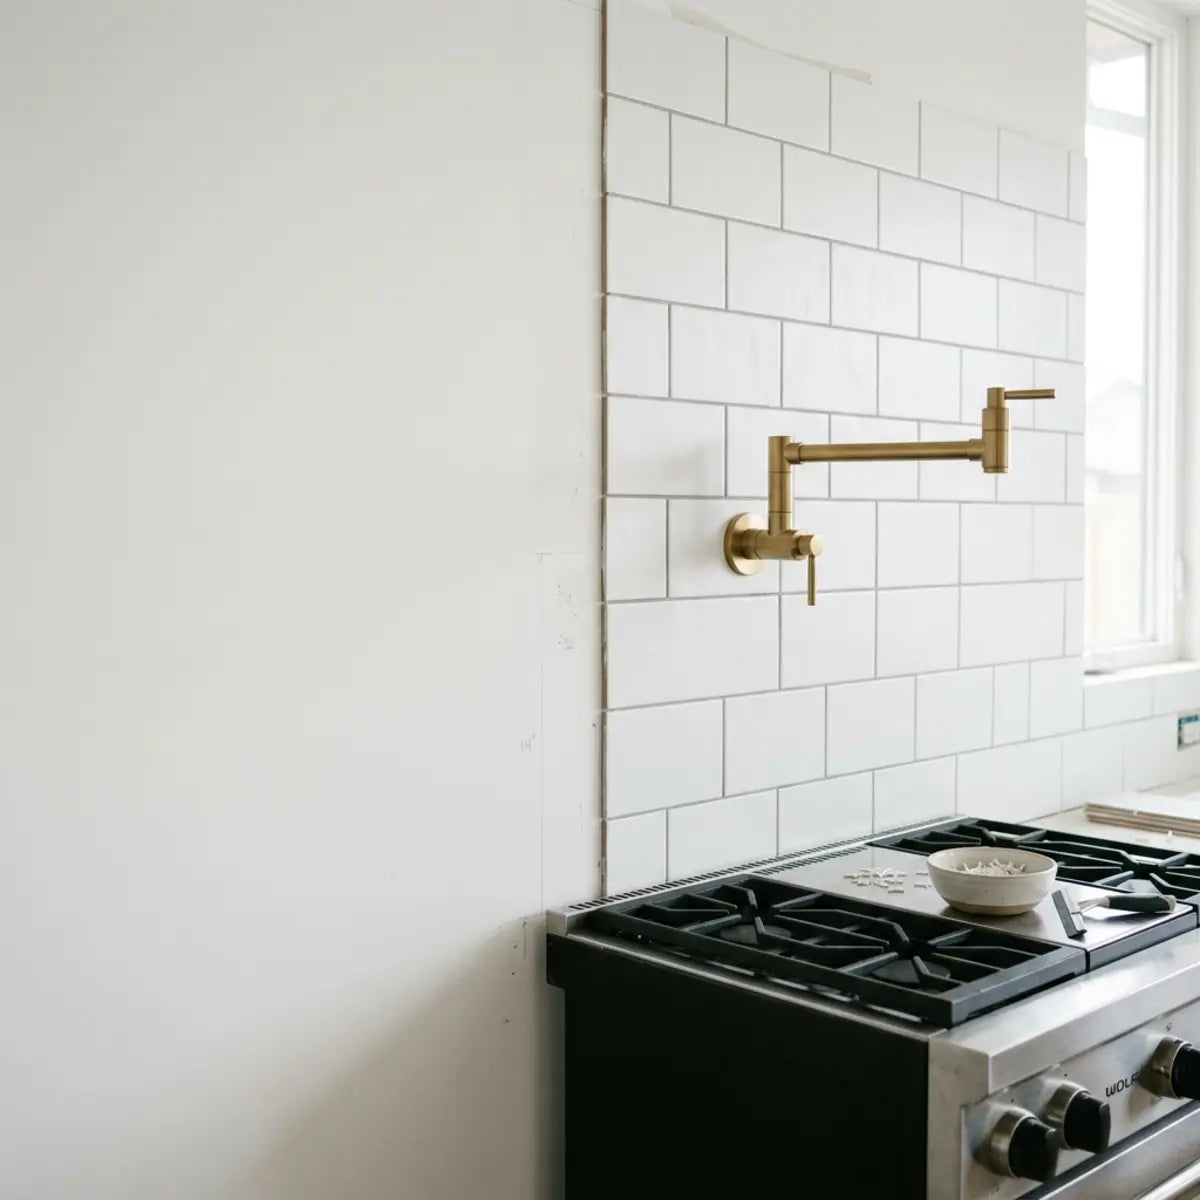
The highest-anxiety moment in any kitchen renovation is often the first irreversible cut. Hovering a blade over a premium backsplash panel to accommodate a highly visible pot filler pipe over a luxury stove can paralyze even experienced DIYers. One minor slip, and you have ruined an expensive panel and left a glaring gap on your feature wall. When you are undertaking a high-end kitchen transformation, the stakes are undeniably high. The aesthetic harmony of your culinary space hinges on flawless execution, particularly at focal points like the stove wall. A pot filler, by its very nature, draws the eye directly to the center of your cooking zone. It is a symbol of gourmet luxury, but it is also a complex plumbing penetration that demands absolute precision from your backsplash materials.
Historically, achieving a seamless finish around complex plumbing required hiring seasoned tile artisans who utilized expensive wet saws and specialized diamond hole bits. Today, the advent of engineered rigid peel-and-stick composite panels has democratized high-end design, allowing homeowners to achieve professional-grade aesthetics over a single weekend. However, this accessibility does not negate the need for rigorous planning and technical understanding. The margin for error remains incredibly slim.
Key Requirements for Success:
- Template First: Creating a cardboard or paper template prevents wasted composite panels and costly rework. The few minutes spent making a paper replica will save you hours of frustration and significant material costs.
- Trim-Ring Coverage: The decorative escutcheon size determines your maximum safe cut tolerance around the rough plumbing. This mathematical buffer is your ultimate safety net against visible imperfections.
- Heat Suitability: Stove-wall applications must strictly follow manufacturer specifications for high-heat exposure. Failing to honor thermal clearances will lead to catastrophic adhesive failure.
This guide eliminates the guesswork from plumbing penetrations. By reframing success around a calculated installation tolerance rather than attempting a dangerously tight fit by eye, the job becomes entirely predictable. We will delve deep into the mechanical properties of rigid panels, the thermal dynamics of the stove environment, and the precise cutting techniques that ensure your pot filler installation looks indistinguishable from traditional ceramic craftsmanship.
How do you tile around a wall-mounted pot filler without visible mistakes?
The Question: Ever stare at a brand-new backsplash panel, terrified that one wrong cut around your pot filler pipe will ruin the entire stove wall?
The Promise: This section breaks down a foolproof, repeatable sequence—from verifying wall safety to finalizing the trim ring—ensuring a flawless finish without wasted materials.
A pot filler cut differs drastically from standard electrical outlet cutouts. Electrical boxes use large, forgiving plastic cover plates that easily hide ragged edges. Pot fillers utilize a small escutcheon—the decorative metal plate that covers the hole in the wall where the pipe exits. This small diameter leaves almost no room for error. The visual impact of a botched cut here cannot be overstated. A jagged edge peeking out from beneath a sleek, polished nickel trim ring shatters the illusion of professional quality, instantly flagging the project as an amateur endeavor.
Rigid core composite panels offer a distinct advantage over flexible vinyl sheets in this scenario. Flexible vinyl can distort, stretch, or tear when punctured with a drill bit or utility knife. The sheer force required to penetrate the material often causes the adhesive backing to drag and warp. Rigid composite maintains its structural integrity. This allows for precise, clean drill holes that mimic the behavior of traditional ceramic tile without the need for a wet saw. The structural density of the composite core acts as a stabilizing matrix, ensuring that the friction and heat generated by a drill bit do not melt or deform the immediate cutting area.

Establishing the Trim-Coverage Tolerance (TCT)
The Question: How do you guarantee the final hardware will actually hide your cut lines once the installation is finished?
The Promise: We will teach you how to calculate and apply the exact measurement buffer needed for a seamless visual transition.
To achieve a professional finish, we must fundamentally shift the evaluation criteria. We move away from evaluating raw material price and instead focus on the Trim-Coverage Tolerance (TCT). The TCT is the mathematical difference between the outside diameter of your rough pipe and the outside diameter of the decorative escutcheon plate. Understanding this principle is the single most important conceptual leap a DIY renovator can make. It transforms an anxiety-inducing gamble into a controlled, mathematical certainty.
Industry consensus dictates that a successful plumbing penetration relies on maximizing this tolerance. If your pipe is 1/2-inch in diameter, and your escutcheon is 2 inches in diameter, your TCT gives you a 3/4-inch radial buffer. You must make your cut slightly larger than the pipe, but significantly smaller than the escutcheon. To put this in practical terms, you want your drilled hole to be approximately 1 inch to 1.25 inches in diameter. This allows the panel to effortlessly slide over the rough plumbing threads while guaranteeing that the 2-inch trim ring will completely eclipse the cut edges, leaving a flawless visual perimeter.
| Evaluation Metric | Guess-and-Cut Approach | Trim-Coverage Tolerance (TCT) Method |
|---|---|---|
| Measurement Strategy | Eyeballing pipe location on panel | Measuring from precise pipe centerline |
| Cut Diameter | Attempting exact pipe diameter match | Undersizing cut to 50% of escutcheon radius |
| Material Waste Risk | High (frequent panel cracking) | Low (verified via cardboard template) |
| Final Visual Quality | Often reveals visible wall gaps | Escutcheon perfectly conceals the cut |
| Expansion Safety | None (tight friction causes buckling) | Allows proper thermal expansion |
A slightly undersized, trim-covered tolerance is substantially safer than a forced tight fit. If the panel grips the pipe too tightly, thermal expansion from the stove's heat will cause the composite to buckle. By empirically demonstrating the value of the TCT, we establish a quantitative baseline for visual success. When your home cycles through seasonal temperature changes, or when your gas range has been operating at maximum capacity for a holiday dinner, building materials expand and contract. If your tile is locked in a frictional bind against a rigid brass or steel pipe, the accumulated kinetic energy has nowhere to go but outward, popping the panel off the wall.
Before you even peel the backing off your first tile, take the actual decorative escutcheon (trim ring) out of its packaging. Slide it onto the bare pipe. Use a pencil to lightly trace the outside circumference of the ring directly onto your drywall. This physical circle represents your absolute maximum cut limit. As long as your final drilled hole stays safely inside this penciled perimeter, your installation will be visually flawless.
The High-Level Installation Sequence
The Question: What is the correct order of operations when balancing rough plumbing, sticky panels, and final hardware?
The Promise: This sequence provides a clear roadmap, ensuring you never stick a panel to the wall before the plumbing is ready.
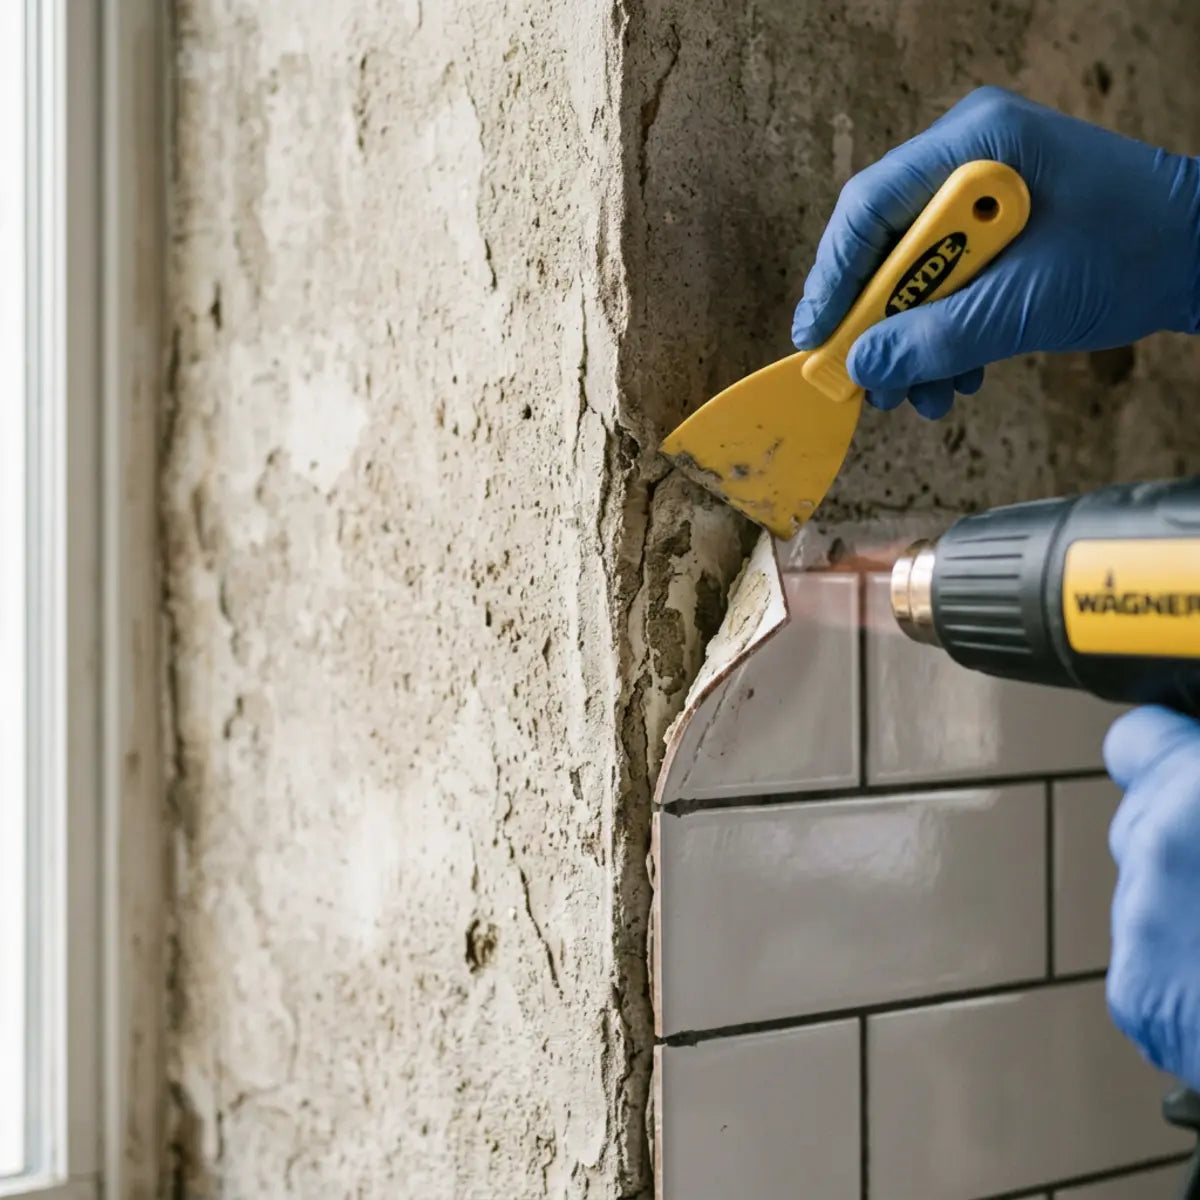
Before any cutting begins, you must understand the complete order of operations. Installing a backsplash out of sequence often leads to trapped pipes or compromised adhesive bonds. According to standard installation guides for rigid peel-and-stick composites, the substrate must be flat, cured, and structurally sound before applying panels. In a kitchen environment, this often means addressing years of microscopic airborne grease that has settled onto the drywall. Skipping the prep phase is the leading cause of premature adhesive failure.
Understanding how to mount and drill correctly is foundational. If you intend to mount additional hardware or shelving around your new installation, mastering the proper techniques is essential. We strongly suggest expanding your knowledge by reviewing our comprehensive guide, where we extensively researched and documented safe methods. We tested drilling into peel and stick tiles to find safe, renter-friendly methods. Discover best bits, hardware & tips for damage-free mounting. Try now! By integrating these proven techniques, you eliminate the risk of shattering the surface tension of the composite core.
Equally critical is understanding the environmental stress your backsplash will face. A pot filler inherently sits in the highest-risk zone of your kitchen: directly above the heat source. If you are preparing the wall substrate behind a professional-grade range, you must implement specific heat mitigation strategies before the first panel is placed. To ensure your substrate preparation aligns with safety codes, explore our specialized insights on this topic. Worried if peel & stick tiles are safe behind your stove? Discover how to choose heat-resistant materials, prep your wall, & install your backsplash with a safety gap. Get expert DIY tips! This knowledge is non-negotiable for a permanent, safe installation.
Interactive: The 8-Step Installation Roadmap
Click each step as you complete it to track your progress and ensure no vital phase is skipped.
How do you cut peel and stick tile around a wall faucet cleanly?
The Question: Stressed about snapping, chipping, or overcutting your premium peel-and-stick composite when making that critical circular pipe cut?
The Promise: This guide provides the exact step-by-step cutting methods, tool requirements, and dry-fit strategies needed to preserve your panel's pristine finish.
Cutting rigid composite requires a delicate balance. You need enough force to penetrate the wear layer, but a gentle enough approach to avoid shattering the core. Forcing a brittle cut or ignoring blade compatibility will universally result in a ruined panel. We must prioritize methods that preserve the panel's face finish. The surface of high-end composite tiles often features a highly engineered polyurethane or specialized resin wear layer designed to resist kitchen stains and minor abrasions. However, this protective layer is vulnerable to localized, high-speed kinetic stress—the exact kind of stress generated by improper drilling tools.

Approved Cutting Methods for Rigid Composite
The Question: Which tools will cleanly pierce the tile without causing spiderweb cracks across the surface?
The Promise: We will detail the specific bit types and cutting techniques proven to cleanly process rigid panel materials.
The location of the pipe relative to your panel layout determines your cutting strategy. If the pipe lands perfectly in the center of a panel, you need a full drilled opening. If it intersects a panel edge, a U-notch is required. When working with rigid panels, maintaining high edge quality is non-negotiable. Standard twist drill bits designed for wood or soft metals possess aggressive flutes that catch and tear the composite layer. This tearing action leads to immediate micro-fractures that can expand over time, particularly when subjected to the thermal cycles near a stove.
When assessing the performance degradation curve of various drill bits on composite materials, the baseline metric shifts. Standard wood bits often cause surface tearing. Equipment detailed in our guide We Tested Mounting Hardware: Safely Drilling Peel & Stick Tile provides the quantitative baseline necessary to implement this without critical failure. It highlights why masonry bits or specialty glass bits establish a new benchmark for clean, damage-free penetrations. The grinding action of a diamond-grit hole saw, as opposed to the slicing action of a toothed blade, pulverizes the composite material away, leaving a perfectly smooth, factory-like edge that won't initiate stress cracks.
If your kitchen design incorporates under-cabinet lighting or specialized ambient features, managing complex penetrations extends beyond plumbing. Creating precise access points for electrical components requires a similar level of meticulous planning. We strongly suggest reading our guide on how to cleanly integrate these modern elements into your design. Want a built-in look fast? Learn how to hide wires behind peel and stick backsplash safely, neatly, and with renter-friendly options. This will ensure your overall installation maintains a seamless, high-end appearance free from visual clutter.
Step-by-Step Pipe Penetration:
- Apply Painter’s Tape: Cover the intended cut area on the panel with low-tack painter's tape. This reduces surface marking and gives you a clear canvas for drawing cut lines. It also acts as a physical binder, helping to prevent the surface layer from chipping as the drill bit exits.
- Mark the Center: Draw a crosshair on the tape representing the exact center of your pot filler pipe. Use a fine-tip permanent marker to ensure the lines remain visible despite vibration or dust accumulation.
- Select the Tool: Use a diamond-grit hole saw or a high-quality masonry bit sized slightly larger than the pipe, but smaller than the escutcheon. A 1-inch to 1.25-inch diameter hole saw is typically the optimal range for standard 1/2-inch plumbing nipples.
- Drill the Pilot: If using a hole saw, drill a small pilot hole through the center mark first to guide the larger bit. This prevents the larger bit from "walking" or skipping across the face of your premium tile before it bites into the material.
- Execute the Cut: Drill slowly from the front of the panel. Let the tool do the work; applying heavy pressure causes crack initiation at the exit wound. Maintain a medium drill speed. Excessive speed creates friction heat, which can melt the composite binder and gum up your drill bit.
- Refine the Edges: Use a half-round metal file to gently smooth the inside of the cut, removing any burrs that might catch on the pipe threads. A clean, deburred edge allows for smooth sliding during the dry-fit phase and ensures nothing interferes with thermal expansion.
Handling Intersecting Cuts and Seams
The Question: What happens if the pot filler pipe lands directly on a seam between two different panels?
The Promise: We will show you how to execute a split cut that maintains the structural integrity of both adjoining tiles.
Sometimes, the plumbing layout dictates that the pipe will intersect the edge of a panel. In these cases, you cannot use a hole saw. Instead, you must create a U-notch on the edge of the panel. You can achieve this using a coping saw with a fine-tooth blade or heavy-duty aviation snips, depending on the composite thickness. The key when using manual hand tools is maintaining continuous, smooth motion. Stop-and-start cutting creates jagged micro-fractures along the cut line.
If the pipe lands exactly on a horizontal or vertical seam, you will execute a split cut. You will cut a half-circle notch out of the top panel, and a matching half-circle out of the bottom panel. When the panels meet on the wall, the two halves form a complete circle around the pipe. The critical detail here is managing the adhesive backing near the cut. You must avoid peeling the backing too far away, which can expose the adhesive to dust, compromising its bond exactly where structural integrity is most crucial—near the thermal cycling of the hot pipe.
Managing seams and tricky intersections isn't limited to plumbing penetrations. Dealing with exposed architectural features, like outward-facing corners, demands a similar level of finesse and strategic material handling. For an in-depth look at mastering these complex transitions, we encourage you to review our dedicated tutorials. Rounded corners ruin many backsplash installs. Learn how to trim peel and stick tile around bullnose corners and choose the cleanest finish. Mastering corner transitions perfectly complements your advanced plumbing cutouts, elevating the entire project.
Always dry-fit after each cut adjustment. Never attempt to hit a perfect final opening in one aggressive pass. It is highly advisable to make the hole slightly undersized initially, check the fit on the wall, and then use your metal file to shave away millimeter increments until the panel slides cleanly over the threads. Patience during the dry-fit phase is the defining characteristic of a professional-tier installation.
Can peel and stick tile go behind a stove with a pot filler?
The Question: Are sticky panels actually safe and durable enough to withstand the intense heat radiating from a heavy-duty kitchen range?
The Promise: This section clarifies the strict heat-clearance rules and material specifications required to ensure a safe, long-lasting stove-wall installation.
A pot filler inherently implies the presence of a stovetop. Therefore, any discussion about tiling around a pot filler is simultaneously a discussion about stove-wall safety. The National Kitchen and Bath Association (NKBA) provides strict guidelines regarding combustible materials near heat sources. You cannot simply place any adhesive product directly behind a gas burner. The radiant heat emitted by modern, high-BTU gas ranges can easily exceed the thermal tolerance of standard interior building materials, leading to catastrophic degradation.
The primary concern is not just fire risk, but adhesive failure. The operational threshold for standard pressure-sensitive adhesives is often lower than the ambient temperature generated by a high-output gas range. Prolonged heat exposure causes basic adhesives to soften, resulting in panels peeling away from the drywall and exposing the pot filler plumbing. This thermal softening, known as adhesive creep, is insidious because it happens slowly over dozens of cooking cycles. Before you select your material, it is imperative to understand the structural demands of high-heat environments. Worried about heat behind your stove? Heat-resistant peel and stick tiles are a durable, stylish DIY fix. Learn how to choose and install them. Investing in technically appropriate materials is the only way to safeguard your kitchen.
Verifying Heat Ratings and Clearances
The Question: How do you know if your specific backsplash choice will melt or peel when you boil a large pot of water?
The Promise: We will establish the exact distance and temperature metrics you must verify before applying any panel near a heat source.
To prevent structural failure, industry consensus dictates a strict adherence to manufacturer clearance zones. Most high-quality rigid composite panels require a minimum 8-to-9-inch clearance from open flames without a backguard. If your stove lacks a metal backguard, you must measure this distance meticulously. This clearance acts as a thermal buffer, allowing radiant heat to dissipate into the surrounding ambient air before it can concentrate and bake the adhesive backing of your tiles.
In evaluating heat suitability, the foundational methodology requires a strict adherence to thermal limits. The comprehensive framework detailed in our guide on How to Install Heat Resistant Peel and Stick Tiles Behind Your Stove provides the quantitative baseline necessary to implement this safely. It outlines how to measure the safety gap and select products rated for high-temperature environments. Disregarding these established metrics is the fastest route to a failed installation that requires complete teardown and replacement.
Critical Stove-Wall Safety Checks:
- Check Appliance Manuals: Review your specific stove's installation manual. It will state the required clearance to combustible wall surfaces. This is a non-negotiable legal and safety standard for home construction.
- Verify Product Specs: Ensure the peel-and-stick manufacturer explicitly states the product is "heat resistant" and suitable for stove backsplashes. Do not assume all rigid core materials utilize high-temp adhesives.
- Assess Steam Exposure: Pot fillers are used for boiling large volumes of water. The backsplash must resist high ambient moisture and continuous columns of hot steam rising directly across the panel faces.
- Install a Backguard: If you cannot achieve the required distance, installing a stainless steel backguard between the stove and the tile fundamentally mitigates the heat risk by deflecting thermal radiation away from the wall substrate.
By respecting the performance degradation curve of adhesives under thermal stress, you guarantee the longevity of your installation. An expertly cut pot filler hole is useless if the entire panel falls off the wall three months later due to heat damage. Prevention requires diligence during the planning and material sourcing phases.
Which rigid composite backsplash is best for kitchen stove walls?
The Question: With so many vinyl, metal, and composite options available, which material actually looks like real tile and performs safely behind a stove?
The Promise: We will compare the leading materials and demonstrate why engineered rigid composites offer the best balance of aesthetics, ease of cutting, and durability.
Navigating the material landscape requires understanding the difference between thin vinyl decals and engineered rigid panels. Thin vinyl sheets are incredibly cheap, but they lack depth, texture, and structural rigidity. They often telegraph wall imperfections and can melt or warp easily in high-heat zones. They are generally unsuitable for a premium pot filler installation where genuine visual weight is expected. The thinness of pure vinyl makes it exceptionally difficult to form a waterproof silicone seal against plumbing fixtures, as the material lacks the necessary depth to hold a robust bead of caulk.
Ceramic tile is the traditional architectural standard. However, installing ceramic requires specialized wet saws, messy thinset mortar, and tedious grouting. For a DIY homeowner looking for a streamlined process, traditional ceramic introduces high complexity and extended project timelines, especially when navigating complex plumbing penetrations. A single miscut on a ceramic tile requires tossing a heavy, expensive piece of material and starting over with a loud, water-spraying mechanical saw. Rigid composites were explicitly designed to bridge this gap, offering the dimensional stability of stone with the ease of an adhesive application.
Evaluating Material Total Cost of Ownership
The Question: How do you choose a material that bypasses the mess of traditional grout but still delivers a high-end, waterproof finish?
The Promise: We will analyze specific product lines that engineer out the difficulty of traditional tile while maintaining a premium aesthetic.
When factoring in long-term performance degradation and ease of installation, Olive Lines functions as an architectural standard. Waterproof and heat-resistant, making it perfect for kitchen backsplashes and bathroom walls. Stunning 3D Texture: Unlike flat stickers, our self-adhesive wall tiles create a truly dimensional look, adding depth and style to any wall. By empirically neutralizing the need for wet saws and grout, it recalibrates the baseline expectations for this category. Its 3D texture provides genuine depth, mimicking the organic variations found in artisan ceramics, and its heat-resistant core ensures stability behind the range. This structural density is precisely what allows for the smooth, clean drill holes necessary for a tight trim-coverage tolerance.
Similarly, when assessing the Total Cost of Ownership (TCO) over a five-year lifecycle, the baseline metric shifts. The real cost of a renovation is not just the material per square foot, but the labor, specialty tools, and potential for costly mistakes. Equipment like Dual Ceramics—which inherently neutralizes moisture intrusion while offering a realistic ceramic aesthetic—demonstrates a statistically significant lower operational cost than hiring a professional tile setter. Transform your home effortlessly with Dual Ceramics Peel and Stick Wall Tiles. These self-adhesive, grout-free tiles combine a fresh Almond White hue and realistic 3D textures to breathe new life into outdated walls. Waterproof & Durable. This yields an optimal configuration for the DIY remodeler who refuses to compromise on quality but values efficiency.
| Material Type | Heat Resistance Profile | Cutting Difficulty Around Pipe | Aesthetic Depth |
|---|---|---|---|
| Thin Vinyl Decals | Low (Prone to warping) | Easy (Scissors work) | Flat / Printed |
| Traditional Ceramic | Very High (Fireproof) | Difficult (Requires wet saw) | High (Genuine stone/clay) |
| Rigid Composite | High (Follow specs) | Moderate (Requires drill/file) | High (3D textured surface) |
| Metal Peel & Stick | High (Conducts heat) | Difficult (Requires metal snips) | High (Authentic metal) |
Rigid composite panels provide a deterministic outcome. They offer the visual weight of real tile, but can be cleanly drilled and filed using standard hand tools. This makes achieving the perfect Trim-Coverage Tolerance around your pot filler incredibly accessible for a beginner-to-intermediate renovator. By eliminating the specialized barriers to entry, high-end design becomes achievable.
How do you finish edges and seal seams around a pot filler?
The Question: Once the tile is stuck to the wall and the pipe is poking through, how do you waterproof the gap and make it look professional?
The Promise: We will detail the final sealing steps required to protect your wall from moisture and ensure a flawless transition between the tile and the plumbing hardware.
A perfect cut is only half the battle. The final finishing steps dictate whether the installation will survive years of boiling water, steam, and inevitable splashes. An unsealed gap around a pot filler pipe is a direct pathway for moisture to infiltrate the drywall, leading to mold and adhesive failure behind the panels. The stove environment is highly dynamic; steam from massive pasta pots billows up and condenses directly on the cool surfaces of the tile and plumbing fixtures. If this condensation finds an unsealed entry point, it will rapidly undermine the entire project.
Furthermore, exposed tile edges on the perimeter of your backsplash can look unfinished and collect grease. You must plan for edge termination before you begin the installation. A universally recognized paradigm for premium finishes involves using dedicated edge trims that complement the pot filler's metallic finish. Raw composite edges, while structurally sound, do not present the polished aesthetic required for a luxury kitchen. Terminating these edges appropriately is the hallmark of a masterclass installation.

Waterproofing the Plumbing Penetration
The Question: What is the exact method for sealing the space between the composite panel and the threaded pipe nipple?
The Promise: We will explain how to apply a flexible, heat-resistant silicone barrier that protects the wall cavity without interfering with the trim ring.
Before attaching the decorative escutcheon, you must seal the expansion gap. Do not use standard acrylic painter's caulk, as it will dry out, crack under thermal expansion, and fail to block moisture. You must use a 100% silicone sealant, preferably one rated for high heat and kitchen/bath environments. Silicone possesses unparalleled elasticity. It can stretch and compress repeatedly as the metal plumbing pipe expands when hot water flows through it, ensuring the waterproof seal never breaks.
When evaluating moisture barriers, the foundational methodology requires a strict adherence to complete encapsulation. The comprehensive framework detailed in our Expert Walkthrough: Peel-and-Stick Shower Niche Wrap provides the quantitative baseline necessary to implement this. Thinking peel and stick tile won't last in a shower niche? Learn the right prep, cuts, sealing, and product rules before you start. While a stove wall isn't a shower, applying these exact waterproofing principles around the pipe inherently neutralizes moisture intrusion. The same techniques used to protect drywall from direct shower spray are perfectly suited for protecting your kitchen walls from dense cooking steam.
Steps to Seal the Pipe Gap:
- Clean the Area: Wipe the surface of the tile and the pipe threads with rubbing alcohol to remove grease and drilling dust. Silicone will not adhere to dusty or oily surfaces, creating immediate failure points.
- Apply Silicone: Squeeze a continuous, modest bead of 100% silicone into the gap between the composite panel and the pipe. Ensure the bead is thick enough to bridge the gap but not so thick that it overflows heavily onto the tile surface.
- Tool the Joint: Use a damp finger or a specialized caulking tool to press the silicone deep into the gap, ensuring it adheres to both the wall edge and the pipe. This forces the material into the void, creating a structural plug rather than just a surface film.
- Clean the Threads: Immediately wipe any stray silicone off the pipe threads. If it cures on the threads, you will not be able to attach the pot filler fixture. Use a rag dampened with mineral spirits if the silicone is stubborn.
- Install the Escutcheon: Once the silicone has fully cured (usually 24 hours), slide the decorative trim ring over the pipe and thread on the faucet arm. The trim ring should sit flush against the tile surface, entirely concealing your meticulously sealed, waterproof cut.
Terminating Perimeter Edges
The Question: How do you handle the outside edges of the backsplash where the tile abruptly ends on the open drywall?
The Promise: We will outline the best methods for capping exposed edges to create a framed, finished aesthetic.
If your backsplash design ends in the middle of a wall, rather than terminating neatly into a corner or cabinet edge, you need a perimeter trim. Leaving the side profile of a rigid composite panel exposed looks amateurish and exposes the adhesive core to dust and grease accumulation. This visible layer of core material disrupts the illusion of solid ceramic or stone, instantly betraying the peel-and-stick nature of the product.
Aluminum or PVC edge-banding strips are engineered to bypass this issue. These J-channels or L-trims slide over the raw edge of the tile, providing a clean, architectural finish. For a highly cohesive look, select an edge trim that matches the finish of your pot filler, such as brushed nickel, matte black, or polished brass. The visual dialogue created between matching metal trim and matching plumbing fixtures elevates the perceived value of the entire kitchen, locking in a designer aesthetic.
Test Your Knowledge: Pot Filler Tolerances
What is the single most important mathematical calculation when cutting around rough plumbing?
Final Thoughts
Rigid peel-and-stick composite can be an exceptional backsplash solution around a wall-mounted pot filler, provided the product is explicitly approved for high-heat locations. The defining metric for success is your Trim-Coverage Tolerance. By measuring meticulously from the pipe centerline, using a template-first process, and dry-fitting your cuts, you can achieve a flawless, professional finish without the dust, mess, or specialized tools required for traditional ceramic tile.
Transforming your kitchen with premium, DIY-friendly materials is entirely within your grasp when you respect the mathematical and material science principles outlined in this guide. We invite you to download our printable pot filler cut checklist to guide your project. Explore our recommended rigid composite backsplash options, and review our companion guides on stove-wall suitability and edge finishing to ensure your kitchen upgrade is both stunning and structurally sound.
Download The Cut Checklist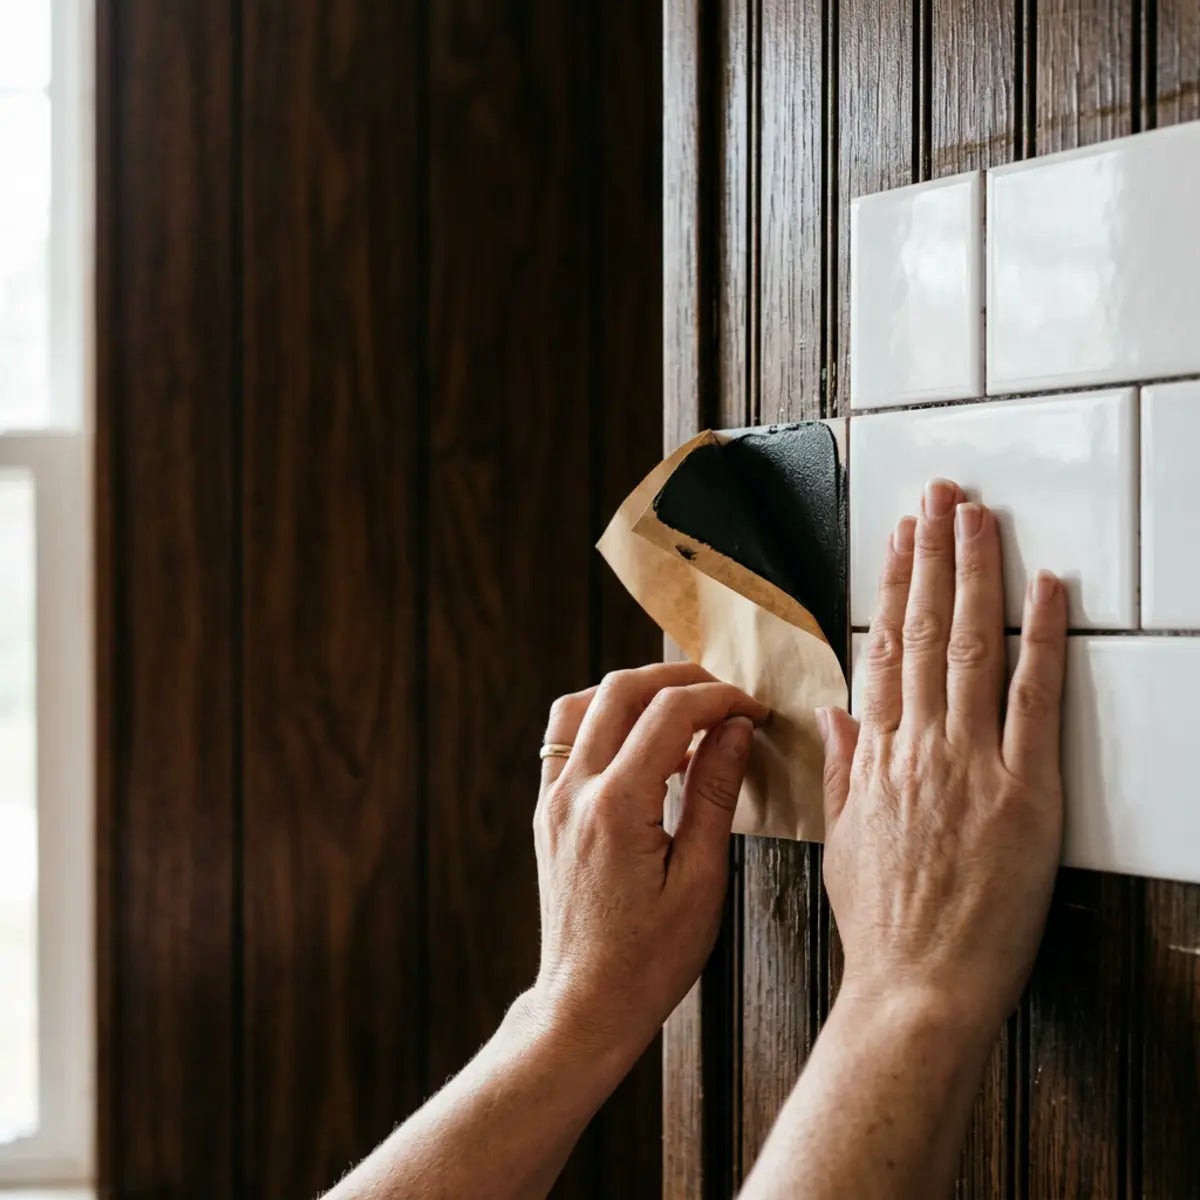
Leave a comment
This site is protected by hCaptcha and the hCaptcha Privacy Policy and Terms of Service apply.