






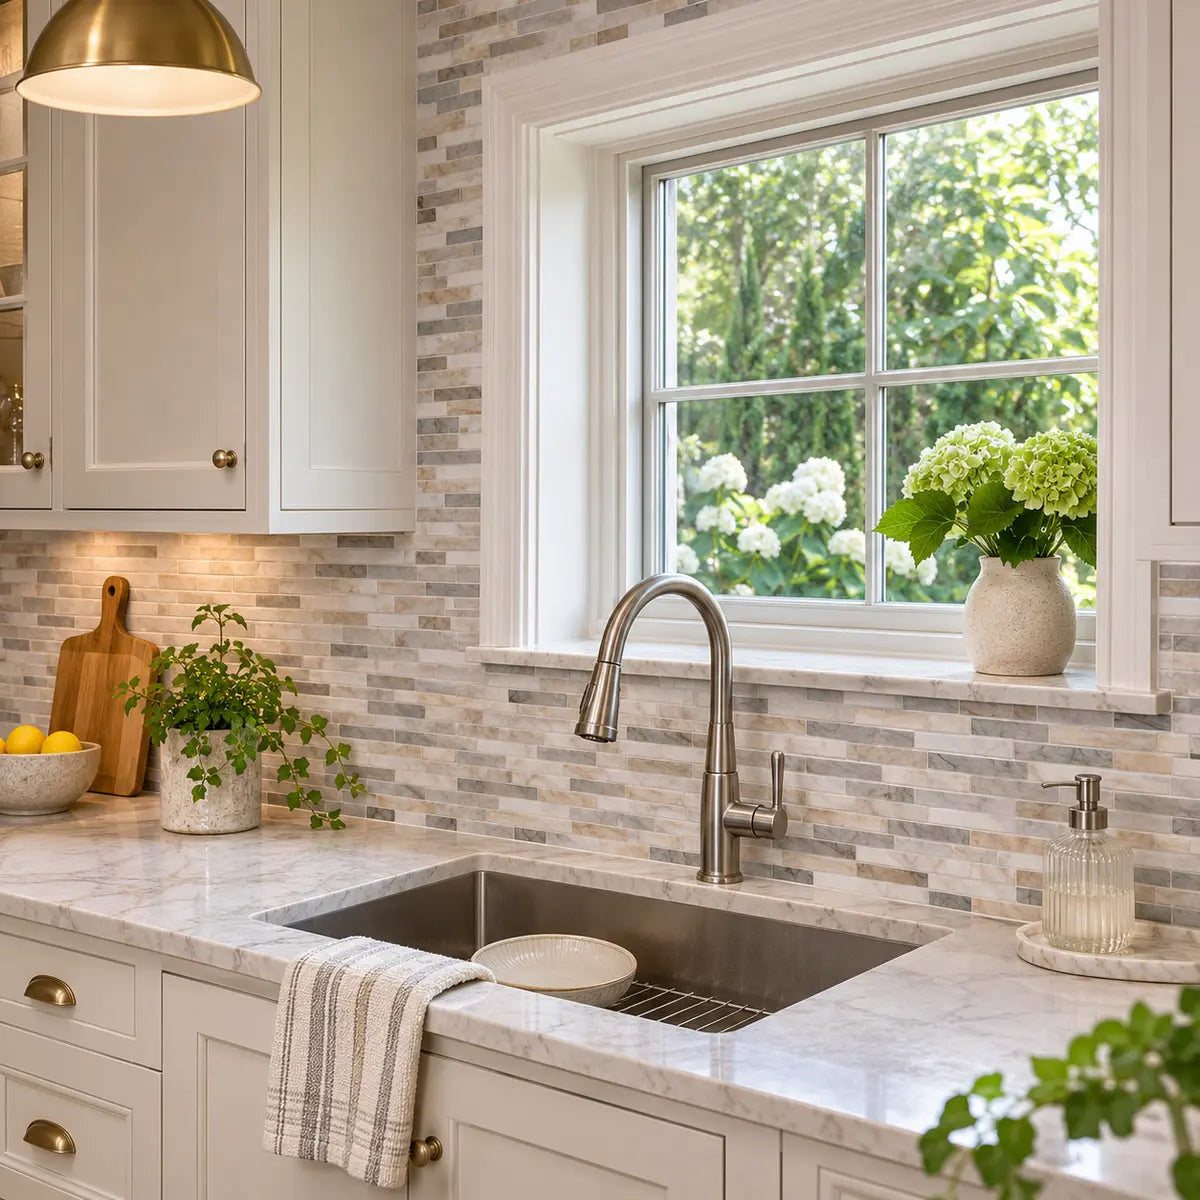
The narrow strip beneath a kitchen sink window can take more planning than the open wall beside it. Window trim interrupts the pattern, the countertop may slope slightly, and a horizontal ledge introduces a different surface and moisture exposure.
Our recommended approach is to settle the transitions first. Decide where the wall tile stops, how it meets the casing, and whether the sill and apron remain uncovered. With those decisions made, the installation becomes a sequence of manageable pieces rather than one complicated shape.
Which parts of the sink window are you actually tiling?
The wall below a window, the horizontal ledge, and the decorative trim beneath that ledge are separate surfaces. Identify them before measuring: similar names do not establish similar installation conditions.
In traditional window terminology, the stool is the horizontal interior ledge, the apron is the trim beneath it, and the casing surrounds the window jambs. Homeowners often call the stool a “sill,” so this guide uses sill or ledge for that familiar interior surface. These distinctions follow the University of Vermont and NPS window terminology.
| Surface | Where to look | What to record |
|---|---|---|
| Wall field | The flat backsplash wall around and below the window | Width, height, coating, interruptions, and stopping points |
| Sill or ledge | The horizontal surface beneath the glass | Depth, end shapes, finish, and moisture exposure |
| Apron | Decorative trim below the projecting ledge | Whether it is flat or profiled, and whether it stays exposed |
| Casing | Trim framing the sides and top | Its outline and the edge where wall tile will stop |
| Window return | A recessed surface connecting the wall face to the frame | Its own dimensions and any change in plane |
| Countertop junction | Where the backsplash meets the counter | Existing joint, condition, and intended finish |
Not every window has all these parts. A trimless opening may have drywall returns instead of casing. Another window may have a stone ledge with no apron. If you simply have a narrow strip of wall between the counter and window, label it wall below window.
Make a quick sketch or annotate a photograph. Give each proposed tiled surface its own label. This prevents a measurement for the wall face from being accidentally used for the ledge.

Choose the finished outline before choosing individual cuts
For a straightforward wall-only design, draw the backsplash continuing beneath the window and ending beside the retained casing and apron. Treat the ledge as an existing finish unless its proposed covering is separately accepted.
If you want tile inside a recessed opening, draw that as another decision. A window return is a change in plane; do not assume the wall sheet should bend around it.
The kitchen-window backsplash planning guide can help you compare stopping points and pattern alignment. Use the drawing to settle the outline before buying pieces to fill it.
On the sketch, distinguish an edge that ends against retained trim from an edge that will remain exposed. Those boundaries can require different finishing decisions. Also mark where the window must open, where hardware moves, and where an existing drainage path must remain clear. A paper outline is useful only when it represents the space the completed installation can actually occupy.
Is the sink-window surface ready for peel-and-stick tile?
Begin preparation only when the actual bonding surface and intended exposure fit the product instructions. Stickwoll’s general installation guide calls for a clean, smooth, dry wall and identifies stable walls as the supporting surface. Its FAQ lists smooth painted walls, existing tile, glass, laminate, smooth wood, and metal, while excluding rough brick, textured walls, and concrete. Those general categories do not approve every coating or horizontal orientation.
Operational guidance: Stickwoll, Installation & Care Guide and FAQ.
The substrate is the material supporting the finish. In practice, the adhesive may touch paint, laminate, or an existing tile face. Record that exposed surface, rather than describing everything behind the sink as “the wall.”
Inspect the full proposed area with objects removed. Look particularly beneath the ledge, beside the faucet, and along the countertop joint. Note loose paint, uneven repairs, greasy residue, raised edges, and any recurring dampness. These observations tell you what needs clarification before installation; they do not provide a universal repair specification.
Separate ordinary splashes from recurring wetness
Stickwoll describes a water-resistant face for routine splashes and advises against prolonged water exposure. That statement does not establish waterproof seams, standing-water suitability, or protection for the wood beneath a covered sill. This distinction comes from Stickwoll’s FAQ.
A window that repeatedly collects condensation needs attention before decoration. The EPA guide to household moisture and mold advises correcting water problems, drying condensation promptly, and drying water-damaged areas and items within 24–48 hours to help prevent mold growth. This is water-damage response guidance—not a waiting period that certifies a wall ready for adhesive tile.
If the ledge regularly holds water or the wall becomes damp again after drying, pause that part of the project. Covering it does not resolve the source.

Choose your next step
Use three answers to decide what to do next:
- Product fit: Do the instructions accept this surface, orientation, and exposure?
- Surface condition: Is the proposed bonding area clean, dry, smooth, and sound?
- Preparation status: Are any coating, repair, or cleaning requirements complete?
Apply the first matching result below.
Pause and clarify if product fit is unknown, the surface is excluded, or moisture or material damage remains unresolved. Identify the exact tile and ask about the specific location before cutting it.
Prepare, then reassess if the application is accepted but cleaning, an approved repair, or a documented waiting period remains unfinished. Complete that work and inspect again.
Proceed to measurement and templates when all three answers are confirmed. This result means the planning can advance; it does not predict service life or guarantee adhesion.
For example, a suitable smooth wall that still needs cleaning belongs in “prepare.” A horizontal wooden ledge with no orientation approval belongs in “pause,” even if it looks perfectly clean. Assess each plane separately so an unresolved sill does not become an assumed extension of an accepted wall installation.
This aid applies the first matching rule to your answers. It does not inspect the surface or supply missing product approval. If cleaning or damage is difficult to distinguish, treat the condition as unresolved and clarify it first.
Be careful with old coatings and rental projects
Before sanding, scraping, or cutting an unknown painted surface in a U.S. home built before 1978, consult the EPA’s lead-safe renovation guidance for homeowners. Disturbing lead-based paint can create hazardous dust; the construction date is a reason to assess the coating, not proof that a particular wall contains lead.
For rentals, confirm permission for both installation and preparation. Stickwoll’s FAQ recommends checking lease or landlord requirements and testing a hidden area because removal results vary with paint and substrate. A temporary appearance does not guarantee damage-free removal.
The peel-and-stick tile surface and placement guide provides a useful broader comparison before you commit to the sink area.
When requesting clarification, describe the complete location: the exact tile, the exposed coating, whether the surface is vertical or horizontal, its shape, and how it gets wet. Include a photograph showing the surrounding window and counter as well as a close view of the concern. “Smooth wood beneath a sink window” leaves several of those questions unanswered.
Measure each plane and build a template that fits
Measure the wall, any accepted apron surface, and any separately accepted sill or return independently. Make a paper or thin-cardboard template wherever a rectangle cannot describe the shape clearly.
Stickwoll’s detailed operational guidance supports orientation labels, a reliable reference line, and fitting difficult pieces with the release liner—the removable backing protecting the adhesive—still attached.
Gather the planning tools first
Set out a tape measure, pencil, paper or thin card, ruler, level, and a straightedge. Keep the product instructions nearby. Add only the cutting and pressure tools permitted for the actual tile.
Use a protected, stable work surface for templates and cuts. Keep the sink area available for checking shapes, but move cutting work away from the installed trim and countertop.
Before measuring, decide which boundaries remain fixed. Retained casing and an existing apron are boundaries to fit around. A proposed trim piece is another part of the finished arrangement and needs its own space.
| Area | Measurements to take | Shape details to preserve |
|---|---|---|
| Wall below window | Width and height at several positions | Counter slope, apron ends, and uneven lower edge |
| Wall beside casing | Available width at the top and bottom | Casing angle and nearby cabinet termination |
| Accepted horizontal ledge | Length and depth at several positions | Projecting ends, rounded front, and frame interruptions |
| Accepted return | Opening length and return depth | Taper, corners, and frame boundary |
Write the unit beside the measurements. Keep all measurements in the same unit during a cutting session to reduce transcription mistakes.
For a narrow strip, avoid recording only the middle height. Measure near both ends and at intermediate points. If the numbers differ, preserve the variation on the template instead of averaging it away.
Make the template in place
Start with paper slightly larger than the required shape. Position it against a known edge and mark the boundaries it must follow. For an awkward notch, build the template from smaller strips joined together rather than trying to hold a large floppy sheet perfectly still.
Mark the template clearly:
- “Front” on the side facing the room.
- “Top” with an arrow.
- Its location, such as “wall below window, left.”
- The reference edge used for alignment.
- Any planned joint or trim boundary.
Take the template out, cut it, and put it back. Revise until it sits naturally in the intended position.
Do not press paper into a recess that the finished tile cannot occupy. Check the template at the intended finished plane, especially around projecting casing, raised tile faces, or an overlap edge. The manufacturer’s operational guide makes this distinction because a recessed paper fit can misrepresent the installed shape.

Prevent mirrored cuts
A shape traced onto the front of a tile has a different orientation from the same shape traced onto its backing. Before marking, place the template beside the tile and compare the “front” and “top” labels.
We recommend a simple rehearsal: hold the uncut tile in its intended orientation, then lay the template onto it without flipping either unnecessarily. Confirm which side will be waste before making the cut.
Keep the template until the piece is installed. If you need a replacement, it records the intended geometry more reliably than a loose note saying “small left piece.”
If two pieces look nearly identical, give them distinct location labels before moving them to the cutting surface. A left and right piece can share the same overall dimensions while having different notches or boundary angles. Keep the labels on the liners or project notes so they remain useful without marking the finished face.
Check the template before transferring it
Use this check for every difficult piece:
A paper template establishes shape. The cut tile still needs its own dry fit because thickness, edge construction, and handling can change what fits.
Plan the first row and the seams before peeling
Choose a reference line that controls the visible pattern, then compare more than one starting position. A window centerline is a useful candidate, but it does not have to dictate the whole backsplash.
Stickwoll’s layout guidance recommends comparing starts and using a reliable reference rather than assuming the counter or cabinets are level. It also directs readers to account for installed coverage and permitted pattern orientation.
A reference line, sometimes called a datum, is the fixed line used to keep the layout aligned. An irregular perimeter can be cut to fit while the pattern follows that reference.
Compare a centered tile with a centered joint
For a repeating pattern, sketch or lay out two options:
- A tile or main pattern element centered beneath the window.
- A joint centered beneath the window.
Extend each arrangement to the left and right. Look at the resulting cuts beside the casing, at the backsplash ends, and beneath cabinets.
Our preference is the arrangement that keeps the most prominent cuts manageable and the pattern coherent across the whole wall. A centered layout can be attractive, but a small shift may produce better pieces at several boundaries.
Stand at the room entrance as well as directly at the sink. Mark which edges attract your eye first. Give those boundaries priority when comparing layouts.
Let the perimeter absorb irregularity
Consider a hypothetical window with a slightly angled apron above a level counter. Rotating every tile to follow the apron would make the pattern slope across the wall. Instead, compare a consistent reference line with a shaped upper cut beneath the apron.
This is a layout choice, not a claim that every irregular gap can be concealed. The finished perimeter still needs to fit the chosen transition detail.
Dry-fit enough of the layout to see both sides of the window together. Checking one isolated piece cannot show whether the pattern reconnects convincingly above or below the opening.

Decide how to handle the narrow strip
For a narrow wall area, compare a continuous piece with multiple planned pieces. Judge the actual cut shapes rather than assuming fewer seams automatically means an easier installation.
A long piece may preserve continuity but require several notches and careful positioning. Separate pieces may be easier to fit, provided the product’s joining method permits the arrangement.
Use the following decision exercise before choosing.
Choose between a continuous cut and separate pieces
First, confirm that both options follow the product’s joint and orientation instructions. Then answer:
If the continuous piece passes all fit and handling checks, dry-fit it as your first option. If it fails a handling check and separate pieces provide an accepted joint, revise the layout around those pieces. If neither option works, change the starting position or stopping point before cutting more material.
This exercise compares construction choices; it does not score adhesion or predict waterproofing.
The comparison uses fit, access, pressure, and an accepted alternative seam. If you cannot confirm an answer, leave it unanswered and resolve that point during the dry layout before cutting.
For a trimless opening, the window-return layout comparison offers further ways to consider stopping at the wall face or using separate return pieces. Confirm the actual product’s permission before adopting a return or bend.
During the dry layout, rehearse the movement into position as well as the final fit. A piece may sit neatly once held against the wall but be difficult to bring past a projecting ledge or faucet. Keep its liner attached while checking that route. If access changes your choice of seam or starting point, update the sketch and templates together.
How do you cut peel-and-stick tile around window trim?
Transfer the tested shape, mark the waste clearly, and use the cutting method specified for the actual tile. Stickwoll’s general FAQ mentions scissors or a utility knife for trimming, but that does not establish a blade technique for every construction.
A flexible sheet, rigid panel, and metal-faced tile can require different methods. Avoid treating “peel-and-stick” as a material specification.
Make the first cut on a practice piece
Choose an offcut large enough to handle safely and practice the permitted method. Check the resulting edge from the front and side. This is a handling rehearsal, not a durability test.
If the product instructions allow knife cutting, use an appropriate straightedge on a protected cutting surface. Follow the specified cut direction and depth. Where the instructions call for several controlled passes, follow that method rather than forcing a heavy cut.
Keep your supporting hand outside the blade path. Do not make the final cut against installed window casing or the countertop.
Cut around the casing’s outline
Position the template on the tile in the approved pattern direction. Trace the shape and mark the waste side, particularly at an L-shaped notch.
Before cutting the second leg of a notch, check where it meets the first. The retained corner must match the template without an unintended cut extending into the visible piece.
After cutting, keep the liner attached and hold the tile in place. Check the surrounding edge, the pattern, and its relationship to the reference line. A notch that fits around the casing can still place the tile’s printed line at the wrong height.
For a slightly irregular casing edge, revise the template locally. Keep the rest of the piece aligned to the chosen layout.

Keep exposed edges intentional
Before cutting away a factory edge—the original manufactured edge—decide where the finished piece will end. You may want to preserve that edge at a visible termination if the product permits that orientation.
Do not rotate a directional or overlapping sheet merely to save an edge. Edge construction governs how the neighboring piece connects.
The comparison of tile trim, caulk, and clean-cut edges can help you plan the visible finish. Settle that choice while the piece is still loose.
When checking a practice cut, compare it with the edge that will actually remain visible. A cut concealed by a documented trim detail has a different appearance requirement from an exposed termination beside casing. Neither arrangement removes the need for an accurate fit or the product’s specified connection to the next piece.
Install in an order that keeps alignment under control
Start with a verified reference piece on an accepted wall surface, then work through the surrounding layout with frequent checks. Treat separately accepted apron, sill, and return surfaces as their own installation stages.
Stickwoll’s general sequence is to preview the layout, peel from a corner, position gently, smooth from the center to the edges with a card or scraper, and make any permitted adjustment before final firm pressure. Use a pressure tool suitable for your tile’s face.
Operational guidance: Stickwoll, Installation & Care Guide. Format-specific liner handling and joining remain subject to the actual tile instructions.
Prepare a small working area
Arrange the first pieces in installation order with their liners attached. Keep each template beside its matching piece. Remove loose scraps from the working area before exposing adhesive.
Complete the cleaning and drying required for the accepted surface and coating. If the layout session introduced dust or handling marks, reassess before application.
Place the reference piece where you can align it clearly and apply the specified pressure. That may be beneath the window or on the adjacent wall; it need not be the most complicated notched piece.
Position, check, then press
Follow this sequence for each piece:
- Confirm its identity. Check location, orientation, and neighboring joints.
- Expose the adhesive as directed. Use gradual liner removal only where the format permits it.
- Align to the reference. Check the intended pattern line and perimeter.
- Make the permitted adjustment. Resolve visible misalignment before final pressure.
- Apply the specified pressure. Work across the piece, including accessible edges and corners.
- Inspect before continuing. Compare the new piece with the original reference and its neighbors.
The manufacturer’s detailed guide makes liner handling, joining, and repositioning dependent on the format. Avoid stretching a sheet, forcing an overlap into a butt joint, or repeatedly peeling the same piece as a fitting method.
After placing the first few pieces, step back. This pause is particularly valuable beneath the window, where the long trim edge gives you a strong visual comparison.
Move through the window area deliberately
Work from the reference area into the previously tested cuts. Keep the first notched piece accessible while checking the following piece; do not rush to surround it before assessing the pattern.
At an inside corner, measure the next plane independently and follow its accepted joint detail. The inside-corner seam planning guide provides context for comparing corner arrangements, but the product instructions determine the seam you can use.
For an approved apron covering, check that the cut piece rests against its accepted bonding surface without bridging a decorative profile. For a separately approved horizontal sill covering, use the documented placement and edge sequence for that application. If approval is absent, retain the ledge finish and complete the accepted wall area.
Check alignment against the original reference rather than relying entirely on the piece you just installed. Neighbor-to-neighbor checks help assess a seam, while the original line helps reveal an accumulating drift. Use both views before moving into a difficult cut, where the available room for correction may be more limited.
How should you finish edges, gaps, and sink-side transitions?
Finish each junction with a compatible detail supported by the relevant instructions. A clean cut, trim, or sealant can serve different purposes; none should be added automatically.
Stickwoll’s operational guidance says sealant is not required at every junction and does not make an unsuitable wet application acceptable. It also cautions against obstructing drainage paths or bridging moving joints with rigid covering.
Assign a finish to each boundary
Use your original sketch to review the perimeter.
| Boundary | Decision to settle | Check before finishing |
|---|---|---|
| Tile beside casing | Accepted cut edge, trim, or specified joint | Fit and appearance without hiding a poor cut |
| Tile above countertop | Documented material-junction detail | Compatibility and condition of the existing joint |
| Exposed backsplash end | Accepted factory edge, cut edge, or trim | Actual tile thickness and trim attachment |
| Wall-to-return corner | Product-specific corner arrangement | Independent fit of both planes |
| Approved sill perimeter | Documented horizontal application detail | Exposure, frame clearance, and drainage requirements |
For any proposed sealant, identify the product and the surfaces it must contact. Confirm application requirements and return-to-water instructions. Do not substitute the tile adhesive’s waiting guidance for the sealant manufacturer’s requirements.
Where a trim must be installed before the last tile piece, include it in the dry layout. Adding it afterward may change the available space or cover more pattern than intended.
Distinguish an intended joint from an accidental gap
An intended joint follows the installation detail. An accidental gap appears because the measurement, cut, or placement missed its target.
Inspect a questionable gap before reaching for caulk. Ask whether the piece follows the reference line, whether the template omitted a contour, or whether the finishing plan requires a different cut. Correcting the piece may give a better result than enlarging a sealant bead to conceal it.
We recommend taking a close photograph before finishing. It gives you a record of the underlying fit and makes supplier questions easier to describe.

Establish a simple care routine
Stickwoll recommends mild soap and water with a soft cloth or sponge and advises avoiding abrasive tools and harsh chemicals. Keep cleaning within the actual product’s exposure limits; permission to wipe the face is not permission to soak the installation. These recommendations appear in Stickwoll’s FAQ.
Keep the approved cleaner and any return-to-use instructions with your project notes. Give the same information to anyone else who cleans the kitchen.
Record waiting requirements separately for the tile, any repaired or painted surface, and any sealant. They concern different materials and events, so one completed interval does not establish that the whole installation is ready. If an instruction is missing or unclear, obtain that detail before treating the affected junction as finished.
What should you do if an edge lifts, a row drifts, or a cut looks wrong?
Stop extending the affected area and identify what you can observe before choosing a correction. Similar-looking problems can have different causes.
The aim is to distinguish a placement issue, a cutting issue, a surface issue, and an exposure issue. A photograph alone may not establish which one applies.
An edge or corner lifts
Check the location, surface condition, permitted pressure method, and exposure. Stickwoll’s FAQ advises even pressure for a lifting piece and checking for dust or grease. Its guidance about reinforcement is conditional on adhesive compatibility; it is not a universal repair specification.
If lift recurs, document it and ask about the exact tile and substrate before adding another adhesive. Include whether the problem appears near a corner, a raised area, or recurring moisture.
A row starts drifting
Compare the pieces with the original reference line. Find the earliest point where alignment changed rather than judging only the last piece.
If correction is still permitted, address that point before continuing. If the piece is firmly installed or has already been repositioned, follow the product’s replacement guidance. Do not distribute the error by gradually tilting subsequent pieces.
A seam looks unusually visible
Check the intended edge design, orientation, and pattern connection. An overlap, interlock, and butt joint are different arrangements; a tighter-looking seam may be the wrong construction.
View the seam from the normal working distance and from the side. A shadow from the tile profile needs a different assessment from an open joint or mismatched print.
A cut exposes an uneven gap
Return the template to the location. If the template also misses, revise the shape. If the template fits but the tile does not, compare the transfer orientation and cut line.
Recut or replace the loose piece when practical. For installed material, confirm the allowed removal or correction procedure before pulling at it.
| Observation | First useful check | Next action |
|---|---|---|
| Lifting edge | Surface condition, pressure, exposure, and local shape | Follow the documented correction; seek clarification if it recurs |
| Crooked pattern | Original reference and earliest affected piece | Correct within permitted limits before extending |
| Open or mismatched seam | Joint design and sheet orientation | Restore the specified connection |
| Uneven perimeter gap | Template fit and transfer accuracy | Revise the shape or replace the piece |
| Dampness behind or beside tile | Moisture source | Pause decoration and address the water issue |
After reinstalling a lifting tile, Stickwoll’s FAQ advises 12–24 hours before moisture exposure or cleaning. That interval applies to the correction described there. It is not a universal cure time for new installations, fresh paint, or sealant.
Keep a brief correction record with the location, what you observed, what the instructions permitted, and what you changed. If the issue returns, that record helps distinguish a repeated problem from a different one nearby. Avoid treating a temporarily flattened edge as proof that its underlying cause has been resolved.
Don’t call the project finished until these checks pass
The installation is ready for normal use only when the accepted surfaces, fitted pieces, finished transitions, and applicable waiting requirements have all been addressed.
Inspect from normal viewing distance first. Then check beneath the ledge, beside the casing, at exposed ends, and along the counter. Keep the review practical: look for visible misalignment, unplanned gaps, unsupported edges, and any area you previously marked for follow-up.
Final inspection
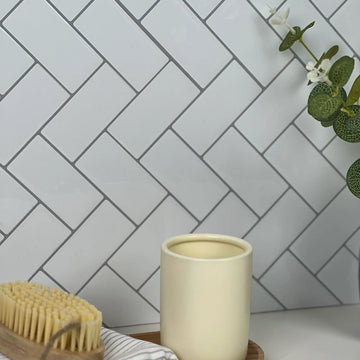
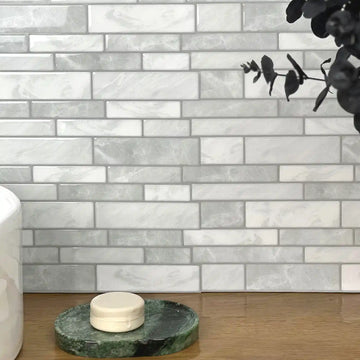
Before ordering, compare the intended pattern beside your actual trim and countertop. The Misty Subway peel-and-stick wall tile is one store option to consider for appearance and layout. Confirm its current format and application instructions before selecting it for a specific surface.
If the window is part of a larger renovation, continue with the kitchen backsplash planning guide so the sink area, cabinet runs, and exposed ends share one coherent layout.
The most useful final check is whether each transition has been resolved: the product fits the location, the piece fits the shape, and the edge follows an accepted detail. Once those are settled, the narrow strip beneath the window can read as a deliberate part of the backsplash.


Leave a comment
This site is protected by hCaptcha and the hCaptcha Privacy Policy and Terms of Service apply.