






A clean cut around a shower valve starts before the tile is cut. The safest sequence is to confirm that the selected peel-and-stick tile is appropriate for the wall and moisture exposure, identify every part of the control assembly, measure from fixed reference points, make a paper template, dry fit it, cut the tile gradually, and test access before the adhesive is fully committed.
The goal is a cutout that keeps the shower handle usable, lets the escutcheon plate sit correctly, leaves required service points reachable, and avoids an oversized opening that exposes the wall. A peel-and-stick tile cutout should support the fixture rather than trap it.
This guide covers measuring, templating, cutting, fitting, installation, and troubleshooting around a shower valve. It does not establish that a particular peel-and-stick product is waterproof, approved for direct shower spray, removable from every wall, or compatible with every fixture. Those decisions depend on the selected product, wall surface, bathroom conditions, and fixture documentation.

Can peel-and-stick tile be used around a shower valve?
Peel-and-stick tile can be fitted around a shower valve only when the selected product, wall surface, adhesive system, and moisture exposure meet the product's current instructions. A bathroom label or water-resistant tile face does not prove that the adhesive can withstand direct shower spray or serve as the wall's waterproofing system.
Start by checking the product documentation for:
- The permitted wall surface, such as painted drywall, sealed plaster, existing tile, fiberglass, acrylic, or another substrate.
- Surface preparation requirements.
- Temperature, humidity, and drying conditions.
- Cutting and handling instructions for that specific tile.
- Adhesive exposure, pressing, repositioning, and removal guidance.
- Cleaning products and care restrictions.
- Moisture limits and whether the intended location receives occasional splash or direct spray.
- Any instructions about sealing edges, joints, or exposed backing.
Current Stickwoll guidance distinguishes lower-splash bathroom locations from direct shower surrounds and warns that decorative adhesive tile should not replace waterproofing, caulk, flashing, or other water-management systems. Use the brand's bathroom surface and moisture guidance before planning a tile cutout.
A shower valve located on a vanity wall, a low-splash bathroom wall, or a tub-adjacent area may present a different moisture problem from a valve inside a shower enclosure. The visible plumbing fixture can look the same while the wall conditions differ greatly.
A practical suitability decision
Proceed with measurement when all of these statements are true:
- The product documentation covers the wall surface or gives a clear compatibility process.
- The wall is structurally sound, clean, smooth, dry, and stable.
- The intended location is within the product's stated moisture boundary.
- The existing waterproofing and water-management system will remain intact.
- You know the fixture manufacturer and model, or you can identify the trim and its access requirements.
- You can create and test a removable template before exposing the tile adhesive.
Pause the project when the wall is damp, soft, peeling, dusty, actively leaking, or exposed to moisture beyond the product's stated limits. Cleaning alone does not make a compromised or unsuitable wall ready for adhesive tile. Stickwoll's general peel-and-stick tile guide provides broader planning guidance about surface condition, room exposure, layout, and product selection.
If the tile will sit inside a direct shower spray zone, treat suitability as an unresolved product-specific question. The checked general guidance identifies direct shower surrounds as high risk, and a self-published manufacturer test on a fiberglass or acrylic shower surround reported temporary, unreliable performance in direct spray conditions. That report is manufacturer evidence for caution, not approval or a universal service-life prediction.
Understand the shower valve, handle, and escutcheon before measuring
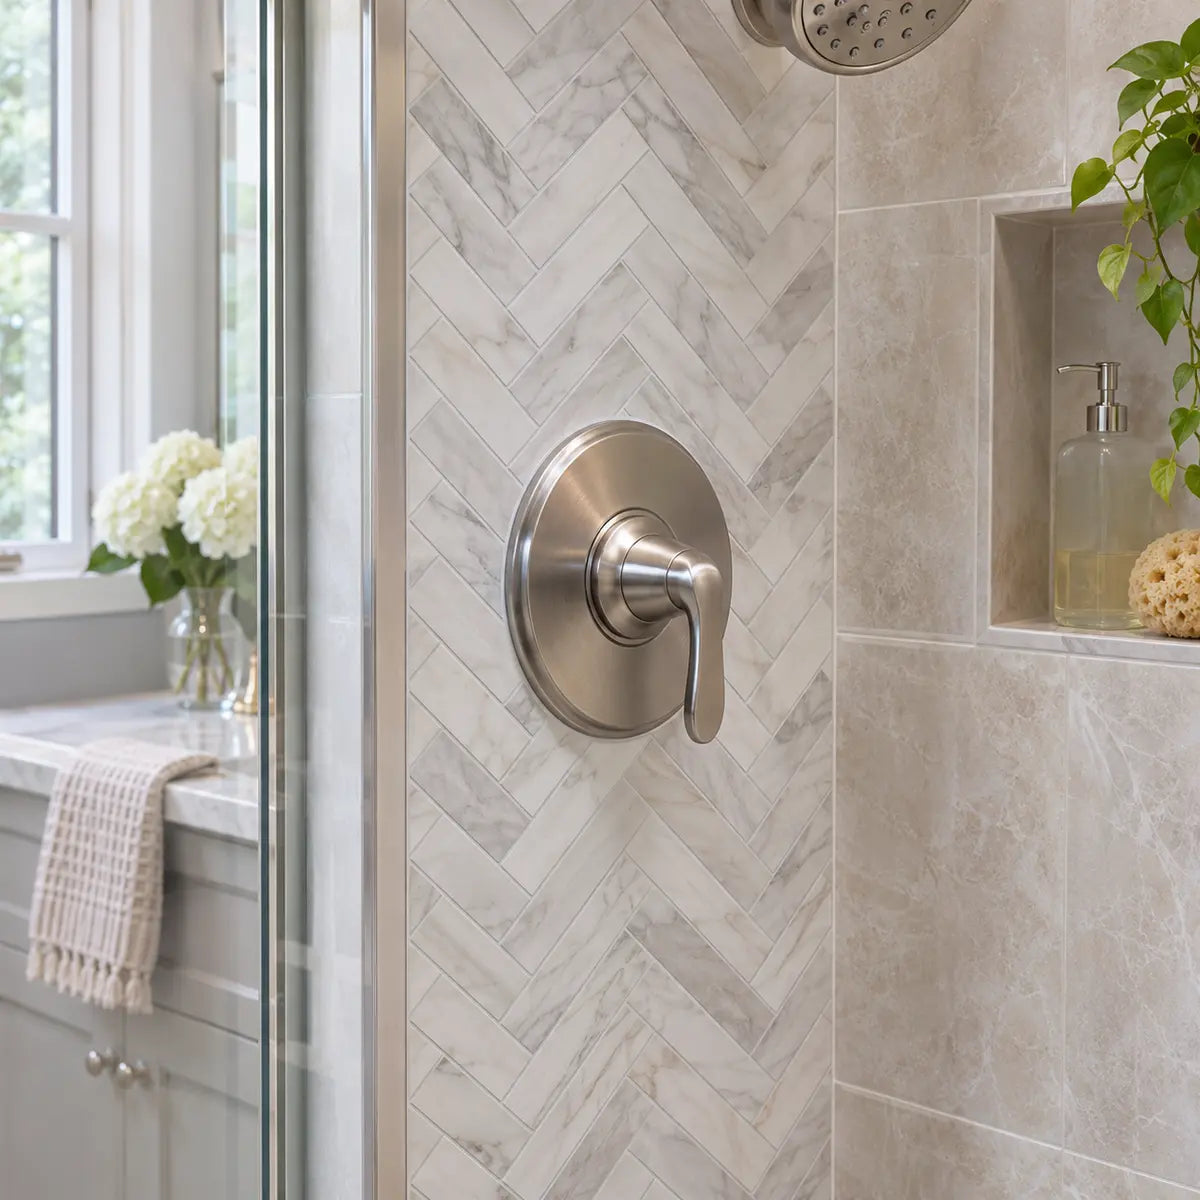
The shower valve is the plumbing control body that regulates water flow, temperature, or both. A mixing valve is a type of shower valve that blends hot and cold water. The shower handle is the part the user moves to operate the valve. The escutcheon plate is the visible trim plate that covers the wall area around the valve and frames the handle.
These parts perform different jobs, so the tile opening must be planned around all of them.
The escutcheon may cover most of the cutout, but it is not a substitute for access. Depending on the fixture, the escutcheon may be held by screws, an adapter, the handle assembly, friction, or another trim arrangement. Gerber's fixture instructions show that attachment varies among trim designs, so do not assume that every round plate can be removed in the same way.
The handle's movement matters just as much as the handle's centre point. A single-lever control may rotate, pull outward, tilt, or combine several movements. A cross handle may need clearance around its full turning path. Some controls have a temperature limit stop, retaining screw, adapter, or decorative cap that must remain accessible.
Before measuring, inspect the fixture with the water off and identify:
- The centre or mounting position of the valve.
- The outer edge of the escutcheon.
- The handle's operating direction and full travel.
- Any retaining screw, set screw, cap, adapter, gasket, or stop that may need access.
- Any joint, seam, fastener, or service point that may be covered by the tile.
- The wall area that the escutcheon must contact or cover.
Do not remove the trim unless the fixture instructions clearly explain how to do it. Removing a handle or escutcheon without the correct sequence can damage a finish, disturb a gasket, or make reassembly difficult.
Fixture documentation also shows why a universal cutout number is unsafe. One specific DXV/American Standard installation sheet describes a 4-inch, or 102 mm, shower-stall hole and two additional 1-inch, or 25 mm, holes for stop access. Those dimensions belong to that identified valve installation and may describe rough-in or service openings rather than the finished trim opening. They are not a general recommendation for every shower valve.
The correct opening is therefore determined by the actual fixture, the trim coverage, the handle path, and any service requirements.
For related service-first planning, see ways to tile around a wall-mounted faucet. The same principle applies here: identify the parts that must remain usable before deciding where to cut.

What tools do you need to measure a shower valve opening?
You need a simple measurement and templating setup rather than a complicated collection of cutting tools. The most useful items are a tape measure or ruler, pencil, masking tape, paper or thin card, scissors, a straightedge, and a way to mark the tile without damaging its visible face.
Gather:
- A clean sheet of paper, thin card, or another removable template material.
- Tape measure or ruler.
- Pencil and fine marker.
- Straightedge or small square.
- Scissors for the paper template.
- Masking tape or low-tack painter's tape.
- The fixture and tile instructions.
- The selected tile, kept with its backing attached until the template has passed.
- The product-approved cutting tool.
The current checked Stickwoll pages provide general handling and installation guidance, but they do not establish one universal cutting tool, cutting surface, hole-saw size, blade, or cutout method for every product variant. Choose the tool from the instructions for the specific tile. Do not assume that a utility knife, scissors, hole saw, jigsaw, wet saw, or rotary tool is suitable for the selected material.
Use the Stickwoll installation and care guide to review the general sequence for a clean, smooth, dry wall, layout previewing, gentle positioning, smoothing, and removal. Apply the guide's handling principles to the valve cutout only after confirming the tile-specific cutting instructions.
Measure from fixed reference points
A fixed reference point is a wall feature that will stay in the same position while you transfer the measurement. Good reference points include:
- The finished edge of the wall.
- A vertical tile joint that has already been established.
- A horizontal grout-line equivalent or layout line.
- The corner of the tile area.
- The top or bottom edge of a neighbouring tile.
- A level line marked across the wall.
Do not measure only from the visible escutcheon. The plate may be slightly off-centre, may overlap the tile unevenly, or may be removable. The trim also may not show the full position of the valve body behind the wall.
Record at least two distances to the valve centre or to the planned opening centre:
- Horizontal distance from a stable vertical reference.
- Vertical distance from a stable horizontal reference.
If the opening is irregular, record additional points around the perimeter. For example, mark the distance from the reference lines to the top, bottom, left, and right limits of the area that must remain open. Add any handle travel or fastener locations that cannot be covered.
Write the measurements directly on the template. Mark the orientation with words such as “top,” “left,” and “wall side.” This prevents the common error of turning the template over and reversing the opening.
Use the template to decide whether the cutout is ready
The template is ready to transfer only when it represents the tile position, the valve position, the handle path, and the escutcheon coverage at the same time. Record the measurements and checks below while the template is still removable.
These fields are a place to record the actual fixture measurements. They do not calculate a universal clearance or approve a product for direct shower spray.
Ready to transfer: the template passes when the handle completes its intended movement, the escutcheon covers the opening, the service points remain reachable, and enough tile remains around the cutout to stay stable.
How do you make a paper template for a shower valve cutout?
Make the opening in paper or thin card first, then test it against the wall and the trim before cutting the actual tile. A template turns an irreversible cut into a reversible fit check.
The template should show three things at once:
- The tile's position relative to the surrounding layout.
- The valve or handle's position relative to the tile.
- The boundary of the opening required for operation and service.
Create the template in place
Start with a piece of paper larger than the planned opening. Tape it lightly to the wall in the position the tile will occupy. Align its edges with the surrounding layout lines or the edges of adjacent tiles.
Mark the fixed reference points on the paper. Transfer the horizontal and vertical distances to the planned opening centre. If the tile has a visible pattern, orientation, edge, or printed design, mark that direction too.
Next, trace or draw the required opening. There are several ways to do this:
- If the escutcheon is safely removable according to its fixture instructions, trace the relevant wall-side perimeter.
- If the escutcheon stays in place, trace the opening boundary from the visible trim and then add only the clearance needed for the handle path and required access.
- If the opening is irregular, use several measured points rather than forcing it into a perfect circle.
- If the valve body is not visible, use the handle centre, trim position, and fixture manual as references.
Cut the template gradually. Begin with an opening that is slightly smaller than the area you expect to need. A small opening can be enlarged during testing; an oversized opening cannot be made smaller without changing the tile or adding another piece.
Hold or tape the template in its final position and test the fixture:
- Does the handle pass through the opening without rubbing?
- Can the handle complete its full intended movement?
- Does the escutcheon cover the opening on every side?
- Are screw heads, adapters, gaskets, or retaining parts still reachable?
- Does the template follow the wall surface without folding into the opening?
- Is the opening centred in the tile layout?
- Does the template leave enough material around the tile perimeter to keep it stable?
- Does the opening avoid a tile seam or weak narrow strip where possible?
The template does not need to predict a universal clearance dimension. It needs to prove that the planned tile position works with the actual fixture.
Use a removable alignment worksheet
A written worksheet can make the check easier, especially when the valve sits near a tile edge or the wall is uneven.
| Measurement or check | Record before cutting |
|---|---|
| Tile orientation | Mark “top” and “wall side” |
| Horizontal reference | Name the wall edge, joint, or layout line |
| Vertical reference | Name the level line, tile edge, or corner |
| Opening centre | Record horizontal and vertical distances |
| Opening shape | Circle, oval, notch, or irregular outline |
| Escutcheon coverage | Confirm visible coverage around the opening |
| Handle movement | Rotate, pull, tilt, or combined movement |
| Service points | Screws, adapter, gasket, stop, or trim access |
| Dry-fit result | Pass, enlarge, reposition, or remake template |
Use the worksheet as a decision aid:
- If the template is off-centre, correct the reference measurements.
- If the handle touches the template, enlarge only the affected area and test again.
- If the escutcheon does not cover the opening, reduce the opening or reconsider the tile position.
- If service access is blocked, follow the fixture manual before proceeding.
- If the wall is too uneven for the template to sit accurately, solve the surface or layout problem before cutting the tile.
This check is more valuable than measuring the same opening repeatedly with a ruler. The question is not simply “What is the diameter?” The question is “Will this opening let the finished fixture operate, cover the edge, and remain serviceable?”

How much space should be left around a shower valve?
Leave enough space for the handle's complete intended movement, the escutcheon to cover the cut edge, and any fixture-specific service requirements. There is no universal clearance number that applies to every shower valve, handle, escutcheon, or trim system.
A tight cutout may look precise, but it can interfere with a handle that tilts, pulls, rotates, or moves in more than one direction. A generous cutout can preserve access while leaving an exposed wall ring that the escutcheon cannot hide. The right size is the smallest tested opening that satisfies operation, trim coverage, and access.
Use this order of priority:
- Follow the fixture manufacturer's required access and operating path.
- Confirm the escutcheon covers the opening in the finished position.
- Test the handle through its full intended movement.
- Preserve access to screws, adapters, gaskets, stops, or removable trim.
- Keep the cut edge neat and supported by enough tile material.
- Enlarge only the areas that fail the test.
A circular escutcheon may hide a circular opening, but a handle's movement may require a small extension or relief on one side. An oval or notched opening can be more functional than a perfectly round one if the fixture requires it. The final shape should follow the fixture, not a generic diagram.
Transfer the approved template to the tile
Transfer the template only after it passes the wall test. Keep the tile's backing attached while marking and cutting unless the product instructions require a different arrangement.
Place the template on the tile in the exact orientation used on the wall. Align the tile edge, layout mark, pattern, and valve reference. Tape the template lightly so it cannot shift. Mark the opening and transfer the fixed reference marks to the tile.
Before cutting, check the mark against the tile twice:
- Is the template facing the correct direction?
- Is the opening located at the correct distance from each tile edge?
- Does the cut avoid a visible pattern feature or narrow edge?
- Is the tile being marked on the correct surface?
- Does the product instruction specify a particular cutting side or support method?
- Is the cut line clear enough to follow without guessing?
The current checked product documentation does not support one universal cutting method. Use the selected product's package instructions or technical documentation for the approved tool and handling sequence. If the documentation is silent, test the cutting method on a spare piece from the same product before touching the tile intended for the wall.
Cut gradually instead of making one large opening
For a circular or oval opening, make a controlled series of small cuts or trim passes according to the product instructions. The purpose is to approach the marked line slowly and keep the edge intact.
A gradual approach helps with four common problems:
- The measurement is slightly off.
- The wall is not perfectly flat.
- The escutcheon sits at a small angle.
- The handle needs clearance on one side but not the other.
Do not force the tile around the valve. Do not bend it sharply across an opening if doing so could crease, fracture, delaminate, or distort the visible surface. Keep the cut edge clean and supported while working.
After the first cut, place the tile over the wall without exposing adhesive. Test the opening again with the handle and escutcheon. Enlarge the cut in small stages. Stop as soon as the tile passes.
For more general template-first cutting guidance, see how to cut peel-and-stick tile around outlets and edges. If the wall or valve surround is irregular, template and scribing guidance for uneven edges can help you adapt the same controlled process.

Prepare the wall before exposing adhesive
The wall must be clean, smooth, dry, and stable before the tile is applied. Remove dust, grease, loose material, and residue according to the product instructions, then allow the surface to dry fully.
Inspect the wall for:
- Active leaks or dampness.
- Soft drywall or swelling.
- Loose paint.
- Flaking or powdery surfaces.
- Raised texture.
- Deep grout lines or ridges.
- Uneven transitions that could leave unsupported tile.
- Old adhesive or cleaning residue.
- Cracks or movement around the valve trim.
Surface preparation is part of the cutout process because an uneven or unstable wall changes how the tile sits around the valve. A template may pass while the installed tile twists, lifts, or loses contact near the opening.
The selected product may have specific rules for cleaning agents, primer, temperature, drying, and surface coatings. Follow those rules instead of adding an unapproved primer or sealant. A primer, caulk, or extra adhesive can change the bond and may complicate later removal or fixture service.
A laboratory study of adhesive joints found that peel response depended on the relationship between surface roughness and adhesive thickness in the tested materials. The work examined controlled plastic substrates and laboratory adhesive joints, not bathroom walls or Stickwoll tiles, so it does not establish product performance. It does support a practical principle: surface condition and adhesive geometry can affect peeling, which is why a smooth, stable wall and a supported cut edge matter. See the bounded arXiv study on surface roughness and adhesive joints.
Install the tile around the valve
Install the tile only after the complete dry fit passes. Keep the handle and escutcheon visible while positioning the tile so the cutout cannot drift unnoticed.
Follow this sequence:
- Preview the tile against the wall with the backing still attached.
- Align the tile with the surrounding layout and fixed reference marks.
- Confirm that the valve opening is centred correctly.
- Expose only the amount of adhesive recommended by the product instructions.
- Position the tile gently without pressing the entire surface immediately.
- Check the handle path and escutcheon position again.
- Continue exposing adhesive in manageable sections.
- Press and smooth the tile according to the product instructions.
- Work from the centre toward the edges if that is the specified sequence.
- Give special attention to the cut edge and the area around the escutcheon.
Stickwoll's general installation guidance advises layout previewing, gentle initial placement, smoothing, and limited repositioning before firm pressure. That guidance does not promise unlimited repositioning for every product. Once firm pressure has been applied, the bond and removal outcome depend on the tile, adhesive, wall coating, substrate, and installation age.
Keep the cut edge from folding into the opening. If the escutcheon will cover the edge, let it sit naturally in its planned position. Do not use the trim to force a badly positioned tile into alignment.
If the tile must be shifted substantially after adhesive contact, pause and consult the selected product's removal or repositioning instructions. Do not pull hard at a corner, twist the tile around the valve, or use the fixture as a lever.

Complete the access and trim check
The installation is complete only when the shower control works and the trim sits correctly. A visually neat cutout that blocks the handle or traps the escutcheon has failed its main purpose.
Perform the final check in the order below.
Check handle operation
Move the handle through its full intended range. Test every direction the fixture is designed to use:
- Rotate left and right.
- Pull outward if required.
- Push inward if required.
- Tilt up, down, or sideways if the fixture uses that movement.
- Check any temperature-limit or stop position described in the fixture instructions.
The handle should not rub the tile edge, catch on the cutout, or require unusual force. Do not enlarge the opening simply because the trim appears close; first determine which movement is actually being blocked.
Check escutcheon coverage
Place or inspect the escutcheon in its finished position. Confirm that:
- The plate sits flat or in the position specified by the fixture instructions.
- The visible cut edge is covered around the intended perimeter.
- The plate is not tilted by the tile.
- Gaskets or seals remain positioned correctly.
- Fasteners, adapters, and retaining points remain accessible when required.
- The tile does not hold the escutcheon away from the wall.
A gap that is hidden from one viewing angle may be visible from another. Check from standing height, from the side, and under the room's normal lighting.
Check serviceability
Serviceability means preserving the ability to inspect, remove, or repair the fixture when the manufacturer's instructions require it. The exact service path depends on the valve model.
The fixture manual may require removal of the handle and trim to reach a cartridge, stop, gasket, adapter, or valve component. One official DXV installation sheet, for example, describes trim removal as part of valve access. That does not make its dimensions universal, but it shows why the cutout should not trap the trim permanently.
If you cannot remove the trim as described by the fixture manufacturer, stop and correct the tile arrangement before pressing further or adding sealant. Never use tile adhesive, caulk, or decorative trim to cover a service point that the fixture instructions identify as necessary.
Check the cut edge and surrounding tile
Run a visual and light-touch inspection around the opening. Look for:
- Lifting corners.
- Cracks or delamination.
- A jagged edge that the escutcheon does not cover.
- Tile movement when the handle is operated.
- A visible gap between the tile and the wall.
- Unsupported narrow strips.
- Adhesive contamination on the fixture finish.
- A seam that has opened near the valve.
Follow the product's edge-treatment and cleaning instructions. Do not apply a sealant around the opening unless the product and fixture documentation support it and the sealant will not interfere with future trim removal.
For related care and finishing guidance, see peel-and-stick tile care guidance. The access-panel principles are useful here because they keep future movement and service in the installation plan.
What should you do if the cutout is too small?
If the cutout is too small, enlarge it gradually while the tile remains accessible and supported. Identify the exact point of interference before removing more material.
A small opening is often recoverable when:
- The tile is still dry fitted.
- The escutcheon covers the enlarged area.
- Enough tile remains around the opening.
- The edge can be cut cleanly using the product-approved tool.
- The handle path is the only problem.
Remove a small amount from the affected side, then dry fit again. Test the handle and escutcheon after each change. Avoid enlarging the entire opening when only one movement or fastener is blocked.
If the tile is already firmly installed, follow the product's removal instructions. Stickwoll's general guide describes warming from one corner for removal, but the result depends on the exact product and wall. Removing a tile can damage paint, paper-faced drywall, weak coatings, or other substrates. Do not assume that a tile described as repositionable will be cleanly removable after firm pressure.
What should you do if the cutout is too large?
If the cutout is too large, first check whether the escutcheon covers it fully and whether the wall's required water-management system remains intact. A large opening can be acceptable visually only when the fixture trim covers it and the product instructions allow the surrounding installation.
If the opening is exposed, off-centre, or too close to the tile edge, the best recovery is usually to replace the tile or revise the layout. Adding a loose patch around a shower valve may create an uneven surface, a visible seam, or an unsupported edge.
Possible recovery paths include:
- Replace the tile with a new piece cut from the approved template.
- Use a larger escutcheon only if the fixture manufacturer provides or approves one.
- Rework the layout so the opening falls in a more suitable tile position.
- Use a removable access panel or another finish specified for the location.
- Stop and select a wall finish that meets the moisture and service requirements.
Do not rely on caulk to hide an oversized opening or to turn decorative adhesive tile into a waterproofing system.

How do you fix an off-centre or uneven opening?
An off-centre opening should be corrected before adhesive is committed whenever possible. Compare the tile's reference marks with the wall reference points, then determine whether the error is in the template, the transfer, the tile orientation, or the wall layout.
For an uneven opening:
- Check whether the valve trim itself is mounted square to the wall.
- Confirm that the wall is flat enough for the template and tile to sit correctly.
- Measure several points around the opening instead of assuming a perfect circle.
- Mark the actual escutcheon coverage.
- Trim only the side that blocks operation or exposes the wall.
- Replace the tile if the correction would leave a weak or highly visible edge.
A wavy wall can make a carefully cut tile appear misaligned because the tile does not lie flat. Guidance for scribing peel-and-stick tile against uneven surfaces can help when the wall edge or neighbouring surface is irregular, but the product's own cutting and adhesion instructions remain the controlling source.
What should you do if an edge lifts around the valve?
If an edge lifts, stop pressing it repeatedly until you know why. Lifting may result from contamination, surface texture, inadequate contact, bending stress, unsupported material, moisture, or an unsuitable wall condition.
Inspect the area for:
- Dust, grease, or residue beneath the tile.
- Moisture or condensation.
- A wall ridge or hollow.
- A cut edge that is too close to the escutcheon.
- A tile that was forced around the valve.
- Adhesive that was exposed too early or contaminated.
- A product location outside the stated moisture boundary.
Follow the selected product's instructions for correcting an edge. Do not add household glue or construction adhesive unless the product documentation specifically permits it. Extra adhesive can change the tile's flexibility, interfere with trim removal, damage the wall, or create a ridge under the escutcheon.
If lifting continues in a direct spray area, treat it as a suitability problem rather than a small cosmetic defect. A manufacturer-published fiberglass test reported edge lifting and failure observations under direct shower conditions, but that report does not establish a universal failure rate or evaluate a valve cutout specifically.
Is removable peel-and-stick tile suitable around a shower valve?
A product should be called removable around a shower valve only when its current documentation supports that description for the selected wall and installation conditions. “Peel-and-stick” describes the application format; it does not guarantee clean removal.
Early repositioning may be possible before firm pressure, while later removal may affect paint, drywall paper, sealers, existing tile, or other coatings. The adhesive bond can also change with time, heat, humidity, cleaning, and pressure.
If future access is a major concern, plan the tile arrangement so the valve area can be serviced without destroying a large section of the wall finish. That may mean:
- Keeping the cutout clear enough for the fixture's required trim removal.
- Avoiding a tile seam directly through a service fastener.
- Preserving a removable panel where the product system supports one.
- Keeping spare tiles from the same product and batch when possible.
- Recording the tile layout and fixture model for future work.
A removable design still needs a secure finished edge. Serviceability does not mean leaving the tile loose or relying on the escutcheon to hold it in place.
A pre-adhesive shower valve tile checklist
Use this checklist before exposing the tile adhesive:
If the selected tile is a Stickwoll product, review the specific product instructions for the tile you are considering or the textured Dual Ceramics option before choosing the material for this location. Product pages may identify bathroom use, but the current instructions still control surface compatibility, cutting, adhesion, cleaning, removal, and moisture limits.
Frequently Asked Questions
Can I cut peel-and-stick tile around a shower handle without removing the handle?
Sometimes, but the answer depends on the fixture and the tile. Keeping the handle installed can reduce the risk of disturbing trim, but it may make it harder to measure the valve centre or test the escutcheon. Use the fixture manual before removing any trim. If the handle remains in place, make a paper template and confirm its complete operating path before cutting the tile.
Should the opening follow the shower handle or the escutcheon?
The opening should follow the access needs of the handle and valve, while the finished visible boundary should be covered by the escutcheon. The escutcheon determines how much of the cut edge can be hidden. The handle determines how much space must remain clear for operation. Neither part alone gives a universal cutout size.
Can I use a hole saw for the shower valve opening?
Only if the selected product's current instructions permit it and the tile's structure is compatible with that tool. The checked general Stickwoll documentation does not establish one universal cutting tool or hole-saw method. Test the approved method on a spare piece first, keep the template and backing orientation clear, and dry fit the result before exposing adhesive.
How do I leave access to a shower valve when tiling?
Measure from fixed reference points, create a removable template, preserve the handle's full operating path, keep the escutcheon removable when required, and complete a final serviceability check. Do not depend on a visible trim plate to provide access if the fixture manual requires the handle or escutcheon to be removed for service.
Can peel-and-stick tile replace waterproofing around a shower valve?
Do not treat decorative peel-and-stick tile as the shower wall's waterproofing or water-management system. Follow the product's current moisture guidance and preserve any required waterproofing, caulk, flashing, seals, and fixture gaskets. If the product documentation does not expressly cover the intended direct-spray location, choose a finish or installation system that does.



Leave a comment
This site is protected by hCaptcha and the hCaptcha Privacy Policy and Terms of Service apply.