





















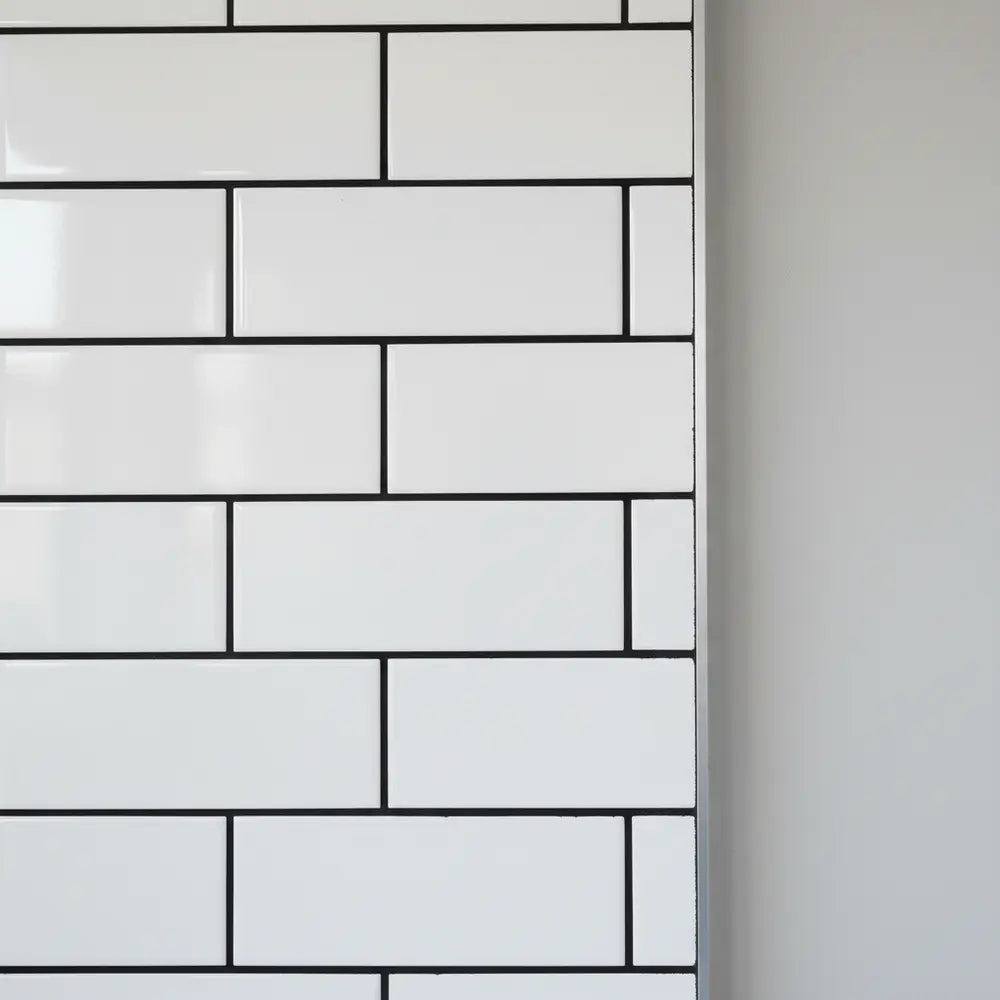
Clean white subway tile and black grout by first identifying the tile, the grout and the residue. Use a cleaner accepted for all the materials it will touch, work on a small area with a non-abrasive tool, remove the dirty solution and inspect after drying. Do not automatically apply vinegar, bleach or an annual sealer: the correct treatment depends on the actual grout and finish.
Explore this guide
The contrast is the reason you chose this look. White rectangles make the wall feel crisp, while dark joints show the layout clearly. The same contrast also makes a pale film conspicuous. A white mark on black grout can look like fading even when the pigment has not changed. Before buying another bottle, work out whether you are seeing removable residue, a maintenance problem, an installation residue or a damaged material.
This guide covers ordinary maintenance, diagnosis and planning for a traditional tile installation. It also explains the important exception for adhesive panels with printed or molded grout lines. Those lines are part of the decorative product, not a cement joint to scrub or seal. The methods below are not a report of a Stickwoll cleaning experiment, and no cleaner or sealer is ranked by an invented performance score.
Identify what your black grout actually is
Find the installation invoice, the leftover container or the product information supplied by the installer. Color is not enough to identify grout chemistry. Two equally dark joints may have different cleaning, curing and sealing requirements. Record the exact product, not merely the brand, and include any sealer or colorant applied later. A later treatment can change the relevant care instructions.
Cement-based grout, epoxy grout and ready-to-use grout are different product families. Some cement formulations have enhanced stain resistance; some products do not require sealing. Do not assume that a hard, dark line is cement, or that every material supplied in a tub has the same chemistry. When the identity is unknown, ask the installer or manufacturer to help before choosing a specialist chemical treatment.
Inspect the white tile as well. Glazed ceramic, porcelain, natural marble and a printed adhesive surface are not interchangeable simply because they share a subway shape. A cleaner directed at the grout may also touch the tile, metal trim, countertop and perimeter sealant. The most restrictive compatible-use requirement matters wherever the liquid can travel.
| What you have | What to confirm | Do not assume |
|---|---|---|
| Cement-based grout | Exact formulation, cure state and permitted maintenance products | That all cement grouts need annual sealing |
| Epoxy or ready-to-use grout | Product-specific cleaner and residue-removal instructions | That a cement-haze remover is appropriate |
| Grout treated with a colorant | Colorant identity, curing and care requirements | That the original grout guide covers the added finish |
| Flexible joint at a corner or counter | Sealant identity and the intended joint detail | That cracking can be repaired with a smear of rigid grout |
| Printed or embossed dark line on adhesive tile | Care instructions for the decorative face and sheet edges | That it should receive grout sealer or a grout brush |
Take one overall photograph and one close-up of the problem. Include a dry, unaffected area for comparison. This small record is helpful if you later need advice, and it stops several different issues from being described simply as black grout turning white.
Separate white residue from actual color loss
Start with timing. A pale film noticed immediately after installation suggests a different investigation from a patch that appears after months of shower use. Note whether it began after a new cleaner, a leak, sealing or a grout repair. The sequence does not prove the cause, but it narrows the questions worth asking.
A film concentrated where water dries may be associated with deposits or cleaning residue. A repeated powdery deposit can need investigation of moisture movement. A dull or lightened patch that does not respond to the permitted cleaning routine may involve surface change rather than dirt. Do not diagnose these solely from a phone photograph or assume that every white mark will dissolve in acid.
Inspect when the surface is dry. Wetting a dark material can temporarily change its appearance, so a patch that looks restored while wet is not necessarily repaired. Keep the viewing angle and lighting reasonably consistent. Strong side lighting can reveal a film that overhead light conceals, but it can also make harmless surface variation more noticeable.
| Clue | Question to ask | Next useful action |
|---|---|---|
| Film present since grouting | Was the original installation cleanup completed with the correct method? | Ask the installer about the grout type and suitable residue treatment. |
| Marks follow repeated water drying | Are deposits or retained cleaner involved? | Review water exposure and complete the approved cleaning and rinse process. |
| Patch appears after a chemical change | Could the cleaner have affected grout, sealer or colorant? | Stop that product and save its label for the supplier. |
| Powder returns after cleaning | Is moisture continuing to move through the assembly? | Investigate the source instead of repeatedly concealing the symptom. |
| Cracking, loose grout or damp wall | Is this now a repair rather than a cleaning task? | Pause cosmetic treatment and obtain an appropriate assessment. |
A useful first distinction is whether an approved gentle wipe removes anything onto a clean white cloth. That observation is not a laboratory identification. It simply helps you describe the problem without immediately progressing to a stronger chemical or a harder brush.

Build a controlled routine for ordinary cleaning
Prepare clean soft cloths, the accepted cleaner, a suitable non-abrasive tool and a separate way to remove the dirty solution. Follow the label for dilution, application and any protective equipment. Do not make a ready-to-use spray stronger, or guess the dose of a concentrate. Work only when nearby cooking equipment is safe and keep liquids away from electrical fittings.
Remove loose grit first so it is not dragged over the tile. Apply the permitted method to a small manageable area. Keep enough clean cloth surfaces available to pick up soil rather than redistribute it. A cloth saturated with dirty solution can leave a pale film that resembles the problem you were trying to remove.
Allow only the contact time specified for the cleaner and accepted by the surfaces. There is no universal ten-minute soak for every grout. Do not let the solution dry unexpectedly or spread into a neighboring stone countertop. A longer dwell is not automatically a better cleaning result, especially when the problem has been misidentified.
Agitate gently with the tool the care instructions permit. A nylon brush varies widely in stiffness, so the word nylon alone is not approval. Test the tool where a small change would be acceptable, and stop if grout sheds, the finish scratches or color transfers unexpectedly. A clean but visibly abraded joint is not a successful result.
Remove the dirty liquid and rinse or wipe as directed, using fresh water and clean tools where required. Dry the surface appropriately, then inspect it before repeating the process. Finish the complete sequence on one area before moving to the rest of the wall. This makes it easier to identify whether the method is helping or simply spreading residue.
The routine should follow use, not an inflexible calendar. A heavily used splash area may need prompt attention after normal activity; a dry decorative wall may need much less. Periodic inspection matters more than automatically deep-scrubbing clean grout every month. Extra treatment can create unnecessary work and exposure without solving a real problem.
Why a universal vinegar recipe is the wrong shortcut
A homemade mixture does not become compatible with every surface because it is inexpensive or familiar. Acidic products have specific intended uses and exclusions. White tile can include acid-sensitive natural stone, and cementitious grout or a later color treatment can also react differently from a glazed face. Consider everything the liquid will touch before treating the dark line.
CUSTOM's cement grout haze remover documentation distinguishes cementitious installation residue from other grout residues and warns about possible effects on cementitious materials, some glazes and acid-sensitive stone. That is an example of why residue identity and material compatibility must come first. It is not a recommendation to use an acid on your wall or a dilution rule for vinegar.
Likewise, do not treat bleach as either a universal cure or a guaranteed explanation for every faded joint. The applicable product instructions and the observed history matter. Do not mix cleaning chemicals, attempt to neutralize one bottle with another or follow a social-media combination that lacks a labeled use for the surface. Routine cleaning and disinfection are separate tasks.
If a specialized cleaner is necessary, give the manufacturer the tile, grout, sealer and residue details. Ask whether its directions are appropriate for the entire installation and what result to expect. Keep the answer with the product label. A small spot check can reveal an obvious problem, but it does not override a stated exclusion.
A sensible escalation therefore changes one known factor at a time. First confirm that the gentle routine was completed correctly. Then identify the residue more precisely. Only after that choose another permitted method. Do not alternate vinegar, bleach, degreaser and abrasive powder in the hope that one will work before the finish changes.
Understand when grout sealing is necessary
Sealing is a product and maintenance decision, not an annual ritual for everything colored black. MAPEI states that sealing its Ultracolor Plus FA and Max grouts is not required, although it can be used to improve maintenance in some applications. This specific example contradicts a blanket instruction to seal all black grout. It does not determine the requirements for a different grout or sealer. Read MAPEI's explanation.
Find out whether a sealer already exists before adding another layer. Note its type, application date and any maintenance instructions. A penetrating treatment, a color-enhancing treatment and a topical colorant can affect appearance differently. Do not assume a product that makes grout look darker while wet will preserve that appearance after curing.
A water-beading observation may be part of a manufacturer's maintenance check, but it is not a universal test of every grout's need for resealing. The grout formulation, contamination and existing finish affect what you see. Do not convert one drop of water into a diagnosis of the whole wall or use it to promise waterproofing.
When sealing is permitted or specified, trial the complete process on a representative small area. Evaluate the dry appearance beside the white tile, including whether unwanted film remains. Use the recommended applicator and remove excess within the product's instructions. Protect neighboring materials as directed and respect the stated return-to-use conditions.
Keep the product information for future care. The next person cleaning the wall needs to know what treatment is present. A sealer can assist maintenance under its stated use; it does not repair loose grout, stop an active leak, restore every damaged pigment or replace the waterproofing design behind a shower.

Choose between cleaning, recoloring and repair
Cleaning removes unwanted material. Recoloring changes or restores the visible finish. Repair addresses a failed joint or substrate. These jobs require different products and expectations. Decide which job you actually have before purchasing a combined promise of stain removal, sealing and restoration.
If an accepted cleaning method restores the dry appearance and the joint is sound, further intervention may be unnecessary. If the color remains uneven, discuss a compatible colorant with the grout or treatment manufacturer. Ask about the required preparation, suitable substrates, exposure restrictions and how closely the finished color can match an adjacent untreated area.
For a proposed color treatment, view a cured sample next to the white tile and existing sealant. A catalog swatch cannot show every lighting condition in your room. Work out whether the whole visible run should be treated consistently rather than painting isolated dark spots that become a different kind of patchwork.
A recurring crack deserves a different investigation. Note whether it occurs within the tile field, at an inside corner, along a countertop or beside another material. Do not substitute rigid grout for a flexible joint or cover movement with a cosmetic colorant. TCNA's movement-joint guidance emphasizes accommodating movement and notes that location and spacing depend on site conditions. It is not a universal gap size for adhesive panels.
Where the wall shows dampness, loose pieces or repeated deterioration, ask an appropriate installer to assess it. A new bead, grout patch or darker color can hide evidence without correcting the cause. Save photographs before the repair and document the products used afterward so the maintenance history remains understandable.
Do not confuse a clean tile face with a waterproof shower
A neat, dark joint can look reassuring, but appearance alone does not establish how a shower manages water. The tile face, grout, corners, penetrations and underlying layers have different functions. Cleaning and sealing should preserve the intended system rather than replace missing waterproofing with a surface treatment.
Schluter's shower guidance makes the distinction explicit: tile and grout alone are not the waterproofing system. That principle explains why an annual sealer cannot be treated as insurance against every hidden leak. It also means that a stain near a shower joint deserves attention to the assembly, not just the choice of cleaning spray.
Do not block a designed drainage detail or seal an opening merely because it looks untidy. If you are unsure what a detail does, ask the installer before changing it. The correct treatment at a shower corner can differ from the decorative junction beside a dry kitchen cabinet.
Keep the routine proportionate. A sound wall that needs ordinary cleaning does not automatically require demolition, just as a recurring leak does not become an ordinary cleaning issue because the surface wipes dry. Describe the symptom and let the appropriate assessment determine whether maintenance or repair is needed.
Adapt the process for adhesive tiles with a grout-look pattern
On many peel-and-stick designs, the dark line is printed, embossed or molded into a sheet. Applying a grout sealer to it may add a film to the decorative coating without serving the purpose it would on a real grout joint. A stiff grout brush can also be inappropriate for that surface. Identify the format before transferring a traditional tile routine.
Follow the exact panel's care instructions for cleaner, tool and moisture exposure. Clean the actual seams between sheets deliberately, without flooding an edge or catching a lifted corner. A seamless-looking pattern is not proof that water cannot reach the backing or wall.
If the appearance has changed after cleaning, record the cleaner and the dry result. Do not immediately apply a grout colorant, polish or abrasive restorer. Ask whether the surface can be treated or whether a permitted local replacement is more appropriate. A product designed for mineral grout is not automatically compatible with a printed face.
For related planning, use our peel-and-stick grease-cleaning guide and kitchen backsplash guide. They address care and placement for decorative coverings without treating them as fired ceramic or a complete wet-area assembly.
Keep the high-contrast design looking intentional
The dark grid makes alignment and joint consistency easy to notice. When planning a new wall, look at the pattern from both the room entrance and the working position at the counter. Decide whether you want the joints to be a prominent graphic feature or a quieter outline. A slightly softer charcoal can produce a different effect from a very deep black, but evaluate actual samples rather than names alone.
Check how the white tile relates to the countertop, paint and cabinet finish. Two whites that look similar in separate photographs can look different side by side. View the combination under the lighting you actually use. The objective is a combination you enjoy, not proof that one shade is a universal design standard.
Consider interruptions before selecting a strong contrast. An outlet, short return or cabinet edge can break a grid. A dry layout lets you decide where those breaks should fall and whether a smaller feature area works better. See the pattern-direction guide for comparing alternatives without promising that one orientation will change the room's dimensions.
Maintenance access is also a design choice. Leave the countertop junction and normally dirty areas reachable. A decorative object permanently pressed against a damp corner may make inspection harder. Design the room so the attractive surface can remain visible and manageable after the first photographs are taken.
A practical care record and three example decisions
Your care record can be one page: tile identity, grout identity, treatment history, approved cleaner, tool, label directions and supplier contact. Add the date and location of any recurring mark. This prevents a household member or cleaner from changing the chemical routine without knowing what is on the wall.
In a hypothetical kitchen, a pale streak appears after a new spray is used. The owner stops the spray, checks its label and completes the approved residue-removal method on a small area. The dry result improves, so recoloring is unnecessary. The lesson is to investigate a changed routine before assuming the grout pigment has failed.
In a hypothetical shower, a powdery deposit returns in the same corner despite appropriate cleaning. Rather than repeatedly using stronger products, the owner records when it returns and asks the installer to investigate the joint and moisture history. The example does not diagnose efflorescence or a leak from appearance alone; it shows when a repeated symptom needs more than cosmetic treatment.
In a third example, the wall is actually an adhesive sheet with a printed charcoal line. The owner sets aside the grout sealer and asks for the panel's care instructions. The method changes because the material is different, not because black is inherently difficult to maintain. Correct identification avoids spending money on a treatment intended for another construction.
Budget the work by task rather than buying a collection of products in advance. Ordinary cleaning may need only the existing approved supplies. A specialist treatment, color restoration or repair may require a sample and professional advice. Keep those costs separate and do not use a fixed replacement interval or a promised sealer lifespan without support from the actual product.
Prepare a useful message before buying a specialist treatment
When the gentle permitted routine does not resolve the mark, send the supplier a compact description rather than a guess about the chemistry. Include the tile material, grout name, any sealer or colorant, installation age and the cleaner already used. Explain whether the mark appeared immediately, after a particular treatment or repeatedly following water exposure.
Take the photographs after the surface is dry and include an unaffected area. Show both the whole location and the close-up so a joint beside a sink is not mistaken for an isolated decorative wall. A photograph cannot establish the cause, but it can make the next question more specific.
Ask what the proposed treatment is intended to remove and which surfaces it excludes. Confirm that it can contact the white tile, dark grout, nearby trim and counter under the required conditions. If the answer depends on identifying the grout, resolve that first instead of buying several products to try in sequence.
Request the complete process, including any cure requirement, contact method and final cleanup. Do not ask only whether the chemical is strong enough. Compatibility and removal of the dirty solution matter as much as its ability to affect a deposit.
Keep the response with the product information and note the result of any accepted small-area treatment. That turns the next cleaning decision into a documented continuation rather than starting again from a vague memory. If the supplier recommends an installer assessment, retain the same record so the history does not have to be reconstructed.

Frequently asked questions
Does every black grout need annual sealing?
No. Requirements depend on the grout and any existing treatment. Some modern grout products do not require sealing. Follow the exact instructions and maintenance guidance rather than a schedule based only on color.
Can I use vinegar on white subway tile and black grout?
Do not assume it is suitable. The tile may include acid-sensitive material, and the grout, colorant or sealer may have its own restrictions. Identify the residue and use a permitted cleaner. A household dilution is not a universal compatibility rule.
Why does the grout look black again when it is wet?
Wetting can change appearance and temporarily obscure a pale film. That observation alone does not tell you whether the issue is residue, treatment wear or color change. Compare the dry surface and review the history before selecting a restoration method.
Is a steam cleaner a safe alternative to chemicals?
Only when the tile, grout, treatment and complete installation permit that exposure. Heat and moisture are still exposures. Do not treat the absence of detergent as proof of compatibility, especially for adhesive panels or a damaged joint.
Can I fill a cracked corner with leftover grout?
First establish the intended joint detail and why it cracked. A junction that must accommodate movement may require a different treatment from a joint in the tile field. A surface patch is not a substitute for correcting recurring movement or water entry.
What information helps a supplier diagnose the problem?
Provide the tile and grout products, treatment history, cleaner name, time the mark appeared, location and dry photographs. Explain what you observed and which permitted steps you have already tried. Avoid guessing a chemical cause before the materials are identified.
Sources and their scope
- CUSTOM: Aqua Mix Cement Grout Haze Remover and technical data — Identifies intended residue and surface exclusions; acidic cleaners can affect stone and cementitious materials.
- MAPEI: whether Ultracolor Plus FA and Max require sealing — Manufacturer-specific grout care; not a universal annual sealing rule.
- Tile Council of North America: placement and movement joints — Tile-assembly movement principles; exact joint detail remains system-specific.
- Schluter: waterproof shower assemblies — Tile and grout alone are not a complete shower waterproofing system.



Leave a comment
This site is protected by hCaptcha and the hCaptcha Privacy Policy and Terms of Service apply.