


DIY Peel and Stick Backsplash Guide for Renters
Wish you could upgrade your drab rental kitchen without risking your security deposit? You’re not alone. For many renters, a dated kitchen feels like a permanent problem. But what if you could turn those bland walls into a stylish showpiece with no tools, no grout, and absolutely no damage?
The Short Answer: Yes, You Can Create a Stunning Kitchen Backsplash as a Renter
A DIY peel and stick backsplash is the perfect solution for renters. These self-adhesive tiles are specifically designed to be easily installed and, most importantly, removed without damaging the walls. They are affordable, water-resistant, and come in countless styles, allowing you to get a high-end look on a budget.
This guide is your complete roadmap to a stress-free kitchen transformation. We'll walk you through everything, from choosing the right tiles to a visual step-by-step installation and the damage-free removal that will make your landlord smile. Get ready to blend inspiration with practical, easy-to-follow action.
Why Peel and Stick Backsplash Is Perfect for Renters
The Question: "I want to update my kitchen, but I'm worried about making permanent changes that will cost me my security deposit. Is there a safe way?"
The Promise: This section explains why peel and stick tiles are the ideal non-permanent, budget-friendly, and stylish solution specifically designed for renters' needs.
As a renter, you walk a fine line between making a space feel like your own and adhering to the terms of your lease. This is where peel and stick backsplash truly shines. It was practically made for this exact situation.
It's Genuinely Non-Permanent and Removable
The biggest fear for any renter is damaging the property. Unlike traditional ceramic tiles that require mortar and grout, peel and stick versions use a specially formulated adhesive. This adhesive is strong enough to last for years but gentle enough to be removed with a little heat, leaving the wall behind it intact.
In our experience, when removed correctly, these tiles leave zero trace. This means you can add a bold pattern or a classic subway tile look to your kitchen for the duration of your lease and simply peel it away before you move out. Understanding the specifics of safe removal is key to a worry-free experience. For more details on the removal process, our guide on how to Transform & Remove Renters Peel and Stick Tiles Safely is the go-to resource for ensuring your walls remain pristine.
It’s Incredibly Budget-Friendly
A professional kitchen backsplash installation can easily run from $1,000 to $3,000 or more, factoring in materials and labor. For a renter, that's a massive investment in a property you don't own.
Peel and stick tiles flip that equation on its head. A typical kitchen can be transformed for between $80 and $250. Think of it this way: for less than the cost of a fancy night out, you can give your entire kitchen a visual facelift that you'll enjoy every single day.
You Get Luxury Style Without the Luxury Price
The design world for self-adhesive backsplash has exploded. Gone are the days of cheap-looking, plasticky options. Today, you can find high-quality tiles that convincingly mimic expensive materials.
From the veining of Calacatta marble to the handmade look of Zellige tiles or the timeless appeal of herringbone, the styles are endless. These luxury peel and stick tiles use 3D gel technology and high-resolution printing to create depth and texture that looks remarkably like the real thing.
Choosing the Best Peel and Stick Tiles for Your Kitchen
The Question: "There are so many different kinds of peel and stick tiles. How do I know which one is right for my kitchen's heat, moisture, and style?"
The Promise: We'll break down the different materials, must-have features like heat resistance, and the top design trends for 2025 to help you choose with confidence.
Once you’re sold on the idea, the next step is choosing the right tile. The options can feel overwhelming, but focusing on three key areas—material, features, and style—will make the decision simple.

What Are the Different Materials?
The material of your tile affects its look, feel, durability, and price. Understanding the main types is key to making a choice you'll be happy with for years.
| Material | Key Features | Best For |
|---|---|---|
| Vinyl Tiles | Most common and affordable. Flat, printed designs. Flexible and easy to cut. | Budget-conscious DIYers and low-moisture areas. |
| Gel (3D Epoxy) Tiles | A gel layer over a printed design gives a 3D "puffy" tile effect. More realistic look and feel. | Mimicking the look of real tiles with added depth and shine. |
| 3D PVC Tiles | Rigid plastic tiles that are thicker and more durable. Often have textured surfaces. | High-traffic kitchens and achieving a premium, robust look. |
Are Peel and Stick Tiles Heat and Water-Resistant?
This is one of the most common concerns, and for good reason. Your backsplash needs to handle splashes from the sink and heat from the stove.
The simple answer is yes, most modern peel and stick tiles are designed for the kitchen environment. However, you must check the product specifications.
Pro-Tip: For the area behind your stove, look for tiles explicitly labeled "heat resistant." Most manufacturers recommend keeping them at least 8-10 inches away from a direct flame (like on a gas stove). For electric or induction cooktops, the risk is much lower.
What are the Top Backsplash Trends for 2025?
Your kitchen can be both functional and fashionable. According to insights from sources like Home Renovation Magazine, the trends for 2025 are all about warmth, texture, and sophisticated color.
- Matte Finishes: A shift away from high gloss, matte black, green, and navy tiles offer a sophisticated, modern look.
- Warm Neutrals: Think warm whites, creamy beiges, and soft taupes. These colors make a space feel inviting and bright.
- Natural Stone Looks: High-resolution marble and travertine patterns continue to be a top choice for achieving a luxury feel for less.
- Fluted and Textured Tiles: Tiles with vertical grooves or other 3D textures add architectural interest and depth.
To truly get a feel for how these trends translate into stunning kitchen designs, exploring the Peel Stick Backsplash Kitchen Ideas 2025 can provide a wealth of inspiration and help you visualize your new space.
Tools and Prep: Setting Up for Success
The Question: "I'm not very handy. What do I actually need, and what if my walls aren't perfect?"
The Promise: This section provides a simple checklist of tools and a clear guide to preparing your walls—even if they're not perfectly smooth—for a professional-looking result.
Proper preparation is the secret to a flawless installation that lasts. The good news? It’s the easiest part of the process and requires no specialized equipment. Think of it as creating a clean canvas for your new artwork.
Your Minimalist Toolkit
How to Prepare Your Walls
A clean, smooth surface is essential for proper adhesion. Any grease, dust, or grime will prevent the tiles from sticking correctly.
- Clean Thoroughly: Wipe down the entire backsplash area with a degreasing cleaner. Kitchen walls, especially behind the stove, accumulate a thin layer of cooking oil.
- Rinse and Dry: Wipe the wall with a clean, damp cloth to remove any soap residue.
- Let It Dry Completely: Allow the wall to air dry for at least an hour. Trapped moisture is the enemy of adhesive. The wall should be completely dry to the touch before you begin.
What if My Walls Are Textured?
This is a common question. Peel and stick tiles require a smooth, non-porous surface to bond effectively. Applying them directly to a heavily textured wall (like an "orange peel" or knockdown texture) will create air gaps and lead to peeling corners.
- The Misconception: Many people assume you just can't use these tiles on textured walls. That's not entirely true.
- The Solution: For lightly textured walls, you can try sanding the area smooth. For heavier textures, the best renter-friendly option is to install a thin, smooth panel (like hardboard or plexiglass) over the wall first. This gives you the perfect surface to tile onto.
Step-by-Step Installation Guide
The Question: "I'm worried I'll stick the tiles on crooked or mess up the cuts around outlets. Can you show me exactly how to do it?"
The Promise: This detailed, 500-word section breaks down the entire installation into simple, manageable actions, turning a daunting task into a foolproof weekend project.
This is where the magic happens. We’re going to transform your kitchen in a few simple steps. Take a deep breath—you can do this. We'll follow a renter, Alex, who tackled his galley kitchen in under two hours.

Step 1: Measure and Plan Your Layout
Before you peel a single tile, know your plan. Measure the height and width of the area you want to cover. This helps you calculate how many tiles you need to buy.
Pro-Tip: Lay your tiles out on the floor or a countertop first. This allows you to see how the pattern connects and plan where your cuts will need to be. It’s a great way to visualize the final look before committing.
Step 2: Create a Level Guideline
Your first row of tiles is the most important; it guides all the others. Don’t trust your countertop or cabinets to be perfectly level—they rarely are.
Use your level and a pencil to draw a faint, perfectly straight line on the wall where the top of your first row of tiles will sit. This is your foundation. Alex found his countertop was a quarter-inch off from one end to the other, a difference that would have created a slanted look. His pencil line saved the project.
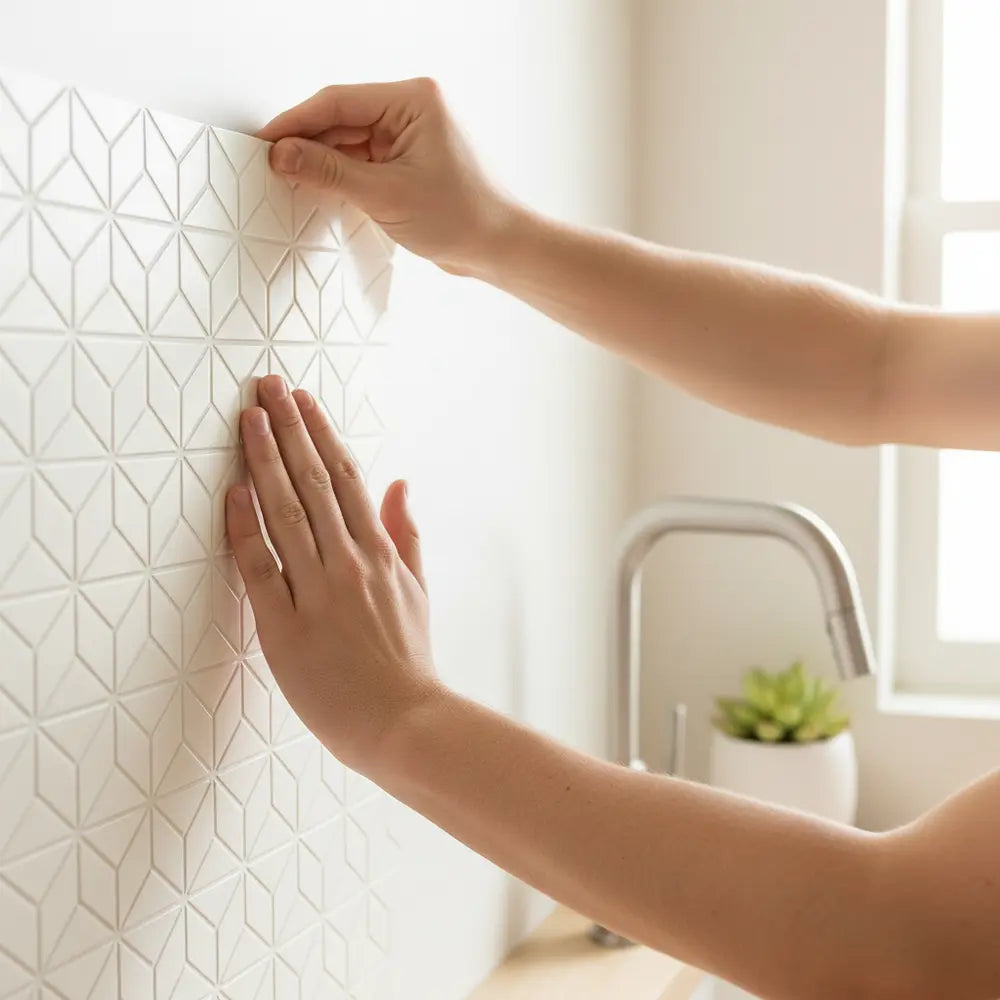
Step 3: The First Tile—Peel, Align, and Stick
Start at one end of your guideline. Take your first tile and peel back only the top few inches of the backing paper. Don't expose the entire adhesive at once, as it can be tricky to handle.
Align the top edge of the tile with your pencil line and the side edge with the corner of your wall. Once you’re happy with the placement, press the exposed adhesive firmly against the wall. Then, slowly pull away the rest of the backing while smoothing the tile down with your hand or a small plastic squeegee.
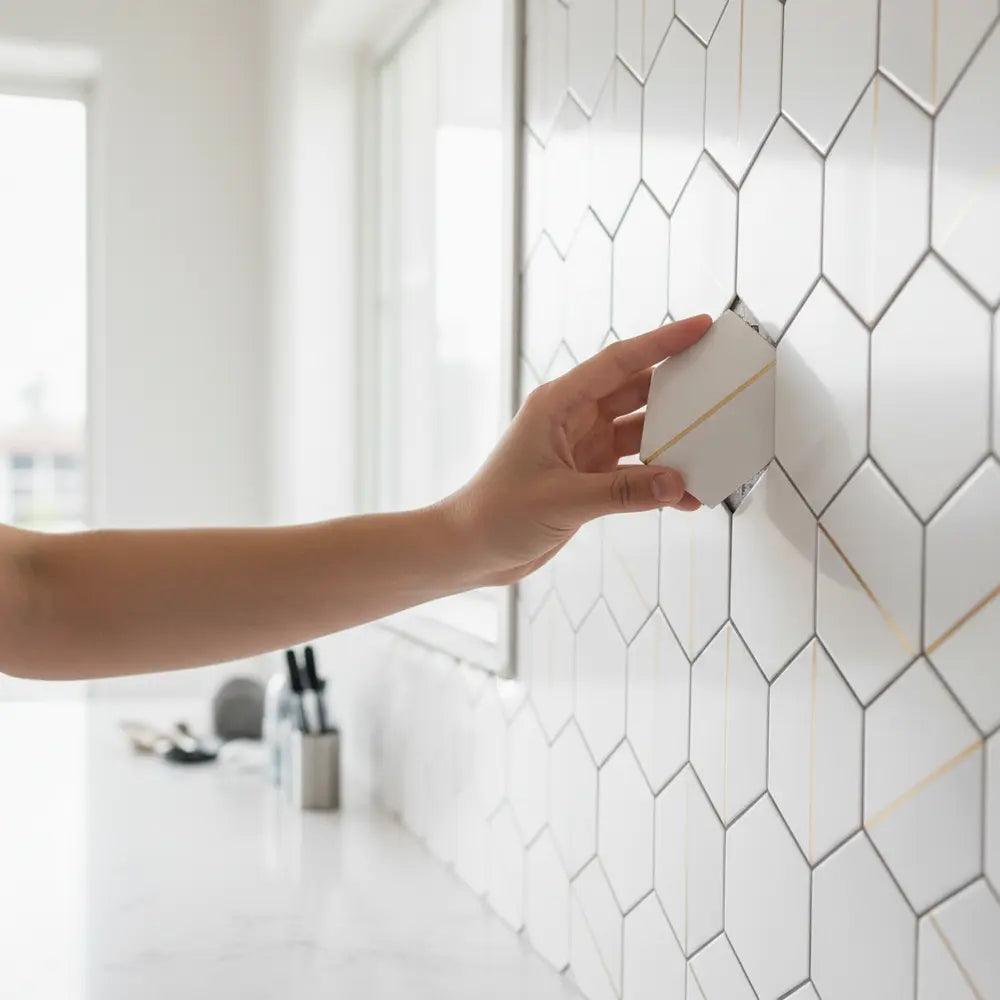
Step 4: Overlap and Repeat
Most peel and stick tiles are designed with a small overlapping edge to create a seamless, waterproof seal. The instructions on your tile package will show you exactly how to overlap them.
Take your second tile, align it with your guideline, and butt it up against the overlap area of the first tile. Press firmly and smooth it down. Continue this process across the first row. The rhythm becomes second nature after just a few tiles.
Step 5: Making Cuts for Outlets and Switches
Outlets are not as intimidating as they seem. You never have to do any electrical work.
- Safety First: For peace of mind, turn off the power to the outlets at your breaker box.
- Measure: Hold the tile over the outlet, ensuring it's aligned with the surrounding tiles. Use your pencil to mark on the tile's protective film where the four corners of the outlet box are.
- Cut: Place the tile on a cutting mat. Use your utility knife and a straight edge to connect the marks and cut out the rectangle. It’s better to cut slightly too small than too large; you can always trim more.
- Apply: Fit the cut tile around the outlet and press it into place. The outlet cover will hide any minor imperfections in your cut.
Step 6: Cutting for Edges and Corners
When you reach the end of a row or need to fit a tile under a cabinet, you'll need to cut it to size.
Measure the gap you need to fill and transfer that measurement to a tile. Use your utility knife and straight edge to score the tile firmly, then snap it along the line. For thinner vinyl tiles, a good pair of scissors may also work.
Step 7: Press for Final Adhesion
Once all your tiles are in place, the final step is to ensure a strong bond. Go back over the entire surface, pressing firmly on every square inch of every tile. Pay special attention to the edges and overlapping seams. This activates the pressure-sensitive adhesive and pushes out any air bubbles.
For those who appreciate detailed visuals, our Easy Guide: Install Peel & Stick Subway Tiles offers a perfect companion resource, filled with pictures and troubleshooting tips to ensure a flawless finish.
Maintenance, Durability, and Longevity
The Question: "This sounds great, but how long will it actually last? And will it be a nightmare to keep clean?"
The Promise: Here, we provide realistic expectations for the lifespan of your backsplash and give you simple, effective cleaning tips to keep it looking new for years.
A common misconception is that peel and stick backsplash is a flimsy, short-term fix. While it's removable, a quality installation is surprisingly durable and designed to withstand the rigors of a busy kitchen.
How to Clean Your New Backsplash
Keeping your backsplash looking pristine is simple. The key is to be gentle.
- Use a Mild Cleaner: A soft cloth or sponge with a bit of mild dish soap and water is all you need for daily wipe-downs.
- Avoid Abrasives: Do not use scouring pads, steel wool, or harsh chemical cleaners (like those with high acid content or bleach). These can scratch the surface or cause discoloration over time.
- Wipe Up Spills Quickly: For messes like tomato sauce or oil splatters, wipe them up as soon as you can to prevent any potential for staining.
What Is the Real Lifespan of Peel and Stick Tiles?
With proper prep and care, you can expect your peel and stick backsplash to last. According to most leading manufacturers, a high-quality tile can maintain its adhesion and color for 3 to 5 years, and often much longer.
Many renters find the backsplash lasts for the entire duration of their multi-year lease without any issues. The first signs that it might be time for a replacement are usually peeling at the corners or edges, especially in high-moisture areas. To learn more about getting the most life out of your installation, check out the top designs and methods in our guide on installing peel and stick tiles with the best designs for 2025.
Signs It’s Time to Replace
After several years, you might notice some wear and tear. Here’s what to look for:
- Persistent Peeling: If corners start to lift and won't re-stick, the adhesive may be losing its grip.
- Discoloration: Yellowing can occur over a long period, especially with exposure to direct sunlight or if the tiles are lower quality.
- Deep Scratches or Gouges: While durable, the surface can be damaged by sharp objects.
Safe Removal Without Damage
The Question: "I'm terrified of peeling the paint off the wall when I move out. How do I remove the tiles without losing my security deposit?"
The Promise: This section delivers a foolproof, step-by-step method for removing your backsplash that guarantees your walls will look exactly as they did before.
This is the moment of truth for any renter. The fear of leaving behind a sticky mess or a wall of peeled paint is real. But the removal process is surprisingly simple and, when done with a little patience, completely damage-free.

The Secret Weapon: Gentle Heat
The adhesive used on removable tiles is designed to release when warmed. You don’t need a powerful heat gun; in fact, that’s overkill and could damage the wall.
Pro-Tip: Your everyday hairdryer is the only tool you need for this job. It provides the perfect amount of gentle, controlled heat to soften the glue without scorching the paint underneath.
Step-by-Step Damage-Free Removal
- Apply Heat: Set your hairdryer to a low or medium heat setting. Hold it about 6-8 inches from the wall and warm up the first tile for about 15-20 seconds, moving the hairdryer back and forth to distribute the heat evenly.
- Start Peeling: Begin at a top corner. Use a fingernail or a plastic putty knife to gently lift the edge of the tile.
- Peel Slowly and at an Angle: Once you have a grip, pull the tile away from the wall slowly and at a low angle (close to 180 degrees). Do not rip it off like a bandage. If you feel strong resistance, stop and apply a little more heat.
- Clean Any Minor Residue: In most cases, high-quality tiles will leave little to no residue. If you do find a few sticky spots, a citrus-based cleaner or a bit of rubbing alcohol on a soft cloth will easily wipe them away. Always test the cleaner on a small, inconspicuous spot first.
By following this method, you can have the entire backsplash down in under an hour, with your walls looking untouched. For extra peace of mind, make sure to review our dedicated Removable Kitchen Tiles: Peel & Stick Backsplash Guide before you begin.
Design Inspiration for Small and Modern Kitchens
The Question: "My kitchen is tiny and bland. What styles will actually make it look better and more modern, not just more crowded?"
The Promise: Discover on-trend design ideas and expert tips specifically for making small kitchens feel larger and achieving a luxury, ceramic-like look on a budget.
A peel and stick backsplash isn't just a practical solution; it's a powerful design tool. It's one of the fastest ways to inject personality and style into your kitchen, no matter its size or existing decor.

Ideas for Small Kitchens
In a small kitchen, every design choice matters. The right backsplash can create an illusion of space and light.
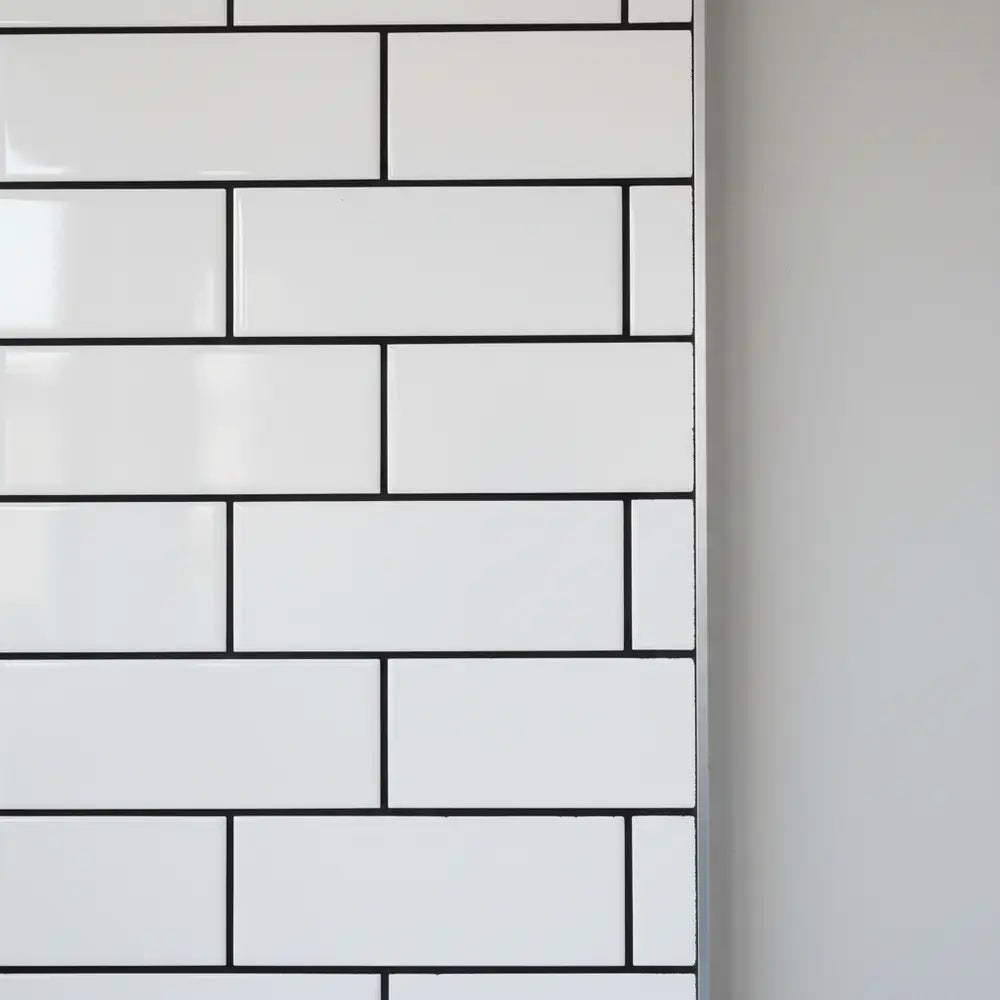
- Go Light and Bright: Tiles in shades of white, light gray, or soft pastels will reflect light and make the kitchen feel more open and airy. Classic white subway tiles are a can't-miss choice.
- Use Glossy Finishes: A tile with a bit of shine or a glossy finish will bounce light around the room, much like a mirror does.
- Think Vertically: Installing rectangular tiles in a vertical pattern draws the eye upward, creating a sense of height and making a low ceiling feel taller.
How to Get a Luxury Look That Looks Like Real Ceramic
The latest generation of peel and stick tiles is designed to fool the eye. If you want a high-end look, here's what to search for:
- Marble Veining: Look for large-format tiles with realistic, subtle marble veining. These instantly add a touch of elegance.
- Zellige and Terracotta Styles: The perfectly imperfect, handmade look of Zellige tiles is a huge trend. Find peel and stick versions with varied tones and textures to replicate this coveted style.
- Dark and Moody Hues: Don't be afraid of color. A backsplash in a deep emerald green, navy blue, or matte black can create a dramatic and expensive-looking focal point.
Exploring Eco-Friendly and 3D Options
The market is evolving with even more innovative options. You can now find tiles made from more sustainable materials. Additionally, thicker 3D tiles, like those made from rigid PVC, offer deep textures and shadow lines that are nearly indistinguishable from traditional tilework. These are fantastic for adding a tactile, architectural element to your kitchen. To see these trends in action and discover a range of possibilities, browse our gallery of DIY Peel and Stick Tiles: Easy Kitchen Upgrade ideas.
Poll: Which backsplash style fits your kitchen?
Budget Breakdown and Where to Buy
The Question: "This sounds affordable, but what's the real cost? And where can I find the best selection of quality tiles?"
The Promise: We'll provide a clear cost comparison between a DIY project and a professional installation, show you a real-world budget example, and list the best places to shop.
Understanding the financial commitment is the final step before you begin your project. Here, we break down the costs and show just how much you can save by going the DIY route.
DIY vs. Professional Installation: The Cost Savings
The difference in cost is staggering. A professional tile job involves labor costs, material markups, and several days of disruption. A peel and stick project is a one-time purchase that you complete in an afternoon.
| Factor | DIY Peel & Stick Backsplash | Professional Ceramic Tile Installation |
|---|---|---|
| Average Cost | $80 - $250 | $1,000 - $3,000+ |
| Time to Complete | 1-3 hours | 2-4 days |
| Skill Level | Beginner | Professional |
| Permanence | Removable | Permanent |
Example: The $60 Renter Kitchen Makeover
Let's imagine a small rental kitchen with a backsplash area of about 15 square feet.
- Tiles: 15 sq. ft. of affordable vinyl subway tiles at ~$4/sq. ft. = $60
- Tools: You likely already own a tape measure, scissors, and cleaner.
- Total Cost: $60
For this price, you achieve a complete transformation that dramatically improves the look and feel of your kitchen. Even with premium, luxury-look tiles, the total cost rarely exceeds a few hundred dollars. This level of affordability is why so many people are turning to this solution. To see how to get started on your own project, explore our guide on How to DIY a Peel and Stick Kitchen for 2025.
Where to Buy the Best Peel and Stick Tiles
You can find peel and stick backsplash at a variety of retailers, both online and in-store.
- Big-Box Stores: Retailers like Home Depot, Lowe's, and Target offer a convenient way to see some options in person. Their selection can sometimes be limited to more basic styles.
- Online Marketplaces: Amazon and Wayfair have a massive selection from dozens of brands, making it easy to compare prices and read user reviews.
- Specialty Online Stores: Websites like Stickwoll and other direct-to-consumer brands often have the most unique, on-trend designs and the highest quality materials, as they specialize in this one product category.
Before making a final decision, we recommend exploring a full What Kitchen Backsplash Tile Guide to compare all your options, from peel-and-stick to traditional materials, ensuring you choose the perfect fit for your style and budget.
Your Stylish, Damage-Free Kitchen Awaits
A stylish kitchen that reflects your personality is no longer out of reach just because you're a renter. A DIY peel and stick backsplash is an affordable, easy, and incredibly satisfying project that empowers you to take control of your space.
You can install it with confidence, knowing it can handle kitchen life with ease. And you can peel it away just as easily, guaranteeing you'll get your full security deposit back. You have the knowledge and the tools—now all that's left is to pick a style you love and get started.
Explore our curated collections of removable kitchen tilesFor more renter-friendly DIY projects and inspiration, subscribe to our weekly newsletter!
Frequently Asked Questions
Can I install peel and stick backsplash over existing tiles?
Yes, in most cases, you can. As long as the existing tiles are clean, smooth, and not heavily textured, peel and stick tiles will adhere well. It's a great way to cover up a dated ceramic tile pattern without any demolition.
How do I clean peel and stick backsplash?
Clean the tiles using a soft cloth or sponge with a mild, non-abrasive cleaner, like a simple mixture of dish soap and water. Avoid using harsh chemicals, bleach, or scouring pads, as they can damage the surface of the tiles.
Will the tiles really come off without damaging the wall?
Absolutely. When you follow the proper removal technique—using gentle heat from a hairdryer to soften the adhesive and peeling slowly—they are designed to come off cleanly without pulling paint or leaving significant residue.
How heat resistant are these tiles for behind a stove?
Most quality peel and stick tiles are heat resistant, but not heatproof. It's crucial to check the manufacturer's specifications. Generally, they should be installed at least 8-10 inches away from an open flame on a gas stove. They are perfectly safe for use behind electric and induction cooktops.

Leave a comment
This site is protected by hCaptcha and the hCaptcha Privacy Policy and Terms of Service apply.