





















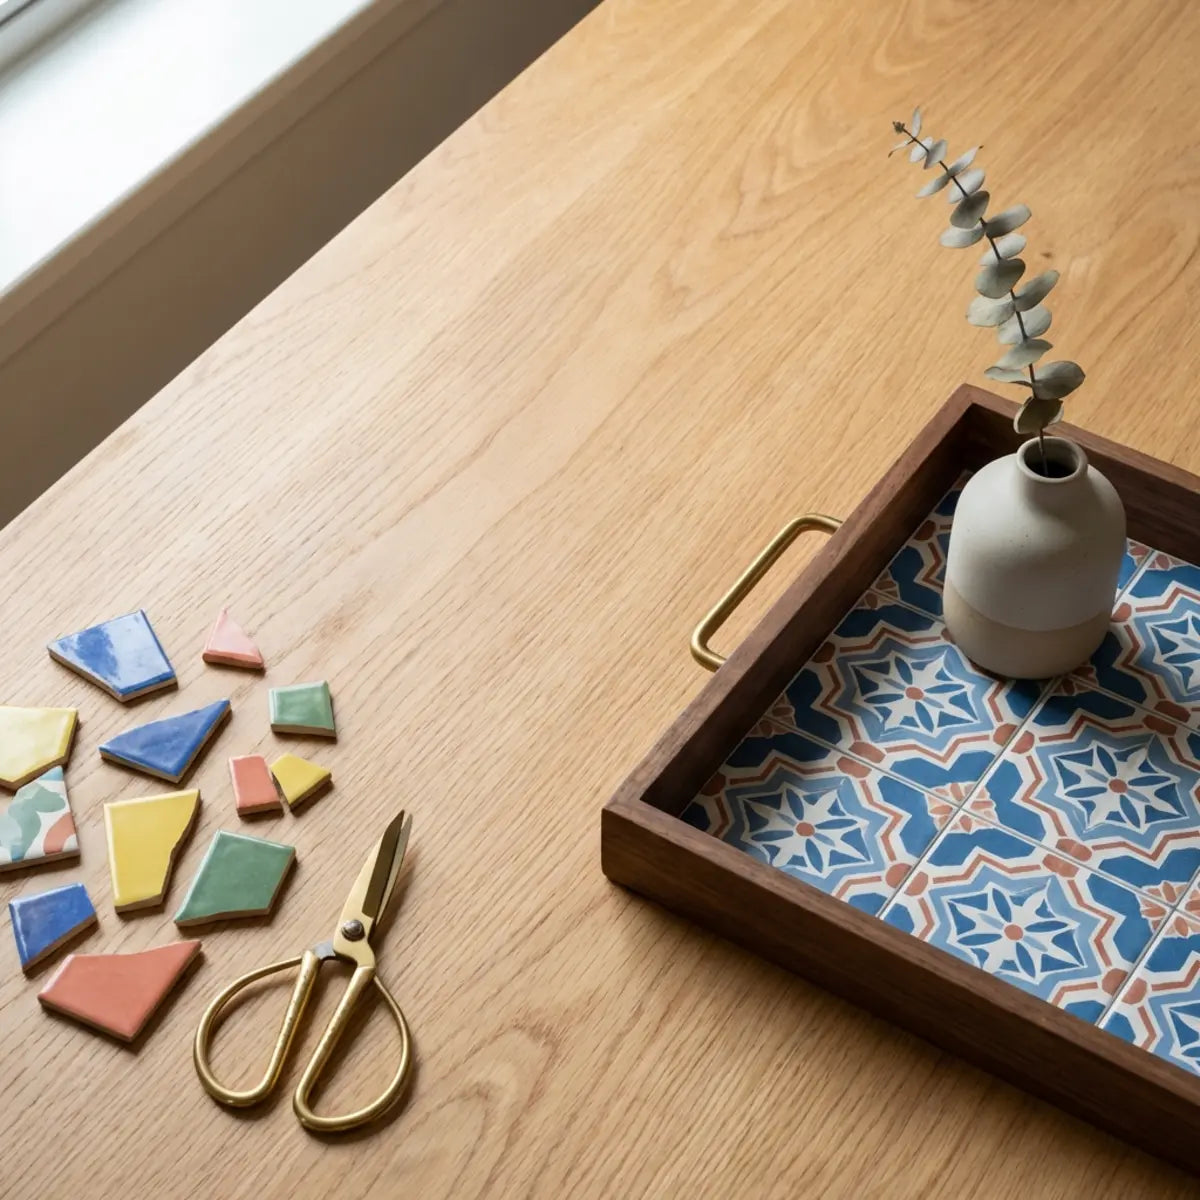
Leftover peel-and-stick tile can be useful, but “zero waste” should be treated as a direction, not a guarantee. A few offcuts turned into coasters or a small panel do not prove that the original product has no environmental impact, and saving every tiny scrap can create clutter rather than meaningful reuse.
A practical hierarchy is simpler: first keep enough matching material for future wall repair, then reuse clean and useful offcuts in projects that fit the material, then follow local recycling or disposal guidance for what remains. This mirrors the U.S. EPA’s broader waste hierarchy, which prioritizes source reduction and reuse before recycling. EPA’s Sustainable Materials Management hierarchy explains that no single waste-management approach fits every material and circumstance.
Reserve repair stock before craft stock
The most valuable leftover tile may be the full piece you never turn into a craft. If the installed wall is later damaged during plumbing work, appliance replacement or an accidental impact, matching material from the original order can make a local repair much easier.
Keep full pieces first, especially when the pattern, color or batch could change. Label them with the product name, handle or SKU, room and order date. Store them flat and according to the product instructions. Only after you have a reasonable repair reserve should the remaining offcuts become craft material.
Sort scraps by size and condition
Separate full pieces, large clean offcuts, narrow strips and tiny irregular scraps. Discard or isolate pieces contaminated with dust, grease, damaged adhesive, unknown chemicals or sharp exposed layers if they are not suitable for safe reuse.
Sorting helps prevent a common “zero-waste” problem: keeping a large mixed box of unusable fragments indefinitely. Reuse works best when the saved material has a defined purpose and can be identified later.
Know the construction before choosing the craft
Peel-and-stick wall products can use vinyl, composites, metal-faced layers, gel-like relief or other constructions. Those materials cut, bend, clean and adhere differently. A project that works with a flexible vinyl offcut may not be appropriate for a thicker or metal-faced piece.
Keep the product label or note with the scrap. If the material is unknown, use the most conservative low-load decorative project or skip the craft. Do not invent new adhesives, heat-forming methods or food-contact uses for a material simply because a small piece is available.
Use larger offcuts for the simplest projects first
A clean rectangular offcut can become a small decorative panel, drawer or shelf-back accent, sample board, plant-pot sleeve, framed pattern sample or other low-load object. The best reuse project often requires the least extra material and the fewest new chemicals.
Keep the original adhesive backing only if it remains clean and appropriate for the new substrate. If the backing is contaminated or no longer suitable, do not automatically add construction adhesive. Check compatibility or choose a project where the tile can be mechanically contained rather than permanently bonded.
A sample board can be more useful than a decorative craft
One leftover piece can become a reference for future repairs, cleaning tests and color matching. Label the board with product name, dimensions, date and room. If the wall later needs touch-up, you can test a compatible cleaner or compare a replacement product without experimenting on the installed surface.
This is reuse even though the sample is not decorative. EPA’s hierarchy places value on reuse because keeping a usable material in service can avoid immediate disposal. The practical value of a reference sample may exceed the novelty of turning every scrap into a new object.
Coasters are a finish-and-edge experiment, not a universal tile use
A coaster-sized project can be useful for practicing clean cuts and edge finishing, but it should not automatically be treated as waterproof, heatproof or food-safe. The tile construction and any added backing or edge material determine how the object behaves.
Keep beverages on a separate stable coaster base rather than assuming the tile adhesive and edge are designed for prolonged condensation. Do not use decorative wall tile as a cutting surface or direct food-contact surface unless the product documentation specifically supports that use.
Small framed panels avoid new wall-adhesive questions
If the goal is to show a pattern rather than permanently bond it to another wall, mount the offcuts to a suitable craft panel or frame that can be displayed as an object. This separates the tile craft from the rental wall and makes future removal much easier to plan.
The panel substrate still needs to be compatible with the tile adhesive. A sealed smooth board can behave differently from raw porous fiberboard. Test one piece before committing the entire collection of scraps.
Use tray and shelf accents only where cleaning is predictable
A decorative tray bottom or shelf-back insert can use larger scraps without asking the tile to carry structural load. Keep the project away from food cutting, open flame and standing water unless the exact product is documented for that exposure.
If the object will be wiped frequently, test the manufacturer-approved cleaner on a spare piece. A craft sealant, topcoat or solvent can change color, gloss, flexibility and future recyclability, so do not add one automatically.
Plant-pot accents should stay outside the drainage path
A decorative band around an outer cachepot can reuse narrow strips, but the tile should not be placed where it blocks drainage or sits in standing water. Water that runs repeatedly behind a decorative layer can attack the adhesive or substrate.
Keep the planting container and drainage function separate from the decorative outer surface. If the pot is frequently wet on the outside, choose a different reuse project rather than trying to turn a wall finish into a wet-container system.
Do not make an adhesive compatibility claim without evidence
Leftover pieces may tempt you to add glue when the original backing is weak. That can create a new chemical-compatibility problem. An adhesive that bonds well to wood may attack a printed face, soften a polymer backing, stain a translucent piece or create fumes during curing.
If additional adhesive is necessary, check both the tile material and the adhesive manufacturer’s substrate list. When that information is unavailable, choose a project that does not require a second adhesive rather than inventing a universal craft-glue recommendation.
Keep renter mounting separate from tile reuse
A framed scrap project can be removable as an object while the method used to hang it still affects the rental wall. A command-style strip, nail, screw or adhesive hook each has its own load and removal limits. Do not call the craft “renter-safe” solely because the tile itself came from a removable wall project.
Check the lease, wall coating and mounting-product instructions separately. The safer reuse decision can be a freestanding object that does not add another adhesive layer to the wall.
Use offcuts for layout practice before the main installation
Small scraps can be useful before the project is even finished. Practice a straight cut, inside corner, outlet template or edge finish on spare material before making the same cut on the final full sheet. This reuse reduces the chance that the learning piece becomes a more expensive installed mistake.
Record which blade, cutter or method produced the cleanest result. Do not assume one tool works across vinyl, composite and metal-faced products. Follow the product-specific cutting guidance first.
Use scraps to test seam appearance under real light
Two or three offcuts can form a small seam mock-up. Place it under the same under-cabinet, window or vanity lighting that will hit the installed wall. Side lighting can reveal overlap height, print discontinuity and edge shadows that are difficult to judge from a product photo.
This test is descriptive, not a standardized performance test. Its value is to help your own project layout before the remaining material is installed.
Keep food-contact and heat-contact projects out of the default list
A decorative wall tile is not automatically certified as a cutting board, trivet, hot-pan surface or direct food-contact material. Product ingredients, coatings and adhesives may not have been evaluated for those uses.
Use a separate food-safe or heat-rated surface when those functions matter. A wall-tile scrap can decorate the outside of an object while the functional food/heat-contact surface remains a material designed for that job.
Do not turn “reuse” into a universal sustainability claim
Reusing material can reduce immediate disposal, but the environmental profile of a product depends on more than one craft project. Manufacturing, material inputs, transport, service life, repair, reuse and end-of-life all contribute to the broader picture.
The Federal Trade Commission’s environmental marketing guidance emphasizes that environmental claims need competent and reliable evidence. That means a seller should not call a tile “eco-friendly,” “green,” “zero waste” or “sustainable” merely because a customer can reuse the scraps.
Separate recycled content from recyclability
A product containing some recycled content is not automatically recyclable in your local program. Likewise, a recyclable material may contain no recycled content. Adhesives, backing layers and mixed-material constructions can affect what local recyclers accept.
Check local program rules using the actual material information. Do not place unknown composite or adhesive-backed scraps into curbside recycling based only on appearance. Contamination can create problems for a recycling stream that is not designed for the material.
Reuse should not require more material than it saves without a reason
A craft that uses one small scrap but requires a new frame, sealant, paint, glue, backing board and several disposable accessories may still be worthwhile for creative reasons, but the environmental story is not simply “waste eliminated.” Keep the claim proportional to what actually happened.
If the goal is material efficiency, favor projects that need little extra input. Repair stock, sample boards and simple accent panels often meet that test better than elaborate crafts built around a tiny piece of leftover tile.
Use a simple reuse hierarchy at the end of the project
- Reserve matching repair pieces. Keep full sheets or tiles that could replace installed material later.
- Use large clean offcuts. Choose low-load decorative or reference projects that fit the known construction.
- Use narrow strips only when the project genuinely needs them. Edge-practice pieces, small sample boards or pattern labels can be useful.
- Recycle only where the local program accepts the actual material. Adhesive-backed, mixed-material or unknown scraps may not belong in curbside recycling.
- Dispose of unusable material according to local rules. Keeping unsafe or unidentified scraps forever is not meaningful waste prevention.
This order aligns with EPA’s emphasis on source reduction and reuse before recycling. It also recognizes that some leftovers are more valuable as repair material than as crafts.
Measure reuse with simple facts, not a synthetic environmental score
If you want to document the project, record the number or approximate area of full pieces kept for repair, the offcuts reused, and the material that still required disposal. That creates an honest record of what happened without converting a few scraps into an unsupported carbon, landfill or “zero waste” score.
Environmental-impact calculations require system boundaries, material data and assumptions that a household craft rarely has. Avoid presenting a calculator result as scientific evidence when the inputs are guesses.
Document the product identity with each stored scrap
Write the product name, size and order date on the storage envelope or box. If the design has a directional pattern, note the installation orientation. Keep any relevant care and cutting guidance with the material.
This information becomes useful when a wall needs repair months later. It also prevents a future craft user from guessing whether an unknown offcut is vinyl, composite or metal-faced material.
Keep scraps dry, flat and protected
Storage can ruin material before it is reused. Keep pieces away from standing water, excessive heat, dust and sharp objects. Protect adhesive backing from contamination where possible, and avoid folding a product that is intended to remain flat.
If storage conditions have damaged the adhesive or face, downgrade the scrap to a non-adhesive reference sample or dispose of it appropriately. Do not force a compromised piece into an installed repair.
Use a scrap inventory only if you will actually maintain it
A simple list can record product, dimensions, quantity and storage location. This is helpful for a large project with several patterns; it is unnecessary bureaucracy for three small offcuts.
Set a storage limit. If the box becomes full of tiny pieces with no repair or craft use, review it and keep only material that still has a realistic purpose.
Repair use often provides the strongest practical value
A matching spare can prevent a much larger section of wall from being replaced after one local damage event. That practical maintenance value is one reason to preserve repair stock before using every leftover piece for decoration.
When repair is needed, correct the cause first. A lifted piece caused by moisture, contamination or repeated impact should not simply be replaced until the underlying condition is addressed.
When donation or sharing might make sense
Clean full pieces from an identifiable product may be useful to another person who owns the same design or wants a small sample. Whether donation is practical depends on local organizations, packaging and material condition. Do not donate damaged, contaminated or unlabeled scraps as though they were installation-ready product.
A local maker group or reuse organization may accept some materials, but acceptance policies vary. Contact the organization before transporting material rather than assuming all construction offcuts are wanted.
When recycling is not straightforward
Mixed-material wall products can contain face layers, cores, adhesive and release liners. A municipal recycling symbol on one component does not prove the whole installed or adhesive-backed scrap is accepted in curbside recycling.
Check local recycling guidance for the actual material and condition. If the program does not accept it, use the appropriate waste stream rather than contaminating a recycling bin.
Keep the environmental claim narrower than the action
If you reused six offcuts, say you reused six offcuts. If you reserved two full tiles for repair, say that. Those are verifiable actions. Avoid escalating them into “this renovation created zero waste” unless every relevant waste stream has actually been measured and the claim can be supported.
The same principle applies to product marketing. “Some customers reuse offcuts” is different from “the product is sustainable.” FTC guidance is useful precisely because it encourages marketers to define and substantiate the environmental attribute being claimed.
Five low-risk leftover-tile projects to consider
1. Labeled repair sample
Keep a full or partial piece mounted on a small board with the product name, dimensions and room. This supports future matching and cleaner testing.
2. Framed pattern panel
Arrange coordinated offcuts on a compatible board inside a frame. Display the frame as an object rather than bonding another adhesive layer directly to a rental wall.
3. Drawer or shelf-back accent
Use a clean larger offcut on a suitable smooth surface where the tile is not carrying load, touching food or exposed to standing water. Confirm that the original adhesive is compatible with the substrate.
4. Plant-pot outer accent
Apply only to a dry decorative outer surface, keeping the tile away from drainage paths and standing water. Use a separate inner pot for the plant and moisture.
5. Cut-and-seam practice board
Use scraps to practice outlet templates, edge cuts or seam alignment before making the same cut on full material. This can reduce mistakes on the main project.
Frequently asked questions
Are leftover peel-and-stick tiles recyclable?
It depends on the actual material, adhesive/backing and local recycling program. Do not assume a scrap belongs in curbside recycling because one layer looks like plastic or metal. Check the product information and local acceptance rules.
Does reusing scraps make the product eco-friendly?
Reuse is a useful material-management action, but it does not establish the full environmental profile of a product. Broad environmental claims require evidence that matches the specific attribute being claimed.
Should I use all scraps for crafts?
No. Reserve useful matching pieces for wall repair first. A full spare tile may be more valuable for future maintenance than a decorative craft.
Can tile scraps be used as trivets or cutting boards?
Do not assume a decorative wall tile is designed for direct heat or food contact. Use materials specifically rated for those functions unless the product documentation states otherwise.
Can I add craft glue to old peel-and-stick scraps?
Only when the adhesive and tile materials are documented as compatible. Unknown supplemental adhesive can stain, soften or damage a tile. A mechanically contained or framed project may be safer when compatibility is unclear.
Are leftover tile crafts renter-friendly?
The craft and the method used to mount it are separate questions. A framed object can be removable while a wall hook or adhesive strip still affects the paint. Check the lease, wall and mounting-product instructions.
How long should I keep repair stock?
Keep it while the installed design remains in use and you have practical storage space. Matching material can be useful for local repair. If the wall is removed or the scraps become damaged, reassess whether continued storage has value.
Bottom line
A responsible leftover-tile plan starts with prevention and maintenance, not a promise that every fragment will become a craft. Order from a measured layout, keep matching repair pieces, reuse clean offcuts where the material fits the new substrate and function, and handle the remainder according to local recycling or disposal rules.
Be equally careful with the environmental story. EPA’s hierarchy supports reduction and reuse as preferred strategies, but that does not turn one reuse project into a product-level sustainability claim. Record what you actually saved and reused, keep the craft within the material’s known limits, and let the measurable action speak for itself.
Start with useful offcuts, not a zero-waste promise
Reusing offcuts can keep usable material in service, but not every scrap is worth saving. Sort pieces by size, pattern, condition and adhesive backing and keep only those that can support a realistic repair or craft.
EPA materials guidance supports source reduction and reuse broadly; it does not mean a small craft eliminates the environmental impact of the original product.
Match the scrap to a compatible craft substrate
A leftover self-adhesive tile may work on a smooth sealed panel, tray insert or sample board but may not be appropriate on every wood, fabric, paper or flexible object.
Use the exact product guidance and a craft substrate that can accept the adhesive without warping or releasing.
Do not invent a universal supplemental adhesive
If the original backing no longer works for the craft, choose an adhesive only when it is compatible with both tile and substrate and appropriate for the use.
Avoid broad chemical-safety claims and follow the adhesive manufacturer instructions, ventilation and cure requirements.
Keep food-contact surfaces separate
A tiled tray base can be decorative without becoming a certified food-contact or cutting surface. Keep food-contact use tied to materials documented for that purpose.
Use removable dishes or inserts when the decorative layer’s food-contact status is unknown.
Use coasters as a finish-and-edge exercise
Small coaster projects are useful for practicing straight cuts and edge finishing. Add a suitable backing or base so the tile edge does not become the furniture-contact surface.
Choose dimensions from the actual scrap rather than forcing several tiny fragments together.
Create a small accent panel from coordinated scraps
Several pieces from one project can become a framed sample panel or shelf-back accent. Dry-layout color and pattern first so the project looks intentional rather than like random leftovers.
Keep the frame or mounting method appropriate to the finished weight.
Use repair stock before craft stock
When the installed wall may need future matching material, reserve full pieces for repairs first. Crafts should use surplus that is unlikely to be required for the original installation.
A coaster is not a good trade if it forces a future full-wall repair because the matching tile was used up.
Keep sharp cutting practices product-specific
Rigid composites, thin vinyl and metal-faced products require different cutting methods. Use the manufacturer guidance and suitable tools rather than one universal score-and-snap instruction.
Protect work surfaces and dispose of unusable sharp fragments appropriately.
Treat renter mounting separately
A craft made from leftover tile may be removable as an object without the mounting method being safe for every painted wall. Use a documented wall attachment appropriate to the object weight and lease.
Do not assume painter’s tape creates a reliable or wall-safe mounting system.
Document material identity
Keep the product name with crafted objects when care depends on the original finish. A future cleaner or repair decision is easier when the surface is known.
If the scrap came from several products, label them separately.
Use a final reuse hierarchy
First reserve repair stock, then reuse larger offcuts in practical projects, then recycle or dispose of remaining material according to local options and product composition.
That sequence is more credible than claiming every scrap can or should become decor.
Keep the project honest about waste
Record which scraps were genuinely reused and which still required disposal. A small project can reduce leftover material without claiming that the original installation became zero waste.
This makes the reuse story more credible and helps future projects plan cut layouts that generate fewer unusable fragments.
Use the safest simple craft first
When the tile composition or adhesive compatibility is uncertain, choose a low-load decorative sample board rather than a wall-mounted or food-adjacent object.
Complexity should increase only when the materials and attachment method are understood.
Keep a scrap inventory small
Save only useful sizes and label them. When scraps become a large unsorted pile, the storage burden can outweigh the chance of meaningful reuse.
A periodic sort keeps repair stock and craft material distinct.
Keep leftover-material projects secondary to repair needs
Reserve matching material for the installed wall before using scraps for crafts.
Repair stock can prevent a much larger future replacement.
Keep the reuse story measurable
Note the approximate scrap area reused and what remained for repair or disposal.
Simple documentation is more credible than calling a project zero waste without accounting for the leftovers.
Close the reuse record
Keep repair stock and craft stock labeled separately so future maintenance does not consume the wrong material.
Keep storage of scraps proportional
When repair stock and craft pieces exceed the space you are willing to store, keep the most useful full pieces and dispose of or recycle the rest according to local options.
Reuse should reduce clutter rather than move waste into indefinite storage.
Sources and scope
- US EPA: Sustainable Materials Management Hierarchy — Reuse/source-reduction context; not product-level environmental proof.
- US FTC: Green Guides — Environmental marketing guidance; not a certification.


Leave a comment
This site is protected by hCaptcha and the hCaptcha Privacy Policy and Terms of Service apply.