





















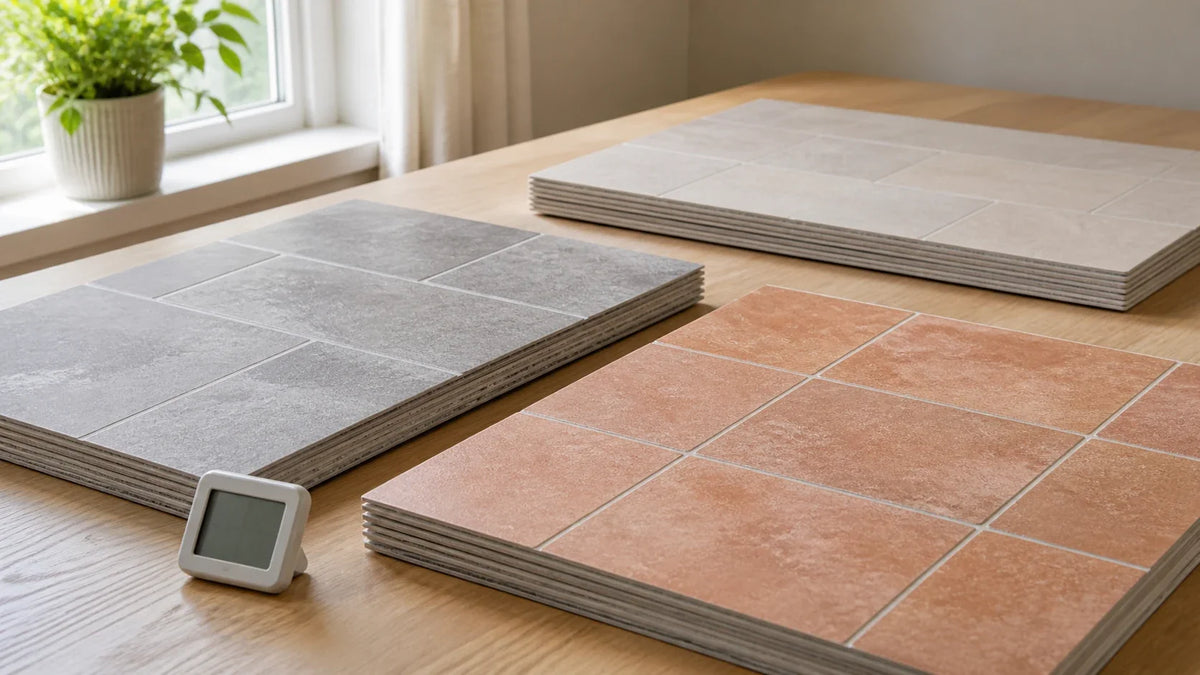
Ein an den Herstellerangaben orientierter Leitfaden für die Entscheidung, ob im kalten Zustand gelieferte selbstklebende Fliesen getestet werden können, weiter aufgewärmt werden sollten oder für eine Rücksendung dokumentiert werden müssen.
Ihre Lieferung für den Winter ist endlich im Haus. Die Raumtemperatur fühlt sich angenehm an, doch die Fliesen können noch kalt, starr, gewölbt oder kaum klebrig sein. Genau diese Abweichung ist der Grund dafür, dass die bekannte Diskussion über 24 oder 48 Stunden oft zu unzuverlässigen Empfehlungen führt.
- Die vergangene Zeit ist kein Beweis: Ein Karton kann 48 Stunden im Haus stehen, während sein Inneres noch kälter als der Raum ist.
- Die einzelnen Temperaturen sind entscheidend: Messen Sie Raumtemperatur, Fliesentemperatur und Untergrundtemperatur unabhängig voneinander.
- Auch das Haftverhalten ist entscheidend: Prüfen Sie eine verdeckt angebrachte Testfliese nach einer Stunde, nach 24 Stunden, nach sieben Tagen und – bei einer Qualifizierungsprüfung – nach 30 Tagen.
Warten ist frustrierend, besonders wenn ein Wochenendprojekt oder ein Einzugstermin bevorsteht. Trotzdem kann die Zeit allein nicht bestätigen, dass die Fliesen bereit sind. Das Zusammenspiel von Temperatur, Materialerholung, Vorbereitung der Oberfläche, Anpressdruck und Kantenhaftung liefert eine besser begründbare Einschätzung.
Ein Punkt zur Transparenz ist besonders wichtig: Mit diesem Artikelbrief wurden keine vollständigen physikalischen Testdaten, keine Produkt-SKU, keine Chargennummer, kein technisches Datenblatt, kein Transportdatenlogger und kein Messprotokoll bereitgestellt. Wir werden nichts davon erfinden. Die folgenden Tabellen zeigen daher den standardisierten Testrahmen, die erforderlichen Rohdatenfelder und die Entscheidungsschwellen, die für ein aussagekräftiges Ergebnis benötigt werden.
Eine fehlende Messung ist kein Beleg dafür, dass ein Produkt die Prüfung bestanden hat.
Offenlegung der Methodik
- Kontrollierte Variablen: Zeitpunkte der Kontrollmessungen, Messstellen, Vorbereitung des Untergrunds, Größe der Proben, Vorgehensweise beim Andrücken mit der Rolle und Formulierungen bei der Prüfung sollten einheitlich bleiben.
- Nicht kontrollierte Variablen: Produktzusammensetzung, Chargenverlauf, Belastung während des Versands, Kartondichte, Luftzirkulation im Raum und nicht dokumentierte Lagerbedingungen sind unbekannt.
- Mögliche Abweichungen: Angaben im Shop, allgemeine Empfehlungen und produktspezifische technische Anweisungen können voneinander abweichen; maßgeblich sind die aktuellen Anweisungen des Herstellers.
- Einschränkungen: Die bereitgestellten Messungen belegen nicht, dass eine bestimmte Prüfung bestanden wurde. Ein Test zu Hause kann offensichtliche Probleme erkennen, aber die Produktleistung insgesamt nicht bestätigen.
Was sollten Sie tun, wenn kalte Fliesen ankommen?
Bedeutet eine starre, gewölbte oder nur schwach klebrige Fliese, dass der Winterversand sie dauerhaft beschädigt hat?
Dieses Vorgehen nach dem Eintreffen hilft Ihnen, vorübergehendes kältebedingtes Verhalten von Rissen, Verunreinigungen, Ablösungen und anderen Mängeln zu unterscheiden, die eine Rücksendung rechtfertigen können.
Behandeln Sie eine kalte Lieferung als Material, das dokumentiert und geprüft werden muss – nicht als etwas, das Sie übereilt verarbeiten sollten. Lassen Sie den Karton lange genug unberührt, um seinen Zustand zu prüfen, die genauen Anweisungen zu finden und die Temperaturen von Raum, Fliesen und Untergrund zu vergleichen.
Kälte kann das Verhalten eines druckempfindlichen Klebstoffs vorübergehend verändern. Ein druckempfindlicher Klebstoff, kurz PSA, ist ein Klebstoff, der so formuliert ist, dass er durch Kontakt und Anpressdruck haftet – nicht durch Wasser, Aktivierung mit Wärme oder das Mischen von Chemikalien.
PSA-Klebstoffe hängen von ihrem viskoelastischen Verhalten ab. Das bedeutet, dass sie sich teilweise wie eine Flüssigkeit verhalten und in kleinste Unebenheiten der Oberfläche fließen müssen, zugleich aber teilweise wie ein Feststoff wirken und sich dem Ablösen widersetzen. Niedrigere Temperaturen können dieses Benetzungsverhalten verringern und dazu führen, dass sich der Klebstoff weniger klebrig anfühlt.
Cretons wissenschaftliche Übersichtsarbeit zur Haftung druckempfindlicher Klebstoffe erläutert, dass die Verbindung von einem Gleichgewicht zwischen dem Fließen des Klebstoffs und seinem Widerstand gegen das Ablösen abhängt.1 Auch die Herstellerhinweise von 3M weisen darauf hin, dass die Anwendungstemperatur den ersten Kontakt des Klebers maßgeblich beeinflusst.2
Kältebedingte Steifigkeit kann sich wieder zurückbilden. Risse, abgelöste Schichten, Verunreinigungen des Klebers und bleibende Verformungen sind andere Probleme.
So gehst du bei einer Lieferung bei kaltem Wetter vor
- Fotografiere das ungeöffnete Paket: Halte eingedrückte Ecken, Einstiche, Wasserflecken, offene Nähte, Versandetiketten und sichtbare Verformungen fest.
- Dokumentiere die Lieferbedingungen: Notiere die Lieferzeit, die Außentemperatur, wie lange der Karton draußen stand und ob er Schnee oder Regen ausgesetzt war.
- Suche die genauen Produktanweisungen heraus: Stimme nach Möglichkeit Marke, Kollektion, Modell oder SKU, Fliesentyp und Charge ab. Eine Händlerbeschreibung ersetzt nicht das technische Datenblatt des Herstellers.
- Miss den Raum: Notiere die Raumtemperatur und die relative Luftfeuchtigkeit in der Nähe des gelagerten Kartons.
- Miss den Karton vorsichtig: Prüfe die Außenseite und nach der ersten Kontrolle eine zugängliche Fliese am Rand des Kartons. Gehe nicht davon aus, dass die Mitte des Kartons dieselbe Temperatur hat.
- Prüfe das Material, ohne es stark zu biegen: Achte auf Risse, abgelöste Schichten, Knicke, Kleberückstände, nasses Trägerpapier und Verunreinigungen.
- Lagere das Material flach: Lege den gesamten Karton oder Fliesenstapel auf einer ebenen Fläche im Innenbereich ab. Stelle flexible Fliesen nicht an eine Wand gelehnt auf.
- Erwärme die Lieferung langsam: Sorge für gleichbleibende Raumtemperatur statt für die Wärme eines Heizgeräts, einer Heizmatte, eines Haartrockners, Heizkörpers oder beheizten Fußbodens.
- Prüfe die messbaren Bedingungen erneut: Notiere die Temperaturen der Fliesen, des Raums und des Untergrunds, bevor du die Flexibilität, die Klebekraft oder eine Testfläche prüfst.
Jeder Punkt dieses Ablaufs erfüllt einen anderen Zweck. Fotos halten den Zustand als Beleg fest. Temperaturmessungen zeigen, ob sich das Material wieder erwärmt. Eine flache Lagerung verringert Verformungen. Die Herstelleranweisungen legen den maßgeblichen Grenzwert für die Verarbeitung fest.

Sollten die Kartons verschlossen bleiben oder geöffnet werden?
Lass die Lieferung in der ersten Phase verpackt, sofern der Hersteller nichts anderes vorgibt oder sichtbare Feuchtigkeit eine sofortige Kontrolle erforderlich macht. Die Verpackung schützt vor Staub und kann schnelle, ungleichmäßige Temperaturveränderungen verringern.
Sobald sich der äußere Karton der Raumtemperatur angenähert hat, kannst du ihn öffnen, um die inneren Fliesen zu prüfen und den Luftaustausch zu verbessern. Die richtige Vorgehensweise hängt von den Produktanweisungen, der Verpackung und dem Feuchtigkeitszustand ab.
Diese praktische Unterscheidung hilft dir:
| Zustand der Lieferung | Erste Maßnahme | Grund |
|---|---|---|
| Karton ist trocken und unbeschädigt | Während der ersten Erwärmung verpackt lassen | Verringert Verunreinigungen und abrupte Temperaturveränderungen |
| Karton ist eingedrückt oder durchstochen | Fotografieren und anschließend vorsichtig prüfen | Verdeckte Risse oder Verformungen sind möglich |
| Verpackung ist nass | Dokumentieren Sie den Zustand und wenden Sie sich an den Verkäufer oder Hersteller | Feuchtigkeit kann das Trägerpapier, den Klebstoff oder die Eignung des Untergrunds beeinträchtigen |
| Die Fliesen sind einzeln verpackt | Befolgen Sie die Anweisungen des Herstellers zum Öffnen der Verpackung | Die Innenverpackung kann Teil der empfohlenen Akklimatisierung sein |
| Kondenswasser ist sichtbar | Brechen Sie den Vorgang ab und lassen Sie die Bedingungen sich stabilisieren | Die Montage auf Kondenswasser kann die Haftung beeinträchtigen |
| Die Anleitung schreibt das Auspacken vor | Packen Sie die Fliesen aus und stapeln Sie sie wie angegeben | Die produktspezifischen Anweisungen sind maßgeblich |
„Versiegelt“ bedeutet nicht automatisch „richtig akklimatisiert“. Ein dicht gepackter Karton verhält sich wie eine Kühlbox. Sein Inneres kann der Umgebungstemperatur noch viele Stunden hinterherhinken.
Deshalb sollte die verstrichene Zeit mit der gemessenen Fliesentemperatur abgeglichen werden und nicht als alleiniger Maßstab gelten.
Warum sollten die Fliesen flach gelagert werden?
Durch das flache Stapeln wird die Fliese über ihre gesamte Fläche abgestützt und ein durch die Schwerkraft verursachtes Verbiegen begrenzt. Das ist besonders bei flexiblen Vinylprodukten und strukturierten Spritzschutzplatten wichtig, die nach einem kalten Transport vorübergehend gebogen bleiben können.
Legen Sie keine schweren oder improvisierten Gewichte auf dekorative Fliesen, es sei denn, der Hersteller erlaubt dies. Zu viel Druck kann geprägte Oberflächen beschädigen, Schaumschichten zusammendrücken oder Muster von einer Fliese auf die nächste übertragen.
Bei einer sorgfältigen Prüfung lässt sich vorübergehendes Einrollen von einer bleibenden Verformung unterscheiden:
- Vorübergehendes Einrollen: Die Fliese wird zunehmend wieder glatt, während sich ihre Temperatur der Raumtemperatur nähert.
- Bleibendes Einrollen: Die Fliese bleibt auch nach einer den Herstellervorgaben entsprechenden Konditionierung verformt.
- Knicke: Eine scharfe Linie oder Falte bleibt sichtbar und geht nicht zurück.
- Ablösung der Schichten: Die dekorative Oberfläche, der Kern, die Rückseite oder der Klebstoff scheinen sich abzulösen.
- Risse: Die Oberfläche oder der Fliesenkörper weist Brüche, Weißverfärbungen oder Risse auf.
Vorübergehendes Einrollen spricht dafür, zunächst abzuwarten. Knicke, Risse oder eine Ablösung der Schichten sind in der Regel ein Grund, den Vorgang abzubrechen und den Hersteller oder Händler zu kontaktieren.
Warum sind Heizgeräte und Heizmatten riskant?
Konzentrierte Wärme kann die freiliegende Oberfläche deutlich schneller erwärmen als das Innere der Fliese. Außerdem können dabei lokale Überhitzungen entstehen, die die zulässigen Lagertemperaturen überschreiten, während der übrige Teil des Produkts noch kalt ist.
Stellen Sie sich einen gefrorenen Auflauf unter dem Backofengrill vor. Die Oberfläche kann heiß werden, während das Innere kalt bleibt. Eine selbstklebende Fliese kann einen ähnlichen Temperaturunterschied aufweisen, auch wenn sich Materialien und Risiken unterscheiden.
- Örtliche Erweichung: Ein Bereich wird flexibel, während ein anderer steif bleibt.
- Veränderungen am Klebstoff: Übermäßige Wärme kann die Klebrigkeit, das Ablöseverhalten der Rückseite oder die Verteilung des Klebstoffs verändern.
- Spannungen durch unterschiedliche Ausdehnung: Die verschiedenen Schichten können sich unterschiedlich stark ausdehnen.
- Irreführende Messwerte: Eine warme Oberfläche kann einen kälteren Kern oder eine darunterliegende kalte Fliese verdecken.
- Dauerhafte Verformung: Wärme und eine ungleichmäßige Auflage können das Produkt verformen.
Eine gleichmäßige Temperierung im Raum schafft optimale Bedingungen, da sie große Temperaturunterschiede grundlegend reduziert. Sie dauert länger als eine direkte Erwärmung, lässt sich aber deutlich leichter dokumentieren und wiederholen.
Was ist die Bewertung der Erholung nach einer Kältelieferung?
Die Bewertung der Erholung nach einer Kältelieferung, kurz CDRS, ist eine Prüfung in sechs Punkten mit den Ergebnissen Weiterarbeiten, Warten oder Rückgabe. Sie ersetzt nicht die Herstelleranweisungen, sondern ordnet die Informationen, die für ihre Anwendung erforderlich sind.
Für jeden bestätigten positiven Punkt gibt es einen Punkt:
| CDRS-Kategorie | In Ordnung | Warten | Zurückgeben oder eine Prüfung durch den Hersteller anfordern |
|---|---|---|---|
| Zustand der Verpackung | Trocken und strukturell unbeschädigt | Leichte Schäden, die geprüft werden müssen | Durchfeuchtung, starke Quetschung oder Durchstoß bis zum Produkt |
| Temperatur der Fliese | Innerhalb des angegebenen Temperaturbereichs für die Verlegung | Unterhalb des erforderlichen Temperaturbereichs | Die Einwirkung hat eine angegebene Lagergrenze überschritten |
| Ebenheit | Liegt innerhalb der Produkttoleranz | Die Wölbung geht während der Temperierung zurück | Bleibende Knickstelle, Wölbung oder Verformung |
| Flexibilität | Verhält sich bei geeigneter Temperatur normal | Noch kalt oder steif | Risse, Brüche oder Ablösung der Schichten |
| Zustand des Klebers | Sauber und gleichmäßig | Haftung unklar, solange die Fliese kühl ist | Verunreinigung, fehlender Klebstoff, Übertragung oder Ablösung |
| Anweisungen | Das genaue Dokument wurde gefunden und die Anforderungen werden erfüllt | Die Anforderungen sind noch nicht überprüft | Der Hersteller gibt an, dass die Einwirkung eine Ablehnung erfordert |
- Sechs bestätigte positive Punkte: Fahren Sie mit einem Test an einer unauffälligen Stelle fort, nicht direkt mit der vollständigen Verlegung.
- Ein oder mehrere Punkte mit „Warten“: Weiter langsam temperieren und erneut prüfen.
- Bei einem Rückgabegrund: Brechen Sie die Montage ab und bewahren Sie die Verpackung auf.
- Fehlende Anleitung: Betrachten Sie das Ergebnis als unvollständig, auch wenn sich die Fliese warm anfühlt.
- Unbekannte Frosteinwirkung: Fragen Sie beim Hersteller nach, ob für das Produkt eine angegebene Mindestlagertemperatur gilt.
CDRS ist eine standardisierte Bewertung, keine Laborzertifizierung. Der Nutzen liegt darin, zu verhindern, dass ein positives Anzeichen – etwa ein warmer Raum – mehrere ungeklärte Risiken überlagert.
Was ist, wenn die selbstklebende Fliese gefroren geliefert wurde?
Biegen, lösen, rollen oder montieren Sie eine Fliese nicht, solange sie gefroren ist oder vermutlich gefroren war. Bringen Sie das Paket ins Haus, dokumentieren Sie seinen Zustand und lassen Sie es unter den vom Hersteller vorgegebenen Bedingungen langsam wieder auf Temperatur kommen.
- Festgestelltes Einfrieren: Die Fliese oder das Paket wurde nachweislich auf 32 °F oder darunter gemessen.
- Wahrscheinliches Einfrieren: Sendungsverfolgung und Wetteraufzeichnungen belegen eine längere Einwirkung von Temperaturen unter dem Gefrierpunkt.
- Kalt bei Berührung: Die Fliese fühlt sich sehr kalt an, aber es wurde keine Temperatur gemessen.
- Verstoß gegen die Lagergrenze: Die Einwirkung lag unter der vom Hersteller angegebenen Mindesttemperatur, die über oder unter 32 °F liegen kann.
Diese Kategorien sind nicht gleichzusetzen. Durch Berühren lässt sich die Materialtemperatur nicht zuverlässig bestimmen, und die Außentemperatur belegt nicht die Temperatur im Inneren der Fliese.
Wenn der Hersteller ein Einfrieren untersagt, wird der Verstoß durch das Erwärmen der Fliese nicht rückgängig gemacht. Wenden Sie sich vor der Montage an den Hersteller und bewahren Sie Fotos, Etiketten, Quittungen sowie Wetter- oder Versandnachweise auf.
Was ist, wenn die Fliesen gewölbt sind oder sich der Klebstoff hart anfühlt?
Warten Sie, bis die Fliese innerhalb des angegebenen Temperaturbereichs liegt, bevor Sie ihre Flexibilität oder Klebkraft beurteilen. Kälte kann sowohl die Fliese selbst als auch den Klebstoff fester erscheinen lassen.
Berühren Sie den Klebstoff nicht wiederholt, um ihn zu „testen“. Hautfett, Staub und Fasern können die nutzbare Kontaktfläche verringern.
- Erholung prüfen: Halten Sie fest, ob die Wölbung abnimmt, während sich die Temperaturen angleichen.
- Trennfolie prüfen: Achten Sie auf Ablösungen, Falten, Feuchtigkeit oder Klebstoffübertragungen.
- Muster vergleichen: Untersuchen Sie nach der Temperaturanpassung Fliesen vom Rand und aus der Mitte des Kartons.
- Reststück verwenden: Falls zulässig, können Sie die Klebkraft prüfen, ohne eine für die Montage benötigte Fliese zu verunreinigen.
- Verdeckten Test durchführen: Bringen Sie eine Fliese auf einer ordnungsgemäß vorbereiteten Fläche an und prüfen Sie ihre Ränder zum vorgesehenen Zeitpunkt.
Eine hohe Klebkraft beim Fingertest garantiert keine dauerhafte Haftung. Eine geringe Klebkraft beim Fingertest weist nicht automatisch auf einen Fehler hin. Die Haftung hängt außerdem von der Chemie des Untergrunds, der Oberflächenenergie, der Sauberkeit, der Feuchtigkeit, dem Anpressdruck und der Einwirkzeit ab.
Ändert die Art des Raums die Entscheidung?
Ja. Badezimmer, Böden und Rückwände setzen selbstklebende Produkte unterschiedlichen Belastungen und möglichen Fehlerursachen aus. Vergewissern Sie sich, dass das konkrete Produkt für den vorgesehenen Einsatzort zugelassen ist.
- Badezimmerprojekt: Prüfen Sie die Vorgaben zu Feuchtigkeit, Spritzwasserbereichen und Untergründen. „Wasserfeste Fliese“ bedeutet nicht unbedingt, dass Wasser unbedenklich durch die Fugen gelangen kann.
- Bodenfliese: Vergewissern Sie sich, dass es sich um einen elastischen Bodenbelag und nicht um eine dekorative Wandverkleidung handelt. Prüfen Sie die Anforderungen an Ebenheit und Feuchtigkeit des Untergrunds, rollende Belastungen, die Nutzung sowie die Bodentemperatur.
- Fliese für die Küchenrückwand: Prüfen Sie die Vorgaben zu Hitzeabständen, zur Aushärtung gestrichener Wände, zur Oberflächenstruktur, zu Fett und zu direktem Wasserkontakt.
- Frisch gestrichene Wand: Bei frischen Anstrichen reicht es nicht, dass die Oberfläche trocken wirkt. Beachten Sie die Aushärtezeiten und führen Sie die verdeckten Haftungsprüfungen aus Selbstklebende Fliesen nach dem Streichen: Wie lange sollten Sie warten?.
- Reparatur mit Spachtelmasse: Beziehen Sie Spachtelmasse und Grundierung als Teil des Haftverbunds ein. Um zwischen einem Versagen des Klebstoffs und einem Versagen von Grundierung oder Spachtelmasse zu unterscheiden, befolgen Sie die Prüfmethode in Wir haben selbstklebende Fliesen auf Spachtelmasse getestet.
- Allgemeine Anleitung zum Anbringen eines Küchenrückwands: Sobald die Einsatzbereitschaft bestätigt ist, folgen Sie der Reihenfolge für Vorbereitung, Planung, Anbringen und abschließende Arbeiten in Selbstklebende Fliesen anbringen: Anleitung und beste Designs 2025.
Bei einem Wandprodukt wie Schneeweiße Keramiksollten Sie zunächst das Format der ablösbaren, selbstklebenden Wandfliese und die Angaben zum vorgesehenen Raum prüfen und anschließend mit den genauen technischen Anweisungen abgleichen. Entscheidend ist die Eignung für den jeweiligen Einsatzort – nicht das Aussehen oder die Geschwindigkeit. In der Produktbeschreibung wird sie als ablösbare, selbstklebende Wandfliese geführt. Die genauen technischen Anweisungen müssen jedoch weiterhin die zulässigen Temperaturen und Untergründe festlegen.
Diese begriffliche Unterscheidung ist wichtig: Eine Produktseite beschreibt den vorgesehenen Verwendungszweck, ein technisches Datenblatt legt die Bedingungen für die Installation fest.
Wenn Sie ein anderes fugenmörtelfreies Wandfliesenformat vergleichen, bieten die Produktdetails von Dual Ceramics eine hilfreiche Grundlage, um den vorgesehenen Einsatz an Wänden, die ablösbare Ausführung, Angaben zur Feuchtigkeitsbeständigkeit und die Oberfläche zu prüfen, bevor Sie die produktspezifischen Installationsgrenzen kontrollieren.
Wann sind selbstklebende Fliesen bereit für die Installation?
Reichen 24 oder 48 Stunden aus, wenn sich die Fliese wärmer anfühlt, der Boden oder die Wand aber noch kalt ist?
Der Index für Installationsbereitschaft ersetzt eine pauschale Zeitangabe durch messbare Kriterien für Temperatur, Material, Untergrund und Haftung.
Selbstklebende Fliesen sind erst dann bereit, wenn alle Anforderungen des Herstellers erfüllt sind und ein kontrollierter Test ein akzeptables Anbringen sowie ein unauffälliges Verhalten der Kanten zeigt. Eine einzelne Zeitvorgabe kann das Gewicht des Kartons, die Raumbedingungen, die Temperatur des Untergrunds, die Klebstoffzusammensetzung oder die winterliche Kälte nicht berücksichtigen.
Die zentrale Messgröße ist die thermische Angleichung– der Zeitpunkt, an dem sich Fliese und Untergrund ausreichend an stabile Raumverhältnisse angenähert haben, um die Produktanweisungen zu erfüllen und einen großen Temperaturunterschied während der Installation zu vermeiden.
Für eine thermische Angleichung sind nicht drei identische Messwerte erforderlich. Entscheidend sind stabile, zulässige Messwerte, die im Rahmen des für das Produkt angegebenen Bereichs bewertet werden.
Was ist der Index für Installationsbereitschaft?
Der Index für Installationsbereitschaft, kurz IRI, ist eine Prüfung anhand von fünf Kriterien, auf die eine separate Bestätigung der Dauerhaftigkeit folgt. So werden vage Eindrücke in dokumentierte Entscheidungen für „Anbringen“ oder „Warten“ übersetzt.
| IRI-Kriterium | Erforderliche Nachweise | Warum es wichtig ist |
|---|---|---|
| Einhaltung der Herstellervorgaben | Die richtigen Anweisungen liegen vor; Vorgaben für Lagerung und Installation sind erfüllt | Die produktspezifischen Grenzen sind maßgeblich |
| Thermische Angleichung | Die Messwerte von Raum, Fliese und Untergrund sind stabil und liegen im zulässigen Bereich | Verringert das Risiko durch kaltes Material und kalte Oberflächen |
| Erholung des Materials | Die Fliese ist ausreichend plan, flexibel, unbeschädigt und frei von Verunreinigungen. | Unterscheidet eine vorübergehende Steifigkeit von Schäden |
| Bereitschaft des Untergrunds | Der Untergrund ist sauber, trocken, tragfähig, glatt und geeignet. | Der Klebstoff kann einen nicht tragfähigen Untergrund nicht ausgleichen. |
| Kontrolliertes Anbringen | Der richtige Druck, eine präzise Ausrichtung und sofortiger Kontakt an den Kanten | Haftklebstoffe benötigen einen vollflächigen Kontakt mit dem Untergrund. |
| Überprüfung der Haltbarkeit | Überprüfung der Kanten nach 1 Stunde, 24 Stunden, 7 Tagen und 30 Tagen | Zeigt, ob das Prüfstück den Kontakt dauerhaft gehalten hat |
Hier ist eine wichtige Korrektur nötig: Die Haftung an den Kanten nach 30 Tagen kann nicht bestimmen, ob die heutige Fliese bereits verlegt werden kann. Damit lässt sich jedoch eine Eignungsprüfung oder ein kleinflächiger Test nach dem Anbringen bestätigen.
Für die sofortige Entscheidung, ob du fortfahren oder warten solltest, müssen die ersten fünf Prüfpunkte erfüllt sein. Die Prüfung nach 30 Tagen bestätigt anschließend, ob die getestete Kombination stabil geblieben ist.
Diese Unterscheidung verhindert Zirkelschlüsse. Eine Beobachtung aus der Zukunft kann nicht als Beleg für die Gegenwart dienen.
Warum kann nicht für jedes Produkt dieselbe Akklimatisierungszeit gelten?
Hersteller geben unterschiedliche Anforderungen vor, weil sich ihre Materialien, Klebstoffe, Verpackungen und vorgesehenen Untergründe unterscheiden.
So wurde in den Verlegeanleitungen von Armstrong für Bodenbeläge im Wohnbereich in der Vergangenheit beispielsweise festgelegt, dass Bodenbeläge und Klebstoffe vor, während und nach der Verlegung bei kontrollierten Temperaturen gelagert beziehungsweise gehalten werden müssen.3 FloorPops veröffentlicht eigene Hinweise zur Vorbereitung, Temperatur und Akklimatisierung seiner selbstklebenden Bodenbeläge.4
Diese Dokumente sind als produktspezifische Primärquellen zu lesen – nicht als Beweis dafür, dass für jede Fliese dieselben Grenzwerte gelten.
Nach allgemeinem Branchenverständnis haben die Anweisungen des Herstellers Vorrang vor einer pauschalen Regel aus einem Blog. Ein Zeitraum von 48 Stunden kann dennoch bei der Planung helfen. Wie du dieses Zeitfenster in eine klare Reihenfolge für Vorbereitung und Problemlösung verwandelst, erfährst du in Wir haben die 48-Stunden-Regel für selbstklebende Fliesen getestet. Die dort genannten Zeitangaben solltest du erst anwenden, wenn die genauen Grenzwerte für dein Produkt bestätigt sind.
Die bessere Frage lautet nicht: „Sind 48 Stunden vergangen?“ Sondern: „Was hat sich in diesen 48 Stunden verändert, und waren alle erforderlichen Bedingungen erfüllt?“

Wie sollte ein Akklimatisierungstest mit fünf Prüfpunkten aufgebaut sein?
Halte die Bedingungen bei der Ankunft sowie nach 6, 12, 24 und 48 Stunden fest. Verwende bei jedem Prüfpunkt dieselben Messgeräte, Messstellen, Untergründe, Vorbereitungsmethoden und Beschreibungen der Beobachtungen.
Ein aussagekräftiger produktbezogener Bericht muss Folgendes enthalten:
- Produktidentität: Marke, vollständiger Produktname, SKU, Abmessungen, Fliesentyp und – sofern angegeben – Aufbau des Klebstoffs.
- Rückverfolgbarkeit: Chargen-, Batch- oder Produktionscode von der Verpackung.
- Nachweise zum Transport: Sendungsverlauf, Lieferzeit, Bedingungen im Freien und gegebenenfalls Daten eines Temperatur-Loggers.
- Angaben zu den Messgeräten: Hersteller, Modell, angegebene Genauigkeit und Kalibrierungsprüfung von Thermometer und Hygrometer.
- Raumbedingungen: Temperatur und relative Luftfeuchtigkeit bei jedem Prüfpunkt.
- Materialbedingungen: Temperatur der Fliesen am Kartonrand und in der Kartonmitte.
- Bedingungen des Untergrunds: Oberflächentemperatur, Material, Beschichtung, Feuchtigkeitszustand und Vorbereitung.
- Anwendungskontrolle: Rollengewicht, Anzahl und Richtung der Durchgänge, Druckausübung und Verlegezeit.
- Prüfzeitplan: Beobachtungen nach einer Stunde, 24 Stunden, sieben Tagen und 30 Tagen.
- Einschränkungen: Stichprobengröße, fehlende Labor-Konditionierung, Messunsicherheit und die Unmöglichkeit, jede mögliche Belastung während des Versands nachzustellen.
Ohne diese Angaben lässt sich ein Test weder empirisch belegen noch mit einem anderen Test vergleichen.
Was sollte das Protokoll der Rohmessdaten enthalten?
Die folgende Tabelle enthält die mindestens erforderliche, nachvollziehbare Dokumentation. „NR“ bedeutet „nicht erfasst“, nicht „nicht bestanden“.
| Prüfpunkt | Raum °F | rF % | Fliesenkante °F | Fliesenmitte °F | Untergrund °F | Ebenheit | Flexibilität | Beobachtung zum Klebstoff | IRI-Status |
|---|---|---|---|---|---|---|---|---|---|
| Bei Ankunft | NR | NR | NR | NR | NR | NR | NR | NR | Nicht bewertbar |
| 6 Stunden | NR | Nicht bewertbar | |||||||
| 12 Stunden | NR | Nicht bewertbar | |||||||
| 24 Stunden | k. A. | Nicht bewertbar | |||||||
| 48 Stunden | k. A. | Nicht bewertbar | |||||||
Da keine Messwerte vorliegen, kann dieser Artikel nicht wahrheitsgemäß behaupten, dass nach 24 oder 48 Stunden erstmals alle IRI-Kriterien erfüllt waren. Das Veröffentlichen erfundener Temperatur- oder Ergebnisse zum Anheben der Kanten würde eine falsche Genauigkeit vortäuschen.
Ersetzen Sie für Ihre eigene Lieferung jeden Eintrag mit „k. A.“ durch einen unter wiederholbaren Bedingungen ermittelten Messwert. Fügen Sie Fotos hinzu und notieren Sie die genaue Uhrzeit.
Prüfen Sie, ob die Installation beginnen kann
Geben Sie alle drei gemessenen Temperaturen sowie die vom Hersteller vorgeschriebene Mindesttemperatur für die Installation ein. Bestätigen Sie anschließend die übrigen Voraussetzungen für die Einsatzbereitschaft.
Wie misst man die Fliesentemperatur richtig?
Ein Infrarotthermometer schätzt die Oberflächentemperatur anhand der abgegebenen Infrarotenergie. Es misst weder die Temperatur im Inneren des Kartons noch die Lufttemperatur oder die Klebstofftemperatur unter mehreren übereinanderliegenden Fliesen.
- Lesen Sie die Bedienungsanleitung des Messgeräts: Prüfen Sie das Verhältnis von Entfernung zu Messfleck, den Betriebsbereich, die Genauigkeit und die Einstellung des Emissionsgrads.
- Messen Sie eine große, matte Fläche: Vermeiden Sie nach Möglichkeit reflektierende Metallic-Muster, glänzende Oberflächen und transparente Schutzfolien.
- Halten Sie einen gleichbleibenden Abstand ein: Das Thermometer erfasst den Durchschnitt einer Fläche, die mit zunehmender Entfernung größer wird.
- Nehmen Sie mehrere Messungen vor: Messen Sie die Mitte und die Ecken der Fliese, statt sich auf einen einzigen Messpunkt zu verlassen.
- Prüfen Sie die Mitte des Kartons: Fliesen am Rand erwärmen sich in der Regel früher als dicht gepackte Fliesen in der Mitte.
- Überprüfen Sie fragliche Messwerte: Verwenden Sie einen geeigneten Kontaktfühler oder, sofern vom Hersteller des Messgeräts zugelassen, vorübergehend eine matte Referenzfläche.
- Halten Sie die Messunsicherheit fest: Eine Anzeige von 68°F bedeutet nicht, dass die tatsächliche Temperatur genau 68.0°F beträgt.
Emissionsgrad bezeichnet die Fähigkeit einer Oberfläche, Infrarotenergie abzugeben. Glänzende oder reflektierende Oberflächen können irreführende Infrarotmesswerte liefern, da das Messgerät möglicherweise von nahe gelegenen Objekten reflektierte Energie erfasst.
Die Dokumentation von Fluke zu Infrarotthermometern erläutert sowohl das Verhalten des Verhältnisses von Entfernung zu Messfleck als auch die Bedeutung des Emissionsgrads.5 Befolgen Sie die Anleitung für Ihr konkretes Modell, statt Einstellungen von einem nicht dafür vorgesehenen Gerät zu übernehmen.
Eine praktische Methode besteht darin, wiederholte Messungen an denselben markierten Stellen zu vergleichen. Der Trend kann aussagekräftiger sein als ein einzelner absoluter Wert – besonders in der Nähe eines vom Hersteller festgelegten Betriebsgrenzwerts.
Warum muss die Temperatur des Untergrunds separat gemessen werden?
Die Wand oder der Boden kann auch dann noch kalt sein, wenn sich die Raumluft bereits erwärmt hat. Außenwände, Betonplatten, unbeheizte Kriechkeller, Garagen und Räume über offenen Fundamentbereichen sind typische Beispiele.
Wenn warme Fliesen auf einem kalten Untergrund verlegt werden, kann sich die Benetzung des Klebers an der Klebefuge verringern. Das Raumthermostat kann diesen Zustand nicht anzeigen.
- Raumtemperatur: Die Luft rund um den Arbeitsbereich.
- Fliesentemperatur: Die tatsächliche Oberflächentemperatur der Fliese, einschließlich eines Exemplars aus der Mitte des Kartons.
- Untergrundtemperatur: Die Temperatur der Wand oder des Bodens, an dem der Kleber haften soll.
Stellen Sie sich eine Küche im Nordosten der USA mit einer angenehmen Lufttemperatur von 70 °F vor. Eine Außenwand aus Mauerwerk kann in einer Ecke trotzdem deutlich kälter sein. Die Raumtemperatur ist in Ordnung, die Klebefläche möglicherweise nicht.
Deshalb bilden alle drei Messwerte die quantitative Grundlage. Ein Messwert kann die beiden anderen nicht ersetzen.
Welche Rolle spielt die relative Luftfeuchtigkeit?
Die relative Luftfeuchtigkeit, kurz RH, gibt an, wie viel Wasserdampf sich im Verhältnis zur maximalen Aufnahmefähigkeit der Luft bei dieser Temperatur in der Luft befindet. Sie hilft dabei, instabile Umgebungsbedingungen und das Risiko von Kondensation zu erkennen.
Die RH beweist nicht unmittelbar, dass eine Wand oder Betonplatte trocken ist. Sie beschreibt die Umgebungsbedingungen und ist kein Feuchtigkeitstest für den Untergrund.
- Schnelle Temperaturänderungen: Kalte Materialien, die in warme, feuchte Luft gebracht werden, können an der Oberfläche Kondenswasser bilden.
- Feuchtigkeit an Außenwänden: Kalte Ecken können näher am Taupunkt bleiben.
- Feuchtigkeit im Beton: Die Feuchtigkeit einer Betonplatte muss mit einem geeigneten Test geprüft werden – ein tragbares Raumhygrometer reicht dafür nicht aus.
- Badezimmerbedingungen: Eine hohe relative Luftfeuchtigkeit im Raum kann zusammen mit Spritzwasser und unzureichend abgedichteten Fugen problematisch sein.
- Saisonale Bedingungen: Heizsysteme können die Luft stark austrocknen, während der Untergrund kalt bleibt.
Bei hoher Luftfeuchtigkeit können Sie die dokumentierten Anzeichen für Haftungsprobleme und den auf Kondensation ausgerichteten Ansatz aus dem Beitrag Wir haben die Haftung geprüft: Selbstklebende Fliesen bei sommerlicher Luftfeuchtigkeit als ergänzende diagnostische Grundlage heranziehen. Luftfeuchtigkeit und Temperatur sollten gemeinsam beurteilt werden, da Kondensation von beidem abhängt.
Wie ist ASTM F710 anzuwenden?
ASTM F710 ist die Standardpraxis zur Vorbereitung von Betonböden für die Verlegung elastischer Bodenbeläge. Sie behandelt die Vorbereitung von Betonuntergründen und damit verbundene Bedingungen für elastische Bodenbeläge.6
Sie ist für selbstklebende elastische Vinylbodenfliesen relevant, die auf Beton verlegt werden. Sie ist jedoch kein universeller Verlegestandard für dekorative Wandpaneele, Küchenrückwände aus Trockenbau oder jedes Klebeprodukt.
- Zustand des Betons: Die Betonplatte muss für die Verlegung eines Bodenbelags geeignet sein.
- Verunreinigungen auf der Oberfläche: Farbe, Nachbehandlungsmittel, Staub, Öl und andere haftungshemmende Rückstände müssen überprüft werden.
- Ebenheit und Festigkeit: Klebstoff kann keine schwache, raue oder sich zersetzende Oberfläche ausgleichen.
- Feuchtigkeit: Die Feuchtigkeit im Beton muss mit den vom Bodenbelagshersteller vorgeschriebenen Methoden geprüft werden.
- Verträglichkeit: Vorbereitungsprodukte und Grundierungen müssen für das Bodensystem zugelassen sein.
Ein weit verbreiteter Irrglaube ist, dass eine schwerere Walze mangelhaften Beton ausgleichen kann. Das ist nicht der Fall. Druck kann den Kontakt verbessern, aber er macht aus Staub, Feuchtigkeit oder schwachem Oberflächenmaterial keinen tragfähigen Untergrund.
Wie lässt sich ein gleichmäßiger Anpressdruck sicherstellen?
Verwenden Sie die vom Hersteller angegebene Walze. Halten Sie ihr Gewicht, die Anzahl der Überrollungen, die Richtung und die Zeitspanne nach dem Verlegen fest.
Eine Bodenbelagswalze übt gleichmäßig verteilten Druck aus, damit ein Haftklebstoff eng am Untergrund anliegt. Handdruck lässt sich nur schwer standardisieren, besonders an Ecken und Fugen.
- Nur ein Untergrundsystem vorbereiten: Vergleichen Sie keine Fliesen auf unterschiedlich gestrichenen, gereinigten oder grundierten Oberflächen.
- Einheitliche Probengrößen verwenden: Größere Fliesen können anderen Kräften ausgesetzt sein, die zu einem Aufwölben führen.
- Walzbahnen markieren: Wenden Sie bei jeder Probe dasselbe Walzmuster an.
- Zeitabläufe einheitlich halten: Walzen Sie jede Fliese innerhalb desselben Zeitintervalls nach dem Verlegen.
- Einseitige Belastung an den Rändern vermeiden: Drücken Sie nicht wiederholt auf eine angehobene Ecke, während andere unberührt bleiben.
- Druckmethode dokumentieren: Geben Sie an, ob für den Test die vom Hersteller angegebene Walze oder eine andere Methode verwendet wurde.
Gleichmäßiger Druck garantiert keine gleichen Ergebnisse. Er eliminiert eine wichtige Variable, sodass sich temperaturbedingte Beobachtungen leichter beurteilen lassen.

Wie sollte die Haftung an den Rändern geprüft werden?
Prüfen Sie dieselben markierten Stellen nach einer Stunde, 24 Stunden, sieben Tagen und 30 Tagen. Heben Sie eine haftende Kante nicht immer wieder an, um zu sehen, ob sie fest haftet; eine zerstörende Prüfung verändert die Probe.
| Prüfzeit | Was ist zu dokumentieren | Was sich möglicherweise zeigt |
|---|---|---|
| 1 Stunde | Erster Kontakt, Aufwölbung an den Ecken, Blasen, Verrutschen | Problem beim Verlegen oder bei der unmittelbaren Benetzung des Klebstoffs |
| 24 Stunden | Anheben der Kanten, Bewegung an den Fugen, Abzeichnung | Frühzeitiges Haftungs- oder Untergrundproblem |
| 7 Tage | Wiederkehrende Aufwölbungen an den Ecken, Lücken, Bewegung unter normalen Bedingungen | Anhaltende Verformung oder schwache Haftung |
| 30 Tage | Stabiler Randbereich, fortschreitendes Ablösen, Maßveränderung | Haftungsmuster für die Produktqualifizierung |
Markieren Sie jede Ecke mit A bis D und fotografieren Sie sie aus demselben Winkel. Ein Lineal oder Maßstab sollte dabei sichtbar sein.
Für jede Messung des Ablösens an den Kanten muss ein festgelegter Grenzwert gelten. „Sieht gut aus“ lässt sich nicht mit einem anderen Prüfstück vergleichen. In einem Prüfplan könnte das maximal sichtbare Ablösen in Millimetern dokumentiert werden. Der Grenzwert für das Bestehen der Prüfung muss jedoch aus den Herstellerangaben stammen oder auf einem vorab festgelegten redaktionellen Kriterium beruhen, das eindeutig als solches gekennzeichnet ist.
Ein Heimtest mit nur einem Karton kann keine statistisch signifikante Aussage über die Produktleistung liefern. Er kann jedoch zeigen, ob diese konkrete Kombination bereits frühzeitig offensichtliche Mängel aufweist.
Was sollten Sie tun, wenn sich der Kleber weiterhin schwach anfühlt?
Stellen Sie zunächst sicher, dass sich Fliese und Untergrund innerhalb des vom Hersteller angegebenen Bereichs befinden. Prüfen Sie anschließend die Vorbereitung der Oberfläche, Verunreinigungen, Feuchtigkeit, den Anpressdruck und mögliche Produktschäden.
-
Liegt die Temperatur der Fliese noch unter dem erforderlichen Wert?
- Ja: Warten Sie unter stabilen Raumbedingungen.
- Nein: Fahren Sie mit der Prüfung des Untergrunds fort.
-
Entspricht die Temperatur des Untergrunds den Vorgaben?
- Nein: Stabilisieren Sie Raum und Untergrund.
- Ja: Fahren Sie mit der Vorbereitung der Oberfläche fort.
-
Ist die Oberfläche staubig, glänzend, fettig, strukturiert, feucht oder instabil?
- Ja: Stoppen Sie und bereiten Sie die Oberfläche gemäß der Produktanleitung vor.
- Nein: Fahren Sie mit der Materialprüfung fort.
-
Ist die Fliese gerissen, delaminiert, verunreinigt oder dauerhaft verformt?
- Ja: Sichern Sie die Belege und bitten Sie den Hersteller oder Händler um eine Prüfung.
- Nein: Fahren Sie mit der Kontrolle der Verlegung fort.
-
Wurde die vorgeschriebene Rolle oder Anpressmethode verwendet?
- Nein: Befolgen Sie die vorgegebene Methode an einem neuen Prüfstück.
- Ja: Fahren Sie mit dem Ergebnis des Testbereichs fort.
-
Hat sich bei einer korrekt angebrachten, verdeckt liegenden Testfliese die Kante abgelöst?
- Ja: Stoppen Sie die vollständige Verlegung und ermitteln Sie die Ursache des Fehlers.
- Nein: Beobachten Sie das Ergebnis weiterhin gemäß dem angegebenen Zeitplan.
Verwenden Sie keinen Baukleber, sofern der Hersteller dies nicht ausdrücklich genehmigt. Zusätzlicher Kleber kann mit der Fliese reagieren, Lösungsmittel einschließen, den Anstrich beschädigen, die Entfernung erschweren und die Verantwortung vom geprüften Verlegesystem wegverlagern.
Sollten Sie fortfahren, warten oder die Lieferung zurücksenden?
Fahren Sie nur fort, wenn alle erforderlichen Prüfpunkte erfüllt sind. Warten Sie, wenn sich das Problem möglicherweise von selbst beheben lässt. Senden Sie die Lieferung zurück oder holen Sie eine schriftliche Auskunft ein, wenn die Hinweise auf eine Beschädigung oder unzulässige Einwirkung hindeuten.
| Entscheidung | Bedingungen |
|---|---|
| Mit einer unauffälligen Fliese fortfahren | Anleitung gefunden; alle Temperaturen im zulässigen Bereich; Fliese hat sich erholt; Untergrund bereit; keine Schäden |
| Mit einer begrenzten Verlegung fortfahren | Der Test an der unauffälligen Stelle bleibt während des geplanten Beobachtungszeitraums akzeptabel |
| Warten und erneut messen | Fliese oder Untergrund ist kalt; Wölbung geht zurück; Kondensationsrisiko besteht weiterhin; Messwerte sind instabil |
| Untergrund erneut vorbereiten | Staub, Fett, Struktur, Feuchtigkeit, lose Farbe oder eine ungeeignete Beschichtung ist vorhanden |
| Hersteller kontaktieren | Lagerbedingungen unklar; Grenzwerte widersprüchlich; Klebrigkeit weiterhin ungewöhnlich; Verformung bleibt bestehen |
| Ersatz oder Rückgabe anfordern | Risse, Ablösung, Durchfeuchtung, Verunreinigung, starke Druckschäden oder eine unzulässige Frosteinwirkung sind dokumentiert |
Die sicherste Vorgehensweise mit dem geringsten Risiko ist ganz einfach: Suchen Sie die Anleitung, dokumentieren Sie alle drei Temperaturen, überprüfen Sie den Untergrund und bringen Sie eine Fliese an einer unauffälligen Stelle an.
Diese Vorgehensweise verhindert von vornherein, dass ein warmer Raum oder die verstrichene Zeit fälschlicherweise als Beweis gewertet werden.
Welche Entscheidung ist am sichersten?
Was entscheidet nach all diesen Prüfungen tatsächlich darüber, ob das Projekt beginnen kann?
Herstellerkonforme Bedingungen und das beobachtete Haftverhalten – nicht eine allgemeingültige Wartezeit – liefern die belastbare Antwort.
Eine bei kalten Temperaturen gelieferte selbstklebende Fliese ist bereit, wenn die genauen Anforderungen des Herstellers erfüllt sind, Fliese und Untergrund stabile Temperaturen im zulässigen Bereich erreicht haben, sich das Material ohne Schäden erholt hat, die Oberfläche geeignet ist und ein kontrollierter Test an einer unauffälligen Stelle ein akzeptables Verhalten zeigt.
Hier lagen keine verlässlichen Messdaten vor, anhand derer sich feststellen ließ, ob die Lieferung, 6, 12, 24 oder 48 Stunden den ersten erfolgreichen Prüfzeitpunkt darstellen. Dieses Ergebnis sollte unveröffentlicht bleiben, bis ein genaues Produkt, eine Charge, ein dokumentiertes Zustandsprotokoll, Aufzeichnungen zu den Messgeräten, eine kontrollierte Anwendung und anschließende Beobachtungen dokumentiert sind.
Diese Zurückhaltung ist hilfreicher als eine erfundene Antwort. Sie bewahrt die klare Grenze zwischen gemessener Beobachtung und Hypothese.
Bevor Sie das gesamte Projekt in Angriff nehmen:
- Laden Sie das Messprotokoll herunter oder kopieren Sie es: Notieren Sie die Messwerte für Raum, Fliesenkante, Fliesenmitte und Untergrund.
- Suchen Sie die genaue Anleitung: Überprüfen Sie SKU und Versionsstand, statt sich auf ein ähnliches Produkt zu verlassen.
- Auf Schäden prüfen: Unterscheiden Sie zwischen reversibler Steifigkeit und Rissen, Ablösung, Verunreinigung sowie anhaltender Verformung.
- Bereiten Sie eine unauffällige Stelle vor: Reinigen und behandeln Sie sie genau nach den Vorgaben.
- Mit kontrolliertem Druck anbringen: Verwenden Sie die angegebene Walze oder Druckmethode.
- Beobachten Sie die Testfliese: Überprüfen Sie sie nach einer Stunde, 24 Stunden, sieben Tagen und, sofern praktikabel, nach 30 Tagen.
Die Gesamtkosten eines DIY-Fliesenprojekts umfassen auch Ersatzmaterial, die Reparatur des Untergrunds, den Zeitaufwand und eine erneute Verlegung – nicht nur den Preis des Kartons. Eine einzelne, vermessene Testfliese hat ein deutlich besseres Kosten-Nutzen-Verhältnis, als einen vollständig misslungenen Boden oder eine ganze Rückwand zu entfernen.
Häufig gestellte Fragen
Wie lange sollten selbstklebende Fliesen nach dem Versand akklimatisieren?
Gibt es eine Wartezeit, die für jede Lieferung im Winter geeignet ist?
Am sichersten ist die Dauer, die erforderlich ist, um die genauen Produktvorgaben zu erfüllen und messbare Prüfungen der Verlegebereitschaft zu bestehen.
Für die Akklimatisierung selbstklebender Fliesen gibt es keine allgemeingültige Zeitangabe. Einige Hersteller empfehlen 24 oder 48 Stunden, während andere abweichende Vorgaben für die Anpassung an die Raumverhältnisse machen.
Messen Sie Raum, Fliese und Untergrund. Setzen Sie die Akklimatisierung fort, bis alle Messwerte stabil sind und den Vorgaben entsprechen, die Fliese ihre normale Flexibilität und Ebenheit wiedererlangt hat und eine unauffällige Teststelle fachgerecht verklebt werden kann.
Kann man kalte selbstklebende Fliesen verlegen?
Kann zusätzlicher Druck ausgleichen, dass eine Fliese noch kalt und steif ist?
Mit der Verlegung sollte gewartet werden, bis sowohl die Fliese als auch die Klebefläche die Temperaturvorgaben des Herstellers erfüllen.
Kalte Fliesen können weniger flexibel sein, und der Kleber kann sich anfangs schlechter mit dem Untergrund verbinden. Ein kalter Untergrund kann dasselbe Problem verursachen, selbst wenn sich die Fliese warm anfühlt.
Versuchen Sie nicht, dies durch zusätzliches Andrücken oder Anrollen, eine Heißluftpistole oder einen nicht freigegebenen Kleber auszugleichen. Stabilisieren Sie die Bedingungen und messen Sie erneut.
Sind 24 oder 48 Stunden für die Akklimatisierung selbstklebender Fliesen besser?
Bietet doppelt so langes Warten automatisch doppelt so viel Sicherheit?
Entscheiden Sie anhand der übereinstimmenden Messwerte und der Produktvorgaben – nicht anhand der größeren Zahl.
48 Stunden bieten mehr Zeit für die Anpassung als 24 Stunden, doch keine der beiden Zeitspannen beweist, dass die Fliese verlegebereit ist. Ein kleiner Karton kann sich in einem konstant temperierten Raum schnell erwärmen. Ein dicht gepackter Karton auf einer kalten Betonplatte kann sich dagegen nur langsam erwärmen.
Nutzen Sie die Zeit für Ihre Planung. Entscheidend sind Temperatur, Materialverhalten, Bereitschaft des Untergrunds und die Haftung bei einem Test.
Welche Temperatur sollten selbstklebende Fliesen vor der Verlegung haben?
Reicht Raumtemperatur aus, oder muss die Fliese selbst eine bestimmte Temperatur erreichen?
Fliese und Untergrund müssen innerhalb des vom Hersteller genau angegebenen Temperaturbereichs für die Verlegung liegen.
Übernehmen Sie nicht einfach einen allgemeinen Temperaturwert einer anderen Marke. Erfassen Sie Raumtemperatur, Fliesentemperatur und Untergrundtemperatur getrennt und vergleichen Sie alle drei Werte mit den aktuellen Anweisungen für Ihre SKU.
Wenn die Dokumentation fehlt oder unklar ist, bitten Sie den Hersteller vor der Verlegung um eine schriftliche Auskunft.
Macht Frost den Kleber selbstklebender Fliesen dauerhaft unbrauchbar?
Kann sich eine gefrorene Lieferung wieder erholen, oder muss sie immer zurückgesendet werden?
Das hängt von der Klebstoffformulierung und den vom Hersteller angegebenen Lagerbedingungen ab.
Eine durch Kälte bedingte Steifheit kann sich beim langsamen Erwärmen teilweise wieder zurückbilden. Wurde die Lieferung jedoch unzulässiger Kälteeinwirkung ausgesetzt oder bleiben Verhärtungen, Klebstoffübertragungen, Risse, Ablösungen oder Verformungen bestehen, muss der Hersteller den Fall prüfen.
Gehen Sie nicht davon aus, dass wiedergewonnene Flexibilität beweist, dass der Kleber seine ursprüngliche Leistungsfähigkeit behalten hat.
Woran erkennt man, dass der Untergrund zu kalt ist?
Was ist, wenn das Thermostat 70°F anzeigt, sich der Boden oder eine Außenwand aber kühl anfühlt?
Messen Sie die Verlegefläche direkt mit einem geeigneten Thermometer.
Überprüfen Sie mehrere Stellen, darunter Außenecken, Randbereiche der Betonplatte, Bereiche über Kriechkellern sowie Abschnitte in der Nähe von Fenstern oder Türen. Messen Sie mit einer einheitlichen Infrarot-Methode und überprüfen Sie auffällige Messwerte nach Möglichkeit.
Eine passende Lufttemperatur macht eine zu niedrige Untergrundtemperatur nicht unproblematisch.
Sollten Sie die Kartons mit selbstklebenden Fliesen während der Akklimatisierung öffnen?
Beschleunigt das Öffnen des Kartons die Erwärmung, oder setzt es den Kleber einem vermeidbaren Risiko aus?
Befolgen Sie zunächst die Verpackungshinweise des Herstellers und wägen Sie dann Inspektion und Luftzirkulation gegen das Risiko einer Verunreinigung ab.
Trockene, unbeschädigte Kartons können während der ersten Erwärmungsphase in der Regel verschlossen bleiben. Öffnen Sie sie, wenn der Hersteller dies vorgibt, wenn sich die Außenverpackung ausreichend stabilisiert hat, um eine Inspektion zu ermöglichen, oder wenn Schäden oder Feuchtigkeit dokumentiert werden müssen.
Lassen Sie die Schutzfolien an ihrem Platz und lagern Sie die Fliesen flach.
Was sollten Sie tun, wenn sich die Ecken nach der Verlegung lösen?
Braucht eine Ecke, die sich löst, einfach mehr Druck, oder deutet sie auf ein größeres Problem hin?
Unterbrechen Sie die Arbeit und prüfen Sie Temperatur, Verunreinigungen, Feuchtigkeit, die Festigkeit des Untergrunds, Verformungen und den Anpressdruck, bevor Sie fortfahren.
Drücken oder erwärmen Sie die Ecke nicht wiederholt, ohne zunächst die Ursache zu ermitteln. Fotografieren Sie die angehobene Stelle, notieren Sie ihre Position und Größe und vergleichen Sie sie mit den anderen markierten Ecken.
Wenn sich eine ordnungsgemäß vorbereitete, verdeckt angebrachte Testfliese weiterhin anhebt, unterbrechen Sie das Projekt und wenden Sie sich an den Hersteller.
Quellen und technische Referenzen
- C. Creton, „Druckempfindliche Klebstoffe: Eine Einführung“, MRS Bulletin, 2003, 28(6), 434–439. Cambridge University Press.
- 3M, „Leistung druckempfindlicher Klebebänder“, technische Hinweise zu Oberflächenkontakt, Druck und Verarbeitungstemperatur. 3M Wissenschaft der Haftung.
- Armstrong Flooring, Installationshinweise für elastische Bodenbeläge im Wohnbereich. Bestätigen Sie das aktuelle Dokument und die produktspezifischen Temperaturanforderungen über das Technical Center von Armstrong Flooring.
- FloorPops, Installationshinweise des Herstellers und häufig gestellte Fragen zu selbstklebenden Bodenfliesen. Bestätigen Sie die Anweisungen für die genaue SKU direkt bei FloorPops.
- Fluke Corporation, Bedienungsanleitungen und Gerätespezifikationen für Infrarotthermometer der Serie 62 MAX. Dokumentation zum Fluke 62 MAX.
- ASTM International, ASTM F710, Standardverfahren zur Vorbereitung von Betonböden für die Aufnahme elastischer Bodenbeläge.


Kommentar hinterlassen
Diese Website ist durch hCaptcha geschützt und es gelten die allgemeinen Geschäftsbedingungen und Datenschutzbestimmungen von hCaptcha.