





















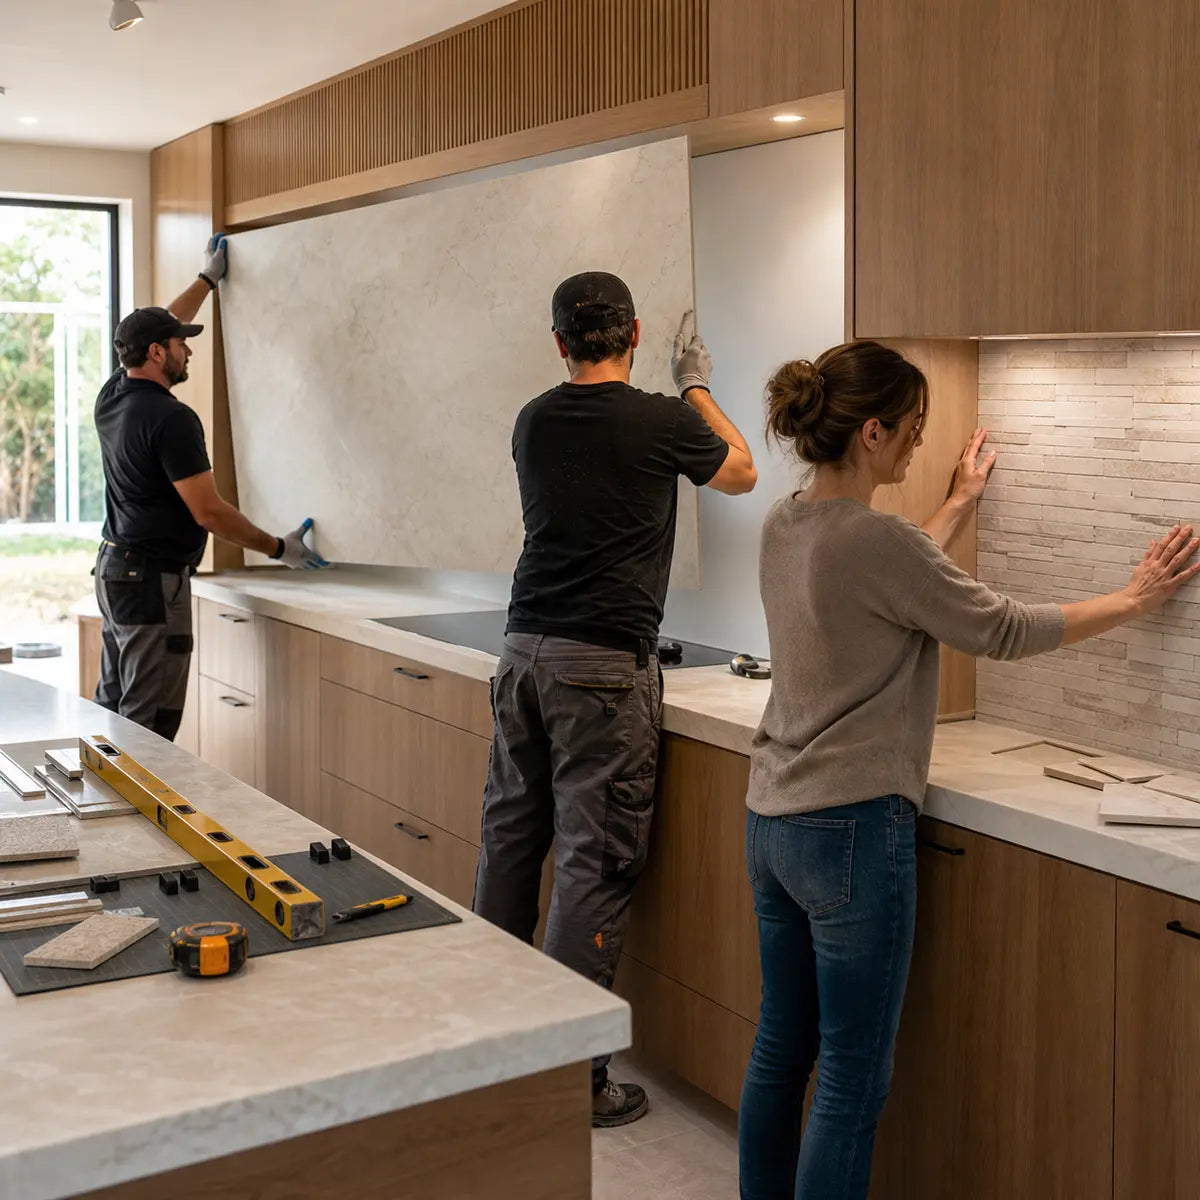
The backsplash that looks simplest on installation day may not be the simplest or least costly surface to own, repair, or remove later.
Neither porcelain slab nor composite peel-and-stick backsplash is universally better. A large-format porcelain panel may be the stronger fit when visual continuity, a permanent installation, and a fabricated surface are priorities. A composite peel-and-stick system may be the better fit when manageable panel sizes, section-by-section installation, and the possibility of replacing a smaller area matter more.
Those are conditional advantages, not category guarantees. The right choice depends on the exact product dimensions, unit weight, wall condition, access route, cutout layout, installation instructions, heat and moisture limits, labor plan, and future repair consequences.
| Decision factor | Porcelain slab or large-format porcelain panel | Composite peel-and-stick backsplash |
|---|---|---|
| Visual continuity | May cover a larger field with fewer repeated joints | Usually creates more panel-to-panel joints, though they may be tight or patterned |
| Handling | Large pieces can require trained labor, specialized tools, multiple handlers, and careful access planning | Smaller sections may be easier to carry, stage, and position |
| Wall preparation | Requires a suitable, sufficiently flat, properly prepared substrate and compatible setting system | Still requires a sound, clean, smooth, dry, compatible surface |
| Cutting and openings | Fabrication around outlets and corners can be a specialized part of the project | Individual panels may be easier to cut, but every outlet and edge still requires accurate layout |
| Cost comparison | Material price alone can omit fabrication, delivery, handling, setting materials, labor, and wall correction | Material price alone can omit preparation, primer, waste, trim, supplemental adhesive, removal, and wall repair |
| Seams | May reduce field joints but cannot be assumed to be literally joint-free | May avoid grout with some products while still containing repeated panel joints |
| Repair | Scope depends on damage type, layout, bond, substrate, and replacement material | An individual panel may sometimes be removed, but wall damage and loss of the removed panel are possible |
| Removal | Normally planned as a permanent bonded finish | Product-specific removal may be possible, but damage-free reversibility must not be assumed |
| Best early signal | You accept fabrication and installation demands to pursue a larger visual field | You prefer smaller working sections and have verified adhesive compatibility |

The most useful question is not, “Which backsplash is best?” It is: Which system fits the hardest constraint in this particular room?
Which backsplash is better: porcelain slab or peel-and-stick?
Porcelain slab is usually the better candidate for a permanent, large-format design when the wall, access route, fabrication plan, and budget can support it. Composite peel-and-stick is usually the better candidate when smaller sections and a different installation pathway are more valuable than minimizing the number of field joints.
Start by identifying the constraint you cannot easily change:
- The wall is visibly uneven or damaged.
- The backsplash has many outlets, switches, penetrations, or inside corners.
- A full-size fabricated piece cannot pass through doors, hallways, stairs, or the installation area.
- The project cannot accommodate professional fabrication or specialized handling.
- A lease or alteration agreement limits permanent wall finishes.
- The selected self-adhesive product is not approved for the wall finish, heat exposure, or moisture conditions.
- The appearance depends on uninterrupted veining or a carefully centered pattern.
- Future replacement must be limited to a small section whenever possible.
A product that performs well on five secondary criteria can still be the wrong choice if it fails the one criterion that controls the project. For example, a porcelain panel may offer the larger visual field you want, yet become impractical if the fabricated piece cannot reach the wall without an extra seam. A peel-and-stick panel may appear easy to install, yet become unsuitable if the painted surface is weak, textured, contaminated, damp, or outside the manufacturer’s instructions.
That is why we recommend eliminating incompatible options before comparing colors or advertised material prices.
Use this project-fit decision aid
| Project condition | Mark P when… | Mark S when… | Mark Verify when… |
|---|---|---|---|
| Visual goal | A larger uninterrupted field is a leading priority | A repeated panel pattern or smaller sections are acceptable | You have not drawn the actual joint layout |
| Labor | Qualified fabrication and installation are within scope | You plan a section-by-section installation permitted by the instructions | Required skills, tools, or installer qualifications are unknown |
| Wall | The proposed porcelain assembly has been approved for the inspected substrate | The adhesive product explicitly accepts the cleaned and prepared wall | The wall is loose, uneven, damp, textured, contaminated, or damaged |
| Access | The fabricated pieces can be delivered and maneuvered safely | Smaller packaged panels fit the access route | Doorways, turns, counters, appliances, and staging space have not been measured |
| Openings | Outlet and switch fabrication has been planned before production | Individual panel cuts fit your available tools and skill | Electrical openings or fragile cut geometry remain unresolved |
| Future intervention | You accept that a bonded large-format finish may require broader work to replace | Smaller replaceable sections are valuable | Matching replacement stock and removal consequences are unknown |
| Property rules | Permanent work is authorized | Self-adhesive wall covering is explicitly allowed | Written approval or restoration requirements are missing |
| Heat and moisture | The entire specified assembly is approved for the location | The exact adhesive panel is approved for the exposure | Product limits and appliance clearances have not been checked |
Interpret the result this way:
- Three or more P marks and no unresolved stop condition: investigate porcelain slab quotes and fabrication layouts first.
- Three or more S marks and no unresolved stop condition: investigate documented composite peel-and-stick systems first.
- A close result: price both complete scopes using the same wall measurements and exclusions.
- Any Verify mark involving wall integrity, moisture, heat, electrical openings, access, or property authorization: resolve it before selecting either system.
This is a project-screening method, not a performance rating. It cannot replace manufacturer instructions, an on-site wall assessment, or a fabricator’s review of the proposed cuts.
What are you actually comparing?
A porcelain slab and a composite peel-and-stick panel are different surface systems, not two versions of the same tile. Their dimensions, construction, attachment method, installation sequence, joint design, and removal behavior can differ materially.
A gauged porcelain tile panel or slab is a thin, large-facial-area porcelain product governed by specialized material and installation provisions. The current ANSI standard for gauged porcelain panels defines a panel or slab as having at least one square meter of facial area. That definition does not mean every product casually called a porcelain slab has identical thickness, reinforcement, handling instructions, or approved applications.
A composite peel-and-stick backsplash panel is a broader commercial category. “Composite” means the product combines multiple material layers rather than consisting of one solid material. Depending on the product, those layers might include a decorative face, polymer or resin backing, foam, pressure-sensitive adhesive, or another supporting layer.
For one documented example, the Aspect Stone product data sheet describes a panel made with a thin natural-stone face, cured resin backer, and peel-and-stick foam adhesive. The listed panel measures 5.9 by 23.6 inches. Those specifications apply to Aspect Stone, not to every rigid, flexible, vinyl, gel, metal, stone-faced, or store-branded self-adhesive backsplash.
This distinction matters because “peel-and-stick” describes an attachment concept, not a single material. Two self-adhesive products may use different:
- Panel dimensions
- Decorative layers
- Backing materials
- Adhesive chemistry
- Joint methods
- Surface preparation rules
- Paint-curing requirements
- Heat limitations
- Moisture limitations
- Cutting tools
- Repositioning windows
- Removal procedures
- Warranty conditions
Treating all peel-and-stick products as interchangeable is one of the most common comparison errors. The same applies to porcelain. A thickness, size, or handling rule taken from one porcelain-panel manual cannot automatically be assigned to another brand or format.
For a broader look at how material categories can conceal practical differences, the faux stone versus natural stone backsplash comparison provides another useful way to separate appearance from construction, installation, care, and repair.
Build a specification-verification record
Do not approve a product based only on a collection photo or category name. Record the following for each exact SKU:
| Specification to verify | Porcelain product | Peel-and-stick product |
|---|---|---|
| Manufacturer and exact product name | ||
| Current document revision date | ||
| Nominal and actual dimensions | ||
| Total thickness | ||
| Unit weight or weight per area | ||
| Reinforcement or backing | ||
| Approved wall substrates | ||
| Required wall preparation | ||
| Mortar, adhesive, primer, or supplemental adhesive | ||
| Cutting and drilling instructions | ||
| Required tools and trained labor | ||
| Joint, overlap, grout, sealant, or trim method | ||
| Heat and appliance restrictions | ||
| Moisture and location restrictions | ||
| Cleaning restrictions | ||
| Removal instructions | ||
| Warranty exclusions | ||
| Replacement stock available |
If a seller cannot provide the applicable instructions, mark the affected criteria as unknown. Do not fill the blank with a specification from a visually similar product.
How should you compare the two systems fairly?
Compare complete project scopes, not isolated product features. The fairest comparison uses the same measured wall, the same openings, the same removal scope, the same finish boundaries, and the same definition of a completed installation.
A useful comparison has four anchors:
- Cost: Everything required from wall assessment through completion and future removal.
- Weight and handling: Unit weight, piece size, access, crew, tools, staging, and cutout fragility.
- Joints and layout: Field joints, panel joints, movement joints, perimeter joints, corners, trim, outlets, and pattern alignment.
- Repair and removal: What happens after a chip, crack, loose section, stain, failed bond, moisture problem, or later renovation.
Do not let one attractive number stand in for the whole decision. A low box price does not reveal wall preparation or waste. A large nominal slab does not prove that one fabricated piece can cover the wall. A grout-free label does not mean joint-free. A removable label does not guarantee that paint, paper facing, primer, or drywall will remain intact.
The internal tile and self-adhesive surface comparison is useful for reviewing how wall condition, cleaning, cost, and repair scope can shift the answer even when two finishes serve the same decorative area.
Is porcelain slab backsplash more expensive?
Porcelain slab may have the higher total project cost, especially when fabrication, delivery, specialized handling, trained installation, and substrate correction are required. Yet there is no defensible universal price gap without current quotes for the same wall.
No authoritative dataset in the supplied research establishes a current national installed-cost average for porcelain slab versus composite peel-and-stick backsplash. Published retail prices are poor substitutes because these systems are often sold in different units and with different exclusions.
A porcelain material quote may omit:
- Site measurement or digital templating
- Slab yield and unused material
- Vein or pattern positioning
- Fabrication
- Outlet, switch, and penetration cutouts
- Edge finishing
- Freight or local delivery
- Crating and unloading
- Carry-in and staging
- Suction frames or handling equipment
- Wall flattening or substrate replacement
- Mortar and compatible installation materials
- Grout or joint materials
- Perimeter sealant
- Protection of counters, cabinets, floors, and appliances
- Qualified installation labor
- Electrical device adjustment
- Removal of the existing backsplash
- Disposal and final wall repair
A peel-and-stick material total may omit:
- Waste from pattern matching and partial panels
- Primer or approved surface treatment
- Cleaning and degreasing materials
- Repair of weak paint, loose paper, damaged drywall, or uneven tile
- Supplemental adhesive where expressly permitted or required
- Edge trim and exposed-end treatment
- Perimeter sealant where specified
- Replacement blades and cutting tools
- Outlet-device adjustment
- Labor
- Removal of the old finish
- Removal of the new panels at the end of use
- Adhesive-residue removal
- Patching, skim coating, priming, and repainting
- Spare panels for later repairs
The practical lesson is simple: the material subtotal is one row in the project cost, not the project cost itself.
The peel-and-stick versus ceramic tile cost guide can help identify labor and scope categories, but every figure still needs to be replaced with current quotes for your measured project.

Fill-in total-project-cost estimator
Use the same scope date and wall drawing for both columns. Enter zero only when the item is explicitly included elsewhere or genuinely does not apply. Write “unknown” when a cost has not been verified.
| Cost category | Porcelain slab | Composite peel-and-stick |
|---|---|---|
| Exact product quantity | $ | $ |
| Waste, pattern matching, or slab yield | $ | $ |
| Samples or mock-up | $ | $ |
| Existing backsplash removal | $ | $ |
| Wall assessment | $ | $ |
| Wall repair or substrate replacement | $ | $ |
| Flattening, skim coating, sanding, or priming | $ | $ |
| Templating or detailed layout | $ | $ |
| Fabrication and cutting | $ | $ |
| Outlet, switch, and penetration work | $ | $ |
| Mortar, adhesive, or supplemental adhesive | $ | $ |
| Grout, joint treatment, trim, or sealant | $ | $ |
| Delivery, freight, and unloading | $ | $ |
| Carry-in, staging, and protection | $ | $ |
| Installation labor | $ | $ |
| Electrical or appliance coordination | $ | $ |
| Cleanup and disposal | $ | $ |
| Spare material for future repair | $ | $ |
| Expected removal and wall restoration | $ | $ |
| Tax and permit-related charges, if applicable | $ | $ |
| Known project total | $ | $ |
| Unknown or excluded items |
Calculate each known total separately. Then count the unknown or excluded rows.
- Lower total with no major unknowns: This is the stronger current cost position.
- Lower total with several unknowns: The apparent advantage is not yet reliable.
- Similar totals: Let wall suitability, joint layout, disruption, and repair strategy decide.
- Quotes with different scopes: Return them for revision before comparing the totals.
A useful contractor question is: “What work would still be necessary before this wall is ready for your quoted installation?” That question often reveals more than asking for a lower material price.
Which is heavier: porcelain slab or composite peel-and-stick?
A full porcelain panel can be a substantial handling load, but a precise category-wide weight ratio is not available from the checked evidence. Compare exact mass per area, fabricated-piece dimensions, total piece mass, packaging, carrying equipment, and access requirements for the products under consideration.
The Crossville porcelain-panel installation manual reports average areal weights of 8.2 kg/m² for its 3+ panel and 14 kg/m² for its 5.6 mm panel. Applied mathematically to a 1-by-3-meter panel, those values equal about 24.6 kg, or 54.2 pounds, and 42 kg, or 92.6 pounds. They do not include packaging, mortar, handling frames, or other installation materials.
Those figures apply only to the cited Crossville products. They must not be transferred to a Daltile slab, another porcelain brand, or a fabricated piece of a different thickness and size.
The same manual states that Crossville’s 1-by-3-meter panels should be handled by two installers, carried perpendicular to the floor, protected at the corners, and supported with a suction-cup frame. Openings can make a panel more vulnerable during handling. A smaller fabricated backsplash section may require a different process, but that decision belongs to the fabricator and installer.
The checked Aspect Stone documents do not report exact panel mass or mass per area. That means a numeric statement such as “porcelain is five times heavier” would be invented. Ask the peel-and-stick manufacturer for a unit weight in pounds per square foot or kilograms per square meter, then compare both products on the same area basis.

Why piece size matters as much as weight
Two materials can have similar weight per square foot yet create very different installation demands.
A large piece:
- Concentrates more total mass into one handling operation.
- Requires a clear route from delivery point to wall.
- Can be difficult to turn in hallways or between counters and upper cabinets.
- May need temporary support while adhesive or mortar contact is established.
- Becomes more vulnerable around outlet cutouts and narrow connecting sections.
- Can turn a minor measurement error into loss of a much larger fabricated piece.
A smaller panel:
- Divides the field into repeatable handling units.
- May be installed around openings in stages.
- Creates more opportunities for cumulative alignment error.
- Can require many cuts and repeated pressure across the wall.
- Still depends on the wall surface holding each adhesive-backed section.
Do not infer a wall-reinforcement requirement from product weight alone. Substrate type, wall construction, fastener condition, deflection, bond system, moisture, and local requirements all affect assembly suitability. Weight is a screening input, not a structural verdict.
How do seams and visual continuity differ?
Porcelain slab can reduce the number of repeated field joints, while composite peel-and-stick panels usually divide the wall into smaller units. Neither system should be promised as completely seamless.
A backsplash contains several kinds of joints and interruptions:
- Field joint: A joint between separate pieces across the main wall area.
- Panel joint: A meeting line between self-adhesive panels.
- Grout joint: A space filled with grout where the specified tile system requires it.
- Movement joint: A flexible joint that accommodates movement at designated locations.
- Perimeter joint: The transition at a countertop, cabinet, ceiling, side wall, or termination.
- Change-of-plane joint: The junction where two wall planes meet, such as an inside corner.
- Penetration: An outlet, switch, pipe, bracket, hood component, or other opening.
- Pattern transition: A visible change caused by veining, print repeat, color variation, or panel orientation.
The Daltile Panoramic porcelain specification lists nominal formats including 63 by 126 inches at 6 mm, 64 by 127 inches at 12 mm, and 48 by 96 inches at 6 mm. Those dimensions show why a large-format product may cover a broad backsplash field with fewer pieces. They do not prove that a chosen color is available in every size or that one piece will fit the wall.
The same Daltile document lists a 1/8-inch grout-joint recommendation for the specified product. Crossville requires movement joints at restraining surfaces and changes in plane, as well as continuation of existing substrate joints through the tile work. The exact assembly may also require perimeter sealant, corner treatment, or separate fabricated pieces.
Aspect states that its Stone panels use tight butt joints and do not require grout. Its documented panel size is 5.9 by 23.6 inches, so repeated panel-to-panel joints remain part of the installed field even if they are visually tight.

Use a seam-layout planner before ordering
Draw each backsplash wall as a rectangle and add every physical interruption. Do not begin with the product dimensions. Begin with the room.
| Layout feature | Measurement or location | Why it affects the decision |
|---|---|---|
| Total wall width and height | Determines coverage and piece yield | |
| Countertop variation | Reveals whether the lower edge is level or irregular | |
| Upper-cabinet line | Establishes the visible top termination | |
| Exposed side edges | May require trim, finished edges, or careful panel endings | |
| Inside and outside corners | Introduces changes of plane and pattern transitions | |
| Outlets and switches | Creates cuts and narrow material bridges | |
| Range or cooktop zone | Adds heat and appliance-clearance questions | |
| Sink zone | Adds splash, sealant, and wall-condition questions | |
| Hood, shelf, rail, or bracket | Adds penetrations and future access needs | |
| Window or pass-through | Changes piece yield and pattern alignment | |
| Existing movement or control joints | May need to continue through the finish | |
| Planned field joints | Determines visual rhythm and replacement boundaries | |
| Pattern centerline | Controls symmetry and vein or motif placement |
Next, place proposed joints deliberately rather than accepting where the last piece happens to end.
For porcelain, ask:
- Can the primary wall be fabricated from one practical piece?
- Will outlet cutouts leave fragile bridges?
- Would dividing the wall at a corner or appliance boundary improve handling?
- Where will movement and perimeter joints remain visible?
- Does the selected pattern need bookmatching or directional alignment?
- Can the fabricated pieces reach the wall through the measured access route?
For peel-and-stick, ask:
- Does the product butt, overlap, interlock, or use another joint method?
- Where will the first full panel begin?
- Will a small starting error become obvious after several courses?
- Can the pattern continue around inside corners?
- Will narrow strips appear at the most visible edge?
- Can damaged sections be reached later without disrupting surrounding panels?
The best seam plan does not always have the fewest lines. It places required joints where they are visually calm, technically permitted, and practical for fabrication or replacement.

What installation demands should you expect?
Porcelain-panel installation generally carries greater fabrication and handling demands, while peel-and-stick shifts more responsibility to surface preparation, alignment, pressure, and product-specific adhesive rules. Neither system is installation-free.
Crossville directs that its gauged-porcelain work be completed by installers with the appropriate tools, product knowledge, training, and installation experience. This is a manufacturer requirement for the documented system, not a universal legal ban on homeowner work. It does show that large-format porcelain should not be treated like an oversized conventional wall tile.
Typical porcelain scope questions include:
- Who verifies the wall and installation assembly?
- Who creates the template or final fabrication dimensions?
- Where will cutting and drilling occur?
- How will the piece be transported and carried?
- What handling frame, suction equipment, or support is required?
- How will mortar be applied to achieve the required contact?
- How will outlets and other openings be fabricated?
- What joint and movement provisions are required?
- How will dust be controlled during fabrication or modification?
- Who accepts responsibility if the measured wall differs from the template?
Power-tool fabrication of silica-containing porcelain can create respirable crystalline silica. For covered construction employers, the OSHA respirable crystalline silica standard sets an eight-hour permissible exposure limit of 50 micrograms per cubic meter and an action level of 25 micrograms per cubic meter. It requires applicable engineering controls, work practices, and dust-control housekeeping.
That occupational standard is not a complete consumer cutting tutorial. The safe control method depends on the tool and task. A basic dust mask should not be presented as a substitute for engineering controls or a compliant employer respiratory-protection program. Confirm where and how fabrication will occur before accepting a quote that assumes on-site modification.
Peel-and-stick installation replaces mortar work with a different set of controls:
- Verify that the wall material and finish are accepted.
- Confirm paint-curing requirements.
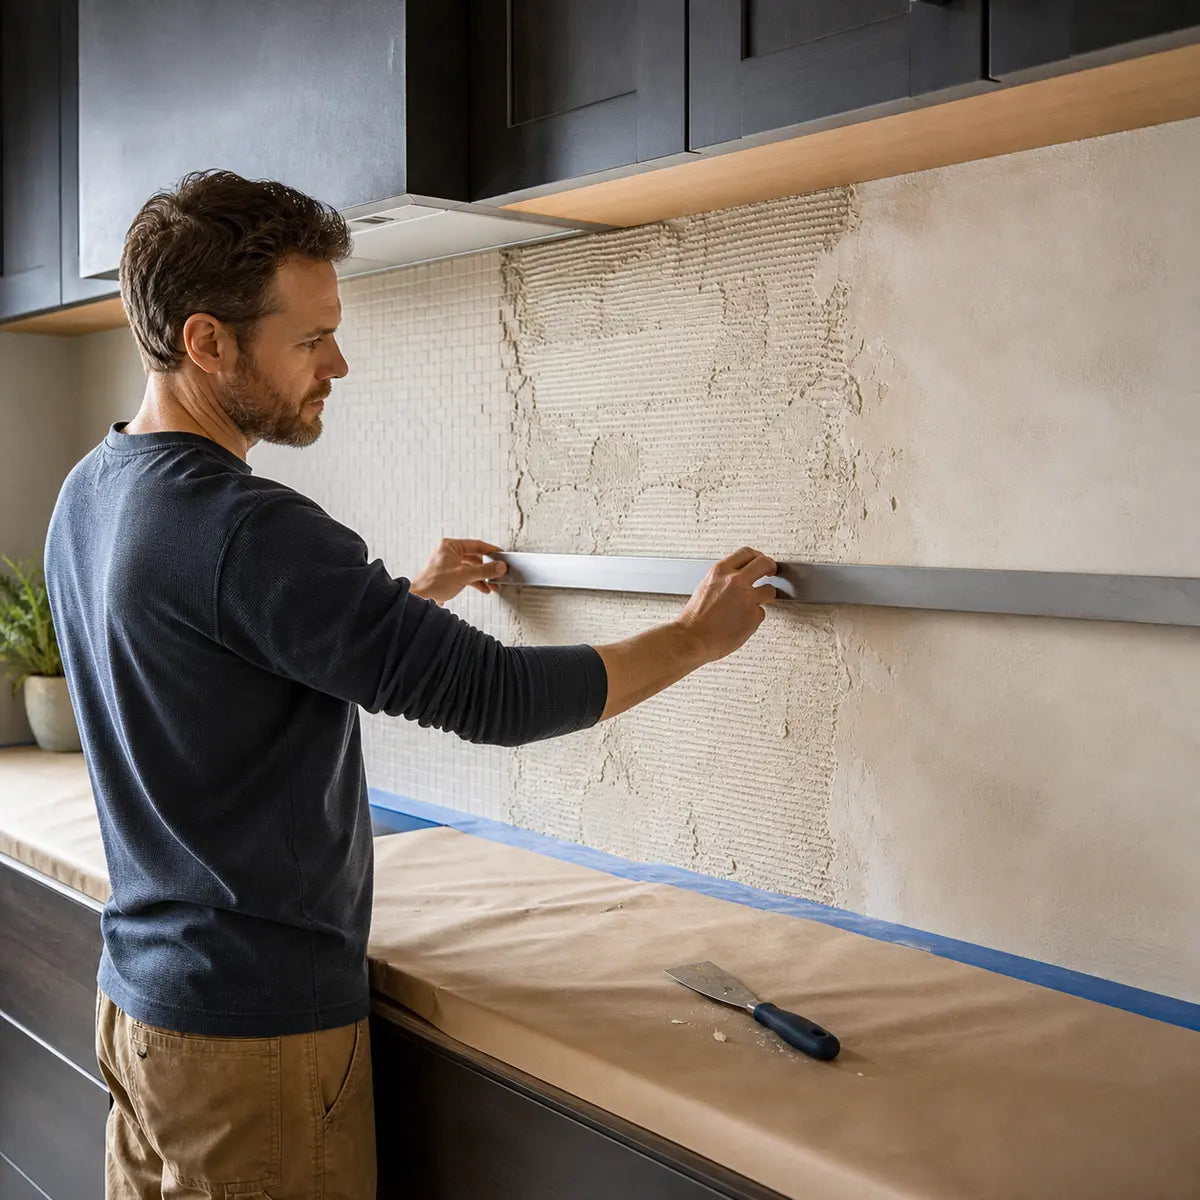
- Remove grease, dust, soap residue, wax, and loose material.
- Repair damaged, soft, or uneven areas.
- Prime porous surfaces when required.
- Create level and plumb reference lines.
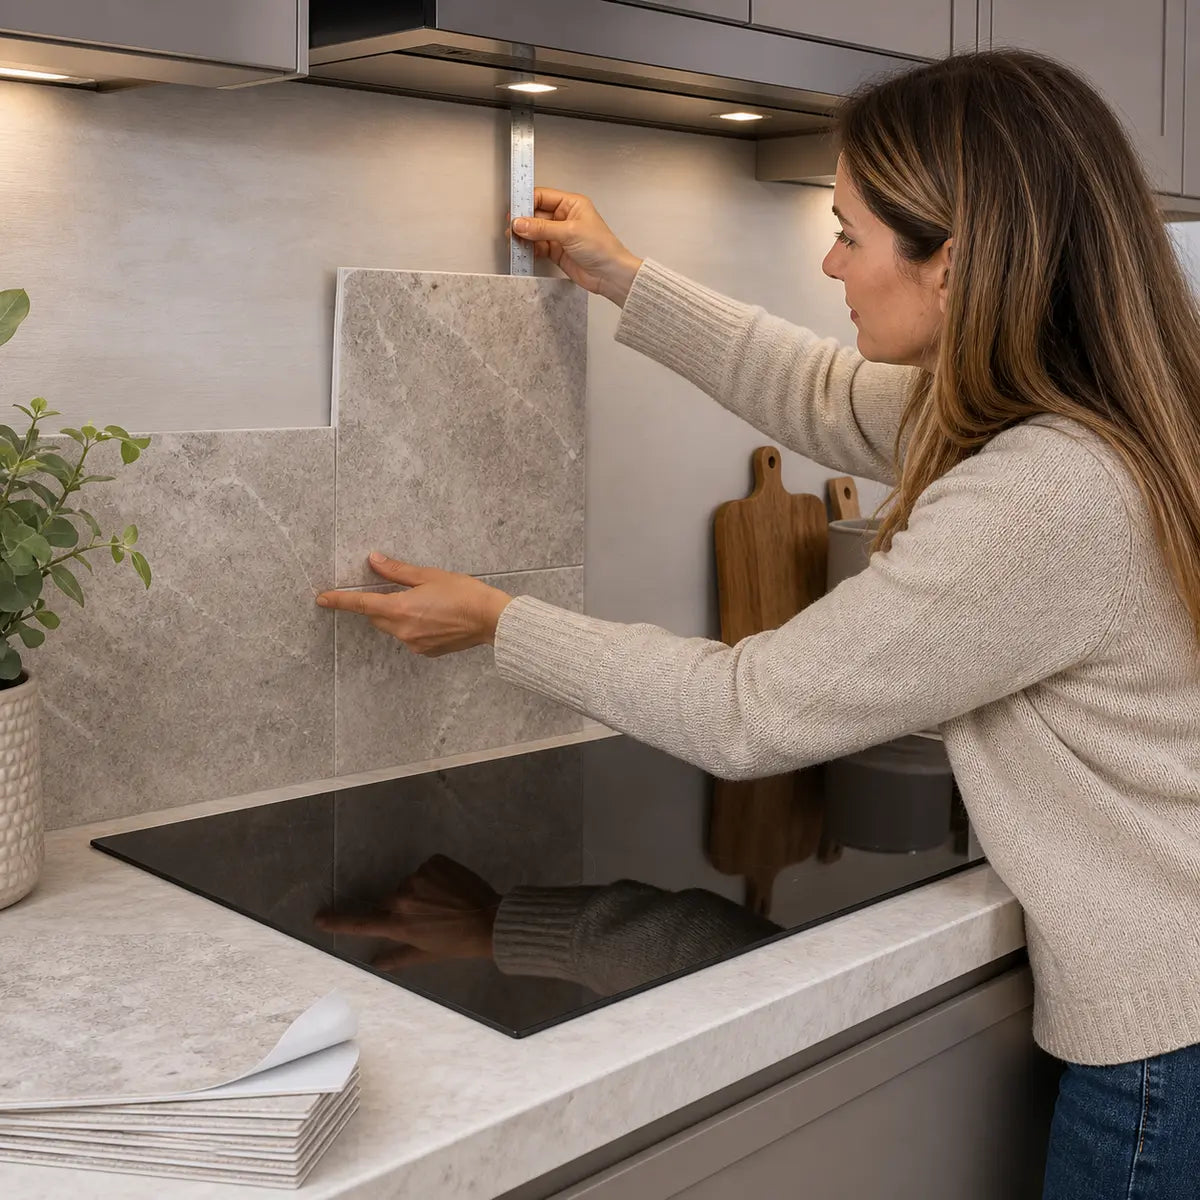
- Dry-lay or temporarily position the pattern where the system permits it.
- Follow the stated sequence for removing release film and applying pressure.
- Use the specified cutting tools and blade type.
- Follow any set-time restrictions before cleaning or exposing the surface to heat or moisture.
- Use supplemental adhesive only when the manufacturer permits or requires it.
Self-adhesive panels still require a measured layout, a compatible surface, clean edges, and current product instructions. The peel-and-stick backsplash planning guide provides that broader installation sequence before you compare it with porcelain work.

Installation-readiness checklist
Do not schedule installation until each applicable item is confirmed:
The wall checklist is intentionally shared by both systems. Adhesive backing does not erase substrate problems, and a large-format finish does not correct an unsuitable wall simply by covering it.
Check the wall, heat, moisture, and property rules first
Either category can be ruled out before purchase if the wall or exposure conditions fall outside the exact installation instructions. Surface compatibility is a pass-or-stop decision, not a minor installation preference.
For its documented panels, Crossville lists properly prepared concrete or concrete masonry units, appropriate tile backer boards, mortar beds, certain existing surfacing materials, and gypsum board or drywall in interior dry areas as potentially suitable substrates. Every category remains subject to preparation, bonding, deflection, moisture, and application limits.
Crossville also specifies maximum substrate variation of 1/8 inch in 10 feet and 1/16 inch in 24 inches for its panel system. Those figures are product-specific tolerances. A wall that meets them is not automatically approved; flatness does not establish structural condition, moisture suitability, or bond compatibility.
The Aspect Stone technical installation guidance requires a structurally sound, clean, flat, smooth, dry surface free of dust, wax, soap scum, and grease. It identifies prepared drywall, plaster, and clean smooth nonporous tile as possible surfaces, with repairs to damaged or uneven areas and primer on porous surfaces.
This corrects a persistent misconception: peel-and-stick does not mean preparation-free. A pressure-sensitive adhesive needs dependable contact with a surface that will remain attached to the wall. If the panel bonds strongly to weak paint, the failure may occur between the paint and drywall rather than between the panel and paint.

Stop and investigate if you find any of these conditions
- Soft, swollen, crumbling, or delaminated drywall
- Active leaks or unexplained staining
- Mold-like growth or persistent dampness
- Loose paint, wallpaper, paper facing, or old adhesive
- Heavy grease contamination
- Deep texture or irregular tile relief
- Moving cracks
- Loose existing tile
- Large humps, depressions, or abrupt plane changes
- Heat exposure without documented product clearance
- A cooktop or range configuration that conflicts with the wall-covering instructions
- A landlord, association, or property rule that has not been checked
- Electrical boxes or devices that may require alteration
- A substrate the product documents do not identify
Heat limits are product-specific
Aspect states that its Stone tiles can withstand temperatures up to 140°F and recommends at least six inches between the installed tile and a heat source or burner. Those values apply only to that product. Appliance instructions, local requirements, and any more restrictive wall-covering rule still control.
Do not transfer Aspect’s limit to another peel-and-stick panel. Do not interpret a porcelain material’s thermal-shock test as permission to install at any distance from any appliance. A material property test and an appliance-clearance instruction answer different questions.
Moisture resistance is not the same as waterproofing
Crossville reports average water absorption of no more than 0.1% under ASTM C373 for its documented panel material. That is a property of the tested porcelain body. It does not prove that grout, sealant, penetrations, mortar, the substrate, or the completed wall assembly is waterproof.
Aspect permits indoor wall use and standard household humidity or cleaning exposure but excludes its adhesive from shower or saturated wet-environment use. A kitchen splash area is not automatically a saturated environment, yet water can still reach a wall through failed perimeter details, penetrations, open seams, or an existing leak.
Evaluate the complete assembly, especially behind sinks, near plumbing penetrations, and at the counter-to-wall junction.
Renters and property managers need written scope approval
“Peel-and-stick” is often treated as a synonym for renter-safe. That assumption is too broad.
Before installation, document:
- Whether adhesive-backed wall covering is allowed
- Which walls may be altered
- Whether primer or supplemental adhesive is permitted
- Required restoration at move-out
- Who pays for paint, drywall, or substrate repair
- Whether samples or test patches are allowed
- Whether electrical cover plates or devices may be adjusted
- Whether the owner requires a named installer
If removal without wall damage is a condition of approval, do not rely on category language. Request a written product-specific statement and test the complete finish system, including paint and primer, in a permitted inconspicuous area.
The Stickwoll FAQ and support information is the appropriate store-local destination for requesting current product documentation. Verify the exact SKU rather than applying one answer across a whole collection.

How do repairability and removal differ?
Smaller self-adhesive panels may create a more localized replacement boundary, but removal can damage the wall and the removed panel may not be reusable. Porcelain repair scope can range from a cosmetic intervention to replacement of a larger fabricated section, depending on the failure.
Repairability should be evaluated by failure type, not material label.
A small surface mark is different from a crack. A cracked outlet corner is different from widespread loss of bond. A lifted adhesive edge is different from moisture-damaged drywall. If the underlying cause is ignored, replacing the visible finish may only hide a continuing problem.
Repair path for a peel-and-stick panel
Aspect says an individual Stone panel can be removed by softening the adhesive with a hair dryer and prying slowly with a putty knife. The manufacturer also warns that the wall may be damaged and the removed panel may be unusable.
Smart Tiles demonstrates why category-wide promises are risky. Its product-specific installation and removal FAQ says its tiles set firmly within 48 hours and may later be removed with heat, but it qualifies wall damage based on the original surface and acknowledges that adhesive residue may need cleaning. Those instructions apply to Smart Tiles, not rigid stone-composite panels or another brand.
A localized peel-and-stick repair usually depends on five conditions:
- The damaged panel can be reached without harming adjacent pieces.
- The manufacturer provides an approved removal procedure.
- The wall remains repairable after removal.
- A matching replacement panel is available.
- The replacement can be aligned without making the repair more visible.
If the panel pattern changes between production lots, a technically successful replacement can still look conspicuous. Retaining spare material from the original order reduces that risk.
Repair path for a porcelain panel
The checked porcelain documents do not establish a universal repair method. The proper scope depends on what happened:
- Small chip or surface mark: Ask whether an approved cosmetic repair is possible and visually acceptable.
- Crack near an outlet or corner: Investigate cut geometry, impact, support, and movement before deciding on replacement.
- Crack extending across the field: Assess the substrate and movement conditions rather than treating it only as surface damage.
- Hollow or loose area: Determine whether the problem is localized bond loss or part of a broader installation issue.
- Moisture behind the finish: Find and correct the water source before closing the wall again.
- Broken fabricated piece: Confirm whether the piece can be removed without unacceptable damage to adjacent finishes, counters, cabinets, or the substrate.
Do not assume every porcelain defect requires full-wall replacement. Do not assume a large bonded panel can always be patched locally. A fabricator or qualified installer needs to review the piece boundaries, cutouts, bond, substrate, pattern, and access.

Use this repair-path selector
Choose the first description that fits what you see:
| Observation | First action | Possible next route |
|---|---|---|
| Surface stain or residue only | Use the approved cleaning method on a small area | Continue cleaning only if the finish is unaffected |
| Small chip with no crack growth | Document size and location; contact the manufacturer or fabricator | Cosmetic repair assessment or replacement planning |
| Crack at an outlet, corner, or penetration | Stop and inspect the cut geometry and substrate | Professional evaluation before replacement |
| Crack continuing across multiple areas | Investigate wall movement or substrate failure | Broader assembly assessment |
| Peel-and-stick edge lifting | Check contamination, texture, heat, moisture, and adhesive instructions | Product-approved correction or panel replacement |
| One peel-and-stick panel damaged | Obtain a matching spare and removal instructions | Local removal with wall-repair allowance |
| Several panels loosening | Treat it as a system or substrate problem | Pause replacement and inspect the wall |
| Dampness, swelling, odor, or staining | Find the moisture source | Repair and dry the assembly before refinishing |
| Damage behind a range or heat source | Check appliance and product limits | Correct clearance or material selection before repair |
| Unknown cause | Do not cover it immediately | Qualified inspection |
Result boundaries:
- A cosmetic issue with no movement, moisture, or bond failure may stay localized.
- A single-panel peel-and-stick issue may allow a localized replacement, but wall repair should be expected as a possibility.
- A crack, repeated bond failure, heat-related change, or moisture symptom needs cause assessment before surface replacement.
- A damaged large-format porcelain piece needs a layout-specific review; no universal replacement rule is supported.
For more comparisons involving maintenance and repair scope, use the backsplash material care and repair guide only if you have not already opened it during this decision process. Retain the product instructions and original order information with your project records.
How should you shortlist the best system for your project?
Shortlist porcelain when visual continuity and a permanent fabricated finish outweigh handling and installation demands. Shortlist composite peel-and-stick when smaller working sections and potential panel-level intervention outweigh the increase in repeated joints.
Use the following matrix as a decision guide rather than a universal ranking.
| Strongest project constraint | Porcelain slab deserves priority when… | Composite peel-and-stick deserves priority when… | Verify before either |
|---|---|---|---|
| Visual continuity | A larger piece can cover the field with an acceptable joint plan | The panel pattern makes repeated joints visually acceptable | Actual wall and product dimensions |
| Limited access | Fabricated pieces can pass through the full route | Smaller panels materially reduce carrying and staging constraints | Doorways, turns, counter clearance, appliance obstacles |
| DIY involvement | The work retained by the homeowner is within the product and installer plan | Cutting, alignment, pressure, and preparation fit the user’s skill | Tool requirements and warranty conditions |
| Wall condition | The substrate can be brought within the porcelain system’s requirements | The wall can be made smooth, dry, sound, and adhesive-compatible | Moisture, loose paint, texture, movement, flatness |
| Many openings | Fabrication layout avoids weak bridges and awkward pieces | Small panels simplify staged cuts around openings | Electrical scope and replacement boundaries |
| Heat exposure | The selected assembly and appliance instructions permit the location | The exact adhesive product’s documented limits permit it | Actual temperature and required clearance |
| Moisture exposure | The complete assembly is suitable, not just the tile body | The adhesive system is approved for the location | Leaks, saturated exposure, perimeter sealing |
| Local repair priority | Piece boundaries and spare material support an acceptable repair strategy | A single panel can be removed and matched | Wall damage and replacement-stock risk |
| Rental or managed property | Permanent installation is explicitly approved | Adhesive installation and restoration scope are explicitly approved | Written alteration terms |
| Cost certainty | Fabrication, labor, delivery, and preparation are fully quoted | Preparation, accessories, labor, removal, and repair are fully quoted | Excluded and unknown costs |
When porcelain slab is the stronger candidate
Porcelain should move to the top of the shortlist when most of these conditions are true:
- A broad, continuous-looking field is central to the design.
- The selected format can cover the wall in practical fabricated pieces.
- The access route supports safe delivery and handling.
- The substrate has been inspected and can meet the specified assembly requirements.
- Professional fabrication and qualified installation are accepted project costs.
- Joint, corner, edge, and outlet details are resolved before fabrication.
- The installation is intended to remain in place.
- Matching material or retained offcuts are available for future evaluation.
When composite peel-and-stick is the stronger candidate
A self-adhesive composite system should move to the top when most of these conditions are true:
- Smaller working sections materially reduce handling constraints.
- The repeated joint pattern fits the design.
- The exact product accepts the existing wall after documented preparation.
- The available tools and installation skills match the instructions.
- The heat and moisture conditions fall within the product limits.
- Section-level replacement is valuable.
- The owner accepts that removal may leave residue or damage the wall.
- Spare panels can be retained.
If you are comparing several self-adhesive suppliers, start with how each brand documents construction, dimensions, installation, and use limits. The peel-and-stick brand comparison organizes those questions without treating a review as a technical approval.
Vinyl products form a narrower buying category than peel-and-stick materials as a whole. The vinyl backsplash buying guide helps you compare appearance and format while keeping heat, moisture, and substrate limits product-specific.
For a stone-look direction, the Platinum Stones pattern gives you one current design to compare. Use the listing for appearance and product-specific instructions, not as approval for an unverified wall or location.
For a more geometric direction, Snowfall Grid provides a separate visual reference. Check its current dimensions, construction, surface requirements, location limits, removal instructions, and warranty terms before ordering.
Build a comparison record before you request quotes
A written project record is the most reliable way to prevent two unlike proposals from appearing comparable. It gives sellers, fabricators, installers, landlords, and property managers the same project facts.
Project measurements
Record:
- Wall A width and height
- Wall B width and height
- Return-wall dimensions
- Distance from counter to upper cabinets
- Range or cooktop opening
- Hood width and mounting points
- Window dimensions
- Exposed terminations
- Inside and outside corners
- Number and location of outlets
- Number and location of switches
- Plumbing or other penetrations
- Countertop irregularities
- Access-route dimensions
- Staging-space dimensions
Existing-wall record
Record:
- Substrate type
- Surface finish
- Approximate finish age
- Paint type, if known
- Existing tile type, if applicable
- Texture
- Flatness or smoothness observations
- Loose or weak areas
- Cracks
- Water stains
- Grease contamination
- Previous adhesive
- Repairs already made
- Moisture source or plumbing concern
- Photos in direct and side lighting
Product record
For every candidate, retain:
- Exact manufacturer
- Exact SKU
- Color and production lot
- Dimensions
- Thickness
- Unit weight
- Coverage per box or slab
- Current technical data sheet
- Current installation manual
- Approved substrates
- Required primer or setting material
- Cutting method
- Joint method
- Heat limit
- Moisture limit
- Cleaning instructions
- Removal procedure
- Warranty
- Spare-material plan
Quote-comparison questions
Ask every bidder or supplier the same questions:
- What exact product and thickness does this quote cover?
- What measured area and waste assumption did you use?
- What wall preparation is included?
- What conditions would trigger a change order?
- Who is responsible for final measurement?
- Who is responsible for outlet and switch cutouts?
- Where will fabrication occur?
- What delivery, unloading, carrying, and staging are included?
- What setting, adhesive, primer, grout, sealant, or trim materials are included?
- What joint widths and locations are assumed?
- What electrical-device work is included or excluded?
- What protection and cleanup are included?
- What material will be retained for future repair?
- What warranty applies to the product and installation?
- What removal or wall-restoration work is excluded?
- How long is the quote valid?
The aim is not to force identical installation methods. It is to make the financial and technical boundaries visible.
What is the final decision rule?
Choose the system whose documented requirements fit the wall, access, labor, layout, exposure, property rules, and full project budget with the fewest unresolved conditions.
Do not choose porcelain solely because it has fewer potential field joints. Do not choose peel-and-stick solely because the box price is lower or the backing is self-adhesive.
A sound decision follows this order:
- Rule out products that are not documented for the substrate, heat, moisture, or property conditions.
- Draw the real wall, including every opening, corner, termination, and access restriction.
- Verify exact dimensions, thickness, unit weight, cutting method, and joint requirements.
- Price complete scopes rather than material quantities.
- Review installation disruption and responsibility for errors.
- Map plausible damage to repair or replacement boundaries.
- Retain instructions, purchase records, photos, layout drawings, and spare material.
Porcelain slab is often the more coherent candidate for a permanent, large-format visual statement. Composite peel-and-stick is often the more manageable candidate for a section-based installation. The better backsplash is the one whose apparent advantage survives contact with the actual project.
Frequently Asked Questions
Can a porcelain slab backsplash be completely seamless?
A large porcelain piece may reduce the number of field joints, but a backsplash should not be described as literally seamless without a product- and layout-specific basis. Perimeter joints, changes of plane, substrate joints, separate fabricated pieces, outlets, switches, penetrations, and appliance boundaries can remain.
The visual result may still read as highly continuous. Ask for an elevation drawing that shows every planned joint before approving fabrication.
Is peel-and-stick backsplash preparation-free?
No. A self-adhesive panel still needs the surface required by its manufacturer. That commonly means a stable, clean, smooth, dry wall without grease, dust, loose paint, wax, soap residue, or active damage.
Some products require primer on porous surfaces or impose specific paint-curing rules. A dirty or weak wall can fail beneath a strongly bonded adhesive.
Is porcelain always heavier than peel-and-stick?
A full-size porcelain panel can carry substantial total mass, but a precise universal weight ratio is unsupported. The checked Crossville products have reported areal weights, while the checked Aspect documents do not provide an exact panel mass or mass per area.
Request pounds per square foot or kilograms per square meter for both exact products. Also compare total fabricated-piece weight, packaging, carrying equipment, access, and crew requirements.
Can one damaged peel-and-stick panel be replaced?
Sometimes, if the panel is accessible, the manufacturer provides a removal procedure, and a matching replacement is available. Removal may damage the wall, leave residue, or make the removed panel unusable.
Check the cause before replacing the panel. Repeated lifting, discoloration, or movement can indicate heat, moisture, contamination, weak paint, or a broader substrate problem.
Does porcelain resist water better?
The porcelain body can have very low water absorption. Crossville reports average absorption of no more than 0.1% for the documented panels. That does not make the entire backsplash waterproof.
The completed assembly includes joints, sealant, penetrations, setting materials, and the wall behind the finish. Water-management decisions must cover the complete installation.
Is peel-and-stick a safer choice for a rental?
It can be considered only after the property rules and restoration requirements are confirmed. Adhesive products may remove paint, paper facing, primer, or drywall material. Residue can remain, and a removed panel may not be reusable.
Get written authorization and avoid promising damage-free removal unless the exact product and complete wall finish have been evaluated for that condition.
Should I buy the backsplash before inspecting the wall?
No. Wall condition can affect product compatibility, preparation cost, installation schedule, adhesion, joint alignment, and future removal.
Inspect and document the wall first. Then compare exact products and request complete scopes based on the same measurements. That order prevents the decorative choice from locking the project into an unsuitable installation method.


Kommentar hinterlassen
Diese Website ist durch hCaptcha geschützt und es gelten die allgemeinen Geschäftsbedingungen und Datenschutzbestimmungen von hCaptcha.