


RV-Küchen-Makeover: Warum Peel and Stick Tiles perfekt für Camper sind
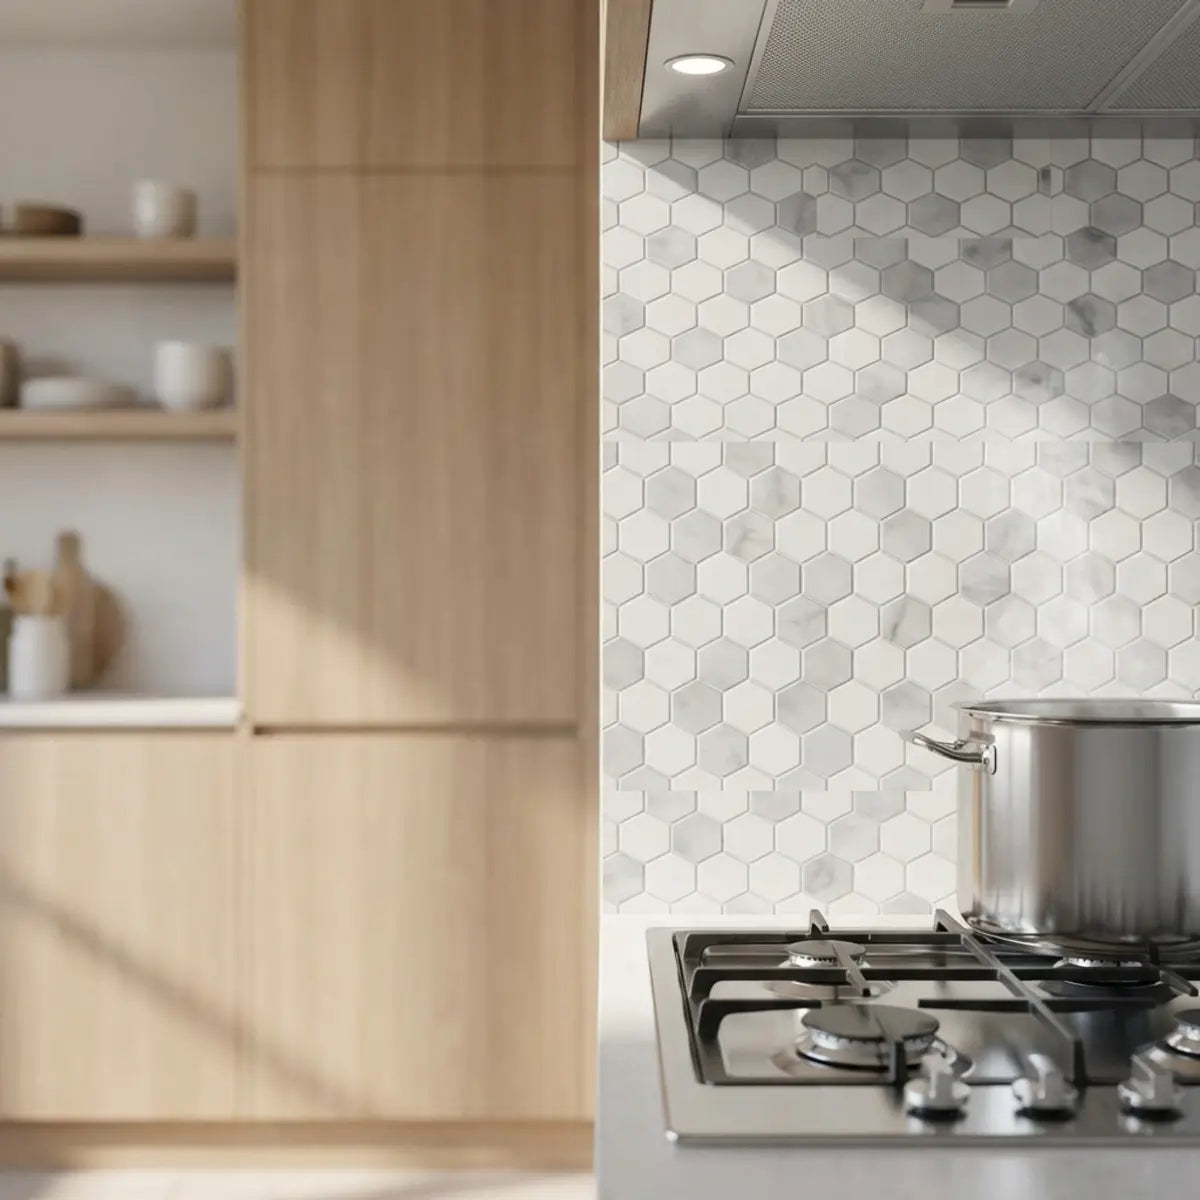
Wenn man in einer typischen RV-Küche steht, fühlt es sich oft an, als würde man in eine Zeitkapsel aus beigen Oberflächen und schweren, veralteten Materialien eintreten. Man schaut auf die dunklen Wandverkleidungen und fragt sich, wie man den Raum aufhellen kann, ohne zusätzliches Gewicht hinzuzufügen, das die Zuglast beeinträchtigt. Wir haben Tausenden von Reisenden geholfen, genau dieses Dilemma zu lösen. Die Antwort ist keine Abrisskolonne; es ist moderne Klebetechnologie.

Peel and stick tiles sind die perfekte Lösung für RV-Küchen-Makeovers, weil sie lightweight, einfach zu installieren, removable und in stilvollen Designs erhältlich sind, die travel conditions standhalten.
Die wichtigsten Punkte:
- ✓ Gewichtsreduzierung: Sie reduzieren die Zuladung erheblich im Vergleich zu Keramik- oder Steinoptionen.
- ✓ DIY-Einfachheit: Sie lassen sich mit minimalem Werkzeug leicht installieren (keine Nasssäge erforderlich).
- ✓ Mieterfreundlich: Sie ermöglichen es Mietern und Wochenend-Heimwerkern, Oberflächen ohne dauerhafte Schäden zu individualisieren.
Viele RV-Besitzer zögern mit einer Renovierung, weil sie die Komplexität von Bauarbeiten in einem kleinen Raum fürchten. Wir haben jedoch festgestellt, dass Klebetiles nicht nur eine optische Verbesserung sind – sie sind ein funktionales Upgrade, das speziell für die besonderen physikalischen Bedingungen eines fahrenden Fahrzeugs geeignet ist.
Warum sind Peel and Stick Tiles ideal für RV-Küchen?
Die Sorge: „Wird das Hinzufügen neuer Materialien mein RV über die Gewichtsgrenze bringen oder beim Fahren durch ein Schlagloch Risse verursachen?“
Die Lösung: Dieser Abschnitt erklärt die technischen Vorteile von selbstklebenden Vinylfliesen und zeigt, warum sie die sicherste und praktischste Wahl für das Leben unterwegs sind.
Peel and stick tiles sind ideal für Camper, weil sie die beiden größten Feinde des RV-Designs angehen: Gewicht und Bewegung. Anders als ein stationäres Zuhause ist Ihr Camper ständig Vibrationen, Torsion und Zuladungsbeschränkungen ausgesetzt. Das Verlegen herkömmlicher Keramikfliesen mit Mörtel ist oft ein Rezept für eine Katastrophe; die starren Fugen können reißen, wenn sich das RV-Fahrgestell auf der Autobahn verdreht.
Die Physik von Zuladung und Design
Gross Vehicle Weight Rating (GVWR) ist das vom Hersteller angegebene maximale Betriebsgewicht/e die maximale Betriebsmasse eines Fahrzeugs. Jedes Pfund, das Sie Ihrer Innenrenovierung hinzufügen, ist ein Pfund, das Sie nicht an Wasser, Kraftstoff oder Ausrüstung mitführen können.
- Gewicht von Keramikfliesen: Eine Standard-Backsplash aus Keramik kann 5 lbs pro Quadratfuß wiegen, plus Mörtel und Fugenmasse.
- Gewicht von Peel and Stick: Hochwertige Vinyl- oder Gel-Fliesen wiegen typischerweise weniger als 0.2 lbs pro Quadratfuß.

In einer typischen RV-Küche mit 10–15 Quadratfuß Backsplash kann der Wechsel zu Klebefliesen Ihnen weit über 50 lbs an Gewicht sparen. Aus unserer Erfahrung ist diese Gewichtsersparnis besonders wichtig für kleinere Wohnwagen und Class-B-Vans, bei denen die Zuladungsreserven hauchdünn sind.
Der Flexibilitätsfaktor
Das Pascalsche Gesetz mag die Hydraulik bestimmen, aber in RVs geht es uns um strukturelle Torsion. Wenn Sie fahren, geben die Wände Ihres RV nach. Starre Materialien wie Keramik wirken dieser Bewegung entgegen und führen zu Rissen. Peel and stick tiles sind von Natur aus flexibel. Sie bewegen sich mit der Wand und absorbieren die Vibrationen der Straße, statt ihnen zu widerstehen.
Kosten und Komfort
Eine Küche in einem „sticks and bricks“-Haus zu renovieren kostet Tausende. Ein RV-Küchen-Makeover mit Klebefliesen kostet oft unter 200 US-Dollar.
Planen Sie eine optische Rundumerneuerung? Braucht Ihre Küche ein Facelift, aber Sie sorgen sich um Zeit, Kosten und Aufwand? Peel and stick tiles sind einfach zu installieren, erschwinglich und können Ihren Küchenraum komplett verwandeln. In unserem Ratgeber erklären wir genau, wie das geht: Verwandeln Sie Ihre Küche mit Peel and Stick Tiles.
Praxisbeispiel: Die Renovierung des „Weekend Warrior“
Nehmen wir „Sarah“, eine Kundin mit einem Jayco Flight von 2015. Die ab Werk angebrachte Tapete löste sich ab, und das beige Design ließ den kleinen Raum klaustrophobisch wirken.
- Herausforderung: Sie hatte keinerlei Renovierungserfahrung und nur einen Samstag Zeit.
- Aktion: Sie verwendete 3D-Gelharzfliesen auf der bestehenden Wandverkleidung.
Was sind die besten peel and stick tiles für RVs in den U.S. und Kanada?
Die Frage: „Es gibt günstige Aufkleber und teure Fliesen – welche halten extreme Hitze und eisige Winter wirklich aus?“
Die Lösung: Wir erklären die Materialkunde hinter den besten Fliesen, damit Sie kein Geld für Produkte verschwenden, die nach einer Saison versagen.
Die besten peel and stick tiles für RVs in Nordamerika sind solche aus Gel-Resin (Epoxy) oder Stone Composite Vinyl. Während Standard-Vinylaufkleber günstig sind, fehlt ihnen die Hitzebeständigkeit, die für einen Camper nötig ist, der in der Sonne Arizonas oder im kanadischen Frost gelagert werden könnte.
Materialunterschiede verstehen
Nicht alle Klebefliesen sind gleich. Im Allgemeinen gibt es drei Kategorien:
- Flache Vinyl-Aufkleber: Dünne, gedruckte Bilder. Gut für glatte Oberflächen, wirken aber „unecht“.
- 3D Gel/Epoxy: Dicker, flexibel und mit realistischer Textur. Am besten für backsplashes.
- Verbundkern: Hart, ahmt echten Stein oder Glas nach. Schwerer zu schneiden, aber sehr langlebig.
Thermische Ausdehnung—die Tendenz von Materie, ihre Form, Fläche, ihr Volumen und ihre Dichte als Reaktion auf eine Temperaturänderung zu verändern—ist hier ein wichtiger Faktor. Ein im Winter gelagerter RV kann -20°F erreichen und im Sommer über 100°F liegen. Billige Klebstoffe halten dieser Belastung nicht stand.

| Merkmal | Flacher Vinyl-Aufkleber | 3D Gel-Resin (Epoxy) | Verbundkern |
|---|---|---|---|
| Gewicht | Extrem leicht | Sehr leicht | Mäßig |
| Hitzebeständigkeit | Niedrig (schmilzt > 120 °F) | Hoch (bis zu 180 °F+) | Sehr hoch |
| Realismus | Niedrig (flach) | Hoch (3D-Textur) | Sehr hoch |
| Flexibilität | Hoch | Hoch | Niedrig (starr) |
| Am besten geeignet für | Schrankeinsätze | Küchenrückwand | Duschakzente |
Expertenempfehlung: Für den Bereich hinter dem Herd sollten Sie der Hitzebeständigkeit höchste Priorität geben. Wir empfehlen dringend, unseren Vergleich von Hitzebeständige Peel-and-Stick-Fliesen für Küchen mit hoher Hitze anzusehen, damit Sie ein Produkt wählen, das sich beim Pasta kochen nicht verformt.
Regionale Besonderheiten: U.S. vs. Kanada
Für unsere kanadischen Leser oder alle, die nach Norden reisen, ist „cold curing“ ein Risiko. Wenn Sie Fliesen bei gefrierendem RV einbauen, haftet der Klebstoff nicht richtig. Heizen Sie den RV immer mindestens 24 Stunden vor und nach der Installation auf mindestens 68°F (20°C), damit der Kleber aushärten kann.
Fallstudie: Der Winter-Haltbarkeitstest
Ein Paar in Ontario installierte wasserdichte peel and stick tiles in seinem Teardrop Trailer. Sie campen das ganze Jahr über.
- Auswahl: Sie entschieden sich für eine dickere, wasserdichte Gel-Fliese, die dafür ausgelegt ist, Feuchtigkeitskondensation zu widerstehen – ein häufiges Problem beim Betrieb von Propanheizungen im Winter.
- Ergebnis: Trotz schwankender Luftfeuchtigkeit im Innenraum von 30% bis 80% hielt der wasserdichte Klebstoff zuverlässig.
- Erkenntnis: Standard-Tapetenkleister versagt bei hoher Luftfeuchtigkeit oft; hochwertiger Fliesenkleber ist hydrophob (stößt Wasser ab).
Sie suchen eine mietersichere Option? Wenn Sie Ihr Fahrzeug nicht besitzen oder den Stil häufig ändern möchten, lesen Sie unseren ausführlichen Bericht: Stickwoll Peel and Stick Tiles: Ein transformierender Testbericht. Er untersucht Ästhetik und Leistung speziell für upgrades, die für Mietobjekte geeignet sind.
Wie installiert man peel and stick tiles in einer Camper-Küche?
Die Angst: „Ich bin nicht handwerklich begabt. Was, wenn ich sie schief anbringe oder sie sich während der Fahrt lösen?“
Die Lösung: Diese Schritt-für-Schritt-Anleitung zeigt die besonderen Vorbereitungen, die für RV-Wände erforderlich sind, und sorgt für einen Halt, der viele Meilen lang hält.
Um peel and stick tiles in einer Camper-Küche zu installieren, musst du die Wände zuerst gründlich entfetten, dein Layout so planen, dass an den Rändern keine schmalen Streifen entstehen, und festen Druck ausüben, um den druckempfindlichen Kleber zu aktivieren.
Schritt 1: Oberflächenvorbereitung (der entscheidende Schritt)
RV-Wände sind oft mit einer Vinyl-Tapete versehen, die leicht strukturiert ist oder eine wachsige Beschichtung hat. Wenn du diesen Schritt überspringst, werden sich deine Fliesen will lösen.
- Reinigen: Wasche die Wände mit TSP (Trinatriumphosphat) oder einem starken Entfetter, um Kochöle und die wachsigen Rückstände des Herstellers zu entfernen.
- Trocknen: Lass alles vollständig trocknen. Hinter den Fliesen eingeschlossene Feuchtigkeit kann Schimmel verursachen.
- Schleifen (optional): Wenn die Wand sehr glänzend ist, schleife sie leicht mit 220er-Schleifpapier an, damit der Kleber etwas hat, woran er „anbeißen“ kann.
+ Pro-Tipp Projektkalkulator
Nicht sicher, wie viel Fliesenmaterial du für diesen backsplash brauchst? Gib unten deine Maße ein, um die benötigte Fläche inklusive eines 10% Verschnittpuffers zu berechnen.
Schritt 2: Die Planung des Layouts
Nicht einfach drauflos kleben.
- Miss deine gesamte Fläche aus.
- Kaufe 10-15% zusätzliches Material für Zuschnitte und Verschnitt.
- Pro-Tipp: Mach einen „Trockenlauf“, indem du die Fliesen mit Malerkrepp an die Wand klebst, um die Optik zu prüfen.
Für eine visuelle Aufschlüsselung dieses Prozesses ist der Leitfaden So installiert man Peel and Stick Vinyl Backsplash der Branchenstandard für DIYer und bietet eine Werkzeug-Checkliste, damit du nichts vergisst.
Schritt 3: Zuschneiden und Aufkleben
Du brauchst keine Nasssäge. Ein scharfes Cuttermesser und eine Metall-Latte sind deine besten Helfer.
- Ritzen und Brechen: Bei dickeren Fliesen ritze die Vorderseite der Fliese mit deinem Messer an und brich sie dann sauber ab.
- Das Überlappen: Viele 3D-Fliesen haben so gestaltete „Fugenlinien“, die überlappen. Achte darauf, dass du sie perfekt ausrichtest, damit ein nahtloser Look entsteht.
- Druck: Diese Kleber sind druckempfindlich. Drücke nach dem Platzieren jeder Fliese fest auf jeden einzelnen Quadratzentimeter. Eine kleine J-Rolle ist dafür hervorragend geeignet.

Häufiges Missverständnis: Viele glauben, dass sie zusätzlichen Sprühkleber brauchen. Verwende keinen Sprühkleber, es sei denn, der Hersteller empfiehlt es. Er kann mit der Rückseite der Fliese chemisch reagieren und ein klebriges Durcheinander verursachen, das nie aushärtet.
Schritt 4: Die letzten Details
In einem RV sind Kanten die Stellen, an denen sich das Ablösen zuerst zeigt.
- Abdichten: Ziehe entlang der unteren Kante, wo die Fliese auf die Arbeitsplatte trifft, eine dünne Raupe Silikon. Das verhindert, dass beim Abwaschen Wasser hinter die Fliesen gelangt.
- Abschlussleisten: Verwende PVC-Abschlussleisten für freiliegende Kanten an den Seiten.
Willst du Anfängerfehler vermeiden? Wir empfehlen dir, So rüstet man Küchen mit Peel and Stick Tiles auf zu lesen. Dort werden die typischen Fehler erklärt, die zu Lücken, Ablösen und ungleichmäßigen Linien führen, damit du es beim ersten Mal richtig machst.
Detaillierte Anleitung: Zeitaufwand
- Vorbereitung: 1 Stunde (Reinigung und Trocknen).
- Layout: 30 Minuten.
- Installation: 2-3 Stunden (je nach Steckdosen und Fenstern).
- Aushärtezeit: 24 Stunden (halte die RV-Temperatur stabil).
Wenn du Mieter bist oder planst, das RV später zu verkaufen, ist die Entfernbarkeit entscheidend. Sieh dir So installiert man Peel and Stick Kitchen Tiles leicht an für konkrete Tipps zur mieterfreundlichen Installation, damit du die Fliesen wieder entfernen kannst, ohne die Wandplatte zu beschädigen.
Bereit für ein größeres Projekt?
Sieh dir unseren DIY-Leitfaden 2025 an, um deine ganze Küche aufzufrischen.
Fazit: Das cleverste RV-Upgrade
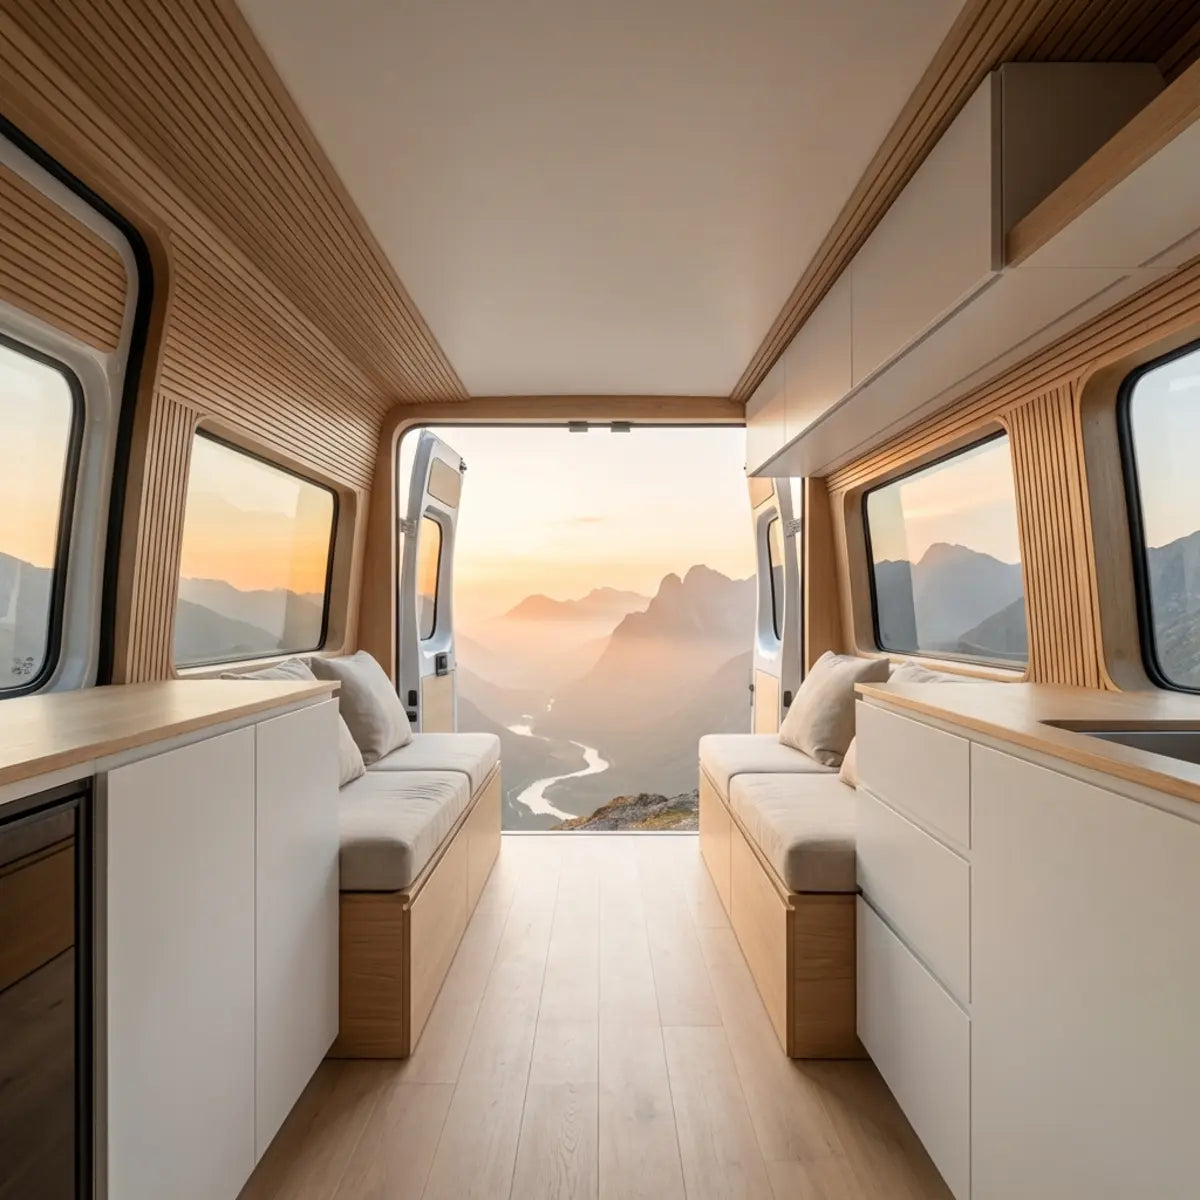
Ein RV-Küchen-Makeover erfordert weder, dein Fahrzeug komplett zu entkernen, noch ein Vermögen auszugeben. Wenn du dich für peel and stick tiles entscheidest, wählst du ein Material, das für die Straße entwickelt wurde: lightweight, flexibel und widerstandsfähig gegen Temperaturschwankungen.
Egal, ob du einen günstigen RV-Küchenumbau oder ein hochwertiges ästhetisches Upgrade suchst, diese Fliesen schlagen die Brücke zwischen Stil und Alltagstauglichkeit. Du sparst Zuladung für die Dinge, die wirklich zählen – wie deine Ausrüstung fürs Abenteuer – und schaffst gleichzeitig einen Raum, der sich wie Zuhause anfühlt.
Verpasse auch nicht unsere Galerie mit Top-Designs, um deine Kreativität anzuregen: So installierst du Peel and Stick Tiles & die besten Designs 2025.
Bereit, dein Projekt zu starten? Sieh dir weitere RV-Küchen-Umgestaltungen an und entdecke die in diesem Ratgeber genannten Designs, um die perfekte Lösung für deinen Reisestil zu finden.
Was ist dein nächstes RV-Küchenprojekt?
Häufig gestellte Fragen
Schmelzen peel and stick tiles hinter meinem RV-Herd?
Die meisten hochwertigen Vinyl- und Gel-Fliesen sind bis 140°F–180°F hitzebeständig. Wenn dein RV-Herd jedoch eine offene Flamme in der Nähe der Rückwand hat und keine Metallabdeckung vorhanden ist, empfehlen wir aus Sicherheitsgründen einen kleinen Spritzschutz aus Glas oder Metall. Prüfe immer die Hitzebeständigkeit des Herstellers.
Kann ich sie über die vorhandenen RV-Tapetenbordüren installieren?
Ja, du kannst sie über vorhandene Tapetenbordüren anbringen, sofern die Tapete gut an der Wand haftet. Wenn sich die Tapete ablöst, musst du sie zuerst entfernen oder festkleben. Wir empfehlen, die Bordüre leicht anzuschleifen, damit der Fliesenkleber besser haftet.
Wie entferne ich sie, ohne die Luan-Wandplatte zu beschädigen?
Um die Fliesen zu entfernen, erwärme sie mit einem Föhn, damit sich der Kleber löst. Ziehe sie dann langsam in einem 45-Grad-Winkel ab. Wenn du zu schnell ziehst, riskierst du, die dünne Papierschicht der Luan-Sperrholz-Wände des RV zu delaminieren. Eventuelle Kleberreste lassen sich mit einem citrusbasierten Kleberentferner reinigen.
Muss ich vor der Installation eine Grundierung verwenden?
In den meisten Fällen reicht eine gründliche Reinigung mit TSP aus. Wenn deine Wände jedoch aus rohem Holz oder stark porösem Sperrholz bestehen, ist eine Schicht Grundierung notwendig, um die Oberfläche zu versiegeln. Ohne Grundierung auf rohem Holz saugt das Holz den Kleber auf, und die Fliesen werden sich irgendwann lösen. Bei standardmäßigen, vinylbeschichteten RV-Wänden ist keine Grundierung erforderlich.
Kommentar hinterlassen
Diese Website ist durch hCaptcha geschützt und es gelten die allgemeinen Geschäftsbedingungen und Datenschutzbestimmungen von hCaptcha.