


Die besten selbstklebenden Fliesen für Küchenwände im Jahr 2025
Hast du es satt, auf diese langweilige, uninspirierende Küchenwand zu schauen? Wenn du schon einmal in deiner Mietwohnung vor der Küchenwand standest und dich gefragt hast, wie du ihr Stil verleihen kannst, ohne deine Kaution zu riskieren, bist du nicht allein. Die Angst vor dauerhaften Veränderungen und die hohen Kosten traditioneller Renovierungen lassen viele mit einem Raum zurück, den sie nicht lieben.
Zum Glück gibt es eine brillante Lösung, die für Mieter und preisbewusste Hausbesitzer gleichermaßen alles verändert: stick on tiles for kitchen walls. Diese innovativen Fliesen bieten eine schnelle, erschwingliche und schadensfreie Möglichkeit, einen beeindruckenden Spritzschutz oder eine Akzentwand zu gestalten. Ein hochwertiger peel and stick kitchen backsplash kann deinen Raum an einem einzigen Nachmittag aufwerten.
Dieser umfassende Leitfaden führt dich durch alles, was du wissen musst. Wir behandeln die verschiedenen verfügbaren Arten, beantworten wichtige Fragen zu Haltbarkeit und Hitzebeständigkeit und geben Expertentipps für Montage und Entfernung. Am Ende hast du das nötige Selbstvertrauen, um deine eigene DIY kitchen makeover zu starten.
Warum selbstklebende Fliesen perfekt für Mieter und Budget-Haushalte sind
Hast du jemals einen Kostenvoranschlag für eine herkömmliche Fliesenarbeit gesehen und gemerkt, wie dein Geldbeutel schmerzt? Oder bist du vielleicht Mieter und hast schon wieder ein „keine dauerhaften Änderungen“ gehört? Dieser Abschnitt erklärt, warum selbstklebende Fliesen die perfekte Antwort auf beide Probleme sind – sie geben dir Gestaltungsfreiheit ohne finanzielle Risiken oder Probleme mit der Miete.
Der Reiz von self adhesive kitchen tiles geht weit über ihr gutes Aussehen hinaus. Sie stehen für einen grundlegenden Wandel bei der Wohnraumgestaltung und machen stilvolle Interieurs für alle zugänglich, unabhängig von Budget oder Mietvertrag. Für einen Bruchteil der Kosten und des Aufwands erreichst du einen Look, der mit traditioneller Keramik oder Naturstein mithalten kann.
Ein wesentlicher Vorteil sind die enormen Kosteneinsparungen. Eine professionelle Fliesenverlegung kann Tausende von Euro kosten, wenn man Materialien, Spezialwerkzeuge und Arbeitskosten berücksichtigt. Im Gegensatz dazu lässt sich ein schöner temporary kitchen backsplash oft schon für unter 100 $ umsetzen – damit gehört er zu den wirkungsvollsten budget kitchen updates, die du machen kannst.
| Merkmal | Abzieh- und Klebefliesen | Traditionelle Keramikfliesen |
|---|---|---|
| Durchschnittskosten (50 sq ft) | 100 € – 300 € | 500 € – 1.500+ € (inkl. Arbeitskosten) |
| Installationszeit | 2 - 4 Stunden | 2–3 Tage (inkl. Trocknungszeit) |
| Benötigte Werkzeuge | Cuttermesser, Lineal | Nasssäge, Kelle, Fugbrett, Eimer |
| Fertigkeitsniveau | Anfänger (DIY-freundlich) | Fortgeschritten bis professionell |
| Renterfreundlich? | Ja, leicht entfernbar | Nein, dauerhafte Installation |
Vor allem für Mieter ist wichtig, dass diese Fliesen für eine einfache, schadensfreie Entfernung entwickelt wurden. Das bedeutet, du kannst deine Küche komplett verwandeln – mit der Sicherheit, sie später wieder in ihren ursprünglichen Zustand zurückversetzen zu können. Keine verlorene Kaution, keine schwierigen Gespräche mit dem Vermieter – nur purer, stressfreier Stil.
Nimm zum Beispiel Chloe, eine Mieterin in einer Stadtwohnung mit einer veralteten, beigen Küche. An einem Samstagnachmittag verlegte sie selbstklebende Subway-Fliesen und hellte den Raum sofort auf. Zwei Jahre später, als sie auszog, erwärmte sie jede Fliese vorsichtig mit einem Föhn und zog sie ab, wobei die Wand darunter völlig unversehrt blieb.
Arten von selbstklebenden Küchenfliesen
Fühlst du dich von der schieren Anzahl an Fliesenoptionen überfordert? Von glänzendem Vinyl bis zu realistischem Marmor – man verliert schnell den Überblick. Dieser Abschnitt erklärt die beliebtesten Materialien und hilft dir, die perfekte Variante für den Stil, das Budget und die funktionalen Anforderungen deiner Küche zu wählen.
Der Markt für stick on tiles for kitchen walls hat eine enorme Vielfalt hervorgebracht und bietet für jeden Geschmack den passenden Stil. Wenn du die wichtigsten Materialien verstehst, kannst du die beste Option für dein Projekt auswählen. Jeder Typ bringt seine eigenen besonderen Eigenschaften mit – von der Textur bis zu den Kosten.

Vinyl Peel-and-Stick-Fliesen
Vinyl ist das gängigste und vielseitigste Material für Peel-and-Stick-Fliesen. Es ist leicht, günstig und unglaublich einfach zu reinigen. Dank moderner Drucktechnologie können Vinylfliesen alles von Keramik bis hin zu gemustertem Zement täuschend echt nachbilden. Sie sind oft die erste Wahl für einen durable vinyl kitchen backsplash.
- Vorteile: Hochgradig wasserbeständig, preiswert, große Designvielfalt, leicht zuzuschneiden und zu installieren.
- Nachteile: Dünnere, günstigere Varianten können mitunter weniger realistisch wirken und sind anfälliger für Beschädigungen.
- Profi-Tipp: Achten Sie auf Vinylfliesen mit einer dickeren Gel- oder Epoxid-Deckschicht. Das sorgt nicht nur für einen 3D-Effekt, der echter Fliese ähnlicher sieht, sondern bietet auch eine bessere Flecken- und Kratzfestigkeit.
Falsche Subway-Fliesen
Klassisch, sauber und zeitlos – Subway-Fliesen sind seit jeher ein Favorit. Stick on tiles für Küchen-Rückwände bieten diesen ikonischen Look ganz ohne den Aufwand von Fugen. Sie kommen in der Regel als leicht anzubringende Bahnen, was gerade Linien und ein gleichmäßiges Ergebnis mit minimalem Aufwand erleichtert.
- Vorteile: Zeitloses Design, lässt Räume größer und heller wirken, Bahnen ermöglichen eine schnelle Installation.
- Nachteile: Kann knifflig sein, um Steckdosen herum zuzuschneiden, wenn Sie kein scharfes Cuttermesser verwenden.
- Häufiges Missverständnis: Viele glauben, dass man die authentisch abgeschrägte Kante einer echten Subway-Fliese nicht bekommen kann. Doch viele hochwertige 3D-Gel-Optionen bilden diesen klassischen, dreidimensionalen Look inzwischen perfekt nach.
Mosaik-Peel-and-Stick-Optionen
Für alle, die feine Muster oder einen Farbakzent setzen möchten, sind mosaikartige Bahnen eine ausgezeichnete Wahl. Diese Fliesen imitieren komplexe Anordnungen aus kleinen Glas-, Stein- oder Keramikelementen. Sie eignen sich perfekt, um hinter Spüle oder Herd einen Blickfang zu schaffen und dem Raum einen Hauch von Luxus und Persönlichkeit zu verleihen.
- Vorteile: Eindrucksvolle Designs, in einer großen Auswahl an Materialien erhältlich, darunter Metall- und Gel-Verbundstoffe, ideal für Akzentwände.
- Nachteile: Kann teurer sein als Fliesen mit Einzeldesign; das exakte Ausrichten der filigranen Muster erfordert Geduld.
Um zu sehen, wie unterschiedliche Muster einen Raum völlig verändern können, ist unser Ratgeber zu den Top Peel-and-Stick-Fliesenmuster für 2025 die erste Anlaufstelle. Er steckt voller Inspiration für Ihr nächstes Projekt.
Marmoroptik-Oberflächen
Die Eleganz von Marmor ist unbestreitbar, doch die Kosten und der Pflegeaufwand sind erhebliche Nachteile. Peel-and-Stick-Fliesen in Marmoroptik bieten dieselbe luxuriöse Ästhetik zu einem Bruchteil des Preises. Sie bestehen aus hochauflösend bedrucktem Vinyl und fangen die edle Maserung und Textur von Naturstein ein.
- Vorteile: Hochwertige Optik zum kleinen Preis, leicht zu reinigen, passt gut zu vielen Schrankfarben.
- Nachteile: Wiederholende Muster bei günstigeren Varianten können verraten, dass es sich nicht um echten Stein handelt.
Quiz: Wie ist deine Küchen-Backsplash-Persönlichkeit?
Kannst du dich nicht für einen Stil entscheiden? Beantworte diese kurzen Fragen, um das perfekte Peel-and-Stick-Fliesendesign für die einzigartige Ausstrahlung deiner Küche zu finden.
1. Wie würdest du die Ästhetik deiner Traumküche beschreiben?
2. Wähle eine Farbpalette:
Haltbarkeit und Hitzebeständigkeit: Können sie in Küchen bestehen?
Hast du Angst, dass dein neuer Backsplash hinter dem Herd schmilzt oder sich schon nach einem Monat ablöst? Das ist die größte Sorge, die viele davon abhält. Dieser Abschnitt beantwortet direkt die entscheidenden Fragen zu Haltbarkeit, Wasser und Hitze und gibt dir die Fakten, die du für einen sicheren Kauf brauchst.
Das ist die wichtigste Frage bei jeder Anwendung in der Küche. Ein Backsplash muss Dampf, Spritzer und Hitze standhalten. Die gute Nachricht: hochwertige selbstklebende Küchenfliesen sind speziell für den Küchenbereich entwickelt. Allerdings sind nicht alle Produkte gleich.
Die meisten Peel-and-Stick-Fliesen bestehen aus Vinyl, das von Natur aus wasserabweisend ist. Das macht sie zu einer ausgezeichneten Wahl für einen Backsplash hinter der Spüle, da sie die Wand vor Feuchtigkeit schützen und sich leicht abwischen lassen. Ein aktueller Branchenbericht stellte fest, dass über 70% der verkauften Peel-and-Stick-Produkte für den Einsatz in Küchen und Bädern geeignet sind.
Um wirklich zu verstehen, wie weit sich diese Materialien entwickelt haben, lohnt sich ein Blick auf ihre Leistung in noch anspruchsvolleren Bereichen. Für ein tieferes Verständnis wasserabweisender Eigenschaften zeigt unser Artikel über die Top wasserdichten Peel-and-Stick-Duschfliesen für 2025, wie weit diese Technologie gekommen ist, und belegt ihre Zuverlässigkeit selbst in stark feuchten Bereichen.
Wenn es um hitzebeständige Peel-and-Stick-Backsplash-Optionen geht, solltest du unbedingt die Spezifikationen des Herstellers prüfen. Die meisten hochwertigen Fliesen halten der Umgebungshitze in einer Küche stand, sollten aber nicht direkter Flamme ausgesetzt werden. Als Faustregel gilt, einen Sicherheitsabstand von 8-10 inches zwischen den Fliesen und einer offenen Flamme eines Gasherds einzuhalten.
Fallstudie: Ein Zwei-Jahres-Test
Mark, ein Mieter, hat vor zwei Jahren einen Peel-and-Stick-Backsplash hinter seinem Elektroherd angebracht. Er kocht täglich und ist beim Reinigen nicht besonders vorsichtig. Heute zeigen die Fliesen keine Anzeichen von Ablösen, Verfärbungen oder Hitzeschäden. Sein Geheimnis? Er hat die Wand richtig vorbereitet, indem er sie mit einem Fettlöser gereinigt hat, und sich für eine hochwertige Marke mit starkem Kleber entschieden.
Immer noch skeptisch? Schau dir an, was unsere Kunden sagen.
Der Beweis liegt in den Ergebnissen. Mieter und Hausbesitzer verwandeln ihre Räume mit Selbstvertrauen. Wenn du dich fragst, ob diese Fliesen den Hype wirklich wert sind, verlasse dich nicht nur auf unser Wort. Tauche in unseren umfassenden Testbericht ein, der Installation, Haltbarkeit und Stil aus der Perspektive eines echten Nutzers behandelt.
Den vollständigen Stickwoll-Fliesen-Testbericht lesenBei fachgerechter Installation und Pflege kann ein hochwertiger Peel-and-Stick-Fliesen-Backsplash problemlos 3 bis 5 Jahre oder sogar länger halten und ist damit eine zuverlässige und clevere Investition für jede Küche.
Pflege- und Tipps zur einfachen Entfernung für Mieter
Machst du dir Sorgen, wie du deine neuen Fliesen frisch hältst oder wie der gefürchtete Moment der Entfernung abläuft? Dieser Abschnitt ist dein mieterfreundlicher Leitfaden für einfache Reinigung, langfristige Pflege und einen Schritt-für-Schritt-Entfernungsprozess ohne Schäden.
Eine der besten Eigenschaften einer Peel-and-Stick-Küchenrückwand ist, wie pflegeleicht sie ist. Im Gegensatz zu herkömmlichen Fliesen gibt es keine Fugen, die geschrubbt oder neu versiegelt werden müssen. Für Mieter ist es jedoch entscheidend zu wissen, wie man die Fliesen pflegt und sie später rückstandslos wieder entfernt.
So reinigst du Peel-and-Stick-Fliesen
Fragst du dich, wie du Tomatensoßenspritzer beseitigst, ohne deine Fliesen zu beschädigen? Die richtige Reinigung ist einfach, aber entscheidend für die Langlebigkeit. Wir zeigen dir, wie deine Rückwand sauber und glänzend bleibt, ohne die Oberfläche oder den Kleber zu beschädigen.
Deine Fliesen wie neu aussehen zu lassen ist ganz einfach. Für alltäglichen Schmutz und Essensspritzer reicht ein weiches Tuch oder ein Schwamm mit warmem Seifenwasser. Wische sie vorsichtig ab und trockne sie mit einem sauberen Tuch, um Wasserflecken zu vermeiden.
Ein häufiger Fehler ist die Verwendung aggressiver oder scheuernder Reinigungsmittel. Produkte mit Ammoniak, Bleichmittel oder Schleifpartikeln können die Oberfläche matt machen oder mit der Zeit sogar Verfärbungen verursachen. Bleib bei milden, nicht scheuernden Reinigern. Eine einfache Mischung aus Wasser und ein paar Tropfen Spülmittel ist ideal.
Bewährte Methoden für langfristige Haftung
Du möchtest sicherstellen, dass deine Fliesen jahrelang haften bleiben? Das Geheimnis für langanhaltenden Halt liegt schon vor dem Anbringen der ersten Fliese. Dieser Abschnitt behandelt den wichtigsten Schritt, den die meisten überspringen: die richtige Vorbereitung der Wand.
Die Haltbarkeit deines Fliesenprojekts hängt fast vollständig von der richtigen Wandvorbereitung ab. Der Kleber braucht eine saubere, glatte und trockene Oberfläche, um eine starke Verbindung aufzubauen. Schon 30 zusätzliche Minuten für die Vorbereitung können die Lebensdauer deiner Rückwand um Jahre verlängern.
Beginne damit, die Wand gründlich mit einem Entfetter wie TSP (Trinatriumphosphat) oder einer einfachen Essig-Wasser-Lösung zu reinigen, um Fett und Schmutz zu entfernen. Stelle nach dem Reinigen sicher, dass die Wand vollständig trocken ist. Eingeschlossene Feuchtigkeit kann den Kleber mit der Zeit schwächen.
Für beste Ergebnisse sollte die Wand glatt sein. Wenn du eine strukturierte Wand hast, musst du sie möglicherweise leicht abschleifen oder zuerst eine dünne Schicht Spachtelmasse auftragen. Beachte immer die Empfehlungen des Fliesenherstellers für strukturierte Oberflächen. Wenn du Lust hast, selbst Hand anzulegen und ein lohnendes Projekt umzusetzen, zeigt dir unser kompletter Leitfaden zu DIY Peel-and-Stick-Fliesen jeden Schritt – von der Vorbereitung bis zum perfekten Ergebnis – für ein einfaches Küchen-Upgrade.
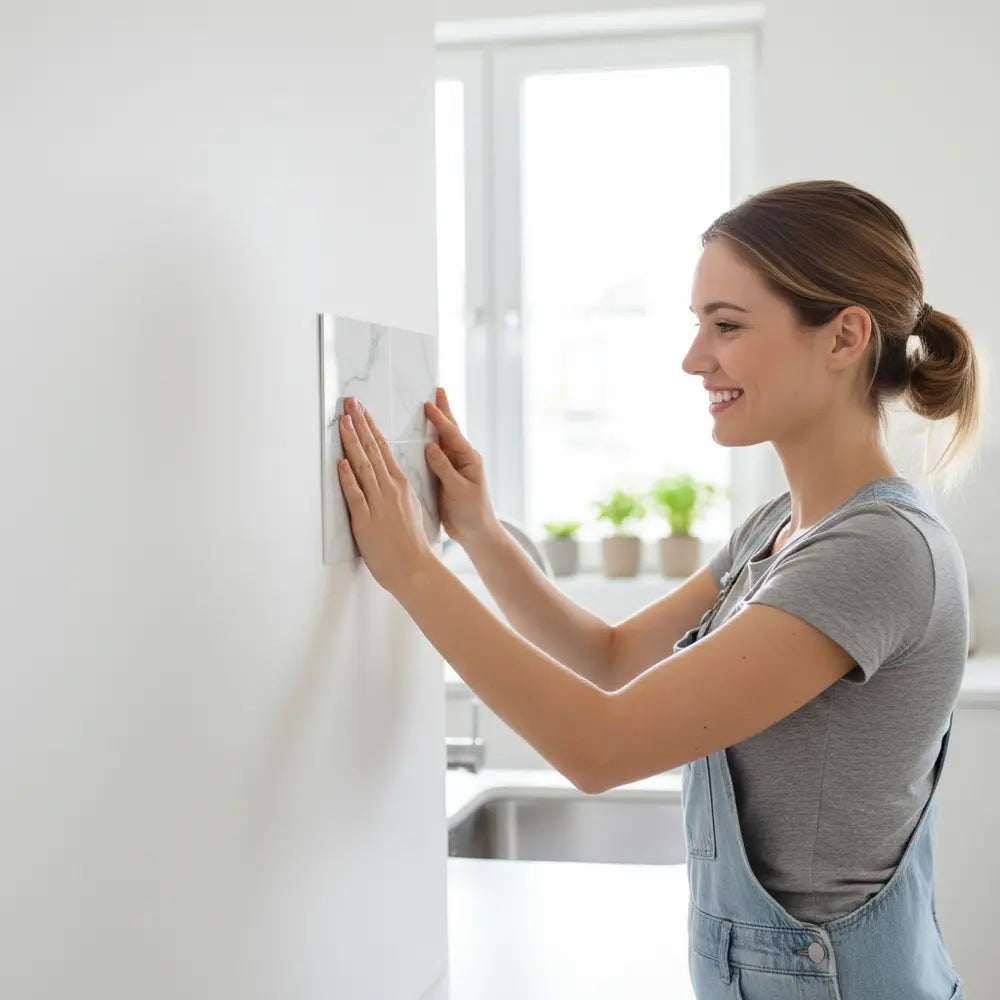
Schritt-für-Schritt-Entfernung ohne Wandschäden
Macht dir das Ende deiner Mietzeit Sorgen? Das ist der ultimative Leitfaden für die beschädigungsfreie Entfernung. Folge diesen einfachen Schritten, um deine Fliesen zu entfernen und die Wand so zu hinterlassen, wie du sie vorgefunden hast.
Das ist der Moment der Wahrheit für jede abnehmbare Fliesenrückwand für Apartments. Wenn du es richtig machst, bleibt die Wand darunter in perfektem Zustand. Der Schlüssel liegt darin, mit Wärme den Kleber zu lösen.

- 1.Werkzeug bereitlegen: Alles, was du brauchst, ist ein normaler Föhn und ein Kunststoffspachtel oder Schaber. Verzichte auf Metallwerkzeuge, da sie die Wand leicht beschädigen können.
- 2.Wärme anwenden: Stelle deinen Föhn auf mittlere oder hohe Hitze ein. Halte ihn etwa 2-3 inches von der Ecke der ersten Fliese entfernt und erwärme die Oberfläche für etwa 30-60 Sekunden. Du wirst merken, wie die Fliese flexibler wird.
- 3.Vorsichtig anheben: Sobald der Kleber weich geworden ist, schiebe die Kante deines Kunststoffspachtels unter die Ecke der Fliese und beginne vorsichtig, sie anzuheben.
- 4.Langsam abziehen: Setze die Wärme mit dem Föhn immer knapp vor der Stelle fort, an der du die Fliese abziehst. Ziehe die Fliese langsam und gleichmäßig von der Wand. Reiße sie nicht ruckartig ab, da sonst Farbe oder Gipskartonpapier abgezogen werden können.
- 5.Rückstände entfernen: Falls klebrige Rückstände zurückbleiben, lassen sie sich meist mit einem Reiniger auf Zitrusbasis (wie Goo Gone) oder einfach durch Abrubbeln mit den Fingern entfernen. Wische die Wand danach mit einem feuchten Tuch sauber.
Wenn du diesen Ablauf befolgst, kannst du dein schönes Küchen-Makeover ganz entspannt genießen und weißt, dass sich die Fliesen später mühelos entfernen lassen.
Stilvolle Küchenverwandlungen: Echte Vorher-Nachher-Beispiele
Brauchst du einen Beweis dafür, dass schon ein kleines Budget eine große Wirkung erzielen kann? Oft ist die Veränderung erst richtig zu erkennen, wenn man sie selbst sieht. In diesem Abschnitt zeigen wir inspirierende, echte Beispiele dafür, wie Peel-and-Stick-Fliesen eine Küche für unter 100 $ komplett verwandeln können.
Die wahre Stärke von Stick-on-Tiles für die Küche an den Wänden zeigt sich in der dramatischen Veränderung, die sie bewirken können. Sie verwandeln eine veraltete, triste Küche in nur wenigen Stunden in einen modernen, lebendigen Raum. Das sind nicht nur kleine Anpassungen – das sind echte Rundum-Veränderungen, die das Herz des Zuhauses neu definieren.
VORHER: Trist und veraltet

AFTER: Hell und modern

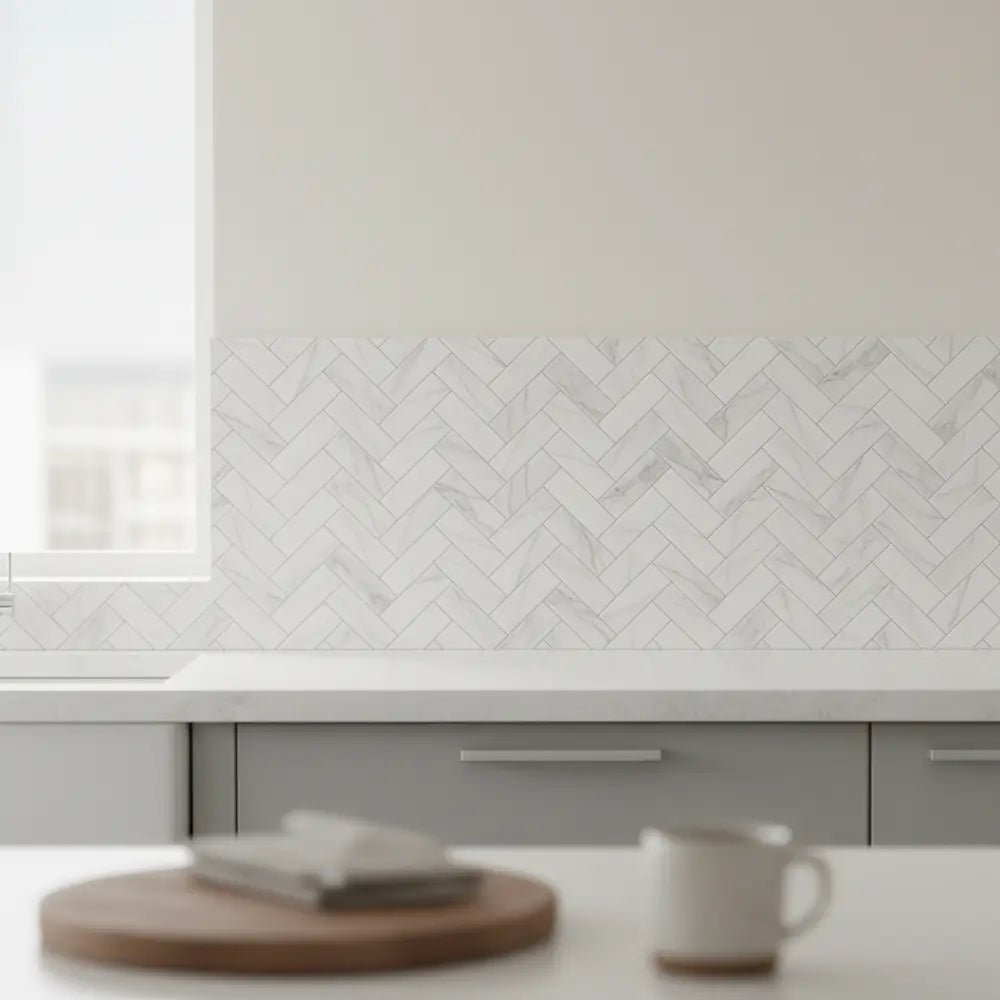
Stellen Sie sich eine Apartmentküche mit alten, vergilbten Laminat-Arbeitsplatten und schlichten weißen Wänden vor. Sie wirkt steril und wenig einladend. Für weniger als 100 US-Dollar bringt der Mieter einen Fliesenspiegel aus stick on tiles für kitchen Wänden mit glänzender Oberfläche an. Das Licht reflektiert nun im Raum und lässt ihn heller und großzügiger wirken. Die klaren Linien der U-Bahn-Fliese verleihen einen Hauch moderner Eleganz.
Ein weiteres Beispiel ist ein Hausbesitzer mit knappem Budget, der sich einen Hauch von Luxus wünschte. Seine Küche war funktional, hatte aber wenig Persönlichkeit. Er entschied sich für eine Peel-and-stick-Fliese in Marmoroptik und schuf damit eine beeindruckende Akzentwand hinter seinen offenen Regalen. Das Projekt dauerte an einem Sonntag drei Stunden und wertete den gesamten Raum deutlich auf, sodass er maßgeschneidert und hochwertig wirkte. Entdecken Sie weitere Möglichkeiten, Ihre Wände aufzuwerten, in unserem Ratgeber zu Stilvollen Küchen-Wandakzenten, in dem wir alles von Fliesen bis zu Zierleisten behandeln.
Diese Geschichten über DIY-Küchen-Makeover zeigen, dass Sie weder ein großes Budget noch professionelle Kenntnisse brauchen, um eine Küche zu schaffen, die Sie lieben. Es geht darum, kreativ zu sein und clevere, bezahlbare Materialien einzusetzen, um eine große Wirkung zu erzielen.
Für mehr anschauliche Beispiele und Ideen ist es wichtig, reale Projekte anzusehen. Unser Artikel Verwandeln Sie Ihre Küche mit Peel-and-Stick-Fliesen ist voller Vorher-nachher-Fotos, die das enorme Potenzial dieser Produkte zeigen. Schon kleine Veränderungen können eine große Wirkung haben, und unser Ratgeber zu Trendigen Küchenwand-Ideen für 2025 bietet noch mehr Inspiration für Ihr nächstes Projekt.
Ihre neue Küche wartet
Sie müssen nicht länger mit einer Küche leben, die Sie nicht inspiriert. Die Erschwinglichkeit, der Stil und der mietfreundliche Charakter von peel and stick kitchen backsplash-Fliesen geben Ihnen die Gestaltungskraft direkt in die Hand. Sie können einen schönen, individuellen Raum schaffen – ohne die hohen Kosten oder die dauerhafte Verpflichtung einer herkömmlichen Renovierung.
Sobald Sie die Grundlagen von Montage und Pflege verstanden haben, können Sie dieses Projekt mit vollem Vertrauen angehen. Das Ergebnis ist eine Küche, die nicht nur fantastisch aussieht, sondern auch Ihren persönlichen Stil widerspiegelt.
Abschließende Checkliste für Mieter
Bevor Sie kaufen, gehen Sie diese kurze Checkliste durch, damit Ihr Projekt reibungslos und erfolgreich verläuft:
- Prüfen Sie Ihren Mietvertrag: Lesen Sie Ihren Mietvertrag kurz durch, um nach speziellen Klauseln zu Wandverkleidungen zu suchen, auch bei vorübergehenden Lösungen.
- Messen Sie Ihren Raum aus: Messen Sie Höhe und Breite des Bereichs, den Sie abdecken möchten, um die Quadratmeterzahl zu berechnen. Kaufen Sie etwa 10% zusätzlich, um Fehler und knifflige Zuschnitte einzuplanen.
- Muster testen: Bestellen Sie, wenn möglich, eine einzelne Fliese als Muster und testen Sie sie an einer unauffälligen Stelle Ihrer Wand. Prüfen Sie die Haftung und wie leicht sie sich nach 24 Stunden wieder entfernen lässt.
- Hitzesicherheit bestätigen: Wenn Sie Fliesen hinter einem Herd anbringen, überprüfen Sie unbedingt die Hitzebeständigkeit des Produkts, um sicherzustellen, dass es für Ihre Situation geeignet ist.
Bereit, den perfekten Stil für Ihren Raum zu finden? Überlassen Sie Ihre Entscheidung nicht dem Zufall. Wir haben die Recherche für Sie übernommen und die Top-Produkte auf dem Markt nach Optik, Haftung und Preis-Leistungs-Verhältnis verglichen.
Entdecken Sie die besten Peel-and-Stick-Küchenfliesen von 2025Melden Sie sich für unseren Newsletter an und erhalten Sie weitere DIY-Tipps, Trend-Updates und mietfreundliche Ideen zur Wohnraumverschönerung direkt in Ihr Postfach.
Häufig gestellte Fragen (FAQ)
1. Kann man stick on tiles über vorhandene Küchenfliesen kleben?
Ja, in vielen Fällen schon. Die vorhandenen Fliesen müssen sauber, eben und fettfrei sein. Peel and stick tiles haften am besten auf glatten Oberflächen. Wenn Ihre aktuellen Fliesen also eine starke Struktur oder tiefe Fugen haben, wird das Ergebnis möglicherweise nicht vollkommen eben. Für ein glatteres Finish ist es am besten, tiefe Fugen mit einer Füllmasse zu verfüllen.
2. Wie repariere ich eine peel and stick tile, die sich an der Ecke zu lösen beginnt?
Wenn sich eine Ecke oder Kante zu lösen beginnt, ist das normalerweise leicht zu beheben. Heben Sie den ablösenden Bereich vorsichtig an und tragen Sie eine kleine Menge zusätzlichen Kleber auf, zum Beispiel einen Sprüh-Baukleber oder einen speziellen Primer für peel and stick tiles. Drücken Sie die Fliese fest wieder an ihren Platz und halten Sie sie eine Minute lang, damit eine starke Haftung entsteht.
3. Sind peel and stick backsplashes wirklich hitzebeständig genug für einen Gasherd?
Die meisten hochwertigen peel and stick tiles sind hitzebeständig, aber nicht feuerfest. Sie halten der Umgebungswärme beim Kochen stand, sollten jedoch nicht direkter Flamme ausgesetzt werden. Bei einem Gasherd sollten Sie einen Abstand von mindestens 8-10 inches zwischen den Brennern und den Fliesen einhalten. Manche bringen direkt hinter dem Herd eine Edelstahlplatte an und fliesen den Bereich darum herum, um zusätzlichen Schutz zu bieten.
4. Wirkt ein peel and stick backsplash billig?
Das ist eine häufige Sorge, aber die Qualität von peel and stick tiles hat sich deutlich verbessert. Entscheidend ist, dickere 3D-Fliesen mit Gel- oder Epoxy-Oberfläche zu wählen, da diese die Tiefe und den Glanz echter Fliesen besser nachahmen. Wenn Sie übermäßig wiederholte Muster vermeiden und sich bei der Montage Zeit nehmen, um saubere Linien sicherzustellen, entsteht ein professioneller, hochwertiger Look.

Kommentar hinterlassen
Diese Website ist durch hCaptcha geschützt und es gelten die allgemeinen Geschäftsbedingungen und Datenschutzbestimmungen von hCaptcha.