












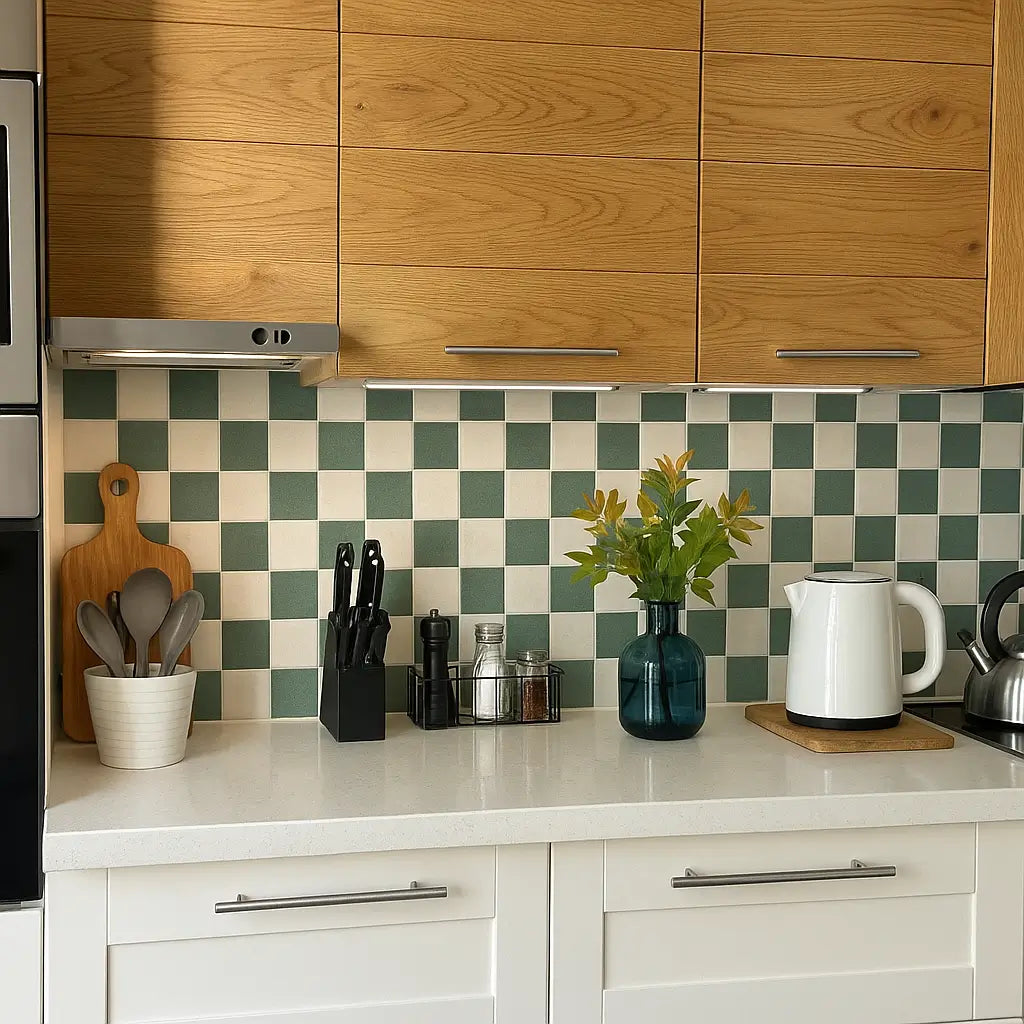
Exploring 2026 Kitchen Wall Trends
Why Peel and Stick is Gaining Popularity
- Easy installation: No messy glue or grout—just peel and stick!
- Budget-friendly: Affordable compared to traditional tiles.
- Renter-friendly: Removable without damaging walls.
Peel and stick tiles are revolutionizing kitchen renovation because they offer a hassle-free way to upgrade your space. Whether you’re a DIY beginner or a seasoned pro, these tiles save time and effort. Plus, they come in endless designs, from modern kitchen designs to rustic farmhouse looks.
Explore this guide
Benefits of Easy Installation
- Quick updates: Refresh your kitchen in a single weekend.
- No special tools: Just a measuring tape and a steady hand.
- Minimal cleanup: Skip the dust and grout residue.
If you’re looking for a quick kitchen makeover, peel and stick tiles are the perfect solution. For example, our Coastal Breeze tiles add an instant beachy vibe without the hassle of traditional backsplashes.
Mix and Match Approach
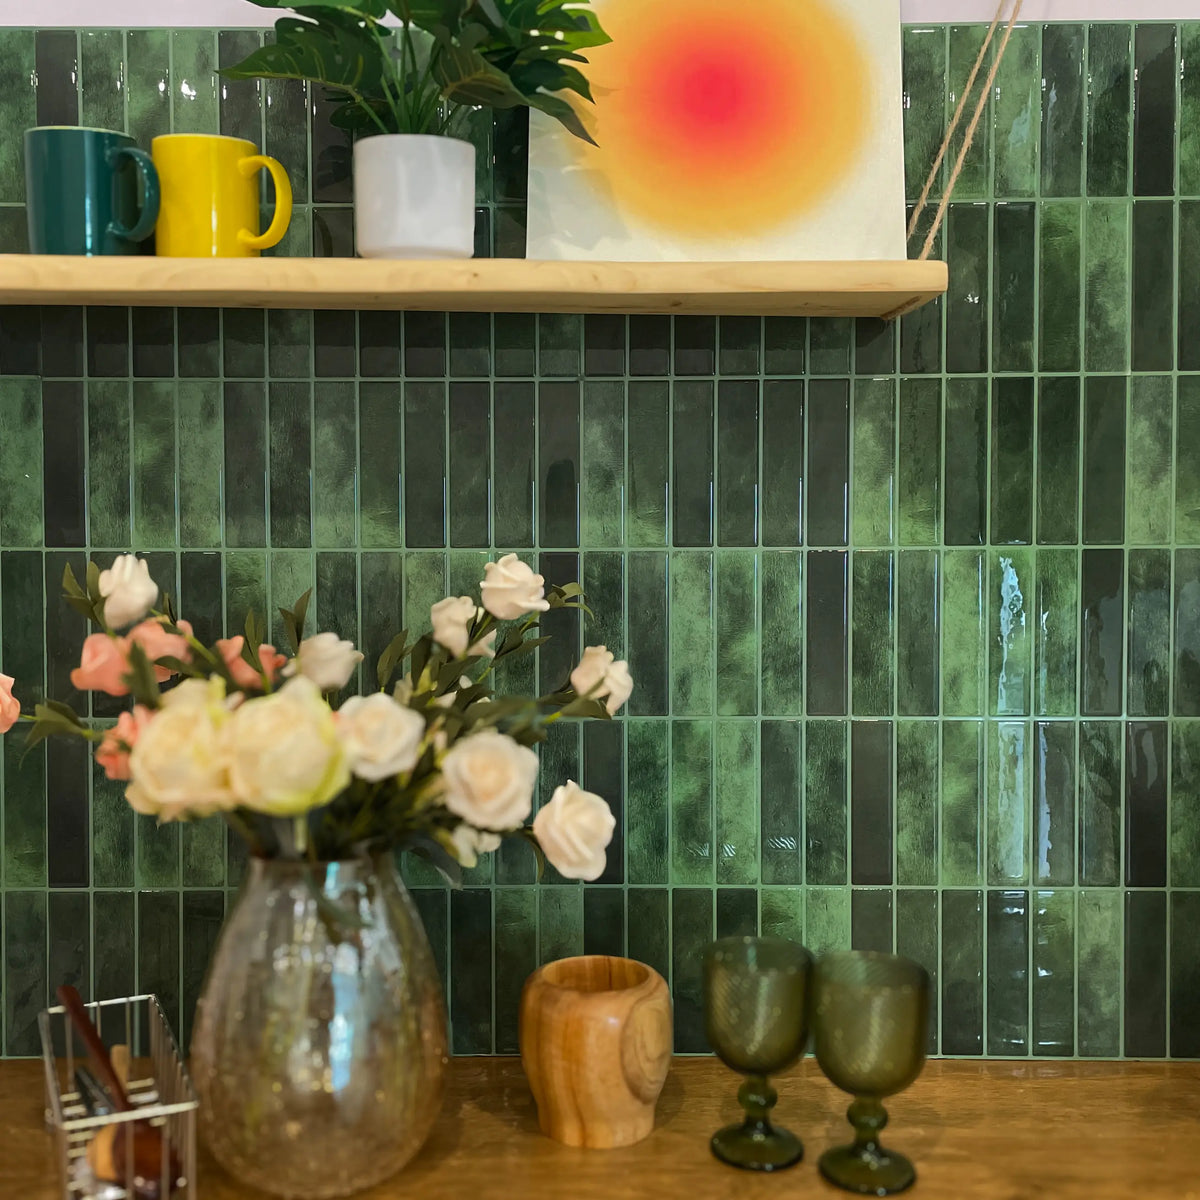
Combining Peel and Stick Tiles with Open Shelving
- Visual contrast: Sleek tiles paired with rustic shelves.
- Functional storage: Display dishes while keeping walls stylish.
- Customizable layouts: Match tiles to shelf materials.
This design combination creates a balanced look. Try our Olive Squares tiles with wooden shelves for a warm, earthy feel.
How to Select the Right Materials
- Durability: Choose water-resistant tiles for kitchens.
- Color coordination: Pick complementary shades.
- Texture play: Mix glossy tiles with matte shelves.
For more stylish kitchen ideas, check out our blog on Modern Kitchen Decorations.
Selecting Peel and Stick Tiles
Popular Designs and Materials
- Geometric patterns: Like our Bright White Zigzag tiles.
- Natural textures: Such as wood-look Timberline Checks.
- Bold colors: For example, Crimson Horizon.
Tips for Choosing Quality Products
- Check adhesive strength: Ensure tiles stick firmly.
- Read reviews: Learn from others’ experiences.
- Sample first: Test a small area before committing.
For kitchen tile patterns inspiration, explore Trendy Kitchen Wall Ideas.
The Benefits of Open Shelving
Why Integrate Open Shelving?
- Airy feel: Makes small kitchens look larger.
- Easy access: Grab spices or dishes quickly.
- Display decor: Show off your favorite mugs or plants.
Pair shelves with Blush Petals tiles for a soft, inviting look.
Installation Tips and Tricks
Step-by-Step Guide for Peel and Stick Tiles
- Clean the wall: Remove grease or dust.
- Measure and mark: Plan your layout.
- Peel and press: Smooth out bubbles as you go.
For a detailed guide, read our DIY Peel and Stick Kitchen blog.
Conclusion
Updating your kitchen wall decor in 2026 is easier than ever with peel and stick tiles and open shelving ideas. Whether you want a modern kitchen design or a cozy farmhouse vibe, these trends offer endless possibilities.
FAQs
Q: How long do peel and stick tiles last?
A: With proper surface preparation and care, they can last 5+ years, making them a lasting solution for your home.
Q: Are open shelves practical for small kitchens?
A: Absolutely! They maximize vertical space and creating an airy feel—learn more in Small Kitchen Decor Hacks.
Q: Can I remove peel and stick tiles without damage?
A: Yes, simply use heat from a hairdryer to loosen the adhesive. They’re perfect for renters. See Renter-Friendly Kitchen Walls for tips.
Ready to transform your kitchen? Browse our peel and stick tile collection today!
Use wall ideas as a menu, not a trend prescription
A kitchen can combine backsplash, paint, open shelving, framed art, wood detail or a dry-wall accent. Start with the fixed cabinets, counters, floor and appliances, then decide which wall needs visual emphasis and which walls should stay quiet.
A current-looking room does not require every fashionable element at once. One clear focal point usually creates more coherence than stacking multiple patterns and shelves across a small space.
Choose open shelving for use as well as appearance
Open shelves put objects into the visual composition, but they also collect dust and cooking residue. Place frequently used dishes or durable objects where they can be cleaned easily and keep the shelf away from conditions the material or mounting system cannot handle.
Shelves need appropriate structural attachment. A decorative adhesive tile or wall panel should not be treated as the support for shelving hardware.
Coordinate the backsplash with shelving before drilling
Mark shelf height and bracket positions on the planned backsplash layout. Decide whether the decorative field passes behind the shelf, stops below it or becomes a separate accent zone.
This prevents a strong grout line or pattern from colliding visually with the shelf and keeps fasteners accessible.
Use lighting to judge wall color and pattern
Compare real samples under daylight, ceiling fixtures and under-cabinet task lighting. DOE lighting guidance is a useful reminder that light-source appearance and color rendering affect what the material looks like.
Gloss, relief and metallic effects can create glare or highlights that are not visible in a catalog image.
Map sink, prep and cooking zones
A kitchen wall is not one exposure. Record repeated splash, grease, steam, appliance heat and ordinary dry areas. Match the exact wall product to the zone rather than assuming all high-quality vinyl behaves the same way.
A dry dining wall can often support a more decorative finish than a hard-working cooking zone.
Treat heat claims as product-specific
Check the appliance instructions and the selected wall material. Do not rely on a universal distance or a generic statement that a vinyl tile is made for kitchens.
If suitability is unclear, move the accent or choose a documented system for the cooking area.
Inspect moisture before decorating
Recurring dampness, soft drywall, staining or mold should be investigated first. EPA guidance emphasizes moisture control; a wall covering should not hide the source.
Around the sink, inspect the counter joint and penetrations before adding another layer.
Use pattern scale to control visual energy
Large motifs, fine grids and vertical lines create different rhythms once repeated across a whole wall. Mock up several repeats and view them from the doorway.
Furniture and shelving can hide the center of a pattern and leave only fragments visible, so evaluate the furnished room rather than an empty wall.
Plan exposed edges and returns
Decide how the backsplash or accent ends at a cabinet, doorway or open wall. Use a product-compatible edge, trim or clean termination.
A finish can look convincing head-on but reveal a contrasting backing or thickness from the side.
Make cleaning part of material selection
Open shelving and textured wall finishes increase the number of surfaces that need cleaning. Read the exact care instructions and consider whether the household’s routine matches the finish.
Do not assume a decorative coating tolerates the same scrubber or chemical as ceramic tile.
Keep future flexibility
Use small changeable layers—art, objects, textiles or a limited accent wall—to carry short trend cycles while durable fixed finishes stay calmer.
This makes the next refresh less wasteful and avoids rebuilding the whole wall when color preferences change.
Use a final wall-plan checklist
Confirm zone suitability, wall condition, lighting, shelf attachment, outlet access, exposed edges, cleaning and future repair before installation.
A wall idea is ready when the technical details support the look rather than being hidden by it.
Compare paint, tile and shelving as separate layers
Paint changes color with minimal thickness, backsplash materials add a cleanable working surface and shelving adds storage plus visible objects. Decide which problem each layer is solving before combining them.
A wall does not become more current simply because all three appear together. The strongest plan gives each layer a job.
Use a dry-wall accent when the backsplash is already good
If the existing backsplash is durable and visually compatible with the kitchen, leave it in place and put the trend layer on a dry side wall or dining zone.
This can reduce material use and avoid creating a second surface over one that already functions well.
Make open shelving edit the view, not increase clutter
Decide in advance what will live on the shelf. Frequently used dishes, a small group of glassware or a few durable objects are easier to maintain than a rotating collection of decorative pieces.
Leave negative space between groups. The wall pattern and the objects should not both compete at maximum contrast.
Coordinate shelf finish with hardware and appliances
Black, brass, chrome, wood and painted shelves each create a different relationship with cabinet pulls and appliances. Use the fixed hardware as a reference instead of treating the shelf as an isolated trend object.
A material board can reveal when the room has too many unrelated metal finishes or wood tones.
Plan the shelf bracket before the backsplash pattern
Bracket locations need appropriate structural support. Mark them before finalizing the decorative pattern so a strong grout line or motif is not cut awkwardly by hardware.
Do not rely on adhesive wall covering as the attachment surface for a loaded shelf.
Use art where cleaning exposure is low
Framed prints or textile art can be an easy way to change a kitchen wall without installing another permanent surface. Place them away from direct grease, steam and repeated sink splash unless the framing system is designed for that environment.
Keep the mounting method appropriate to the wall and item weight, especially in rentals.
Treat texture as a maintenance decision
Fluted, brick-like, relief and woven-look surfaces create shadow and depth but also change how dust or grease settles. Compare the permitted cleaning method before choosing a high-relief finish beside cooking.
A smoother version of the same color can be more practical in a hard-working zone while the deeper texture moves to a dry accent wall.
Use vertical lines only when they fit the architecture
Vertical tile or panel layouts can create a strong directional rhythm, but they do not universally make every kitchen look taller. Check how the lines meet cabinet edges, windows and the ceiling.
Choose orientation because it produces a balanced composition in the actual room, not because of a assured optical effect.
Plan a mixed-material transition
If paint, tile and wood meet on one wall, decide where the transition occurs and how the exposed edge is finished. Aligning the change with a cabinet edge, shelf or architectural break can look more deliberate than stopping in an arbitrary location.
Dry-fit the boundary and view it from across the room before installing permanent material.
Use trend color in replaceable pieces first
If you are unsure about a strong color, test it in art, stools, textiles or a small dry-wall sample before committing to a large backsplash.
This separates color experimentation from the technical requirements of the working wall and reduces the cost of changing direction later.
Compare the wall after counters are cleared
Visual clutter on the counter can make a wall pattern seem busier than it really is. Clear the work surface to its normal reset state before judging whether the wall needs more pattern or storage.
Sometimes the best wall update is smaller because organization already gives the room more visual breathing space.
Keep a material and maintenance record
Store the product names, paint colors, shelf hardware, approved cleaners and spare finish material together. Photograph the completed wall from the main sight lines.
The record makes future repairs and updates easier because the next change can build on known materials instead of starting from guesswork.
Review trends against replacement cost
Ask which elements can change cheaply and which require major labor to reverse. Put fast-moving preferences into the low-cost layer and reserve more durable finishes for choices you are comfortable keeping longer.
This does not predict how long a style will remain popular. It simply aligns design flexibility with the cost of change.
Use a final composition check
Step back with the room fully furnished and check whether backsplash, shelves, art, hardware and counter objects have a clear hierarchy. Remove one element if several are competing for attention.
A current kitchen wall can still be calm. Trend awareness is most useful when it helps you choose deliberately rather than add more.
Use ceiling height and cabinet height together
A wall treatment that continues above cabinets creates a different composition from one confined to the backsplash zone. Mark the upper boundary before choosing pattern scale or orientation.
If the wall includes crown molding, soffits or uneven cabinet heights, use those real lines in the mockup instead of assuming a standard kitchen elevation.
Treat a pantry or tall cabinet wall as its own composition
Tall cabinets can create a large vertical plane with very little exposed wall. A strong pattern squeezed into the remaining strip may look busier than expected.
In that situation, color or small art may provide a cleaner update than extending a full backsplash material into every gap.
Coordinate wood tones deliberately
Open shelves, floors, butcher block and cabinet finishes can introduce several wood colors. Compare undertones rather than assuming all natural wood automatically works together.
Repeating one wood tone or choosing a clear contrast often looks more intentional than adding a fourth similar-but-not-matching finish.
Use metal accents in a controlled set
Shelf brackets, cabinet pulls, faucet, lights and appliances may already represent several metal finishes. Decide whether a new wall detail should repeat one of them or remain visually neutral.
There is no requirement that every metal match exactly, but the mix should look chosen rather than accidental.
Plan a backsplash around an irregular counter
Older counters and walls may not be perfectly straight. Dry-fit the first course and decide how the visible line will be controlled without forcing flexible material into tension.
A level reference and product-approved edge treatment are more reliable than simply following an uneven counter line across the room.
Use a shelf mockup before making holes
Tape the shelf length and bracket positions on the wall and place representative objects within the outline. Check whether the shelf crowds the backsplash pattern, window or cabinet doors.
This lets you change proportion and position before structural attachment or decorative installation begins.
Keep frequently touched walls practical
A wall beside a breakfast bench, doorway or trash area may receive repeated contact even if it is dry. Choose a finish whose cleaning and abrasion guidance fits that use.
A delicate texture can still be used elsewhere in the room where it is less likely to be bumped.
Use a project budget by layer
Separate costs for paint, wall finish, shelves, hardware, electrical changes, trim and repair. This prevents a low-cost decorative material from making the total project appear cheaper than it is.
If the budget grows, remove the least important layer rather than reducing preparation or safety-related work.
Plan renter-friendly changes as reversible layers
Use lease-permitted paint, art, freestanding storage or compatible removable wall material where appropriate. Photograph the original condition and keep removal instructions.
A renter-focused design should include the effort of restoration rather than claiming the wall will be unchanged.
Finish with a one-week use review
After the wall update, cook, clean and use the kitchen normally for a week. Notice whether shelving is convenient, whether the finish shows grease, whether glare is distracting and whether any edge receives repeated impact.
Use those observations to refine small details before extending the same idea elsewhere.
Use a low-commitment prototype for a strong idea
Before painting a large wall or installing a bold pattern, create a temporary full-size panel or paper mockup and live with it for several days. View it during cooking, cleaning and evening lighting.
A prototype exposes scale and color issues while change is still inexpensive.
Keep ventilation paths visually quiet
Range-hood clearances, return-air paths and appliance vents should remain unobstructed. Avoid arranging shelves, fabric or decorative objects so they crowd equipment that needs airflow or service access.
Technical space can be left visually simple rather than filled just because it is blank.
Treat the sink window wall as a separate design problem
A sink under a window creates trim, splash, sill and sight-line conditions that differ from a standard cabinet backsplash. Decide where the finish ends and how the window remains easy to clean.
If water regularly reaches the sill or jamb, use materials and details appropriate to that exposure rather than assuming the wall product alone protects the assembly.
Plan artwork around humidity and grease
Kitchen art can work well on a dry side wall, but paper, textile and unsealed frames are poor choices directly beside repeated steam or grease. Match the object and frame to the location.
A strong piece placed farther from the work zone can still provide the color or theme without increasing cleaning difficulty.
Use shelves to frame negative space
Open shelving does not need to fill the entire wall. Leaving a deliberate gap around a window, hood or art piece can make the composition feel calmer and preserve easier cleaning.
Measure the objects that will actually be stored before setting shelf spacing.
Choose one trend to lead
If the room already uses a bold backsplash, let open shelving and wall color support it. If the wall is painted a strong color, a simpler backsplash may be enough.
Picking one leading trend reduces the chance that several individually attractive ideas compete with one another.
Recheck the design after seasonal objects are removed
Holiday decor, plants and countertop appliances can temporarily change how busy the wall appears. Judge the permanent wall plan with those temporary layers removed first.
Then add seasonal or movable objects back in smaller amounts so the permanent composition remains legible.
Create a future-change map
Mark which parts of the wall are easiest to repaint, re-style, repair or remove and which involve outlets, trim or structural shelf attachment. Put faster-changing preferences in the easier zones.
This turns flexibility into a practical layout decision instead of a vague promise that the whole kitchen can be changed easily.
Use the refrigerator wall for scale testing
Large uninterrupted side walls can make a small sample appear much more repetitive once expanded. Tape several paper repeats beside the refrigerator or pantry and view them from the room entrance.
If the repeat feels too busy, reduce the covered area or choose a larger, quieter motif.
Coordinate ceiling fixtures with wall sheen
Pendant and ceiling lights can create reflections on glossy wall finishes that differ from under-cabinet lighting. Check the sample with all normal evening lights on.
If glare becomes the focal point, change finish, light direction or wall location rather than relying on the catalog image.
Plan cleaning reach on tall wall sections
A finish above cabinets or around a tall pantry may be difficult to reach for routine cleaning. Use a material whose maintenance needs make sense at that height and avoid placing grease-prone decor where it cannot be cleaned safely.
Decorative height should not create a maintenance problem.
Keep one documented reason for every layer
For paint, backsplash, shelf, art or trim, write the job it performs: color, cleanable surface, storage, focal point or edge finish. Remove a layer that has no clear job.
This simple test keeps a trend-driven wall from becoming a collection of unrelated features.
Review the plan against future appliance changes
A new refrigerator, range hood or countertop appliance can change sight lines, clearances and wall exposure. Keep strong permanent details away from areas likely to be reconfigured soon.
Place faster-changing design ideas on walls that are less dependent on a specific appliance footprint.
Keep one wall easy to repaint
Even in a layered kitchen, leaving one prominent wall as paint can provide a low-cost place for future color changes without disturbing shelves, backsplash or electrical details.
That simple flexibility can carry a new palette when the permanent working surfaces still perform well.
Final trend filter
Keep an idea when it fits the wall conditions, cleaning routine, room lighting and future change cost. Drop it when it only works in a styled photograph or requires ignoring product and appliance limits.
The result can still feel current without depending on unsupported claims about what every modern kitchen should include.
Keep the wall plan readable after installation
Photograph the final shelf positions, finish transitions and service points and save the product names. A future update is easier when the wall can be understood without removing pieces to discover what is behind them.
If one layer changes later, update the record rather than rebuilding the whole design history from memory.
Use the wall after the novelty wears off
Revisit the room several weeks after the update, once the newness is gone. Check whether the shelf still earns its space, the wall is easy to clean and the focal point still feels balanced with daily objects.
If one layer consistently creates clutter or maintenance without adding useful function, simplify it. A durable wall plan is allowed to become quieter after real use reveals what matters.
Keep the final wall simple enough to maintain
A wall idea should remain easy to wipe, inspect and service after the styling layer is added. If maintaining the look requires constant moving or special handling, simplify the composition before considering the project finished.
Sources and scope
- US DOE: Color and Spectrum — Lighting and color-rendering context; not a material-performance rating.
- US EPA: A Brief Guide to Mold, Moisture and Your Home — Moisture-control guidance; not approval of a decorative wall covering or shower assembly.
- 3M: Applying VHB Pressure-Sensitive Tape — General surface-preparation principles for named 3M tapes; not Stickwoll specifications.


Leave a comment
This site is protected by hCaptcha and the hCaptcha Privacy Policy and Terms of Service apply.