





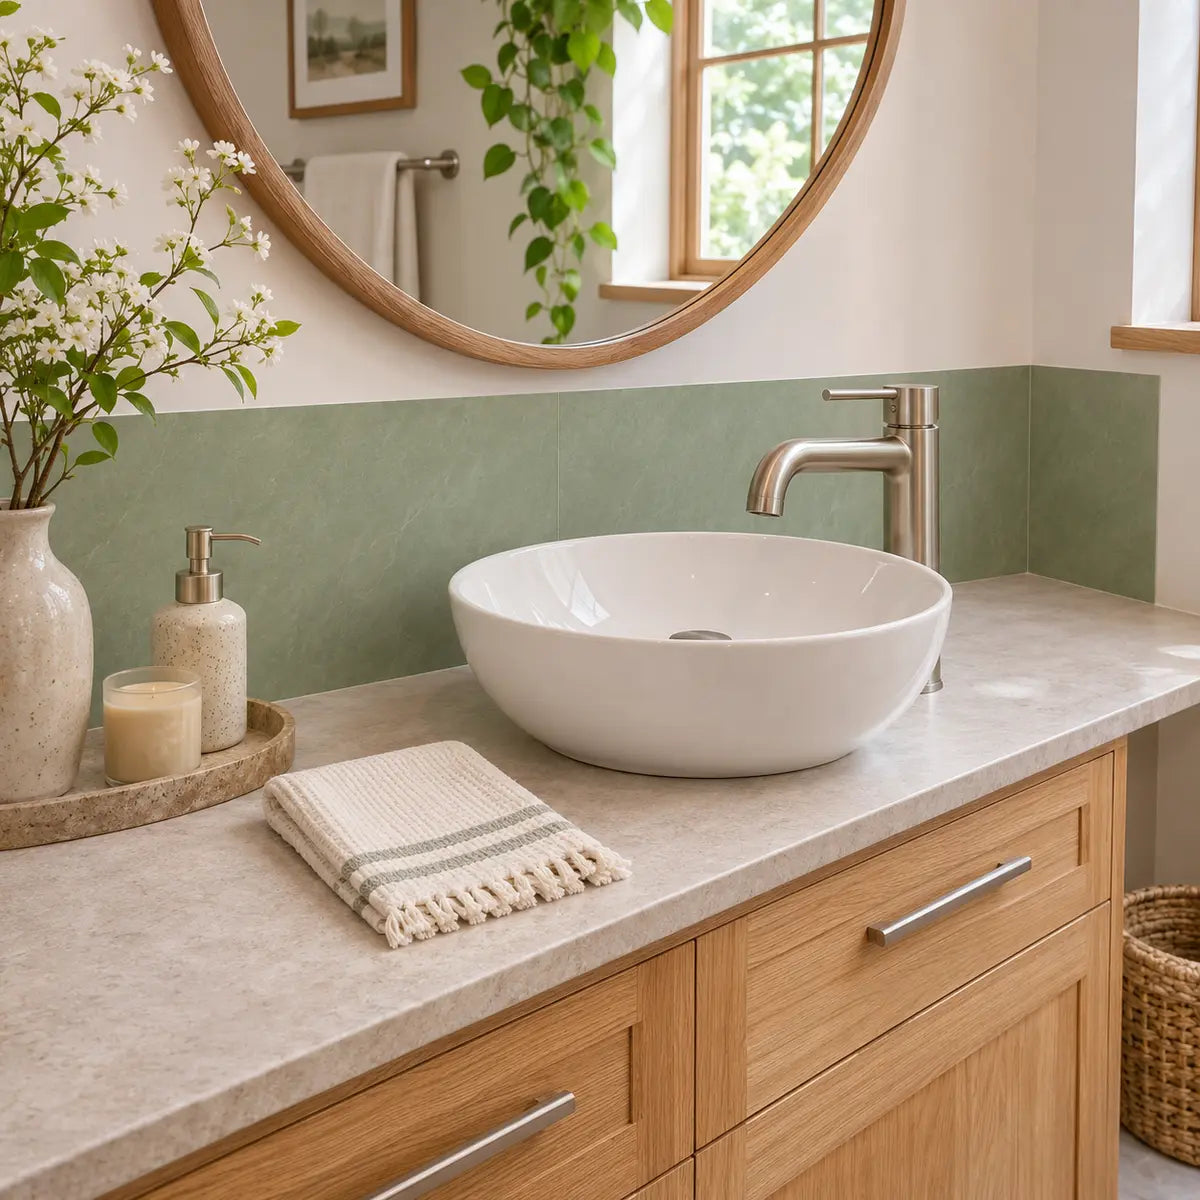
Yes, you can install a peel-and-stick backsplash behind a vessel sink if the exact tile is approved for your wall surface and the water exposure at the vanity. To size it, put the zero end of the tape measure on the countertop. Record the bowl rim and faucet outlet as separate heights. Set the top and side edges beyond the places where droplets repeatedly land during normal handwashing.
Can peel-and-stick tile go behind your vessel sink?
It can work on a sound wall that the tile manufacturer approves for vanity use and the amount of splashing you see. Look at the wall after handwashing and again later. A few droplets on a wall that dries between uses present a different set of conditions from a wall that stays damp or gets direct spray from a nearby shower.
Check these four things before buying:
- Placement and exposure. Find the instructions for the exact tile or sheet. Look for approval for the proposed bathroom location and check any limits on splashing, humidity, and direct spray. A water-resistant tile face tells you little about the wall behind it or the joints around it.
- The surface the adhesive will touch. Identify the actual finish, such as painted drywall, primer, or glazed tile. Check that the finish is firmly attached, flat enough for the sheets to lie against, and approved by the tile maker. Look closely at the wall below the rim, where damage is easy to miss.
- Moisture and damage. Investigate peeling paint, soft wallboard, a wet counter joint, or dampness that returns when nobody has used the faucet. Fix leaks or other moisture sources and let affected materials dry before covering the wall. Report recurring dampness or leaks to building management if you rent. See the EPA’s home moisture and mold guidance.
- Permission and access. Check whether you can change the finish, apply primer, add trim or sealant, or temporarily remove a fixture if the layout requires it. Treat each change as a separate decision. Permission to put up adhesive sheets may leave the other work out.
If your vanity sits beside a tub or shower, observe what reaches the proposed backsplash during ordinary use of those fixtures, too. For more on distinguishing vanity droplets from heavier exposure, check the bathroom splash and moisture guide.
Check painted drywall and existing tile
On painted drywall, inspect patches and areas where paint has flaked or lifted. Adhesive applied to a loose layer of paint still depends on that layer staying attached. Use the cleaner and preparation method listed for the tile, and check the required wait after priming or painting. Paint that feels dry can still be within the manufacturer's waiting period. For example, the Smart Tiles U.S. self-adhesive tile FAQ specifies 72 hours after the primer application it describes and 21 days after fresh paint. Those waits apply to the preparations in that FAQ.
On existing tile, confirm that the manufacturer approves an overlay on that finish. Place a straightedge across several tiles and grout lines. Look for raised tile edges, recessed joints, texture, and loose tiles. Hold a liner-backed sample over a typical joint to see where it bridges the recess. If the adhesive would have to span an irregular area, check the manufacturer's accepted preparation before committing. You can use the same inspection method to check painted drywall and existing tile before applying adhesive sheets.
What should renters document before buying?
Get permission for the actual installation, including any surface preparation and the planned countertop finish. Photograph the existing wall, paint defects, tile joints, and caulk in good light. Save the tile maker’s removal instructions and record what the property manager expects you to restore. Include any primer, trim, or sealant in that conversation because it may have its own removal requirements.
Read the removal directions for the specific tile and surface. Smart Tiles describes softening its adhesive with a hairdryer before lifting the tile and removing residue. Aspect’s Matted Glass instructions describe a different removal procedure and warn that the underlying wall can be damaged. If the owner allows a small test in an inconspicuous spot, check what happens to the paint and whether residue comes off using the documented procedure. That tells you about the test spot. Plan for the possibility that other areas respond differently.
If permission depends on leaving the finish intact and you can’t accept the risk of a wall repair, pause before sticking anything down. Use the project’s actual finish and permission limits to review wall compatibility and removal considerations.
What should you compare before buying adhesive tile?
Compare the installation instructions for each exact tile side by side. Two sheets with a similar pattern can call for different primer, cutting tools, seam placement, or edge treatment. Look for enough detail to tell whether you can complete the work with the bowl and faucet in their current positions.
| Check | What to look for | Why it matters at the vanity |
|---|---|---|
| Location and water exposure | Approved bathroom placement and limits on spray or wetting | The rear wall, side wall, and counter joint may see different amounts of water |
| Preparation | Accepted wall finishes, cleaner, primer, overlay rules, and wait times | The existing finish may need work you can’t do behind the bowl or don’t have permission to do |
| Installed coverage | Usable width and height after joining, plus pattern direction and repeat | The package dimensions alone may overstate how far each sheet advances |
| Cutting and pressing | Approved cutting tools, handling instructions, and pressure method | A sheet that can slide behind a bowl still needs enough room for alignment and pressure |
| Seams and edges | Butt or overlap instructions, exposed-edge options, and counter-joint treatment | Each connection may call for a different finish, with space reserved before cutting |
| Care and removal | Approved cleaning products, removal steps, and possible finish damage | These affect upkeep and what you may need to restore later |
Treat preparation details as part of the buying decision. Aspect’s Glass FAQ, for example, calls for a primed substrate near sinks and tubs and excludes shower use. Its Matted Glass installation guide also gives surface requirements for the pressure-sensitive method. Verify that the preparation route you’re considering applies to the tile and the sink location. If an instruction about your specific wall finish or exposure is unclear, ask the manufacturer before buying enough material for the whole vanity.
How high and wide should a vessel sink backsplash be?
Measure height from the countertop. Set the top edge above the highest recurring rear-wall mark and the ends beyond the leftmost and rightmost recurring marks. Use the bowl rim and spout heights to sketch the fixtures and judge where the tile will look and fit best. There’s no single height above the rim or fixed distance past the bowl that will account for every vanity.
Map the droplets from normal handwashing
Start with the sink, counter, and nearby walls dry. If droplets are hard to see on the wall, use clean, dry paper as a temporary splash catcher. Hold or secure it flat against the rear wall and any adjacent side wall using a method that won’t damage the finish. Keep it clear of the spout and bowl. Extend the paper past the area you expect to cover so you can see marks that fall outside your first guess.
Use the sink as you normally would. Check the paper or wall immediately and note where fresh droplets landed. Dry the area or replace the paper between checks so you can tell which marks are new. Repeat during several ordinary uses, including different household users if practical. If you sometimes wash at a stronger flow, include that setting. If a mark appears only after you knock the paper or shake water off your hands unusually hard, record it separately from the ordinary pattern.
Look for water at the bottom of the proposed backsplash as well. A few spots on the wall and repeated pooling behind the bowl call for different follow-up. Dry the counter and watch whether water reaches the joint by running across the deck, dripping from a fixture, or falling directly onto it. That observation will help you decide whether you need to address the fixture, the joint, or the coverage.
Turn your marks into a provisional boundary
Choose a fixed left reference, such as the left end of the vanity, and use it for both horizontal measurements. If you have a side wall, measure forward on that wall from the rear inside corner. Use the same units for all entries.
Read your result. The distance between the outer rear marks is the right measurement minus the left measurement. That gives you the observed splash span, before adding any coverage beyond it. If your right measurement is smaller than the left measurement, recheck that both came from the same reference. If you haven’t found consistent rear marks, keep the rear boundary provisional and observe again under representative use before sizing to those marks.
Put the rear top line above the highest mark and the rear end lines outside the outer marks. Choose how much farther to extend by looking at the trim, the pattern, and the available wall. Keep an edge from landing in a frequently wet strip just because a sheet happens to end there. If side marks recur, draw a side-wall return, which is the portion of backsplash that continues around the inside corner. Place its top above the highest side mark and its front edge past the farthest recurring side mark. If none showed up, try the rear-only layout first. If you haven’t checked the side, leave that decision open.
Sketch the same vanity from the front and above
An elevation is the view straight at the rear wall. A plan view is the view looking down on the counter. The elevation carries your vertical measurements into the sheet layout. The plan shows how the bowl, faucet, and side wall affect coverage and access.
- Front view. Draw the counter as your zero-height reference. Add the bowl centerline, bowl rim, spout outlet height, mirror edge, and any wall trim. Plot the rear marks. Then draw in the top and both ends of the proposed backsplash.
- Top view. Draw the rear wall, counter outline, bowl footprint, and faucet position. Mark the space behind the bowl and any mount or handle that interferes with your hand or tool. If there’s a side wall, show how far its marks reach forward from the rear corner. Draw the proposed return along that wall.

For example, on a hypothetical 36-inch vanity with a right-side wall, the rim is 6 inches above the counter and the spout outlet is 10 inches above it. The highest recurring rear mark is 11 inches up, and the outer rear marks are 3 and 33 inches from the left. The rear splash span is 30 inches. A design that covers the full 36-inch width and tops out at 13 inches would put all those rear marks inside the field. If side marks reach 7 inches up and 5 inches forward, one option is a return that shares the 13-inch top line and ends 7 inches forward. These are layout choices for this example. A different sink, mirror, or pattern could lead to different edges.
If the countertop slopes, note where you took your height measurements. Use a level line for layout as the tile instructions direct, then verify the actual top clearance above the marks and the bottom fit across the full run. Moving the installation line to follow a sloped counter can also tilt the pattern.
Check the faucet stream before locking in the coverage
Watch where the stream first hits the bowl and when droplets leave it. Check the flow briefly with your hands out of the way, then wash normally. If water sprays sideways as it leaves the spout, check the outlet first. If the stream looks even and droplets appear only as it strikes the bowl or your hands, note the impact point. Mark it on your plan view so you can compare it after any change.

If the stream has become uneven or sprays at the outlet, look up the faucet model’s instructions for the aerator, the fitting at the end of the spout that shapes the stream on many faucets. For the specified Delta Stryke T3576LF-WL and T35766LF-WL trims, Delta’s manual directs owners dealing with outlet splash to remove the aerator with the supplied wrench, clean it, and reinstall it. Follow your fixture’s service and water shutoff instructions. Only adjust stream direction or use a different outlet part if your model’s documentation permits it.
Repeat the splash check with fresh paper or a dry wall after the service or adjustment. Use roughly the same flow, hand position, and washing routine, and compare the landing point and recurring rear and side marks. If the marks move, redraw the boundaries around the new pattern. Check again before shrinking the planned field based on one wash. If an even stream still splashes against the bowl or your hands, use those marks to decide where more coverage would help. A larger backsplash covers more of the area that gets wet. Addressing a fixture problem can change where the water goes in the first place.
If the fixtures aren’t installed yet, use their actual dimensional drawings and your planned positions to make a provisional sketch. Leave room to revise the stop lines after you can observe the installed sink in use, if your installation sequence allows.
Dry-fit the sheets around the bowl and faucet
Keep the release liners, the paper backings over the adhesive, in place while you compare layouts. Tape up paper stand-ins or lay out actual sheets on a flat surface. Take the splash marks with you: transfer the rear top and end lines from the elevation and the side return from the plan. Mark the same references on your mock-up so you can tell when a layout change moves a seam versus when it changes the coverage.
Measure the installed advance and pattern repeat
Join two sheets with the liners on, using the arrangement shown in the exact product instructions. Measure how much width the second sheet adds after the joint is made. That’s the installed advance. Check the height the same way if you need multiple rows. Examine the pattern repeat, the distance before the motif lines up again, and note which parts of the sheet can meet without breaking the design. On staggered patterns, check the alignment in the next row too. A promising bottom row can leave an awkward cut higher up at the spout or mirror.
Try a centered layout first. Line up a complete motif or a grout line with the bowl centerline, depending on what looks balanced from the doorway. If the spout sits off-center, sketch its position so you can judge both sightlines. Then try an offset layout by moving the pattern while keeping the top and end boundaries fixed. Look at how each shift changes the exposed cuts and where seams hit the fixture openings. If you need more help here, plan sheet seams and avoid narrow end cuts.
Compare your two dry fits
For each layout, write down the left and right end-cut widths and circle the smaller one. Measure the usable face you’ll keep after making the sheet joint. Then answer three questions for each layout:
Enter your installed cut widths as decimals in the same units for both layouts. Use 0 for a factory edge that meets the stop line without a cut. Compare only actual cuts when finding the narrower piece. Leave unmeasured widths blank.
- Do the top, ends, and any side return still contain the recurring splash marks?
- Do the sheet edges match as specified, and can you make the cuts while preserving any required factory edges and trim clearance?
- Can you bring each piece into position and press its full face, including the bottom edge and seams behind the bowl?
Any layout with a no needs revision. Mark it recheck if you still need to verify any of the three answers. If only one layout passes, use that one. If both pass, compare their smaller end cuts. Prefer the layout with more usable material at the narrowest end if the other would leave a sliver you’d struggle to cut, finish, or press. If both cuts are workable, choose the pattern alignment you prefer. This comparison ranks your two mock-ups. Use any minimum piece size the manufacturer specifies.
On the same 36-inch example vanity, suppose a centered pattern leaves a ¾-inch installed end piece on each side. An offset mock-up of the actual sheets removes the cut at the left stop and leaves a 1½-inch end piece at the right. If the right finish accepts that cut and the sheet edges still join correctly, that shift removes two narrow end cuts in favor of one wider cut. If the shift places a seam across a faucet opening or behind a handle you can’t reach around, adjust the dry fit again. The numbers describe this mock-up, so use your sheet’s actual repeat and usable width.
Count sheets from the chosen cut map. Label each full piece and each planned cut, then see which offcuts can serve elsewhere with the pattern facing the right way and the necessary edges intact. Include the return and pieces you may need to recut around trim. A square-foot estimate gives you a starting point. The dry fit shows whether two shapes you hoped to cut from one sheet actually fit on it.
Test access behind the bowl and around the faucet
Measure the narrowest space between the wall and the vessel bowl or deck-mounted faucet at the height where each sheet will go. Hold a liner-backed sheet or a same-thickness mock-up there. Rehearse bringing it to the wall along the route you’ll actually use and aligning it with the guide line. Then reach across its face with your hand or the approved pressing tool. Include the lowest corners, the joint behind the bowl, and the area directly behind a faucet base. A flashlight and small mirror can help you see where your hand blocks the view.

If you can insert a piece but can’t press part of it, check whether shifting a seam or changing the starting point gives you a workable approach with the same coverage. If it still won’t work, consider a documented installation sequence in which the fixture goes in afterward, or choose another suitable finish. For an installed bowl or faucet that must come out to create access, follow the fixture instructions and get help with plumbing work outside your comfort level.
How do you fit sheets around a wall-mounted faucet?
Use the exact fixture drawing and the actual trim to check the opening, how the flange sits, the added wall thickness, and service access before cutting. A flange is the visible plate at the wall behind a spout or handle. Its outside shape shows what trim will cover. The opening and support it requires come from the installation instructions. For example, Delta’s Stryke specification drawing lists a finished-wall thickness of ⅛ to 1⅛ inches for the specified models and rough-in. That dimension describes the total finished wall at the fixture. Check your own existing build-up, including tile and any trim that changes the seating plane.
Locate openings from two fixed references, such as the countertop or a level guide line for height and the vanity’s left edge for horizontal position. Mark each center on a paper template. Transfer the required opening from the fixture instructions and mark the visible flange footprint separately. Hold the template against the wall, front side facing you, and check whether each piece can slide into position. A closed hole that fits around the stem on paper may be impossible to slip over the installed spout.
Test with a liner-backed offcut of the actual tile where thickness matters. Check that trim can sit flat as required, gaskets can seat as shown, and you can still reach set screws or other service points. A sheet edge under one side of a flange can create an uneven seat. If you can’t verify the fit with the trim in place, stop before cutting or loosening anything. Check the fixture maker’s installation procedure and whether you have permission to remove and refit the trim.
Dry-fit the side-wall return as a separate run
Measure the rear and side walls separately at the heights where the sheets will sit. Use a paper template at the inside corner if it is out of square. Fit the rear and side pieces together with their liners on. Check both runs from above and from the front for pattern alignment, a workable corner joint, and enough reach past the recurring side marks. Follow the product’s corner detail and installation order. If the front edge of the return needs trim, allow for its footprint in the cut map. For more on the corner mock-up, dry-fit the inside corner and side-wall return.
Do your peel-and-stick backsplash seams butt or overlap?
The exact sheet instructions answer that question. A butt joint brings the specified edges together side by side. An overlap joint places one sheet over a designated strip on the next or previous sheet, in the direction the maker specifies. Other designs can use interlocking edges. Set up the joint before you mark the first cut, since it controls which edges you’ll need to preserve.
Smart Tiles’ Milano guide shows an overlap on its marked grout line, with the printed marks covered by the adjoining sheet. Aspect’s Stone instructions show pieces fitted tightly edge to edge against the neighboring piece and lower row. These examples illustrate why you should identify the system from the instructions for the tile in your hand.

Dry-fit two sheets and follow the pattern across the proposed seam. On the backs, mark the orientation and the factory edges that need to meet. If a cut removes a required joining edge, move the cut to a perimeter or revise the layout as the product permits. Check what happens in the row above the seam and around any spout cutout. It’s easier to correct a mismatch when both liners are still on. Finish sheet seams according to their own instructions, then check the instructions for the exposed edges and the counter transition separately.
Install the peel-and-stick backsplash
Start once the wall is ready, the pieces have been dry-fitted, and you know where to begin for your sheet system. Gather a tape measure, level, straightedge, paper templates, and the cleaner, cutting tools, protective equipment, and pressing tool specified for your product. A flexible sheet and a glass mat can call for different tools. Set up a stable cutting surface away from the vanity. Keep the tile, trim, and sealant instructions handy.
- Prepare the wall. Resolve moisture problems and repair unstable areas before covering them. Clean the full work area as directed, including the narrow strip behind the bowl and the wall beside the faucet. Remove any residue as instructed and allow the surface to dry. Complete required priming or other preparation and let the specified waiting period pass before applying adhesive.
- Transfer the boundaries and reference lines. Use the final splash sketch to mark the top, ends, and any return. Set the level start line the sheet instructions call for. Check the counter along the whole run and carry over any allowance for the bottom joint, corner, or trim. Hold the first piece in place against those marks and check it from the front of the vanity.
- Cut and recheck the first pieces. Transfer the templates with the pieces oriented face up or face down as appropriate for the cutting method. Mark which end is the cut edge and which edges must join the next sheet. Use the product-approved tool. Dry-fit each fixture cut in its actual position before exposing adhesive. Check that the bottom edge clears the intended countertop joint and that the next factory edge is still usable.
- Set the first sheet. Remove the liner as directed. Position the sheet at the reference line using the access route you rehearsed. If the instructions permit progressive peeling, keep the unused backing in place until you can align the sheet. Check the first sheet’s level and orientation before applying final pressure. Follow the maker’s repositioning instructions if it catches in the wrong place.
- Join and press the remaining pieces. Align the pattern and make each butt, overlap, or other specified joint before moving on. Press the full face as directed, including the seam and the strip below the bowl rim. Look along the row as you work. If the pattern starts to drift or a corner stands away from the wall, pause and check guide-line alignment, flatness, and contact while the next sheet is still off.
- Inspect the field and finish the planned transitions. Look at the sides, top, inside corner, and lower edge with a light. Check for gaps in the installed pattern, loose corners, or an edge bearing on the counter or trim. Fit approved edge treatment in the specified order, which may require placing a trim piece with the tile. Check the counter joint on its own before preparing the sink for use.

Should you caulk where the backsplash meets the countertop?
Use caulk there only if the tile instructions specify or permit it and the sealant is compatible with the tile and countertop finishes. First check whether the tile calls for a gap, direct fit, trim, or another treatment. Check the dimensions along the whole joint. A low spot can create a gap wider than the approved finish accommodates, even when the rest of the row fits.

Think of the bottom detail in a side view. The tile lies against the wall. Its bottom edge stops where the product specifies. The counter runs horizontally beneath it. The joint is the line where those surfaces meet, and any approved trim or sealant belongs in the location shown in the instructions. The sheet seams sit farther up or across the wall and follow the sheet system. If the low spot behind the bowl changes the joint, check how to fit and finish an uneven countertop transition.
Smart Tiles’ tile FAQ recommends caulking the countertop transition and identifies silicone-based caulk as an option. Aspect’s Matted Glass guide permits a bead at the bottom gap if desired and discusses outside-edge finishing separately. For your installation, confirm the exact sealant’s compatibility, the required joint preparation, and how long it must stay dry before splash exposure. If the wall or existing counter joint stays wet, find the cause before sealing over it.
Allow for two separate waits if you’ve used sealant. The Milano guide, for example, gives a 48-hour adhesive set interval for those sheets. The sealant’s water-exposure instructions govern its own wait, measured from when you apply it. Check both products and return the vanity to normal splashing once every applicable interval has elapsed. Use the tile maker’s approved face-cleaning method afterward. A cleaner specified for bare-wall prep may differ from one approved for the installed tile.
Trace lifting edges, opening seams, and recurring splashes
Start with the location and timing of the problem. Take a photo while the area is dry, and note where water lands when the sink is used. Look at the nearest unaffected piece for comparison. Use what you see to choose the next check before adding any repair material.
- Only the edge behind the bowl lifts. Check whether that strip got full pressure and whether a high spot, grout line, or caulk ridge kept the backing from contacting the wall. Check for repeated wetting there. If you replace the piece, rehearse access first so you can reach the full edge this time.
- A sheet seam opens in the middle of the wall. Check the original joint instructions, the required factory edge, and the direction of any overlap. Look for a sheet bridging a hollow or a pattern that was pulled out of alignment. Use the manufacturer’s approved repair or replacement approach after correcting the condition you find.
- Several sheets loosen or paint comes away. Look for a weak finish, uneven substrate, preparation problems, or dampness. If the wall is soft or stays damp after ordinary use, address the source before putting a new finish over it. In a rental, document the condition and report it before removing further material.
- Splash keeps passing the top or side edge. Repeat the dry-wall splash check and compare it with the original sketch. Watch for a changed stream, droplets off hands, or a recurring side-wall mark beyond the return. If the fixture is working as specified and the wetting falls within the tile’s documented use, extend coverage only if you can make the new joints and press the new pieces as directed.
A lifted corner alone can have several causes. A bead of caulk won’t restore a weak layer of paint or give a sheet contact where it bridges a recess. Verify the surface and the joint first, then use the repair method approved for that exact tile. Keep any replacement sheets labeled with the product and pattern orientation so you can dry-fit a match later.
Before you peel the first liner, stand at the vanity with the tile instructions and your dry layout. Confirm that the final top and end lines enclose the recurring splash marks, that you can press behind the bowl, and that you can identify the correct sheet seam and countertop treatment. If the wall finish, water exposure, or access falls outside the instructions, pause and choose a documented installation method or another wall treatment approved for the spot.


Kommentar hinterlassen
Diese Website ist durch hCaptcha geschützt und es gelten die allgemeinen Geschäftsbedingungen und Datenschutzbestimmungen von hCaptcha.