


¿Sueñas con renovar la cocina o el baño, pero te da miedo pensar en lechada desordenada, altas facturas de contratistas y días de obras? ¿Y si pudieras lograr un aspecto nuevo y espectacular en solo unas horas? Esa es la promesa de peel and stick tiles, la solución apta para DIY que está transformando las mejoras del hogar.
Estas innovadoras baldosas ofrecen un atajo hacia un estilo renovado, pero también plantean preguntas válidas. ¿Son duraderas? ¿Tienen un aspecto auténtico? ¿Pueden realmente soportar el calor de una cocina o la humedad de un baño? Tú tienes las dudas, y nosotros tenemos las respuestas.
Esta guía es tu fuente definitiva para 2025. Vamos a filtrar el ruido del marketing para darte consejos imparciales sobre lo que funciona, lo que no, y cómo elegir el producto adecuado para tu hogar. Prepárate para sentirte seguro sobre tu próximo proyecto.
¿Qué son las peel and stick tiles?
En esencia, las peel and stick tiles son exactamente lo que parecen: baldosas decorativas con un reverso autoadhesivo. Piensa en ellas como una versión resistente y diseñada específicamente para paredes y suelos, similar a una pegatina. Solo tienes que retirar la capa protectora y presionar la baldosa sobre una superficie limpia y lisa.
Estas no son las frágiles calcomanías de vinilo de antes. Las baldosas modernas son productos de varias capas. La capa superior aporta el diseño y un recubrimiento protector, mientras que el núcleo le da consistencia. La capa inferior es un adhesivo potente diseñado para una sujeción prolongada, creando una unión sorprendentemente fuerte.
Tipos diferentes que debes conocer
El mercado de las self-adhesive tiles se ha disparado en variedad. Entender los principales tipos te ayuda a elegir el material adecuado para tu proyecto.
- Vinilo (PVC): La opción más común y asequible. Es flexible, resistente al agua y está disponible en infinitos diseños, desde vetas de madera realistas hasta intrincados patrones geométricos. Es un gran punto de partida para la mayoría de los amantes del DIY.
- Gel 3D y epoxi: Estas baldosas tienen un acabado superior tipo gel o epoxi que les da una apariencia tridimensional y brillante muy convincente, imitando de cerca las baldosas reales de cerámica o vidrio. Son especialmente populares para salpicaderos.
- Metal: Fabricadas con una fina capa de metal real (como aluminio o acero inoxidable) sobre un núcleo compuesto. Ofrecen un aspecto elegante e industrial y una excelente resistencia al calor, lo que las convierte en una gran opción para colocar detrás de una estufa.
- Piedra y compuesto: Las opciones de gama alta suelen usar un núcleo de compuesto vinílico o compuesto de polímero de piedra (SPC). Son más rígidas y duraderas, por lo que resultan una elección sólida para luxury vinyl peel and stick flooring.
- Opciones ecológicas: Una categoría en crecimiento incluye baldosas fabricadas con materiales reciclados o sustancias naturales como el corcho. Son perfectas para el propietario consciente del medioambiente. Si priorizas la sostenibilidad, merece la pena echar un vistazo a las mejores baldosas de pared peel and stick ecológicas disponibles en el mercado.
Pros y contras de las peel and stick tiles
Tomar una decisión informada significa mirar ambos lados de la moneda. Las peel and stick tiles ofrecen beneficios increíbles, pero también es igual de importante entender sus limitaciones antes de empezar tu proyecto.
Las ventajas: por qué los amantes del DIY las adoran
- Asequibilidad imbatible: La diferencia de precio es un gran cambio. Una instalación profesional de baldosas cerámicas puede costar miles de dólares. Un proyecto de peel and stick tiles a menudo puede completarse por menos de $200, lo que hace que las actualizaciones con estilo sean accesibles para todos.
- Instalación sencilla y sin complicaciones: Este es su mayor punto de venta. No necesitas grout, mortero ni sierras especiales. Un cúter, un nivel y una cinta métrica suelen ser todo lo que necesitas. La mayoría de los backsplashes se pueden hacer en una tarde.
- Apto para inquilinos y removible: ¿Te preocupa el depósito de seguridad? La mayoría de las removable wall tiles se pueden retirar con poco esfuerzo y sin daños, lo que las convierte en una solución perfecta para espacios temporales.
- Variedad increíble: Desde los clásicos azulejos tipo subway hasta llamativos patrones mediterráneos, las posibilidades de diseño son casi infinitas. Puedes encontrar un estilo que encaje con cualquier estética sin quedar atado a una opción permanente.
Las desventajas: qué tener en cuenta
- Dudas sobre la durabilidad: Esta es la preocupación más común. Las baldosas de baja calidad pueden despegarse en los bordes, decolorarse o perforarse en zonas de mucho tránsito. La clave es invertir en una marca de confianza cuyos productos sean conocidos por durar.
- No es una imitación perfecta: Aunque las baldosas de gama alta se ven sorprendentemente reales, puede que no tengan la misma sensación fría y sólida que la cerámica o la piedra auténticas. La ausencia de líneas de grout reales también puede delatarlo para algunos ojos exigentes.
- Sensibilidad de la superficie: El adhesivo necesita una superficie perfectamente lisa, limpia y no porosa para funcionar. No se adherirá bien a paredes texturizadas (como orange peel), paneles de drywall sin terminar o superficies grasosas.
- Límites de agua y calor: Aunque muchas baldosas son resistentes al agua, no son completamente impermeables. No se recomiendan para usar dentro de una ducha. Para kitchens, debes usar heat resistant peel and stick tiles near stove y mantener la distancia de seguridad adecuada.
¿Te sientes seguro respecto a los compromisos? Antes de empezar a explorar, mira cómo se comparan las distintas marcas en una comparación cara a cara. Nuestro recurso de referencia es la guía definitiva, Stickwoll vs. las mejores marcas de peel and stick tiles de 2025.
¿Dónde puedes usar peel and stick tiles?
La versatilidad de estas baldosas es una de sus mayores fortalezas. Son soluciones para muchas zonas del hogar, pero algunas aplicaciones son más adecuadas que otras. Saber dónde brillan más te ayudará a obtener los mejores resultados.
Salpicadero de cocina: la aplicación estrella
El salpicadero de la cocina es donde los peel and stick tiles se hicieron famosos por primera vez. Es una zona de bajo impacto y alta visibilidad, perfecta para una renovación DIY. Un nuevo salpicadero puede cambiar al instante por completo el ambiente de tu kitchen.
Consejo profesional: Elige siempre un producto específicamente clasificado como heat resistant peel and stick tiles near stove áreas. Como regla general, mantén al menos una separación de 6-8 inch entre los tiles y cualquier fuente de calor directo, como un quemador de gas.
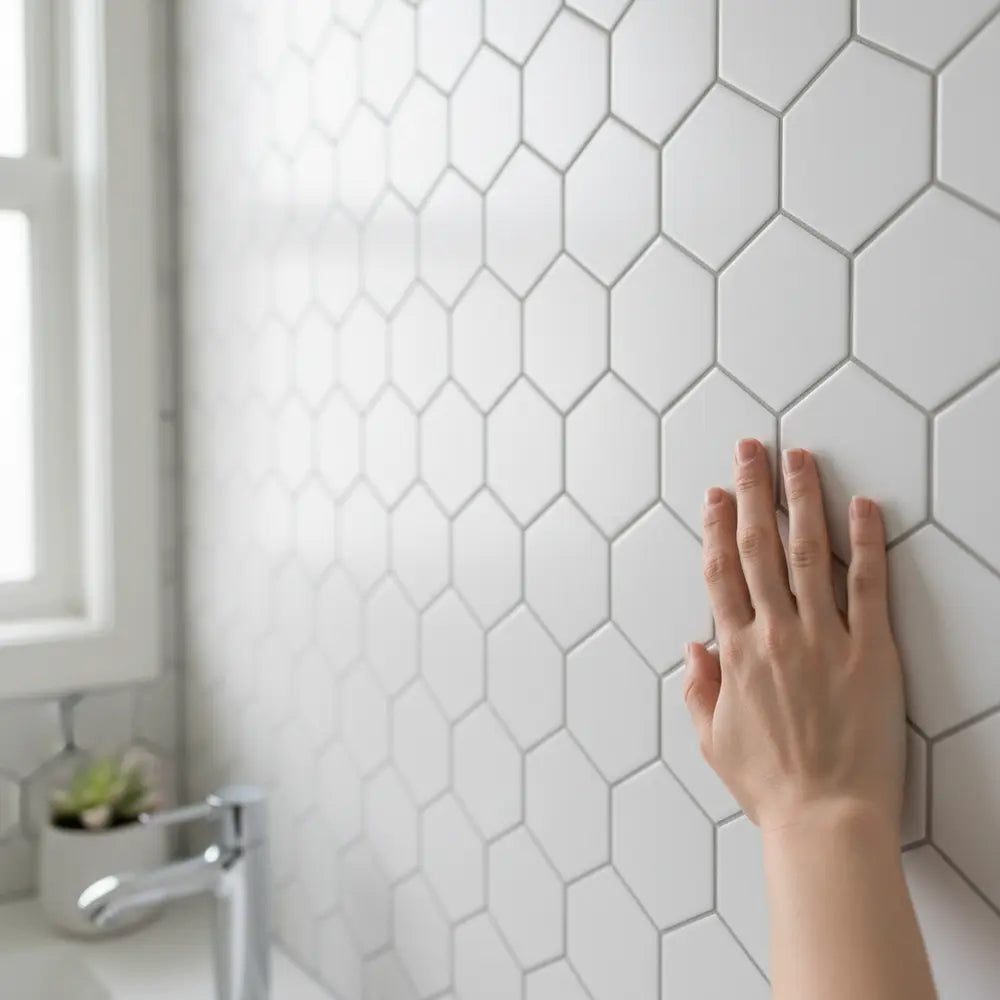
Elección de diseño: Los clásicos tiles tipo subway ofrecen un aspecto atemporal, mientras que los patrones hexagonales o en espiga pueden añadir un toque moderno. Los tiles con aspecto de mármol aportan un aire de lujo sin el alto coste.
Baños: una zona propensa a la moisture
Usar estos tiles en un bathroom requiere una selección cuidadosa. Debes elegir un producto etiquetado como waterproof peel and stick tiles for bathroom use. Están diseñados para soportar el vapor y las salpicaduras ocasionales comunes en este entorno.
Idea equivocada común: Muchas personas piensan que los peel and stick tiles pueden usarse dentro de una ducha. Esto es incorrecto. La exposición constante al agua hará que el adhesivo falle. Funcionan mejor como backsplash de bathroom o en paredes fuera de la zona de ducha directa.
Consejo práctico: Para aumentar la durabilidad, puedes aplicar una línea fina de silicona transparente alrededor de los bordes donde los tiles se encuentran con la encimera o el lavabo. Esto crea una barrera adicional contra la moisture. Para más inspiración visual y consejos técnicos sobre esta aplicación concreta, mira cómo otros han tenido éxito en nuestra guía sobre Cómo transformar tu baño con Peel and Stick Tiles 2025.
Suelos y paredes decorativas: soltando la creatividad
Más allá de las kitchens y los bathrooms, estos tiles son excelentes para otros proyectos creativos.
- Suelos: Para los floors, debes usar tiles específicamente diseñados para ese propósito. Luxury vinyl peel and stick flooring es mucho más grueso y cuenta con una capa de desgaste duradera para soportar el tránsito peatonal. Es una opción fantástica para lavanderías, recibidores o incluso sótanos.
- Paredes decorativas: ¿Tienes una pared aburrida en tu dormitorio o sala de estar? Crea una pared protagonista detrás de tu cama o televisión. Es una forma de bajo compromiso de añadir textura y personalidad a una habitación.
- Otras ideas: ¡Piensa fuera de la caja! Úsalos en los frontales de las escaleras, en la parte trasera de una estantería, en el revestimiento de una chimenea (lejos del hogar) o para renovar la superficie de una mesa antigua.
Las mejores marcas de peel and stick tiles en 2025
Navegar entre tantas opciones puede ser la parte más difícil del proceso. La marca que elijas influye directamente en la calidad, el aspecto y la durabilidad de tu proyecto. Aquí tienes un desglose del mercado para ayudarte a encontrar las best brands for peel and stick tiles.
Opciones económicas para empezar
Estas marcas están ampliamente disponibles en grandes superficies y en línea. Son una excelente puerta de entrada para proyectos pequeños o para quienes tienen un presupuesto muy ajustado.
- Qué esperar: Los precios son bajos, pero también lo es el grosor del material. A menudo son láminas finas de vinilo. La adhesión puede ser inconsistente y son más adecuados para aplicaciones muy temporales o zonas de poco impacto.
- Consejo profesional: Si usas una marca económica, considera comprar una lata de adhesivo en spray. Aplicar una capa adicional ligera puede mejorar significativamente la fijación y evitar que los bordes se despeguen con el tiempo.
Marcas de gama media más fiables
Este es el punto ideal para la mayoría de los homeowners. Las marcas de esta categoría ofrecen un gran equilibrio entre calidad, diseño y precio. A menudo utilizan vinilo más grueso o materiales de gel-epoxi que se ven y se sienten más sólidos.
"Usé una marca barata en mi alquiler y se despegó en 6 meses. Gasté un poco más en una marca de gama media para mi nueva casa, y el salpicadero de la cocina sigue viéndose perfecto después de dos años."
Qué buscar: Busca marcas con miles de reseñas positivas, instrucciones de instalación claras y una amplia gama de diseños modernos.
Marcas de lujo y especializadas
En el segmento alto del mercado, encontrarás marcas enfocadas en materiales superiores y diseños de vanguardia. Esto incluye luxury vinyl peel and stick flooring que imita de forma convincente la madera o la piedra, así como baldosas de pared gruesas y de estilo arquitectónico.
- Stickwoll: Como líder en este espacio, Stickwoll se centra en materiales premium y duraderos diseñados para ofrecer un aspecto de alta gama que perdure. El énfasis está en texturas realistas y una adhesión fuerte y fiable, resolviendo los principales problemas de durabilidad y apariencia.
- Innovadores ecológicos: Las marcas especializadas en eco-friendly peel and stick wall tiles también forman parte de este nivel. Utilizan materiales como plásticos reciclados o fibras naturales, ofreciendo una opción sostenible sin sacrificar el estilo. Por ejemplo, encontrar opciones elegantes y sostenibles como las Mejores baldosas verdes peel and stick para cocinas es más fácil que nunca, lo que demuestra cómo las marcas premium están respondiendo a la demanda de productos ecológicos.
Para tomar la decisión más informada, un análisis comparativo lado a lado es invaluable. Para un desglose detallado de los líderes del mercado y cómo se comparan en precio, calidad y estilo, el recurso principal es nuestra comparación definitiva: Stickwoll vs. las mejores marcas de baldosas peel and stick 2025.
Cómo instalar peel and stick tiles (paso a paso)
La ventaja de las peel and stick tiles es su instalación sencilla. No necesitas ser un contratista con experiencia para lograr resultados de aspecto profesional. El éxito depende de una sola cosa: una preparación cuidadosa. Sigue estos pasos para un acabado impecable.
Paso 1: La preparación de la superficie lo es todo
Punto débil principal: "Me preocupa que las baldosas se caigan."
Solución: Una superficie perfectamente preparada garantiza una adherencia que dura años. Este es el paso más importante.
- Limpieza: La pared debe estar completamente limpia. Usa un limpiador desengrasante (como TSP o una mezcla sencilla de jabón para platos y agua) para eliminar cualquier grasa, polvo o suciedad. Luego, límpiala con un paño limpio y húmedo y déjala secar por completo durante al menos 24 horas.
- Alisado: La superficie debe ser lisa. Las peel and stick tiles mostrarán cualquier relieve o protuberancia que haya debajo. Rellena cualquier agujero o grieta con masilla, y luego lija hasta dejarlo al ras. En paredes con textura, puede que necesites aplicar una capa fina de masilla para juntas o instalar un panel delgado de hardboard.
- Error común: Muchos creen que basta con colocar las baldosas sobre una pared recién pintada. Debes esperar a que la pintura se cure por completo, lo que puede tardar hasta 3-4 semanas. Instalar demasiado pronto hará que el adhesivo falle.
Paso 2: Planifica la distribución
Consejo profesional: No empieces a alicatar desde una esquina. Busca el centro de la pared y traza una línea vertical y otra horizontal niveladas para crear una cruz guía. Empieza tu primera baldosa en esa intersección y trabaja hacia afuera. Esto garantiza que el patrón quede centrado y se vea equilibrado.
Colocación en seco: Antes de despegar nada, distribuye las baldosas en el suelo o sobre la encimera para visualizar el patrón y los cortes que tendrás que hacer alrededor de enchufes o esquinas. Esto ayuda a evitar errores costosos.
Paso 3: El proceso peel and stick
- Cómo instalar: Despega solo las primeras pulgadas del papel protector. Alinea el borde superior de la baldosa con tu línea guía. Presiónala firmemente en su lugar y luego retira lentamente el resto del soporte mientras alisas la baldosa de arriba hacia abajo.
- Consejo práctico: Para how to install peel and stick floor tiles, el proceso es similar. Empieza desde el centro de la habitación y avanza hacia afuera. Usa un rodillo en J o incluso un rodillo de cocina para aplicar una presión uniforme sobre toda la baldosa y activar por completo el adhesivo.
- Cómo hacer cortes: Para cortar una baldosa, simplemente mide y marca tu línea. Usa un cúter afilado y una regla para marcar la línea con firmeza. Después puedes partir la baldosa limpiamente a lo largo de la línea marcada. Para cortes complejos alrededor de enchufes, crea primero una plantilla de papel.
Paso 4: Toques finales
- Dales un poco de calor: Una vez que todas las baldosas estén en su lugar, usa un secador de pelo para calentar suavemente la superficie. Pásalo una última vez con el rodillo o con un paño suave. El calor ayuda a que el adhesivo cree una unión aún más fuerte y duradera.
Para obtener una guía visual más detallada, técnicas avanzadas y consejos de diseño, nuestro artículo completo sobre Cómo instalar peel and stick tiles y mejores diseños 2025 es una lectura esencial a continuación.
¿Listo para empezar tu proyecto?
No te pierdas ni un solo paso. Descarga nuestra lista de verificación completa para garantizar una instalación perfecta de principio a fin.
Descargar lista de verificación gratuita para compradoresMantenimiento y vida útil de los peel and stick tiles
Has terminado tu proyecto y se ve fantástico. Ahora, ¿cómo mantienes ese resultado? La durabilidad de tus peel and stick tiles depende de elegir un producto de calidad y seguir reglas sencillas de mantenimiento.
Cómo limpiar peel and stick tiles
Punto de dolor principal: "No quiero arruinar mis nuevos azulejos limpiándolos de la forma incorrecta."
Solución: La limpieza suave es el secreto para una larga vida útil.
- El método correcto: Usa un paño suave o una esponja con un limpiador suave y no abrasivo. Una solución simple de agua y unas gotas de jabón para platos con pH neutro funciona perfectamente. Para los suelos, una mopa de microfibra es ideal.
- Qué evitar: Mantente alejado de productos químicos agresivos como lejía, amoníaco o polvos abrasivos y estropajos. Estos pueden rayar la capa superior protectora, opacar el acabado y degradar el material con el tiempo.
Durabilidad y vida útil esperadas
¿Cuánto tiempo durarán tus azulejos? La respuesta depende en gran medida de la calidad del azulejo y de dónde se instalen.
- Mucho tránsito vs. poco tránsito: Un azulejo de luxury vinyl peel and stick flooring en una entrada con mucho tránsito podría mostrar desgaste después de 3-5 años. El mismo azulejo de la misma calidad usado como backsplash de cocina, que no recibe tránsito peatonal, podría durar fácilmente 10 años o más.
- Dato: Un informe de consumidores de 2024 señaló que los backsplashes peel and stick de gama media a alta, cuando se instalan y mantienen correctamente, tienen una vida útil promedio de 7-12 años, lo que los convierte en una inversión sólida a largo plazo.
Consejos profesionales para prolongar la vida útil
- Limpia los derrames de inmediato: Tanto en suelos como en paredes, no dejes que los líquidos permanezcan sobre la superficie. Esto es especialmente importante con sustancias ácidas como la salsa de tomate o el vino, que pueden manchar la superficie si se dejan demasiado tiempo.
- Revisa los bordes: Inspecciona periódicamente las juntas y los bordes de tus azulejos. Si notas que una esquina empieza a levantarse, a menudo puedes reactivarla con un secador de pelo y presión, o aplicar una pequeña gota de adhesivo de construcción fuerte para fijarla.
- Usa protectores para muebles: Para pisos peel and stick, coloca fieltros adhesivos debajo de las patas de todos los muebles para evitar rayones y marcas cuando se mueven las cosas.
Para un desglose completo de los productos de limpieza recomendados y las técnicas avanzadas, nuestra Guía de mantenimiento de peel and stick tiles 2025 es el recurso definitivo para mantener tus azulejos como nuevos durante años.
Cómo quitar peel and stick tiles sin dañarlos
Una de las características más atractivas de los azulejos de pared removibles es que no son permanentes. Esto es una gran ventaja para inquilinos o para propietarios que adoran cambiar la decoración con frecuencia. La clave es retirarlos con cuidado para proteger la superficie que hay debajo.
Paso 1: Prepara tus herramientas
No necesitas mucho. La herramienta más importante es un simple secador de pelo. También te convendrá una espátula de plástico o rascador (nunca metal, que puede dañar la pared) y un limpiador para retirar cualquier residuo restante.
Paso 2: Aplica calor para ablandar el adhesivo
Problema principal: "Me aterra despegar la pintura o dañar el drywall."
Solución: El calor es tu mejor aliado. Ablanda el adhesivo y permite que la baldosa se desprenda sin resistencia.
La técnica: Pon el secador en una temperatura media o alta. Mantenlo a unos 2-3 inches de la baldosa, concentrándote en una esquina. Calienta la zona durante unos 30-60 segundos, moviendo el secador para que la baldosa se caliente de manera uniforme. Verás que se vuelve más flexible.
Paso 3: Haz palanca y despega con cuidado
Consejo práctico: Cuando la baldosa esté caliente, desliza la espátula de plástico debajo de la esquina calentada. Haz palanca con suavidad, lo justo para poder agarrarla con los dedos.
Despacio y con calma: Despega la baldosa lentamente y en un ángulo bajo (pegado a la pared), no hacia afuera. Si notas mucha resistencia, detente y aplica más calor. Tirar demasiado rápido o con fuerza es lo que hace que se desprenda la pintura. Sigue aplicando calor mientras vas despegando la baldosa de la pared.
Paso 4: Limpia los residuos
Incluso con una retirada limpia, puede que queden algunos restos pegajosos.
- Los mejores limpiadores: Empieza con la opción más suave. Muchas veces puedes retirar el residuo frotándolo con el pulgar. Si eso no funciona, un limpiador a base de cítricos (como Goo Gone) o alcohol isopropílico en un paño suave funciona muy bien para disolver el adhesivo.
- Limpieza final: Después de quitar el residuo, limpia la pared con un paño limpio y húmedo para eliminar cualquier resto del producto de limpieza. La pared ya debería estar lista para una nueva capa de pintura o para tu próximo proyecto de DIY.
Encuentra tu combinación perfecta
¿Te abruma la variedad? Haz nuestro cuestionario rápido y divertido de diseño para descubrir qué estilo de peel and stick tiles encaja perfectamente con tu hogar y tu personalidad.
Haz ahora el cuestionario de estiloIdeas modernas de peel and stick tiles para 2025
Los peel and stick tiles ya no son solo una solución funcional; también son una declaración de diseño. Las tendencias para 2025 giran en torno a aportar personalidad, textura y un color sofisticado a tu hogar. Inspírate con estas ideas modernas.
Diseños y patrones en tendencia
Problema principal: "Quiero que mi casa se vea elegante y actual, no barata ni anticuada."
Solución: Adopta los últimos patrones que imitan materiales de alta gama.
- Zellige y terracota: El aspecto artesanal, perfectamente imperfecto, de las baldosas Zellige es enormemente popular. Busca versiones de peel and stick tiles con sutiles variaciones de color y un acabado ondulado y brillante. Los tonos cálidos y terrosos de terracota también están regresando con fuerza.
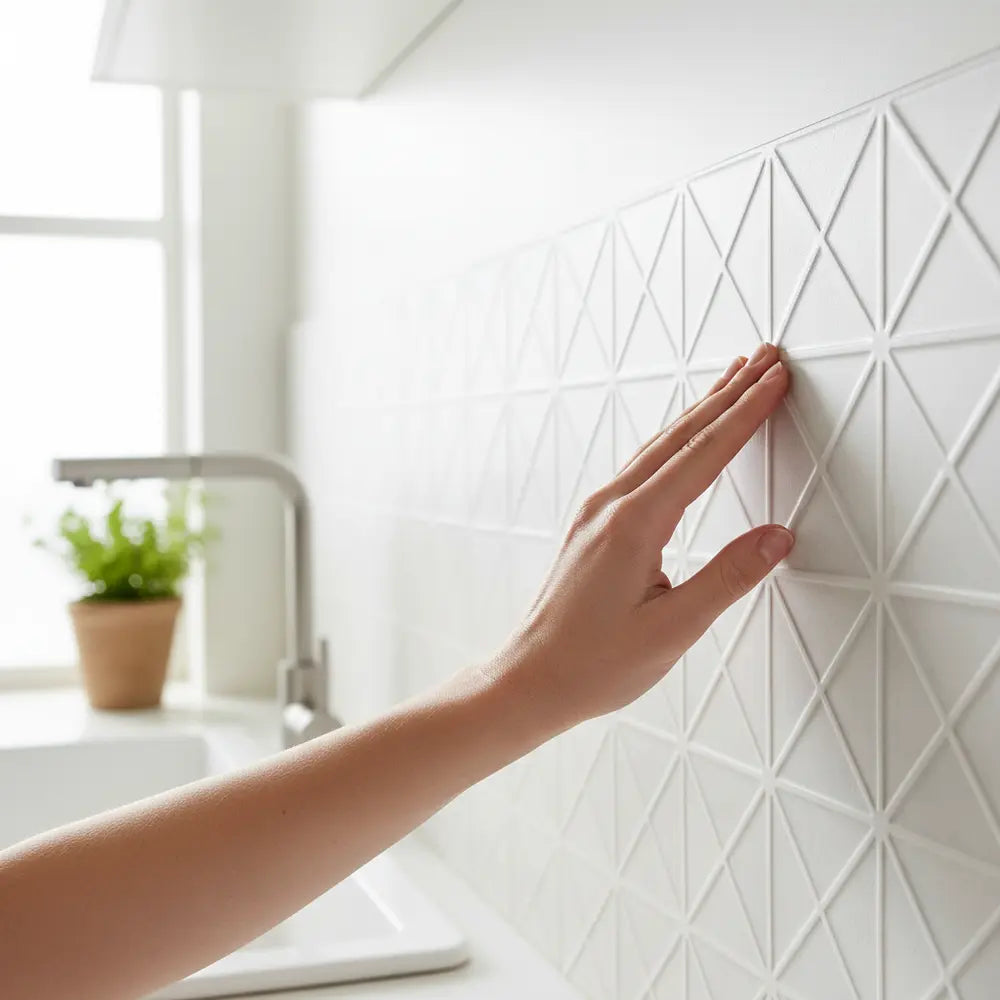
- Texturas acanaladas y estriadas: Las baldosas 3D con patrones verticales acanalados o estriados añaden interés arquitectónico y una sensación de altura a un espacio. Son fantásticas para una pared de acento sofisticada o el frente de una isla de cocina.
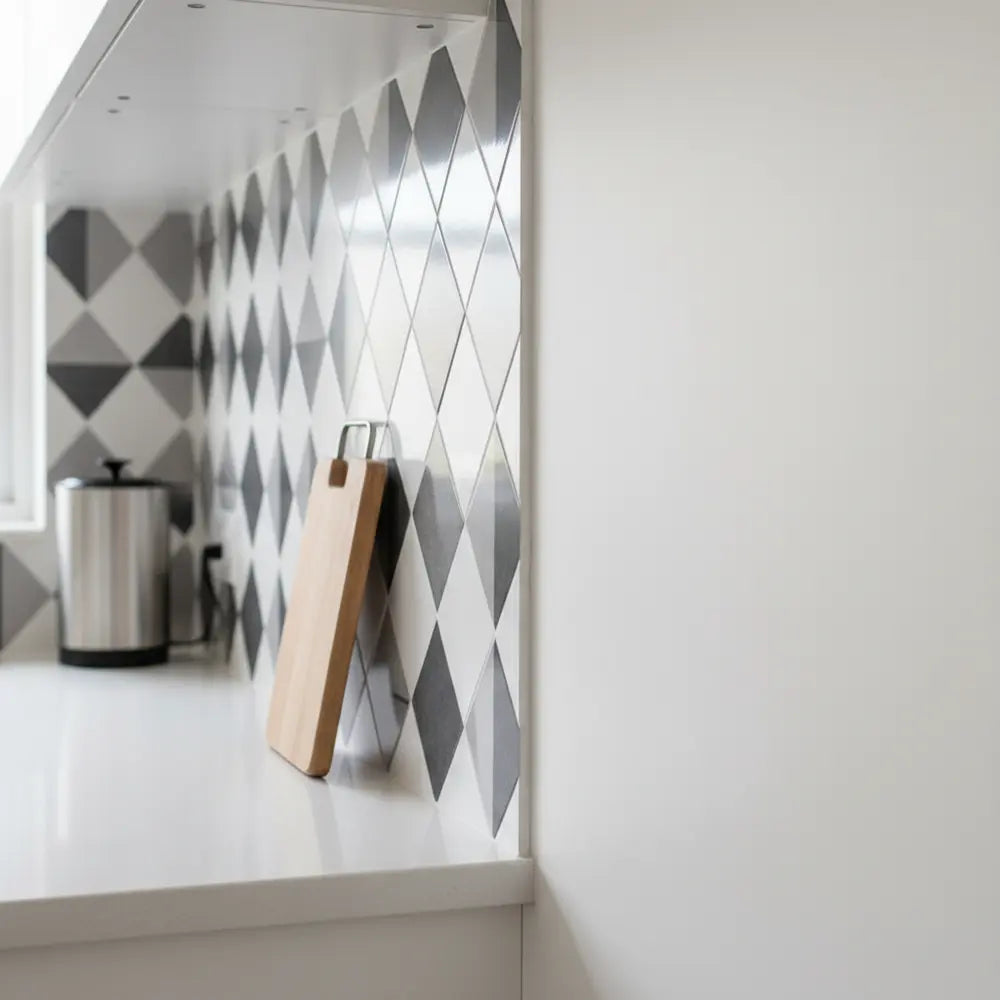
- Geométricos atrevidos: Aunque los patrones clásicos siguen vigentes, los diseños geométricos grandes y llamativos están de moda. Piensa en hexágonos de gran formato, formas de abanico impactantes (estilo Art Deco) o patrones de tablero de ajedrez de alto contraste en los suelos. Para más ideas visuales sorprendentes y ver cómo se aplican estas tendencias en hogares reales, explora nuestra guía seleccionada de Los mejores patrones de peel and stick tiles para 2025.
Paletas de color sofisticadas
Olvídate del blanco básico. La paleta de colores de 2025 es rica y matizada.
- Verdes terrosos: Del verde bosque intenso al suave salvia, el verde es el nuevo neutro. Aporta una sensación natural y orgánica a cocinas y baños. Nuestra selección curada de Los mejores peel and stick tiles verdes para cocinas muestra lo versátil que puede ser este color.
- Neutros cálidos: Hazle espacio a los grises fríos. Los neutros cálidos como beige, topo y greige están creando ambientes acogedores y atractivos. Combínalos con tonos de madera natural y detalles en negro para un look moderno y orgánico.
- Azules empolvados y tonos profundos: Los azules empolvados y sofisticados, junto con tonos intensos y envolventes como el carbón y el azul marino, se están usando para crear espacios dramáticos y con sensación de lujo, especialmente en paredes de acento o en aseos pequeños.
Aplicaciones creativas e inesperadas
Piensa más allá del backsplash para crear una propuesta única.
- El backsplash del "rincón de lectura": Usa una baldosa divertida y estampada en la pared trasera de una estantería empotrada o de un armario para añadir un toque de color y personalidad.
Tu mejora del hogar inteligente y con estilo
Durante años, las mejoras importantes del hogar parecían estar fuera de alcance sin un gran presupuesto o ayuda profesional. peel and stick tiles han cambiado las reglas. Demuestran que una transformación elegante y con impacto puede ser asequible, rápida y algo que puedes hacer con orgullo tú mismo.
Desde entender los distintos materiales hasta dominar la instalación, ahora tienes el conocimiento para abordar tu proyecto con confianza. Sabes que debes priorizar una marca de calidad para lograr durabilidad, preparar meticulosamente la superficie para una adhesión duradera y elegir un diseño que refleje de verdad tu estilo personal.
Ya sea un vibrante salpicadero de cocina, una serena pared de baño o un nuevo piso durable, esta es tu oportunidad de crear un espacio que te encante.
¿Listo para dar el siguiente paso en tu aventura DIY?
Preguntas frecuentes
1. ¿Se pueden colocar peel and stick tiles directamente sobre azulejos cerámicos existentes?
Sí, se puede, pero con un paso crítico de preparación. Las líneas de grout de los azulejos existentes deben rellenarse con una fina capa de yeso de alisado o masilla y lijarse hasta quedar lisas. Aplicar peel and stick tiles directamente sobre las líneas de grout hará que con el tiempo se transparenten y puede crear bolsas de aire, debilitando la adhesión.
2. ¿Son realmente impermeables los peel and stick tiles para una ducha?
No. Aunque muchos productos son resistentes al agua y adecuados para paredes de baño y salpicaderos, no están diseñados para la exposición constante y directa al agua dentro de una ducha o de un cerramiento de bañera. Las juntas no son 100% completamente impermeables y con el tiempo fallarán bajo estas condiciones.
3. ¿Cuánto debería presupuestar para un proyecto de peel and stick tile?
El costo puede variar mucho, pero una buena estimación para un salpicadero de cocina estándar de 15 a 20 pies cuadrados usando una marca de gama media de calidad suele estar entre $100 y $250. Los proyectos de suelo costarán más debido a que requieren azulejos más gruesos y durables. Las marcas económicas pueden ser más baratas, pero quizá no ofrezcan la misma longevidad.
4. ¿Los peel and stick tiles se ven baratos en persona?
Este era un problema común hace una década, pero ya no. Los modernos peel and stick tiles de alta calidad peel and stick tiles han avanzado muchísimo. Los azulejos 3D de epoxi tienen un brillo y una profundidad realistas, y las opciones de luxury vinyl peel and stick flooring suelen tener texturas en relieve que imitan tan bien la veta real de la madera o la piedra que es difícil notar la diferencia sin tocarlos.

Deja un comentario
Este sitio está protegido por hCaptcha y se aplican la Política de privacidad de hCaptcha y los Términos del servicio.