


Ideas de salpicadero aptas para inquilinos que transforman apartamentos
Mirar una pared de cocina sosa y sin inspiración es una sensación familiar para muchos inquilinos. Sueñas con un espacio elegante y personal, pero el miedo a perder el depósito de seguridad te impide hacer cambios reales. ¿Y si pudieras lograr un aspecto de alta gama sin correr el riesgo? Aquí es donde entran en juego las elegantes ideas de salpicadero removible para apartamentos.
Imagina transformar tu cocina de aburrida a dinámica en una sola tarde por menos que el coste de una cena elegante fuera de casa. No es un sueño. Miles de inquilinos están consiguiendo resultados impresionantes con opciones de peel and stick backsplash que son a la vez económicas y completamente reversibles. No son las endebles pegatinas de antes; las tendencias de 2025 muestran diseños sofisticados y duraderos que imitan el azulejo real.
Esta guía es tu hoja de ruta completa para una mejora segura para el depósito. Exploraremos por qué las soluciones temporales son la mejor aliada de un inquilino y repasaremos las principales opciones de productos disponibles. Verás casos reales de transformaciones por menos de 100 $, aprenderás exactamente cómo instalar y retirar tu salpicadero, y obtendrás una guía seleccionada sobre dónde comprar los mejores productos.
Por qué los inquilinos necesitan soluciones temporales de salpicadero
¿Debate entre darle un toque personal y proteger tu depósito de seguridad? No estás solo. Esta sección desglosa por qué un salpicadero temporal es la mejora más inteligente que puedes hacer, cuidando tu bolsillo y tu contrato de alquiler.
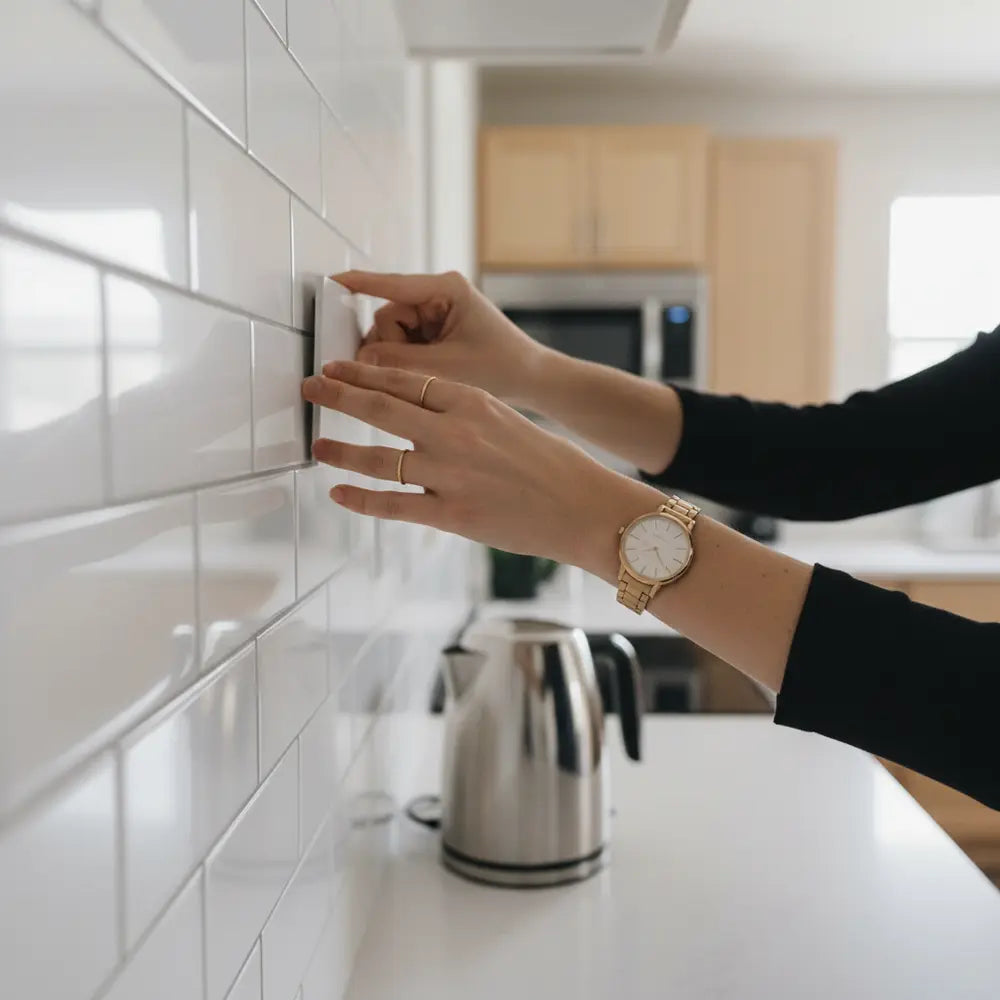
Para los inquilinos, cada decisión de diseño es un cálculo. ¿El factor más importante? Proteger ese depósito de seguridad. Un solo agujero de clavo puede parecer un riesgo, así que pensar en pegar azulejos a una pared está fuera de la cuestión. Los salpicaderos temporales resuelven este miedo principal al ofrecer una forma damage-free de personalizar.
Piénsalo como una funda protectora para tu teléfono. Aporta estilo y personalidad mientras mantiene impecable la superficie original que hay debajo. Por ejemplo, una estudiante universitaria que afrontaba un depósito de 1.000 $ utilizó azulejos subway peel-and-stick para cubrir una pared de cocina manchada. Cuando se mudó dos años después, los retiró en 20 minutos, dejando la pared exactamente como la encontró y recuperando su depósito completo.
Más allá de la protección, estas soluciones te permiten hacer que un espacio sea verdaderamente tuyo, aunque sea temporal. El beige de estándar de arrendador y los patrones anticuados ya no tienen por qué definir tu hogar. Un renter friendly backsplash es una herramienta poderosa para una personalización no permanente, permitiéndote reflejar tu estilo personal de una manera significativa.
Por último, estas mejoras son increíblemente budget-friendly. Un trabajo tradicional de azulejos puede costar miles, pero una transformación elegante con peel and stick backsplash a menudo se puede completar por menos de 100 $. Es un proyecto de bricolaje de gran impacto y bajo coste que añade un valor enorme a tu día a día sin vaciar tus ahorros. Esta es una de las mejoras de apartamento más eficaces y seguras para el depósito que puedes emprender.deposit-safe apartment upgrades puedes emprender.

Las mejores ideas de salpicadero removible para apartamentos
¿Te sientes abrumado por los distintos tipos de opciones temporales que existen? Aclararemos las mejores alternativas para que puedas elegir el material perfecto según tu estilo, presupuesto y nivel de habilidad.
Una vez que decidas optar por una solución temporal, encontrarás algunas opciones excelentes pensadas para inquilinos. Cada una tiene sus propias ventajas, pero todas comparten la promesa básica de una instalación fácil y una retirada sin daños. Entender las diferencias es el primer paso hacia el nuevo aspecto de tu cocina.
Azulejos peel-and-stick
Azulejos 3D que imitan cerámica, piedra o vidrio reales. Ideales para un aspecto realista y de alta gama, y añaden textura.
Vinyl Wall Decals
Láminas grandes y planas con patrones impresos. Ideales para un impacto gráfico, diseños intrincados y rapidez de instalación.
Magnetic Panels
Paneles metálicos que se adhieren a una base magnética. Ideales para la máxima flexibilidad y cambiar de diseño con facilidad.
Azulejos peel-and-stick
Esta es la categoría más popular y versátil. Estos azulejos están diseñados para parecerse y sentirse como los de verdad, desde cerámica y vidrio hasta piedra. Vienen en azulejos individuales o, más comúnmente, en láminas entrelazadas que facilitan la alineación. Su textura 3D añade profundidad que las pegatinas planas no pueden igualar, convirtiéndolos en una opción ideal para lograr un aspecto convincente y de alta gama.
Vinyl Wall Decals
Si quieres un patrón o un gráfico específico, los vinilos decorativos son una opción fantástica. Básicamente son pegatinas grandes de alta calidad que vienen en láminas o rollos. Aunque la mayoría son planos, pueden crear un gran impacto visual con patrones intrincados como azulejos marroquíes o diseños geométricos. A menudo son la opción más económica y rápida de aplicar.
Paneles de salpicadero magnéticos
Una opción menos conocida pero brillante son los paneles magnéticos. Este sistema consiste en aplicar primero a la pared una capa base magnética autoadhesiva. Luego, los paneles decorativos de metal (a menudo de acero inoxidable o con diseños impresos) simplemente encajan en su sitio. Esto hace que sea increíblemente fácil cambiarlos si cambias de opinión, aunque el costo inicial puede ser un poco más alto.
Por ejemplo, dos compañeros de piso, Alex y Ben, se encargaron de sus cocinas idénticas y aburridas. Alex eligió un backsplash efecto mármol peel and stick para lograr una sensación clásica y luminosa. Ben optó por llamativos vinilos geométricos verdes para dar un toque de color. Ambos gastaron menos de 80 $ y terminaron en unas dos horas, cambiando por completo el carácter de sus espacios. Esto demuestra cómo distintas ideas de backsplash removible para apartamentos pueden adaptarse a personalidades únicas.

Las mejores opciones de backsplash peel and stick por menos de 100 $
¿Crees que una cocina bonita está fuera de tu presupuesto? Piénsalo otra vez. Esta sección es tu mapa del tesoro para encontrar opciones de backsplash peel and stick preciosas, modernas y baratas que no lo parecen en absoluto.
La belleza del mercado de peel and stick backsplash es su accesibilidad. No necesitas un gran presupuesto para crear un look lujoso. Muchas marcas mejor valoradas ofrecen colecciones impresionantes por bastante menos de 100 $, lo que convierte esto en uno de los proyectos DIY con estilo para inquilinos más satisfactorios disponibles.stylish renter DIY projects disponibles.
Una idea equivocada muy común es que “budget-friendly” significa “de aspecto barato”. La realidad es que la tecnología de fabricación ha avanzado tanto que hoy los azulejos asequibles incorporan texturas realistas, líneas de rejunte y acabados muy logrados. Puedes encontrar opciones que imitan de forma convincente materiales caros.
Aquí tienes algunos de los acabados modernos más populares que puedes encontrar con presupuesto ajustado:
- Clásico Subway: Atemporal, limpio y disponible en una docena de colores y tamaños. Funciona con cualquier estilo de decoración.
- Efecto mármol: Un backsplash efecto mármol peel and stick aporta al instante un toque de elegancia y luminosidad sin el coste ni la porosidad de la piedra real.
- Farmhouse moderno: Busca shiplap, madera rústica o azulejos con estampados clásicos. Un backsplash peel and stick farmhouse moderno puede añadir calidez y carácter al instante.
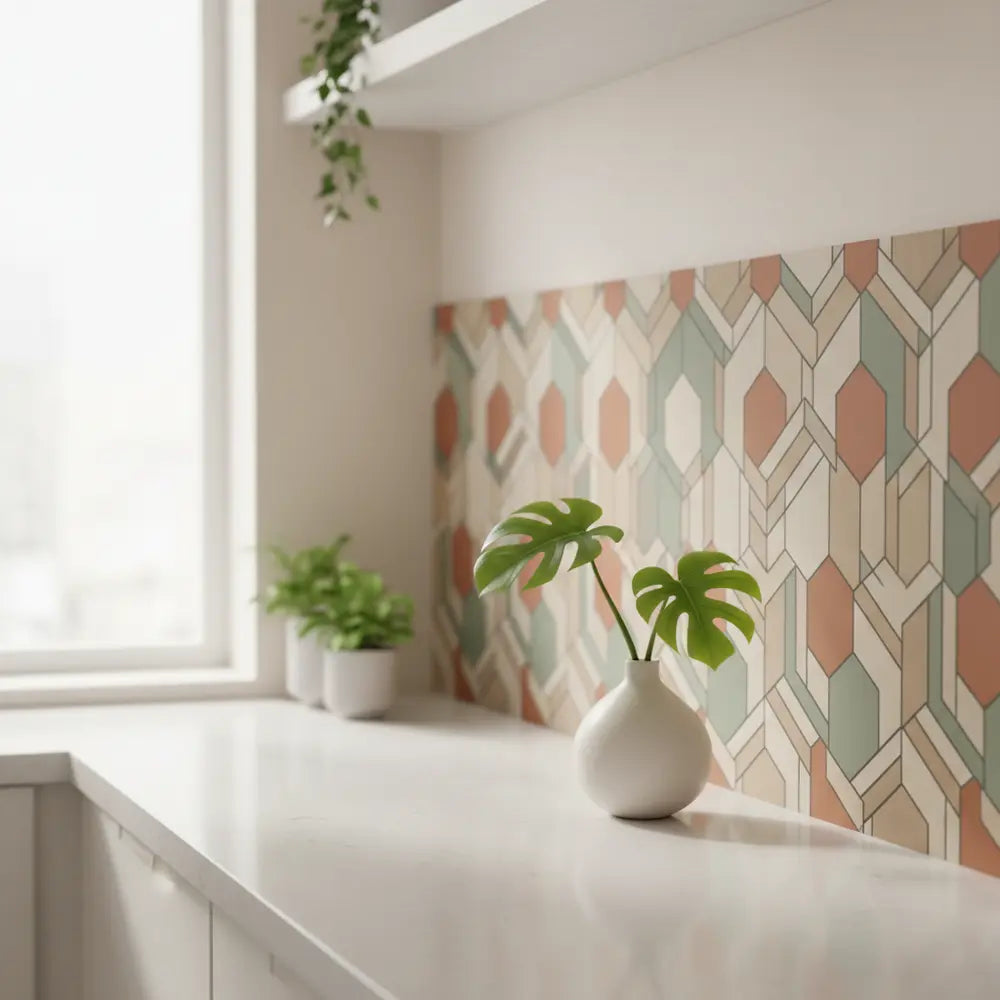
- Hexágonos y geométricos: Para un ambiente más moderno y divertido, los hexágonos y otros azulejos geométricos son una de las grandes tendencias, a menudo con colores intensos. Para más inspiración sobre esto, nuestra guía de Baldosas modernas peel and stick: paredes de acento y patrones es un gran recurso.
Para demostrarlo, piensa en tres inquilinos. Sarah gastó 75 $ en azulejos hexagonales blancos para conseguir un ambiente limpio y moderno. Maria invirtió $90 in en un sofisticado backsplash estilo mármol. Y Tom solo usó 65 $ en azulejos con acabado de madera rústica para crear una sensación acogedora y farmhouse. Los tres transformaron por completo sus cocinas con una inversión modesta.
Puedes encontrar estas opciones en grandes tiendas de mejoras para el hogar, en Amazon o en sitios web de venta directa al consumidor como Wayfair. Si buscas un toque de color que sea a la vez elegante y temporal, explorar una colección seleccionada como nuestras Ideas de backsplash verde renter-friendly peel & stick puede darte una inspiración increíble.
Cómo instalar backsplash peel and stick en cocinas y baños
¿Te preocupa arruinar la instalación? No te preocupes. Esta guía paso a paso elimina todas las dudas y te da la confianza para conseguir un resultado de aspecto profesional a la primera.
Uno de los mayores atractivos de un peel and stick backsplash es lo sencillo que resulta instalarlo. No necesitas lechada, mortero ni herramientas especializadas. Con un poco de preparación y paciencia, puedes lograr un acabado impecable. El proceso es el mismo tanto para cocinas como para baños.
Guía de instalación paso a paso
- Limpia la pared: Este es el paso más importante. Usa un desengrasante para limpiar a fondo la superficie de la pared. Cualquier resto de grasa o suciedad impedirá que las baldosas se adhieran correctamente. Déjala secar por completo. Lo ideal es esperar 24 horas.
- Mide y planifica: Mide el área que quieres cubrir. Es recomendable colocar primero las baldosas sobre una superficie plana para visualizar el patrón y planificar cualquier corte. Esto ayuda a evitar errores una vez que empieces a pegarlas.
- Traza una línea guía: Usa un nivel y un lápiz para dibujar una línea horizontal recta en la pared. Esta será tu guía para la primera fila de baldosas y garantizará que todo tu backsplash quede nivelado, aunque tus encimeras no lo estén.
Cortar y ajustar los azulejos
Para enchufes y esquinas, tendrás que hacer cortes. Simplemente mide el espacio, marca el azulejo con un lápiz y usa un cúter afilado y una regla para marcar y partir el azulejo. Es sorprendentemente fácil. Un consejo profesional es crear primero una plantilla de papel del enchufe para asegurar un corte perfecto.
Para quienes aprecian el aprendizaje visual, ver una guía detallada puede marcar toda la diferencia. Obtén una visión aún más profunda del proceso consultando nuestra guía sobre Cómo instalar azulejos adhesivos sin esfuerzo, que ofrece instrucciones visuales completas.

Lista de verificación de lo que se debe y no se debe hacer en la instalación
- SÍ espera al menos 21 días antes de aplicarlo sobre una pared recién pintada.
- NO lo instales sobre paredes texturizadas como ladrillo o popcorn; no se adherirá bien.
- SÍ compra aproximadamente 10% de extra para tener en cuenta errores y cortes difíciles.
- NO apresures el paso de limpieza. Una superficie limpia es 90% de la batalla.
- SÍ usa una pequeña espátula de plástico o una tarjeta de crédito para sacar las burbujas de aire.
Si estás deseando dominar la instalación y ver los mejores diseños que estarán en tendencia el próximo año, asegúrate de revisar nuestro tutorial completo sobre Cómo instalar azulejos peel and stick y los mejores diseños 2025 para obtener una visión general completa.
¿Qué estilo de backsplash encaja con tu alquiler?
¡Responde esta pregunta para encontrar tu combinación perfecta!
Cuando se trata del ambiente de tu hogar, prefieres:
¿Vale la pena el peel and stick backsplash para inquilinos?
¿Te preguntas si esta solución de moda realmente durará o si solo es una tendencia pasajera? Esta sección aborda las preguntas difíciles sobre durabilidad, rendimiento y valor a largo plazo para ayudarte a decidir si es la opción adecuada para ti.
Al considerar una mejora, incluso una temporal, quieres saber si tu tiempo y tu dinero están bien invertidos. ¿Un peel and stick backsplash es solo una solución cosmética rápida o ofrece un valor real y duradero para un inquilino? La respuesta depende de gestionar las expectativas y elegir el producto adecuado.
La mayoría de las baldosas peel-and-stick de alta calidad están diseñadas para durar años. Los fabricantes suelen indicar una vida útil de 3 a 5 años, y muchos inquilinos afirman que siguen viéndose bien incluso más tiempo. Una encuesta reciente mostró que más de 80% de los usuarios estaban satisfechos con la durabilidad de sus baldosas adhesivas después de dos años de uso. Para un inquilino que quizá solo permanezca en un espacio unos pocos años, este es un plazo perfecto.
Una preocupación importante es el rendimiento en cocinas y baños, especialmente en relación con el calor y el agua. Las marcas de confianza hacen que sus productos sean resistentes a la humedad y a las salpicaduras. Esto significa que son perfectamente seguros detrás del fregadero. Para usarlos detrás de la estufa, es crucial revisar las especificaciones del producto para comprobar la resistencia al calor y asegurarse de que haya una separación adecuada (normalmente 6-8 inches) de las fuentes de calor directas.
Piensa en Sarah, una inquilina que instaló un backsplash peel-and-stick en la cocina de su apartamento. Cocinaba a diario, salpicaba agua al lavar los platos y convivió con él durante más de dos años. Las baldosas nunca se despegaron, amarillearon ni perdieron adherencia. Para ella, la inversión de 80 $ le proporcionó dos años de disfrute en una cocina que amaba, convirtiendo la relación coste-valor en una victoria clara.
En última instancia, por su costo relativamente bajo, la mejora estética y la satisfacción personal son enormes. Transforma un espacio prestado en un hogar. Así que, para los inquilinos que buscan una mejora no permanente, de alto impacto y budget-friendly, un renter friendly backsplash sin duda vale la pena. Para entender mejor cómo se comparan estas baldosas con las soluciones permanentes, nuestra Guía de azulejos para backsplash de cocina ofrece una comparación útil entre peel-and-stick y los azulejos tradicionales.
Cómo quitar un peel and stick backsplash sin causar daños
¿Te preocupa que “removable” no sea tan removable cuando llegue el momento de mudarte? Esta sección ofrece un método infalible para desmontar tu salpicadero, garantizando que tus paredes —y tu depósito de seguridad— permanezcan perfectamente intactos.
La mayor promesa de un peel and stick backsplash es su capacidad de retirarse. Esta es la característica que lo convierte en un verdadero renter friendly backsplash. Pero conocer la técnica correcta es clave para una mudanza sin estrés. Un tirón apresurado puede causar daños, mientras que un enfoque paciente dejará la pared como si nada hubiera pasado.
El arma secreta para una retirada segura es el calor. Una aplicación suave de calor ablanda el adhesivo, permitiendo que las baldosas se despeguen de la pared sin arrancar la pintura ni el papel de yeso. Esta es la parte más importante de cómo quitar un peel and stick backsplash sin causar daños.
Herramientas necesarias:
- Un secador de pelo o una pistola de calor en temperatura baja
- Una espátula o rasqueta de plástico
- Una solución de limpieza (como Goo Gone) y un paño suave
El proceso de retirada segura:
- Calienta la primera baldosa: Empieza en una esquina superior del backsplash. Mantén el secador a unos 6-8 inches de la baldosa y calienta la superficie durante unos 30-60 segundos. Mueve el secador para distribuir el calor de manera uniforme.
- Levanta con cuidado el borde: Una vez que la baldosa esté tibia al tacto, usa la espátula de plástico para levantar suavemente una de las esquinas. El plástico es importante, ya que un cuchillo de metal podría fácilmente dañar la pared.
- Despega lentamente: Una vez que tengas una esquina suelta, empieza a despegar la baldosa de la pared lenta y suavemente. Tira hacia abajo en un ángulo pronunciado, en paralelo a la pared, en lugar de hacerlo hacia afuera. Si sientes mucha resistencia, aplica más calor. No lo fuerces.
- Limpia cualquier residuo: Después de retirar todas las baldosas, puede que encuentres algo de residuo pegajoso. Aplica un poco de Goo Gone u otro removedor de adhesivo sobre un paño suave y frota suavemente el residuo con movimientos circulares.
- Limpieza final: Una vez que el residuo haya desaparecido, limpia toda el área con un paño húmedo para retirar cualquier producto de limpieza y déjala secar. Tu pared debería verse como nueva.
Un inquilino, Mark, documentó su mudanza. Estaba nervioso por el atrevido backsplash que había tenido durante tres años. Usando este método de calor, retiró todo el backsplash en menos de 45 minutos. Su foto de “después” mostraba una pared limpia y sin daños, y recibió de vuelta su depósito de seguridad completo. Para una guía visual paso a paso sobre esto, el recurso definitivo es nuestro artículo, Transforma y retira con seguridad las baldosas peel and stick para inquilinos.
Casos prácticos: transformaciones de cocinas para inquilinos por menos de $100
¿Necesitas verlo para creerlo? Estas renovaciones reales de inquilinos muestran el increíble impacto que puede tener un pequeño presupuesto y unas pocas horas de trabajo, demostrando que la cocina de tus sueños está a tu alcance.
La mejor manera de entender el poder de un renter friendly backsplash es ver los resultados. Estos mini casos prácticos presentan a inquilinos reales que cambiaron por completo sus cocinas con un presupuesto modesto y un poco de espíritu DIY. Cada uno es un testimonio de lo que es posible con removable backsplash ideas for apartments.

Caso práctico 1: la renovación modern farmhouse
Inquilina: Chloe, una joven profesional.
El problema: Su cocina de apartamento tenía una pared anticuada y amarillenta detrás del fregadero que hacía que todo el espacio se sintiera sombrío.
La solución: Chloe eligió un clásico modern farmhouse peel and stick backsplash blanco con patrón de azulejo tipo subway para iluminar la habitación.
Presupuesto: $85 para las baldosas y un cúter. | Tiempo invertido: 2.5 horas.
El impacto: El nuevo backsplash hizo que la cocina se sintiera al instante más limpia, luminosa y moderna. Chloe dijo que “la hizo feliz volver a estar en su cocina” y sintió que fue el mejor dinero que había gastado en su apartamento.
Caso práctico 2: el aspecto lujoso del mármol por muy poco dinero
Inquilino: David, un estudiante de posgrado.
El problema: La cocina de David era funcional, pero carecía por completo de personalidad. Quería un aspecto más sofisticado sin un precio elevado.
La solución: Optó por un marble look peel and stick backsplash con vetas grises realistas. Cubría el área entre la encimera y los armarios.
Presupuesto: $95 por baldosas gruesas y de alta calidad. | Tiempo invertido: 3 horas.
El impacto: La transformación fue espectacular. El patrón de mármol añadió una sensación de lujo y profundidad, haciendo que toda la cocina pareciera más cara. Se convirtió en un punto focal instantáneo de su estudio.
Caso práctico 3: el baño llamativo y económico
Inquilina: Mia, una freelance creativa.
El problema: Su pequeño baño sin ventanas parecía una caja blanca. Quería añadir un toque de color y personalidad.
La solución: Mia usó un vibrante peel and stick backsplash estampado en la pared detrás del lavabo del baño. Eligió un cheap peel and stick backsplash under $50.
Presupuesto: $48 en total. | Tiempo invertido: 1 hora.
El impacto: El backsplash colorido convirtió la pared aburrida en una pared protagonista. Añadió energía y estilo, haciendo que el espacio pequeño se sintiera intencional y diseñado. Mia demostró que incluso un presupuesto diminuto puede crear un impacto enorme.
Dónde comprar el mejor peel and stick backsplash en línea en 2025
¿Listo para empezar tu propia transformación pero no sabes dónde comprar? Esta guía seleccionada te lleva a las mejores fuentes en línea de baldosas para backsplash elegantes, fiables y aprobadas para inquilinos.
Encontrar el best peel and stick backsplash for renters nunca ha sido tan fácil. El mercado en línea está lleno de opciones para todos los estilos y presupuestos. Saber dónde buscar puede ahorrarte tiempo y ayudarte a encontrar un producto de alta calidad que se vea genial y funcione bien.
Principales marketplaces en línea
Estos grandes actores ofrecen la mayor selección y precios competitivos. Las reseñas de sus usuarios son invaluables para evaluar la calidad real y la facilidad de instalación de las distintas marcas.
- Amazon: Ofrece una enorme variedad de innumerables marcas. Busca productos con un gran número de reseñas positivas y fotos de clientes.
- Wayfair: Conocido por su selección curada de artículos para el hogar, Wayfair tiene muchos diseños elegantes y exclusivos de peel-and-stick.
- The Home Depot & Lowe's: Sus tiendas en línea suelen tener una selección mayor que sus ubicaciones físicas y ofrecen la comodidad de recoger en tienda o hacer devoluciones allí mismo.
Marcas emergentes a seguir
Más allá de los grandes referentes, varias marcas direct-to-consumer se especializan en azulejos adhesivos de alta calidad y con un diseño muy cuidado. Marcas como Stickwoll, Smart Tiles y Art3d suelen ser muy valoradas por su durabilidad, sus texturas realistas y sus patrones únicos. Comprar directamente a estas marcas a veces te da acceso primero a los diseños más nuevos. Mientras planificas tu proyecto, adelántate a la tendencia revisando nuestro informe Ideas de backsplash con peel stick para cocina 2025, que destaca una fuerte tendencia hacia azulejos con texturas más ricas y materiales ecológicos.
Guía de compra: las mejores opciones para todos los presupuestos
Opciones por menos de $50:
- Azulejo clásico blanco tipo metro
- Azulejo hexagonal gris sencillo
- Adhesivos geométricos en blanco y negro
- Listones con aspecto de madera clara
- Azulejo tipo penny en negro mate
Opciones de lujo (siguen siendo renter-friendly):
- Azulejo en espiga de mármol Carrara más grueso
- Kit de azulejos Kit-Kat verde texturizado (consulta nuestras Ideas de backsplash verde con peel & stick aptas para renters para inspirarte)
- Azulejo de vidrio brillante en un color único
Al elegir, céntrate en productos comercializados específicamente como soluciones de backsplash de vinilo removible para renters. Están formulados con adhesivos lo bastante fuertes para durar, pero lo bastante suaves para retirarlos sin pelearte con ellos. Para una lista seleccionada centrada en esto, consulta nuestra guía sobre las Mejores soluciones de backsplash de vinilo removible para renters.
Tu mejora con estilo y segura para el depósito te está esperando
No tienes por qué aceptar una cocina o un baño aburridos de alquiler como tu destino. El miedo a hacer cambios permanentes o a perder tu security deposit no debería impedirte crear un espacio que te encante. Un backsplash peel and stick es la solución perfecta, porque ofrece una poderosa combinación de estilo, asequibilidad y tranquilidad.
Como muestran nuestros casos de estudio, una transformación impresionante es posible en solo una tarde y por menos de $100. Desde un aspecto farmhouse, luminoso y limpio, hasta un sofisticado acabado de mármol, estas mejoras de apartamento seguras para el depósito ponen el poder del diseño directamente en tus manos. Por fin puedes cubrir esa pared fea, típica de casero, y hacer que tu espacio se sienta como en casa.
¿Listo para encontrar más formas ingeniosas de personalizar tu alquiler? Explora nuestras otras guías sobre proyectos renter-friendly que causan un gran impacto sin arriesgar nada.
Empieza hoy tu camino hacia un alquiler más bonito. Suscríbete a nuestro boletín para recibir más trucos para renters y descarga gratis nuestra Checklist para mejorar tu alquiler y planificar tu próximo proyecto.
Descarga tu checklist gratisPreguntas frecuentes (FAQ)
1. ¿El backsplash peel and stick se puede mojar?
Sí, la mayoría de los azulejos peel-and-stick de buena calidad están hechos de vinilo y son resistentes al agua, por lo que son aptos para colocarlos detrás del fregadero en cocinas y baños. Sin embargo, no son totalmente impermeables, así que no deben usarse dentro de una ducha donde estarían constantemente sumergidos en agua.
2. ¿Los azulejos peel and stick se verán baratos?
¡Ya no! Aunque las primeras versiones podían parecer endebles, los azulejos peel-and-stick modernos han evolucionado muchísimo. Muchos incorporan texturas 3D, líneas de lechada realistas y acabados de alta calidad que imitan de forma convincente los azulejos reales de cerámica, piedra y vidrio. La clave es elegir una marca reconocida y pedir primero una muestra si no estás seguro.
3. ¿Cuánto tiempo debo esperar para colocar el backsplash en una pared recién pintada?
Esto es muy importante para asegurar una retirada fácil más adelante. Debes esperar al menos 3 semanas (21 días) para que la pintura nueva cure por completo. Si colocas los azulejos demasiado pronto, el adhesivo puede adherirse a la pintura que aún no ha curado, lo que podría hacer que la pintura se desprenda cuando retires los azulejos.
4. ¿Puedo poner backsplash peel and stick sobre azulejos existentes?
Sí, en muchos casos, puedes. Siempre que la superficie del azulejo existente sea lisa, limpia y no porosa (como un azulejo estándar de cerámica o porcelana), un backsplash peel-and-stick se adherirá bien. Debes limpiar a fondo los azulejos existentes y las líneas de lechada para eliminar primero cualquier grasa o residuo de jabón. Es una excelente forma de cubrir un patrón de azulejos anticuado sin demolición.

Deja un comentario
Este sitio está protegido por hCaptcha y se aplican la Política de privacidad de hCaptcha y los Términos del servicio.