












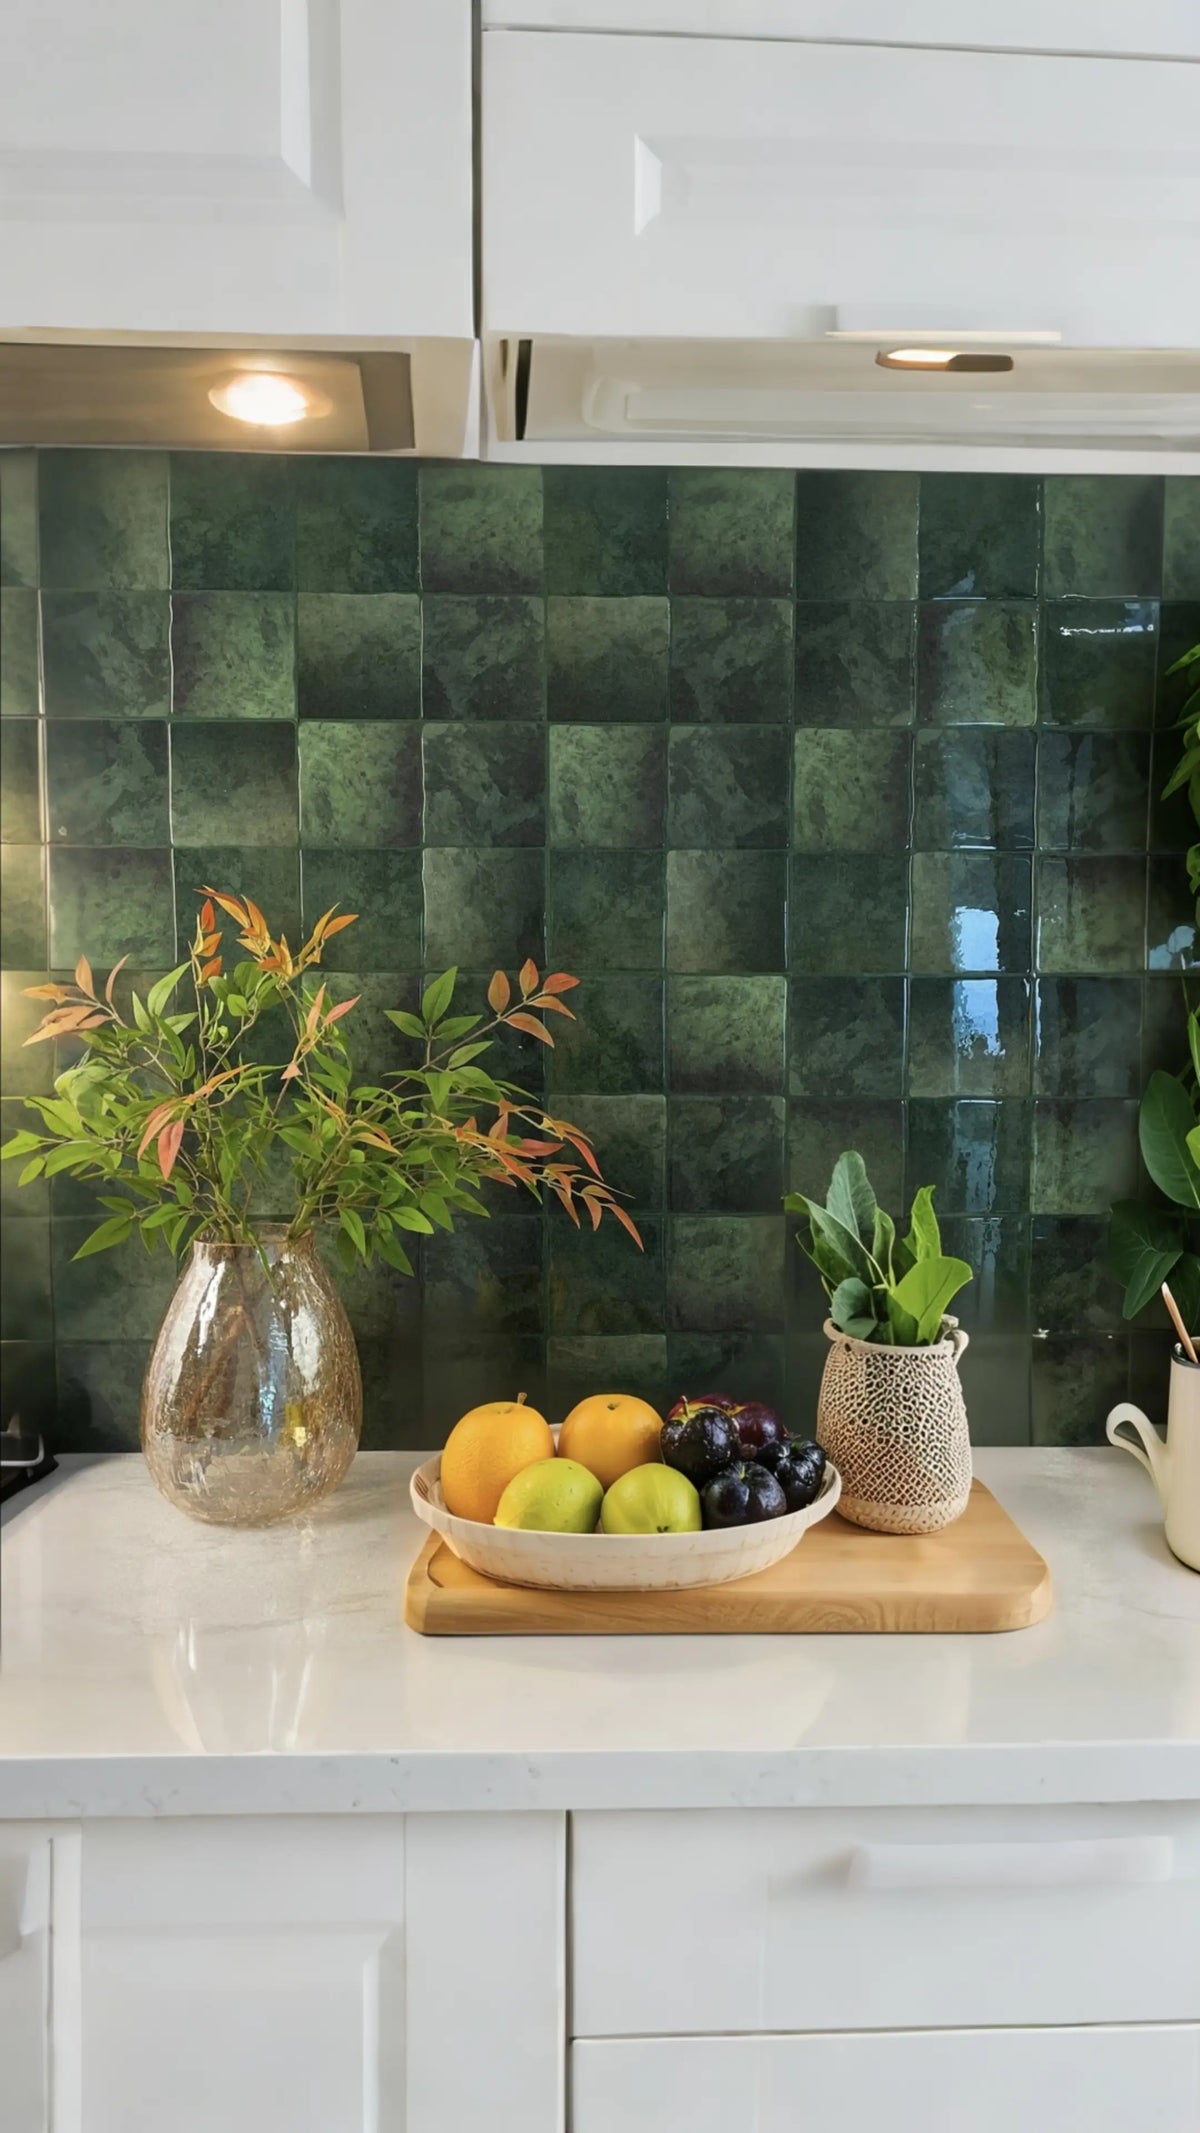
Stick-on wall tile can support a lower-disruption update, especially where the wall, lease and product instructions allow it. This guide focuses on the actual installation and removal plan rather than trend-year claims or survey percentages.
Explore this guide
Understanding Stick-On Tiles
What are Stick-On Tiles?
-
Composition of Stick-On Tiles: Stick-on tiles are primarily made from materials like vinyl or PVC. They have a strong adhesive backing that allows for easy installation. These tiles come in various designs, textures, and colors, making them an excellent choice for anyone looking to refresh their space. The materials used are often durable, water-resistant, and easy to clean, which makes them ideal for kitchens and bathrooms.
-
Popular Styles and Designs: There’s a wide variety of styles available when it comes to stick-on tiles. From classic subway tiles to modern geometric patterns, you can find designs that suit any aesthetic. If you’re looking for a rustic feel, wood-look tiles or brick patterns are also available. This versatility allows homeowners and renters alike to express their personal style without the commitment of traditional tiling.
-
Advantages of Using Stick-On Tiles: The primary advantage of stick-on tiles is their ease of installation. You don’t need professional help or specialized tools; just peel off the backing and stick! Additionally, they are easy to remove, which is perfect for renters. You can change your decor as often as you like without causing damage to the walls. This flexibility makes stick-on tiles an attractive option for anyone looking to update their space.
Why Choose Stick-On Tiles?
Choosing stick-on tiles is a smart decision for many reasons. First, they are incredibly affordable compared to traditional tiling options. Second, they offer a unique way to achieve a designer look without a designer budget. Plus, they are an eco-friendly choice as many brands are now producing tiles from recycled materials.
For renters, stick-on tiles present a hassle-free way to enhance the decor while sticking to rental agreements that often prohibit permanent changes. With the ability to easily remove and replace these tiles, you can enjoy a beautiful space without the stress of potential penalties for damages or alterations.
Preparation Before Installation
Cleaning and Measuring the Area
-
Clean the Surface: Before you can install your stick-on tiles, the surface must be clean and dry. I usually use a mild detergent to wipe down the area, removing any dust, grease, or grime. This ensures that the adhesive sticks properly and lasts longer.
-
Measure the Area: Accurate measurements are crucial. I recommend using a measuring tape to determine how many tiles you will need. Measure the height and width of the wall or floor area, then multiply these numbers to get the total square footage. Don’t forget to account for any cutouts or spaces where tiles will not be placed. This step helps in avoiding unexpected shortages during installation.
Tools Needed for Installation
-
Essential Tools: You won’t need a lot of fancy tools to install stick-on tiles. Here’s a short list of what I recommend:
- A utility knife for cutting tiles.
- A straightedge or ruler for making clean, straight cuts.
- A level to ensure that your tiles are aligned properly.
- A measuring tape for getting the right dimensions.
- A soft cloth for wiping down surfaces.
These tools will make your installation process much smoother and ensure that your tiles look professional.
Tips for Optimal Placement
-
Plan Your Layout: Before you start installing, lay out your tiles on the floor or wall without removing the adhesive backing. This gives you a clear picture of how the design will look and allows you to make any adjustments easily.
-
Start from the Center: For a more symmetrical look, I find it helpful to begin at the center of the area and work outward. This method ensures that any cuts or adjustments are distributed evenly, making the final appearance more balanced.
Step-by-Step Guide to Installing Stick-On Tiles
Aligning the First Tile Correctly
-
Starting Point: The first tile is crucial for a good-looking installation. Once you’ve measured and planned your layout, peel the backing off the first tile and carefully position it on the wall or floor. I like to use a level to ensure it’s straight.
-
Press Firmly: Once the tile is in place, press down firmly, especially around the edges, to ensure a solid bond. It’s important to take your time at this stage, as the first tile sets the tone for the rest of the installation.
Cutting Tiles to Fit Spaces
-
Making Cuts: When you reach the edges or corners, you might need to cut tiles to fit. I recommend marking the tile with a pencil before cutting to ensure accuracy. Using a utility knife, carefully cut along the markings. Make sure you have a steady hand to achieve clean edges.
-
Edge Finishing: Sometimes, you may need to use smaller tiles for odd shapes or spaces. This is where creativity comes into play. Consider using decorative pieces or smaller tiles to enhance the design while fitting the space perfectly.
Ensuring Adhesion and Longevity
-
Pressing for Adhesion: After placing each tile, I recommend going over the surface with a soft cloth or roller to smooth out any air bubbles. This extra step can help ensure that the tiles adhere properly and last longer.
-
Following Up: After installation, avoid heavy cleaning or placing any weight on the tiles for at least 24 hours. This ensures that the adhesive has time to set and creates a strong bond.
Pros of Using Stick-On Tiles in Rentals
Affordability and Versatility
-
Cost-Effective: One of the biggest advantages of stick-on tiles is their price point. For renters looking to make a kitchen makeover on a budget, these tiles provide an affordable option without sacrificing style. Whether you’re updating a backsplash or flooring, the cost is significantly lower than traditional tile installation.
-
Versatile Applications: Stick-on tiles can be used in various settings. From kitchen backsplashes to bathroom updates, these tiles are perfect for enhancing any area in a rental home. Their versatility means that you can constantly change the look of a room without additional expenses.
Easy Removal with No Damage
-
Removal Planning: When it comes time to move out, you can easily remove the tiles with a documented removal and restoration plan. This makes stick-on tiles a tenant-friendly decor solution. It’s a huge relief knowing I won’t face any penalties for wall damage when I leave a rental.
-
Repositionable Tiles: If you make a mistake during installation, these tiles can often be repositioned without losing their adhesive properties. This is a significant benefit for those of us who might not get it right on the first try!
Customizable Options for Personal Style
-
Personal Touch: With so many styles and colors available, you can customize your space to reflect your taste. Whether you prefer a minimalist home decor style or vibrant, creative wall designs, there’s a peel and stick tile for you!
-
Seasonal Changes: You can easily change the look of your space with the seasons. For instance, I like to swap out my tiles every few months to keep things fresh and exciting. Stick-on tiles allow for this flexibility without breaking the bank.
Cons of Using Stick-On Tiles in Rentals
Potential for Wear and Tear
-
Durability Issues: While stick-on tiles are great for many applications, they aren’t indestructible. In high-traffic areas, they may show signs of wear over time. For example, if you use them in a busy kitchen, you might find that they need to be replaced more frequently compared to traditional tiles.
-
Cleaning Challenges: Some stick-on tiles may not hold up as well against harsh cleaning products. It’s essential to use mild detergents to ensure you don’t damage the finish.
Limitations on Usage in High Moisture Areas
-
Moisture Concerns: Although many stick-on tiles are water-resistant, they may not be suitable for areas exposed to significant moisture, like showers or swimming pools. This is something to consider when planning your installation.
-
Landlord Approval: It’s always a good idea to check with your landlord before making any significant changes—even if they are temporary. Some landlords may have specific rules regarding what can or cannot be done to the rental property, which could impact your decision to use stick-on tiles.
Impact on Rental Agreements and Landlord Approvals
-
Rental Agreements: Always ensure your use of stick-on tiles complies with your lease agreement. While many landlords are open to temporary decor solutions, it’s best to clarify any potential issues beforehand.
-
Approval Process: Some renters may find it helpful to have a conversation with their landlords about their plans. This proactive approach can prevent misunderstandings and ensure that you’re both on the same page regarding home improvements.
Conclusion
Effortless stick-on tiles offer an exciting way to transform living spaces in 2026 without the need for permanent changes. With various styles and easy installation, they’re perfect for renters seeking stylish wall coverings or a quick home makeover. It’s important to weigh the pros and cons, considering factors like durability and landlord approval, but the flexibility and affordability they provide often outweigh the drawbacks. Whether you are looking to enhance your kitchen, bathroom, or any other space, stick-on tiles are an excellent choice for budget-friendly home improvements.
Check whether the wall is ready for adhesive
Identify the wall material and top coating, then inspect for dust, grease, loose paint, repairs, moisture and texture. An adhesive tile bonds to the topmost layer, so strong tack cannot compensate for paint that is releasing from the wall.
Use the cleaner and preparation method accepted for both surfaces. Do not automatically sand a glossy coating or apply a primer unless the instructions call for it. Allow coatings and repairs to reach their required condition before installation.
Plan reference lines, seams and difficult cuts
Measure the eligible area and draw the pattern across exposed ends, corners and outlets. Decide whether the product overlaps, interlocks or butts together. Dry-fit difficult pieces while the backing remains protected.
A level reference line can be more useful than following an irregular countertop or ceiling edge. Check the visual result from normal viewing distance before committing the full field.
Apply pressure without treating pressure as compatibility
Place each piece according to the product instructions and use the permitted pressure method to improve contact. More pressure cannot make an incompatible surface suitable, and it should not crush embossing or stretch a flexible sheet.
Inspect seams and edges as you work. If a piece will not sit flat, stop and identify the wall or cut problem rather than adding undocumented adhesive.
Recheck moisture and heat by room
A dry living-room accent wall, sink backsplash and bathroom wall can need different products. A waterproof face does not make a shower system, and a heat-resistant label does not define clearance from an appliance or flame.
Use the product and appliance documentation for the actual location. When a source of dampness is active, repair it before covering the wall.
Keep an exit plan for rentals and future updates
Save the installation date, product, wall condition and removal instructions. A sample removal can reveal an obvious problem but cannot promise the same outcome after long dwell time.
Plan possible cleaning, patching or repainting and do not tie the installation to a deposit guarantee. A temporary decor project is easier to reverse when its starting condition was documented.
Compare complete products instead of broad categories
Stick-on tile can refer to thin films, foam-backed sheets, gel surfaces, rigid composite panels and metal-faced products. Their thickness, cutting method, edge treatment, heat limits and cleaning instructions can differ. Read the exact product construction before copying an installation method from another brand or material.
Save the current instructions and product identity with the order. If the seller uses general terms such as waterproof, renter friendly or heat resistant, ask what location, layer and test those words describe. A broad label should not replace a specific installation limit.
Walk through a small wall example
Suppose a dry feature wall is eight feet wide and four feet high. Its face area is thirty-two square feet before accounting for any large opening. If a selected pack provides four square feet of usable installed coverage, eight packs cover that area arithmetically. Pattern matching, difficult cuts and repair stock can justify additional material; the example is not a universal waste percentage.
Before opening every pack, dry-fit representative pieces and check the end cuts. If the final strip would be unreasonably narrow, adjust the starting point while the installation is still reversible.
Troubleshoot symptoms before adding stronger adhesive
If an edge lifts, note whether paint, adhesive or backing moved with it. Inspect for moisture, unsupported texture, stretched material or contamination. Do not assume more glue is the correct repair until the product permits it and the cause is understood.
If a finish becomes dull, sticky or discolored during cleaning, stop the cleaner and check the care instructions. Photograph the condition before trying another chemical so the evidence is not erased by repeated treatment.
Plan the complete project, not only the sticking step
A fast adhesive installation still depends on preparation, measuring, cutting, finishing and cleanup. Build a simple task list before starting: inspect the wall, confirm product eligibility, gather tools, dry-fit the layout, complete difficult cuts, install, finish edges and document the result. This makes it easier to see where professional help or extra time may be needed.
Keep electrical work separate from decoration. Outlet covers and devices need to remain properly installed and accessible. If a box position or device depth must change, use qualified help rather than hiding the issue behind a decorative panel.
Compare the installed cost rather than the pack price
Include product quantity, shipping, preparation materials, edge trim, cutting tools, spare pieces and any wall repair. A product with a lower price per pack can cost more if it needs more packs or creates additional finishing work. Compare the same finished area and scope.
For a rental, include restoration time and materials as a possible future cost. For an owned home, include the value of keeping spare material and clear product records for later repairs.
Use a representative sample for the right questions
A loose sample can answer color and texture questions. A permitted wall sample can reveal an obvious compatibility or removal concern. Neither proves a universal service life. Keep the sample location, preparation and observation period with the notes so later conclusions remain tied to what was actually tested.
If the sample fails, do not simply increase pressure or add another adhesive. Check whether the wall, product, cleaning or exposure is outside the intended conditions. A failed sample can save a larger wall from an avoidable mistake when its cause is investigated before continuing.
Prepare for maintenance from day one
Keep the approved cleaner and a soft permitted tool available. Cleaning becomes harder when residue is allowed to accumulate around seams, but aggressive scrubbing can damage a finish. Use the product-specific method and inspect edges during routine care.
When furniture, appliances or room use changes, reconsider the wall exposure. A panel installed on a dry wall can later become a splash or heat zone after a room is rearranged. The installation decision should be revisited when the conditions change.
Use a final acceptance walk-through
View the wall from normal room positions and under the lighting used during the day and evening. Check pattern direction, exposed edges, outlets, corners and seams. Photograph any intentional gap or special detail so it is not mistaken for later damage.
Store the installation instructions, remaining material and photographs together. A clear handoff record is one of the simplest ways to make a DIY finish easier to repair, clean or eventually remove.
Check the project again after the room returns to normal
Once furniture, appliances and daily objects are back in place, look at the wall from the positions where it is normally seen. Confirm that doors, drawers and shelves can still open, that cleaning tools can reach the lower edge, and that no accessory now rubs against an exposed corner. Problems created by room use are easier to solve when found before the installation becomes part of the background.
Repeat a simple inspection after the first few normal cleanings. Look for residue near seams, edges that collect dirt, or finish changes caused by a cleaner. This observation is not a durability test; it is a practical check that the selected care routine works with the installed finish.
Plan small repairs before they are needed
Keep a spare piece large enough to cover one of the more difficult cuts in the layout. Label it with the product and batch information and store it flat or as otherwise directed. A repair stock that is curled, contaminated or separated from its identity may not be useful later.
If a damaged piece needs replacement, photograph the condition first and identify why it failed. A local impact, cleaning damage, moisture problem and weak paint require different responses. Replacing the visible piece without addressing the cause can reproduce the same problem.
Decide when a DIY finish should be replaced rather than patched
A small isolated cosmetic defect may be repairable, while widespread lifting, unstable paint, recurring moisture or a change in room use can justify removing the finish and reassessing the wall. Use product-specific repair guidance and avoid layering undocumented adhesives over a system that is already failing.
The advantage of a well-documented project is not that it can never fail. It is that the next decision—clean, repair, remove or replace—can be based on known materials and observed conditions rather than guesswork.
Recheck the wall before extending the finish into another area
Do not assume success on one wall automatically approves the next. A nearby wall can have different paint, repairs, sunlight, moisture or heat exposure. Repeat the basic eligibility check and compare the new location with the original installation conditions.
If the second area requires a different edge treatment, cleaner, or appliance clearance, keep those differences in the project record. Using the same pattern across rooms can create visual continuity without requiring identical construction or installation details everywhere.
This room-by-room approach also limits the cost of a wrong assumption. One completed, observed area provides practical experience while leaving future surfaces reversible until their own conditions are understood.
Estimate quantity from the real installation
Measure eligible wall rectangles and identify windows, outlets, returns and exposed ends. Use usable installed coverage rather than nominal sheet size where overlaps or interlocks apply. Add a justified allowance for cuts, pattern matching and a repair reserve instead of an automatic percentage.
Keep unopened packs within the return policy until the first representative dry layout has been approved. Compare delivered shade, print and finish before mixing all cartons into the installation.
Resolve edges, outlets and transitions
Plan how the material ends at cabinets, doors and open walls. Use an accepted trim or clean factory edge rather than leaving an exposed backing. Around outlets, preserve proper device access and do not use decorative material to conceal unsafe electrical work.
At counters and corners, follow the joint method for the selected system. Extra sealant should not be used as a substitute for a compatible product or an accurate cut.
Maintain the wall without over-cleaning it
Use the cleaner and tool permitted for the finish. Wipe spills before they become difficult residues, control liquid near seams, and stop if color transfers, the face softens or edges begin to lift.
Keep spare pieces and the care instructions. If a new cleaner, appliance or moisture condition changes the exposure, reassess the location rather than assuming the original decision covers every future use.
Frequently Asked Questions
1. How do I clean stick-on tiles?
To clean stick-on tiles, use a mild detergent and warm water. Avoid harsh chemicals or abrasive sponges that might damage the surface. A soft cloth is ideal for wiping down the tiles to maintain their luster.
2. Can stick-on tiles be used in bathrooms?
Yes, many stick-on tiles are moisture-resistant and suitable for bathrooms. However, avoid using them in areas that are frequently exposed to direct water, like inside a shower cubicle.
3. How long do stick-on tiles last?
With proper installation and care, stick-on tiles can last between 3 to 5 years. However, they may need replacing sooner in high-traffic or moist areas.
4. Are stick-on tiles easy to remove?
Yes, stick-on tiles are designed for easy removal without damaging the underlying surface, making them an excellent choice for renters. Using a hairdryer to warm the adhesive can make removal even smoother.
If you’re ready to transform your space with stick-on tiles, check out our collection of Timberline Checks peel and stick tiles and Crimson Horizon adhesive tiles. Your DIY home decor journey starts here, and I can’t wait to see what you create! For more tips and inspiration, don’t forget to explore our internal blog resources like Smart Tiles for Modern Spaces and Peel-and-Stick Bathroom Renovations to further enhance your home transformation!
Sources and scope
- 3M — Surface Preparation for VHB Tape Applications — Specific PSA preparation principles; not Stickwoll specifications.
- US EPA — Mold, Moisture and Your Home — Moisture-source control; not tile certification.


Leave a comment
This site is protected by hCaptcha and the hCaptcha Privacy Policy and Terms of Service apply.