


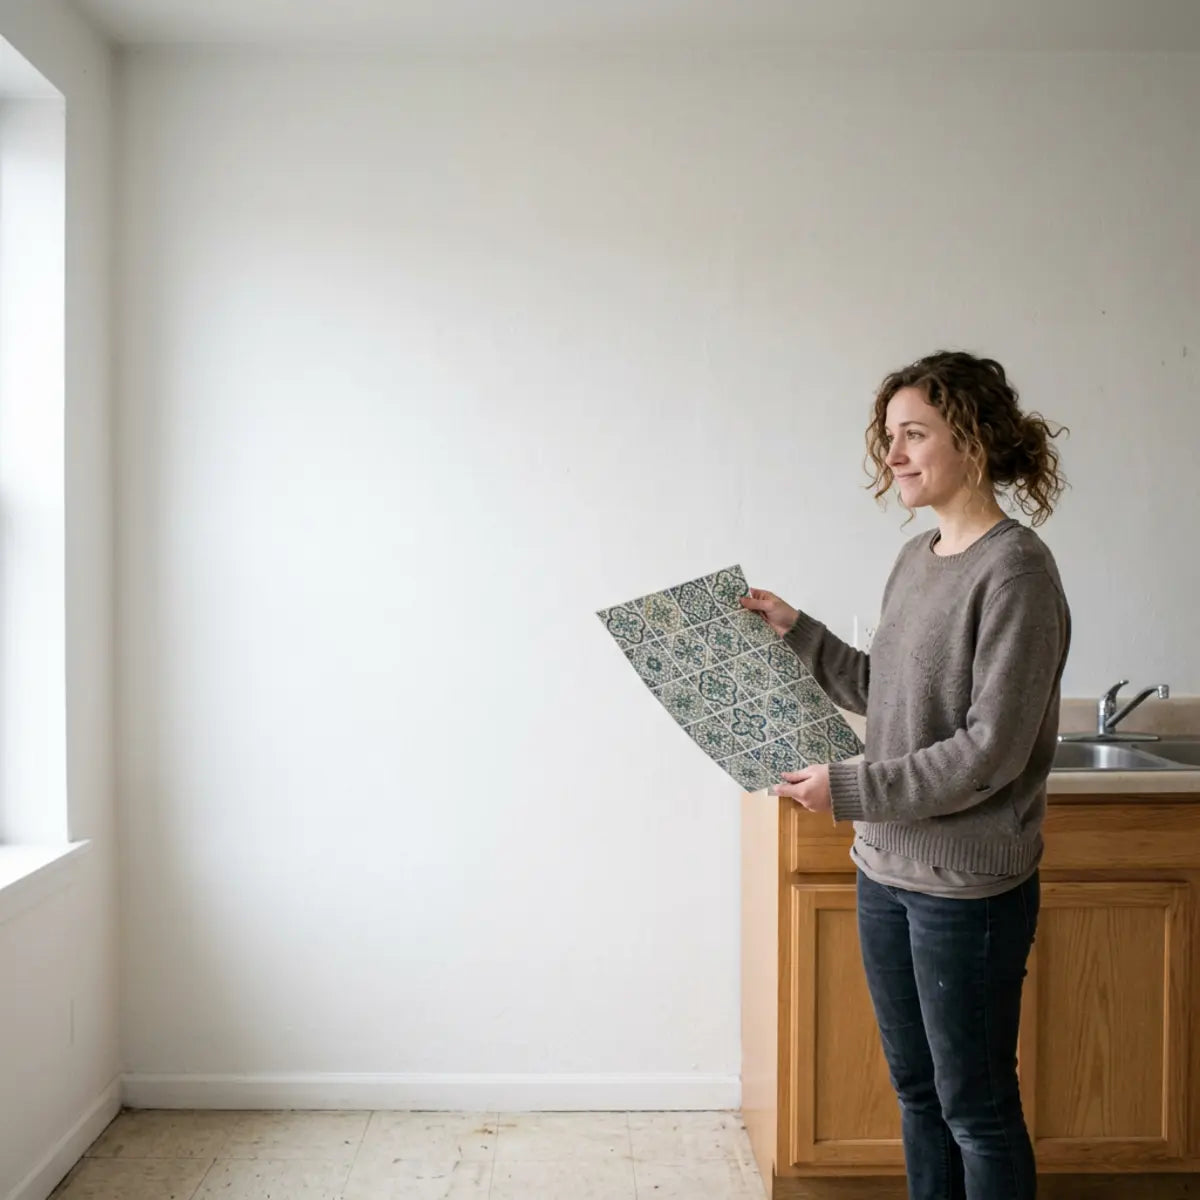
The anxiety of a renter upgrading their kitchen rarely comes from choosing the right color. The real stress begins with the fear of losing part or all of a security deposit due to unexpected paint damage or stubborn adhesive residue.
A renter friendly backsplash is only low-risk after it passes a lease review, wall-condition check, paint-cure check, hidden adhesive patch test, and removal test. Peel-and-stick tile can damage apartment walls if the underlying paint is uncured, flat, poorly primed, already peeling, heat-exposed, or if the adhesive leaves a heavy residue.
Before committing to a full installation, you must establish a pass/fail threshold. This means you must check lease permissions first. Then, test the adhesive on a hidden wall area for 48-72 hours. Finally, document the wall before installation and plan your exact removal strategy long before moving out. The process of modifying a space you do not own requires a highly strategic approach. It is not merely about aesthetic enhancement; it is an exercise in risk management and architectural preservation. Understanding the physical and chemical interactions between temporary decor and structural wall elements is paramount to protecting your financial assets.
How Do You Know If a Renter Friendly Backsplash Is Actually Safe?
The phrase "renter friendly" is a marketing claim, not a legal deposit guarantee. To protect your finances, you must define renter friendly as reversible, documented, lease-compliant, and removable without visible damage. A product is only safe when it strictly adheres to these conditions. The burden of proof ultimately falls on the tenant. Landlords operate on a baseline of property preservation, viewing any unauthorized modification—regardless of how easily it can be reversed—as a potential liability. Therefore, your approach must be clinical and documented.
The most common mistake renters make is trusting a label over a physical test. Adhesive backing behaves differently depending on the wall texture, the type of paint, and the ambient temperature of the kitchen. Pressure-sensitive adhesives (PSAs), the standard backing for most temporary wall products, operate on microscopic levels of surface tension. Their bond strength is heavily dictated by environmental variables that no manufacturer can perfectly predict for your specific apartment.
To determine true safety, industry consensus dictates using an objective grading system. We utilize a Deposit-Risk Score (DRS). This is a 0-100 framework combining lease permission, paint stability, adhesive removability, heat exposure, residue risk, and move-out reversibility.
By applying this standardized evaluation, you establish a quantitative baseline for your project. This completely removes the emotion and guesswork from your remodeling decisions, replacing hope with empirical data.
Understanding the Deposit-Risk Score (DRS)
The DRS forces you to look at your kitchen wall objectively. Instead of guessing if a temporary kitchen backsplash will cause damage, you assign numerical values to specific risk factors. By systematically breaking down the installation environment into measurable metrics, you transition from subjective aesthetic desire to objective risk analysis. This methodology is critical because property management companies do not evaluate damage subjectively; they use strict financial deduction schedules for drywall repair, skimming, and repainting.
This empirically demonstrated method fundamentally mitigates the risk of losing your security deposit. It shifts the evaluation criteria from aesthetics to structural compatibility. Below is the theoretical framework used by renovation professionals to grade temporary installations.
| DRS Evaluation Metric | Low Risk (80-100 Points) | Caution (50-79 Points) | High Risk/Fail (0-49 Points) |
|---|---|---|---|
| Lease Compliance | Written permission obtained. | Ambiguous lease language. | Explicit ban on wall adhesives. |
| Paint Condition | Glossy/satin, cured > 30 days. | Unknown age, matte finish. | Fresh paint, bubbling, chalky. |
| Surface Texture | Completely smooth drywall. | Slight orange peel texture. | Heavy texture, exposed brick. |
| Heat Exposure | Installed far from stovetop. | Near stove, indirect heat. | Directly behind high-BTU burner. |
| Patch Test Result | Clean removal, zero residue. | Slight residue, easily cleaned. | Paint lift, drywall paper tears. |
If your total score falls below 50, do not install the product. A pass/fail result is safer than a guess. Proceeding with a failing score mathematically guarantees that you will spend significant labor hours upon move-out attempting to reverse the damage, or worse, forfeiting hundreds of dollars to your landlord's maintenance team.
Interactive Tool: Calculate Your Custom DRS Score
Select the conditions that currently match your rental kitchen to instantly calculate your objective risk level before proceeding.
In evaluating lease compliance and surface readiness, the foundational methodology requires a strict adherence to structured preparation. A failure in preparation exponentially magnifies the likelihood of chemical bonding failure or paint delamination. Renters who skip wall prep often find that while the tiles adhere initially, they begin to peel at the corners due to microscopic grease layers, eventually pulling the weakened topcoat of paint with them. The comprehensive framework detailed in our Renter-Safe Wall Prep Before Peel-and-Stick Tile guide provides the quantitative baseline necessary to implement this without critical failure. By thoroughly digesting and executing every step of that preparatory protocol, you effectively construct a defensive barrier between your design aspirations and your landlord's damage assessments, ensuring your walls are chemically clean and structurally ready for safe adhesive application.
The Five Pre-Install Checks
To ensure your apartment kitchen upgrade does not end in a financial penalty, you must execute five mandatory pre-install checks. Skipping even one of these steps compromises the integrity of your security deposit protection. Think of these checks as a pilot's pre-flight routine; precision here dictates the safety of the entire journey.
- Check the Lease Alterations Clause: Review your rental agreement for language regarding "alterations," "improvements," or "wall coverings." Most standard leases require written permission for modifications.
- Evaluate the Wall Surface: Inspect the area for physical defects. Look for bubbling paint, existing chips, chalky residue, or signs of moisture damage.
- Confirm Paint Cure Time: Paint must be fully cured, not just dry to the touch. Most paint manufacturers require at least 30 days for latex paint to cure completely.
- Run an Adhesive Patch Test: Apply a small section of the product to a hidden area. You must observe how the adhesive interacts with the wall over time.
- Develop a Move-Out Removal Plan: Know exactly how you will remove the product, what tools you will need, and how much time it will take.
Analyzing the Lease Alterations Clause
Your lease is a legally binding contract that dictates what you can and cannot do to the property. Landlords often use broad language to prevent unauthorized renovations. This protective vernacular is designed to encompass everything from driving nails into studs to applying aggressive adhesives. Attempting to exploit a loophole by arguing that stick-on tiles aren't "permanent renovations" rarely holds up during a final move-out inspection if there is visual evidence of alteration.
Interactive Lease Language Checker
Scan your digital lease document. Check off the terms you find to assess your documentation needs.

According to guidelines from the U.S. Department of Housing and Urban Development (HUD), tenants are typically responsible for damages that exceed "normal wear and tear." Paint lift caused by an adhesive backsplash tiles installation is almost universally classified as damage, not wear and tear. Standard wear and tear accounts for minor scuffs, tiny pinholes from picture frames, and slight fading due to sunlight. Tearing the top layer of drywall paper off across a ten-square-foot section behind your sink is considered severe negligence.
Therefore, securing written permission is your strongest defense. A simple email to your landlord explaining that you are using a removable wall covering and offering to run a damage test can often yield an optimal configuration for your project. Property managers are much more likely to approve modifications if you approach them with a professional, documented plan demonstrating how you will prevent damage, rather than asking for vague forgiveness after the fact.
The Physics of Paint Cure Times
A common misconception is that if paint feels dry, it is ready for adhesives. This is empirically false. Paint dries quickly as water evaporates, but curing is a chemical process that takes much longer. When latex paints cure, the polymers cross-link to form a continuous, tough film. This polymerization process is highly dependent on humidity, temperature, and ventilation. Until this cross-linking is 100% complete, the paint layer is structurally vulnerable.
When you apply a peel and stick backsplash rental product over uncured paint, the adhesive bonds with the soft chemical structure of the paint. It effectively merges with the drying paint film. When you attempt to remove the tile later, the paint will pull away from the drywall primer, because the bond between the adhesive and the paint is stronger than the bond between the uncured paint and the primer beneath it.
Always wait a minimum of 30 days after a wall has been painted before applying any adhesive product. This universally recognized paradigm protects the wall's structural integrity. If you have just moved into a freshly flipped apartment with newly painted walls, patience is not optional—it is a strict chemical requirement to ensure you don't orchestrate your own deposit forfeiture.
When to Avoid Peel-and-Stick Tile Entirely
Even the highest quality no damage backsplash is not suitable for every environment. You must recognize when the operational threshold of the product has been exceeded. The structural integrity of the host wall dictates the success of the applied layer. If the foundation is flawed, the aesthetic upgrade will ultimately fail.
- Bubbling or Peeling Paint: If the existing paint is already failing, the adhesive will simply pull the loose paint completely off the wall. Adhesives do not fix structural problems; they exploit them.
- Highly Textured Walls: Adhesives require surface area contact. Heavy textures prevent a secure bond and increase the likelihood of the panels falling down. Deep trowel marks or heavy stucco-style finishes will trap air pockets behind the tile backing.
- Direct Stove Heat Zones: Extreme heat causes polymer degradation in standard adhesives. This can cause the tiles to melt, release, or bake the adhesive permanently into the wall.
- Active Moisture Problems: If the wall behind your sink suffers from condensation or plumbing leaks, the moisture will degrade the adhesive backing rapidly. Chronic dampness prevents the formation of a sustainable bond and promotes microbial growth behind the vinyl.
The Science of Heat Exposure and Adhesives
Heat exposure is a critical, often overlooked variable. Standard adhesive backsplash panels are formulated for ambient room temperatures. When exposed to the thermal dynamics of a high-BTU gas range, the chemical properties of the backing material fundamentally change. High heat accelerates the aging process of polymers.
When installed directly behind a high-output gas range without a protective backguard, the continuous heat cycling alters the chemical state of the adhesive. It essentially vulcanizes the glue, turning a temporary kitchen backsplash into a permanent, deposit-destroying fixture. The heat softens the glue, allowing it to penetrate deeper into the porous structure of the latex paint. When it cools, it hardens into an inseparable mass.
Industry consensus dictates maintaining a minimum clearance of eight to nine inches from direct heat sources. If your apartment layout does not allow for this clearance, you must use a freestanding panel or a stainless steel heat shield. Do not attempt to bend the laws of thermodynamics in a rental property; the resulting damage is notoriously difficult and expensive for professional painters to correct.
What Wall Damage Test Should Renters Run Before Installing Peel-and-Stick Tile?
Renters often do not know how to test adhesive safely. They struggle with understanding how long to wait, identifying what paint lift looks like, or knowing when residue indicates the product is too risky. This lack of testing methodology is exactly why temporary decor gets a bad reputation in property management circles.
To eliminate this uncertainty, you must conduct a formal wall damage test. This protocol is your primary defense against landlord disputes. It provides irrefutable evidence of how a specific material interacts with your specific walls under real-world conditions.
By running this test, you measure the true compatibility between the adhesive and your specific apartment wall. This objective evaluation inherently neutralizes the risk of post-removal surprises. It transforms anxiety into confidence.
Never test on only the "easiest" surface if the install area has different paint, grease, heat, or texture. Testing an adhesive behind a pristine living room bookshelf tells you absolutely nothing about how it will perform behind a greasy, heat-exposed kitchen range. Ensure your test location mirrors the actual environmental stress of the final installation zone.
The Removal Reversibility Index (RRI)
To grade your hidden patch test, we use the Removal Reversibility Index (RRI). This is a practical test score measuring clean removal, paint adhesion, residue level, surface distortion, and cleanup time. It evaluates the aftermath of a temporary installation to ensure that the "restoration to original condition" clause in your lease can be easily fulfilled.
The RRI is measured after a strict 48-72 hour hidden patch test. This timeframe allows the adhesive to settle and form a true bond with the wall surface. This specific window is critical because many pressure-sensitive adhesives continue to increase their bond strength exponentially over the first 48 hours of contact.
| RRI Metric | Passing Standard | Failing Condition | Action Required |
|---|---|---|---|
| Clean Removal | Tile pulls away smoothly with low heat. | Tile splinters or tears upon removal. | Use specialized removal tools or abandon project. |
| Paint Adhesion | Paint remains completely intact. | Paint chips, lifts, or exposes primer. | Stop immediately. Do not install. |
| Residue Level | Zero to minimal sticky residue. | Heavy, thick glue left on the wall. | Test chemical degreasers before proceeding. |
| Drywall Paper | Paper face remains pristine. | Paper face tears or fuzzes. | Stop immediately. Wall requires professional patching. |
| Cleanup Time | Less than 5 minutes per square foot. | Extensive scrubbing required. | Re-evaluate total cost of ownership (TCO) in labor. |
If your test results in paint lift, primer exposure, or drywall paper tearing, the product fails the RRI. You must pivot to safer alternatives immediately. Forcing a failing material onto a vulnerable wall is an architectural error that will directly impact your wallet upon vacating the premises.
The 5-Step Patch Test Protocol
This standardized evaluation is designed to be foolproof. Follow these steps meticulously to establish a definitive, factual baseline for your project's safety. This is the exact protocol recommended by interior designers who specialize in transient housing and rental properties.
- Select a Hidden Location: Test a small sample behind an appliance, inside a cabinet side return, or another hidden painted area with an identical finish to your backsplash zone.
- Document the Starting Condition: Photograph the wall before doing anything. Note the paint type, texture, existing chips, grease spots, and any moisture.
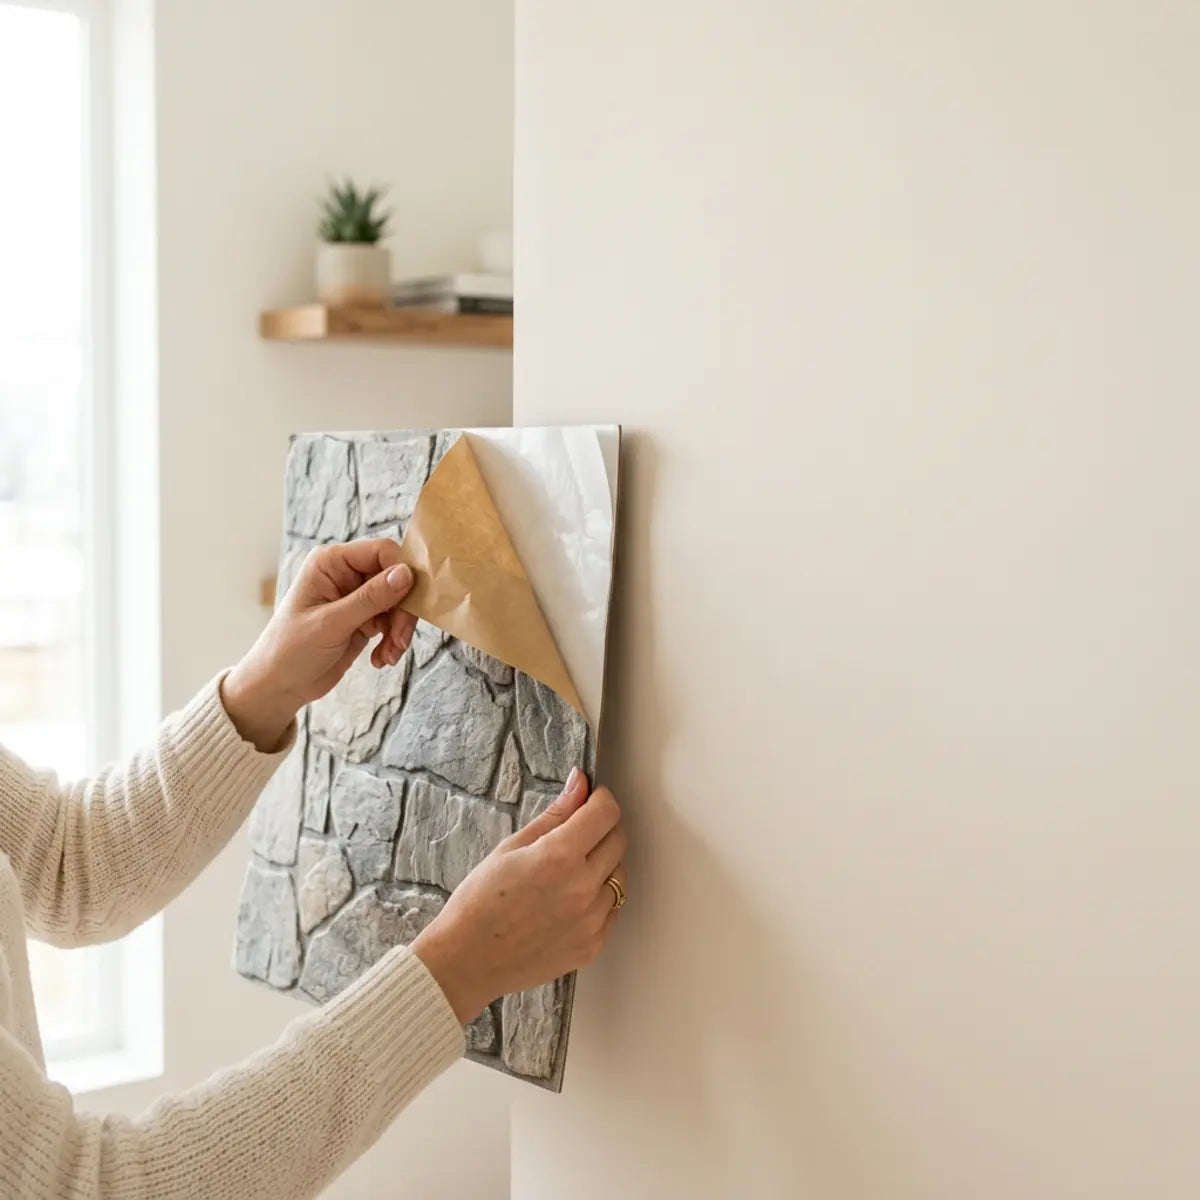
- Apply the Sample: Clean the test area with a mild degreaser, dry it completely, and apply a small piece of the tile or adhesive sample. Press firmly.
- Wait and Remove: Wait 48-72 hours. Then, remove the sample slowly. Apply low heat with a hairdryer if manufacturer-approved. Pull parallel to the wall, not straight out.
- Inspect and Score: Inspect the wall under bright light. Score the results using the Removal Reversibility Index (RRI).

Interactive Pass/Fail Decision Matrix
After completing your 72-hour patch test, use this matrix to generate a definitive GO/NO-GO installation verdict based on your physical observations.
Step 1: Strategic Documentation
Documentation is your shield against unfair deposit deductions. Before installing a removable tile backsplash, take high-resolution photos of the entire kitchen area. Ensure you capture the corners, the areas directly behind the sink, and the spaces flanking the oven. Landlords often perform rushed initial walkthroughs, missing pre-existing micro-damage that they might suddenly notice upon your departure.
Ensure the lighting is bright and clearly shows the current state of the paint. If there are existing scuffs or grease stains, document them. This creates a factual, time-stamped record of the wall's condition before your intervention. Cloud-sync these photos immediately to establish verifiable timestamp metadata.
Think of this like renting a car. You always photograph the scratches before driving off the lot. Your apartment walls require the exact same level of scrutiny. A strong photographic baseline eliminates the "he-said, she-said" dynamic during the move-out inspection.
Step 2: Surface Preparation
Adhesives bond to the top layer of whatever they touch. In a kitchen, that top layer is often a microscopic film of aerosolized cooking grease. This layer is practically invisible to the naked eye but acts as a highly effective barrier preventing the adhesive from reaching the actual paint layer.
If you apply a peel and stick tile damage test over grease, you are only testing the adhesive's bond to the grease, not the paint. This guarantees a false-positive test; the tile will remove easily because it was never truly attached to the wall in the first place.
You must clean the test spot thoroughly. A simple wipe down is insufficient. Use a dedicated surface prep cleaner, rinse with water, and let it dry entirely. Only chemically clean paint allows for an accurate assessment of adhesive tension and risk.
Step 3: The Critical Waiting Period
Patience is mandatory. Applying a sample and peeling it off five minutes later tells you absolutely nothing. Adhesives require time to "wet out" and achieve their maximum holding power. The polymers in the adhesive backing slowly flow into the microscopic pores of the wall paint over hours and days.
Leaving the sample in place for 48 to 72 hours simulates a long-term installation accurately. This dwell time allows you to see how the adhesive reacts to the typical temperature fluctuations in your kitchen. As the room heats and cools, the adhesive expands and contracts slightly, settling into its final chemical bond.
When removing the sample, always use a hairdryer on a low setting to soften the adhesive. This step engineered to bypass aggressive pulling and reduces stress on the paint layer. By raising the temperature of the backing, you reactivate the glue, lowering its shear strength and allowing for a significantly safer release.
Step 4: Inspecting for Paint Lift and Residue
Once the sample is removed, run your fingers over the area. Is it tacky? Shine a flashlight parallel to the wall. Does the surface gloss look dull or distorted? These subtle textural changes are the first warning signs that the adhesive may be too aggressive for full-scale application.
If you see the white layer of primer beneath your paint color, the test has failed. Paint lift indicates that the cohesive strength of your paint is weaker than the adhesive bond of the tile. This is a fatal structural mismatch. Do not assume you can "just be careful" during the final removal; physics dictates that the paint will fail.
If sticky residue remains after gentle cleaning, you face a significant move-out labor burden. You must weigh this against your overall project goals. While residue can often be cleaned, the labor required to safely degrease a ten-foot kitchen wall without damaging the matte paint finish is extraordinary.
Step 5: Mitigating Post-Removal Residue
If your test leaves behind a stubborn layer of glue, you must confirm that you can clean it without damaging the underlying paint finish. Using abrasive sponges will ruin matte or eggshell paint instantly. The goal is chemical dissolution of the glue, not mechanical abrasion of the wall.
Benchmarked against standard cleaning methods, specific chemical applications are required for safe removal. You cannot simply use dish soap for heavy industrial adhesive residue. The empirical data shown in our We Tested Degreasers on Peel and Stick Backsplash report establishes a deterministic outcome for safe cleanup. Reviewing this data ensures that you select a chemical solvent that dissolves the vinyl backing glue without simultaneously dissolving your landlord's latex wall paint.
Testing your cleaning method during the patch test phase guarantees you will not be frantically scrubbing your walls on moving day. Proactive mitigation is significantly cheaper and less stressful than reactive panic.
Evaluating Safer Renter-Friendly Alternatives
If your patch test fails the RRI, you cannot proceed with a standard adhesive installation. However, this does not mean you are stuck with an ugly kitchen. The interior design market has evolved rapidly to provide alternatives that circumvent weak wall surfaces entirely.
You must explore safer alternatives. Freestanding panels, tension-rod backsplash boards, or removable acrylic sheets offer genuine zero-damage solutions. These methods rely on mechanical friction or physical barriers rather than chemical adhesives. To understand the full spectrum of these safe design strategies and how to flawlessly execute them without risking a dime of your deposit, you should consult a comprehensive overview. The architectural insights found in the definitive Removable Kitchen Tiles: Peel & Stick Backsplash Guide provide a masterclass in selecting the right non-destructive materials, ensuring you can still achieve a massive visual upgrade even if your walls failed the baseline adhesive test.
Another reliable option involves creating a barrier. You can apply a layer of high-quality, painter-grade masking tape to the wall, and then adhere the tiles to the tape. This fundamentally mitigates direct adhesive-to-paint contact, allowing the painter's tape—which is explicitly engineered for safe, low-tack removal—to act as the sacrificial intermediate layer.
Selecting the Architectural Standard in Removable Tiles
When factoring in long-term performance degradation and residue accumulation, material selection is paramount. You must choose products that are engineered specifically for temporary applications. Do not buy permanent flooring tiles and attempt to put them on your wall; the adhesives are formulated for entirely different substrate stresses.
When assessing the total cost of ownership (TCO) over a standard 12-month lease cycle, the baseline metric shifts. The Blanco Chevron functions as the architectural standard in this category. By empirically neutralizing the risk of severe adhesive bonding over time, it calibrates the output expectations for renter-safe remodeling. The specific backing formulation on these tiles is designed to provide high initial tack while maintaining a low shear profile during eventual removal, striking the perfect balance between staying power and safe reversibility.
Similarly, standardized evaluation of the Retro Retreat collection yields an optimal configuration for high-traffic rental kitchens. Its specific adhesive backing is engineered to bypass the aggressive bonding issues common in cheaper, permanent-grade vinyls. This specific formulation prevents the glue from leaching deep into porous wall textures, ensuring the product behaves as a true temporary covering rather than an accidental permanent fixture.
These products are not chosen subjectively; their formulation strictly adheres to the metrics demanded by the Removal Reversibility Index. When you invest in materials built specifically to respect the constraints of rental properties, you preemptively solve 90% of your move-out anxieties.
Understanding Impact Resistance in Kitchens
A backsplash does more than look pretty; it protects the wall from daily kitchen hazards. Renters frequently focus solely on adhesive damage, entirely forgetting that the primary function of a backsplash is to act as a physical shield against cast iron pans, flying utensils, and aggressive scrubbing.
If a heavy pot strikes a brittle tile, the impact energy transfers directly into the drywall, potentially causing dents that jeopardize your deposit. Material flexibility is a key defense mechanism. Rigid materials shatter and dent the underlying substrate, while advanced composites absorb and distribute kinetic energy laterally.
Industry consensus dictates that impact-resistant composites provide superior wall protection. The empirical data shown in our We Drop-Tested Skillets: Peel-and-Stick vs Glass Tile evaluation establishes a statistically significant advantage for flexible tiles, fundamentally mitigating impact-related drywall damage. Understanding this data allows renters to choose a product that not only removes safely but physically fortifies the delicate drywall against mechanical trauma throughout the duration of the lease.
The Importance of the Move-Out Removal Plan
The biggest mistake renters make is installing a backsplash without a clear plan for taking it down. You must anticipate the labor and tools required for the move-out phase before you even purchase the tiles. Hope is not a strategy when it comes to reversing a kitchen renovation 48 hours before handing your keys back to the property manager.
A proper removal plan involves allocating at least one full day for the project. You will need a heat gun or high-powered hairdryer, plastic putty knives, and a safe adhesive remover. It is critical to execute this phase with precision. For a highly detailed, step-by-step methodology on applying the material initially to ensure an effortless takedown later, review the comprehensive guide on How to Install Peel and Stick Wall Tiles Without Damage. Mastering the installation angle directly dictates the ease of your eventual removal.
For a comprehensive breakdown of the entire lifecycle of the project, the framework detailed in our DIY Peel and Stick Backsplash: Renter-Safe Kitchen Upgrade guide provides the necessary sequential steps. It outlines how to execute a controlled removal that inherently neutralizes the risk of last-minute panic scraping. Adhering to this lifecycle plan ensures your security deposit remains completely intact.
Documenting the Completed Installation
Once your patch test passes and you complete the installation, your documentation task is not over. Maintaining an immaculate paper trail is the hallmark of a savvy renter.
Take photos of the finished, clean installation. If you secured landlord permission, keep a printed copy of that email or letter in your physical apartment file. Do not rely solely on an email account you might lose access to two years from now.
Interactive Renter Documentation Checklist
Complete this checklist to verify you have all necessary documentation to defend your deposit. Click to download a summary text file for your records.
This creates a definitive paper trail. If a new property manager takes over the building, you have the empirical evidence required to prove your installation was authorized and compliant with building standards. Property management turnover is incredibly high; the person who gave you permission today might not be the person evaluating your move-out inspection next year. Hard documentation bridges that administrative gap.

Final Thoughts
A peel-and-stick tile installation is not automatically renter safe. The marketing promises on a box cannot protect your security deposit from the reality of apartment wall chemistry. Adhesives are powerful chemical agents, and pretending they operate magically without consequence is a fast track to financial penalties.
These products become a lower risk only when your lease, wall condition, paint stability, adhesive interaction, heat zone clearance, and move-out plan pass objective, rigorous checks. A pass/fail result is always safer than an optimistic guess. By removing assumption from the process and replacing it with strict testing protocols, you command the outcome of your renovation.
By treating this upgrade as a structural project rather than just a decor change, you maintain complete control over your rental finances. We strongly advise that you download the free Deposit-Risk Score checklist before purchasing your backsplash tile. This structured approach fundamentally shifts the power dynamic back in favor of the tenant.
Always test one sample patch before committing to full wall coverage. If your lease language remains unclear, utilize a landlord-permission template to secure written approval immediately. Your home should be a reflection of your style, but protecting the legal constraints of your lease must always remain your architectural priority.
Frequently Asked Questions
How long does peel-and-stick backsplash last in an apartment?
When installed correctly on a properly prepped surface, a high-quality temporary kitchen backsplash can easily last the duration of a standard 12-to-24-month lease. Environmental factors heavily influence longevity. The structural lifespan is directly correlated to the thoroughness of the initial wall degreasing and the ambient temperature consistency of the room.
Areas exposed to constant steam, heavy grease splatter, or direct UV sunlight will experience a faster performance degradation curve. Regular cleaning with gentle, non-abrasive solutions extends the lifespan significantly. Avoid harsh chemical cleaners, as they can break down the top protective layer of the vinyl, leading to premature curling at the edges.
Will peel-and-stick tile damage my drywall?
It can cause severe damage if installed over weak paint, uncured primer, or failing drywall paper. The risk is minimized by strictly adhering to the hidden patch test protocol. The adhesive does not typically penetrate through healthy, cured paint into the drywall paper itself unless the paint layer is incredibly thin or compromised by existing moisture.
If the underlying wall surface is structurally sound and the paint is fully cured, the adhesive is much less likely to cause drywall paper tears. The primary threat is usually paint lift, not structural drywall failure. However, brute-force removal without heat dramatically increases the sheer stress on the drywall, making tears highly probable.
How do you safely remove adhesive backsplash tiles?
Safe removal requires a standardized evaluation of the adhesive's current state. Never pull the tiles straight away from the wall. Pulling at a 90-degree angle exerts maximum tensile force on the paint film, almost guaranteeing that it will rip off along with the tile.
You must apply consistent, low heat using a hairdryer to soften the adhesive bond. Gently pry up one corner using a plastic putty knife, and pull the tile slowly, keeping it parallel to the wall surface. This technique fundamentally mitigates sheer force against the paint. By stretching the adhesive backwards over itself, you force the glue to let go of the wall safely.
Can I install a temporary kitchen backsplash over existing tile?
Yes, installing over existing, smooth ceramic or glass tile is generally considered the safest application for renters. The glossy surface of existing tiles provides an excellent, flat bonding area while virtually eliminating the risk of paint lift. Ceramic glaze is significantly tougher than any pressure-sensitive adhesive, making clean removal exponentially easier upon move-out.
You must ensure the existing tiles and grout lines are meticulously degreased before application. If the existing grout lines are very deep, they may telegraph through thinner vinyl panels, creating an uneven visual texture. In such cases, utilizing a thicker, composite tile or filling the grout lines temporarily (if permitted) can yield a more professional finish.
Laisser un commentaire
Ce site est protégé par hCaptcha, et la Politique de confidentialité et les Conditions de service de hCaptcha s’appliquent.