


Guide DIY peel and stick pour crédence de cuisine : transformez votre espace à petit prix
Vous rêvez d’une cuisine relookée, mais vous êtes confronté à la réalité d’un appartement en location ou d’un budget serré en tant que primo-accédant ? Les rénovations coûteuses et chronophages, avec leur poussière à n’en plus finir et les retards liés aux artisans, semblent souvent hors de portée. Les restrictions du propriétaire n’arrangent rien, rendant une mise à jour élégante presque impossible.
Mais si vous pouviez obtenir une transformation spectaculaire sans le prix élevé, sans modifications permanentes ni outils complexes ? Ce guide vous montre comment. Nous allons explorer les carreaux DIY peel and stick kitchen backsplash comme solution idéale. Ils sont économiques, renter-approved et étonnamment chics.
Cet article propose un kitchen backsplash installation guide complet, conçu pour les débutants. Vous y apprendrez les étapes essentielles, des astuces malignes pour les locataires et des conseils cruciaux sur la durabilité. Nous verrons aussi les dernières peel and stick backsplash kitchen ideas 2025 pour inspirer votre prochain projet. Préparez-vous à adopter un relooking DIY sans prise de tête !
Pourquoi choisir des carreaux peel and stick pour la cuisine ?
Les mises à jour de cuisine s’accompagnent souvent d’un coût élevé, surtout lorsqu’on envisage un carrelage traditionnel. Beaucoup de locataires ou de nouveaux propriétaires font face à des espaces datés sans avoir les moyens ou l’autorisation de lancer de grands travaux. Les carreaux peel and stick offrent une alternative fraîche et accessible à ces problèmes courants.
Rentable par rapport au carrelage traditionnel
Les projets de carrelage traditionnel peuvent vite grimper, coûtant souvent des milliers d’euros entre les matériaux et la main-d’œuvre professionnelle. Cela met souvent une cuisine élégante hors de portée pour beaucoup. En revanche, les options de peel and stick backsplash réduisent considérablement les dépenses.
Vous pouvez souvent obtenir une transformation complète de crédence pour moins de 100 à 200 $. Cela en fait un petit investissement à l’impact visuel énorme. Selon de récents sondages auprès d’amateurs de DIY, les options peel and stick permettent d’économiser jusqu’à 90% par rapport aux méthodes traditionnelles.
Parfait pour les locataires (amovible et sans dégâts)
L’une des plus grandes préoccupations des locataires est d’effectuer des changements sans risquer leur dépôt de garantie. Le carrelage traditionnel étant permanent, il ne convient pas aux logements temporaires. C’est là que la removable peel and stick backsplash for renters brille vraiment.
Ces carreaux sont conçus pour se retirer facilement et sans dégâts, ce qui les rend idéaux pour des mises à jour temporaires. Imaginez transformer l’apparence de votre cuisine pendant quelques années, puis retirer les carreaux proprement avant de déménager. Pour un locataire qui souhaite une mise à jour sans engagement à long terme, c’est une liberté incroyable.
Des designs modernes disponibles en 2025
L’idée que les carreaux peel and stick font « bon marché » est une idée reçue courante. Le marché actuel propose une incroyable variété de designs sophistiqués et modernes qui rivalisent avec les carreaux traditionnels. L’évolution du design fait que ces carreaux ne sont plus un compromis.
Vous trouverez de tout, des motifs élégants effet marbre aux textures de brique rustique, en passant par des styles géométriques épurés. Ces possibilités esthétiques modernes permettent des stylish kitchen transformations with peel and stick tiles. Beaucoup de ces designs sont mis en avant dans des articles comme « Peel Stick Backsplash Kitchen Ideas 2025 » de Stickwoll.
Mise en avant d’une transformation parlante : imaginez une cuisine datée avec des plans de travail en stratifié usés et un mur peint sans relief. Avec la simple application de carreaux peel and stick effet marbre, l’espace gagne instantanément une allure luxueuse et plus lumineuse. Le changement n’est pas seulement esthétique ; il redéfinit toute l’ambiance, rendant la cuisine plus spacieuse et plus moderne. Cela montre comment des applications ciblées de peel and stick peuvent imiter des finitions haut de gamme pour une fraction du coût, ce qui en fait une solution idéale pour les locataires et les propriétaires soucieux de leur budget.
Les carreaux peel and stick sont-ils durables et sûrs pour la cuisine ?
Une crainte fréquente chez les adeptes du DIY est que les carreaux peel and stick ne durent pas ou ne soient pas sûrs, surtout dans une zone très fréquentée et humide comme la cuisine. Les inquiétudes concernant la résistance à la chaleur et la longévité sont légitimes. Cependant, la fabrication moderne a résolu bon nombre de ces problèmes, en faisant un choix fiable lorsqu’ils sont correctement sélectionnés.
Résistance à la chaleur et à l’eau
La cuisine est un environnement exposé à la chaleur et à l’humidité. Les best waterproof peel and stick tiles for kitchens de haute qualité sont spécialement conçus pour résister aux éclaboussures et à l’humidité. Le vinyle, le PVC et certains carreaux en composite aluminium offrent une excellente résistance à l’eau.
Ces matériaux créent une barrière protectrice contre l’humidité, ce qui les rend adaptés aux zones autour de l’évier. Pour une protection supplémentaire, vous pouvez appliquer un joint d’étanchéité transparent sur les bords après l’installation. Cette astuce de pro empêche l’eau de s’infiltrer derrière les carreaux et améliore leur longévité.
Longévité et résistance à l’usage quotidien
Avec une installation et un entretien appropriés, les carreaux peel and stick backsplash peuvent durer plusieurs années, souvent 3 à 5 ans, voire davantage. Leur durée de vie dépend fortement de la qualité du produit et de la préparation de la surface. De nombreuses marques proposent désormais une technologie adhésive améliorée pour une fixation plus solide et plus durable.
Un facteur clé de leur durabilité est d’éviter toute exposition directe et constante à la chaleur. Pour un usage cuisine classique, ces carreaux résistent bien à l’usure quotidienne. C’est une idée reçue de penser qu’ils vont simplement se décoller du mur après quelques mois.
Exigences d’entretien
Entretenir des carreaux peel and stick durables pour cuisines à fort passage est remarquablement simple. La plupart nécessitent seulement un essuyage avec un chiffon humide et un savon doux. Cela les rend idéaux pour les foyers occupés. Évitez les nettoyants abrasifs agressifs ou les tampons à récurer, car ils peuvent endommager la finition ou les bords du carreau.
Pour les projections de graisse tenaces, un dégraissant doux formulé pour les surfaces de cuisine fait généralement l’affaire. Un nettoyage léger et régulier aide à préserver l’apparence des carreaux et à éviter l’accumulation de saleté. Cet entretien facile contribue fortement à leur attrait à long terme.
Guide d’installation étape par étape
L’idée d’installer une crédence peut sembler intimidante, avec des images de joints salissants et de découpes complexes. Cependant, how to install peel and stick tiles in kitchen est conçu pour être un processus simple et convivial. Ce guide le détaille en étapes gérables, afin de donner confiance même aux adeptes du DIY débutants.
Votre checklist interactive de préparation à l’installation :
- Mesurez votre surface : Mesurez avec précision la hauteur et la largeur de la zone de la crédence. N’oubliez pas de prendre en compte les prises et les angles.
- Commandez des carreaux supplémentaires : Commandez toujours environ 10-15% % de carreaux en plus que votre mesure initiale pour tenir compte des découpes et des erreurs éventuelles.
- Nettoyez et préparez la surface : Dégraissez, nettoyez et séchez soigneusement votre mur. Reboucher les trous ou les irrégularités pour une adhérence optimale.
- Rassemblez tous les outils : Préparez votre mètre ruban, crayon, cutter, règle droite, niveau, chiffon propre et rouleau.
- Planifiez votre disposition : Disposez les carreaux à sec (sans retirer le support) pour visualiser le motif et effectuer les ajustements nécessaires avant la pose.
Compléter cette checklist garantit un processus d’installation fluide et réussi pour votre nouvelle crédence de cuisine. Cochez chaque case au fur et à mesure !
Outils nécessaires
Avant de install peel and stick tiles in kitchen, rassembler les bons outils rend le processus beaucoup plus fluide. Vous n’aurez pas besoin d’équipement spécialisé pour le carrelage. Voyez cela plutôt comme un projet de création manuelle.
Voici ce qu’il vous faut généralement :
- Mètre ruban : Pour des dimensions précises.
- Crayon : Pour marquer les découpes et les repères.
- Cutter ou ciseaux bien aiguisés : Pour une découpe précise.
- Règle droite ou règle graduée : Pour guider vos coupes.
- Niveau : Pour vous assurer que votre première rangée est parfaitement droite.
- Chiffon propre : Pour la préparation de la surface.
- Rouleau à pâtisserie ou J-roller : Pour assurer une bonne adhérence.
- 1 Commencez par un guide : utilisez votre niveau pour tracer une ligne horizontale droite sur le mur à l’endroit où se situera le bas de votre première rangée de carreaux. C’est essentiel pour un rendu professionnel.
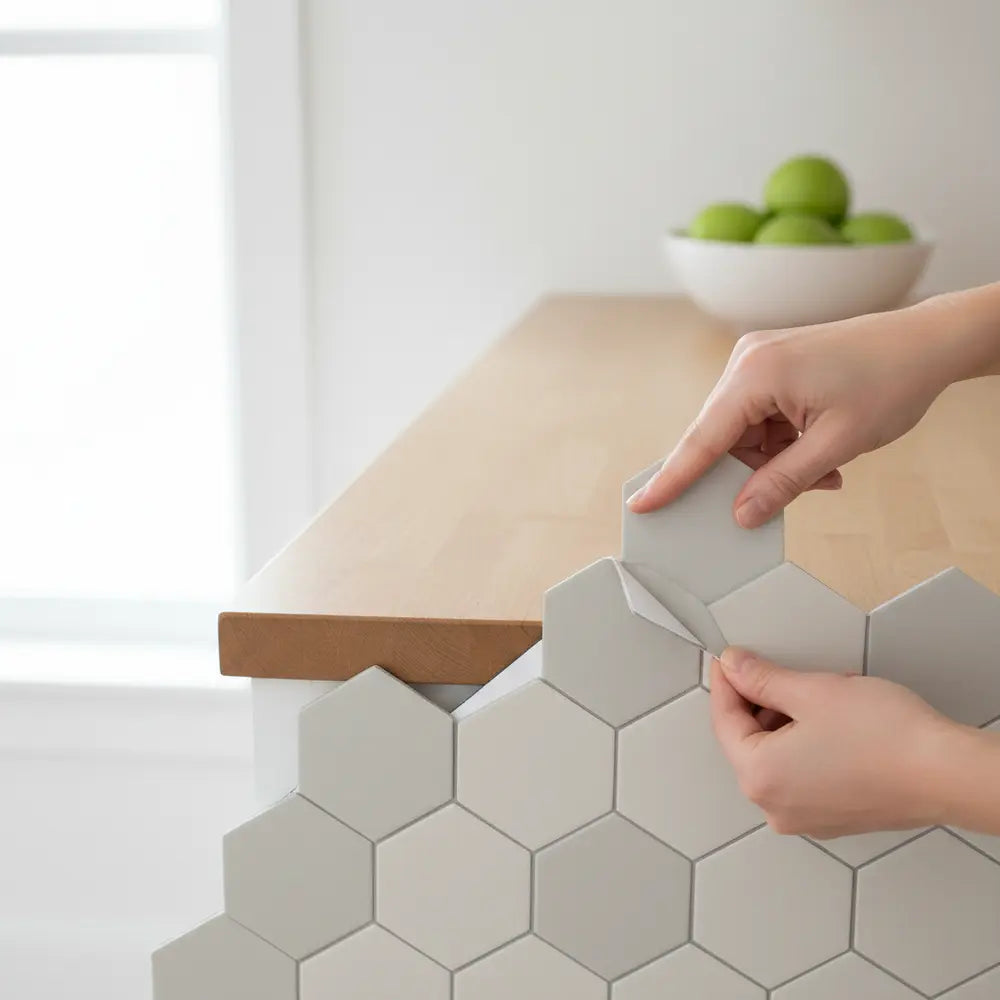
- 2 Peler et placer : décollez soigneusement une petite partie du film adhésif à l’arrière de votre premier carreau. Alignez-le précisément avec votre ligne de repère et appuyez fermement pour le mettre en place. Retirez progressivement le reste du film tout en lissant le carreau.
- 3 Chevaucher et presser : lors de la pose des carreaux suivants, veillez à ce qu’ils se chevauchent correctement avec le précédent, surtout s’ils ont un design type shiplap ou emboîtable. Utilisez un rouleau à pâtisserie ou un J-roller pour presser fermement chaque carreau, éliminer les bulles d’air et assurer une bonne fixation.
- 4 Découpe : utilisez votre cutter et une règle droite pour découper les carreaux des angles ou des prises. Mesurez deux fois, coupez une fois ! Cette méthode permet de limiter le gaspillage et d’obtenir un rendu net et sur mesure.
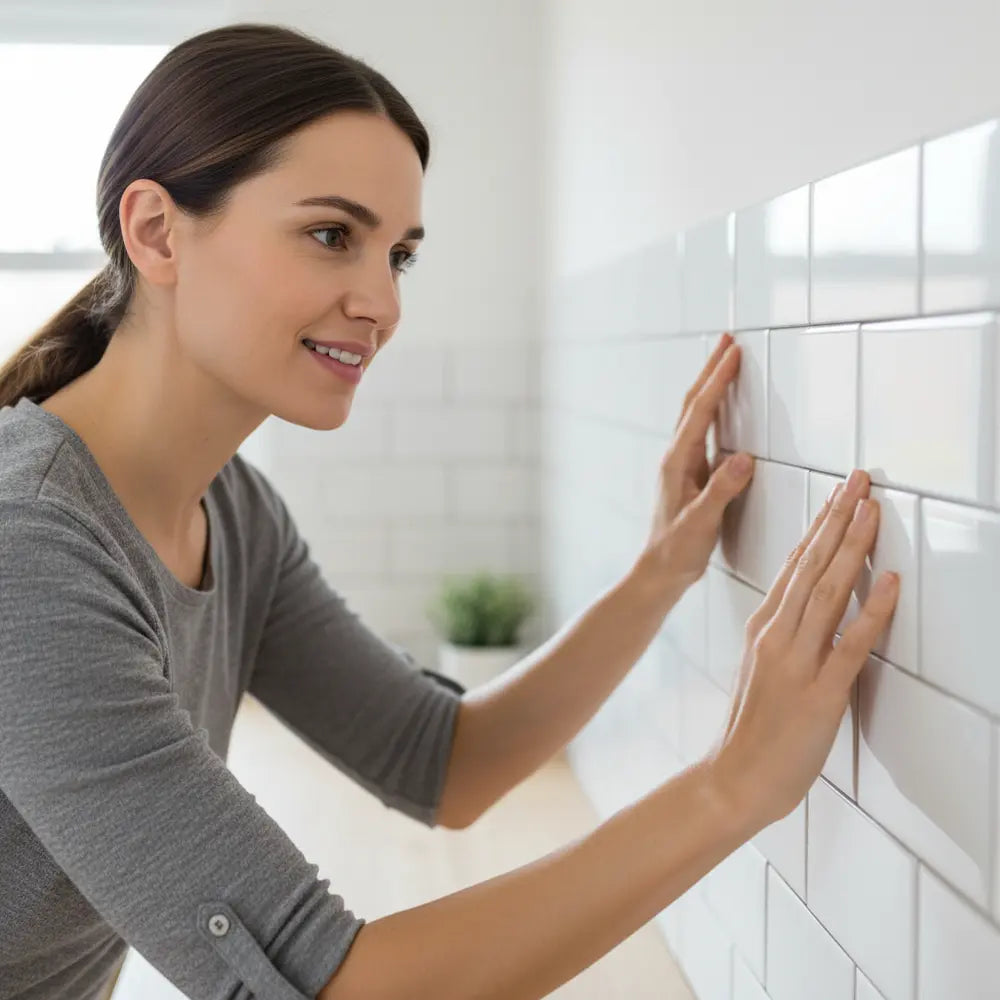
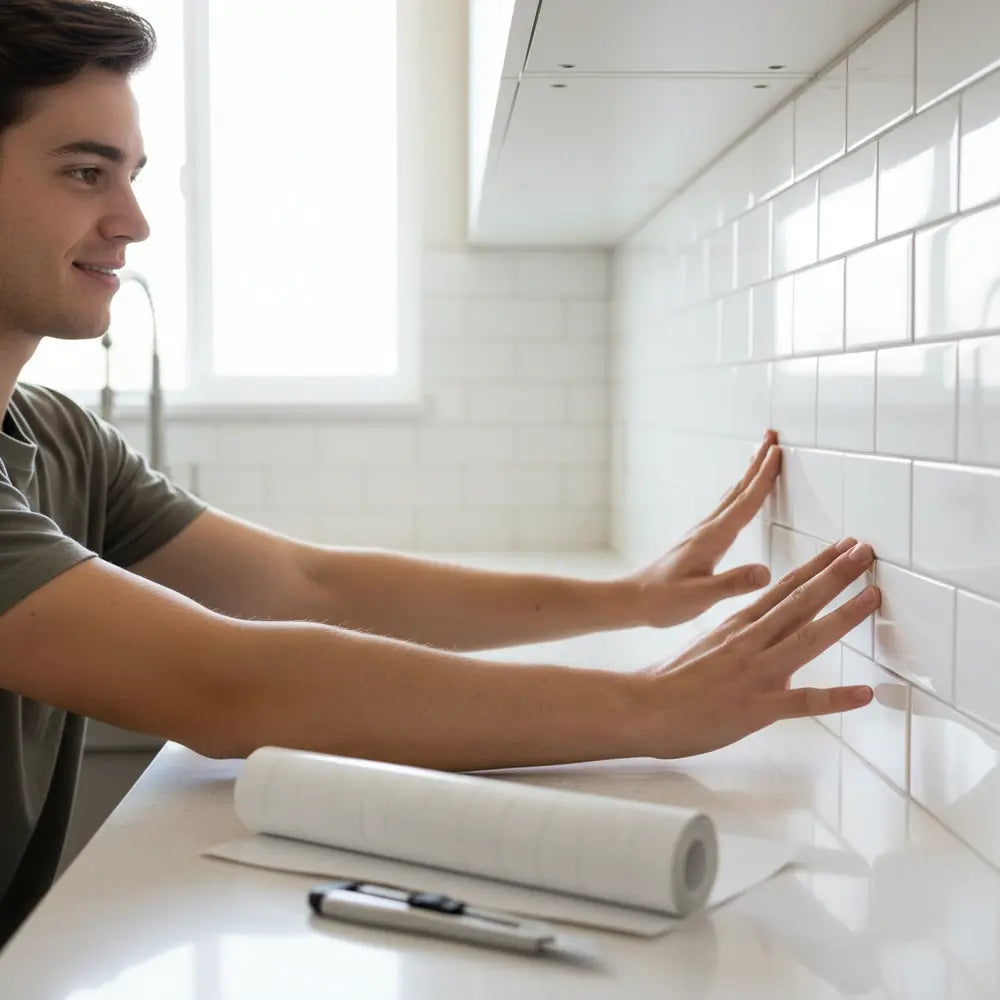
- Métro mat minimaliste : Des carreaux métro plus longs (e.g., 3x12 inch) dans un blanc mat doux ou un gris clair. Offre un rendu épuré et discret qui illumine l’espace et donne une impression de volume.
- Hexagones artisanaux : Petits carreaux hexagonaux avec une texture subtile ou une légère variation de couleur, créant une sensation faite main et sur mesure. Très appréciés dans des neutres chaleureux ou des tons bijoux sourds.
- Abstrait géométrique : Motifs géométriques audacieux et répétitifs (e.g., tessellations ou designs imbriqués) dans des couleurs contrastées comme le charbon et le blanc, ou le bleu profond et l’or. Crée un point focal dynamique.
- Élégance effet marbre : Carreaux réalistes aspect marbre, avec de subtiles veines et de grands formats, apportant un luxe classique sans le coût ni l’entretien élevés. S’intègre parfaitement dans des ambiances modernes comme traditionnelles.
- Retour de la brique rustique : Carreaux texturés à l’aspect brique vieillie, dans des tons terre cuite, gris ou blanc vieilli. Ajoute chaleur et caractère, idéal pour les cuisines d’inspiration farmhouse ou industrielle.
Pour une démonstration visuelle de ces outils en action, découvrez le guide « Comment installer une crédence en vinyle peel and stick », qui fournit des étapes détaillées et des conseils d’expert.
Préparation de la surface
Une bonne préparation de la surface est sans doute l’étape la plus importante pour une DIY peel and stick kitchen backsplash durable. L’adhésif a besoin d’une surface propre, lisse et sèche pour bien adhérer. Sauter cette étape peut entraîner un décollement ou empêcher les carreaux de coller correctement.
Commencez par nettoyer soigneusement le mur avec un dégraissant afin d’éliminer toute graisse, saleté ou poussière. Ensuite, rebouchez les trous ou imperfections du mur, en veillant à ce que la surface soit aussi lisse que possible. Enfin, laissez le mur sécher complètement. Pour les surfaces poreuses, une couche d’apprêt peut améliorer l’adhérence. Cela garantit le taux de réussite de l’adhérence indiqué par les fabricants.75%.
Poser les carreaux correctement
Une fois la surface préparée, vous êtes prêt à commencer la pose de votre easy DIY backsplash. Ce processus ressemble à un puzzle, chaque pièce s’ajoutant à la précédente. En commençant par la rangée du bas, repérez une zone bien visible et bien droite.
Prêt à vraiment maîtriser comment installer des carreaux peel and stick ? Plongez dans notre guide détaillé sur l’installation et découvrez les meilleurs designs pour 2025 pour sublimer votre espace en toute simplicité : Comment installer des carreaux peel and stick & meilleurs designs 2025.
Astuces pour une installation renter-friendly
En tant que locataire, le rêve d’une cuisine personnalisée se heurte souvent aux règles du propriétaire. Vous voulez améliorer votre espace sans perdre votre dépôt de garantie. Ces astuces ingénieuses garantissent que votre crédence amovible peel and stick pour locataires peut être installée et retirée sans laisser de trace. Il s’agit avant tout de préserver l’état d’origine des murs.
Solutions de support temporaires
La pose directe de carreaux peel and stick peut parfois entraîner de légers dommages à la peinture lors du retrait, selon le mur et la قوة de l’adhésif. Pour éviter cela, pensez à des solutions de support temporaires. Une fine couche de ruban de peintre ou un adhésif en spray à faible adhérence appliqué sur le mur avant la pose peut servir de barrière protectrice.
Certains locataires utilisent même une fine feuille de plastique ou de panneau de mousse comme couche de base, en y fixant d’abord les carreaux. Cela crée un panneau entièrement autonome, facile à poser et à retirer. Cette stratégie vous permet de rendre l’appartement à son état d’origine, comme dans une réussite de locataire sans aucune trace de dommage.
Éviter d’endommager le mur
La clé pour éviter d’abîmer le mur est la préparation et la patience. Avant de poser les carreaux, assurez-vous que la surface du mur est propre et sèche. Évitez de poser sur des murs fortement texturés ou abîmés, car cela peut affecter l’adhérence et le retrait. Une surface lisse et bien préparée est essentielle.
Pendant l’installation, essayez d’éviter une pression excessive si vous craignez un futur retrait. Appliquez juste assez de pression pour fixer le carreau sans créer une liaison trop forte. Une idée reçue courante veut que plus de pression signifie toujours une meilleure adhérence pour les locataires ; pour des solutions temporaires, une pression modérée est souvent préférable.
Conseils pour un retrait facile
Lorsqu’il est temps de déménager, retirer votre crédence temporaire peut se faire sans stress avec la bonne technique. La méthode la plus efficace consiste à utiliser une chaleur douce. Servez-vous d’un sèche-cheveux réglé sur une faible puissance pour réchauffer les carreaux, surtout sur les bords. Cela ramollit l’adhésif et rend les carreaux plus souples.
Commencez à décoller depuis un coin, lentement et régulièrement, en tirant le carreau vers l’arrière selon un angle de 45 degrés. Cela réduit la pression sur la surface du mur. Les éventuels résidus d’adhésif peuvent généralement être retirés avec un dissolvant doux pour adhésif ou de l’alcool à friction, appliqué avec un chiffon doux. Des données indiquent que la chaleur réduit la force de l’adhésif jusqu’à 30%, ce qui facilite grandement le retrait.
Ce que disent les locataires : de vraies transformations
« En tant que locataire, je pensais qu’une cuisine élégante était hors de portée. Mais ces tiles peel and stick de Stickwoll ont complètement changé ma façon de voir les choses ! Faciles à poser, superbes, et surtout, je sais que je peux les retirer sans perdre ma caution. Une vraie révolution pour la vie temporaire. » – Sarah L., locataire en appartement
« J’ai utilisé une solution de support temporaire pour ma crédence peel and stick, et cela a parfaitement fonctionné ! Quand j’ai déménagé, les carreaux se sont retirés proprement, laissant le mur en parfait état. Je recommande vivement à toute personne qui souhaite moderniser son intérieur avec style sans s’engager sur le long terme. » – Mark T., résident en logement étudiant
Meilleures marques de crédence peel and stick en 2025
Choisir la bonne marque est essentiel pour la réussite et la durabilité de votre DIY peel and stick kitchen backsplash. Le marché regorge d’options, mais elles ne se valent pas toutes. En 2025, certaines marques se distinguent par leur qualité, la variété de leurs designs et leurs fonctionnalités innovantes. Cette section vous aide à faire le tri, en s’appuyant sur les conseils de « Guide des carreaux de crédence de cuisine ».
Meilleures marques étanches
Pour les cuisines, surtout autour des éviers et des plaques de cuisson, une excellente résistance à l’eau est indispensable. Les marques qui utilisent des matériaux comme le vinyle haut de gamme, le PVC ou l’aluminium composite sont les mieux placées. Ces matériaux garantissent que votre crédence résistera aux éclaboussures et à l’humidité sans problème.
Recherchez les marques qui indiquent clairement « étanche » ou « très résistant à l’humidité » dans leurs descriptions. Elles proposent souvent une couche supérieure épaisse et durable ainsi qu’un adhésif robuste. De nombreuses options de Stickwoll, par exemple, sont conçues avec une étanchéité avancée, ce qui en fait un choix incontournable pour les cuisines exigeantes.
Options résistantes à la chaleur
Bien que les carreaux peel and stick soient généralement sûrs, une exposition directe et prolongée à une forte chaleur, comme derrière une cuisinière à gaz sans dosseret, peut poser problème. Cependant, plusieurs marques proposent des carreaux peel and stick résistants à la chaleur pour derrière la cuisinière. Ceux-ci intègrent souvent des couches d’aluminium ou des matériaux composites spécifiques capables de supporter des températures plus élevées.
Vérifiez toujours les spécifications du fabricant concernant les températures admissibles. En règle générale, il est conseillé de prévoir au moins 6 pouces d’écart avec les sources de chaleur directe. Les marques qui misent sur des finitions métalliques ou effet céramique offrent souvent une meilleure résistance à la chaleur. Cela permet d’obtenir une solution à la fois élégante et pratique pour les zones proches des appareils de cuisson.
Choix écologiques et économiques
À mesure que la sensibilité environnementale augmente, la demande en matériaux de rénovation durable progresse elle aussi. Plusieurs marques proposent désormais des carreaux peel and stick écologiques pour la cuisine, fabriqués à partir de matériaux recyclés ou avec des adhésifs non toxiques. Ces options vous permettent de moderniser votre intérieur de manière responsable.
Pour ceux qui ont un budget serré, de nombreuses marques offrent une qualité impressionnante à prix abordable. Même si la qualité peut varier, beaucoup d’options économiques offrent toujours une excellente durabilité et un large choix de designs. Il est souvent possible de trouver des promotions ou des remises sur les achats en grande quantité. L’approche la plus intelligente consiste à trouver le bon équilibre entre le coût et les caractéristiques essentielles comme l’étanchéité et la résistance à la chaleur afin d’obtenir le meilleur rapport qualité-prix.
Aperçu des marques et de la durabilité (comparaison textuelle)
Stickwoll Pro-Series : Reconnue pour ses composites avancés en vinyle multicouche et aluminium. Offre une excellente résistance à l’eau et à la chaleur, adaptée derrière la plupart des plaques de cuisson (avec dégagement suffisant). Durée de vie typique de 5 à 7 ans. Qualité premium, prix modéré. Idéale pour les projets DIY à long terme.
Carreaux Eco-Sense : fabriqués en PVC recyclé et avec des adhésifs non toxiques. Bonne résistance à l’eau pour les zones autour de l’évier, mais résistance modérée à la chaleur ; déconseillés à proximité directe d’une source de chaleur. Durée de vie de 3 à 5 ans. Une option excellente, économique et écoresponsable.
Urban Chic Metals : spécialisée dans l’aluminium brossé et les finitions métalliques. Forte résistance à la chaleur (vérifiez les indices spécifiques du produit pour une proximité avec une flamme directe) et excellentes propriétés d’imperméabilité. Durée de vie de 6 à 8 ans. Prix plus élevé, idéal pour un style industriel ou moderne.
Pour un guide complet sur comment DIY votre cuisine peel and stick en 2025, y compris des techniques de déco originales, cette ressource est précieuse : Comment DIY une cuisine peel and stick 2025.
Inspiration déco pour la cuisine et tendances 2025
Au-delà de la fonctionnalité, une crédence de cuisine DIY peel and stick backsplash est un puissant atout déco. Elle peut transformer complètement l’esthétique de votre cuisine, refléter votre style personnel et intégrer les tendances actuelles. En 2025, le design de cuisine s’oriente vers des styles précis à la fois modernes et accueillants. Cette section propose de l’inspiration, dans l’esprit des idées de « Idées de crédence cuisine peel stick 2025 ».
Motifs de design modernes
En 2025, l’accent est fortement mis sur la texture, les motifs subtils et les éléments naturels. Les transformations de cuisine élégantes avec des peel and stick tiles adoptent des formes géométriques, des looks de carreaux métro classiques revisités avec une touche moderne (comme des carreaux plus longs et plus fins) et des motifs marocains sophistiqués. Les finitions mates sont particulièrement populaires, offrant une élégance raffinée et discrète.
Voyez plus loin que les simples carrés. Les hexagones, les motifs en chevron et même les effets de matériaux mixtes sont tendance. Ces motifs peuvent créer un point focal dynamique sans surcharger l’espace. La crédence agit comme le bijou de la cuisine, en lui donnant un caractère distinctif.
Collage de styles de crédence tendance 2025 (descriptions textuelles)
Relooking des petites cuisines
Les petites cuisines peuvent paraître étroites et datées, mais une crédence peel and stick apporte immédiatement un coup de frais visuel. La clé d’un relooking réussi d’une petite cuisine à moins de 200 $ réside dans le choix judicieux des carreaux. Des carreaux clairs, comme le blanc, le crème ou le gris clair, peuvent donner l’impression qu’un petit espace est plus grand et plus lumineux en réfléchissant la lumière.
Utiliser une finition brillante peut renforcer encore cet effet. Une pose verticale de type carreaux métro peut aussi attirer le regard vers le haut, donnant l’impression que les plafonds sont plus hauts. Pensez à un motif continu pour créer une illusion d’espace, plutôt que de le fragmenter. Cet usage astucieux du design a un impact important sur la perception.
Conceptions pour cuisines très fréquentées
Pour les cuisines très sollicitées, la durabilité et la facilité de nettoyage sont essentielles. Lors du choix de designs de backsplash peel and stick pour les zones à fort passage, privilégiez des motifs capables de masquer les petites imperfections ou éclaboussures entre deux nettoyages. Des joints plus foncés (même factices) dans des motifs métro ou en quadrillage sont indulgents.
Les carreaux texturés, comme ceux imitant la pierre naturelle ou la brique, peuvent aussi être très tolérants. Les carreaux en vinyle ou en composite d’aluminium sont d’excellents choix pour leur résistance et leur facilité d’essuyage. Pour un plus large éventail d’idées, consultez notre article « Transformez votre cuisine avec des peel and stick tiles » pour davantage d’inspiration.
Sondage : Quel style de crédence convient le mieux à votre cuisine ?
Aidez-nous à comprendre les tendances populaires et à trouver l’inspiration grâce aux autres !
Vous êtes curieux des styles les plus avant-gardistes pour votre cuisine ? Découvrez les plus captivants idées de peel stick backsplash kitchen 2025 qui façonnent le design contemporain : Idées de peel stick backsplash kitchen 2025.
Questions fréquentes répondues
Même avec un guide détaillé, certaines questions précises reviennent souvent lorsqu’on envisage un DIY peel and stick kitchen backsplash. Répondre à ces préoccupations vous aide à vous sentir pleinement préparé et confiant pour votre projet. Nous avons rassemblé certaines des questions les plus fréquentes afin de fournir des réponses claires et expertes.
Le peel and stick peut-il être posé sur une crédence existante ?
Oui, peel and stick backsplash peut souvent être posé par-dessus une crédence existante, mais avec des réserves importantes. La surface existante doit être complètement lisse, propre, sèche et plane. Toute texture ou irrégularité provenant d’anciens joints ou de carreaux ébréchés se verra à travers les nouveaux carreaux peel and stick, ce qui donnera une finition peu soignée et une mauvaise adhérence.
Si votre crédence existante est fortement texturée ou présente des joints profonds, mieux vaut la retirer ou appliquer d’abord une fine couche d’enduit pour créer une surface lisse. Il est courant de penser qu’ils adhèrent à n’importe quelle surface ; en réalité, plus c’est plat, meilleurs sont les résultats.
Combien de temps durent-ils ?
La longévité des carreaux DIY peel and stick kitchen backsplash varie, allant généralement de 3 à 10 ans. Plusieurs facteurs influencent cette durée de vie. Des carreaux de haute qualité provenant de marques réputées, correctement posés sur une surface bien préparée, dureront plus longtemps. Les zones moins exposées à la chaleur directe et à l’humidité bénéficieront aussi d’une meilleure durabilité.
Une forte exposition à la vapeur et aux graisses peut réduire leur durée de vie s’ils ne sont pas nettoyés régulièrement. Un entretien régulier et l’évitement de produits nettoyants agressifs contribuent également beaucoup au maintien de leur aspect neuf. Pensez-y comme à une peinture : une bonne préparation et de bons soins prolongent sa durée de vie.
Sont-ils sûrs près des sources de chaleur ?
Certains types de carreaux peel and stick backsplash sont conçus pour être sûrs près des sources de chaleur, mais la prudence reste toujours de mise. Les carreaux en aluminium, en composites métalliques ou en certains mélanges de vinyle offrent souvent une meilleure résistance à la chaleur. Ils conviennent aux zones situées derrière les cuisinières, à condition de respecter un dégagement suffisant.
Vérifiez toujours les recommandations du fabricant concernant les limites de température et les distances minimales par rapport aux sources de chaleur. Pour les cuisinières à gaz, une plaque de protection arrière est souvent recommandée afin de protéger tout revêtement mural, y compris les carreaux peel and stick, contre l’exposition directe aux flammes. Comme pour tout autre matériau de construction, vous devez en choisir un adapté à son environnement.
Débloquez tout le potentiel de votre espace cuisine en découvrant comment transformer votre cuisine avec des carreaux peel and stick, un article rempli d’inspiration visuelle et de conseils pratiques : Transformez votre cuisine avec des carreaux peel and stick.
Avant de faire votre choix final, consultez notre guide des carreaux de crédence de cuisine complet pour comparer les options peel and stick aux installations traditionnelles : Quel guide des carreaux de crédence de cuisine.
Développez vos connaissances au-delà de la cuisine et découvrez comment utiliser des carreaux peel and stick en 2025 dans toute la maison pour divers projets créatifs : Comment utiliser des carreaux peel and stick en 2025.
Prêt à transformer votre cuisine ?
Rénover votre cuisine ne doit pas être une démarche écrasante ni coûteuse. Comme nous l’avons vu, un DIY peel and stick kitchen backsplash offre une solution accessible, abordable et élégante pour les locataires comme pour les propriétaires. Vous pouvez moderniser une esthétique datée, respecter les restrictions du propriétaire et obtenir malgré tout un résultat qui vous ressemble vraiment.
Ne laissez pas la peur d’une faible durabilité ou d’une installation compliquée vous freiner. Les carreaux peel and stick modernes sont conçus à la fois pour la beauté et la résistance, ce qui en fait un choix malin pour n’importe quelle cuisine. Commencez par une petite zone test, choisissez un design qui vous inspire et regardez votre cuisine se transformer.
Passez à l’étape suivante pour créer la cuisine de vos rêves ! Téléchargez notre guide exclusif « 25 Renter Hacks for Kitchens in 2025 » pour encore plus d’idées astucieuses et de conseils.
Téléchargez votre guide Renter Hacks !Pour aller plus loin et réussir votre DIY peel and stick tile kitchen upgrade aussi facilement que possible, consultez notre ressource produit dédiée : Carreaux peel and stick : rénovation facile de la cuisine.
FAQ
1. Puis-je installer un backsplash peel and stick sur des murs texturés ?
Non, pour de meilleurs résultats, votre mur doit être aussi lisse que possible. Les surfaces texturées peuvent empêcher les carreaux d’adhérer correctement, ce qui entraîne des bords qui se décollent ou une finition irrégulière. Il est préférable de lisser le mur d’abord en le ponçant ou en appliquant une couche de lissage.
2. Comment nettoyer mon backsplash de cuisine peel and stick ?
Le nettoyage est simple ! Utilisez un chiffon doux et humide avec un savon doux ou un nettoyant de cuisine délicat. Évitez les éponges abrasives et les nettoyants chimiques agressifs, car ils peuvent endommager la finition du carreau ou compromettre l’adhésif avec le temps.
3. Que faire si je fais une erreur pendant l’installation ? Puis-je repositionner les carreaux ?
De nombreux carreaux peel and stick permettent un léger repositionnement pendant les premières minutes après la pose. Cependant, des repositionnements fréquents peuvent affaiblir l’adhésif. Si vous devez effectuer un ajustement important, décollez délicatement le carreau, réchauffez l’adhésif avec un sèche-cheveux, puis reposez-le.
4. Les carreaux peel and stick sont-ils sujets à la moisissure dans les cuisines humides ?
Les carreaux peel and stick imperméables de haute qualité résistent à la moisissure, surtout lorsqu’ils sont correctement posés et scellés sur les bords. Assurer une bonne ventilation dans votre cuisine aide aussi à éviter une accumulation excessive d’humidité, ce qui protège votre backsplash.

Laisser un commentaire
Ce site est protégé par hCaptcha, et la Politique de confidentialité et les Conditions de service de hCaptcha s’appliquent.