


 Guide DIY facile : installez des carreaux de salle de bain à peler et coller
Sondage rapide : quelle est votre principale raison d’envisager des carreaux de salle de bain à peler et coller ?
Introduction
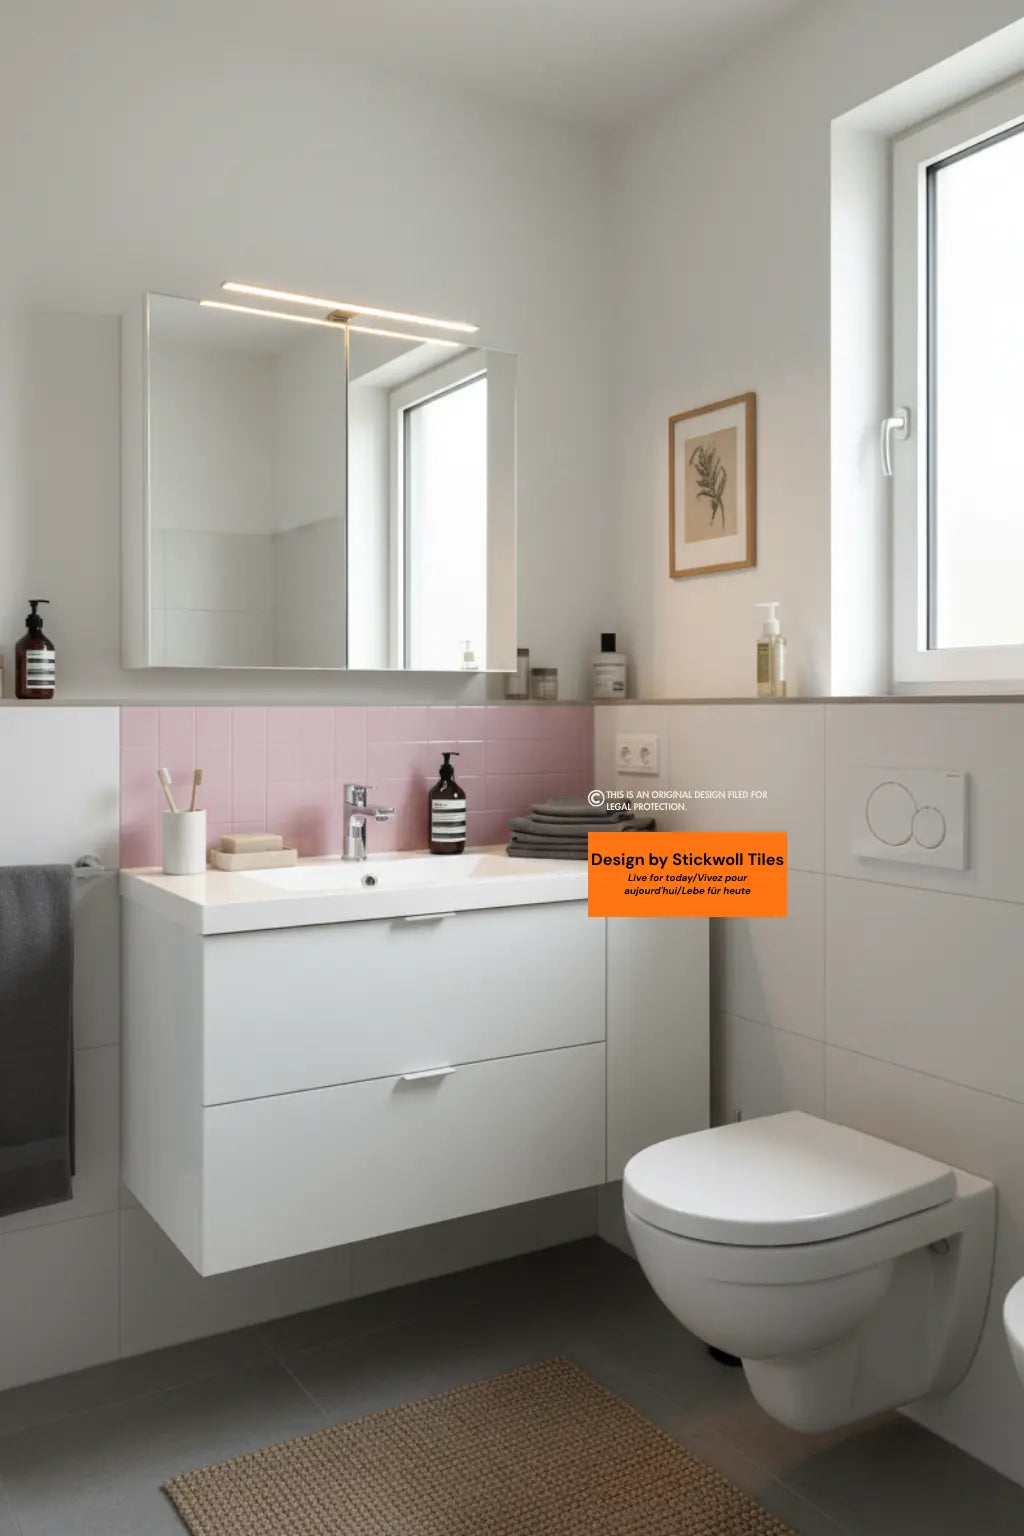
Votre salle de bain semble datée. Les carreaux sont ébréchés, les murs ont l’air fatigués, et vous aimeriez rafraîchir l’espace — mais le coût d’une rénovation complète vous fait hésiter. Si vous louez, une rénovation permanente n’est même pas envisageable.
Voici la bonne nouvelle : les carreaux de salle de bain à peler et coller peuvent transformer complètement l’apparence de votre salle de bain en un après-midi, sans vider vos économies ni faire appel à un professionnel. Ces carreaux auto-adhésifs sont adaptés aux locataires, économiques et étonnamment tolérants pour les débutants.
Ce guide étape par étape a été conçu pour les novices. À la fin, vous comprendrez non seulement comment installer des carreaux de salle de bain à peler et coller, mais aussi comment préparer vos murs, prendre les bonnes mesures, éviter les erreurs courantes et corriger les problèmes sans tout recommencer.
- Un guide clair d’installation de carreaux étape par étape
- Des tactiques de dépannage pour des carreaux mal alignés ou qui se décollent
- Une liste de contrôle d’entretien pour garder votre salle de bain fraîche pendant des années
- L’assurance que vous pouvez réussir ce projet de pose de carreaux DIY à peler et coller, même si vous n’avez jamais posé de carrelage de votre vie
Pourquoi choisir des carreaux de salle de bain à peler et coller ?
Les carreaux de salle de bain à peler et coller sont devenus l’une des alternatives au carrelage de salle de bain les plus populaires, surtout pour les locataires, les étudiants et les propriétaires qui veulent une rénovation de salle de bain à petit budget sans le stress de la démolition.
Abordables et économiques
En moyenne, une installation traditionnelle de carrelage en céramique dans une petite salle de bain peut coûter entre 1 000 et 3 000 $, main-d’œuvre et matériaux compris. Les carreaux auto-adhésifs, quant à eux, coûtent généralement entre 1 et 5 $ le pied carré. Un petit espace peut être rafraîchi pour moins de 150 $.
L’un de mes exemples préférés : une amie a modernisé sa salle d’eau avec des carreaux métro à peler et coller pour moins de 80 $. Elle a estimé que le projet lui avait fait économiser environ 1 200 $ par rapport à l’embauche d’un professionnel pour une pose complète.
Adaptés aux locataires
Contrairement au carrelage permanent, les carreaux à peler et coller sont semi-temporaires. Ils adhèrent fermement, mais peuvent être retirés avec une chaleur douce (comme celle d’un sèche-cheveux) lorsqu’il est temps de déménager. Cela en fait l’une des améliorations de salle de bain les plus faciles et adaptées aux locataires disponibles.
Transformation rapide
Ces carreaux offrent une satisfaction immédiate. Là où un carrelage traditionnel peut nécessiter des jours de préparation, de pose et de jointoiement, les carreaux de salle de bain DIY faciles peuvent être installés en seulement quelques heures. Même les configurations de salle de bain les plus délicates, comme autour des meubles-lavabos ou des miroirs, restent gérables avec un cutter et un peu de patience.
Astuce : si vous cherchez encore plus d’inspiration, notre article sur Carrelage de salle de bain à peler et coller pour l’humidité explique pourquoi ces carreaux sont idéaux pour les espaces humides et les transformations rapides.
Rassemblez vos outils et matériaux
Une pose réussie de carreaux DIY à peler et coller commence par la préparation. Le processus lui-même n’est fluide que si les outils sont prêts avant de commencer.
Outils essentiels
- Mètre ruban
- Cutter ou ciseaux
- Niveau
- Produits de nettoyage
- Crayon ou cordeau traceur
Outils optionnels pour une finition plus nette
Pour ceux qui veulent obtenir un résultat encore plus soigné, des outils optionnels comme un rouleau en J ou un tapis de découpe permettent d’obtenir des lignes nettes.
Approfondissez vos connaissances avec ce guide utile : Comment installer une crédence en vinyle à peler et coller, qui va plus loin dans les listes d’outils, les visuels et les conseils de retrait adaptés aux locataires pour des projets similaires.
De combien de carreaux avez-vous besoin ?
Mesurez avec soin. Commandez toujours 10 à 15% % de plus pour tenir compte des erreurs. Acheter un surplus garantit une cohérence des couleurs entre les lots.
Préparation de la surface : l’étape décisive
Si votre surface n’est pas prête, les carreaux n’adhéreront pas. C’est le problème n°1 que je vois dans les projets de débutants. Une mauvaise préparation de la surface pour les carreaux à peler et coller entraîne presque toujours plus tard des lignes de travers et des bords qui se décollent.
À éviter
- Poussière et graisse
- Murs irréguliers
- Humidité
Comment préparer correctement
- Surface propre
- Bien sécher
- Combler les espaces, poncer jusqu’à obtenir une surface lisse
- Essuyer avec de l’alcool
Vous vous inquiétez encore des surfaces délicates ? Notre article sur L’installation de Stick Tiles sur des murs peints présente des étapes intelligentes pour garantir l’adhérence des carreaux sur des surfaces peintes et difficiles.
Guide d’installation de carrelage étape par étape
Il est maintenant temps d’installer vos carreaux auto-adhésifs.
Étape 1 : marquez votre ligne de départ
Tracez une ligne de niveau. Ne vous précipitez pas.
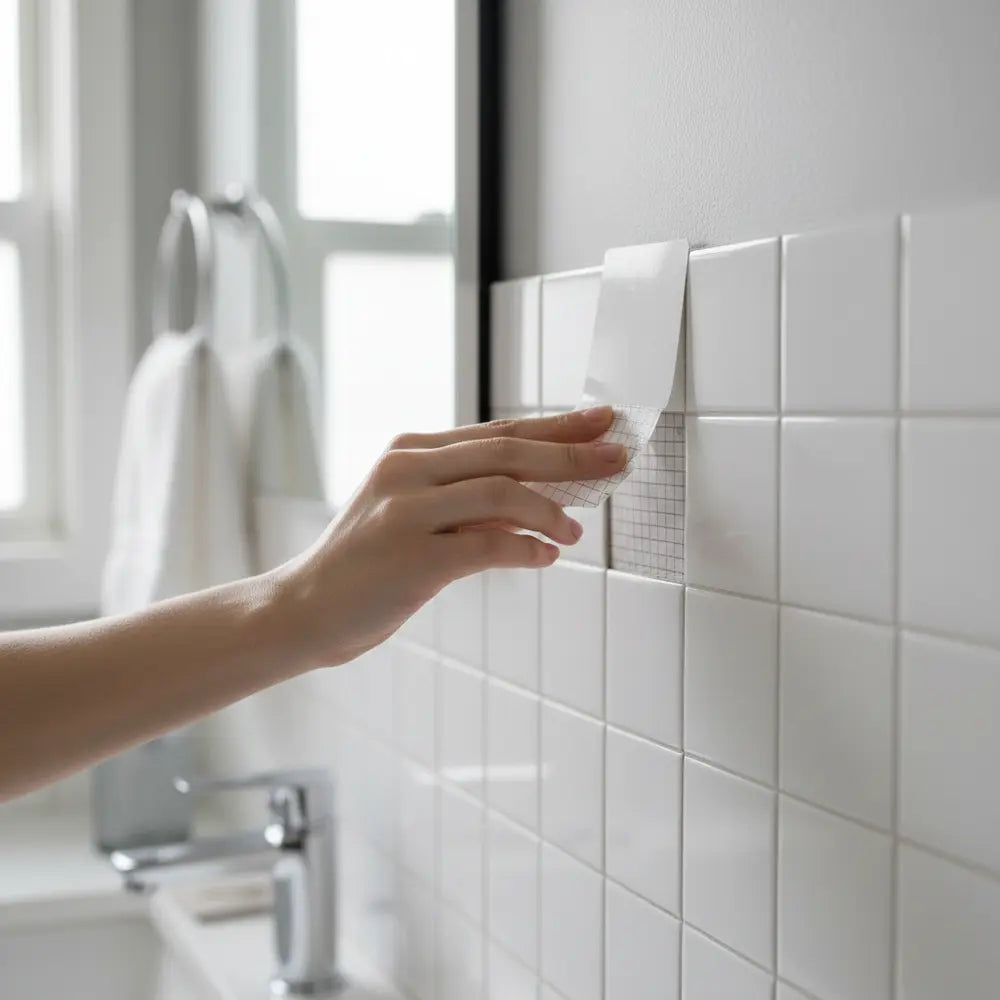
Étape 2 : Peler et appliquer le premier carreau
Alignez soigneusement et lissez du centre vers l’extérieur.
Étape 3 : Continuez rang par rang
Travaillez rang par rang, vérifiez régulièrement l’alignement. Découpez au besoin.
Étape 4 : Appuyez et fixez
Utilisez un rouleau en J pour bien fixer l’adhésif.
Si vous souhaitez découvrir des tutoriels adaptés aux débutants et à des styles de carrelage métro précis, essayez cet article : Guide facile : installer des carreaux métro peel and stick, avec des visuels et des solutions aux problèmes courants.
Résolution des problèmes courants
Pour une perspective plus large, l’article Comment installer des carreaux peel and stick et meilleurs designs 2025 vous guide à travers l’installation et des designs de pointe au-delà des salles de bains.
Touches finales et entretien
Une fois posés, scellez les bords et nettoyez délicatement. Évitez les produits abrasifs. Avec un bon entretien, les carreaux durent 5 à 10 ans et sont amovibles pour les locataires.
- Inspectez les bords tous les quelques mois
- Appuyez ou appliquez du mastic sur les coins qui se décollent
- Nettoyez localement les accumulations de saleté
Découvrez davantage sur la durabilité imperméable avec notre article vedette : Top des meilleurs carreaux de douche peel and stick imperméables pour 2025, parfait pour les salles de bains très humides.
CTA : Vous cherchez encore plus d’inspiration ? Voir plus d’améliorations DIY pour la salle de bains pour harmoniser votre nouvelle finition de carrelage.
Conclusion
Installer des carreaux peel and stick est économique et accessible. Avec de la patience et une bonne préparation de la surface, vous pouvez transformer votre salle de bains rapidement.
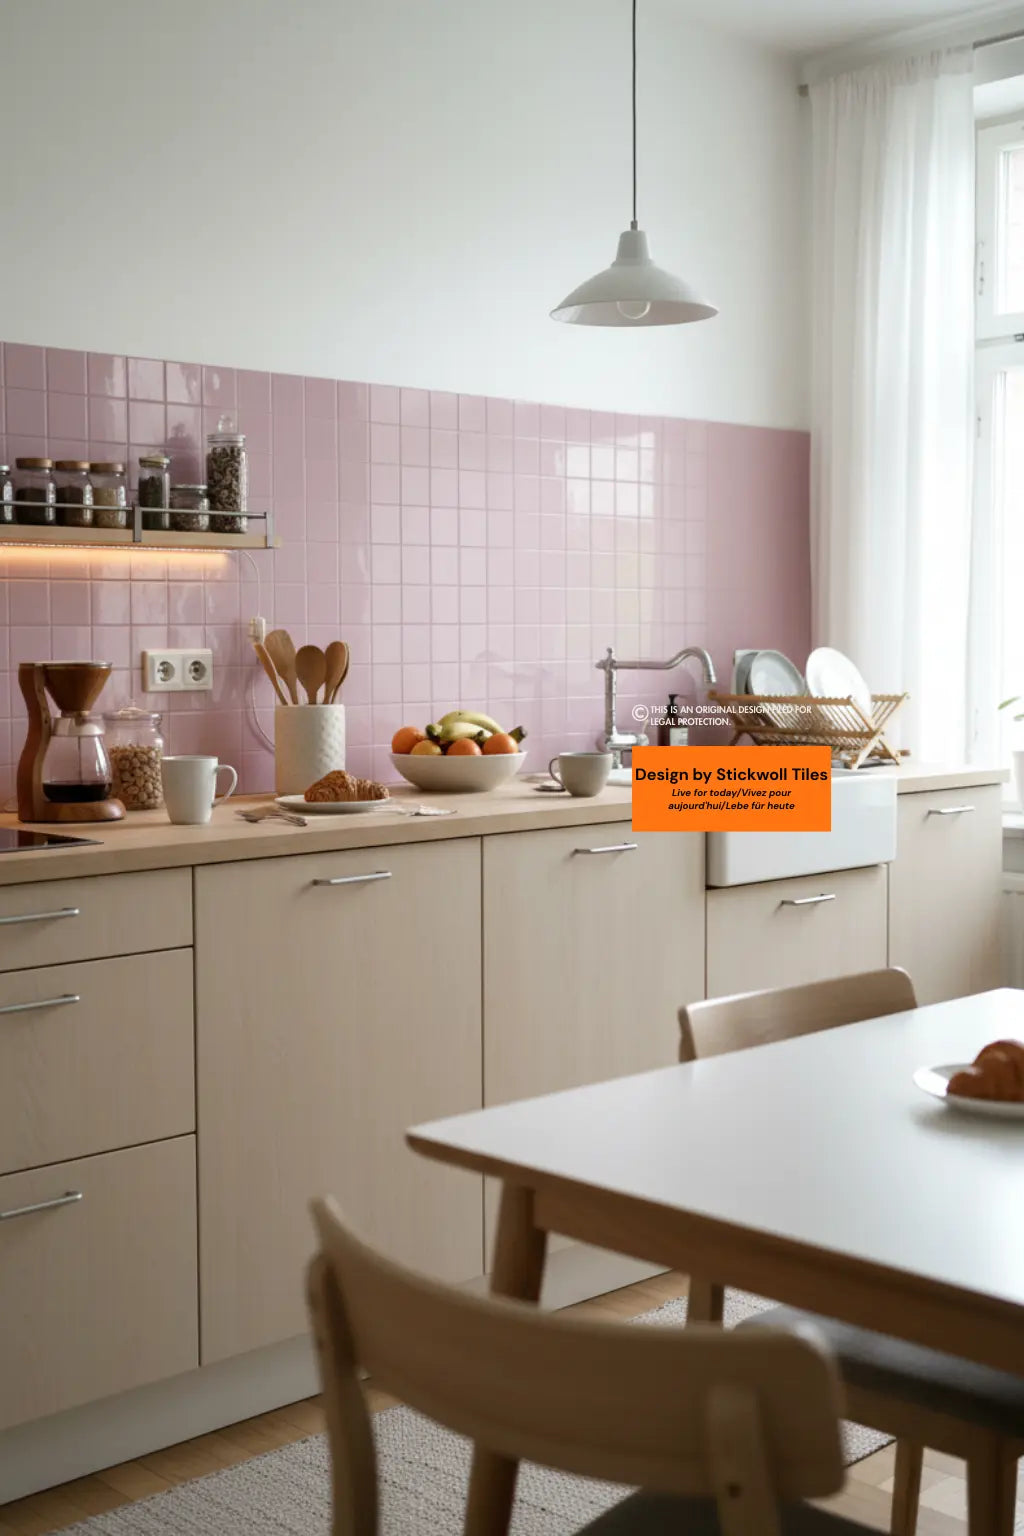
Vous en voulez plus ? Consultez notre guide détaillé : Comment utiliser des carreaux peel and stick en 2025— il couvre toutes les applications créatives, des cuisines aux murs d’accent.
FAQ sur les carreaux DIY
Q1 : Peut-on poser des carreaux peel and stick directement sur d’anciens carreaux en céramique ? Oui, il suffit de bien nettoyer et de niveler les joints.
Q2 : Résisteront-ils à l’humidité de la salle de bains ? Oui, lorsqu’ils sont correctement scellés autour des zones exposées aux éclaboussures.
Q3 : Que faire si ma première rangée paraît de travers ? Repositionnez rapidement ou découpez puis continuez en gardant l’alignement.
Q4 : Ai-je besoin de joint ? Non, la plupart des modèles impriment les lignes de joint pour vous.
Q5 : Puis-je les retirer sans abîmer les murs ? Oui, chauffez délicatement, décollez avec précaution et nettoyez les résidus.

Laisser un commentaire
Ce site est protégé par hCaptcha, et la Politique de confidentialité et les Conditions de service de hCaptcha s’appliquent.