












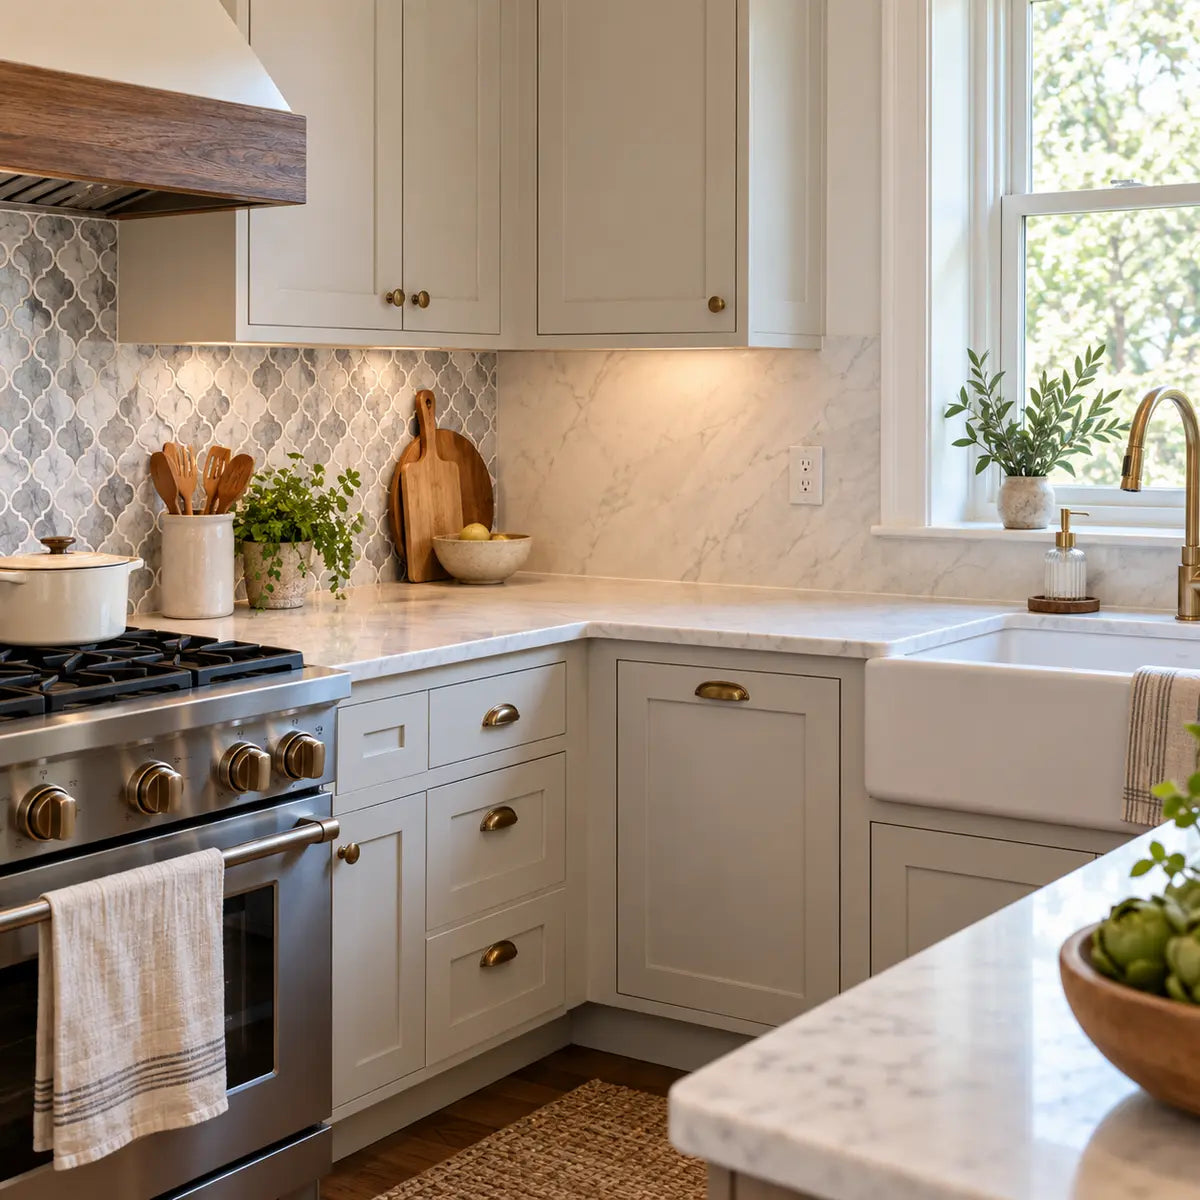
Kitchen backsplash comparison
The right backsplash depends on where it will go. A wall behind a stove faces heat, steam, grease, and appliance-clearance requirements; a wall beside a sink faces splashes, cleaning, and moisture at the edges; a low-exposure counter wall may need little more than an attractive, easy-to-install surface.
For most renters, first-time DIYers, and small kitchen updates, peel-and-stick tile is the more accessible starting point when the exact product documentation permits the intended use. Laminate or a laminate-style sheet can make more sense when you want a broad, low-seam surface, have the tools or installer for accurate cutting, and prefer a more permanent installation.
There is no universal winner in the peel and stick tile vs laminate backsplash comparison. The decision turns on seven practical questions:
- How much heat will the surface receive?
- Will it see occasional splashes or persistent moisture?
- How will seams, corners, outlets, and edges be finished?
- How much cutting and alignment work can you handle?
- What happens if the surface is scratched or damaged?
- Can you remove it later?
- What is the complete project cost after tools, preparation, waste, sealants, labor, and repairs?
This guide compares those questions by installation zone so you can choose a surface that fits the kitchen you actually have.

Which backsplash is better overall?
Peel-and-stick tile is usually the better fit for a small, low-commitment project with a sound wall, moderate exposure, and a strong preference for simple installation or future change. Laminate-style sheet backsplash is usually the better fit when you want a broad surface with fewer internal joints and can manage more precise fabrication and installation.
That answer becomes less certain behind a stove. Product categories are too broad to support a blanket claim that either surface is automatically safe or suitable there. Manufacturer documents for different peel-and-stick and sheet products set different limits for heat, moisture, substrate preparation, sealing, and removal. the Aspect Glass installation guide illustrates why the exact product document matters.
The safest decision process is:
- Identify the zone: behind a stove, beside a sink, or along a lower-exposure wall.
- Read the exact backsplash product instructions.
- Read the exact range or cooktop installation instructions.
- Inspect the wall before choosing an adhesive-backed product.
- Compare the complete project cost rather than the visible material price alone.
- Decide how much future flexibility matters.
| Project condition | Peel-and-stick tile tends to fit when… | Laminate-style sheet tends to fit when… | Check before buying |
|---|---|---|---|
| Behind a stove | The exact product permits the exposure and the appliance instructions allow the placement. | The exact sheet product permits the appliance and heat conditions. | Burner type, appliance clearances, radiant heat limits, ventilation, and product instructions. |
| Beside a sink | The wall is sound and the product allows splash exposure with properly sealed borders. | You want a broad surface with fewer internal joints and can seal the perimeter correctly. | Moisture language, edge sealing, standing-water risk, and cleaning instructions. |
| Rental or temporary update | You value lower commitment and can accept that removal may still affect paint or drywall. | You have written approval and a plan for a more permanent installation. | Lease terms, landlord approval, test area, wall condition, and removal instructions. |
| First DIY project | You can measure carefully, dry fit, and work slowly around outlets and corners. | You have the required cutting tools, a safe work area, and confidence making accurate cutouts. | Cutting method, alignment tolerance, surface preparation, and mistake recovery. |
| Large uninterrupted wall | You want a tile pattern and can manage repeated seams. | You prefer a broad sheet appearance with fewer internal joints. | Sheet size, transport, fabrication, corner treatment, and visible transitions. |
A useful rule from our experience is to choose the least demanding material that still meets the exposure requirements. Convenience matters, but only after the wall, appliance, and product limits line up.
For a product-specific review, you can examine the Subway Marble peel-and-stick tile specifications or compare the Dual Ceramics product information.
A quick zone-based decision guide
Use the following decision path before comparing colors or patterns.
If the backsplash is behind a gas cooktop or range: start with the appliance manual and the backsplash product instructions. Do not assume a heat-resistant label covers every distance, burner arrangement, or installation condition.
If the backsplash is beside a sink: focus on edge sealing, cleaning, and whether the product is described as moisture resistant or suitable for continuous wet exposure. Those terms have different meanings.
If the backsplash is on a low-exposure counter wall: peel-and-stick tile often deserves closer consideration because installation access and reversibility may matter more than maximum heat or water protection.
If the wall is damaged, dusty, greasy, textured, damp, or loose: stop and repair the substrate first. Adhesive-backed tile and sheet materials both depend on a stable, clean, reasonably flat surface.
If your priority is future removal: peel-and-stick tile may offer more flexibility, but the adhesive can still lift paint or damage drywall. Treat removability as a possibility to verify, not a promise.
What do peel-and-stick tile and laminate backsplash actually mean?
Peel-and-stick tile is a surface product with a pressure-sensitive adhesive backing. Laminate backsplash usually refers to a decorative sheet or panel that is cut to fit and attached with a separate adhesive, often with sealed edges and transitions.
A pressure-sensitive adhesive, or PSA, is an adhesive that bonds when pressure brings it into contact with the surface. It does not need a traditional wet cure in the same way as mortar, but its performance still depends on the substrate, pressure, temperature, humidity, and installation method.
“Laminate” can create confusion because sellers use the word for more than one construction. A high-pressure laminate sheet bonded to a substrate is different from a decorative acrylic sheet, a compact laminate panel, a PVC sheet, or a laminate-faced backsplash panel. Their cutting requirements and heat limits may differ.
The checked Wilsonart backsplash specification, for example, applies to a particular decorative acrylic sheet product. It describes a single-sheet surface, silicone adhesive, perimeter sealing, and specific limitations around gas cooktops and radiant heat. Those instructions should not be applied automatically to every product marketed as laminate. Wilsonart’s decorative acrylic backsplash specification sets boundaries for that particular product.
Peel-and-stick tile also covers several constructions:
- Flexible vinyl or polymer tile
- Rigid composite tile
- Glass tile mounted to an adhesive mat
- Ceramic-style panels
- Grout-free decorative wall tiles
- Other adhesive-backed surfaces with different cores and facings
The category name tells you how the product attaches. It does not tell you the maximum heat, moisture exposure, service life, compatible wall surfaces, or removal outcome.
A 2024 laboratory study of pressure-sensitive adhesives used in flexible-display research found that temperature and relative humidity affected elasticity, stiffness, and stress relaxation in the tested adhesive system. That finding helps explain why the kitchen environment matters, but it did not test backsplash products or predict their service life on drywall, tile, or painted walls. Luo and colleagues’ Scientific Reports adhesive study provides that bounded laboratory context.
A separate laboratory study found that increased humidity could increase water uptake and make a tested pressure-sensitive adhesive easier to peel under its experimental conditions. That supports caution around moisture, especially at unsealed edges, but it does not mean ordinary sink splashes will cause a specific backsplash to fail.
The practical distinction is simple:
- Peel-and-stick tile shifts more of the work into wall preparation, layout, pressure, and edge finishing.
- Laminate-style sheet shifts more of the work into measuring, cutting, handling, adhesive application, fabrication, and perimeter sealing.
Neither option eliminates preparation. They distribute the risk differently.

Is peel-and-stick tile safe behind a stove?
It may be suitable behind a stove only when the exact backsplash product and the exact appliance installation requirements support that location. A general “heat resistant” description is not enough to establish safe placement.
The stove zone is where broad comparison language causes the most trouble. Heat reaches the wall through several paths:
- Direct radiant heat from burners or heating elements
- Hot cookware extending beyond the cooking surface
- Steam and grease carried upward
- Heat reflected from cookware, control panels, or adjacent surfaces
- Extended high-heat operation
- Heat concentrated in a narrow area behind the appliance
The appliance manual controls required clearances. The backsplash instructions control the material’s approved use. You need both.
GE’s general range guidance says model-specific installation instructions control clearances. Its guidance also discusses spacing around surfaces exposed to steam, grease splatter, and heat, and offers general recommendations that vary by appliance type and placement. GE separately suggests allowing a wall gap in some range installations to reduce scorching risk from extended high heat or no-load burner use. Those values are general manufacturer guidance, not a universal rule for every kitchen. GE’s range clearance guidance explains that model-specific instructions control.
A Whirlpool dimension guide for one specific 30-inch freestanding gas range illustrates why model details matter. The guide lists a 30-inch minimum clearance above the cooking surface to the bottom of an upper cabinet and other model-specific rear-wall and combustible-material dimensions. It is a planning document for that range, not a universal clearance chart or a certification for any backsplash material. Whirlpool’s WFG975H0H dimension guide shows the model-specific nature of these measurements.
The checked Aspect Glass installation guide gives another important example. It says the product adhesive should set for 24 hours before exposure to a heat source such as a stovetop or oven. That is a post-installation wait time, not a maximum service-temperature rating and not proof that the product is suitable behind every stove.
The checked Wilsonart decorative acrylic specification sets a different boundary: it says that product is not suitable behind gas cooktops or gas slide-in ranges because of excess heat and is not suitable for radiant heat sources above 245°F. That limit applies to the specified product, not to laminate backsplash products generally.
How should you evaluate a stove-zone backsplash?
Read the product instructions for these exact phrases or topics:
- Approved use behind a range, cooktop, or oven
- Gas, electric, induction, radiant, or slide-in appliance restrictions
- Minimum distance from burners or heating elements
- Maximum radiant or surface temperature
- Required gap, shield, or noncombustible backing
- Heat-set or curing period after installation
- Restrictions on direct flame, concentrated heat, or high-output burners
- Ventilation and grease-cleaning requirements
- Edge and corner treatment near the appliance
Do not fill an information gap with a guess based on another product. A glass peel-and-stick tile, a flexible vinyl tile, a decorative acrylic sheet, and a high-pressure laminate panel can respond differently to the same kitchen conditions.
If the product instructions do not clearly address your stove or cooktop zone, pause the purchase and ask the manufacturer for written guidance. A product page that says “for kitchens” does not necessarily answer whether it is suitable in the narrow, high-heat area directly behind a burner.
For more context on stove-area planning and product-specific heat questions, see the guide to heat-resistant peel-and-stick kitchen tiles using the exact published path.
How do water, splashes, and cleaning change the choice?
Both surfaces can work beside a sink when the product, substrate, edges, and cleaning method are compatible. Moisture resistance does not automatically mean waterproof performance or suitability for standing water.
The sink zone is usually less about a single splash and more about repeated small exposures. Water may reach:
- The bottom edge of the backsplash
- A countertop-to-wall joint
- Corners near the sink
- Outlet cutouts
- A seam between tile sheets
- A gap behind a faucet or soap dispenser
- The wall if the countertop is uneven or the caulk joint has failed
The most vulnerable location is often the edge rather than the face of the backsplash. A sealed face can still have an unprotected perimeter.
The checked Stick-It guide recommends silicone-based sealant on all borders and says border sealing near a sink or other high-moisture area helps prevent moisture from reaching the adhesive. The same guide describes the product as moisture resistant while limiting its use in or above a shower. That distinction matters: a backsplash beside a sink and a shower wall do not receive the same exposure, but neither should be treated as automatically waterproof without product-specific evidence. the Stick-It installation and FAQ guide describes that product-specific border-sealing guidance.
The Wilsonart sheet specification also requires perimeter sealing. Its single-sheet construction can remove grout joints within the sheet, but it does not remove the need to seal the perimeter, corners, cutouts, and any sheet-to-sheet transitions.
What does “water resistant” mean in a kitchen?
Water resistant generally means the product can tolerate some moisture under stated conditions. It does not, by itself, mean that water cannot reach the adhesive, wall, seams, or substrate.
Before choosing a product for a sink wall, ask:
- Is the product approved for backsplash use beside a sink?
- Does the manufacturer require silicone at all borders?
- Does the product have limits on standing water or continuous wet exposure?
- Can the wall behind it dry if moisture reaches an edge?
- Is the countertop joint already sealed?
- Will cleaning involve spraying, soaking, steam, or abrasive scrubbing?
- Are the seams and outlet cutouts easy to inspect?
With peel-and-stick tile, seal the edges only if the product instructions permit and explain the appropriate sealant. With sheet material, use the specified adhesive and perimeter sealant. Do not assume that adding extra adhesive or caulk improves every installation; incompatible materials can complicate future repair or removal.
For cleaning, use the least aggressive method that removes the soil. Repeated scrubbing, harsh solvents, abrasive pads, and standing moisture can affect the face, printed finish, sealant, or adhesive depending on the product.
The Kitchen Backsplash Guide can help organize the sink zone, countertop joint, outlet locations, edges, and quantity before you order.

Which option creates fewer visible backsplash seams?
Laminate-style sheet usually creates fewer internal joints across a broad wall, while peel-and-stick tile makes seams part of the visual pattern. Neither option eliminates every transition.
A seam is the line where two pieces, panels, tiles, or surfaces meet. In a tile layout, repeated seams can look intentional because they follow a pattern. In a sheet installation, fewer internal seams can create a quieter appearance, but the large panel still requires accurate cutting and careful treatment at corners, outlets, counters, cabinets, and ends.
The strongest visual result comes from planning the interruptions before installation. Most backsplash failures that look “unfinished” are not caused by the main field of material. They appear at:
- Outside corners
- Inside corners
- The bottom edge above the counter
- The top edge beneath cabinets
- Outlet and switch cutouts
- The end of the backsplash at an open wall
- The area behind or beside a range
- A change in wall depth
- A transition between two materials
Peel-and-stick tile can disguise small variations through pattern and repetition, but misalignment becomes visible when the pattern meets an outlet or cabinet. A sheet can look clean across a long run, but a poorly cut outlet or an unsealed corner can draw more attention than several tile joints.
The Wilsonart specification describes single-sheet construction that eliminates grout joints within the sheet. It also requires perimeter sealing and recognizes the need to plan seams and layouts. The practical lesson is that “fewer seams” does not mean “no finishing work.”
How can you make peel-and-stick seams look intentional?
Start with the most visible wall and plan the layout before removing the backing. Mark a level reference line rather than assuming the countertop or cabinet is perfectly level. Dry fit the first row and check how the pattern lands at outlets, corners, and the open ends of the wall.
Use the product’s own pattern repeat when aligning tiles. A printed faux-grout line can be visually unforgiving if adjacent pieces drift by even a small amount. Work in manageable sections and inspect the lines from normal standing distance, not only from directly in front of the wall.
At corners and ends, decide whether the design needs:
- A clean straight stop
- A trim piece
- A return onto the adjacent wall
- A caulked joint
- A transition to another surface
- A cabinet or appliance to conceal the edge
The Stickwoll peel-and-stick tile guide is a useful place to review surface preparation, edge finishing, moisture, heat, quantity, and removal questions before ordering.
How can a sheet backsplash avoid a fabricated look?
Measure the wall in several places. Walls, counters, and cabinets can vary, especially in older kitchens. Record the smallest usable dimension where a panel must fit, then plan the cut line so a slight variation does not create a visible gap.
Make a full-size layout when outlets or corners are involved. Mark the opening from fixed reference points rather than measuring from a flexible edge. Dry fit the sheet before applying adhesive, and verify that the cutouts align with the electrical boxes and cover plates.
The checked Wilsonart guide describes cutting with a circular saw, jigsaw, or router using carbide-tipped blades. It also specifies a minimum 1/8-inch corner radius for finished cutouts on that product. These requirements illustrate the kind of precision that sheet installation can demand, though tools and cutout rules vary by manufacturer and material.

Which backsplash is easier to install for a first DIY project?
Peel-and-stick tile generally reduces the amount of cutting and separate adhesive handling, but it demands careful wall preparation and alignment. Laminate-style sheet usually requires more fabrication skill, lifting, cutting, and edge finishing.
The word “easy” hides two different tasks:
- Making the material fit the wall
- Making the material stay bonded and look aligned
Peel-and-stick tile often feels easier because each piece is smaller and the adhesive is already attached. That can help in a small kitchen, especially around outlets and short wall sections. Yet the backing can make the installation unforgiving. Once a strong adhesive is firmly pressed, repositioning may be difficult or impossible.
The checked Aspect Glass guide recommends dry fitting, progressive alignment checks, and careful placement because its pressure-sensitive adhesive does not allow easy repositioning after firm pressing. It also requires a clean, flat, smooth, dry substrate free of dust, grease, wax, and soap residue.
What preparation does peel-and-stick tile need?
Preparation is the part most likely to determine the result. The wall should be:
- Sound and firmly attached
- Flat enough for the product
- Smooth enough for full adhesive contact
- Clean and free of grease, dust, wax, and soap residue
- Dry
- Free of loose paint, wallpaper residue, and flaking material
- Compatible with the manufacturer’s primer or adhesive requirements
Repair dents and high spots before installation. Remove residue rather than covering it. A backsplash can hide an unattractive wall, but it cannot reliably turn a weak, greasy, damp, or loose wall into a stable adhesive surface.
The checked Aspect guide calls for a fresh stand-alone primer for its primary installation method and specifies an installation range of 65°F to 100°F for the tile and substrate. That is an installation condition for that product, not a general operating-temperature rating.
Plan the layout before exposing the adhesive. Check:
- The first horizontal line
- The first vertical joint
- Pattern repeat
- Outlet centers
- Corner returns
- Cabinet ends
- Appliance edges
- The final partial piece
Peel back only enough release liner to position the tile. Press progressively from the center or starting edge according to the instructions. Firm pressure helps contact, but excessive pressure can make a correction harder.
What preparation does laminate-style sheet need?
Sheet installation typically requires more planning before the adhesive is opened. You may need:
- Accurate wall measurements
- A full-size template
- A stable work surface
- A straightedge and marking tools
- A saw or router suited to the material
- Carbide-tipped blades or bits where specified
- Assistance handling the panel
- Compatible construction adhesive or silicone
- Clamps, supports, or temporary braces
- Perimeter sealant
- A plan for outlet and corner cutouts
A sheet may be easier to clean visually after installation because it has fewer internal joints, but it can be harder to fabricate without the right equipment. The material may flex, chip, scratch, or require support while being cut.
Do not use a tool or adhesive simply because it worked on another sheet product. Follow the exact guide for the material you purchased. For a practical preparation sequence, use the kitchen backsplash installation and measurement guidance before cutting or ordering.

What happens when the backsplash is scratched, chipped, stained, or installed incorrectly?
Peel-and-stick tile usually makes localized replacement more approachable because the surface is divided into smaller pieces. Sheet backsplash can provide a continuous appearance, but a serious localized defect may require a more involved patch or panel replacement.
Repairability depends on the type of damage and whether you kept spare material. Save extra tile or a leftover section of sheet. Record the product name, color, pattern direction, and purchase date. Finishes can change or become unavailable, and a repair is easier when the replacement material comes from the same batch.
Common peel-and-stick tile problems
Lifted edge:
Check whether the edge is lifting because of grease, moisture, poor pressure, an uneven wall, or insufficient border treatment. Do not simply press it down repeatedly without correcting the cause. If the adhesive is contaminated or the tile has curled, replacement may be cleaner.
Scratch or stain:
Clean according to the product instructions first. Abrasive scrubbing can create a larger visible mark. If the face is damaged, replacing the tile may be more predictable than trying to refinish it.
Misaligned tile:
If the adhesive is still unpressed and the manufacturer allows repositioning, correct it early. If the tile has been firmly pressed, removal may damage the tile or wall depending on the product.
Outlet or corner error:
A replacement tile may solve a small mistake, but the new piece still has to match the pattern and fit the opening. Keep spare material for this reason.
Moisture at the edge:
Find the source before replacing the tile. A failed countertop joint, leaking faucet connection, or damp wall can damage a replacement just as quickly.
Common sheet backsplash problems
Small surface scratch:
The repair method depends on the sheet material and finish. Some surfaces may allow careful polishing or touch-up; others show sanding or color differences. Follow the manufacturer’s care instructions.
Deep chip or broken corner:
A patch may be visible, especially on a patterned or glossy surface. A replacement panel can produce a better result but may require removing adjacent sealant and adhesive.
Stained sealant:
Perimeter sealant may be removable and replaceable, but the new bead must bond to clean, compatible surfaces. Do not apply fresh sealant over loose or moldy material.
Wrong cutout:
A cover plate may hide a small measuring error, but enlarging a cutout can weaken the visual finish or leave too little support. A replacement panel may be the cleanest correction.
Panel movement:
Stop and determine whether the issue comes from the substrate, adhesive, inadequate support, or moisture. Adding adhesive at the visible edge without fixing the cause can trap water or create a raised transition.
The repair question is one reason a tile layout can feel forgiving in a small project. It spreads risk across multiple pieces. A sheet reduces visual interruptions but concentrates more of the cutting and replacement risk in a larger component.

Is peel-and-stick backsplash really removable for renters?
It may be removable, but no adhesive-backed backsplash should be assumed damage-free on every painted wall. Removal depends on the adhesive, paint, primer, drywall paper, wall condition, installation duration, temperature, and removal technique.
A rental-friendly product description is a useful starting point, not a guarantee about your particular wall. Painted drywall can fail in several ways:
- Paint may lift with the adhesive.
- Drywall paper may tear.
- Adhesive residue may remain.
- A repaired area may show through after removal.
- A previously patched section may separate.
- A tile may break or become unusable during removal.
- Heat used during removal may affect paint or surrounding materials.
The checked Aspect Glass guide says removal with a putty knife and heat can damage the wall and make the tiles unusable. It also makes clear that the adhesive is aggressive and that installation conditions affect the outcome.
That does not mean every peel-and-stick installation will damage a wall. It means the outcome is conditional.
Before installing in a rental:
- Read the lease and ask the landlord or property manager for written approval if required.
- Test the exact product on an inconspicuous area.
- Photograph the wall condition before installation.
- Keep the product packaging and instructions.
- Do not install over loose paint, unsealed repairs, or damaged drywall.
- Keep spare material for a controlled repair if a piece must be removed.
- Plan for adhesive residue and paint touch-up even if the product is marketed as removable.
The removal guidance for adhesive-backed tile can help you review the wall and product questions before committing. If removal risk is unacceptable, a removable panel mounted to a separate protective substrate may deserve consideration, subject to lease approval and the specific installation method.
Laminate-style sheet generally involves a stronger, more permanent adhesive and more finishing work. That can be an advantage for a long-term project, but it makes future changes harder. If you expect to remodel again soon, the permanent surface may carry a higher future labor cost even if it looks attractive today.
How should you compare total project cost?
Compare the full installed project cost, not just the price of the tile or sheet. Peel-and-stick may reduce tools and labor, while laminate-style sheet may reduce repeated pieces and some seam finishing. The lower total cost depends on the project inputs.
A useful formula is:
Total project cost = material + waste + substrate preparation + adhesive or sealant + tools + cutting or fabrication + labor + repair allowance + removal or disposal allowance
A material-only comparison can mislead in both directions. A peel-and-stick product may appear inexpensive until you add extra pieces for pattern matching, wall repair, primer, edge sealant, and replacement tiles. A sheet may appear expensive until you account for fewer pieces, a shorter visible seam plan, and professional fabrication that prevents costly mistakes.
No universal price winner can be established without current product prices, coverage, waste, labor rates, tools, and project dimensions. Build your own estimate.
Editable backsplash cost worksheet
| Cost input | Peel-and-stick tile | Laminate-style sheet |
|---|---|---|
| Wall width × height | $_____ | $_____ |
| Product coverage or sheet count | $_____ | $_____ |
| Extra material for waste and mistakes | $_____ | $_____ |
| Primer or substrate repair | $_____ | $_____ |
| Separate adhesive | $_____ | $_____ |
| Silicone or edge sealant | $_____ | $_____ |
| Cutting tools or blade upgrades | $_____ | $_____ |
| Template or fabrication cost | $_____ | $_____ |
| Delivery or transportation | $_____ | $_____ |
| DIY labor value or contractor labor | $_____ | $_____ |
| Expected repair or replacement allowance | $_____ | $_____ |
| Expected removal or disposal cost | $_____ | $_____ |
| Estimated total | $_____ | $_____ |
Measure the wall in square feet, then add the waste allowance recommended by the product seller or installer. Patterned tile often needs more planning than plain tile because you may lose usable pieces when matching the repeat. Sheet material can require a different allowance because a single bad cut may affect a larger section.
Use the backsplash measurement guide to map the wall, stove and sink zones, outlets, seams, and quantity before filling in the worksheet.
What costs are easy to overlook?
Substrate repair: Adhesive products need a sound wall. If the wall needs degreasing, scraping, patching, sanding, priming, or paint repair, include those materials and your time.
Edge treatment: The visible face is only part of the installation. Include caulk, trim, corner treatment, outlet finishing, and transitions.
Tools: A peel-and-stick installation may need only basic layout and cutting tools, depending on the product. A sheet installation may require a saw, specialized blade, router, clamps, supports, or fabrication service.
Waste: A low material price per package does not help if the coverage does not match your wall dimensions or the pattern produces unusable leftovers.
Mistake recovery: The cost of a replacement tile is different from the cost of replacing a sheet with an incorrectly cut outlet.
Labor: If you hire help, compare the labor task, not only the material. Sheet fabrication may cost more at the start but reduce installation time. Peel-and-stick tile may reduce fabrication while increasing layout time on a complicated wall.
Future change: A lower upfront price can become less attractive if removal requires wall repair. A more permanent surface can become costly if you expect another remodel soon.
The best cost comparison is the one that includes the inconvenience you are trying to avoid.
Which backsplash fits renters, small kitchens, stove zones, and sink zones?
Choose by the dominant constraint in each zone. Renters often prioritize reversibility, small kitchens often reward simpler handling, stove zones require product-specific heat and appliance checks, and sink zones require careful edge and moisture planning.
For renters and low-commitment homeowners
Peel-and-stick tile deserves early consideration when:
- The landlord permits the installation.
- The wall is smooth, clean, dry, and sound.
- The product instructions address your intended kitchen zone.
- You can test the adhesive first.
- You accept that removal may require touch-up or repair.
- You want to change the style later.
- The project is small enough to manage carefully.
Avoid treating “renter friendly” as an unconditional promise. The phrase may describe the product’s intended use, but the wall determines the actual removal result.
A sheet backsplash may still work in a rental if it is installed on a separate removable panel and approved in writing. The panel, mounting system, weight, edge finish, and removal plan all matter.
For small kitchens
Small kitchens often favor the option that reduces measuring and handling errors. Peel-and-stick tile can be practical when the wall has many short sections, corners, and interruptions because individual pieces are easier to handle than one large panel.
The tradeoff is visual density. Repeated seams may make a small kitchen feel busier, especially if the pattern is strong. A sheet can create a calmer field, but transport and cutout accuracy may become the main challenge.
Measure every wall section separately. Do not assume that a compact kitchen has a simple backsplash. Small spaces often contain more outlets, corners, cabinet returns, and appliance transitions per square foot.
For the wall behind a stove
Start with the appliance manual. Then compare the exact backsplash product’s restrictions. If either document leaves the placement unclear, ask the manufacturer before installing.
The material choice may also depend on whether the backsplash sits directly behind the appliance, extends above the cooking surface, returns onto side walls, or is separated from the hottest area by a required clearance. A surface that works on a side wall may not be appropriate directly behind a burner.
The heat question is also an adhesive question. A face material can tolerate a condition while the adhesive, sealant, substrate, or paint system does not. Treat the entire assembly as the installation you are evaluating.
For the wall beside a sink
Focus on:
- Countertop-to-wall sealing
- Bottom and side edge treatment
- Faucet splash pattern
- Cleaning method
- Standing-water risk
- Wall dryness
- Product moisture limits
- Future access to plumbing
Peel-and-stick tile can suit a sink wall when the product permits the exposure and the edges are finished according to the instructions. A sheet can reduce internal joints, but it still needs proper perimeter sealing and a sound substrate.
For a low-exposure counter wall
This is often the easiest place to use peel-and-stick tile. The wall may face less direct heat and moisture, so installation effort, appearance, and reversibility can carry more weight.
That does not remove the need for preparation. Grease from nearby cooking can travel farther than expected, and an unsealed countertop joint can still expose the bottom edge to moisture.
What should you check before choosing a Stickwoll peel-and-stick tile?
Confirm the exact product’s instructions for heat, moisture, substrate, installation, care, removal, and warranty before ordering for a high-exposure zone. Category-level guidance cannot replace product-specific documentation.
The validated Stickwoll range includes different styles and constructions, so compare the actual product page and its instructions rather than relying on the category name. You can review the Subway Marble tile option, Dual Ceramics tile option, or Jet Subway tile option after identifying the installation zone.
Use this fit checklist.
Stickwoll fit checklist
Product and exposure
Wall and installation
Rental and future changes
Cost
If several boxes remain unchecked, delay the order until you can answer them. The most expensive backsplash mistake is often purchasing a material before discovering that the wall, appliance, or installation method does not fit.
Frequently Asked Questions
Is peel-and-stick tile good for a kitchen backsplash?
It can be a good kitchen backsplash choice in the right zone and on the right wall. It is often attractive for small projects, renters, first-time DIYers, and homeowners who value a lower-commitment installation. Its suitability depends on the exact product’s heat, moisture, substrate, cleaning, and removal instructions.
A low-exposure counter wall is usually easier to evaluate than the area directly behind a stove. Beside a sink, edge sealing and cleaning matter as much as the tile face. Behind a range, the appliance manual and product instructions must be checked together.
Is peel-and-stick backsplash safe behind a stove?
Do not assume that it is. Some products may be suitable under stated conditions; others may have restrictions around gas cooktops, radiant heat, burner distance, or concentrated exposure.
The checked Aspect Glass guide requires a 24-hour adhesive set period before exposure to a heat source, but that does not establish a universal service rating. The checked Wilsonart decorative acrylic specification excludes its product from certain gas-cooktop uses and sets a stated radiant-heat limit for that product. The exact documents for your product and appliance control.
Is laminate backsplash waterproof?
Do not use “laminate” as a universal waterproof classification. A sheet backsplash may tolerate ordinary kitchen cleaning when installed and sealed correctly, but the face, edges, seams, adhesive, and wall assembly all affect moisture performance.
A sealed perimeter can reduce the chance of moisture reaching the substrate, but it does not make every installation suitable for standing water or continuous wet exposure. Read the exact product instructions and plan the countertop joint carefully.
Which backsplash has fewer seams?
A laminate-style sheet usually has fewer internal joints across a broad wall. Peel-and-stick tile has more visible repeated seams, though those seams can be part of the design.
A sheet still has transitions at the perimeter, corners, outlets, and panel joints. Peel-and-stick tile still needs careful alignment around interruptions. The cleaner-looking result depends on layout and edge treatment as much as on the material category.
Is peel-and-stick backsplash removable without damaging drywall?
It may be removable, but damage-free removal is not guaranteed. Adhesive strength, paint quality, wall preparation, installation duration, heat, humidity, and removal technique all affect the outcome.
Test the exact product first, obtain landlord approval when needed, and plan for possible paint or drywall repair. Keep the removal instructions and spare material.
Which option costs less overall?
Neither option is always less expensive. Peel-and-stick tile may reduce tool and fabrication costs, while laminate-style sheet may reduce repeated seams and piece-by-piece installation on a large uninterrupted wall.
Compare material, waste, preparation, sealants, tools, labor, delivery, repairs, and future removal. Use your measured project dimensions rather than a generic price-per-square-foot comparison.
How do you make the final choice?
Choose peel-and-stick tile when the exact product fits the exposure, the wall is ready, the project benefits from manageable pieces, and future flexibility matters. Choose laminate-style sheet when the exact product fits the exposure, you want fewer internal joints, and you can manage accurate fabrication, handling, adhesive, and edge sealing.
For a rental or short-term style update, peel-and-stick tile may be the practical choice after a test area and approval. For a low-exposure wall in a small kitchen, it can offer a manageable DIY path with a strong visual result.
For a demanding stove zone, neither label is enough. Compare the exact product restrictions with the exact appliance manual. A product that works on a counter wall may not belong directly behind a cooktop.
For a sink wall, focus on the edges. A broad sheet may reduce internal joints, while tile may make localized replacement easier. Both need a sound wall and a properly sealed countertop transition.
For a larger, long-term project, laminate-style sheet can suit a clean, continuous appearance if the wall measurements, cutouts, tools, and installation method are under control. The material may be less forgiving when a large cut goes wrong.
The best next step is to measure the backsplash area, mark the stove and sink zones, identify the appliance model, inspect the wall, and complete the fit checklist. Then review the exact Stickwoll tile specifications, follow the relevant peel-and-stick installation guidance, and compare your complete estimate with the sheet alternative.
If you want more background before deciding, explore the guidance on peel-and-stick backsplash cost and buying factors, self-adhesive backsplash versus conventional surfaces, and seams, preparation, repairs, and removal considerations.


Laisser un commentaire
Ce site est protégé par hCaptcha, et la Politique de confidentialité et les Conditions de service de hCaptcha s’appliquent.