












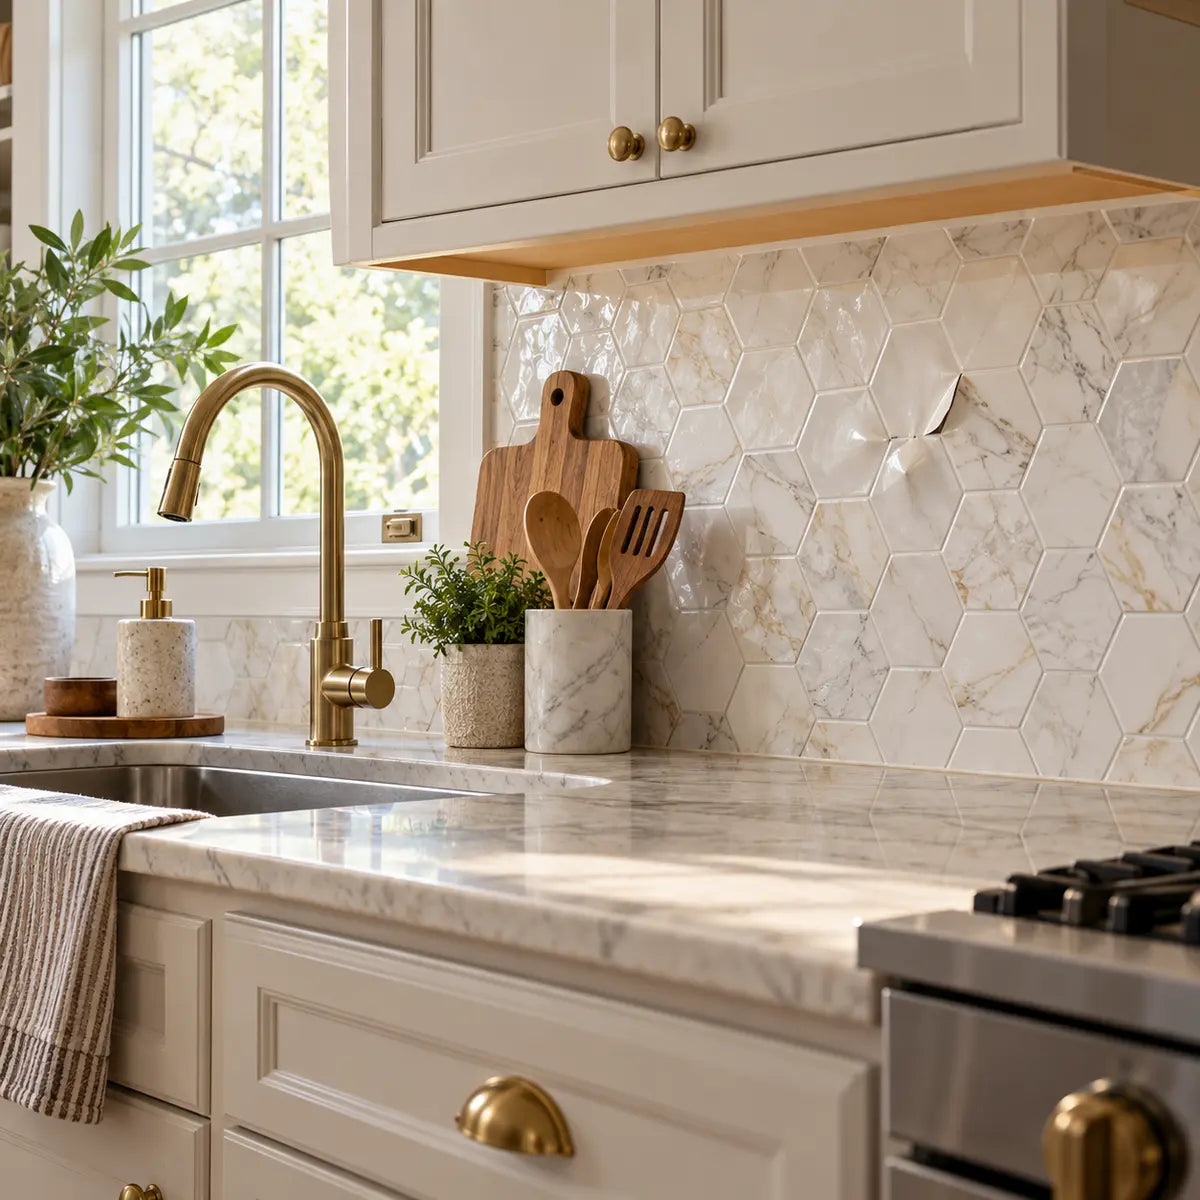
A small, stable air pocket may flatten with controlled pressure, but lifting, creasing, recurring bubbles, broad adhesion failure, or an uneven surface call for a different repair path. Before you press, photograph the raised area, inspect its edges and surrounding surface, and check the installation guidance for the exact tile product.
Avoid puncturing, scraping, aggressive heat, or forceful rubbing as a first response. A visible bubble is a symptom, not proof of trapped air. The raised area may reflect incomplete contact, a dirty or damp substrate, surface texture, tile damage, adhesive failure, or movement below the tile.
This guide gives you a decision path:
- Flatten a small, stable, uncreased bubble when the edges remain firmly attached and the product guidance permits controlled smoothing.
- Carefully lift and reposition a tile when the defect appeared during installation and the tile can still be moved without stretching or damaging it.
- Replace the tile when it is creased, torn, stretched, broadly loose, repeatedly bubbling, or sitting over an uneven or unresolved surface.
- Stop when the tile or substrate begins to show damage, when removal may pull paint or finish, or when the cause of the bubble remains unclear.

What should you do first when peel-and-stick tile has a bubble?
Pause and inspect the raised area before touching it with a tool. Take a close photograph, note whether the bubble is isolated or widespread, and check the tile edges, surface below, and installation age. The safest repair depends on those details.
Start with these observations:
- Size and shape: Is it a small, rounded pocket, a long ridge, a broad dome, or several connected raised areas?
- Location: Is it near an edge, seam, corner, grout line, wall joint, floor dip, appliance, sink, heat source, or wet area?
- Firmness: Does the raised area feel soft and hollow, or does it feel hard because the tile is bending over something underneath?
- Edges: Are the tile edges flat and firmly attached, or are they lifting, curling, or separating?
- Surface condition: Can you see a crease, stretch mark, tear, dent, ridge, grout depression, paint flake, or other irregularity?
- Recurrence: Did the bubble appear immediately, return after pressing, or develop days or weeks after installation?
- Pattern: Is one tile affected, or do several nearby tiles show the same problem?
A small air pocket with sound edges is the only situation where controlled flattening is a reasonable first option. If several tiles are raised in the same area, the surface beneath them may be the more important problem.
Manufacturer installation guidance for comparable peel-and-stick products consistently places the substrate at the center of adhesion: the surface should be suitable for the product, clean, dry, smooth, and stable. WallPops, for example, requires a smooth, dry, clean, firm wall for its checked backsplash products and warns that textured or unclean surfaces may not hold the material. Its floor-tile guidance adds flatness and freedom from grease, wax, oils, heavy texture, loose flooring, and excessive moisture. Those are product-specific requirements, so use them as a model for what to inspect while following the instructions for your own tile. WallPops backsplash installation guidance and WallPops floor-tile installation guidance support those boundaries.
If the tile is newly installed, check the product instructions before pressing. Some products allow repositioning during installation, while others become difficult to correct after pressure and time have established the bond. Smart Tiles states that its Metro Babe tile may be repositioned during installation and becomes permanently affixed after pressure and 48 hours, but that timing applies only to that product. Smart Tiles Metro Babe product information documents that product-specific timing.
A quick decision aid
Choose the description that best matches your tile before you begin.
| What you see or feel | First action | Stop condition |
|---|---|---|
| One small, soft, stable pocket; edges flat; no crease | Try controlled smoothing if the product guidance permits it | Stop if the pocket spreads, the surface wrinkles, or the edges lift |
| Bubble appeared during installation; tile still moves without stretching | Peel back only as far as needed, inspect the surface, and reposition if permitted | Stop if the adhesive tears, contaminates, or the tile loses shape |
| Bubble returns after pressing | Inspect for moisture, dirt, surface texture, movement, or failed adhesion | Stop repeating pressure; address the cause or replace the tile |
| Raised line or hard ridge | Inspect for a crease, debris, grout depression, or substrate defect | Do not press the ridge flat with force |
| Edge or corner lifting | Follow a separate edge-repair or replacement path | Stop if paint, finish, or substrate begins lifting |
| Several bubbles across multiple tiles | Pause installation or repair and inspect the substrate and environment | Do not flatten each tile without addressing the shared cause |
| Tile is torn, stretched, deeply creased, or visibly distorted | Replace it if a compatible tile is available | Stop trying to restore its original shape |
| Tile is over a damp, loose, uneven, or moving surface | Correct the surface condition before reinstalling | Do not trap moisture or movement beneath a new tile |
This table is a practical screening guide, not a universal manufacturer threshold. The checked sources do not define one numerical bubble size or one recurrence count that determines repairability for every peel-and-stick tile. The evidence boundary is reflected in the WallPops installation, removal, and care FAQ.
Why are bubbles forming under peel-and-stick tile?
A bubble forms when part of the tile is not making stable, uniform contact with the surface beneath it. The visible raised area may be trapped air, incomplete contact, adhesive failure, a surface irregularity, contamination, moisture, or tile damage.
An air pocket is a section where the tile bridges over the substrate instead of contacting it. It can occur when air remains beneath the tile during installation or when the tile is pressed down unevenly.
Adhesion failure means the bond between the tile backing and the substrate has weakened or did not form properly. It may show up as lifting, recurring bubbles, loose corners, or a tile that can move after installation.
Lifting is separation at an edge, corner, seam, or larger section of the tile. Lifting often gives you a visible gap rather than a contained pocket.
A crease is a permanent fold or sharp bend in the tile. Pressing a crease flat can stretch the face, distort the pattern, or leave a visible line.
The substrate is the surface receiving the tile: a wall, backsplash, floor, existing tile, painted panel, cement board, vinyl surface, or another approved base. A substrate can look smooth from across the room and still have grout depressions, dust, wax, loose paint, texture, moisture, or movement that affects adhesion.
Trapped air or incomplete contact
A small bubble that appears during installation may be trapped air. If the tile is still flexible, the edges are secure, and the raised area has no crease, controlled smoothing may move the air toward an open edge.
The goal is to improve contact gradually. It is not to crush the tile or force air through the face. General pressure-sensitive adhesive guidance from 3M explains that clean, dry, unified surfaces and firm pressure help increase contact between the adhesive and the substrate. That mechanism supports careful smoothing, but it does not prove that extra pressure can repair a failed bond, wet surface, damaged tile, or uneven substrate. See 3M pressure-sensitive adhesive contact guidance for the general mechanism.
Surface irregularity
A hard ridge beneath the tile is more likely to be debris, a grout depression, a ridge, a loose coating, or another surface defect than a simple air pocket. If you flatten the tile over that obstruction, the tile may remain raised or develop a crease.
Surface texture matters because a self-adhesive backing needs enough real contact with the substrate. A related adhesive-joint experiment found that surface roughness affected peel response differently depending on adhesive thickness and the tested joint conditions. That study used specific laboratory materials and adhesive systems, so it does not establish a roughness limit for household peel-and-stick tile. It does explain why “just press harder” is an unreliable answer when the surface beneath the tile is irregular. See the bounded surface-roughness experiment from the arXiv research record for the tested material context and limitations.
Dirt, grease, wax, or cleaning residue
A tile may appear attached at first and then loosen if the backing contacts dust, grease, wax, soap residue, or an incompatible cleaner. A contaminated surface can prevent full contact from forming.
Do not respond by adding more adhesive over the contaminated area. Extra glue may trap the contamination, create a thicker uneven layer, interfere with the existing adhesive, or make later removal harder. Read when extra adhesive is appropriate for peel-and-stick tile before adding any supplemental product.
Moisture or an unsuitable environment
Moisture can come from cleaning, condensation, a leak, a damp concrete surface, a wet wall, or water entering at an edge. Heat and temperature changes may also affect some products, especially near appliances, radiators, cooktops, sunny windows, or heated floors.
A bubble in a wet area deserves more caution than the same shape in a dry interior wall. First determine whether the surface is dry and whether the product is approved for that location. If moisture remains below the tile, pressing the surface down can conceal the problem while the adhesive continues to lose contact.
Adhesive failure or movement
If the bubble returns after smoothing, the tile may have lost adhesion. The substrate may also be moving, flexing, expanding, contracting, or separating from its own base.
A tile that repeatedly rises is telling you that the original condition has not changed. Repeated pressing can make the face look flatter for a short time without restoring a reliable bond.
Peel behavior also depends on how the material, adhesive, and substrate move together. A study of blistered films on a compliant substrate found that curvature, substrate deformation, contact age, and peel mode affected the apparent adhesion behavior in that tested system. It was an adjacent-material study rather than a peel-and-stick tile test, so use it only for the limited point that lifting and peeling should be controlled and interpreted carefully. See the blistered-film mechanics and peel behavior study for its narrow boundary.

Which bubble repair path fits your tile?
Use the least disruptive path that matches the observable condition. Pressing is appropriate only for a stable, uncreased, isolated pocket with sound edges. Careful lifting is more suitable when the tile is still being installed and can be repositioned. Replacement becomes more reliable when the tile or substrate is damaged.
Choose controlled flattening for a small, stable pocket
Controlled flattening is the first option when all or nearly all of these conditions apply:
- The raised area is isolated rather than spread across several tiles.
- The tile face is smooth and uncreased.
- The edges and corners remain attached.
- The pocket feels soft or hollow rather than hard over a ridge.
- The substrate around the pocket appears smooth, dry, clean, and stable.
- The tile product instructions permit smoothing or firm pressure.
- The bubble does not immediately return after a light test.
There is no universal diameter cutoff for a “small” bubble. Use the condition of the tile and the stability of its edges as the more useful guide.
Choose careful lifting during installation
Lifting may make sense if the tile was just placed, the adhesive has not fully set, and the product guidance permits repositioning. Work slowly from an edge or corner rather than pulling the center of the tile upward.
Some products are intended to be repositioned during installation; others become more permanent after pressure and time. Even manufacturer guidance that permits removal may warn that adhesive can lift paint or leave residue. Do not assume that a renter-friendly product will remove without damage.
For wall products, read how to fix lifting edges on peel-and-stick tiles if the main defect is an edge or corner rather than a central bubble.
Choose replacement when the tile is damaged or the cause is unresolved
Replacement is usually the cleaner path when:
- The tile has a sharp crease.
- The face is stretched, torn, dented, or permanently distorted.
- The same bubble returns after a careful attempt.
- The edges are lifting over a wide area.
- Several tiles show similar defects.
- The tile sits over an uneven surface or visible obstruction.
- The substrate is damp, loose, dirty, heavily textured, or moving.
- Removing the tile would expose a surface that still has not been corrected.
Replacement costs more material and time, but repeated pressing can leave a tile visibly distorted while failing to solve the underlying problem. The right comparison is not “pressing is free and replacement costs money.” It is short-term effort versus the likelihood of a stable result.
Use the single-tile replacement guide when replacement is the selected path.
How do you flatten a small bubble under peel-and-stick tile?
Flatten a small bubble with light, controlled pressure, moving toward an attached edge and reassessing after each pass. Do not begin with a pin, blade, scraper, heat gun, or heavy roller.
Gather compatible tools
For a small isolated bubble, you may need:
- A clean, soft cloth
- A plastic smoother, flexible card, or product-approved smoothing tool
- A clean, dry surface
- A flashlight held at a low angle
- A phone for before-and-after photographs
- A replacement tile or product information nearby in case the repair fails
A plastic scraper made for peel-and-stick tile installation can help apply even pressure if its edge is smooth and the product is compatible. The Scraperoo-R peel-and-stick tile scraper is described for smoothing air bubbles, applying even pressure, aligning tiles, flattening corners, and removing excess adhesive. Use a tool like this with a light hand; the tool description does not establish that every tile finish or substrate can tolerate the same pressure.
Do not use a metal putty knife, utility blade, screwdriver, abrasive pad, or rough-edged card on the tile face.
Prepare the area without adding moisture
Remove loose dust from the tile surface and surrounding area with a soft, dry cloth. If the tile product instructions allow cleaning, follow those instructions and let the surface dry fully before attempting repair.
Do not spray cleaner directly onto the tile or force liquid toward an open edge. Product cleaning requirements vary. For example, the FloorPops instructions checked specify a waiting period after installation and restrictions on detergents, harsh chemicals, bleach, wax, and excessive water. Those instructions apply to FloorPops and should not be treated as a universal rule for every tile.
If you suspect moisture below the tile, stop and investigate the source instead of cleaning the face again.
Mark the bubble and its nearest attached edge
Look across the tile from a low angle. Identify the nearest edge where the tile appears firmly attached. That edge gives displaced air or slack material somewhere to move.
If the bubble is round and centered, begin near one side of the pocket and work gradually toward the nearest sound edge. If the bubble is long, follow its length rather than pressing across it in several directions.
Apply controlled pressure
Place the smoother or clean card flat against the tile. Use short, overlapping passes with light pressure. Keep the tool broad and flat so it does not create a sharp point load.
Work from the raised area toward the attached edge. Pause after each few passes and inspect:
- Has the pocket become smaller?
- Has the tile remained flat and smooth?
- Have the edges stayed attached?
- Has the bubble moved or spread?
- Is the face beginning to wrinkle?
- Does the surface now feel hard over a ridge?
The correct pressure is enough to improve contact without stretching the tile. If you feel the tile shifting, creasing, or resisting because something is underneath, stop increasing force.
For wall products, the checked WallPops guidance calls for firm pressure after alignment and use of a plastic smoother to help adhere the product. Its separate bubble guidance concerns peel-and-stick wallpaper and should not be transferred automatically to every tile construction.
Reassess instead of escalating
A common mistake is to keep pressing until the bubble disappears from view. That can turn a contained defect into a stretched surface, lifted edge, or permanent crease.
After the first controlled attempt, inspect the tile from several angles and leave it undisturbed according to the product instructions. General pressure-sensitive adhesive guidance says bond development depends on pressure, time, temperature, adhesive properties, and surface conditions. 3M gives typical bond-development figures for many pressure-sensitive adhesives, including approximately 50% after 20 minutes, 75% after one hour, 90% after one day, and full bond around 72 hours, but those values are not specific to peel-and-stick tile. See 3M bond-development timing guidance for the general figures and their limitations.
Do not use the 72-hour figure as a promise that a bubble will cure itself. It only explains why a newly installed tile may continue developing its bond after application.

Should you use heat or puncture the bubble?
Neither heat nor puncturing is a universal fix. Use either only when the exact product instructions clearly permit it.
Why uncontrolled heat is risky
Heat may soften some adhesive systems, but tile construction, face material, backing, printed finish, substrate, and nearby surfaces differ. Excess heat can:
- Soften or distort the tile face
- Stretch the tile
- Move or smear adhesive
- Damage paint or finish beneath the tile
- Increase edge lifting
- Affect nearby caulk, trim, laminate, or countertop material
- Create a temperature condition outside the product rating
Smart Tiles lists a maximum stated exposure of 49°C/120°F for the checked Metro Babe product. That is a product limit, not permission to use a hair dryer or heat gun as a bubble-repair method. The checked sources do not validate a general heating procedure for bubbled peel-and-stick tile.
Do not use a heat gun. Do not hold a hair dryer close to the tile unless the exact manufacturer instructions authorize that method and give safe limits. Even gentle heat may be unsuitable for a wall beside a stove, a floor over radiant heat, or a tile with a heat-sensitive finish.
Why puncturing is not a default repair
A pin can release air from some thin film products, but piercing a tile creates a permanent hole. It may expose adhesive, allow moisture to enter, damage the printed finish, affect cleaning, or conflict with the warranty.
WallPops documents a small-pin method for a residual bubble in the product category covered by its FAQ. The guidance does not establish that puncturing is suitable for every peel-and-stick tile, tile thickness, face material, adhesive, or location.
For an unknown tile construction, leave the face intact. Contact the manufacturer or use a replacement tile instead. A tiny hole that is invisible from across the room can still become a dark mark, a dirt trap, or a failure point near water.
When should you stop pressing the tile?
Stop as soon as the evidence points away from a simple air pocket. More pressure is unlikely to solve a defect caused by a ridge, crease, moisture, movement, contamination, or failed adhesion.
Stop if:
- The bubble becomes larger or changes location.
- A second bubble appears.
- The tile edge begins to lift.
- The tile wrinkles or develops a crease.
- The surface feels hard over a point or ridge.
- The tile face begins to stretch.
- The adhesive pulls away in strings or patches.
- The tile will not stay flat after pressure is removed.
- The substrate feels damp or soft.
- Paint, finish, grout, or the underlying surface begins to move.
- You are applying progressively more force without visible improvement.
A useful rule is one controlled attempt, followed by diagnosis. The exact number of passes depends on the product and defect, but repeating an unsuccessful action without changing the condition rarely improves the outcome.
The same principle applies during removal. Adhesive joints can fail in different ways depending on peel angle, surface roughness, adhesive thickness, and failure mode. A laboratory study of adhesive strips found that failure mode changed with peel configuration and that roughness and adhesive thickness affected the tested peel response. The study was performed on specific plastic substrates and silicone adhesive joints, so it does not predict what will happen to your floor or wall. It does support using a slow, controlled peel and observing what is happening rather than pulling quickly. See the adhesive peel failure study and its controlled-removal boundary for the exact experimental context.

How do you remove a bubbled tile carefully?
Remove a tile only after documenting it, protecting the surrounding surface, and checking the product’s removal instructions. The goal is to separate the tile gradually while preserving the substrate and neighboring tiles.
Document the tile before removal
Take photographs of:
- The tile pattern and orientation
- The bubble and any crease
- The surrounding seams
- The substrate after a corner is opened
- The lot, packaging, or product label if available
A replacement may differ slightly in color, print, texture, or sheen if the original tile has aged. Keeping a spare tile or an unused piece can make replacement easier.
Protect nearby surfaces
For a wall, place a clean cloth or protective sheet below the tile. For a floor, protect adjacent tiles from tools and adhesive residue. Keep a flat work area available for the removed tile if you plan to inspect or reuse it.
If the tile is near a painted wall, finished cabinet, countertop, or delicate floor coating, assume removal may affect the surface until proven otherwise. Manufacturer guidance for comparable products warns that strong adhesive can leave residue or lift paint. WallPops also describes product-specific differences between repositionable rolls and more permanent tile formats.
Start from a seam or corner
Follow the product instructions. If they permit a thin flat tool, use a smooth, compatible plastic edge and work at a seam or corner. Keep the tool nearly parallel to the surface. Do not drive it downward.
Lift only a small section, then switch to hand peeling if the tile releases. Pull slowly and close to the substrate rather than sharply away from it. A slow peel gives you time to stop if paint, finish, or surface material begins coming up.
Never force a metal scraper under a bonded tile. Do not pour solvent at the edge. Solvents can soften finishes, stain porous surfaces, spread adhesive, or create a larger cleanup problem.
Inspect what caused the bubble
Once the tile is removed, look for:
- Dust or grit
- Grease or wax
- Moisture
- Loose paint
- Grout depressions
- A ridge or raised spot
- Crumbling or soft substrate
- Adhesive missing from one area
- Adhesive transferred unevenly
- Evidence of movement or cracking
Do not reinstall over a defect you can still see or feel. If the surface needs repair, let the repair materials cure and follow the tile manufacturer’s preparation requirements before applying another tile.
Test the surface before replacing the tile
The substrate should be flat enough for the product, clean, dry, stable, and approved for the intended location. For existing tile, inspect grout lines and depressions carefully. Peel-and-stick products can bridge shallow gaps visually while still losing contact in the recessed area.
Use the existing-tile compatibility guide if you are installing over ceramic, porcelain, vinyl, or another tile surface.
If the area is a wall, compare the room and surface conditions with this peel-and-stick wall tile screening guide. It covers smoothness, stability, contamination, moisture, heat, grout depressions, direct-water exposure, and product approval for the intended location.
When is replacement more reliable than repair?
Replace the tile when the tile itself has lost its shape or when the substrate has not been made suitable. Pressing can improve contact; it cannot restore a stretched face, remove a crease, flatten a ridge beneath the tile, or solve recurring moisture.
Replacement is the stronger choice when the problem is visible damage:
- A sharp crease remains after the tile is released.
- The pattern is stretched or distorted.
- The tile has a puncture, tear, or cut.
- The backing has folded or separated.
- Adhesive has collected in ridges.
- The tile no longer lies flat without force.
Replacement is also the stronger choice when the problem repeats:
- The same bubble returns after controlled smoothing.
- Several tiles lift in the same area.
- The tile rises after temperature or moisture changes.
- The edges continue to curl.
- The tile sounds hollow across a broad area.
- The surface below is uneven or unstable.
A replacement is not automatically successful. If you install a new tile over the same contaminated, damp, rough, or moving surface, the new tile may develop the same defect.
Before opening a replacement tile, compare its size, pattern, sheen, and direction with the existing installation. Dry-fit it without removing the backing. Confirm that seams align and that the replacement does not need trimming that could expose an edge.
If you do not have a matching spare, contact the seller or manufacturer with the product name, pattern, purchase date, and photographs. Avoid replacing one tile with a visually similar product unless you accept a difference in color or texture.

How can you prevent bubbles under peel-and-stick tile?
Preventing bubbles starts with substrate preparation and installation control, not with stronger post-installation pressure. The tile needs full, even contact with a surface that is appropriate for the product.
Prepare the substrate
Before installation, verify that the surface is:
- Clean of dust, grease, wax, soap residue, and loose material
- Dry
- Smooth enough for the product
- Flat and stable
- Firmly attached to its own base
- Free of loose paint, peeling coating, and raised debris
- Suitable for the room’s moisture and temperature conditions
Do not assume that a surface is ready because it looks clean. Run your hand across it under a bright side light. A small ridge or flake can create a visible defect beneath a thin tile.
For walls, correct dampness before installation. For floors, check for loose boards, uneven flooring, excessive texture, radiant heat restrictions, and concrete moisture requirements in the product instructions. The checked FloorPops guidance specifically calls for clean, smooth, flat, dry, grease-free surfaces and restricts installation over several unsuitable conditions.
Acclimate the material if required
Some products require the tile package to rest in the installation room before application. The FloorPops instructions checked specify laying the package flat and allowing 48 hours of acclimation at a room temperature of at least 65°F/18°C. This is a product instruction, not proof that acclimation will flatten a post-installation bubble or guarantee adhesion for another tile.
Follow the exact product instructions for temperature, storage, package position, and installation timing.
Plan the layout before exposing adhesive
Dry-fit the tiles and confirm the starting line, seams, corners, outlets, fixtures, and cuts. Repositioning is easier before the adhesive is pressed firmly.
Avoid exposing a large area of adhesive while you are still deciding where the tile belongs. Dust and accidental contact can contaminate the backing.
Apply from the center toward the edges
Place the tile carefully, then smooth it gradually from the center toward the edges when the product instructions describe that approach. Keep your hand, smoother, or roller flat.
Do not slide a tile across the substrate after the adhesive makes contact unless the product specifically permits repositioning. Sliding can move adhesive unevenly and distort the tile.
For floor tile, use only the roller or pressure method the product approves. A 75-to-100-pound roller is specified for the FloorPops product checked, but that does not authorize a heavy roller on wall tile, decorative panels, thin vinyl, or an unknown product.
Control cleaning and moisture after installation
Protect newly installed tile from unnecessary water, harsh cleaners, and heavy use during the product’s stated setting period. Follow the product care instructions rather than applying a generic cleaning schedule.
A tile that has just been installed may look flat while its adhesive continues developing contact. Give it the time and conditions specified by the manufacturer, but do not treat waiting as a repair for a bubble that remains or returns.
For a broader planning reference, use the peel-and-stick tile guide and the installation and care guide before beginning a new installation.
Should you add glue beneath a bubbled tile?
Do not add glue automatically. Extra adhesive changes the thickness, chemistry, and removal behavior of the installation, and it may conceal the actual cause of the bubble.
Consider supplemental adhesive only if:
- The exact tile manufacturer permits it.
- The substrate is prepared and dry.
- The adhesive is approved for that tile and surface.
- The installation location is suitable.
- The added product will not interfere with future removal or the warranty.
If the tile is dirty, creased, stretched, or over an uneven substrate, extra adhesive does not correct those conditions. It may make removal more difficult and spread beyond the repair area.
What should you do if several tiles have bubbles?
Pause and inspect the shared conditions before repairing individual tiles. Multiple raised tiles often point to a common installation or substrate issue.
Look for:
- A damp wall or floor
- A leak, condensation, or cleaning water
- Grease or wax across the installation area
- Heavy texture or grout depressions
- Loose flooring or wall panels
- Temperature exposure
- Tiles installed before acclimation
- A batch or backing problem
- Adhesive contamination during installation
Photograph the full area and a close-up of each defect. Note when the bubbles appeared and whether they grow or shrink with environmental changes.
Repairing one tile may be reasonable as a test, but do not flatten an entire group without understanding the shared cause. If one tile is repaired and the same pattern returns, treat that result as evidence that the problem is broader than trapped air.
Is a bubbled tile safe to leave in place?
A small, stable bubble may remain a cosmetic defect, but a raised tile should not be ignored when it creates a trip point, catches water, spreads, or reflects a damp or unstable substrate.
On a wall, a central bubble may be primarily a visual concern if the tile is not near water or heat. On a floor, a raised edge or corner can catch footwear, cleaning tools, or furniture legs. A broad floor bubble can also indicate that the surface below is unsuitable or that the tile is losing adhesion.
Do not cover a raised floor tile with a rug as a permanent repair. Do not caulk around a lifting tile to hide the edge unless the product guidance specifically supports that detail. Sealing an edge may trap moisture or make later removal harder.
Replacement-readiness checklist
Use this checklist before removing or replacing a tile. If several answers are “no,” pause and correct the preparation before proceeding.
If the tile is part of a rental property, photograph the condition before removal and consider testing an inconspicuous area first. Strong adhesive can remove paint or leave residue, and no general method can guarantee damage-free removal.
Frequently Asked Questions
Can you fix bubbles under peel-and-stick tile without removing the tile?
Sometimes. A small, stable, uncreased pocket with firmly attached edges may respond to controlled smoothing. Use a broad, smooth tool and move pressure toward an attached edge. Stop if the bubble spreads, the tile wrinkles, the edge lifts, or the pocket returns.
A bubble caused by a crease, hard debris, moisture, surface movement, or failed adhesion usually needs a different response.
Is the raised area a small trapped-air pocket or a larger adhesion problem?
You cannot confirm the cause from appearance alone, but observable clues can guide the next step.
A small, soft, isolated pocket with sound edges is more suitable for a cautious flattening attempt. A hard ridge, lifting edge, recurring bubble, broad raised area, or group of bubbles points toward a substrate or adhesion issue. Treat those clues as a decision guide rather than a definitive diagnosis.
Should you poke a bubble with a pin?
Only if the exact product instructions permit it. A WallPops FAQ documents a small-pin method for a residual bubble in the product category it covers, but that guidance does not apply automatically to every peel-and-stick tile.
For an unknown tile, keep the face intact and choose controlled smoothing, careful removal, or replacement.
Can a hair dryer flatten a bubbled peel-and-stick tile?
Do not use heat as a universal remedy. Heat tolerance varies by tile construction, adhesive, substrate, and location. The checked sources include product-specific heat limits, but they do not validate a general hair-dryer or heat-gun repair method.
Use heat during removal only when the exact product instructions authorize it and provide safe conditions.
How long should you wait before deciding whether a repair worked?
Follow the product’s setting and care instructions. General pressure-sensitive adhesive guidance says bond development can continue over time, but typical timing figures for general adhesives do not establish a cure period for your tile.
Inspect the repair after the product’s stated setting period and after normal room conditions return. If the bubble returns, stop repeating pressure and investigate the substrate, moisture, tile condition, and adhesive contact.
Should you replace one bubbled tile or the whole section?
Replace one tile when the problem is isolated and the surrounding tiles are flat, secure, and visually consistent. Consider a broader repair when several tiles share the same defect or the substrate beneath them is unsuitable.
Replacing one tile over an unresolved surface problem may produce the same bubble again.
What if removing the tile damages the paint?
Stop pulling and assess the surface. Do not switch immediately to a metal scraper or solvent. Strong adhesive can lift paint or leave residue, especially on fragile, painted, or poorly bonded surfaces.
If the surface is a rental wall or a finished floor, use a product-specific removal procedure and test in an inconspicuous area before continuing.
Can extra adhesive permanently fix a tile that is not sticking properly?
Not automatically. Extra adhesive may help only when the exact product and substrate instructions approve it. It will not correct a crease, contaminated surface, moisture, movement, or an uneven base.
Inspect the tile and substrate first, then compare supplemental adhesive with careful replacement. The extra-adhesive decision guide can help with that comparison.
Final decision: flatten, lift, replace, or stop
A small, stable, uncreased bubble with secure edges is the best candidate for controlled flattening. Use light pressure, a smooth compatible tool, and a gradual path toward an attached edge.
Carefully lift and reposition a tile only when the product guidance permits it and the tile can move without stretching, creasing, or damaging the substrate. Replace the tile when it is distorted, damaged, repeatedly bubbling, or sitting over an unresolved surface problem.
Stop when the tile, adhesive, paint, finish, or substrate begins to fail. The safest repair is the one that solves the cause while preserving the surrounding surface. Before starting, review the installation and care guidance, document the defect, and keep a compatible replacement available if pressing does not produce a stable result.


Laisser un commentaire
Ce site est protégé par hCaptcha, et la Politique de confidentialité et les Conditions de service de hCaptcha s’appliquent.