
















Renter-safe removal guide
Your move-out inspection is a few days away. The peel-and-stick backsplash that made the kitchen feel finished is still attached to painted drywall, and now every corner looks like a possible paint-peeling disaster.
The safest goal is not the fastest removal. It is the lowest reasonable Wall Damage Risk Score: less force, controlled warmth, a shallow peel, a soft scraper, and a cleaning method that becomes stronger only when the wall proves it can tolerate it.
To remove peel-and-stick tile without unnecessary wall damage, warm each tile first with a hair dryer, lift one corner with a plastic putty knife, and peel slowly at a low angle while reheating the adhesive as needed. Clean remaining residue with the mildest method first, test every adhesive remover in a hidden spot, and stop immediately if paint or drywall paper starts lifting.
This guide covers the complete process:
- How to remove peel-and-stick tile from a painted wall
- When to use a hair dryer instead of a heat gun
- How to remove peel-and-stick tile adhesive without aggressive scraping
- How to choose between dish soap, rubbing alcohol, citrus remover, Goo Gone, and mineral spirits
- What to do if paint peels or drywall paper tears
- How to document the wall before a landlord or property manager inspection
The method below is intentionally cautious. Manufacturer instructions support warming and slow release for some peel-and-stick tile products, but they do not guarantee damage-free removal on every painted wall. Smart Tiles, Aspect, and WallPops all place limits around the installation surface, product type, or possibility of paint damage. Smart Tiles removal guidance
What is the safest way to remove peel-and-stick tile?
The safest default sequence is:
- Inspect the tile, paint, and wall substrate.
- Photograph the area before beginning.
- Warm one tile at a time.
- Lift a corner with a plastic putty knife.
- Peel slowly at a low angle.
- Reheat whenever the adhesive resists.
- Remove residue with dry rubbing or warm soapy water.
- Spot-test any solvent before using it on visible paint.
- Inspect the wall after each small section.
- Stop if paint, primer, or drywall paper begins to move.
This is a force-minimized process. The tile may come off quickly in one area and painfully slowly in another because adhesive age, wall paint, humidity, pressure during installation, and the tile’s backing all affect the bond.
The central rule is simple: heat before force. Do not begin by pulling hard, sliding a metal scraper under the tile, or attacking the wall with a strong solvent. Those shortcuts can turn a removable decorating project into a paint or drywall repair.
For a broader move-out plan, use this renter-friendly tile guide before you begin. It covers wall condition, lease considerations, photographs, and preparation for temporary decor changes.

Why does heat help peel-and-stick tile removal?
Heat can soften pressure-sensitive adhesive, making the tile easier to release with less pulling force. Pressure-sensitive adhesive is a sticky bonding material that forms a grip when pressed against a surface; warmth can make that adhesive more flexible and less resistant to peeling.
Smart Tiles instructs users to warm an installed tile with a hair dryer, pull gently from a corner, and clean excess glue afterward. Aspect gives similar guidance for its Stone and Brick backsplash tile, while warning that the adhesive is not engineered for removal and that wall damage is possible. Aspect tile removal instructions
The practical implication is more important than the theory: warming gives you a chance to reduce force, but it does not make the wall damage-proof.
Cold adhesive may resist suddenly. When you pull harder, the force can transfer into weak paint, loose primer, or the paper face of drywall. A slower release gives you more time to notice a change in the wall before a large section lifts.
A National Institute of Standards and Technology experiment on one pressure-sensitive tape bonded to stainless steel found that peel force increased across the tested peel rates. That experiment did not test peel-and-stick tile, painted drywall, a hair dryer, or a heat gun, so it cannot establish a numerical wall-damage reduction for this project. It does support treating sudden, fast pulling as a poor default for a sensitive surface. NIST pressure-sensitive adhesive peel experiment
Heat is a control tool, not a temperature target
Do not chase a specific wall temperature. The supplied manufacturer instructions do not establish a safe painted-drywall temperature range, and household hair dryers vary widely.
Use these practical controls instead:
- Keep the hair dryer moving rather than holding it over one point.
- Warm only the tile section you are about to peel.
- Start with the lowest heat setting that makes the adhesive more flexible.
- Keep the nozzle several inches from the surface.
- Use short heating passes, then test the corner by hand.
- Stop if paint becomes soft, glossy, blistered, discolored, or unusually tacky.
- Never apply rubbing alcohol or another flammable cleaner while a heat source is operating nearby.
A hair dryer is the preferred starting tool because it is easier to control for a beginner. A heat gun can produce much more heat and can damage paint, soften plastic tile, scorch a surface, or create a fire hazard if held too close or left in one place.
Hair dryer or heat gun: which should you use?
For painted drywall and renter-focused removal, start with a hair dryer. A heat gun should be treated as an advanced option, not the normal first step.
| Tool | Best use | Main advantage | Main risk | Renter-safe default |
|---|---|---|---|---|
| Hair dryer | Painted wall, small backsplash, beginner removal | Easier to control and less aggressive | May require patience and repeated heating | Yes |
| Heat gun | Stubborn adhesive after testing and careful control | Delivers stronger, concentrated heat | Can soften paint, plastic, or drywall compounds quickly | Usually no |
| Plastic putty knife | Lifting an edge and supporting the peel | Less likely to gouge than metal | Can still damage paint if forced | Yes |
| Metal scraper | Heavy residue on a hard, undamaged surface | Strong edge | Can cut paint or drywall paper | Avoid on painted drywall |
The correct hair dryer technique is a repeated cycle: warm, test, lift, peel a short distance, warm again, and continue. If the tile only moves when you pull hard, the answer is usually more controlled warmth or a different starting edge, not more strength.
WallPops distinguishes between its removable roll backsplash and stronger-adhering tile-form products. Its guidance warns that removing the tile-form product may lift some wall paint. That distinction matters because “peel-and-stick” describes an installation category, not one universal adhesive behavior. WallPops backsplash removal guidance
What tools do you need for renter-friendly removal?
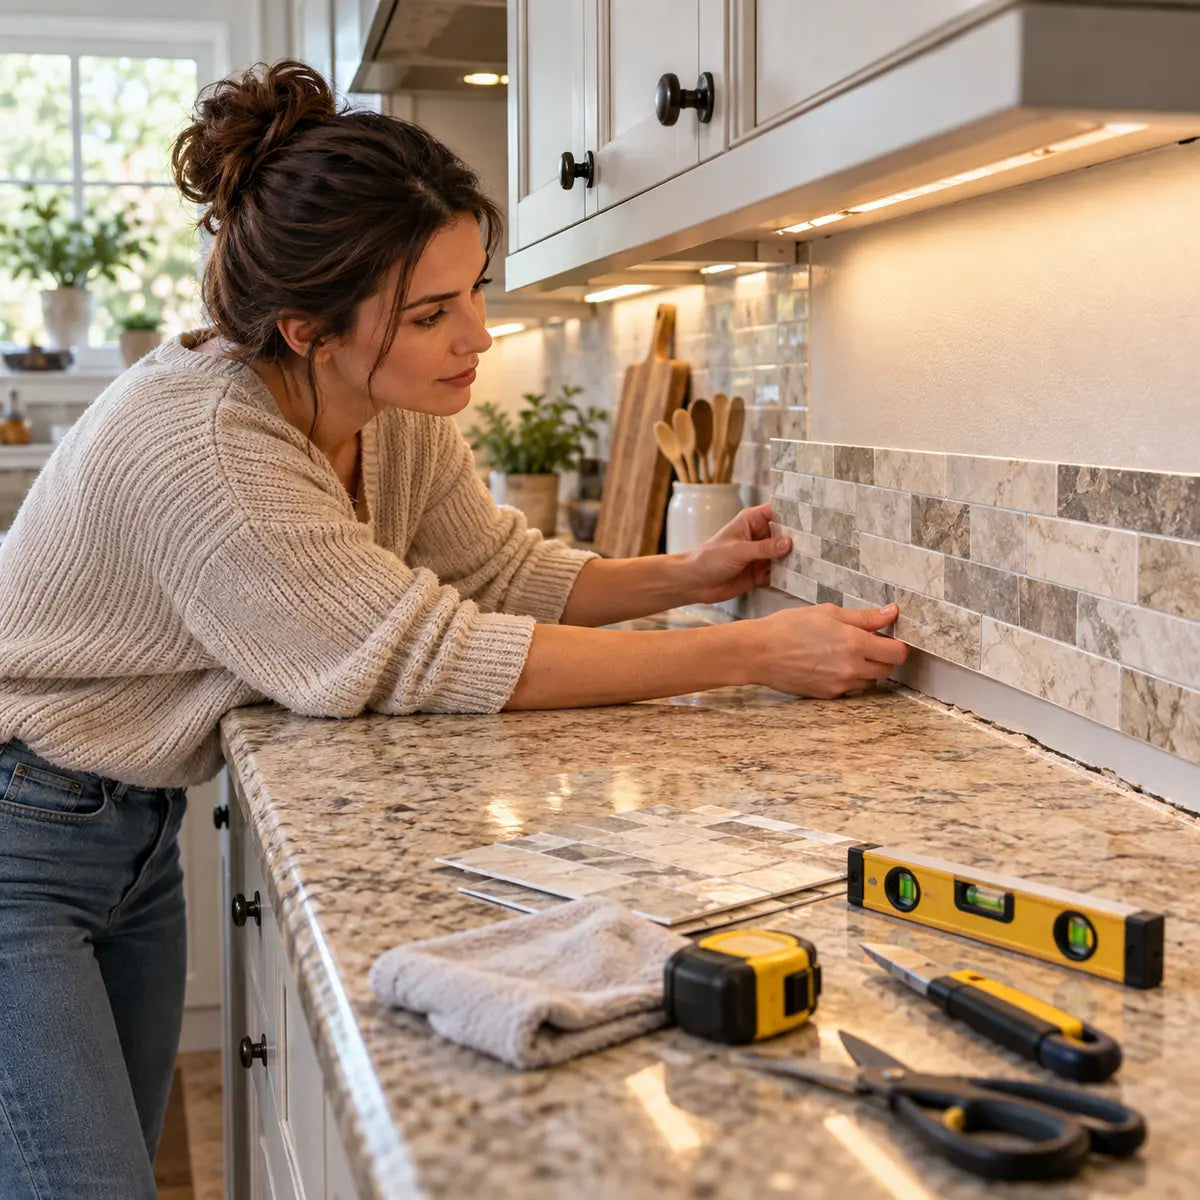
You do not need a large tool collection. The best setup is small, clean, and easy to control.
Essential tools
- Hair dryer with low and medium settings
- Plastic putty knife or plastic scraper
- Microfiber cloths
- Warm water and a small amount of dish soap
- Painter’s tape
- Nitrile or household cleaning gloves
- Drop cloth, towel, or cardboard to protect the counter
- Small bowl for cleaning solution
- Flashlight for inspecting paint edges and drywall paper
- Phone or camera for before-and-after photographs
Optional tools
- Manufacturer-approved adhesive remover
- Cotton swabs for hidden-area testing
- Plastic card with a flexible edge
- Small fan for ventilation when using a labeled solvent
- Matching touch-up paint, only after the wall is fully clean and dry
A plastic scraper should have a clean, rounded edge. Do not use a damaged scraper with a sharp burr. Avoid utility blades, metal putty knives, and sandpaper on painted drywall unless you are already performing a controlled repair and understand the surface risks.
Before starting, place painter’s tape along an adjacent edge if a cabinet, trim piece, or finished surface could be rubbed by the scraper. The tape is not a substitute for care, but it can help keep the tool from drifting into a nearby surface.
For store guidance on warming and gentle peeling, see the Installation & Care Guide. It provides the same basic caution: warm the tile and peel gently from a corner, without promising damage-free removal.

How do you remove peel-and-stick tile from painted drywall?
Begin at a corner, seam, or exposed edge rather than cutting through the face of the tile. The goal is to separate the tile from the adhesive layer while keeping your tool against the tile, not the wall.
Inspect and photograph the wall
Look for:
- Existing paint chips
- Loose or bubbling paint
- Cracks in drywall compound
- Soft or swollen drywall
- Previous patches
- Glossy or poorly bonded paint
- Tile edges that overlap trim or caulk
- Areas where the adhesive appears unusually dark or wet
Photograph the wall before removal, including a wider room view and close-ups of existing defects. This creates a record of the wall’s starting condition. It does not guarantee a deposit outcome, but it helps separate pre-existing damage from changes made during removal.
If your building was constructed before 1978 and the work may disturb old paint, pause before scraping, sanding, or creating dust. EPA guidance warns that renovation or repair work disturbing paint in pre-1978 housing can create hazardous lead dust and recommends determining whether lead-based paint is present before work. EPA lead-safe renovation guidance
Choose a small test tile
Do not begin in the most visible part of the backsplash. Choose a corner tile or an area that is easy to inspect. You are learning how the adhesive and paint behave together.
Warm the tile with the hair dryer, moving the airflow continuously. After a short pass, try to lift the corner with your fingernail or the rounded edge of a plastic putty knife.
If the paint begins to lift with the tile, stop. More heat may not solve the problem. The wall may have weak paint adhesion, or the adhesive may be stronger than the paint bond.
Lift the corner without digging into the wall
Hold the plastic putty knife nearly parallel to the wall. Slide it only far enough to create a starting flap. Do not lever the tool sharply against the drywall.
Once you have a small corner, put the scraper down and use your fingers. A tool is useful for starting the edge; it is not a reason to push deeper into the wall.
Peel slowly and at a shallow angle
Pull the tile back across itself rather than straight away from the wall. Keep the peel close to the surface, with the tile folding back toward the area it has already left.
This is a conditional technique, not a tested guarantee. The supplied evidence does not establish that one exact angle universally prevents paint loss. It is still a sensible control because it keeps you from yanking the tile directly outward and gives you a better view of the surface as the bond releases.
Use short pulls. If the tile stops, warm the next section rather than increasing force.
Reheat the adhesive as needed
A common mistake is warming the first inch and then trying to pull the entire tile cold. Adhesive can cool quickly, especially on a cold wall or near an open window.
Work in sections:
- Warm the next few inches.
- Peel slowly until resistance increases.
- Pause and inspect the paint line.
- Reheat the remaining bonded area.
- Continue only while the wall surface remains stable.
If the tile face begins to stretch, crack, or separate from its backing, switch to shorter pulls. The goal is to keep the tile intact enough to control the release.
Remove remaining tiles in manageable sections
Once you understand the wall’s response, continue one tile at a time. Do not pull a connected group of tiles together unless they release with almost no resistance. A larger sheet can transfer more force across a wider area and make it harder to see where paint is beginning to lift.
The slow approach may feel inefficient, especially when you are close to a move-out deadline. It is still usually easier to clean one controlled section than to repair a large peeled area.
Which wall surfaces are highest risk?
The wall substrate matters as much as the tile adhesive. Drywall is a gypsum panel covered with a paper face. If that paper tears, the problem is more serious than a little leftover glue because the finished surface has been opened.
USG’s gypsum-panel guide treats torn face paper as a repair condition: loose paper is removed, the area is skimmed with joint compound, allowed to dry, sanded, and primed. The guide does not quantify how often tile removal causes this damage, but it confirms that torn paper requires a repair sequence rather than ordinary wiping. USG gypsum-panel repair guide
| Surface condition | Risk level | What to do |
|---|---|---|
| Sound, recently painted drywall | Moderate | Test one small tile first; use a hair dryer and slow peel |
| Older matte paint with visible wear | High | Use very small sections and inspect after every pull |
| Glossy or oil-painted wall | Variable | Test carefully; paint adhesion may differ from the surrounding wall |
| Previously patched drywall | High | Avoid force near patch edges and joints |
| Soft, swollen, or damp drywall | Very high | Stop and ask the property owner or a qualified repair professional |
| Exposed drywall paper | Very high | Do not apply solvent; stop and repair or report the damage |
| Hard, sealed nonporous surface | Often lower, but product-dependent | Follow the tile manufacturer’s instructions and still test first |
| Old plaster | Separate concern | Do not transfer drywall advice without assessing the plaster |
For surface-specific context, compare the discussion in Installing Stick Tiles on Painted Walls and We Tested Glossy Oil Paint: Peel-and-Stick Prep Guide. Those resources can help you think through wall condition before removal, but they do not guarantee that a particular method will preserve paint.
How do you remove peel-and-stick tile adhesive from a wall?
Remove adhesive residue from mild to stronger methods:
- Dry microfiber rubbing
- Gentle warmth
- Warm water with a small amount of dish soap
- A hidden-area test with rubbing alcohol
- A hidden-area test with a labeled adhesive remover
- Stop before using a stronger solvent unless the product label and wall condition support it
The best residue method is the one that removes enough adhesive without changing the paint. There is no validated numerical Residue Removal Efficiency Ratio for these products on comparable painted drywall, so treat the ladder below as a risk-control framework rather than a measured ranking.
Start with dry rubbing
If the residue is thin and rubbery, rub it gently with a clean microfiber cloth or use a soft plastic card. Roll the adhesive into small pieces rather than grinding it into the paint.
Do not rub until the paint becomes warm, shiny, or visibly different. Abrasion can damage a wall even when no chemical is involved.
Try warm soapy water
Mix warm water with a small amount of dish soap. Dampen a microfiber cloth, wring it nearly dry, and work on a small patch. Do not saturate drywall.
After wiping, use a second cloth lightly dampened with clean water, then dry the area. Excess water can soften joint compound, enter seams, or leave marks on porous surfaces.
Test rubbing alcohol only after the mild methods
Rubbing alcohol may loosen some adhesive films, but it can also affect paint depending on the coating and formulation. Test it in a hidden location, such as behind an appliance or beneath a cabinet edge.
Use a small amount on a cotton swab or cloth. Do not pour it onto the wall. Keep the area ventilated and away from heat sources. NIOSH lists a 53°F flash point for isopropyl alcohol; the exact behavior of a diluted household rubbing-alcohol product can differ, but the ignition precaution still matters. NIOSH isopropyl alcohol hazard reference
Never use alcohol while a hair dryer or heat gun is operating. Let the wall dry completely before applying heat again.

Which adhesive remover is safest for painted walls?
No adhesive remover should be treated as automatically safe for painted drywall. Read the label, test a hidden area, use the smallest amount practical, and stop if the paint changes.
| Cleaner or solvent | Paint-risk guidance | Odor and ventilation | Best use |
|---|---|---|---|
| Dish soap and warm water | Lowest starting risk when used with a nearly dry cloth | Low odor; normal ventilation | Light residue and final cleaning |
| Rubbing alcohol | Variable; test first and avoid exposed drywall | Noticeable odor; keep away from ignition sources | Small adhesive spots on sound, tested paint |
| Citrus adhesive remover | Product-dependent; test first | Often noticeable odor; follow label ventilation guidance | Stubborn residue on intact painted surfaces if the label allows it |
| Goo Gone-type product | The exact label controls; Goo Gone Original lists painted surfaces, requires a pre-test, and excludes drywall | Use ventilation and follow label precautions | Tested residue on intact painted surfaces, never exposed drywall |
| Mineral spirits | Not a standard recommendation for painted drywall residue | Stronger solvent odor; ventilation and label precautions required | Only a product-specific use case supported by the label and wall condition |
Goo Gone Original’s label lists painted surfaces among suitable surfaces, requires an inconspicuous pre-test, and says not to use the product on drywall. That means it should never be applied to exposed, torn, or unpainted drywall, even if the surrounding wall is painted. Goo Gone Original label directions
The related Goo Gone safety data sheet warns about breathing mist or vapor and identifies skin-sensitization and aspiration hazards. “Citrus” does not mean free of handling precautions. Goo Gone adhesive remover safety data sheet
Klean-Strip describes its odorless mineral spirits as a solvent for oil-based paint, stain, varnish, and equipment cleanup. The checked product page does not recommend it as a treatment for adhesive residue on painted drywall. Do not make mineral spirits your routine final step based on the name “odorless.” Klean-Strip mineral spirits product guidance
EPA advises increasing ventilation, following product labels, and avoiding mixtures when using household products that emit volatile organic compounds. An open window is helpful, but it does not make every solvent suitable for every room or wall coating. EPA indoor VOC safety guidance
For a product-focused follow-up, read How to Remove Peel and Stick Tile Without Removing Paint before choosing a commercial remover. Use it as additional practical guidance, then verify the label for the exact product in your hand.
What should you do if paint starts peeling?
Stop immediately when paint lifts, wrinkles, or changes sheen. Do not pull through the damaged area to “finish the tile.”
First, hold the tile in place and inspect the edge. If the paint is attached to the tile, lowering the pulling force may allow the paint to settle back, but do not assume it will reattach. If the paint has clearly separated, stop and photograph the area.
Then:
- Do not use more heat to chase the tile off.
- Do not scrape the lifted paint flat with a metal tool.
- Do not apply adhesive remover to the exposed area.
- Do not sand unknown or potentially lead-containing paint.
- Notify the property manager if the damage is substantial or the lease requires reporting.
- Keep any loose paint chips contained and clean the area according to applicable safety guidance.
A small paint chip on a sound wall is different from a broad area of peeled paint, exposed primer, or torn paper. The repair approach depends on the depth and size of the damage, and a renter should check the lease before making a cosmetic repair that could create a color mismatch.
What should you do if drywall paper tears?
If the brown or tan paper face of the drywall lifts, stop using solvents and stop scraping. Exposed drywall paper is porous and fragile. Wet cleaners can make it swell, while more scraping can enlarge the tear.
For a small, stable tear, the general repair sequence described by USG is to remove loose paper, apply joint compound, allow it to dry, sand, and prime. That is a repair process, not part of residue cleaning. If the tear is large, soft, damp, or near a seam, ask the property owner or a qualified repair professional how they want it handled.
Do not hide torn drywall paper under adhesive remover or a fresh layer of paint. A rushed cover-up can make the repair more visible and may leave the wall in worse condition for the next occupant.
For repair-specific preparation, see How to Repair Paint After Removable Wallpaper or Tile. Its plaster-specific advice should not be applied automatically to drywall, so use it mainly to understand why fragile wall surfaces need a different stopping point.

How can you protect your security deposit before move-out?
Protecting a deposit begins before the last tile comes off. Check the lease, photograph the original condition, and give yourself enough time to respond if the wall needs repair.
Your lease may define removable improvements, required notice, approved repairs, or inspection procedures. State and local deposit rules also vary. In New York City, housing guidance describes a tenant’s right to request a pre-vacating inspection, an opportunity to cure identified conditions before the tenancy ends, and an itemized statement for damage deductions generally within 14 days after vacating. That guidance applies to New York City and should not be treated as a nationwide rule. New York City tenant inspection guidance
Use this move-out checklist:
- Review the lease and any written permission for temporary tile.
- Photograph the wall before removal.
- Record existing chips, cracks, stains, and patches.
- Test one tile in a low-visibility area.
- Keep the hair dryer, plastic scraper, and cleaning cloths together.
- Remove tile slowly, one section at a time.
- Photograph any paint or drywall change immediately.
- Let cleaned areas dry before judging the final appearance.
- Do not apply touch-up paint until residue and cleaner are gone.
- Match paint only after the wall is dry and stable.
- Request a pre-move-out inspection if your local rules or lease provide for one.
- Keep receipts for approved supplies or professional repairs.
- Photograph the completed wall in good light.
You can also review The Deposit Defense: Safe Stickwoll Removal Guide for a move-out-focused inspection sequence. Its damage-free promise should not be treated as a guarantee, but the checklist structure can help you organize the work.
Frequently Asked Questions
Can you remove peel-and-stick tile without damaging paint?
Sometimes, but no method guarantees it. The result depends on the tile adhesive, installation age, wall preparation, paint adhesion, substrate, and how the tile was installed. Use heat before force, test a small area, peel slowly, and stop when the wall surface changes.
Is a hair dryer safer than a heat gun for painted drywall?
A hair dryer is the better starting tool because it is easier to control and less aggressive. A heat gun can generate much more heat and may soften or damage paint, plastic tile, or drywall compound. If you use any heat source, keep it moving and never combine it with flammable cleaner on the work surface.
How do you remove sticky tile residue from walls?
Start with dry microfiber rubbing, then try a nearly dry cloth with warm soapy water. If residue remains, test rubbing alcohol or a labeled adhesive remover in a hidden spot. Never apply a solvent to exposed drywall paper, and do not assume products with similar names have the same wall instructions.
Can you use Goo Gone on painted drywall?
The checked Goo Gone Original label lists painted surfaces as suitable with a pre-test but explicitly excludes drywall. Treat that distinction literally: do not use it on exposed, torn, or unpainted drywall. Test a small hidden section of intact paint first and follow the product label.
What if the tile will not come off?
Stop pulling harder. Warm a small section, try a different exposed edge, and use a plastic putty knife only to start the corner. If the paint begins to lift or the drywall feels soft, stop and contact the property manager or a qualified repair professional.
Final Thoughts
The safest way to remove peel-and-stick tile is controlled and unglamorous: heat first, peel slowly, scrape gently, clean residue from mild to stronger methods, and stop when the wall changes.
A hair dryer is usually the right first tool. A plastic putty knife is safer than a metal scraper for starting an edge, but it can still cause damage if forced. Dish soap and warm water belong earlier in the residue process than alcohol or commercial adhesive removers. Mineral spirits should not be treated as a routine painted-drywall solution.
There is no validated numerical Wall Damage Risk Score or Security Deposit Preservation Index for this job, so use those ideas as decision checks rather than promises. Ask whether the next action will reduce force, preserve the paint surface, and leave you enough time to inspect and repair the wall before move-out.
For a temporary tile option, review the Rock Subway peel-and-stick tile listing and follow its surface-preparation guidance before installation. The best renter outcome starts before the tile goes up: photograph the wall, understand the lease, test a small area, and plan the eventual removal before committing to the full backsplash.


Laisser un commentaire
Ce site est protégé par hCaptcha, et la Politique de confidentialité et les Conditions de service de hCaptcha s’appliquent.