


Vous manquez de temps ? Voici la conclusion définitive de notre test approfondi sur mur :
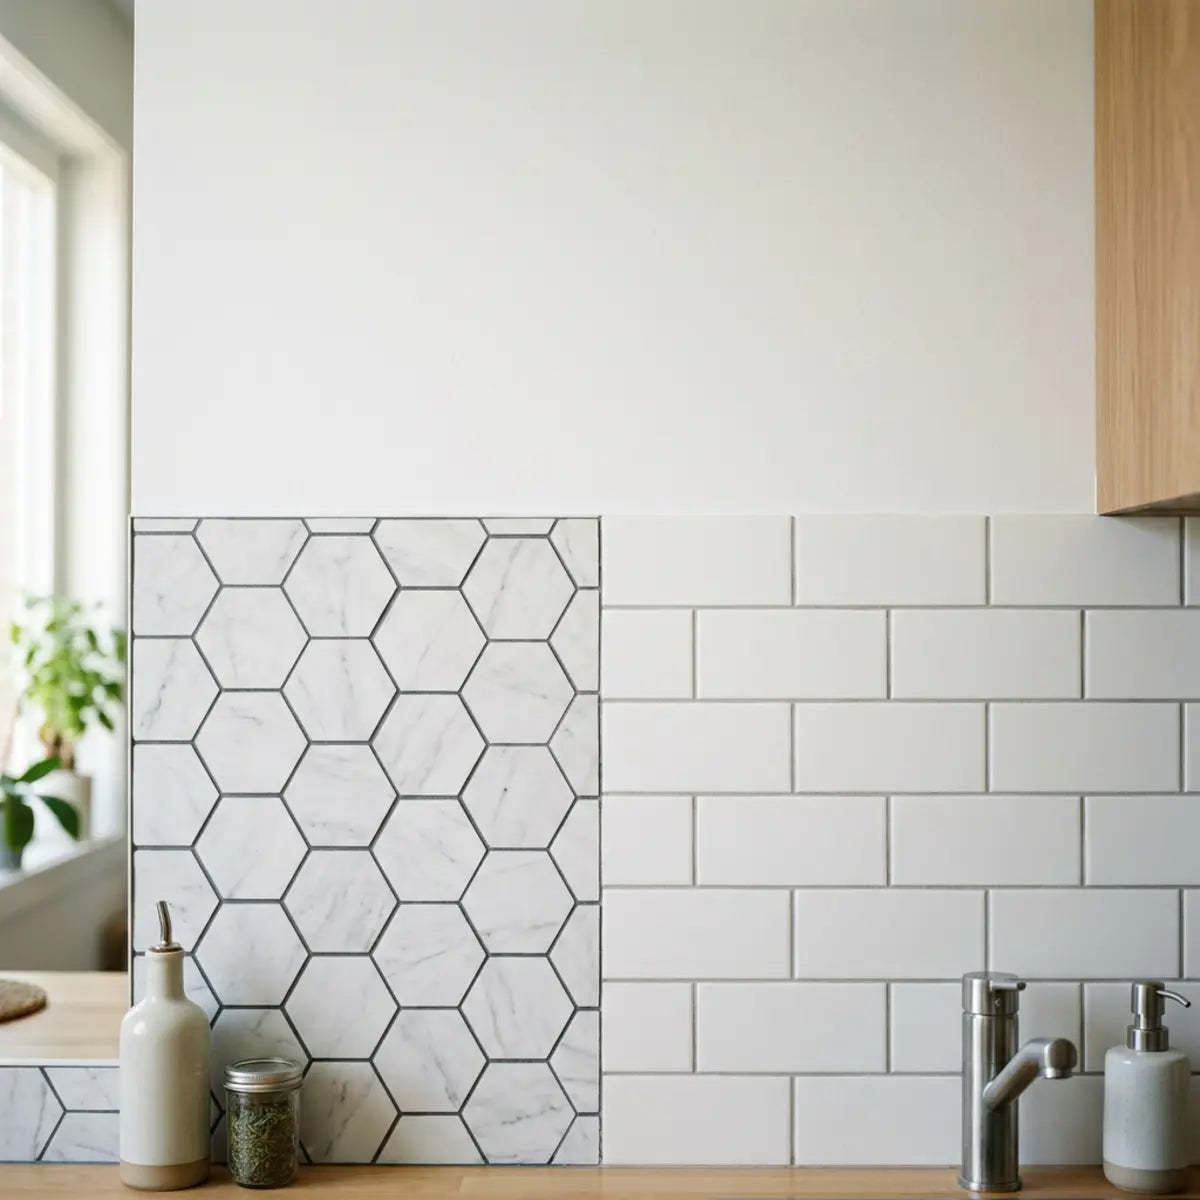
Les joints emboîtants sont les grands gagnants pour la plupart des bricoleurs et des locataires : grâce à un effet d’optique, ils dissimulent mieux les joints sur des murs imparfaits à distance de vision standard. Les carreaux à bord droit offrent un rendu affleurant plus abouti et hyperréaliste, mais exigent une précision de niveau professionnel et un support parfaitement lisse et de niveau.
Le paysage actuel de l’amélioration de la maison est saturé de promesses de transformation instantanée et sans effort. Les crédences peel and stick sont à l’avant-garde de cette révolution, offrant l’attrait d’une cuisine ou d’une salle de bain carrelée sur mesure, sans poussière, sans scie à eau ni artisans coûteux. Pourtant, comme le savent tous les passionnés de DIY expérimentés, l’écart entre le visuel publicitaire et la réalité physique peut être immense. Le facteur le plus déterminant pour qu’un projet ressemble à une rénovation haut de gamme ou à un simple bricolage temporaire tient à un seul détail : le joint.
Lorsque plusieurs panneaux en vinyle ou en gel se rejoignent sur un mur, ce point de jonction devient l’élément clé de la crédibilité de l’installation. Si l’œil repère une ligne verticale continue, l’illusion de carreaux en céramique, en pierre ou en verre s’effondre instantanément. Depuis des décennies, les fabricants cherchent à mettre au point la jonction parfaite, ce qui a conduit aux deux formats dominants du marché actuel.
Nous avons testé les joints de carreaux : emboîtants vs bord droit
Les pages produits en ligne ne racontent presque jamais toute l’histoire. Sur les photos promotionnelles, les crédences peel and stick paraissent toujours parfaitement sans joint. Nous avons laissé de côté les visuels marketing pour réaliser une comparaison sur le même mur, avec le même éclairage et le même installateur. Nous voulions voir ce qui se passe vraiment lorsque des bricoleurs moyens posent ces matériaux dans des conditions normales.
Notre premier verdict bouscule les idées reçues. Les joints emboîtants ont souvent plus bel aspect à distance de vision normale, mais les carreaux à bord droit peuvent paraître plus nets sur des murs parfaitement plats lorsque l’alignement et la répétition du motif sont maîtrisés.
La réponse rapide sur les joints de carrelage : Les carreaux peel and stick à joints emboîtants cachent généralement mieux les joints à distance de vision normale, car leur bord de recouvrement casse les lignes droites trop évidentes. Mais dans notre test sur le même mur, les carreaux à bord droit pouvaient paraître plus réalistes de près sur des supports lisses lorsque l’impression, l’espacement des lignes de coulis et l’alignement étaient meilleurs. Le meilleur choix dépend moins des promesses marketing que de l’indice de détection des joints, de la douceur du mur, de l’éclairage et de votre niveau de compétence en DIY.
Pour vous aider à faire le bon choix pour votre projet, ce guide se concentre sur plusieurs facteurs clés :

Pour vraiment apprécier les nuances de ces résultats, il faut se pencher sur la philosophie de fabrication qui se cache derrière les Peel and Stick Tiles. Les premières versions de ces produits n’étaient guère plus que du papier adhésif glorifié : fines, plates et totalement peu convaincantes. Avec la demande croissante des consommateurs pour des finitions plus haut de gamme, les fabricants ont commencé à utiliser des substrats plus épais, des revêtements en gel de polyuréthane pour imiter le verre et une impression haute définition pour reproduire les veines de la pierre naturelle.
Les layouts à bord droit deviennent plus exigeants lorsque l’impression présente un mouvement directionnel ; les projets effet marbre devraient donc également examiner l’alignement des veines et les tests de répétition du motif avant de s’engager dans une grille qui rend les petits décalages visibles.
Cependant, à mesure que les matériaux sont devenus plus réalistes, les joints sont devenus plus problématiques. Un carreau 3D en gel épais et réaliste ne peut pas simplement être plaqué contre un autre sans tenir compte avec soin du joint physique. Ce défi d’ingénierie a donné naissance aux deux camps distincts que l’on voit aujourd’hui : les adeptes de la ligne cassée et interlockée, et les puristes qui pensent qu’un joint bout à bout parfaitement plat est la seule façon d’obtenir une véritable fidélité architecturale.
Quelle est la différence entre les Peel and Stick Tiles à emboîtement et à bord droit ?
Vous hésitez entre bords superposés et contours plats, et vous vous demandez lequel donne vraiment l’aspect du vrai carrelage sur votre mur ?
Cette section décrypte les différences de construction, en montrant comment chaque style de bord gère les imperfections du mur et influence votre processus d’installation.
Les acheteurs voient souvent les deux termes en ligne, mais ont du mal à comprendre comment les bords superposés et les joints bout à bout modifient l’aspect final. Les différences mécaniques déterminent la façon dont vous coupez le matériau, la tolérance face à des murs irréguliers et, au final, la visibilité des raccords.
L’anatomie des bords des Peel and Stick Tiles
Pour comprendre la performance visuelle, il faut d’abord définir la construction physique. Les deux formats utilisent un adhésif sensible à la pression — un type de colle qui crée une liaison lorsque l’on applique une pression pour faire adhérer l’adhésif au support. La différence réside entièrement dans la conception du périmètre.
Principales différences structurelles :
En approfondissant la chimie et les propriétés physiques, les adhésifs sensibles à la pression (PSA) utilisés sur ces carreaux sont des polymères fascinants. Contrairement aux colles liquides qui durcissent par évaporation du solvant, les PSA restent collants en permanence à température ambiante. La « liaison » qu’ils créent est en réalité un emboîtement mécanique à l’échelle microscopique. Lorsque vous appliquez une pression, l’adhésif viscoélastique s’écoule dans les pores microscopiques et les imperfections du placo peint.
C’est précisément pour cela que le design des bords est si important. Un bord droit concentre toute la tension de cette liaison dans un seul plan vertical continu. Si le mur bombe ne serait-ce que d’une fraction de millimètre, cette tension peut dépasser l’adhérence de la colle, entraînant le retrait du bord et l’apparition d’un espace sombre et visible. Les carreaux à emboîtement répartissent cette tension sur un motif en zigzag ou décalé, réduisant fortement la contrainte localisée sur un seul point de la liaison adhésive.
Établir l’indice de détection des joints (SDI)
Pour établir une base de référence quantitative de la performance visuelle, nous utilisons l’indice de détection des joints (SDI). Cette évaluation standardisée mesure à quel point un joint est facilement repérable à 2 feet, 4 feet et 6 feet dans des conditions d’éclairage direct et indirect.
L’évaluation des matériaux via le SDI fournit un résultat déterministe plutôt que de s’appuyer sur des avis subjectifs. Nous avons testé des motifs identiques dans les deux formats de bord sur une surface de placo standard peinte avec une peinture acrylique mate.
Pour l’un ou l’autre format de joint, la base d’installation s’améliore lorsque les panneaux respectent la règle d’acclimatation de 48 heures pour les peel-and-stick, surtout si les cartons sont arrivés d’un garage, d’un porche ou d’un camion de livraison à une température très différente.
Répartition des performances SDI :
La science derrière le Seam Detection Index repose sur la psychologie de la Gestalt, plus précisément sur les principes de continuité et de fermeture. L’œil humain est biologiquement programmé pour identifier les motifs et les lignes droites, un mécanisme de survie évolué pour repérer les formes inhabituelles dans des environnements naturels. Lorsque votre cerveau analyse un mur recouvert de carreaux, il s’attend à ce que les lignes de joint forment une grille parfaite et continue.
Si un joint à bord droit est décalé d’un seul millimètre, cela crée une micro-ombre. Le cerveau reconnaît instantanément cette ligne verticale comme une rupture dans le motif attendu, signalant immédiatement la surface comme « artificielle » ou « imparfaite ». À deux pieds de distance — la distance standard lorsqu’on se tient au plan de travail de la cuisine pour couper des légumes — cette rupture est indéniable, quel que soit le type de bord. La différence apparaît lorsque l’on recule. À quatre pieds, les ailettes superposées d’un carreau à emboîtement perturbent la micro-ombre verticale. Comme l’ombre n’est pas continue, le cerveau l’écarte et l’intègre à la texture globale des lignes de faux joint. L’illusion visuelle reste forte.
La mécanique du camouflage
Les carreaux peel and stick à emboîtement exploitent la distraction visuelle. En décalant les points de connexion, l’œil ne peut pas suivre facilement une ligne verticale continue. Cela atténue fondamentalement la grille cheap et trop évidente qui affecte les anciens produits peel and stick.
Cependant, le style de bord à lui seul ne détermine pas le réalisme. Si le fabricant utilise un matériau brillant et fin, le chevauchement projette une minuscule ombre. Cette ombre met en évidence հենց le joint que la conception à emboîtement tentait de cacher.
Avantages des formats à emboîtement :

L’exigence de précision des bords droits
À l’inverse, les carreaux à bord droit reposent entièrement sur la précision. Le joint bout à bout ne laisse aucune marge d’erreur. Si votre mur n’est pas parfaitement d’aplomb, ou si vous étirez le matériau pendant la pose, un jour apparaîtra.
Malgré cette difficulté, les carreaux à bord droit offrent un avantage net dans certains cas. Sur des surfaces parfaitement lisses, avec un poseur minutieux, un joint bout à bout affleurant peut rester plus plat contre le mur. Cela élimine complètement l’effet d’ombre du chevauchement.
Avantages des formats à bord droit :
Le défi du bord droit tient aux réalités structurelles. Très peu de murs résidentiels sont parfaitement plats. Le rebouchage au placo, surtout au niveau des bandes à joint, crée de subtiles bosses pouvant s’étendre sur une largeur allant jusqu’à trente centimètres. Lorsqu’un panneau rigide à bord droit passe au-dessus de l’une de ces bosses invisibles, il a naturellement tendance à basculer ou à se soulever. Comme il ne peut pas se chevaucher avec son voisin pour absorber cet écart, le joint bout à bout s’ouvre.
C’est pourquoi les poseurs professionnels recommandent souvent d’utiliser une règle ou un niveau droit pour vérifier la topographie du mur avant de choisir un matériau. Si vous pouvez glisser une pièce sous un niveau de 1,20 m placé contre votre mur, la planéité du support n’est pas suffisante pour une pose impeccable de peel and stick backsplash à bord droit. Vous avez tout intérêt à miser sur la souplesse d’un design emboîtable.
Variables du matériau au-delà du bord
Une évaluation standardisée exige d’isoler les variables. Nous avons vite constaté que, si le bord détermine la jonction, d’autres choix de fabrication influencent fortement le score SDI.
La continuité du motif d’un panneau à l’autre est essentielle. Si le motif de fausse pierre change brutalement au niveau du joint, l’œil repère immédiatement la rupture. De même, l’espacement des lignes de faux joint doit rester constant. Si un joint bout à bout rapproche deux lignes de joint larges, la double épaisseur qui en résulte signale le joint.
Facteurs matériaux cruciaux :
Ce que nous avons remarqué sous l’éclairage sous les meubles hauts
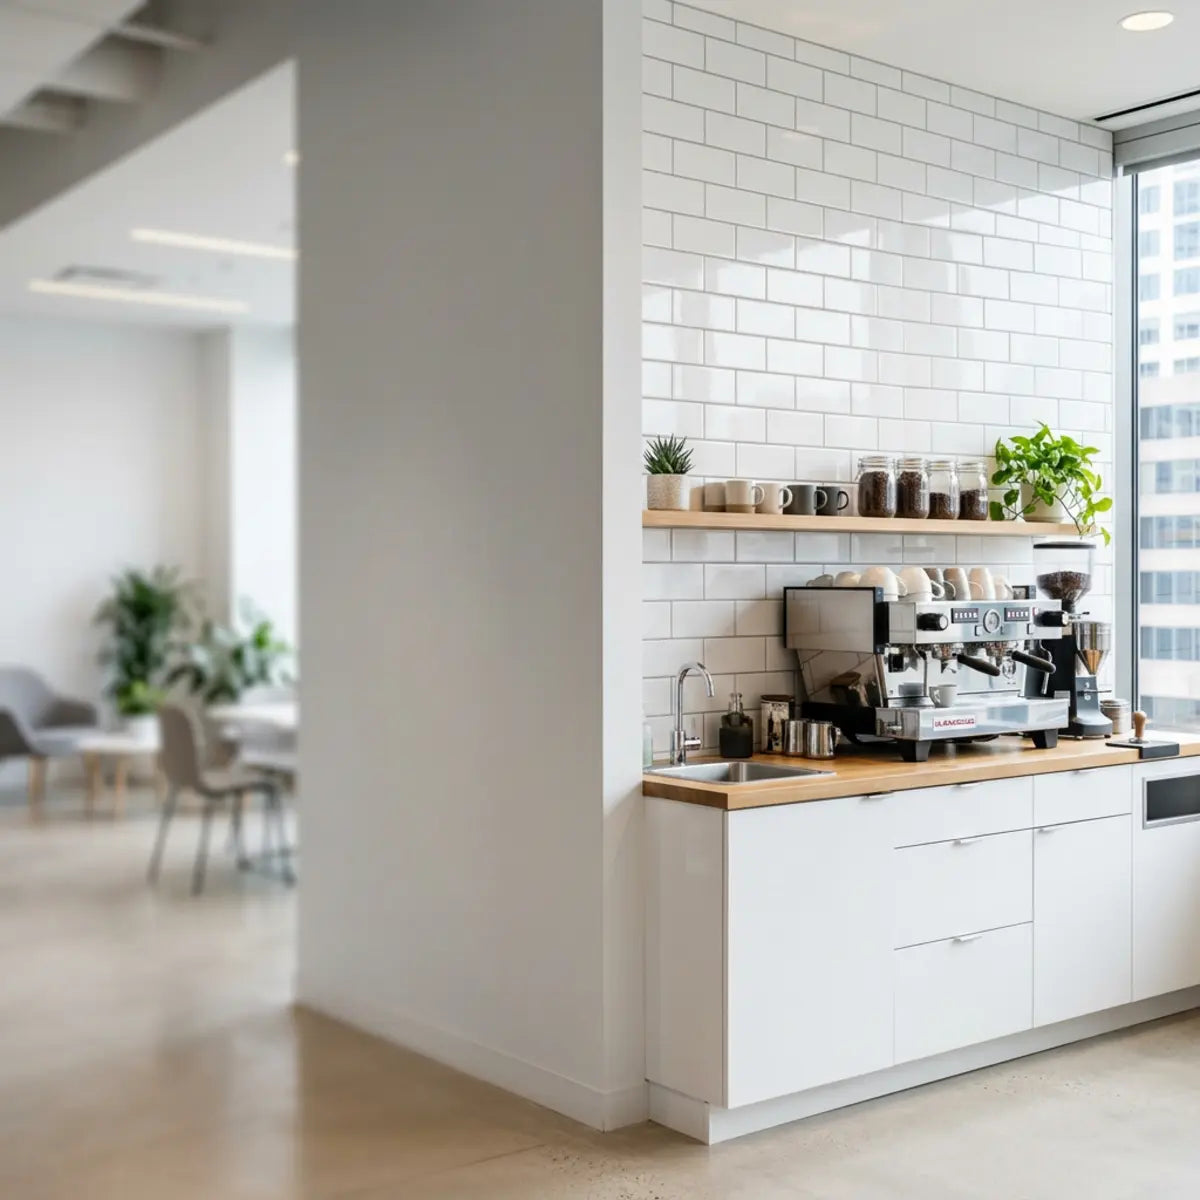
Les tests d’authenticité exigent des conditions réelles. Lors de nos essais dans la cuisine, nous avons activé des spots LED standard de 3000 K sous les meubles hauts. Les résultats étaient spectaculaires. Cette lumière dure, dirigée vers le bas, agissait comme une loupe sur l’épaisseur physique. Les panneaux emboîtables, qui comportent naturellement une couche reposant sur une autre, projetaient de nettes micro-ombres le long du bord chevauché, ce qui augmentait légèrement leur visibilité. À l’inverse, les panneaux à bord droit qui obtenaient un joint bout à bout parfaitement affleurant restaient sans ombre. Si votre source lumineuse principale balaie le mur directement parallèlement au joint, l’épaisseur du matériau et l’affleurage des bords deviennent essentiels à l’illusion.
Application selon le contexte : cuisines vs salles de bains
L’endroit où vous installez ces produits change les enjeux liés à l’apparence des joints. Les crédences de cuisine comportent généralement un éclairage sous les meubles hauts. Cette lumière dure, dirigée vers le bas, projette des ombres marquées sur les joints chevauchés.
Les murs d’accent de salle de bains s’appuient généralement sur un éclairage de plafond plus doux et ambiant. Cette lumière indirecte met en valeur les joints emboîtables et réduit considérablement leur score SDI. Nous avons constaté que le bord droit était moins tolérant sur les murs texturés courants dans les salles de bains anciennes, où le tassement structurel rend les joints bout à bout serrés presque impossibles.
Au-delà de l’éclairage, les conditions environnementales des cuisines et des salles de bain jouent un rôle majeur dans la performance des joints à long terme. Les cuisines sont soumises à des variations de température fréquentes et rapides. L’eau bouillante sur une plaque arrière crée une chaleur localisée qui dilate le matériau vinyle. Si les carreaux à bord droit sont posés trop serrés, sans jeu de dilatation sur le pourtour, cette expansion thermique fera gondoler les joints bout à bout et les fera bomber vers l’extérieur, ruinant ainsi la surface affleurante.
La forme du bord n’est qu’un élément du contrôle des joints ; les pièces exposées à un fort soleil de l’après-midi doivent aussi être vérifiées pour la prévention des écarts de joint liés à la chaleur avant de décider si les joints superposés ou les bords droits resteront visuellement bien ajustés.
Les salles de bain, en revanche, présentent le défi d’une humidité persistante. Bien que l’adhésif soit résistant à l’eau, l’humidité continue qui tente de s’infiltrer dans les micro-poches d’air au niveau d’un joint emboîtable finira par dégrader l’adhérence. C’est pourquoi les installations dans les salles de bain exigent une préparation de surface irréprochable et un marouflage énergique après la pose pour éliminer toute cavité où la vapeur pourrait se condenser derrière le carreau.
Pourquoi les joints des peel and stick tiles sont-ils visibles, et comment les rendre moins apparents ?
Frustré de voir les joints ressortir ou paraître trop évidents malgré le respect des instructions ?
Cette section propose une méthode de dépannage pour identifier les causes profondes comme la texture du mur ou une pression insuffisante, avec des solutions réalistes pour obtenir une finition homogène.
Les lecteurs accusent souvent le carreau lui-même lorsqu’ils constatent un joint visible. Lors de nos tests, nous avons découvert que le vrai problème vient souvent de la texture du mur, d’un mauvais éclairage, d’un contact adhésif insuffisant ou d’une pression trop faible appliquée pendant la pose.
La plupart des joints visibles proviennent d’erreurs d’exécution plutôt que de défauts de fabrication. Quelques habitudes simples de préparation et de pose à petit budget peuvent réduire considérablement la détection des joints, sans promettre une finition invisible.
Avant de poser la première plaque, examinez la couleur de votre mur brut. Si vous installez des peel and stick tiles bleu foncé ou noirs sur un mur blanc éclatant, le moindre micro-écart dans un joint à bord droit brillera intensément lorsque le blanc du mur apparaîtra en dessous. Pour réduire drastiquement la visibilité des joints, peignez une bande de couleur foncée assortie (ou utilisez un marqueur permanent foncé) directement sur le mur exactement à l’endroit où le joint tombera. Cette simple astuce d’ombre en fond masque les micro-écarts et absorbe la lumière qui, autrement, mettrait l’erreur en évidence.
Présentation de l’efficacité de prévention des joints (SPE)
Pour quantifier la réussite de la pose, nous l’avons comparée à une mesure appelée Seam Prevention Efficiency (SPE). Celle-ci suit le nombre de causes de joints visibles qui ont été fondamentalement évitées grâce à une préparation, un alignement et des finitions stratégiques.
Obtenir un score SPE élevé signifie que vous avez pris en compte les facteurs environnementaux et mécaniques qui provoquent l’échec des joints. Nous avons observé qu’augmenter votre SPE permet d’obtenir une configuration optimale, garantissant que l’adhésif sensible à la pression polymérise correctement et que les bords restent plats.
Les coupables cachés derrière les joints visibles
Comprendre pourquoi les joints échouent est la première étape pour les dissimuler. La planéité du substrate est le facteur principal. Un substrate-la surface murale sous-jacente sur laquelle vous appliquez le carreau-doit être plat.
Si vous posez un carreau à bord droit sur une texture peau d’orange marquée, le matériau suivra les reliefs et les creux du mur. Lorsque deux carreaux se rejoignent dans un creux, un espace se forme. Lorsqu’ils se rejoignent sur une bosse, le joint se soulève.
Causes principales des joints visibles :
La chimie de l’échec de l’adhésif est souvent mal comprise. Les propriétaires pensent qu’un mur propre visuellement est prêt à être installé. Pourtant, dans une cuisine, les huiles de cuisson vaporisées se déposent sur les murs et créent une barrière microscopique à faible énergie de surface. Les adhésifs sensibles à la pression ne peuvent tout simplement pas bien mouiller ni adhérer sur des surfaces grasses. L’adhésif peut d’abord tenir, donnant un faux sentiment de sécurité, mais la tension continue sur le joint finira par l’arracher. C’est pourquoi la préparation chimique n’est pas négociable pour obtenir un SPE élevé.
Protocoles de préparation du substrat
Vous ne pouvez pas obtenir un score SDI faible sur un mur mal préparé. Les équivalents validés par des pairs dans le secteur de la construction indiquent qu’un revêtement mural adhésif nécessite une finition de plaques de plâtre de niveau 4 pour une adhérence optimale.
Si vos murs sont texturés, les poncer à plat ou appliquer un enduit de lissage est indispensable pour obtenir un rendu réaliste. Nous avons constaté qu’essuyer le mur avec un dégraissant réduit fondamentalement les risques de défaillance de l’adhésif. Même de faibles traces de graisse de cuisson ou de résidus d’humidité de salle de bains repousseront l’adhésif.
Comment mettre en œuvre les meilleures pratiques de préparation :
Lavez soigneusement le mur avec un dégraissant du commerce ou un substitut de TSP. Un simple mélange d’eau et de savon ne suffit pas pour éliminer les huiles de cuisine polymérisées. Une fois propre, rincez à l’eau claire et laissez la plaque de plâtre sécher complètement pendant au moins 24 heures avant de poser les panneaux.
Aplanissez les textures marquées (comme l’effet peau d’orange ou les finitions écrasées) à l’aide d’une ponceuse à perche équipée d’un papier abrasif de grain 120. L’objectif est de créer un substrat affleurant, lisse comme du verre. Essuyez toute poussière résiduelle avec un chiffon en microfibre ; la poussière est l’ennemie des adhésifs sensibles à la pression.
Utilisez un primaire d’accrochage de haute qualité (comme une gomme-laque pigmentée ou un acrylique à forte adhérence) pour créer une surface uniforme sur laquelle l’adhésif pourra bien prendre. Cela scelle l’enduit de plaques de plâtre poreux et fournit une base homogène à haute énergie de surface pour l’adhérence peel and stick.

Matrice diagnostique des causes profondes
Pour vous aider à résoudre les problèmes en cours de projet, nous avons développé une matrice d’évaluation standardisée. Elle relie les symptômes visuels courants à leurs causes probables et aux solutions pratiques.
| Symptôme visible | Cause probable principale | Solution pratique / stratégie de prévention |
|---|---|---|
| Espaces entre les panneaux à bord droit | Texture du mur provoquant une tension inégale ; matériau qui s’étire pendant l’application. | Poncez le support pour qu’il soit parfaitement plat ; ne tirez jamais sur le panneau et ne l’étirez pas pendant la pose. |
| Ligne d’ombre visible sur le bord emboîtable | Un éclairage de tâche agressif au plafond mettant en évidence le chevauchement physique du matériau. | Installez un carreau à finition mate ; orientez légèrement vers l’arrière les angles de l’éclairage sous les meubles hauts. |
| Bords qui se soulèvent près de la cuisinière ou de l’évier | La chaleur ou l’humidité peuvent dégrader au fil du temps l’adhérence de l’adhésif sensible à la pression. | Appliquez un fin cordon de mastic silicone haute température le long des bords vulnérables. |
| Décalage du motif au niveau de la ligne de jointure | Variations de lot de fabrication ; absence de planification préalable de la disposition au sol. | Présentez d’abord à blanc tous les panneaux sur une table ; vérifiez que les numéros de lot figurant sur l’emballage correspondent. |
| Aspect de joint de coulis deux fois plus épais | En chevauchant le support plastique transparent plutôt que le matériau coloré. | Utilisez un cutter et une règle métallique pour couper l’excédent de film protecteur transparent avant la pose. |
Diagnostic interactif : quel type de joint convient à votre projet ?
Répondez à deux questions rapides pour calculer le format de bord idéal selon nos données de test.
Question 1 : Dans quel état se trouve actuellement votre mur d’installation ?
Alignement et réduction des tensions
La façon dont vous manipulez le matériau pendant l’installation a un impact sur le joint final. Les panneaux Peel and stick sont légèrement élastiques. Si vous tirez sur le matériau pour forcer l’alignement, vous créez une tension.
Au bout de quelques jours, le matériau cherchera à reprendre sa forme d’origine. Cette tension écarte les joints bout à bout straight-edge, laissant apparaître des espaces visibles. Laissez toujours le matériau se positionner naturellement. Appuyez légèrement pour le maintenir, vérifiez l’alignement, puis validez la pose.
Stratégies d’alignement :
Tracez votre mur au crayon et avec un niveau laser avant de décoller le support. Ne vous fiez jamais au plafond ou au plan de travail pour être parfaitement de niveau ; établissez toujours une vraie ligne horizontale.
Décollez seulement deux pouces du support supérieur, alignez le panneau, collez le bord du haut, puis retirez lentement le reste du support vers le bas. Cela évite que toute la feuille n’adhère trop tôt et ne se désaligne.
N’étirez jamais le vinyle pour atteindre un angle ; coupez plutôt une nouvelle pièce. Le recul élastique est la principale cause des écarts apparaissant sur les bords droits quelques semaines après l’installation.
Le phénomène de recul élastique, connu en science des matériaux sous le nom de relaxation des contraintes, est particulièrement marqué dans les produits de carrelage à base de vinyle. Lorsque vous tirez latéralement une feuille de vinyle pour combler un 1mm écart sur un joint à bord droit, les chaînes moléculaires du plastique s’allongent temporairement. L’adhésif sensible à la pression maintient d’abord le matériau dans cet état étiré. Cependant, avec le temps — surtout lorsqu’il est exposé à la chaleur d’une cuisine — les chaînes moléculaires tentent de revenir à leur état initial. La force de ce recul est étonnamment puissante, et elle finit par surpasser l’adhésif, entraînant l’écartement des panneaux et laissant apparaître le mur derrière le joint.
La physique des adhésifs sensibles à la pression
Le terme « peel and stick » est légèrement trompeur. Le bon procédé consiste à décoller, poser et presser. Les adhésifs utilisés sur ces produits s’appuient sur la pression mécanique pour créer une liaison permanente.
Si vous lissez simplement le carreau avec la main, vous laissez des poches d’air microscopiques le long des joints. Ces poches d’air permettent à l’humidité de pénétrer, ce qui finit par soulever le bord et le faire recourber.
Exigences de finition :
Un rouleau à joints en caoutchouc dur est indispensable. Roulez chaque centimètre du panneau en appuyant fermement le long des joints emboîtés ou des joints bout à bout. La main humaine ne peut pas générer la PSI (livres par pouce carré) nécessaire pour bien faire adhérer l’adhésif.
Les adhésifs adhèrent au mieux entre 65°F et 75°F. N’installez jamais les panneaux sur des murs extérieurs froids en hiver sans avoir d’abord réchauffé la pièce. Un adhésif froid est rigide et ne formera pas une liaison mécanique.
Évitez les cuissons intensives ou les douches très chaudes pendant 48 heures afin de laisser la liaison se stabiliser complètement. Exposer l’installation à l’humidité avant la prise complète de l’adhésif garantit une défaillance des bords.
Limites réelles et zones d’éclaboussures
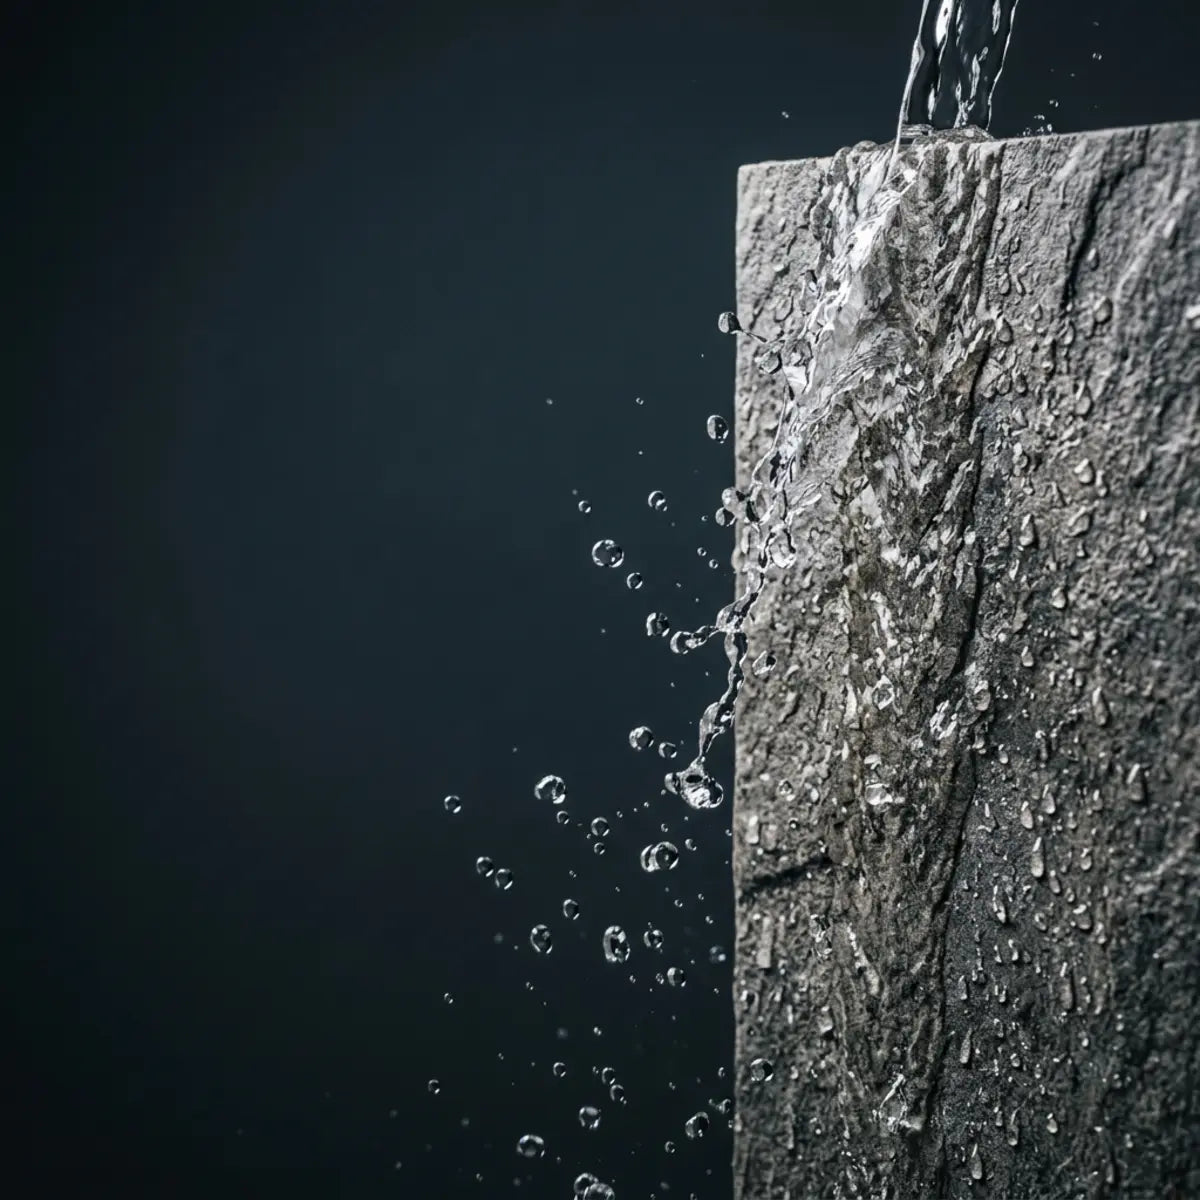
Il est essentiel d’avoir des attentes réalistes en matière de durabilité. Même si de nombreuses marques présentent leurs produits comme imperméables, le consensus du secteur impose une approche plus prudente.
Les joints Peel and stick sont résistants à l’eau, pas imperméables. Une exposition prolongée à l’eau stagnante ou à une forte vapeur dégradera l’adhésif selon une courbe de perte de performance. Près des éviers, des plaques de cuisson et des zones à fortes projections, vous devez prendre des précautions supplémentaires pour protéger les joints.
Nous appliquons strictement la pratique consistant à sceller le bord inférieur, là où le carreau rencontre le plan de travail, avec un cordon de mastic silicone transparent. Cela empêche l’eau de s’infiltrer sous le joint inférieur, qui est le point de défaillance le plus courant dans les applications de cuisine.
La logique qui sous-tend le calfeutrage du joint inférieur est irréfutable. La gravité pousse l’eau — qu’elle provienne de l’essuyage des plans de travail ou des éclaboussures de l’évier — vers le bas. Si le bord inférieur de votre installation peel and stick repose directement sur le plan de travail sans barrière d’étanchéité, l’action capillaire attirera cette humidité vers le haut et derrière la première rangée de carreaux. Une fois que l’eau infiltre la couche adhésive, la dégradation est rapide. Un fin cordon lisse de 100% mastic silicone crée un joint imperméable, prolongeant considérablement la durée de vie de l’ensemble de l’installation et préservant l’intégrité des joints inférieurs.
Conclusion
Nos tests prouvent qu’obtenir un rendu réaliste dépend fortement de l’adaptation du style de bord à l’état de votre mur et à votre niveau de compétence. Les carreaux à emboîtement l’emportent systématiquement pour camoufler les joints à une distance de visualisation standard. Ils constituent l’option la plus sûre pour les locataires et les débutants confrontés à des murs imparfaits.
Les carreaux à bord droit, bien qu’exigeant une précision absolue, peuvent tout de même paraître plus beaux sur des murs exceptionnellement lisses avec un alignement d’impression très net. Une pose soignée avec un rouleau à joints et une préparation adéquate du substrat reste votre meilleure défense contre les lignes visibles.
Concentrez-vous moins sur les promesses du fabricant et davantage sur une préparation réaliste. En comprenant les limites mécaniques de ces matériaux, vous pouvez moderniser votre espace en toute confiance, sans craindre un résultat bon marché. Nous vous conseillons de comparer différents styles de carreaux selon l’état spécifique de votre mur et de consulter des guides détaillés d’installation pour débutants avant de finaliser votre achat.

Laisser un commentaire
Ce site est protégé par hCaptcha, et la Politique de confidentialité et les Conditions de service de hCaptcha s’appliquent.