
















Evidensbaserad skötsel av stänkskydd
En bubbla har uppstått intill kökskranen. Kanten på en platta känns lös. Det är naturligt att misstänka en dold läcka, men att lyfta på en självhäftande platta bevisar inte att vatten har nått gipsskivan.
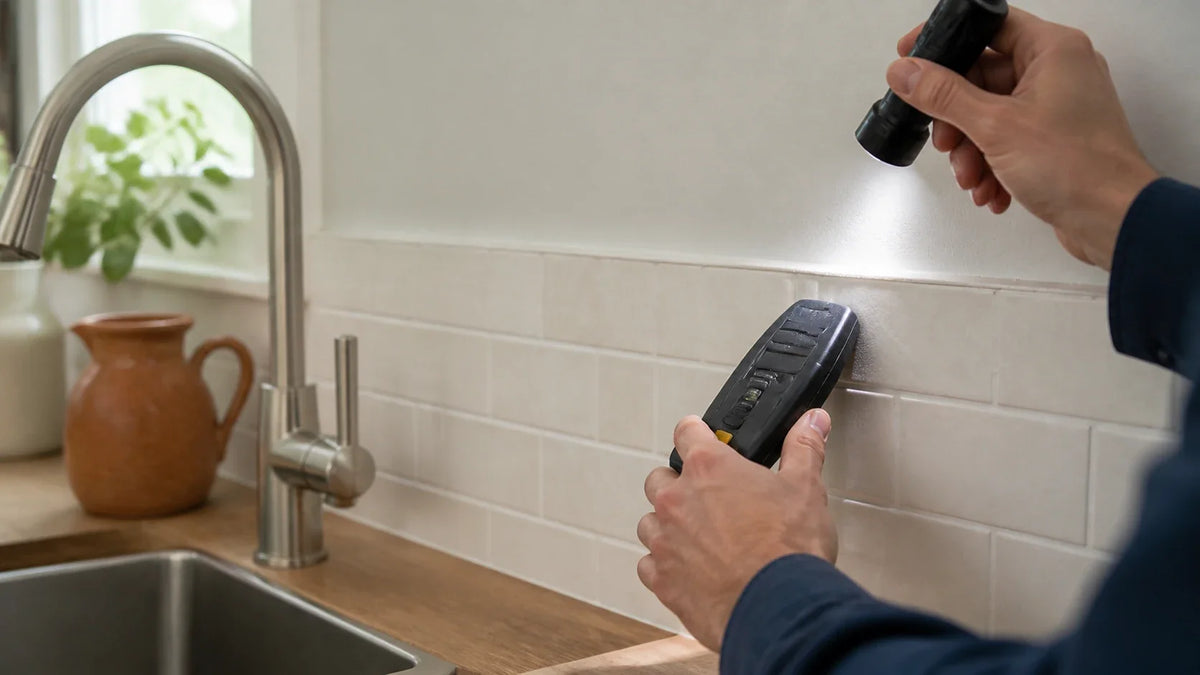
Du kan kontrollera om det finns fukt bakom ett självhäftande stänkskydd utan att ta bort alla plattor genom att kombinera visuella observationer och lukt, fuktkartläggning med torra kontrollområden, fuktighetsmätningar, termisk kontroll och noggrant observerade tester när blandare och andra installationer används.
Ett enskilt symtom, ett procentvärde från en mätare eller en värmebild bevisar inte att gipsskivan är fuktig. Ihållande, återkommande signaler bör bekräftas genom en begränsad öppning eller en fackmannamässig inspektion.
Det säkraste tillvägagångssättet börjar med kontroller som inte påverkar något. Därefter jämför du misstänkta områden med torra kontrollområden, gör om mätningarna under likadana förhållanden, tar hänsyn till material som kan ge missvisande resultat och går vidare först när flera oberoende tecken pekar åt samma håll.
Den processen är viktig eftersom bubblor i ett självhäftande stänkskydd också kan bero på värme, fett, bristande underarbete, färg som släpper, en uttänjd platta eller en otätad kant. En fuktmätare utan stift kan reagera på metall. En värmekamera registrerar temperaturskillnader, inte vatten.
Det du behöver är en beviskedja – inte ett tvärsäkert besked från en apparat.
Testning i fem steg
Hur skapar du en tillförlitlig fuktkarta utan att ta bort plattorna?
Gör den dolda gipsskivan att varje bubbla, lukt eller ovanligt mätvärde känns omöjligt att tolka?
En fuktkarta som kan upprepas hjälper dig att skilja betydelsefulla mönster från värme, metall, byggmaterial och monteringsfel.
Det bästa sättet att upptäcka fukt bakom ett självhäftande stänkskydd är att jämföra flera signaler över ett numrerat rutnät. Börja med visuella observationer, fastställ torra kontrollområden, mät konsekvent, anteckna förhållandena i rummet och upprepa testet.
Vi kallar detta samlad fuktsäkerhetsbedömning, eller CMCS. Det är ett praktiskt hjälpmedel för att fatta beslut, inte en publicerad byggstandard eller ett alternativ till professionell mätning.
CMCS bedömer bevisen utifrån fem faktorer:
- ●Upprepbarhet: Ger samma plats ett liknande resultat vid separata mätningar?
- ●Rumsligt mönster: Följer avvikelsen tyngdkraften, en skarv, ett rör eller en genomföring för en installation?
- ●Oberoende signaler: Stämmer visuella förändringar, lukt, mätarens reaktioner, luftfuktighet och temperaturmönster överens?
- ●Tidpunkt i förhållande till användning: Uppstår eller förstärks avvikelsen när du använder kökskranen, avloppet eller diskmaskinen som vanligt?
- ●Avdrag för störande faktorer: Kan resultatet förklaras av metall, reglar, värme, fett, ett tjockt lager lim eller ytans struktur?
Ett enda högt mätvärde kan ha låg tillförlitlighet. Ett upprepat mätvärde som sträcker sig nedanför ett hål för en vattenanslutning, sammanfaller med fuktigt skåpmaterial och förändras efter normal användning av armaturen väger betydligt tyngre.
Vad bör du kontrollera innan du använder något mätinstrument?
Börja med ögonen, händerna, näsan och mobilkameran. Då får du en daterad utgångspunkt innan ett instrument ger siffror som kan verka säkrare än de faktiskt är.
Granska väggen från låg vinkel. Sidobelysning gör ofta att subtila upphöjda kanter, svällningar eller deformationer i ytan syns – sådant som takbelysning kan dölja.
Kontrollera särskilt de här områdena:
- Kakelfogar: Leta efter upphöjningar som börjar i en vertikal eller horisontell fog i stället för mitt på plattan.
- Fogen mellan bänkskiva och vägg: Kontrollera skarven mellan stänkskyddet och bänkskivan efter glipor, fogmassa som släppt, missfärgningar eller mjuknad tätningsmassa.
- Genomföringar vid kranen: Undersök täckbrickor, monteringshål, öppningar för utdragbar slang och väggmonterade anslutningspunkter.
- Handfatets hörn: Var uppmärksam på stänkvägar där vatten upprepade gånger når en otätad kakelkant.
- Inuti skåpet: Känn efter vid diskbänksskåpets botten, bakstycke, avstängningsventiler, avloppsanslutningar och anslutningar till avfallskvarnen.
- Väggens yta: Notera utbuktningar, mjuka partier, fläckar, flagande färg eller gipsdamm vid oskyddade kanter.
- Mönster för vidhäftning: Anteckna om plattor eller kanter lossnar på ett begränsat område, över större ytor, på den sida som vetter mot värme eller främst nära vatten.
- Luktens mönster: Notera var och när en unken lukt är starkast, men se inte lukten som ett bevis på mögel.

En unken lukt kan komma från fuktigt trä, innehållet i skåpet, ett avlopp, gamla rengöringsmedel eller mikrobiella VOC:er. Mikrobiella VOC:er är flyktiga föreningar som vissa mikroorganismer kan bilda, men de är inte tillräckligt specifika för att identifiera mögeltillväxt.
VOC-sensorer för konsumentbruk kan inte bekräfta dolt mögel. USA:s U.S. miljöskyddsmyndighet förklarar att totala VOC-värden inte identifierar enskilda föroreningar eller deras källor, medan akademiska översikter beskriver tolkningen av mikrobiella VOC:er som begränsad av bakgrundskemikalier och varierande utsläppsmönster (EPA; Korpi, Järnberg och Pasanen, 2009).
En genomgång av väggens risker, anpassad för hyresgäster, kan avslöja ohärdad färg, svaga lagningar, rester eller risk för att färgen lossnar innan du monterar självhäftande plattor. Följ stegen för dokumenterad provning av underlaget och planering av borttagning i vår praktiska checklista för risker med stänkskydd.
Bedöm risken för väggskador bakom stänkskyddet före monteringHur skapar du torra jämförelsepunkter och ett testnät?
En torr jämförelsepunkt är ett område med liknande konstruktion, men utan känd exponering för den misstänkta läckvägen. Den visar hur ”normalt” ser ut i just den väggkonstruktionen.
Jämför likvärdiga ytor. Ett mätvärde över släta polymerplattor bör inte jämföras med bar gips, metallbeklädda plattor, massivt trä eller murverk.
Använd den här arbetsgången:
- Stabilisera förhållandena: Undvik att testa direkt efter matlagning, när du har kokat vatten i en vattenkokare, öppnat fönster eller riktat ventilationsluft mot väggen.
- Fotografera området: Ta med diskbänken, skarven vid bänkskivan, eluttag, skåp och synliga fel.
- Rita ett rutnät: Markera virtuella rutor med cirka 4 till 6 inches mellanrum på ett foto eller ett avtagbart överlägg.
- Numrera varje punkt: Använd beteckningar som A1, A2, B1 och B2 så att upprepade mätningar kan jämföras med de ursprungliga platserna.
- Välj kontrollpunkter: Välj minst tre punkter med liknande kakel- och väggkonstruktion, på avstånd från rör, värmekällor och synliga skador.
- Dokumentera förhållandena: Anteckna rumstemperatur, relativ luftfuktighet, nylig användning av vatteninstallationer, matlagning och tidpunkt.
- Mät på samma sätt varje gång: Håll mätarens riktning, tryck, placering och mätriktning likadana.
- Upprepa senare: Mät igen när förhållandena har stabiliserats och ytterligare en gång efter normal användning av vatteninstallationen, om det kan göras på ett säkert sätt.
Ett användbart rutnät kan täcka tre kolumner runt vattenkranen och fyra rader från den övre delen av stänkskyddet ner till bänkskivan. Lägg till kontrollpunkter på samma vägg, utanför området under diskhon.
torr A1 A2 C2
torr B1 B2
↑ ×2 B3
↑ ×1 C3
torr D1 D2
↑ ×1 D3 D4
Torra kontrollpunkter: Använd minst tre jämförbara platser så att en ovanlig kontrollpunkt inte ensam avgör baslinjen.
Märkning med målartejp: Markera rutnätets koordinater på avtagbar tejp i stället för direkt på kaklets yta.
Testa igen vid samma tidpunkt: Upprepa mätningen ungefär samma tid på dagen för att minska förändringar som orsakas av solljus, matlagning och uppvärmnings- och ventilationssystemens cykler.
För en jämförbar metod för att fastställa en torr baslinje före installationen Vi testade fukten i gipsskivor före ett självhäftande stänkskydd ger den kvantitativa baslinje som behövs för att jämföra senare mätvärden. Rutnätet och metoden med kända torra kontrollpunkter skapar en byggteknisk standard för dokumenterade jämförelser, i stället för att man förlitar sig på ett universellt ”säkert” värde.
Om du vill ha en tydlig utgångspunkt att följa innan limmet kommer i kontakt med väggen innehåller guiden även vägledning om mätare med eller utan stift, kontroller av möjliga felaktiga utslag, en dokumenterad avläsningslogg och ett trafikljusbaserat beslutsunderlag.

Utskrivbar logg för fuktkontroll
Dokumentera normala resultat lika noggrant som misstänkta. Med en komplett logg blir det enklare att jämföra förändringar, kontrollpunkter och tidpunkter.
| Plats | Datum/tid | Användning av vatteninstallation | Luftfuktighet | Temperatur | Lukt | Avläsning/upprepning |
|---|---|---|---|---|---|---|
Kan en fuktmätare upptäcka vatten bakom kakel?
En fuktmätare kan upptäcka en materialreaktion som hänger samman med fukt, men den kan inte på egen hand bevisa att det finns en fuktig gipsskiva bakom kaklet. Resultaten påverkas av mätarens typ, mätdjup, kalibrering, materialets densitet, limmet och närliggande ledande föremål.
En fuktmätare utan stift som mäter kapacitans skickar en elektromagnetisk signal in i konstruktionen och mäter förändringar i dess elektriska respons. Fukt kan öka responsen, men det kan även metallbeslag, rör, folieskikt, hörnskydd, ledningar och variationer i densitet göra.
I bruksanvisningar för sådana instrument anges dessa begränsningar tydligt. Tramex skriver till exempel att ledande material, däribland metall, kan ge höga mätvärden och att mätdjupet varierar beroende på instrument och material (bruksanvisningen till Tramex Moisture Encounter ME5).
I Wagners Orion-bruksanvisning uppmanas användaren på liknande sätt att fastställa referensvärden och ta hänsyn till inbäddad metall, materialtjocklek och mätförhållanden, i stället för att se ett enstaka mätvärde som en säker diagnos (Wagner Orion-bruksanvisning).
Utgå från relativa mönster:
- Intervall för torra kontrollpunkter: Notera den normala variationen mellan jämförbara punkter som verkar vara torra.
- Misstänkt avvikelse: Markera mätvärden som konsekvent ligger över det lokala intervallet, i stället för att använda en generell procentsats.
- Återkommande mönster: Lägg större vikt vid punkter som fortsätter att visa förhöjda värden vid flera mätningar.
- Sammanhängande område: Leta efter sammanhängande mätvärden i stället för en enda isolerad topp.
- Vertikalt mönster: Fukt ger ofta ett mönster som sprider sig nedåt eller åt sidorna, även om kapillärtransport kan göra bilden mer svårtolkad.
- Kontrollera metall: Jämför avvikelsen med var reglar, rör, eluttag, fästdon och detaljer i kaklet finns.
Mätare som är kalibrerade för trä kan visa en procentsats som liknar fukthalt. På kakel- och gipsskivekonstruktioner kan siffran i stället vara en relativ skala. Den ska inte tolkas som den faktiska fukthalten i gipsskivan om inte tillverkaren uttryckligen stöder mätning av det materialet och i det aktuella mätläget.
Vad mätarsignalen passerar igenom
Hur kan metall, reglar, fett och värme ge falska positiva utslag?
Falska utslag följer ofta byggnadens konstruktion mer regelbundet än vatten gör. En lodrät linje kan markera en regel eller ett rör. En skarp punkt kan tyda på ett fästdon. Ett brett varmt område intill en spis kan bero på värmepåverkan och att limmet mjuknar.
Tänk på fyra vanliga felkällor:
- Metallisk yta: Kakelplattor med folie på baksidan, metallbeläggning eller tredimensionell struktur kan förändra mätarens utslag över hela installationen.
- Dold stomme: Reglar och kortlingar förändrar materialets densitet och skapar ett återkommande strukturellt mönster.
- VVS och el: Kopparrör, metalldosor, kablar och skyddsplåtar mot spik kan ge starka, lokala utslag.
- Föroreningar på ytan: Fett och rester av rengöringsmedel kan försvaga limmet eller påverka ytan utan att gipsskivan blir våt.
Anta att mätpunkt B2 visar betydligt högre värden än punkterna intill. Utslaget återkommer vid tre mätningar, men samma toppvärde fortsätter lodrätt från bänkskivan till överskåpet.
En regeldetektor identifierar en regelkonstruktion längs den linjen. Avdraget för felkällan bör därför sänka CMCS avsevärt, eftersom det rumsliga mönstret stämmer bättre med en regel än med en läckagespridning.
Värme kan vilseleda på ett annat sätt. Kakelplattor intill en spis kan börja bukta efter matlagning eftersom limmet mjuknar eller underlaget och kakelplattan utvidgas i olika takt. Om bubblan fortfarande är torr vid en jämförelse, saknar lukt och ligger i linje med ett värmepåverkat område, förblir sannolikheten för fukt låg.
Vad kan luftfuktighet och daggpunkt berätta?
Relativ luftfuktighet hjälper dig att bedöma om kondens är möjlig, men visar inte om gipsskivan redan är våt. Anteckna den tillsammans med lufttemperatur och yttemperatur.
Relativ luftfuktighet är andelen fukt i luften jämfört med den maximala mängd fukt luften kan innehålla vid den temperaturen. Daggpunkt är den temperatur då luften blir mättad och vatten kan kondensera på en yta.
ASHRAE:s psykometriska vägledning beskriver temperatur, fuktighetskvot, relativ luftfuktighet och daggpunkt som sammanhängande egenskaper – inte som utbytbara mätvärden (ASHRAE Psychrometrics).
Om stänkskyddets yta eller det dolda hålrummet i väggen sjunker under daggpunkten blir kondens fysiskt möjlig. Det kan inträffa nära kallvattenrör, vid dåligt isolerade ytterväggar eller under fuktiga sommardagar.
Om en avvikelse i stänkskyddet till exempel uppträder under fuktiga veckor, försvinner när vädret blir torrare och inte påverkas av hur vattenkranen används, kan det tyda på risk för kondens. Mönstret är fortfarande inget bevis. Det väcker en hypotes som bör testas mot registrerade temperaturer och luftfuktighetsnivåer.
Se hur vattentåliga självhäftande kakelplattor inspekterades visuellt vid 85% luftfuktighet, hur de klarade sig, vilka fuktrisker som kvarstod och vad du fortfarande bör kontrollera innan installation i ett fuktigt rum.
Läs testet av kakelplattor vid 85% luftfuktighetKan en värmekamera upptäcka våt gipsskiva bakom ett stänkskydd?
En värmekamera kan upptäcka avvikelser i yttemperaturen som kan ha samband med avdunstning eller förändrat värmeflöde. En värmeavvikelse är inget bevis på vatten.
Infraröd termografi mäter den infraröda strålning som avges och omvandlar den till skenbara yttemperaturer. Den ser inte genom kakelplattor och avbildar inte fukt direkt.
FLIR:s vägledning för byggnadsinspektion anger att värmekamerabilder kan hjälpa till att lokalisera mönster som behöver undersökas närmare, medan bekräftelse kräver en fuktmätare eller någon annan metod (FLIR:s vägledning om fuktinspektion).
Fackgranskad forskning om byggnader kommer fram till samma praktiska slutsats: termografiska resultat beror på miljöförhållanden, materialegenskaper, uppvärmnings- och avkylningscykler samt hur användaren tolkar bilderna. Termografi är mest användbar när det finns en temperaturskillnad och resultaten jämförs med opåverkade områden.
Håll utkik efter dessa felkällor:
- Kallvattenrör: En sval lodrät linje kan vara ett rör och inte en fuktig gipsskiva.
- Luftläckage: Drag runt skåp, eluttag och glipor mot ytterväggar kan skapa kalla mönster.
- Sol och hushållsapparater: Solinstrålning, spisar, diskmaskiner och apparater på bänken kan förvränga temperaturerna.
- Reflekterande kakel: Blanka eller metalliska ytor reflekterar infraröd strålning, vilket gör mätningarna mindre tillförlitliga.
- Avdunstningens tidsförlopp: Ett fuktigt område behöver inte ge ett tydligt värmesignatur när temperaturen har jämnats ut.
Termisk kontroll får större tyngd i CMCS först när mönstret stämmer överens med andra oberoende tecken, till exempel ett förhöjt jämförande mätarutslag, en mjuk övergång eller en förändring som kan kopplas till en installation.
Ett oregelbundet kallt område kan stödja hypotesen om fukt endast när mätarvärden, synliga tecken eller tidsförloppet pekar åt samma håll.
En smal, vertikal eller horisontell kall linje följer ofta rörens placering snarare än en utbredd fuktfläck.
Ett brett varmt område intill en spis eller diskmaskin kan förvränga jämförelser och mjuka upp häftämnet.
Uppvärmning som följer ett visst tidsförlopp kan förklara en färgförändring i värmebilden utan att det finns dolt vatten.
Hur bör de tillgängliga metoderna vägas mot varandra?
Det finns ingen fast ekvation som har visat sig fungera empiriskt för alla typer av stänkskydd. CMCS bör användas som en tydlig bedömningsmall på plats, inte som en diagnostisk certifiering.
| Metod | Uppmätt signal | Främsta begränsning | Vanlig felkälla | Föreslagen CMCS-vikt |
|---|---|---|---|---|
| Visuell och taktil kontroll | Förändringar på ytan, uppmjukning, fläckar och försämrad vidhäftning | Skador kan visa sig sent eller ha en annan orsak än fukt | Värme, fett, bristande underarbete och färg som släpper | 1–2 |
| Stiftlös fuktmätare | Jämförande elektromagnetisk respons | Kan inte fastställa exakt vilket lager som är vått eller vad orsaken är | Metall, reglar, rör, fästelement och densitet | 1–3 |
| Hygrometer och temperaturmätning över tid | Luftförhållanden och risk för kondens | Mäter inte dold fukt i gipsskivan | Matlagning, öppna fönster och HVAC-cykler | 1–2 |
| Värmekamera | Skillnader i yttemperatur | Upptäcker inte vatten direkt | Rör, luftflöde, värme och reflexer | 1–2 |
| Observation vid normal användning av blandaren | Tidpunkten sammanfaller med normal användning | Kan missa läckor som bara uppstår ibland eller utvecklas långsamt | Stänk och redan befintlig fukt | 2–3 |
En standardiserad bedömning kan ge poäng för oberoende bekräftelse och sedan dra av poäng för möjliga störfaktorer. Det exakta antalet är mindre viktigt än att resonemanget dokumenteras.
Tänk på följande exempel från området kring diskhon:
- Första mätningen: B2, B3 och C3 visar högre värden än tre torra referenspunkter.
- Andra mätningen: B2 ligger fortfarande högt, medan B3 och C3 återgår till nivåer nära utgångsvärdet.
- Kontroll av metall: B2 sammanfaller med en regel eller en skyddsplåt.
- Termisk mätning: Inget sammanhängande svalt område syns.
- Observation: En bubbla nära spisen blir större efter matlagning, inte efter att diskhon har använts.
Den första varningssignalen försvagas avsevärt vid upprepade mätningar. B2 får ett avdrag för en möjlig störfaktor, och den värmerelaterade bubblan förblir en osäker fuktsignal.
CMCS-arbetsblad för dokumentation av bevis
Poängen är ett beslutsstöd, inte en diagnostisk certifiering. Pågående vattenflöde, elektriska risker, snabb spridning, förorenat vatten eller att materialet blir mjukt innebär att poängen inte längre är avgörande.
Vilka tecken motiverar torkning, selektiv åtkomst eller hjälp av fackperson?
Hur vet du när det är rimligt att fortsätta hålla området under uppsikt och när väntan kan göra att skadan sprider sig?
Den minst ingripande beslutsgränsen omvandlar din fuktkarta till tydliga åtgärder, villkor för när du omedelbart ska avbryta och hänvisningar till rätt fackperson.
Det är motiverat att gå vidare när upprepade, oberoende tecken väger tyngre än möjliga störfaktorer. Du behöver inte vara helt säker innan du stänger av en vattenkälla, men du bör inte riva bort hela stänkskyddet på grund av en enda oförklarad mätningstopp.
Vi kallar detta den minst ingripande beslutsgränsen, eller LDDT. Det är den minsta mängd bevis som behövs för att motivera fortsatt uppsikt, en VVS-reparation, selektiv åtkomst, torkning eller en professionell bedömning.
När ska du omedelbart sluta testa själv?
Sluta testa och begränsa tillträdet om du ser pågående vattenflöde, en snabb förändring av materialet eller tecken på att el kan vara inblandad. Fortsätt inte att använda en blandare eller annan vattenansluten installation för att försöka återskapa en misstänkt läcka.
Akuta varningssignaler är:
- Pågående vattenflöde: Vatten rinner från en vägg, ett skåp, en anslutning, ett vägguttag eller längs kanten på stänkskyddet.
- Snabb spridning: Fläckar, mjuka partier, bubblor eller förhöjda mätvärden sprider sig på några minuter eller timmar.
- Elektrisk varningssignal: Ett vägguttag är vått, en säkring löser ut, lampor flimrar eller det hörs ett surrande ljud och luktar bränt.
- Försvagad konstruktion: Gipsskivor smulas sönder, skåp sväller eller bänkskivans stöd verkar vara påverkat.
- Förorenat vatten: Avloppsvatten, avloppsstopp, vatten från diskmaskinen eller annat okänt vatten tränger in i konstruktionen.
- Hälsosymtom: Personer i bostaden får akuta symtom som förbättras när de vistas borta från området.
Om det är säkert kan du stänga avstängningsventilen till installationen eller huvudvattenventilen. Rör inte vid våt elektrisk utrustning. Kontakta en elektriker eller akutmottagning om det finns risk för elolycka.
Branschens samlade bedömning visar att torktiden spelar roll. EPA:s riktlinjer anger att våta material vanligtvis bör torkas inom 24–48 timmar för att bidra till att begränsa mögeltillväxt, men tidsintervallet är ingen garanti för att mögel kommer eller inte kommer att växa (EPA:s mögelkurs, kapitel 2).
Standarden ANSI/IICRC S500 ger yrkesverksamma ett ramverk för inspektion av vattenskador, vattenupptagning, torkmål och dokumentation. Det är en konsensusstandard, inte en lag, såvida den inte har införlivats genom ett avtal, av ett försäkringsbolag, en myndighet eller i en föreskrift (IICRC S500).
Hur kan tidpunkten hjälpa dig att skilja kondens, brister i fogmassan och en vattenläcka åt?
Tidpunkten säger ofta mer än det högsta mätvärdet. Följ vad som händer före, under och efter vanliga aktiviteter i hemmet.
Lossa aldrig en anslutning, blockera ett avlopp, låt en diskho svämma över eller öka vattentrycket för att framkalla en läcka. Observera endast vid normal användning och avbryt om vatten visar sig.
| Mönster | Talar mer för | Kontrollera |
|---|---|---|
| Visar sig efter vattenstänk och följer skarven vid bänkskivan | Skadad eller saknad tätning längs kanten | Glipor i fogmassan, vatten som rinner längs ytan, torra röranslutningar i skåpet |
| Visar sig endast när kranen är på | Läcka i kranen, vattenledningen eller vägganslutningen | Ventilspindlar, slangar, kranens fot och genomföringar för vattenledningar |
| Visar sig när vattnet rinner ut ur diskhon | Avlopp, vattenlås, avfallskvarn eller diskmaskinsanslutning | Avloppsskarvar, flänsen till avfallskvarnen och slanganslutningar |
| Följer fuktigt väder och kalla ytor | Kondens | Daggpunkt, temperaturen på ytterväggen och kalla rör |
| Visar sig efter matlagning nära spisen | Värme eller ånga | Yttemperatur, ventilation och limmets skick |
| Finns kvar oavsett om installationen används | Gammal skada, långsam läcka, kondens eller annan störande faktor | Upprepad kartläggning, kontrollmätningar och inspektion via åtkomst |
En långsam läcka från kranen kan visa sig som fukt under kranens fot efter tio minuters normal användning. Mätvärdena i backsplashen kan förbli oförändrade samtidigt som baksidan av skåpet blir synligt fuktig. Då bör du rikta felsökningen mot rörsystemet i stället för att ta bort kakelplattor.
Kondens som uppstår säsongsvis följer ett annat mönster. Mätvärdena kan stiga vid fuktigt väder nära ett kallt rör eller ett ytterhörn och sedan sjunka när daggpunkten inomhus faller. Kurvan för den försämrade funktionen följer klimatförhållandena snarare än när kranen används.
En aktiv läcka på trycksidan kan ge ett entydigt resultat: mätvärdena ökar även när varken kranen eller avloppet används. Stäng av den aktuella ventilen om det kan göras på ett säkert sätt och kontakta en rörmokare.
Vid skador på kanterna i stänkzonen Vi testade stänkzonen vid diskhon för självhäftande kakel ger en kostnadseffektivitetsbedömning som bygger på att de mest utsatta skarvarna skyddas först. Fokus på skarvarna mot bänkskivan, sidokanterna och genomföringarna runt kranen ger en optimal konfiguration för att kontrollera sannolika vägar för ytligt inträngande vatten innan väggen öppnas.
Använd guiden för området vid diskhon för att prioritera vattentät tätning av kanter, skydd av skarvar och tätning runt kranens genomföringar – där upprepade vattenstänk oftast utsätter en i övrigt korrekt installation för påfrestningar.
När är det motiverat att öppna väggen på ett begränsat område?
Det är motiverat att öppna väggen på ett begränsat område när återkommande bevis bildar ett sammanhängande mönster, när en reparation kräver åtkomst eller när dolda förhållanden inte kan klarläggas utan ingrepp. Välj den minsta säkra öppning som kan besvara frågan.
Möjliga vägar för åtkomst är:
- Öppning från skåpsidan: Om väggen nås från insidan av diskbänksskåpet kan de synliga backsplashplattorna bevaras.
- Öppning från andra sidan väggen: En liten öppning i ett angränsande rum kan vara enklare att reparera än kökets ytskikt.
- Inspektion av en lös kant: En kakelplatta som redan har lossnat kan ge åtkomst, om borttagningen inte riskerar att sprida skadan.
- Öppning för inspektion med inspektionskamera: Ett litet hål på en säker plats kan göra det möjligt att inspektera hålrummet.
- Öppning för rörarbete: En rörmokare kan öppna det område som krävs för att komma åt en bekräftat läckande koppling.
En inspektionskamera är en liten kamera på en flexibel eller styv sond. Den kan visa missfärgningar, korrosion, fuktig isolering eller synlig mögelliknande påväxt inne i ett hålrum, men den visar bara det som finns inom det omedelbara synfältet.
Bilder från en inspektionskamera mäter inte fukt och kan missa skador bakom isolering, reglar, lim eller den motsatta gipsskivesidan. Åtkomstpunkten måste dessutom placeras så att rör och elledningar undviks.
En kvalificerad besiktningsperson kan använda en fuktmätare, en infraröd kamera, en hygrometer och en inspektionskamera som ett samlat system för att upptäcka möjliga problem. American Society of Home Inspectors’ Standard of Practice klargör att en vanlig husbesiktning är visuell och i allmänhet inte innebär några ingrepp; dolda förhållanden kan därför ligga utanför besiktningens omfattning (ASHI Standard of Practice).
Fråga innan du anlitar någon:
- Omfattning: Kommer inspektionen att fastställa den sannolika källan, skadans omfattning eller båda delarna?
- Åtkomst: Ingår borrning, och vem reparerar öppningen?
- Dokumentation: Får du kommenterade foton, mätvärden, instrumentmodeller och information om miljöförhållandena?
- Begränsningar: Vilka ytor och hålrum kan inte bedömas?
- Oberoende vid hänvisningar: Säljer besiktningspersonen även sanerings- eller åtgärdstjänster?

Hur bör CMCS- och LDDT-intervallen vägleda nästa åtgärd?
Matrisen nedan ger en kvantitativ utgångspunkt för beslut. Den är inte en universell standard eller försäkringsregel och ersätter inte en lokal fackmässig bedömning.
| Evidensintervall | Typiskt mönster | LDDT-åtgärd | Brådska | Dokumentation att spara | Trolig yrkesperson | Åtkomstnivå | Viktig begränsning |
|---|---|---|---|---|---|---|---|
| Låg säkerhet | Ett symtom eller en enstaka mätning med en tydlig störande faktor | Dokumentera och följ upp | Rutin | Mätpunkter, kontroller, foton och luftfuktighet | Ingen till en början | Ingen åtkomst | En långsam eller tillfällig läcka kan missas |
| Måttlig säkerhet | Ett återkommande mönster från ett mätinstrument och ytterligare ett stödjande tecken | Kontrollera armaturer och tätningsvägar | Snarast | Tidslogg, karta över fuktmätningar och foton av fogarna | Rörmokare eller besiktningsperson | Ingen eller minimal | Källan är fortfarande obekräftad |
| Hög säkerhet | En sammanhängande avvikelse med flera oberoende signaler eller en koppling till när armaturen används | Sluta använda det berörda området och bekräfta källan | Samma dag, om det är praktiskt möjligt | Videor, mätvärden, tidpunkt för avstängning och foton av skadorna | Rörmokare eller besiktningsperson | Selektiv åtkomst är sannolikt tillräcklig | Omfattningen kan fortfarande vara dold |
| Bekräftat fuktskadat byggnadsskikt | Synligt fuktigt material, en aktiv läcka eller direkt bekräftelse av hålrummet | Åtgärda källan och påbörja kontrollerad uttorkning | Brådskande | Foton av källan, fakturor och loggar över uttorkningen | Rörmokare och IICRC-certifierad saneringstekniker | Riktad demontering | Att ytplattan torkar innebär inte nödvändigtvis att gipset torkar |
| Misstänkt mikrobiell påverkan | Ihållande fukt, lukt, synlig mögelpåväxt eller långvarig väta | Skaffa en kvalificerad bedömning enligt delstatens regler | Brådskande | Fukthistorik, foton och frågor om boendemiljön | Auktoriserad mögelinspektör där det krävs | Beror på det enskilda fallet | Utseende och VOC-sensorer kan inte fastställa omfattningen |
Det minst förstörande alternativet är den åtgärd som besvarar den obesvarade frågan utan att oskadat material behöver offras. När säkerheten är låg ger övervakning den bästa totalkostnaden över tid (TCO). När säkerheten är hög kan fördröjd åtkomst leda till mer omfattande reparationer och minska värdet av att bevara stänkskyddet.
Vilken yrkesperson bör du kontakta?
Välj yrkesperson utifrån vad bevisen visar i stället för att kontakta alla yrkesgrupper på en gång.
- Auktoriserad rörmokare: Välj en rörmokare när tecknen följer användningen av kranen, trycket i vattenledningarna, avrinningen, ventilerna, diskmaskinens anslutningar eller anslutningarna till avfallskvarnen.
- Oberoende besiktningsman: Välj en besiktningsman för en bred, icke-invasiv bedömning när källan och omfattningen fortfarande är osäkra.
- Mögelinspektör: Anlita en kvalificerad eller auktoriserad inspektör när långvarig fukt, synlig mögelpåväxt, hälsoproblem eller myndighetskrav motiverar en mikrobiologisk utredning.
- IICRC-certifierad saneringsexpert: Anlita en firma för vattenskadesanering vid bekräftat fuktskadade material, vattenuttagning, uttorkning, avskärmning och dokumenterade fuktmål.
- Elektriker: Kontakta omedelbart en elektriker om vatten kan ha nått eluttag, kablar, apparater eller elcentraler.
Reglerna för mögel varierar mellan delstaterna. I Texas regleras bedömning och sanering av mögel genom delstatens regler för mögelbedömning och mögelsanering, med angivna undantag och en gräns på 25 sammanhängande kvadratfot (Texas Department of Licensing and Regulation).
I New York krävs auktoriserade mögelinspektörer och separata saneringsentreprenörer för arbeten som omfattas av Article 32 (New York Department of Labor). Florida reglerar också mögelinspektörer och saneringsföretag genom Department of Business and Professional Regulation (Florida DBPR).
Kontrollera kraven i din egen delstat, ditt county och din stad innan du anlitar någon. En licens i en delstat innebär inte att personen eller företaget har rätt att arbeta i en annan.
Hur påverkar hyresboende, försäkring och dokumentation vad du bör göra?
Hyresgäster bör skriftligen rapportera misstänkta läckor så snart som möjligt och undvika förstörande tester utan tillstånd. Hyresvärdar och fastighetsförvaltare har nytta av ett daterat underlag med bevis, där observationer hålls åtskilda från slutsatser.
Spara följande:
- Översiktsfoton: Visa hela väggen vid diskhon och de omgivande skåpen.
- Närbilder: Fotografera bubblor, skarvar, fläckar, ventiler och var mätaren placerades.
- Mätprotokoll i rutnät: Spara alla mätvärden, även kontrollvärden från torra områden och normala resultat.
- Miljödata: Notera temperatur, relativ luftfuktighet och det senaste vädret.
- Tidslinje för vatteninstallationer: Notera normal användning, synliga förändringar och när vattnet stängdes av.
- Kommunikationslogg: Spara e-postmeddelanden, serviceärenden, anteckningar från entreprenörer och svar.
- Kvitton och rapporter: Spara rörmokarfakturor, besiktningsrapporter, uttorkningsloggar och dokumentation över skadade föremål.
Benämn inte ett tillstånd som ”mögel”, ”giftigt mögel” eller ”vattenskada” om de tillgängliga uppgifterna inte stödjer det. Beskriv i stället vad du observerade: ”unken lukt bakom skåpet”, ”mätvärdet översteg kontrollpunkterna” eller ”vatten synligt under tilloppsventilen”.
Försäkringsskyddet beror på orsaken, tidpunkten, försäkringsvillkoren, underhållshistoriken och skyldigheten att anmäla skadan. Plötsliga, oavsiktliga vattenskador kan bedömas annorlunda än långvarigt läckage. Skydda fastigheten först och kontakta sedan försäkringsbolaget när det är lämpligt.
Vad kan professionell bekräftelse och reparation kosta?
Kostnaderna varierar kraftigt beroende på region, åtkomst, om det är en akut åtgärd, behörighetskrav, föroreningsklass och vilka återställningsarbeten som krävs. Se nationella prisuppgifter som riktvärden för planering, inte som offerter.
Angis nationella kostnadsguider för 2025 anger följande breda konsumentintervall:
- VVS-reparation: Många VVS-reparationer i hemmet kostar några hundra dollar, medan åtkomst till dolda ledningar och akuthjälp kan kosta mer (Angis kostnadsguide för VVS-reparationer).
- Mögelinspektion: Vanliga inspektioner uppges ofta kosta mellan ungefär $300 och $1,000, beroende på fastighetens storlek och hur omfattande provtagningen är (Angis kostnadsguide för mögelinspektioner).
- Sanering efter vattenskada: Nationellt rapporterade projekt ligger ofta på omkring $1,300 till över $6,000, och förorenat vatten samt uttorkning av konstruktionen ökar kostnaden (Angis guide för sanering efter vattenskador).
- Reparation av gipsvägg: Mindre reparationer för att skapa åtkomst kan kosta några hundra dollar, medan matchning av struktur, målning och större byten höjer totalkostnaden (Angis kostnadsguide för reparation av gipsväggar).
Be om skriftliga lokala offerter där kostnaderna för att åtgärda källan, skapa åtkomst, torka ut, bedöma skadan, ta prover, återuppbygga och byta stänkskyddet redovisas separat. Då blir det tydligt vilket arbete som faktiskt behövs, i stället för att allt döljs bakom en enda klumpsumma.
Myter och fakta
Vilket är nästa säkraste steg?
Är du orolig för att övervakning ska missa en skada, men tvekar inför att förstöra ett nyligen installerat stänkskydd utan bevis?
Använd flera bekräftande tecken för att välja den minsta åtgärd som skyddar människor, väggkonstruktionen och din dokumentation.
Ett mönster av återkommande, oberoende signaler är mer användbart än ett universellt gränsvärde för fukt. Jämför torra kontrollpunkter av samma typ, kartlägg området, upprepa mätningarna, notera förhållandena i rummet och sänk säkerheten i bedömningen när metall, reglar, värme eller reflekterande ytskikt kan förklara resultatet.
Avsluta vanlig gör-det-själv-kontroll om det finns aktivt vatten, elektrisk risk, förorenat vatten, snabba förändringar eller bekräftat fuktigt material. Sådana förhållanden innebär att du bör ta hjälp av fackperson, även om den exakta källan fortfarande är osäker.
Om dina uppgifter fortfarande ger låg säkerhet i bedömningen kan du använda ett numrerat arbetsblad och kontrollera samma punkter under jämförbara förhållanden. Om mönstret kvarstår eller blir tydligare kontaktar du den yrkesperson vars kompetens motsvarar tecknen: VVS-tekniker, besiktningsperson, mögelinspektör, elektriker eller en IICRC-certifierad saneringstekniker.
På så sätt slipper du välja mellan att ignorera problemet och att riva bort alla plattor. Målet är att kunna fatta ett välgrundat nästa beslut – inte att skapa en falsk säkerhet.
Utsågningar för fläktar väcker frågor om luftflöde, tätning och kondens. Läs mer om hur du förebygger fukt, väljer rätt produkt och löser problem kring badrumsfläktar.
Se vilka plattor som tål fukt runt badrumsfläktarJämför torra områden med lägre risk, stänkområden där särskilda villkor gäller och ytor med hög risk för direkt vattenstänk innan du bestämmer var självhäftande badrumsplattor passar.
Kartlägg lämpliga områden för badrumsplattorVälj ytfinish först när väggen har klarat kontrollerna
För en djärv yta med tydlig struktur Timberline-rutor erbjuder självhäftande, fogfria plattor i karmosinrött, som beskrivs som vattentåliga, slitstarka och värmebeständiga samt lämpliga för köks- och badrumsväggar.
Utforska Timberline-rutorFör en lugnare yta med struktur Olivgröna linjer erbjuder vattentåliga och värmebeständiga självhäftande väggplattor för stänkskydd och badrumsväggar – utan behov av särskilda monteringsverktyg.
Utforska Olivgröna linjerVanliga frågor
Har du fortfarande frågor om mätvärden, mögel, uttorkning eller borttagning av plattor?
De här korta svaren förklarar begränsningarna hos vanliga tester och vilka tecken som bör påverka hur du går vidare.
Vilket mätvärde visar att gipsskivan är fuktig bakom plattorna?
Verkar en hög procentsiffra vara ett tydligt godkänt eller underkänt resultat?
Det viktiga riktmärket är en återkommande skillnad jämfört med motsvarande torra kontrollområden – inte ett enda universellt värde.
Det finns ingen universell procentsiffra på en konsumentmätare som bevisar att gipsskivan bakom självhäftande plattor är fuktig. Det visade värdet kan vara relativt, materialspecifikt eller påverkas av metall, lim, plattornas densitet och mätdjupet.
Använd den skala som tillverkaren anger för mätaren, dokumentera torra kontrollområden och leta efter ett sammanhängande mönster som återkommer. Bekräfta viktiga fynd genom att öppna väggen på en begränsad plats eller anlita en kvalificerad fackperson.
Betyder bubblor i stänkskyddet alltid att det finns vatten bakom de självhäftande plattorna?
Är en platta som lossnat tillräckligt för att anta att väggen läcker?
Bubblor är ett varningstecken som bör undersökas, men deras placering och när de uppstår kan hjälpa dig att avgöra den troligaste orsaken.
Nej. Bubblor kan bero på fukt, fett, damm, färg som inte har härdat, dåligt fäste, instängd luft, värme, rörelser i underlaget eller spänningar från monteringen.
En bubbla nära en otät skarv vid diskhon bör undersökas närmare. Om plattor lossnar över ett större område efter monteringen kan det tyda på bristande förberedelse eller att fästförmågan har gått förlorad. Om en bubbla förändras efter matlagning kan den vara värmerelaterad.
Kan en värmekamera bekräfta fukt bakom ett stänkskydd?
Bevisar en blå eller kall yta i en värmebild att det finns vatten där?
Värmebilder visar temperaturskillnader som måste kontrolleras med oberoende tecken.
Nej. En värmeavvikelse är inte ett bevis på vatten. Kalla rör, luftläckage, reflekterande plattor, värme från apparater, solljus och luckor i isoleringen kan ge liknande mönster.
Termografi väger tyngre i en CMCS-bedömning när avvikelsen återkommer och stämmer överens med jämförande mätvärden, synliga förändringar eller tidpunkter då installationen normalt används.
Hur länge bör jag övervaka ett misstänkt stänkskydd?
Kan det ge värdefulla ledtrådar att vänta, eller riskerar dolda skador att förvärras?
Övervakning är lämplig endast när det inte finns några akuta tecken och avvikelsen fortfarande bedöms ha låg säkerhet.
Vid ett stabilt tillstånd med låg säkerhet kan du upprepa mätningen enligt samma rutnät under liknande förhållanden i flera dagar och efter normal användning av köket. Anteckna temperatur, luftfuktighet, när köksutrustning och vatten används samt eventuella förändringar.
Fortsätt inte övervakningen om det finns pågående vatten, snabb utbredning, mjuk gipsskiva, fuktiga elektriska komponenter, stopp eller baktryck i avloppet eller bekräftad fukt i hålrummet. Sådana fynd motiverar omedelbar åtgärd.
Bör jag ta bort en självhäftande platta för att undersöka gipsskivan?
Skulle det räcka att lyfta en platta för att få svar utan att förstöra hela installationen?
Att ta bort en begränsad del kan vara till hjälp när tecknen visar var det är bäst att öppna och säkerhetsriskerna har kontrollerats.
Kanske. Överväg först åtkomst via skåpet under diskhon, en angränsande vägg eller en befintlig lossnad kant. På så sätt kan du kanske bevara det synliga stänkskyddet.
Be om hyresvärdens godkännande om du hyr bostaden. Ta hänsyn till rör och elledningar innan du borrar eller skär. En professionell inspektion med inspektionskamera kan minska skadorna, men inte heller den kan visa alla dolda ytor.
Kan en unken lukt bekräfta dolt mögel?
Betyder en ihållande jordig lukt att mögel växer bakom stänkskyddet?
Lukt kan motivera en närmare undersökning, men den kan inte visa varifrån lukten kommer, vilken organism det rör sig om eller hur omfattande problemet är.
Nej. Unken lukt kan komma från fuktiga material i skåpen, avlopp, förvarade produkter eller mikrobiell aktivitet. VOC-mätare för konsumentbruk kan inte bekräfta förekomst av mögel.
Om lukten kvarstår samtidigt som det finns dokumenterad fukt, synlig påväxt, långvarig fuktbelastning eller oro hos de boende bör du kontrollera vilka regionala behörighetskrav som gäller och kontakta en kvalificerad mögelutredare i stället för att förlita dig på en hemmamätare.



Lämna en kommentar
Denna webbplats är skyddad av hCaptcha och hCaptchas integritetspolicy . Användarvillkor gäller.