


It's frustrating when a home renovation project doesn't turn out as expected. You spend time, money, and effort, only to find yourself wondering why your DIY backsplash never looks Pinterest-perfect. The fear of costly mistakes or choosing the wrong materials can stop a project before it even starts.
What if you had a complete roadmap, guiding you from material selection to flawless installation and long-term maintenance? This guide addresses those exact concerns, giving you the confidence to tackle your next kitchen upgrade. You'll learn how to install a green subway tile backsplash that looks professional and stands the test of time.
✨ Your Dream Kitchen Awaits!
Imagine stepping back and admiring a stunning, self-installed green subway tile backsplash. This article provides that easy roadmap, complete with checklists, diagrams, and expert tips. You'll gain the skills and knowledge to create a beautiful, durable focal point in your kitchen.
Equip yourself for success! Download our comprehensive, printable checklist to ensure you have every tool and material ready before you begin. No more mid-project store runs!
Download Your Free Materials ChecklistWhy Choose a Green Subway Tile Backsplash?
Are you wondering if green is the right choice for your kitchen? A green subway tile backsplash offers remarkable design versatility. It seamlessly integrates into various kitchen aesthetics, from rustic farmhouse to sleek modern and even opulent luxury. This color choice isn't just a trend; it's a timeless statement.
Design Versatility
Green tiles adapt beautifully to diverse kitchen styles. A sage green kitchen backsplash design can evoke a calming, earthy feel, ideal for farmhouse or transitional spaces. In contrast, an emerald green backsplash for white cabinets delivers a bold, sophisticated pop, perfect for contemporary or art deco-inspired interiors.
Dark green tones, like forest green, create a deep, luxurious backdrop. They pair well with natural wood accents or rich metallic hardware. Light green hues brighten a space, making smaller kitchens feel more open and airy.
Psychology of Color
Beyond aesthetics, green profoundly impacts our mood. This color is associated with nature, growth, and tranquility. Introducing green into your kitchen can create a calming and refreshing atmosphere.
Studies show that green environments reduce stress and promote a sense of well-being. A green backsplash can turn your kitchen into a more inviting and harmonious space. It offers a subtle daily reset.
Current Kitchen Trends 2025 Highlighting Green Tones
Green is more than a fleeting fad; it's a enduring design staple. Kitchen trends 2025 green tile backsplash reports indicate its strong presence. Interior designers frequently recommend green for its ability to bring a natural element indoors.
Experts note a shift towards organic textures and colors in home design. Green subway tiles fit this narrative perfectly. They offer a connection to nature while providing a clean, classic subway tile pattern. This trend solidifies green as a forward-thinking choice.
Tools and Materials Checklist
One of the biggest hurdles DIYers face is knowing exactly what to buy. Gathering the correct tools and materials beforehand saves time and prevents frustrating mid-project trips to the store. This section simplifies that process.
Tile Types for Your Green Backsplash
Selecting the right tile is crucial for your project's success and longevity. There are several types of green subway tiles available, each with unique installation requirements. Understanding the differences helps in choosing wisely.
Peel-and-Stick Green Subway Tile
For those seeking the quickest and easiest installation, DIY green peel and stick backsplash options are a top choice. These tiles come with adhesive backing, making them ideal for renters or budget-conscious homeowners. They simplify the process significantly.
Peel-and-stick tiles are generally lighter and require minimal specialized tools. They often come in various finishes, including realistic textures. For a comprehensive look at these convenient options, consider our article, "How to Choose Green Peel and Stick Tiles."
Ceramic and Porcelain Tiles
Traditional ceramic and porcelain tiles offer durability and a classic look. They are denser and require wet saws for cutting. Ceramic tiles are porous and often need sealing, while porcelain is less absorbent.
Many homeowners choose ceramic or porcelain for their vast color and finish selections. They provide a more permanent solution and a sense of traditional craftsmanship.
Glass Tiles
Glass subway tiles offer a luminous, reflective surface that can brighten a kitchen. They are non-porous and resistant to stains. However, glass tiles can be more challenging to cut cleanly without chipping.
They create a sleek, modern aesthetic and often come in vibrant green hues. Glass requires specific adhesives and a gentle hand during installation.
Eco-Friendly Options
Sustainability is a growing concern. Look for recycled glass tiles, bamboo tiles, or those made from reclaimed materials. Some ceramic manufacturers use sustainable practices in their production.
Choosing an eco-friendly backsplash contributes to a healthier home and planet. Research brands committed to environmental responsibility for green choices.
Essential Tools for Installation
Having the right tools makes the job much smoother and more precise. Consider these items non-negotiable for a successful green subway tile backsplash installation.
- Measuring Tape and Pencil: For accurate measurements and marking.
- Level (or Laser Level): Ensures straight lines and a perfectly horizontal first row. A laser level offers unparalleled precision, projecting clear, consistent lines across the entire wall.
- Tile Cutter (Manual or Wet Saw): Essential for precise cuts. A manual snap cutter works well for ceramic, while a wet saw is best for porcelain, glass, or stone.
- Notched Trowel: Spreads adhesive evenly for traditional tiles. The size of the notches depends on your tile size.
- Tile Spacers: Maintain consistent grout lines between tiles. They are crucial for a uniform appearance.
- Rubber Grout Float: For applying grout into the tile joints.
- Grout Sponge: For cleaning excess grout from the tile surface.
- Utility Knife: Handy for cutting mesh backing on peel-and-stick tiles or scoring caulk.
- Bucket: For mixing grout and rinsing sponges.
- Safety Glasses and Gloves: Always protect your eyes and hands.
Optional Upgrades and Sealants
These items enhance the installation process or improve the finished product's longevity.
- Tile Nippers: For making small, irregular cuts or nibbling away edges.
- Mixing Paddle: Attaches to a drill for quick and consistent grout mixing.
- Caulk Gun and Caulk: For sealing edges where the backsplash meets countertops or cabinets. Use a color-matching caulk for a seamless look.
- Tile Sealer: Especially for porous tiles like unglazed ceramic or natural stone. It protects against stains.
- Grout Sealer: Recommended for all grout lines, particularly in high-moisture areas. It repels water and prevents discoloration. This is particularly important for a matte green subway tile backsplash installation, as matte finishes can sometimes show stains more readily without proper sealing.
Planning Your Layout and Design
Effective planning is the secret ingredient to a professional-looking backsplash. Skipping this stage often leads to misaligned tiles or awkward cuts. Taking time now saves significant frustration later.
Unsure which green hue or pattern best suits your kitchen's personality? Take our quick "Discover Your Green Style" quiz! Receive personalized recommendations and a mini-design guide straight to your device.
Discover Your Green Style Quiz!Measure Space Accurately
The first step is always precise measurement. Use your measuring tape to determine the total square footage of your backsplash area. Measure the width and height of each section.
Remember to account for windows, outlets, and corners. It's smart to add 10-15% extra to your tile order for cuts, mistakes, and future repairs. This small buffer prevents running out of tiles mid-project.
Choose Tile Orientation: Horizontal, Vertical, Herringbone
The orientation of your green subway tiles dramatically alters the visual effect. The classic horizontal offset pattern (brick-like) is popular for a reason—it's timeless. However, other patterns offer unique character.
For a deeper dive into various patterns and how they transform a space, check out our guide on "How to Use Trendy Subway Tile Patterns." Choosing the right pattern elevates your entire kitchen design.
Plan for Outlets and Corners
Outlets and corners are common trouble spots. Before applying any adhesive, conduct a dry run. Lay out your tiles on the floor or tape them to the wall. This allows you to visualize cuts and avoid small, sliver-like pieces in visible areas.
Try to center full tiles around outlets where possible. For corners, ensure continuity in your pattern. A small kitchen, for example, might benefit from a simple horizontal offset pattern to minimize complex corner cuts. One pro tip is to make a cardboard template for tricky outlet cuts, ensuring accuracy before cutting the actual tile.
Step-by-Step Installation Guide
This is where your vision truly comes to life. While the process may seem daunting, breaking it down into manageable steps builds confidence. Remember, patience is your best tool.
Surface Prep: Clean and Dry Walls
Proper preparation is non-negotiable for a durable backsplash. The adhesive needs a clean, stable surface to bond effectively.
- 1 Remove Old Backsplash: Carefully pry off any existing backsplash, taking care not to damage the drywall.
- 2 Clean the Surface: Wipe down the wall with a degreaser or mild detergent to remove grease, grime, and dust. A clean surface ensures maximum adhesion.
- 3 Repair and Smooth: Fill any holes or cracks with spackle or joint compound. Sand smooth once dry. Any imperfections will show through your new tiles.
- 4 Seal if Needed: If your drywall is raw or heavily patched, apply a coat of primer/sealer. This creates a uniform surface for the adhesive.
Cutting and Fitting Tiles
Accurate cuts are key to a professional finish. This step often causes the most apprehension, but practice makes perfect.
Measuring for Cuts
Measure the gap where the tile will go, then mark that measurement on your tile. Always measure twice, cut once. Use a pencil or fine-tipped marker.
For outlets, use a template. Hold a tile over the outlet, mark the corners, and transfer to the tile.
Using a Tile Cutter
- Manual Snap Cutter: Best for straight cuts on ceramic tiles. Score the tile firmly, then snap it cleanly.
- Wet Saw: Ideal for porcelain, glass, or intricate cuts. The water cools the blade and reduces dust. Always wear safety glasses when operating a wet saw.
- Tile Nippers: Useful for small, curved cuts or trimming tiny pieces.
Pro-tip: When cutting a tile, position the cut edge so it will be less visible. For example, place a cut edge in a corner or under a cabinet. This minimizes the appearance of any imperfect cuts.
Applying Adhesive and Spacers
This is where the tiles begin their journey onto your wall. Consistency in application is vital for a smooth, even surface.
For Traditional Tiles (Ceramic, Porcelain, Glass)
- 1 Mix Adhesive: Follow the manufacturer's instructions for mixing your thin-set mortar or mastic. Aim for a peanut butter consistency.
- 2 Apply Adhesive: Use a notched trowel to spread a thin, even layer of adhesive onto the wall. Work in small sections, about 2x2 feet at a time, to prevent the adhesive from drying. Hold the trowel at a 45-degree angle.
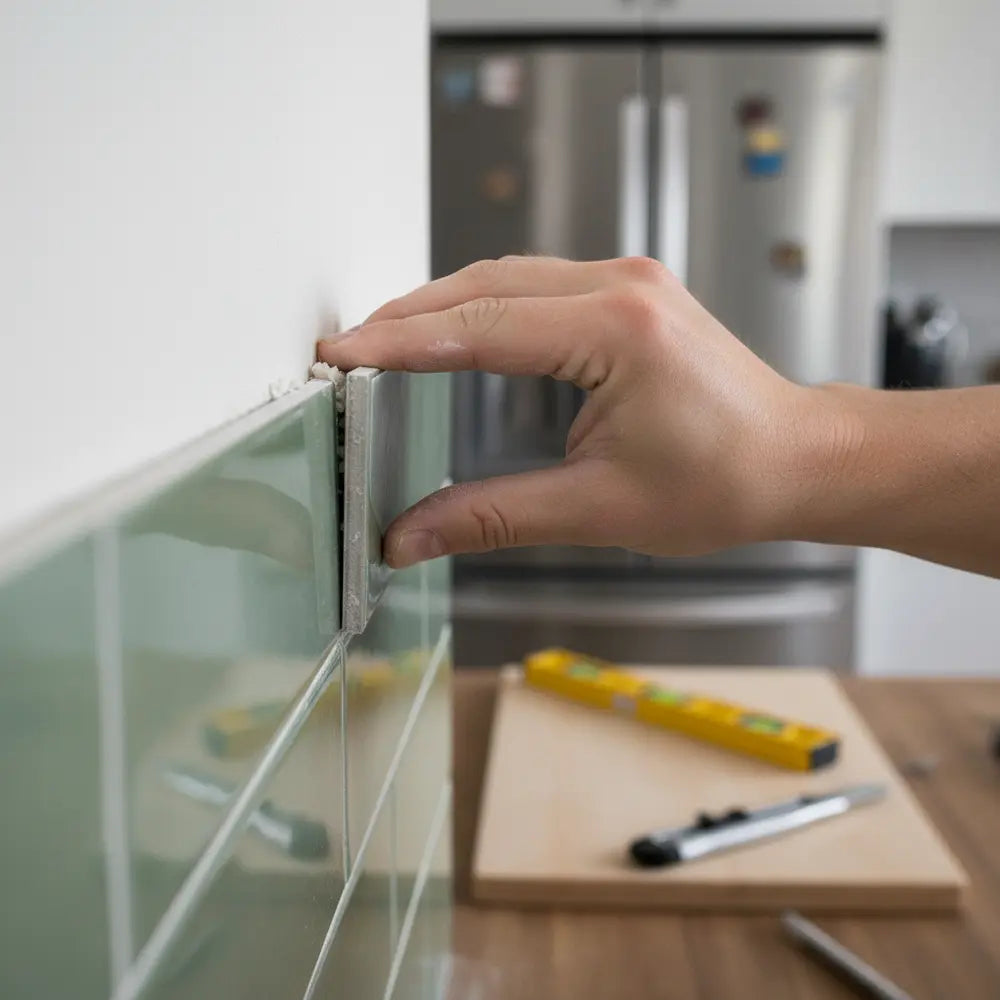
- 3 Place First Tile: Begin in the most visible corner, typically working from the bottom up. Press the tile firmly into the adhesive with a slight twisting motion.
- 4 Insert Spacers: Place tile spacers at each corner of the tile. This ensures uniform grout lines.
- 5 Continue Tiling: Work your way across the row, then up. Regularly check your work with a level to ensure everything remains straight.
- 6 Wipe Excess: Clean any adhesive that squeezes through the grout lines immediately with a damp sponge. Dried adhesive is much harder to remove.
For Peel-and-Stick Backsplash Tiles
Peel-and-stick options simplify this step significantly. For detailed visual instructions and troubleshooting, the "Easy Peel & Stick Subway Tile Install Guide" is a top resource.
- 1 Peel Backing: Remove the protective backing from the tile sheet.
- 2 Align and Press: Carefully align the tile with your starting point and press it firmly onto the wall.
- 3 Smooth Out: Use a roller or a flat edge to ensure full contact and remove any air bubbles.
- 4 Overlap Edges: If tiles are designed to overlap, ensure a snug fit.
For an even simpler guide, perfect for those with no prior tiling experience, explore this easy installation resource: Easy Guide: Install Peel & Stick Subway Tiles.
Regardless of the tile type, a consistent approach to adhesive application and tile placement leads to the best results.
Grouting, Sealing, and Finishing Touches
The final steps are what truly transform your installed tiles into a polished, professional-looking backsplash. Grouting protects the tiles and defines the pattern, while sealing ensures longevity.
Selecting Best Grout Colors for Green Tiles
The choice of grout color dramatically influences the overall appearance of your green subway tile backsplash. It can either highlight the tiles or blend in for a seamless look.
- White Grout: Offers a classic, high-contrast look that makes each green tile pop. It creates a crisp, clean aesthetic. This option is popular for a traditional or farmhouse feel.
- Light Gray Grout: Provides a softer contrast than white, offering a modern and subtle definition. It’s excellent for making the green tone feel more subdued and natural.
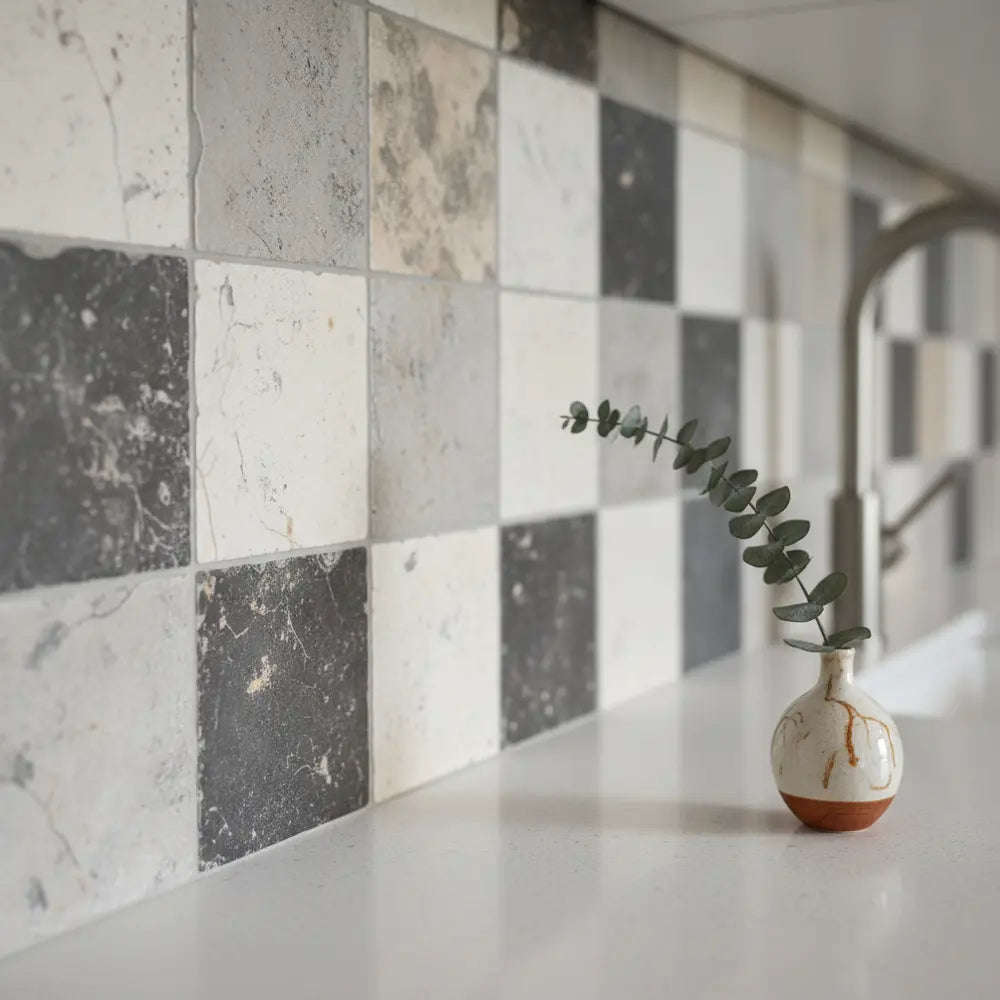
- Dark Gray/Charcoal Grout: Creates a dramatic, graphic effect, especially with lighter green tiles. This choice emphasizes the subway pattern. It can also hide dirt better than lighter grouts.
- Green Grout: For a monochromatic, seamless wall of color. This choice is less common but can create a striking, uniform look where the individual tiles blend into a larger green surface.
Consider how the grout will interact with your matte green subway tile backsplash installation. Matte finishes often benefit from a slightly contrasting grout to define the texture. An example would be pairing a soft sage green tile with a warm light gray grout. This enhances the tile's organic feel.
Application Process
Grouting fills the spaces between your tiles, providing structural integrity and a finished appearance. Wait at least 24 hours after installing tiles before grouting to allow the adhesive to fully cure.
- 1 Mix Grout: Follow the manufacturer's instructions to mix your chosen grout. Aim for a thick, paste-like consistency, similar to peanut butter.
- 2 Apply Grout: Using a rubber grout float, scoop a generous amount of grout and spread it diagonally across the tiles. Press firmly to force the grout into the joints, ensuring all gaps are filled.
- 3 Remove Excess: Hold the float at a 45-degree angle and scrape off as much excess grout as possible. Work in sections to keep the process manageable.
- 4 Clean Tiles: After 15-30 minutes (check manufacturer's drying time), use a damp grout sponge to wipe the tile surface. Rinse the sponge frequently and wring it out well. Over-wetting can weaken the grout. Repeat until the tiles are clean, leaving grout in the lines.
- 5 Buff Haze: Once the grout is dry and a hazy film appears on the tiles, buff the surface with a clean, dry cloth. This step removes any remaining grout haze.
Pro-tip: Grout cures over time, so don't be alarmed if it looks a little uneven initially. The final look emerges after a few days.
Sealing Options for Longevity
Sealing protects your grout and, in some cases, your tiles from moisture and stains. This is a critical step for long-term durability, especially in a kitchen environment.
By meticulously following these steps for grouting and sealing, your green subway tile backsplash will maintain its beauty and integrity for years to come. It’s an investment in your kitchen’s future.
Cost Breakdown and Budgeting Tips
Understanding the financial aspects of your DIY project is crucial. While DIY saves labor costs, materials still add up. This section provides a realistic overview, helping you budget wisely.
Average DIY Costs for Backsplash
The cost of installing a green subway tile backsplash can vary widely, but a DIY approach significantly reduces expenses compared to professional installation. On average, you can expect to spend between $2-$15 per square foot for tiles, and $1-$3 per square foot for adhesive and grout. Tools are a one-time purchase.
For a typical kitchen backsplash covering approximately 30-40 square feet, expect material costs ranging from $150 to $600. This estimate assumes a mix of affordable and mid-range materials. Higher-end glass or designer ceramic tiles will increase this range.
Where to Save and Where to Splurge
Smart budgeting involves knowing when to save and when to invest more. This approach ensures quality where it matters most.
- Save on Tools: Borrow specialized tools like a wet saw from friends, or rent them from a home improvement store. You don't need to buy every single item.
- Save on Basic Tiles: Standard ceramic subway tiles are often the most budget-friendly. Look for sales or bulk discounts.
- Splurge on Quality Adhesive/Grout: These materials are the foundation of your backsplash. Cheap adhesive can lead to tiles lifting, and poor grout can stain or crack. Invest in reputable brands for longevity.
- Splurge on a Feature Tile (Optional): If your budget allows, consider a small section of a higher-end green tile as an accent. This creates visual interest without breaking the bank.
A common misconception is that all tools need to be brand new. Many quality used tools are available, or rental options can save hundreds.
Affordable Sourcing Options
Finding good deals on materials can significantly impact your overall budget. Many retailers offer options for the budget-conscious DIYer.
By strategically sourcing your materials and understanding where your money goes, you can achieve a stunning green subway tile backsplash without overspending.
Maintenance, Cleaning, and Longevity
Your beautiful new green subway tile backsplash deserves proper care to maintain its pristine look. Regular maintenance prevents grime buildup and ensures it lasts for years. Good habits today mean less work tomorrow.
Daily/Weekly Cleaning
Kitchen backsplashes are prone to splatters from cooking. Quick, consistent cleaning is your best defense against tough stains.
- Wipe Down Daily: After cooking, quickly wipe down your backsplash with a damp cloth or sponge. This removes fresh grease and food particles before they dry.
- Mild Soap Solution (Weekly): For a more thorough weekly clean, use a spray bottle filled with warm water and a few drops of mild dish soap. Spray the backsplash, let it sit for a minute, then wipe with a clean, damp cloth.
- Dry Thoroughly: Always dry your tiles and grout after cleaning to prevent water spots and mildew growth. A microfibre cloth works wonders.
Pro-tip: Avoid abrasive cleaners or harsh scrubbing pads, especially on matte green subway tile backsplash installation. These can dull the finish or damage grout.
Avoiding Damage
Preventing damage is easier than repairing it. Simple precautions safeguard your backsplash.
- Hot Pots and Pans: Be mindful of placing extremely hot pots and pans directly against the backsplash, as extreme heat can sometimes affect grout or certain tile types, especially if unsealed.
- Sharp Objects: Avoid cutting or dragging sharp objects directly on the tile surface.
- Chemical Exposure: Protect your backsplash from strong chemicals like oven cleaner or drain cleaner. If spills occur, wipe them immediately. These chemicals can etch tile surfaces or discolor grout.
A common misconception is that all tiles are impervious to damage. While ceramic and porcelain are durable, grout and sealants need protection.
Long-Term Maintenance Tips
For a truly lasting backsplash, consider these actions annually or as needed. They are essential for preserving its appearance and integrity.
- Re-seal Grout: Depending on kitchen use and cleaner frequency, re-seal your grout lines every 1-3 years. A simple water test can indicate if sealing is needed: if water soaks into the grout, it's time to re-seal. For a 2-year-old backsplash in a busy family kitchen, re-sealing annually could be beneficial to prevent discoloration from cooking splatters.
- Inspect Caulk: Check the caulk lines where the backsplash meets the countertop and cabinets. If you notice any cracks or gaps, remove the old caulk and apply fresh silicone caulk. This maintains a waterproof seal.
- Deep Cleaning Grout: Over time, grout can accumulate stubborn stains. For these, use a specialized pH-neutral grout cleaner and a stiff-bristled brush (not wire). Always test in an inconspicuous area first.
Consistent care ensures your green subway tile backsplash remains a beautiful and functional part of your kitchen for many years, reflecting your hard work and good taste.
Green Backsplash Inspiration & Trend Forecast 2025
Green is not just a color; it's a design movement bringing organic richness to our homes. Let's explore modern applications and upcoming trends to inspire your next kitchen update. Your green subway tile backsplash can be a true reflection of contemporary style.
Modern Designs: Sage, Emerald, Dark Green
The beauty of green lies in its spectrum, offering a shade for every design preference. Modern kitchens are embracing these tones with open arms.
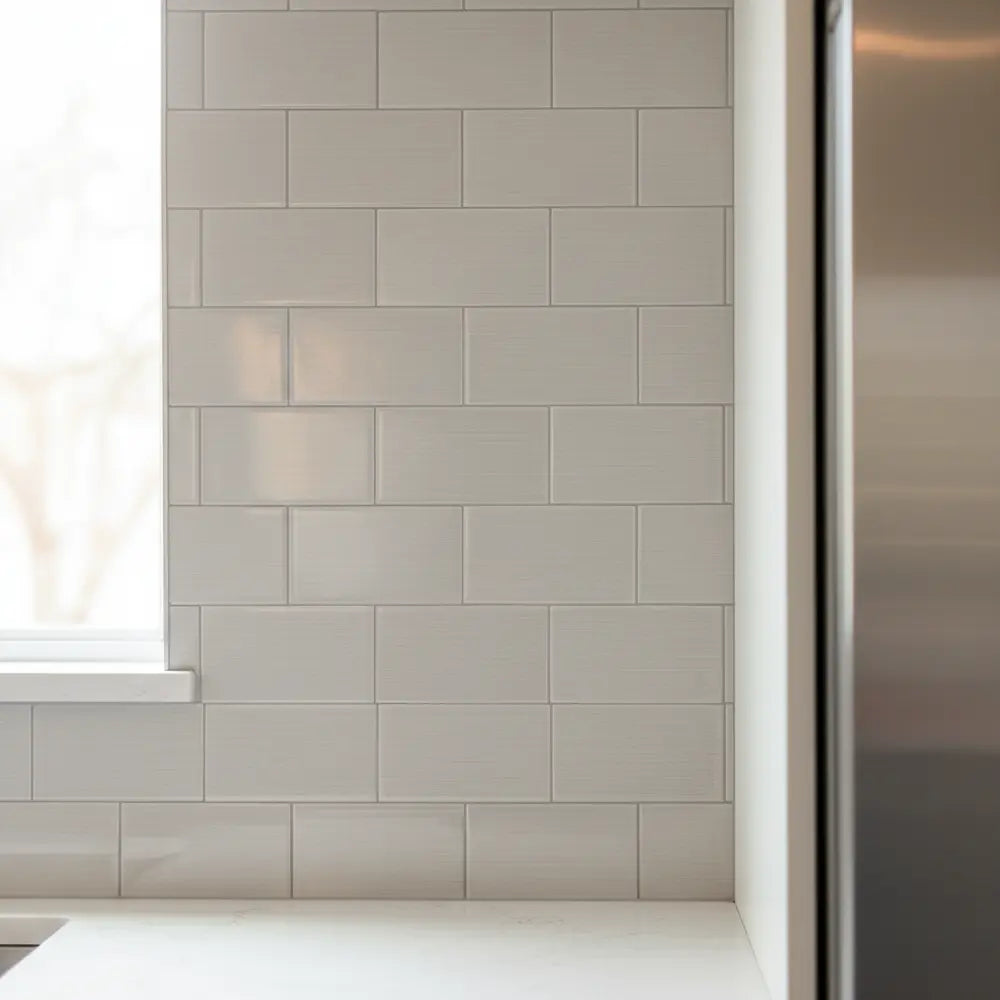
- Sage Green: This muted, soft green brings a serene, understated elegance. It pairs beautifully with natural wood cabinets, brushed gold hardware, and creamy countertops. A modern sage green kitchen backsplash design lends itself to a Nordic or minimalist aesthetic, offering calm without being bland.
- Emerald Green: Bold and luxurious, emerald green makes a statement. When paired with crisp white cabinets and polished brass or chrome fixtures, an emerald green backsplash for white cabinets becomes an undeniable focal point. It injects a glamorous, jewel-toned richness into the space, ideal for sophisticated or eclectic designs.
- Dark Green: Deep forest or hunter green subway tiles create dramatic depth. They work exceptionally well in kitchens with darker cabinetry, black hardware, or industrial accents. This choice evokes a moody, refined atmosphere, perfect for a sophisticated, modern loft or a cozy, rustic-chic kitchen.
These varied green tones illustrate how the color green offers immense flexibility. It allows designers to craft distinct personalities for each kitchen.
Pairing with Countertops and Hardware
The magic of a green backsplash is often amplified by its companions. Consider how it interacts with other fixed elements in your kitchen.
-
Countertops:
- — White Quartz/Marble: Provides a clean, bright contrast that makes green pop. This pairing is classic and fresh.
- — Butcher Block/Wood: Enhances the natural, organic feel, especially with sage or olive green tiles.
- — Dark Granite/Soapstone: Creates a rich, deep aesthetic with emerald or dark green tiles, leaning into a luxurious vibe.
-
Hardware:
- — Brushed Brass/Gold: Adds warmth and sophistication, particularly with jewel-toned greens.
- — Matte Black: Offers a modern, striking contrast, complementing both light and dark green tiles.
- — Stainless Steel/Chrome: Provides a crisp, contemporary edge, ideal for a sleek, modern sage green kitchen backsplash design.
This careful curation of elements ensures a cohesive and visually appealing kitchen. Each component supports the overall design narrative.
Upcoming Kitchen Trends
The year 2025 promises exciting shifts in kitchen design, with green continuing its reign. Home Renovation Magazine highlights several key movements.
- Texture Play: Expect to see more textured green subway tiles—think handmade ceramics with subtle variations or crackle-glaze finishes. These add tactile depth to the space.
- Biophilic Design: The integration of natural elements and patterns will intensify. Green backsplashes are central to this, fostering a connection to the outdoors.
- Soft Industrial: A blending of industrial elements with softer colors and materials. A dark green backsplash, for example, could be paired with concrete countertops and open shelving.
- Smart Storage Integration: While not directly tile-related, this trend will influence how backsplashes are framed, often becoming a backdrop for sleek, integrated storage solutions.
For a deeper dive into current and future kitchen aesthetics, "Peel Stick Backsplash Kitchen Ideas 2025" offers excellent insights. It showcases how even convenient options stay ahead of design curves. By embracing these trends, your green subway tile backsplash won't just be current; it will be a testament to forward-thinking design.
Conclusion
You’ve now walked through the entire process of how to install a green subway tile backsplash, from initial inspiration to the final sealing and maintenance. We covered selecting the perfect shade of green, gathering essential tools, meticulously planning your layout, and executing a flawless installation. These detailed steps are designed to empower you.
Remember, a successful DIY project is within your reach. Even beginners can achieve stunning, professional-level results with careful planning and a step-by-step approach. The satisfaction of transforming your kitchen with your own hands is truly rewarding.
Take the next logical step in your DIY journey. Download our comprehensive checklist to ensure you have every tool and material ready. Explore our material sourcing links to find the perfect green subway tiles for your vision. Then, confidently begin your project.
Ready for more kitchen renovation insights? Subscribe to our newsletter for more DIY kitchen remodel guides and expert tips delivered straight to your inbox. Let's keep building beautiful spaces, together.
Subscribe to Our NewsletterLove your new backsplash? Inspire others! Share your finished green subway tile kitchen on social media using #StickwollGreenDIY and tag us. We can't wait to see your stunning results!
Share Your Style on InstagramFAQ
Q1: How long does it typically take for a DIY green subway tile backsplash installation?
A1: A typical DIY green subway tile backsplash project for an average-sized kitchen (30-40 sq ft) usually takes 1-2 full days of work. This includes surface preparation, tile installation, and grouting. Allow an additional 24-72 hours for adhesive and grout to fully cure before sealing.
Q2: Can I install a matte green subway tile backsplash over existing tiles?
A2: While technically possible, it's generally not recommended for a lasting, professional finish. Installing over existing tiles can create an uneven surface and add unnecessary bulk. For the best results, it's always advisable to remove the old backsplash and prepare a clean, flat surface.
Q3: What are the main advantages of using DIY green peel and stick backsplash tiles?
A3: The main advantages of a DIY green peel and stick backsplash are speed, ease of installation, and affordability. They require minimal tools, no messy grout (for many types), and are perfect for renters or those seeking a quick, low-commitment update. They are also easily removable.
Q4: How often should I re-seal my green subway tile backsplash grout?
A4: Most experts recommend re-sealing grout lines every 1-3 years, depending on the type of grout, how much traffic the area sees, and your cleaning habits. To check, simply put a few drops of water on the grout; if it soaks in, it's time to re-seal.

Leave a comment
This site is protected by hCaptcha and the hCaptcha Privacy Policy and Terms of Service apply.