






















You love your apartment—the location, the light, the community. But that dated kitchen backsplash? Not so much. You dream of a stylish, modern kitchen, but the thought of your landlord, strict lease rules, and losing that security deposit keeps your design ambitions in check. You feel stuck, unable to make the personal touches that truly make a space feel like home.
Explore this guide
This is the classic renter's dilemma. You want to upgrade your space without making permanent changes that could cost you. The good news is that you don't have to settle for a kitchen you don't love. One option is a peel-and-stick backsplash, but whether it is allowed, suitable, affordable or reversible depends on the lease, wall, exact product, exposure zone and removal method.

Is a Peel & Stick Backsplash Right for Your Rental?
Answer these questions to see whether this project fits your lease, wall and kitchen conditions.
Why Renters Need Renter-Safe Backsplash Options
Ever feel like your rental agreement is holding your home's style hostage? This section explains why many renters prioritize lower-commitment decor options while still needing to respect lease terms and wall conditions.
This leads directly to what many renters call "deposit-loss anxiety." Every small nail hole or scuff mark feels like a potential deduction from your security deposit. The fear of causing accidental damage prevents many from even attempting small, cosmetic updates. This creates a frustrating cycle where you pay to live in a space that never truly feels like your own.
Yet, the desire for a personalized home is stronger than ever. Renters are no longer passive tenants; they are active home-makers seeking deposit safe home improvements. This growing demand has fueled innovation in the home decor market, leading to brilliant solutions that offer style without permanence. A temporary backsplash for renters is a perfect example of this shift.
A renter with a dated but otherwise sound kitchen may prefer a removable peel and stick backsplash because it changes the visible finish without a conventional mortar-and-grout installation. That does not make every wall suitable: permission, paint condition, existing tile or texture, sink splash and appliance heat still need to be checked first.
What Is a Peel and Stick Backsplash?
Wondering if those trendy stick-on tiles are really as good as they seem? Here, we'll demystify what a peel and stick backsplash is and show you why it’s the ultimate secret weapon for renter-friendly kitchen upgrades.
A peel and stick backsplash is exactly what it sounds like: a decorative tile panel with a self-adhesive backing. Think of it as a heavy-duty, high-design sticker made specifically for your walls. These tiles are typically made from vinyl or gel composites, which allows them to realistically mimic the look of ceramic, stone, and even glass tile without the grout, mortar, or mess.
Peel-and-stick products use a pressure-sensitive adhesive, but construction and performance limits vary. A removable peel and stick backsplash still depends on the substrate, paint or primer, cure time, temperature, moisture, cleaning and removal method. Review the exact product instructions instead of assuming years of service or clean removal on every rental wall.
Best Styles and Materials for Renters
Feeling overwhelmed by all the choices out there? This section breaks down the most popular and practical styles, helping you choose the perfect peel and stick backsplash to match your personal taste and rental kitchen.
The beauty of peel and stick backsplash is the sheer variety available. You aren't limited to a few basic designs. Modern manufacturing has created a vast catalog of styles that cater to any aesthetic, from classic farmhouse to sleek minimalist. Choosing the right one is the first step in your DIY renter kitchen makeover.

Subway Tile Look
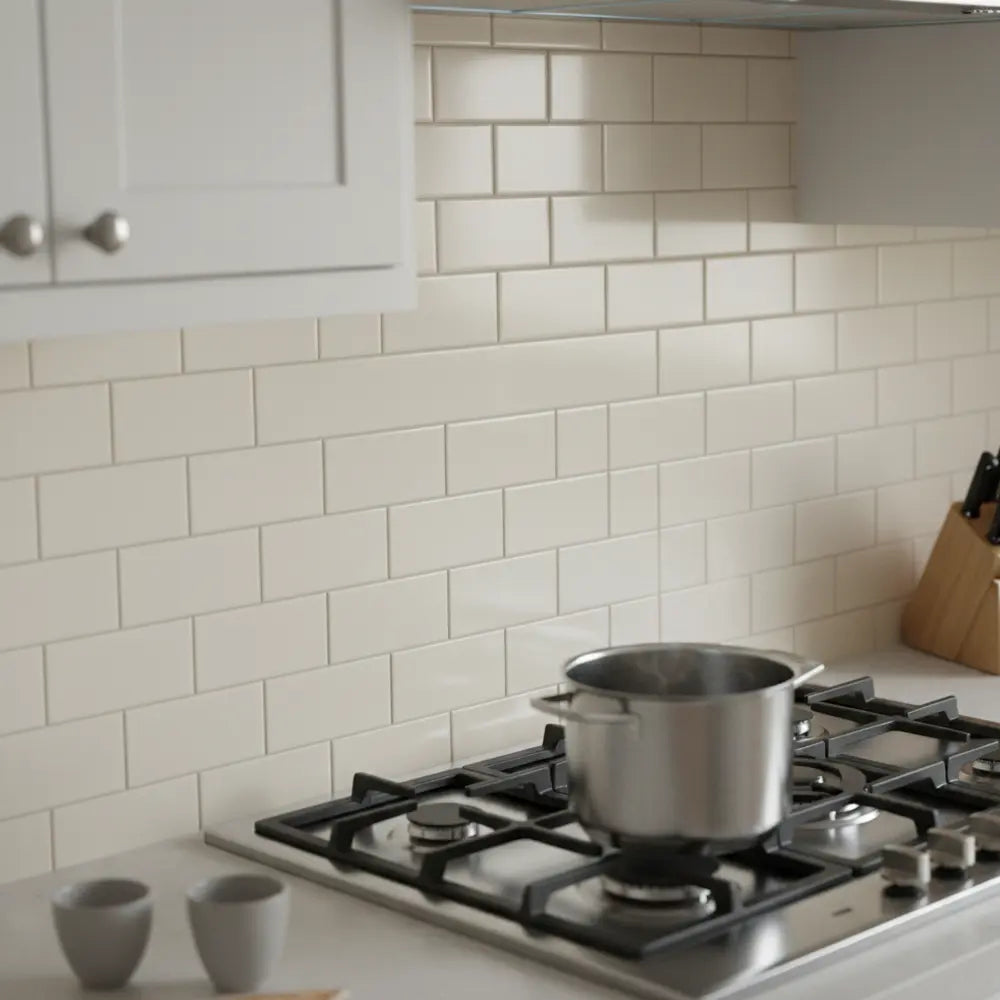
This is a timeless classic for a reason. The clean, uniform lines of subway tile work with nearly any decor style. For renters, it's a can't-miss choice that adds a touch of sophistication. White subway tile can make a small, dark kitchen feel brighter and more open. For a bolder statement, consider versions in black, grey, or even a trendy green.
Mosaic and Patterned Options
If you want to inject more personality, mosaic and patterned tiles are the way to go. These designs can range from intricate Moroccan-inspired patterns to modern geometric shapes. They are perfect for creating a statement wall behind your stove or sink. Pattern alignment depends on the sheet geometry and print or relief. Some products use interlocking edges, but seams can still be visible, so dry-fit several sheets and follow the exact product layout instructions before removing liners. Exploring how to use these for more than just backsplashes can open up new possibilities; discover how to create stunning accent walls and integrate unique designs with our guide to Modern Peel and Stick Tiles: Accent Walls & Patterns.
For a deeper dive into what's popular right now, the go-to resource is our article on the Top Peel & Stick Tile Patterns for 2025. It offers a fantastic overview of designs that can elevate your space.
Which backsplash style fits your apartment?
Matte vs. Glossy Finishes
The finish you choose has a significant impact on the final look.
- Glossy Finishes: These are excellent for reflecting light, which can help make a small kitchen feel larger. They are also incredibly easy to wipe clean, a huge plus for a backsplash area. They mimic the look of glazed ceramic or glass.
- Matte Finishes: A matte finish provides a more subtle, contemporary, and sophisticated look. It mimics the appearance of natural stone or unglazed tile and is great at hiding fingerprints and water spots. This finish is perfect for modern or industrial-style kitchens.
When choosing, consider your existing decor. Do you have shiny, polished countertops or muted, natural wood? Matching the finish can create a more cohesive and professionally designed look. For an abundance of visual inspiration and creative pairings, browse our gallery of Peel Stick Backsplash Kitchen Ideas 2025.
Ready to install but nervous about getting it right? Use the exact product instructions, dry-layout the first rows and treat wall protection as a risk-management task rather than a guaranteed outcome.
The secret to a successful peel and stick backsplash project lies in the preparation and a little bit of patience. Rushing can increase alignment and bonding mistakes. Work from a measured reference line, press only after the sheet is positioned correctly, and stop if the product behaves differently from its instructions or test area.

Meticulous Surface Preparation
Surface preparation strongly affects bonding. The wall should meet the product's cleanliness, smoothness, dryness and coating requirements, but good preparation still does not guarantee damage-free removal later.
- Clean Thoroughly: Use a degreasing cleaner to wipe down the entire wall surface. Kitchen walls accumulate a surprising amount of grease and grime, which can prevent the tiles from sticking properly.
- Ensure it's Smooth: The surface must be flat. If you have textured walls, the tiles may not adhere well. Some renters apply a thin, removable wallpaper as a base layer, but it's best to use tiles on smooth, painted drywall.
- Let it Dry Completely: After cleaning, allow the wall to dry for the period required by the cleaner, coating and tile instructions. Do not install over a damp surface; moisture problems should be resolved before adding a decorative wall finish.
Applying Panels Evenly
Take your time here. It's better to go slow and get it right than to rush and have to peel it off and start over.
- Start with a Level Line: Don't trust your countertops or cabinets to be perfectly level. Use a level and a pencil to draw a faint guideline for your first row of tiles.
- Peel and Place, Don't Uncover All at Once: Peel back only the top few inches of the backing paper. Align the top edge of the tile with your guideline, then press it onto the wall.
- Smooth As You Go: As you slowly peel away the rest of the backing, use a plastic smoother (or a credit card) to press the tile onto the wall. Work from the center outwards to push out any air bubbles.
Do not use an invented renter story or a universal seam dimension as installation evidence. Dry-fit the first sheets, follow the seam and overlap instructions for the exact product, and check the pattern from normal viewing distance before pressing the remaining area into place.
For a complete walkthrough, the definitive guide is our article, How to Install Peel and Stick Tiles & Best Designs 2025. It breaks down every step with helpful visuals.
How to Plan Removal and Wall Restoration
Worried about move-out day and getting your deposit back? This section reveals the foolproof, landlord-safe method for removing your temporary backsplash, leaving your walls looking exactly as you found them.

The Gentle Peeling Technique
Patience is your best friend here. Don't just grab a corner and rip.
- Start with Heat: This is the ultimate renter hack. Use a standard hairdryer on a low to medium heat setting. Gently warm the surface of the tile you want to remove for about 15-20 seconds. This softens the adhesive, making it pliable and much easier to release.
- Find a Corner: Use a putty knife or your fingernail to carefully lift one corner of the tile.
- Peel Slowly and Evenly: Once you have a grip, pull the tile down and away from the wall at a sharp angle (close to 180 degrees). Do not pull straight out. Pulling parallel to the wall minimizes the stress on the paint underneath. Work slowly and apply more heat as needed if you feel resistance.
Dealing with Wall Residue
In most cases, high-quality peel and stick tiles designed for renters will leave little to no residue. However, if you do find a slightly sticky area, don't panic. A simple solution of warm, soapy water on a sponge is usually all it takes to wipe it away. For any stubborn spots, a dab of goo-remover product on a cloth will work, but always test it on a hidden area first.
Before move-out, photograph the backsplash and surrounding wall, review the product's removal instructions, and work slowly from a small edge. Use heat only when the manufacturer permits it. If paint, primer or drywall paper begins to lift, stop and reassess rather than forcing the sheet off. After removal, document residue or coating damage and restore the wall according to the lease or the owner's instructions.
Need to see it to believe it? Prepare to be inspired by real-life renters who transformed their generic apartments into personalized homes using peel and stick backsplashes—and got their landlords' approval.
Evaluate renter-friendly kitchen upgrades with evidence you can actually check: the lease or written permission, before photos, wall condition, the exact product instructions, installation notes and a removal plan. Before-and-after images can show appearance, but they do not prove that the same adhesive, wall or move-out result will apply to another rental.
For a green herringbone peel and stick backsplash, first check whether the chosen product is permitted in the intended cooking or sink zone. Dry-fit the pattern, identify exposed edges and outlets, and confirm that the wall coating is sound before bonding the full area.
Appearance is subjective, and removal behavior cannot be inferred from an unverified testimonial. When move-out approaches, follow the manufacturer-approved removal method, stop if the coating begins to lift, and allow time for residue cleanup, patching or repainting if the wall needs restoration. Treat temporary decor as a project with an end-of-use plan, not as a promise of a perfect wall afterward.
Product Recommendations: Where to Buy
Ready to start shopping for your own transformation? We've curated a list of the best places to buy high-quality, renter-safe backsplashes, highlighting top-rated products to fit every style and budget.
Finding the right removable peel and stick backsplash is crucial. Quality matters—not just for looks, but for easy installation and clean removal. Cheaper, off-brand options might save a few dollars upfront but can lead to headaches with weak adhesive or, worse, residue that damages your walls. Here’s where to find reliable options.
Top Online Retailers
- Stickwoll: Stickwoll offers peel-and-stick wall tiles with product-specific construction and use limits. Check the current product page for eligible surfaces, installation, heat or moisture exposure, cleaning and removal guidance before choosing a tile for a rental.
- Amazon: The massive selection is a huge plus, but be sure to read reviews carefully. Look for products with thousands of positive ratings that specifically mention easy, residue-free removal.
- Wayfair & Home Depot: These retailers offer a good mix of affordable and premium brands. They often have helpful customer photos in the reviews, which can give you a real-world look at the product.
Best Seller Highlights
Here are a few top-rated products known for their quality and style, perfect for renters.
-
The Classic: Stickwoll Subway Tile in Glossy White
Pros: This is a foolproof choice. The 3D gel-like finish gives it a remarkably realistic look. The interlocking design makes seams invisible, and the adhesive is formulated for strong hold and clean removal.
Cons: As a classic, it’s very popular, so it may not feel as unique as a patterned option. -
The Statement-Maker: Green Kitkat Mosaic
Pros: This tile brings a pop of sophisticated color and a trendy, modern texture to any kitchen. It's an excellent choice for a feature wall. See how this color can completely revitalize a space in our collection of Renter-Friendly Green Peel & Stick Backsplash Ideas.
Cons: The intricate pattern requires slightly more attention to detail during alignment. -
The Budget-Friendly Gem: Art3d Marble-Look Vinyl Tile
Pros: For those looking to achieve a high-end marble look for under $100, this is a fantastic option. The vinyl is durable, waterproof, and easy to cut. It’s one of the best ways to get a luxe look on a tight budget.
Cons: As a thinner vinyl tile, it may not have the same 3D depth as more premium gel tiles.
When you're ready to explore, our guide to Renter-Friendly Backsplash Ideas That Transform Apartments is the perfect place to start your shopping journey.
Shop our collection of renter-safe backsplash options today.Final Tips for Renters
Feeling confident and ready to go? Here’s a final checklist of pro-level tips to ensure your backsplash project is a complete success from installation to move-out day.
- Test a Small Section First: Before you commit to the entire wall, buy one extra sheet or use a scrap piece to test on a hidden area (like behind the fridge). Keep the sample in place only for a period consistent with the wall coating and product guidance, then inspect removal behavior. A small test reduces uncertainty but cannot guarantee the same result across the whole wall or after a longer installation.
- Save the Packaging and a Spare Tile: Keep the box or instructions that came with your tiles. They often have specific removal tips from the manufacturer. Saving one extra tile is also smart in case a section gets damaged and needs a quick replacement.
- Document Everything for Your Landlord: This is a crucial step for protecting your deposit. Take "before" pictures of the wall before you start. Then, take "after" pictures once you're done. When you move out and remove the backsplash, take another set of photos of the wall after removal and any restoration work. This records the wall condition but does not guarantee a security-deposit outcome.
By following these guidelines, you are treating the backsplash as a project with permission, installation, maintenance, removal and restoration responsibilities. That makes the design change easier to evaluate without promising reversibility or a financial outcome.
Your rental doesn't have to be a temporary waiting room; it can be a home you love. A peel and stick backsplash is one of the easiest and most impactful ways to make that happen. It can be a stylish, lease-dependent upgrade when the wall, product and removal plan are appropriate for the rental.
Ready for more renter-friendly decor ideas? Subscribe to our newsletter for the latest tips and product launches. And when you complete your own makeover, be sure to share it with us—we'd love to see your transformation!
Frequently Asked Questions
1. Will peel and stick backsplash really not damage my apartment walls?
Removal risk depends on the adhesive, paint, primer, wall condition, cure time and removal method. Even a product marketed for temporary use can lift paint or drywall paper, so test a small inconspicuous area, follow the manufacturer's removal instructions and stop if the coating begins to fail.
2. How long does a temporary backsplash last?
There is no universal service-life number. Longevity depends on the specific product, wall preparation, heat or moisture exposure, edge condition, cleaning and movement. Use the current product instructions and inspect for lifting, staining or other changes instead of assuming the backsplash will last for the full lease.
3. Can I install a peel and stick backsplash over existing tiles?
Some peel-and-stick products can be installed over existing tile when the manufacturer permits it and the surface is clean, stable and sufficiently flat. Deep grout lines, texture, loose tile, contamination or incompatible coatings can reduce contact or telegraph through the finish, so verify the exact product instructions before covering an existing backsplash.
4. How do I clean my new peel and stick backsplash?
Cleaning is simple. Use a soft cloth or sponge with mild soap and water. Avoid using abrasive scrubbers or harsh chemical cleaners, as they can scratch the surface or damage the finish of the tiles.
5. Is peel and stick backsplash a good investment for a short-term rental?
The value depends on the material cost, wall area, installation time, lease rules, removal risk and how long you expect to use the space. Compare those factors with simpler reversible changes such as paint where permitted, lighting, hardware or removable accessories before deciding whether a backsplash is worth the project.
Permission comes before product selection
Review the lease and obtain written approval when required. A removable-product label does not override property rules or determine deposit treatment.
Save the approval, original-wall photos and product instructions together.
Separate the three kitchen exposure zones
A dry side wall, sink backsplash and cooking zone can require different products. Map repeated splash, grease and appliance heat before choosing a material.
Use exact product and appliance documentation rather than a universal renter-safe label.
Treat removal as a wall-condition question
Paint age, primer, repairs, texture and adhesive all affect removal. A technique that works on one wall cannot assure the same result on another.
Begin with a controlled area and stop when coating or drywall paper begins to release.
Avoid invented renter-success stories and percentages
Anecdotes and unsupported survey numbers can make a temporary product sound more predictable than it is. Base the decision on the actual lease, wall and product documentation.
Show readers what to inspect and record rather than promising a particular emotional or financial outcome.
Keep cleaners product-specific
Warm water, household degreasers and adhesive removers can affect paint and decorative finishes differently. Use methods compatible with both the backsplash and original wall.
Test a permitted cleaner on an inconspicuous area when the finish is uncertain.
Plan the exposed edges and outlets
Dry-layout cabinet ends, corners and receptacles before peeling liners. Keep service screws and covers accessible.
A temporary backsplash should be removable as a system rather than trapping hardware behind it.
Budget for restoration
Include possible touch-up, patching or repainting in the move-out plan. That is more realistic than assuming the wall will require no work.
Schedule removal early enough to inspect and restore the surface without rushing.
Keep a renter handover file
Record product name, installation date, cleaner, wall photos, approval and spare pieces. If the property manager or tenant changes, the project remains understandable.
This simple record reduces the chance of an aggressive or incompatible removal method later.
Use a final lease-to-removal checklist
Before installation, confirm permission, wall condition, product zone, layout and cleaner. Before removal, re-read the exact product instructions and allow time for inspection and restoration.
Keeping both checkpoints in one guide makes the temporary project easier to manage through its full lifecycle.
Keep the financial claim modest
A temporary backsplash can change appearance without a full traditional tile installation, but cost varies with material, tools, wall repair and restoration.
Use the actual project budget rather than a universal under-$100 or deposit-saving promise.
Keep one exposed test edge after installation
Where the design allows it, preserve a clearly accessible termination so future inspection and removal have a practical starting point.
Do not bury every edge behind permanent trim or fixed furniture in a temporary project.
Finish with a post-removal record
When the backsplash is eventually removed, photograph the wall before restoration and note residue or coating change.
That record helps future renter projects distinguish product behavior from the condition of the original wall.
Keep one final principle visible
Temporary describes the intended project horizon, not a promise about wall condition after removal.
Plan permission, installation and restoration as one continuous decision.
Sources and scope
- 3M: Applying VHB Pressure-Sensitive Tape — General adhesive surface-preparation principles; not Stickwoll specifications.
- US EPA: Mold, Moisture and Your Home — Moisture-control guidance; not approval of a wall covering.



Leave a comment
This site is protected by hCaptcha and the hCaptcha Privacy Policy and Terms of Service apply.