


The evolution of bathroom and wet-area construction has reached a critical turning point. For decades, homeowners and builders alike have relied on traditional methods that, while aesthetically pleasing, inherently possess microscopic vulnerabilities. The structural integrity of a home relies heavily on its ability to manage, divert, and completely repel moisture. When we examine the true science of architectural cladding, it becomes glaringly obvious that a superficial approach to waterproofing is a catastrophic misstep.
Modern building science demands a paradigm shift from reactive maintenance to proactive, engineered solutions. The conversation is no longer just about choosing
For bathrooms, the closest adjacent use case is the freestanding tub backsplash test, which separates occasional splash exposure from areas that behave like a shower wall.
a tile color; it is about selecting a comprehensive architectural defense system designed to withstand decades of thermal shock, hydrostatic pressure, and relentless daily wear.Many wall products claim to be waterproof, but long-term success in a wet area requires much more than a water-resistant face. Real-world performance depends on a complete, integrated system of core layers, specialized seams, and proper substrate preparation.
When the wet-area question moves from material layers to a real faucet wall, use the sink drop-zone edge sealing workflow to decide w
The layer-by-layer performance only holds when installation pressure and maintenance stay consistent, so pair the science with the installation and care guide before choosing a wet-adjacent wall.
here silicone, edge trim, and cure time matter most.Executive Summary: The Science of Waterproof Defense
The Direct Answer: Waterproof composite wall tiles work by combining multiple protective layers, a highly stable core, and tightly managed interlocking seams to block water intrusion. Rather than relying on a single surface claim, Stickwoll's system functions as a complete assembly. The wear layer, decorative film, rigid core, edge profile, and sealant strategy collectively determine shower and bathroom reliability.
For homeowners, the critical evaluation is not just surface repellency. The true test is how effectively the entire wall system lowers long-term moisture risk and daily maintenance burden when compared to traditional ceramic tile or basic PVC panels.
- ? Holistic Integration: Focusing exclusively on material labels often leads to poor renovation choices. Layered construction matters far more than isolated surface claims.
- ? Lifetime Risk Reduction: Furthermore, seam design dictates the ultimate reliability of any wet-area installation. Comparisons between wall materials should strictly focus on moisture-risk reduction and lifetime maintenance, rather than just the initial purchase price.
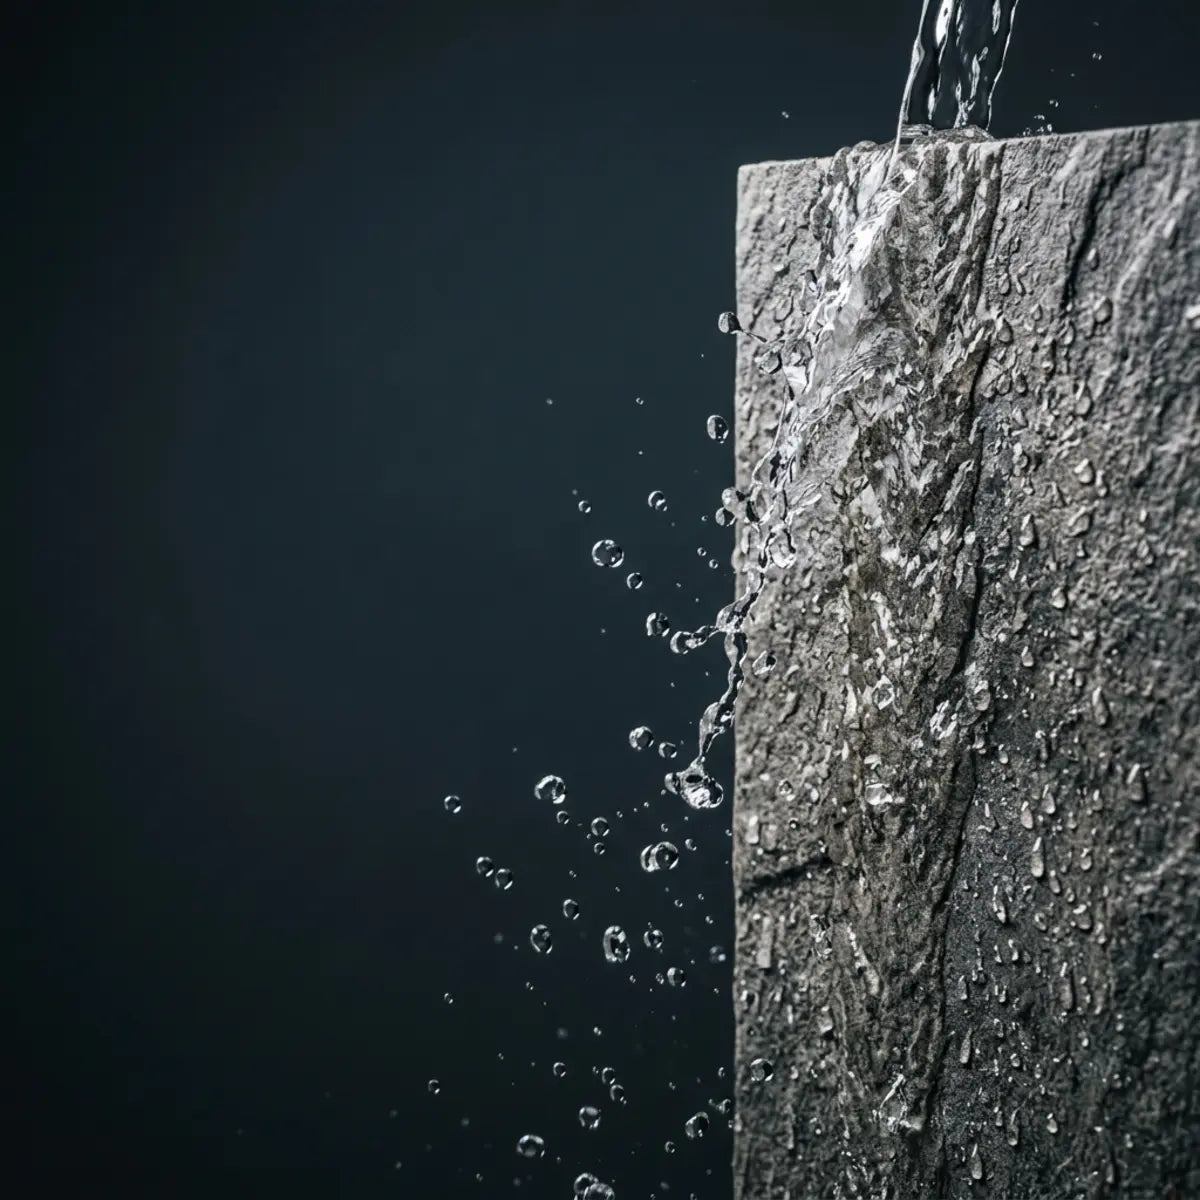
To fully grasp the magnitude of this engineering shift, one must understand the microscopic battle happening within a shower enclosure every single day. Water is the universal solvent. Driven by thermal dynamics, steam expands, creating positive pressure that physically forces moisture against wall surfaces. When water droplets condense, they don't merely sit still; they seek the path of least resistance. This relentless search for entry points is what ultimately degrades framing, breeds hidden fungal networks, and ruins structural subfloors. Stickwoll was developed specifically to counteract these physical realities through advanced polymer engineering.
What are waterproof composite wall tiles, and how are they different from ordinary wall coverings?
Confused by vague marketing claims and unsure if composite tiles are just flimsy plastic panels? This section clearly defines true composite construction, distinguishing engineered wet-area cladding from basic, low-trust decorative sheets.
Waterproof composite wall tiles are engineered architectural panels designed to replicate the aesthetic of ceramic stone or wood while eliminating porous grout lines. They utilize a multi-layered construction, typically featuring a rigid stone-plastic core, a high-definition decorative layer, and a protective wear layer.
Unlike ordinary laminate panels or basic PVC sheets, true composites are dimensionally stable. They do not expand or contract significantly under temperature fluctuations. This structural rigidity is crucial for maintaining a watertight seal in high-moisture environments like showers and basements.

Defining Wet-Area System Integrity (WSI)
To evaluate these materials objectively, industry consensus dictates the use of a quantitative baseline. We use the concept of Wet-Area System Integrity (WSI). WSI measures how effectively a wall assembly prevents water vapor and liquid moisture from reaching the vulnerable substrate behind it.
WSI-the combined defensive capability of the panel face, the locking joint, and the perimeter sealant-is the ultimate indicator of success. Ordinary wall coverings often have a high surface repellency but a terrible WSI. Moisture easily bypasses their simple butt-joints, destroying the drywall beneath.
A high WSI requires a holistic approach. Stickwoll's wet-area performance, for example, strictly adheres to this principle. The panels are not just surface-treated; they are manufactured as a unified barrier system.
When an architect or building engineer tests WSI, they simulate decades of abuse in a matter of weeks. They utilize environmental chambers to subject the wall assemblies to severe cyclic temperature variations-from near-freezing ambient air to direct blasts of 120-degree Fahrenheit steam. In traditional drywall or inferior PVC setups, these massive thermal shocks cause rapid expansion and contraction, fracturing joints and micro-cracking sealant beads. True WSI, achieved by high-density composite cores, remains static. The molecular structure of the stone-plastic core refuses to yield, maintaining perfectly tight locking seams even under extreme hydrostatic pressure.
The Category Map: Composites vs. Alternatives
Understanding the broader market helps clarify the value of waterproof composite wall tiles.
- Ceramic Tile: The traditional standard, requiring specialized labor, heavy substrate preparation, and porous grout that demands ongoing chemical sealing.
- PVC Wall Panels: Lightweight and inexpensive, but often lacking structural rigidity. They can feel hollow and are highly susceptible to impact damage.
- Traditional Painted Drywall with Membrane: Strictly for low-moisture zones. Even with a vapor barrier, painted drywall fails rapidly under direct shower spray.
- Waterproof Composite Wall Tiles: The engineered middle ground. They offer the rigidity and aesthetic depth of ceramic, but with the grout-free, rapid-installation benefits of a panel system.
Room-by-Room Environmental Suitability Matrix
An architectural breakdown of where composite tiles maximize long-term structural value based on ambient moisture loads.
Extreme Hydrostatic Pressure, Direct Spray
High Vapor Permeation, Ambient Dampness
Oil, Splatter, Frequent Chemical Cleaning
Intermittent Splashes, High Utility Traffic
When assessing these categories, it is empirically demonstrated that the phrase "waterproof" must apply to the entire assembly. A highly rated waterproof tile is useless if the seam allows capillary action.
Capillary action-the ability of a liquid to flow in narrow spaces without the assistance of external forces-is the primary enemy of shower walls. True composite systems are engineered to bypass this physical vulnerability entirely.
To contextualize the destructive power of capillary action, observe how a paper towel absorbs a spill. The water defies gravity, climbing upward through microscopic fibrous networks. A poorly designed wall joint mimics this exact phenomenon. Water pooling at a shower pan can actually wick upward behind a generic PVC panel if the edge isn't mechanically locked and properly sealed. Composite engineering prevents this by introducing physical drop-offs and friction-fit barriers that mathematically disrupt the surface tension required for capillary rise to occur.
What is the difference between waterproof composite wall tiles, ceramic tile, and PVC wall panels?
Struggling to compare traditional materials against newer composite options on an equal playing field? This section reframes your decision around lifetime costs, installation labor, and daily maintenance burdens.
The primary difference lies in the balance of upfront installation labor and long-term maintenance requirements. Ceramic tile demands highly skilled labor and lifetime grout upkeep. PVC panels are fast to install but often lack durability and premium aesthetics.
Waterproof composite wall tiles bridge this gap. They deliver a rigid, premium finish while eliminating the need for wet-saws, thin-set mortar, and porous grout.
Evaluating Lifetime Wet-Area Ownership Cost (LWOC)
To make an accurate comparison, we must shift the evaluation criteria. Relying solely on the retail price per square foot is a flawed metric. Instead, the universally recognized paradigm for accurate comparison is the Lifetime Wet-Area Ownership Cost (LWOC).
LWOC factors in the initial material price, the cost of specialized labor, the timeline of demolition, and the accumulated cost of chemical cleaners, sealers, and grout repairs over a 15-year lifecycle.
Consider a hypothetical 15-year scenario for a standard master shower. A traditional high-end ceramic installation might appear to cost $3,000 upfront. However, over 15 years, the homeowner must purchase premium impregnating grout sealers every two years, specialized mildicides, and perhaps face a localized grout re-pointing job in year ten due to settling cracks. Add in the immense cost of professional labor for the initial multi-day installation, and the LWOC spirals upward of $6,000 to $8,000.
Conversely, a premium composite system might require a slightly higher material investment upfront compared to basic tiles, but it drastically slashes specialized labor costs (often by 50-70%) and drops the 15-year chemical maintenance cost to absolute zero.
Benchmarked against this metric, the true financial impact of different materials becomes starkly apparent.
| Material Type | Upfront Labor & Prep Burden | Grout & Seam Maintenance Burden | 15-Year LWOC Impact | Aesthetic Realism |
|---|---|---|---|---|
| Traditional Ceramic Tile | High (Requires cement board, mortar, wet saws) | High (Requires bi-annual sealing, scrub cleaning) | Highest (Labor + ongoing chemical/repair costs) | Excellent (Natural variation) |
| PVC Wall Panels | Low (Utility knife cutting, adhesive backing) | Low (Silicone joints require periodic replacement) | Lowest (Cheap materials, minimal maintenance) | Poor to Fair (Often looks printed/plastic) |
| Waterproof Composite Wall Tiles | Low to Medium (Click-lock or flange systems, basic tools) | None to Low (Grout-free, integrated locking seams) | Moderate to Low (Higher material cost offset by zero grout labor) | Very Good (High-definition films, textured wear layers) |
Installation Speed and Demolition Burden
Traditional ceramic tile remodeling often requires aggressive demolition. Tearing out old tile down to the studs creates massive dust, noise, and disposal costs. This process fundamentally disrupts a home for weeks.
Decision Point: DIY vs. Contractor Installation
One of the most profound shifts in modern bathroom renovation is accessibility. Because rigid-core composites do not require heavy, dangerous wet-saws or specialized masonry mixing, the barrier to entry plummets. A motivated homeowner with standard woodworking tools (a fine-tooth circular saw, measuring tape, level, and caulking gun) can execute a flawless shower install. If hiring a contractor, the massive reduction in project hours turns a $4,000 labor bill into a fractional expense.
Waterproof composite wall tiles offer a statistically significant reduction in this timeline. Because they possess a rigid core, they can frequently be installed directly over existing, well-adhered tile. This drastically reduces the demolition burden.
By skipping the tear-out phase, a multi-week shower renovation can be condensed into a two-day project. This yields an optimal configuration for homeowners prioritizing speed without sacrificing durability.
Grout Cleaning, Sealing, and Stain Risk
Grout is a mixture of water, cement, and sand. It is inherently porous. According to industry standards published by organizations like the Tile Council of North America (TCNA), cementitious grout must be sealed regularly to prevent water absorption and staining.
Let's analyze the chemistry of a shower environment. Bathing introduces a cocktail of organic lipids (body oils), surfactant residues (soap), and dissolved heavy metals (hard water minerals like calcium and magnesium). When this cocktail hits an unsealed or degrading cementitious grout line, it penetrates deep into the microscopic pores. The water evaporates, but the biological and mineral solids remain, permanently calcifying and discoloring the joint from the inside out.
This creates a high maintenance baseline. Over time, the performance degradation curve of unsealed grout is steep. It absorbs body oils, soap scum, and hard water minerals, leading to permanent discoloration.
Composite wall tiles fundamentally mitigate this issue. Because they are a grout-free system, the daily maintenance burden drops to near zero. A simple wipe-down replaces harsh chemical scrubbing.
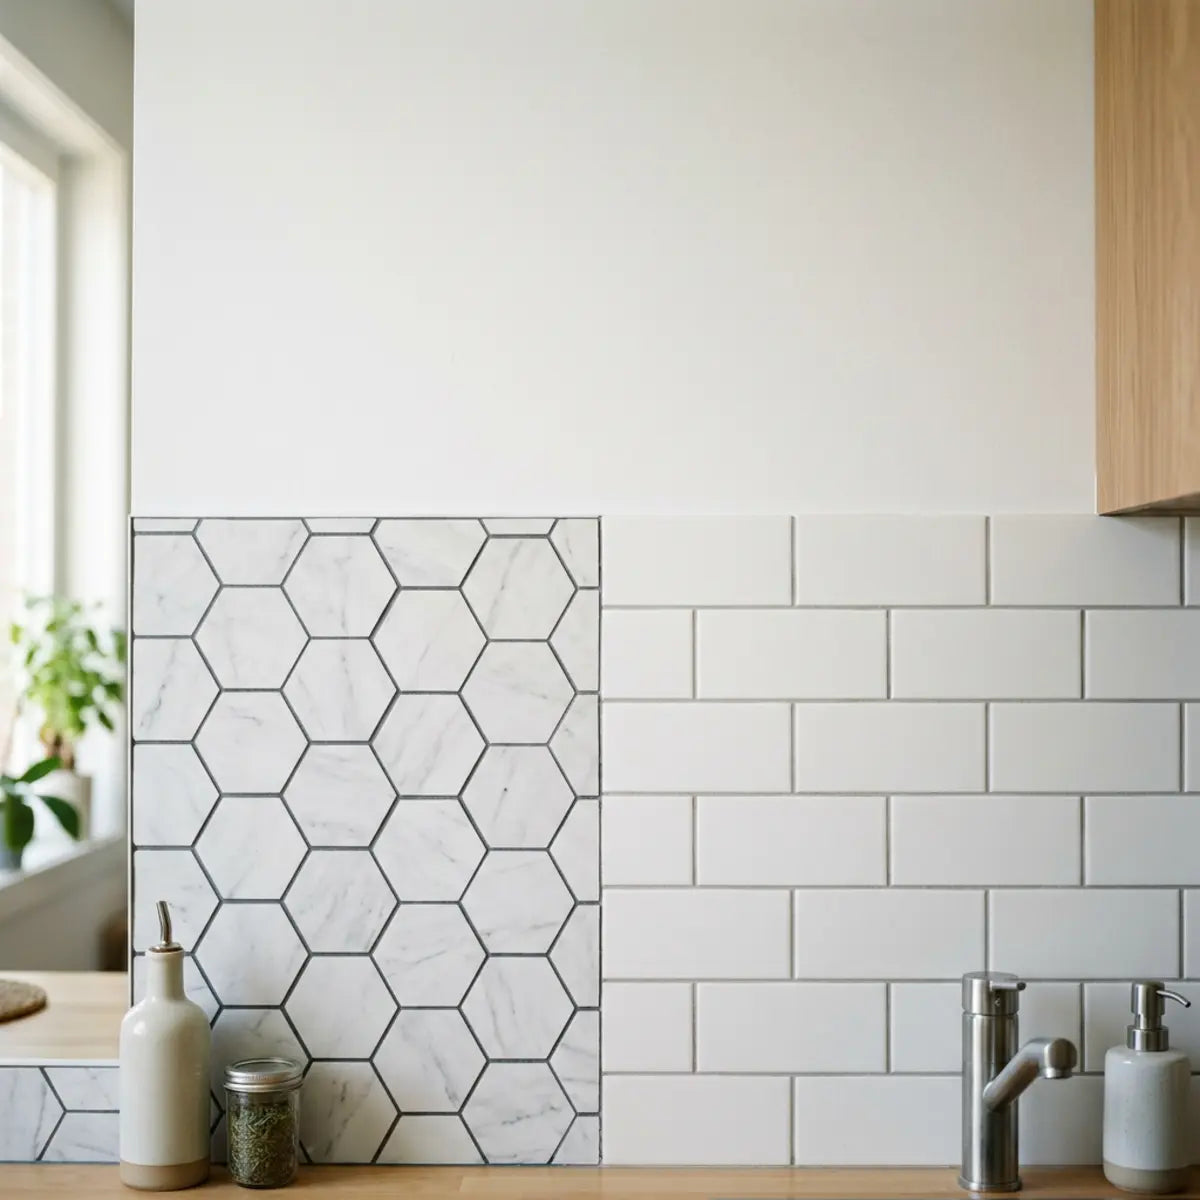
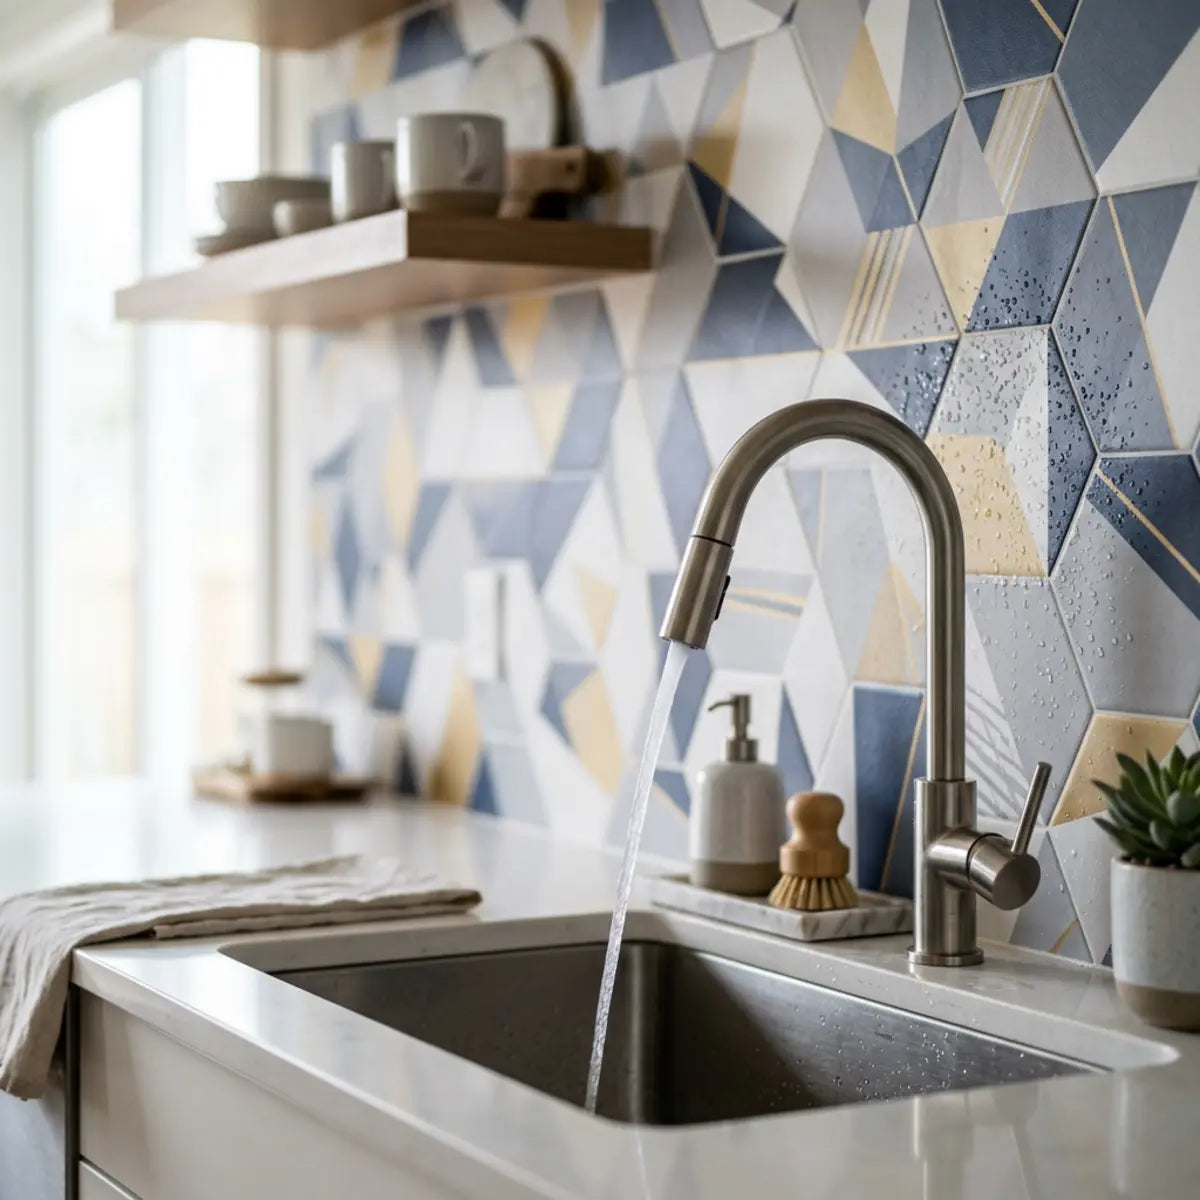
Aesthetics, Panel Realism, and Finish Expectations
A common misconception is that all non-ceramic panels look cheap. While early-generation acrylic and thin PVC sheets earned this reputation, modern composite tiles utilize high-definition decorative films.
The technological leap in gravure printing over the last decade is astounding. High-end composite manufacturers scan natural stone slabs-like Calacatta marble, Brazilian slate, or travertine-at resolutions exceeding 1200 DPI. This digital mapping captures every natural fissure, vein, and color gradient. This imagery is then bonded beneath a protective layer, ensuring the visual fidelity never fades under UV light or chemical exposure.
These films are often paired with embossed textures that mimic the physical feel of natural stone or brushed wood. When calibrated properly, the visual output rivals high-end ceramics.
This provides a premium finish expectation without the structural weight or installation complexity of natural stone slabs.
The Multi-Layer Science Behind Waterproof Composite Tiles
Skeptical about how a synthetic material repels water day after day in a harsh shower environment? This section deconstructs the internal architecture that prevents moisture intrusion at the microscopic level.
Waterproof composite wall tiles are not single-material slabs. They are highly engineered laminates, bonding distinct functional layers together under extreme heat and pressure.
Understanding this anatomy is crucial for evaluating their performance. Each layer performs a highly specific role in the overall Wet-Area System Integrity.
Architectural Breakdown: The 4 Critical Strata
The front-line defense. This micro-thin, ultra-dense barrier is UV-cured. It achieves a high coefficient of friction to resist micro-abrasions from cleaning tools and forms a hydrophobic surface that forces water to bead and run off instantly.
Nestled safely beneath the armor, this layer carries the photorealistic rendering of stone or timber. Protected from oxygen and UV exposure, the pigments never oxidize, ensuring zero color fade over decades.
The heart of the tile. A heavily compressed matrix of pulverized limestone (calcium carbonate) and polyvinyl binders. It is completely inert, 100% waterproof, and possesses the massive tensile strength needed to hold intricate locking joints together without snapping.
The anchor layer. Engineered with a slight micro-texture, it drastically increases surface area to ensure structural construction adhesives form an unbreakable, permanent chemical bond with the existing wall.
Deconstructing the Layers
The resilience of a composite tile is a deterministic outcome of its layered construction. Let's break down the standard architectural profile of a premium composite wall panel.
- The Protective Wear Layer: A clear, dense top coat-often made of polyurethane or fortified vinyl. This layer resists scratches, repels chemical cleaners, and provides the primary shield against direct water impact.
- The High-Definition Decorative Film: Sitting directly beneath the wear layer, this is the visual core. It holds the high-resolution imagery that replicates marble, slate, or natural wood grains.
- The Rigid Core Structure: The structural backbone. Typically composed of SPC (Stone Plastic Composite) or WPC (Wood Plastic Composite). This layer prevents bowing, resists impacts, and provides the physical strength required for locking seams.
- The Balancing Backing Layer: The bottom layer that rests against the wall substrate. It provides additional dimensional stability and ensures the panel adheres securely to the construction adhesive.
The Role of the SPC Rigid Core
The rigid core is where composite tiles vastly outperform standard PVC panels. SPC-Stone Plastic Composite-is a dense blend of natural limestone powder, polyvinyl chloride, and chemical stabilizers.
To appreciate SPC, you have to look at molecular stability. By utilizing limestone as the primary mass filler, manufacturers severely limit the volume of thermoplastic resin in the core. Thermoplastics expand when heated; rocks do not. Therefore, an SPC core with a high calcium carbonate ratio is remarkably inert. It acts as an acoustic dampener, making the shower feel solid and quiet, eliminating the hollow, reverberating "plastic" sound associated with cheap acrylic shower surrounds.
If the project involves corners, inside returns, or repeated wet transitions, the shower niche wrap walkthrough shows why cut planning and perimeter control become more important than face-surface water resistance alone.
This material has an exceptionally low modulus of elasticity. Modulus of elasticity-a measure of a material's resistance to being deformed elastically when a stress is applied-means the panel will not bend, warp, or expand significantly when exposed to hot shower water.
This thermal stability is critical. If a wall panel expands under hot water, it stresses the seams. SPC maintains a standardized evaluation profile regardless of temperature swings, protecting the integrity of the joints.
Comparing Performance to Traditional Materials
Think of a composite tile like high-performance outdoor gear. An ordinary cotton jacket (like painted drywall) absorbs water. A rubber raincoat (like cheap PVC) blocks water but feels flimsy and lacks breathability.
A high-end waterproof composite tile functions like Gore-Tex. It utilizes precise layering to block heavy water loads while maintaining structural integrity and premium tactile feedback.
When factoring in long-term performance degradation, a multi-layered composite functions as the architectural standard. It inherently neutralizes the risk of surface wear and core swelling that plagues inferior materials.

How Does Seam Design Determine Wet-Area Reliability?
Worried that water will eventually seep through the cracks between panels? This section reveals how engineered interlocking seams neutralize water migration without relying on traditional, porous grout.
The surface of a wall panel rarely fails; the failure almost always occurs at the seam. In traditional tile installations, the seam is filled with porous grout, creating an immediate vulnerability.
Pro-Tip: Surface Claims vs. Seam Reality
Do not be fooled by marketing videos showing water bouncing off a flat panel. Any piece of plastic can repel water in the center. The only metric that matters is what happens when that water reaches the edge. When evaluating products, always scrutinize the locking mechanism. If the manufacturer does not explicitly detail how their panels join together to block capillary action, walk away. Seam detailing is 90% of the battle.
Waterproof composite wall tiles utilize engineered mechanical joints instead of chemical fillers. The design of these edges is the most critical factor in preventing moisture from reaching the drywall behind the shower surround.
The Mechanics of the Click-Lock System
Most premium composite tiles feature a proprietary tongue-and-groove or click-lock edge profile. These are precision-milled edges designed to snap together, creating a tight, mechanical friction fit.
When installed correctly, this locking mechanism forces the wear layers of adjacent panels tightly together. This creates an immediate physical barrier that resists direct water spray.
The manufacturing of these edges is an exercise in extreme precision. CNC (Computer Numerical Control) routing tools mill the interlocking profiles to tolerances measured in fractions of a millimeter. When two panels are engaged, the geometries interlock in such a way that pulling them apart laterally requires massive force. This constant inward tension forces the microscopic gap at the surface to close entirely, presenting a unified, impenetrable face to the cascading shower water.
This mechanical connection fundamentally mitigates the need for wide, exposed grout lines. The seam becomes a functional part of the waterproofing strategy, rather than its weakest link.
Neutralizing Capillary Action
As mentioned earlier, capillary action is a silent destroyer in wet areas. Water can defy gravity, wicking upward or sideways into microscopic cracks between tiles.
Corners endure maximum structural flex. Traditional grout cracks here instantly. Composites rely on continuous high-grade silicone expansion joints here to absorb movement safely.
Valve holes are critical entry points. The rigid core of a composite panel allows for precise hole-saw cutting, providing a firm backing for heavy-duty sealant application around the pipe.
Where the wall meets the tub or pan. The engineered flange system prevents water from wicking up, forcing gravity to drain the moisture straight into the basin.
Engineered composite seams are specifically designed to break this capillary draw. Many systems utilize a micro-bevel or a specific overlapping flange design.
An overlapping flange system creates a physical step down behind the decorative face. Even if a microscopic amount of water breaches the front edge, it hits a physical barrier and cannot travel further inward.
The Role of Perimeter Sealants
While the panel-to-panel seams are mechanically locked, the perimeter of the installation still requires careful attention. Where the panels meet the shower pan, bathtub, or ceiling, a high-quality sealant is required.
Industry consensus dictates the use of 100% silicone sealants in these expansion zones. Silicone remains permanently flexible, accommodating any minor settling of the home's framing without cracking.
When the mechanical seams are combined with proper perimeter silicone, it yields an optimal configuration. This approach establishes a definitive operational threshold against water intrusion.

Evaluating Mold Resistance and Long-Term Maintenance
Exhausted by the endless weekend battle against dark shower mold? This section explores how eliminating porous surfaces fundamentally alters your bathroom's hygiene baseline.
Mold requires three things to thrive: a food source, appropriate temperatures, and persistent moisture. Bathrooms provide ideal temperatures and abundant moisture.
? The Myth
"You can permanently eradicate shower mold with heavy bleach applications and aggressive wire brushing."
? The Fact
Bleach only bleaches the surface color of mold within porous grout; the roots remain. The aggressive brushing physically damages the grout, making it more porous and guaranteeing the mold returns faster next time.
The variable you can control is the surface material. Traditional ceramic tile installations provide a vast network of porous grout lines. These lines absorb microscopic organic matter (soap scum, skin cells)-creating a perfect food source for mold spores.
The Problem with Porous Grout
According to guidelines from the Environmental Protection Agency (EPA), controlling indoor moisture is the only effective way to control indoor mold growth. However, when moisture penetrates unsealed grout, it lingers for hours after the shower is turned off.
When examining toxic black mold (Stachybotrys chartarum) under a microscope, scientists note its affinity for cellulosic materials and highly porous matrices that hold lingering moisture. Grout acts as a perfect subterranean bunker for these hyphae (branching filaments). Because grout takes hours to fully dry internally, it sustains the life cycle of fungi long after the shower fan has been turned off.
This lingering dampness creates a micro-climate conducive to mildew. Homeowners are then forced into a cycle of applying harsh bleach-based cleaners and scrubbing with abrasive brushes.
This aggressive cleaning accelerates the performance degradation curve of the grout, making it even more porous and susceptible to future mold. It is a frustrating, self-defeating cycle.
How Composites Alter the Hygiene Baseline
Waterproof composite wall tiles break this cycle entirely. The dense polyurethane wear layer is non-porous and highly hydrophobic. It repels water instantly, forcing it to drain rapidly down the face of the panel.
Because there is no grout, there is nowhere for moisture to hide and no porous material to trap organic food sources. This creates a deterministic outcome: a massive reduction in the potential for mold and mildew colonization.
To maintain a composite shower wall, a simple squeegee or a wipe down with a mild, non-abrasive household cleaner is usually sufficient.
Cost-to-Yield Ratio of Maintenance
When calculating the total cost of ownership (TCO), the value of this low-maintenance profile becomes obvious. The time spent scrubbing tile, combined with the cost of specialized grout cleaners and sealers, adds up significantly over a decade.
Composite wall panels offer a superior cost-to-yield ratio regarding ongoing maintenance. By engineering the problem out of the material itself, it calibrates the output in favor of the homeowner's time and energy.
Installation Method: Can You Install Over Existing Tile?
Dreading the dust, noise, and massive expense of tearing out your old shower walls? This section explains the precise substrate requirements for safely installing composites directly over existing surfaces.
Interactive Self-Assessment: Is Your Wall Ready for a Retrofit?
Answer these 3 quick questions to determine if you can skip the demolition phase and install Stickwoll directly over your current tile.
One of the most compelling advantages of rigid-core composite wall tiles is their retrofit capability. Because the SPC core is exceptionally stiff, it can bridge minor imperfections in the wall surface behind it.
This opens up the possibility of installing the new waterproof system directly over old, outdated ceramic tile, bypassing the demolition phase entirely.
Assessing Substrate Viability
However, installing over existing tile requires a standardized evaluation of the current substrate. You cannot cover up active structural failure.
Before proceeding, you must verify that the existing tile is firmly attached to the wall. Tap the old tiles with a tool handle; a hollow sound indicates the thin-set has failed. Any loose tiles must be removed.
More importantly, the existing wall must be completely free of underlying water damage, rot, or active mold. Sealing new panels over a rotting substrate will trap moisture and accelerate structural decay.
Surface Preparation Protocols
If the existing tile is structurally sound, surface preparation is minimal but critical. The old tile must be thoroughly cleaned and degreased to ensure the new construction adhesive can form a permanent bond.
Step-by-Step Guide: Preparing Your Wall for a Composite Retrofit
Follow these critical engineering steps to ensure a flawless, lifetime bond between the new composite panels and your existing substrate.
- Step 1: Chemical Degreasing and Descaling Over decades, tiles accumulate a microscopic film of bodily lipids, soap wax, and calcium. Standard bathroom cleaners will not remove this. You must use a heavy-duty TSP (Trisodium Phosphate) solution or a commercial degreaser. Scrub the entire wall vigorously and rinse thoroughly with clean water. The wall must be absolutely chemically bare.
- Step 2: Mechanical Abrasion (Scuffing) High-gloss ceramic tiles provide poor bite for structural adhesives. Using a medium-grit sandpaper (60 to 80 grit) on a pole sander, briskly scuff the glaze on the existing tiles. You do not need to remove the glaze entirely, merely dull the finish to create a micro-texture that allows the polymer adhesive to grab hold.
- Step 3: Leveling Deep Grout Lines (If Necessary) While SPC cores can bridge minor gaps, excessively wide (over 1/4 inch) or deeply recessed grout lines must be addressed. Use a fast-setting, polymer-modified leveling patch to skim coat these valleys. A flat substrate ensures maximum contact surface area for the adhesive.
- Step 4: Establishing Plumb Control Lines Never trust the corners of your room to be perfectly straight. Using a 4-foot spirit level or a laser level, strike a perfectly vertical plumb line down the center of your starting wall. This guarantees your interlocking seams remain geometrically perfect all the way to the edges.
- Step 5: Applying Silane-Modified Polymer Adhesive Do not use generic liquid nails. You must use a high-grab, moisture-curing polyurethane or silane-modified polymer (SMP) construction adhesive. Apply the adhesive in vertical beads (not zig-zags) every 3 inches. Vertical beads allow trapped air to escape when you press the panel into place, ensuring a void-free, 100% solid connection.
Heavy textures or prominent grout lines in the old tile may require a skim coat. A skim coat-a thin layer of specialized leveling compound-smooths the surface, ensuring the composite panels have maximum contact area.
Once prepped, the composite panels are typically applied using a high-grab, moisture-curing polyurethane adhesive.
The Demolition Offset
The financial and logistical benefits of this installation method are substantial. Demolishing an old tile shower can cost hundreds of dollars in labor and disposal fees alone.
By eliminating the tear-out, you avoid the mess of drywall dust permeating your HVAC system. You also dramatically reduce the timeline of the renovation.
This streamlined process strictly adheres to modern remodeling efficiency standards. It allows homeowners to achieve a total aesthetic and functional upgrade with a fraction of the traditional disruption.
Final Thoughts
Ready to finalize your wet-area material decision? This section summarizes the core metrics you need to evaluate long-term performance and confidently choose the right lifetime value.
The Wet-Area Purchase Confidence Scorecard
Before purchasing any wall panel system, demand the manufacturer meets these 4 criteria:
Evaluating wet-area wall materials requires looking past the surface. As we have explored, true waterproof composite wall tiles succeed because the entire system-the wear layer, the rigid core, the interlocking seams, and the correct installation-works in harmony.
When comparing your options, rely on objective metrics. Assess the Wet-Area System Integrity (WSI) to ensure water cannot bypass the seams. Evaluate the Lifetime Wet-Area Ownership Cost (LWOC) to understand the true financial impact of installation labor and decades of grout maintenance.
If you are renovating a high-moisture space and want to bypass the heavy labor of ceramic tile without sacrificing aesthetic realism, engineered composites offer a proven, scientifically backed solution.
Take the next step by reviewing detailed product specifications for your specific room type. Compare the seam designs side-by-side, request material samples to feel the rigid core firsthand, and use these standardized evaluation frameworks to make a confident, lasting choice.
Download Free Buyer Checklist (TXT)Frequently Asked Questions
Are composite wall tiles waterproof under direct shower spray? +
Yes, premium waterproof composite wall tiles are engineered for direct water exposure. The dense wear layer repels water, while the rigid core and specialized click-lock seams prevent moisture from penetrating the joints. When installed with correct perimeter sealants according to manufacturer guidelines, they provide a highly effective, continuous barrier against direct shower spray.
Do waterproof composite wall tiles prevent mold growth? +
While no material can entirely eliminate mold if a bathroom has zero ventilation, composite tiles fundamentally mitigate the risk. Unlike ceramic tile installations, composites eliminate porous grout lines. Without grout to absorb moisture and trap organic matter, mold spores have no food source or damp micro-climate to colonize, making the walls vastly easier to keep clean.
How do you clean grout-free waterproof wall tiles? +
Cleaning grout-free composite tiles requires significantly less effort than traditional ceramic. Because the polyurethane wear layer is non-porous, dirt and soap scum sit on the surface. A simple wipe-down with a soft cloth and a mild, non-abrasive household cleaner is usually all that is required. Abrasive scrub brushes and harsh bleach solutions should be avoided, as they can dull the protective finish over time.
What is the best wall tile alternative for wet areas? +
The optimal alternative depends on your specific evaluation metrics. If you are benchmarking against ease of installation, low lifetime maintenance, and high aesthetic realism, rigid-core waterproof composite wall tiles are widely considered the premier alternative to ceramic tile. They offer the visual depth of natural stone while eliminating the labor-intensive wet-saw cutting, thin-set mortar application, and ongoing grout sealing required by traditional methods.

Leave a comment
This site is protected by hCaptcha and the hCaptcha Privacy Policy and Terms of Service apply.