





How-to guide
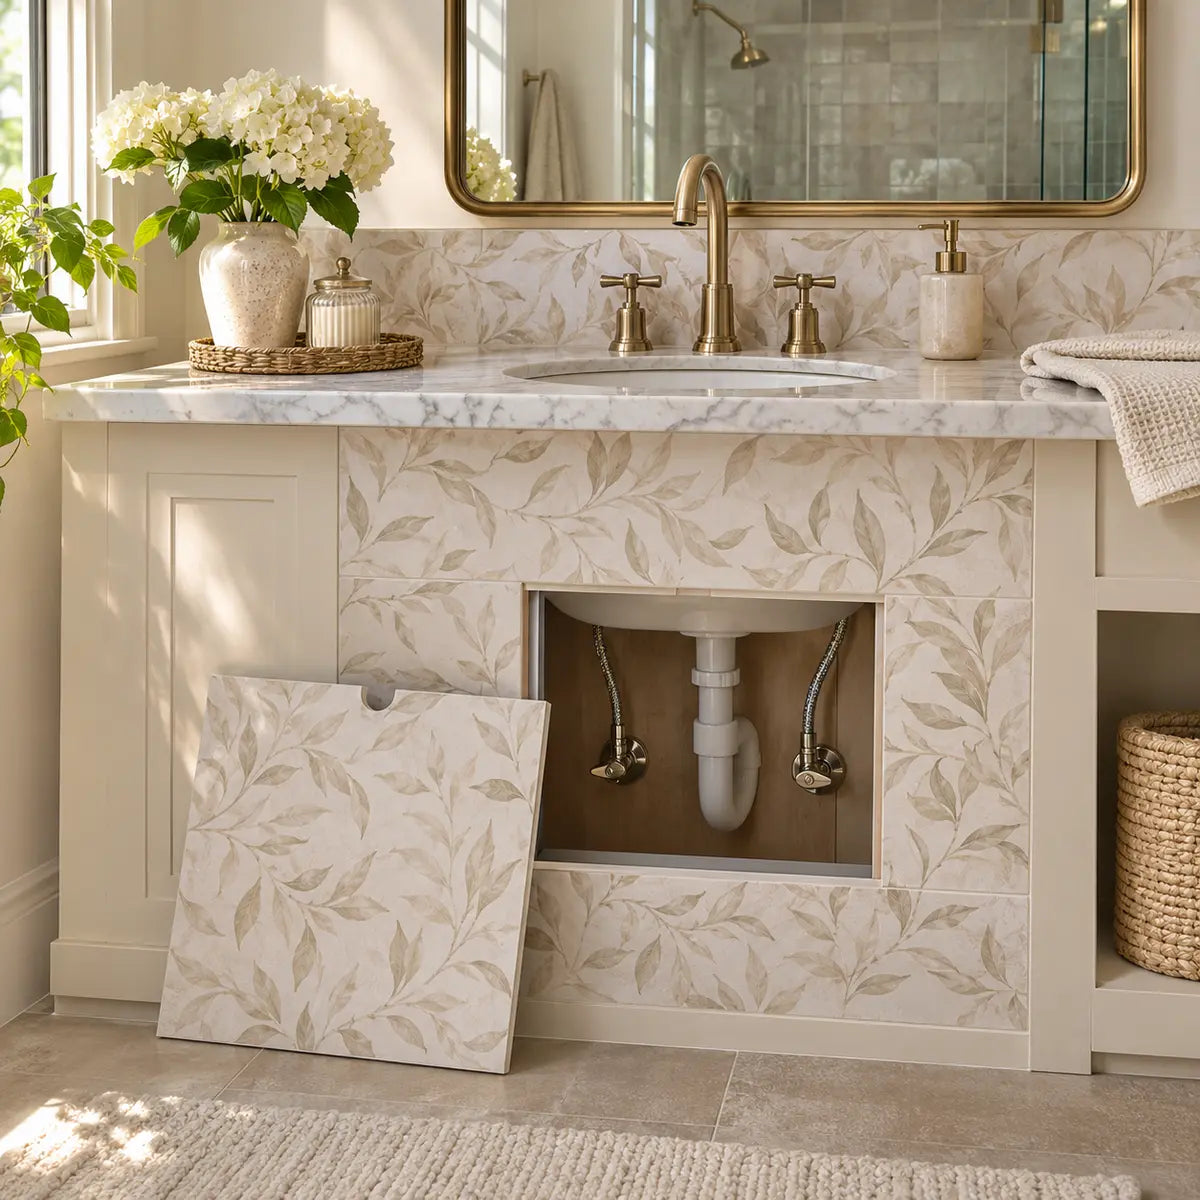
A bathroom vanity backsplash can look simple until a small plumbing access panel interrupts the tile pattern. The panel still needs to open, shutoff valves still need to be reachable, and a cut that is slightly off can become the most visible detail on the wall.
The most reliable workflow is:
- Inspect the panel, plumbing, wall, and tile instructions.
- Measure from stable vanity or wall reference points.
- Make a paper template of the opening and nearby obstructions.
- Plan the tile seams and pattern before cutting.
- Transfer the template to the tile in the correct orientation.
- Cut gradually and dry fit every piece.
- Install only after the panel can still be removed and the layout looks intentional.
This process works for a vanity backsplash where the tile will receive ordinary bathroom splash exposure. The exact surface preparation, cutting tool, adhesive behavior, moisture limits, acclimation time, and edge treatment depend on the selected tile product. Check the current instructions for that product before exposing any adhesive. Current Stickwoll guidance on bathroom splash exposure, for example, distinguishes routine splash exposure from prolonged water exposure and direct shower zones.

What should you check before tiling around the panel?
Before measuring tile, confirm how the panel opens, what plumbing it serves, and whether the surrounding wall is ready for adhesive. The panel should remain removable, the shutoff valves and supply lines should remain reachable, and the wall should be smooth, clean, dry, and stable.
An access panel is a service feature, not a blank section of wall. It may lift out, slide sideways, swing on hinges, or detach after screws are removed. Each opening method affects the tile plan.
Open and close the panel several times before you begin. Watch for:
- The direction the panel travels.
- Any lip, flange, hinge, magnet, latch, screw head, or trim that needs clearance.
- Whether the panel must move outward before it can lift or slide.
- Whether the vanity countertop, backsplash ledge, or cabinet face limits movement.
- Whether the panel sits flush with the wall or is slightly recessed.
- Whether tile on the panel would add thickness that changes its movement.
If the panel lifts out, leave enough room for the fingers, tool, or movement needed to remove it. If it slides, keep the tile edge away from the path of travel. If it is screwed in place, plan around the screw heads and make sure future access to them remains practical.
Check the plumbing before you cover the wall
Look behind the panel and identify the parts that may need service:
- Hot and cold shutoff valves.
- Flexible supply lines.
- Drain connections.
- Slip-joint connections.
- Water filtration lines or accessory plumbing.
- Electrical cords or outlets inside the cabinet.
- Any fasteners holding the panel or surrounding trim.
Turn each shutoff valve only if you can do so safely and without disturbing a leaking or fragile connection. The purpose of this inspection is to understand reach and movement. It is not a reason to alter the plumbing during a cosmetic tile project.
The general rule is simple: tile should frame the access panel, not make the panel or its plumbing harder to use. The 2024 International Plumbing Code includes access provisions for certain concealed slip-joint fixture connections, but local adoption, amendments, and the actual plumbing arrangement determine which requirements apply to a specific bathroom. The code’s cited provision refers to a minimum 12-inch smallest dimension for the specified access panel or utility space; that number does not establish the required size of every existing vanity panel. Check your local requirements before changing the panel or closing off access. See the International Code Council 2024 plumbing access provision for that limited boundary.
Check the wall and backsplash exposure
Self-adhesive tile needs a suitable substrate. In practical terms, the surface should be:
- Smooth enough for the tile to lie flat.
- Clean and free from dust, grease, oils, and residue.
- Dry, with no active leak or unresolved dampness.
- Firm and stable, without loose paint, flaking material, or movement.
- Repaired and fully dry where holes, cracks, or uneven areas exist.
The exact list of acceptable substrates varies by product. A painted wall, laminate side panel, existing tile, drywall, or wood surface should be evaluated against the selected tile’s instructions rather than assumed to be acceptable. The checked guidance from Stickwoll, WallPops, and Lowe’s consistently places surface preparation before adhesive exposure, while the specific acceptable wall types remain product dependent.
A bathroom vanity backsplash may receive splashes, condensation, and regular cleaning. That does not make the tile installation a waterproof wall assembly. Peel-and-stick tile, adhesive seams, panel joints, and the wall behind them should be treated according to the selected product’s stated exposure limits. Do not use decorative adhesive tile as a substitute for a waterproofing system.
If the area is damp because of a plumbing leak, stop and repair the cause first. Covering the wall can hide the problem and may leave the adhesive bonding to a surface that is not ready.
For a broader preparation and exposure check, review this bathroom and wet-area tile guide before ordering material or cutting the first piece.
Make the readiness decision
You are ready to plan the layout when you can answer “yes” to these questions:
- Can the panel be opened and removed using its existing method?
- Can you reach the shutoff valves and visible plumbing connections?
- Do you know where the tile must stop so the panel can move?
- Is the wall smooth, clean, dry, stable, and ready for the selected adhesive?
- Do you have the exact product instructions for the tile you bought?
- Can you identify a straight countertop, vanity edge, or wall line to use as a reference?
If any answer is “no,” pause before measuring. The best time to discover an access problem is before a tile backing is removed.
Gather the tools for measuring, cutting, and testing
You need a small set of measuring and templating tools before you need cutting tools. Keeping those groups separate helps you finish the layout before adhesive becomes part of the problem.
Measurement and layout supplies
- Tape measure or steel rule.
- Small combination square or straightedge.
- Level.
- Pencil or fine-tip marker.
- Painter’s tape.
- Notebook or printed measurement sheet.
- Camera or phone for reference photos.
- Cardstock, kraft paper, construction paper, or thin cardboard for the template.
- Scissors for the template.
- Extra paper for a second version if the first template becomes distorted.
Cutting and installation supplies
- The cutting tool named or permitted by the tile instructions.
- Sharp scissors, if the product allows them.
- Utility knife and replacement blades, if the product allows knife cutting.
- Cutting mat or sacrificial board.
- Straightedge for controlled cuts.
- Scraper, squeegee, or soft smoothing tool if specified by the product.
- Clean, lint-free cloths.
- The approved cleaning supplies for the wall.
- Painter’s tape for temporary positioning.
- Eye protection when cutting.
- Work gloves if the tile edge or cutting tool requires them.
Do not choose a cutting method only because it worked on another peel-and-stick tile. Some products trim with scissors or a knife, while others have a more rigid construction and require a different method. The checked Stickwoll Lemon Zest page describes cutting with scissors or a knife for that product page, but those instructions should not be transferred automatically to another design or material.
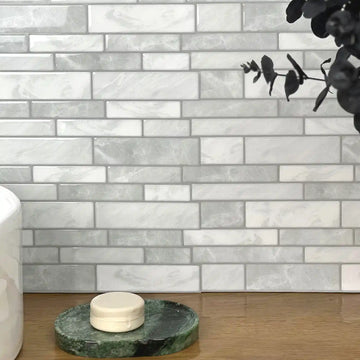
If you are using a specific Stickwoll style, check the installation details for the selected tile before cutting. The Subway Marble product record describes self-adhesive, grout-free wall tiles for kitchen and bathroom applications, but the current instructions still need to be checked against your exact substrate, splash zone, tile orientation, and panel layout.
How do you measure tile around a bathroom vanity access panel?
Measure the panel in relation to stable surrounding references, then record the panel itself, the plumbing, and the tile orientation as separate pieces of information. Do not rely on the apparent size of the opening alone.
The opening may look rectangular while the actual tile must account for a lip, uneven trim, a recessed edge, a hinge, or the movement required to remove the panel. Measurements taken from the panel’s center can also drift if the panel is not perfectly square.
Choose stable reference points
A stable reference point is an edge or line that will stay fixed while you measure and install. Good examples include:
- The front or back edge of the vanity countertop.
- The top of the countertop backsplash ledge.
- A cabinet side that is plumb.
- The edge of a fixed wall or cabinet face.
- A clearly defined vertical corner.
- A level line established across the backsplash area.
Avoid using a loose trim piece, a movable panel edge, or a flexible caulk line as your only reference.
Record the distance from the left reference to the panel’s left edge, and from the reference to the panel’s right edge. Do the same from the countertop or another horizontal reference to the top and bottom edges. Then measure the panel’s width and height separately.
A useful measurement sheet looks like this:
| Measurement | Record |
|---|---|
| Reference edge used | For example, left vanity side |
| Distance to panel left edge | Exact measurement |
| Distance to panel right edge | Exact measurement |
| Distance from countertop to panel top | Exact measurement |
| Distance from countertop to panel bottom | Exact measurement |
| Panel opening width | Exact measurement |
| Panel opening height | Exact measurement |
| Panel thickness or proud edge | If relevant |
| Tile orientation | Which edge is the top and which face is visible |
| Valve or pipe positions | Location from the same references |
| Movement needed to remove panel | Lift, slide, swing, pull, or unscrew |
Measure each important distance twice. If the results differ, do not average them automatically. Find the reason. The panel may be out of square, the tape may have shifted, or you may be measuring two different edges.
Measure the working opening, not just the visible outline
The visible opening and the usable clearance may differ.
For example, a panel that lifts upward may need additional space above it. A panel that swings outward may need clearance across the tile face. A screw-fastened cover may need enough exposed edge to hold while the screws are removed. A panel that sits behind a countertop lip may need to move toward the room before it can be lifted.
Use painter’s tape to mark the panel perimeter temporarily. Open the panel and trace the path it takes. This gives you a better picture of the tile boundary than the face of the panel alone.
If tile will be installed on the removable panel itself, measure the panel as a separate tile surface. Account for its thickness, the direction it moves, and the space around its perimeter. A visually continuous pattern can be attractive, but it may be impractical if the added tile thickness prevents removal.
Record pipes and valves separately
The panel is one obstruction. Pipes and valves are separate obstructions.
Mark each visible pipe, valve, connector, or fastener on your measurement sheet. Note whether it is fixed to the wall, attached to the panel, or free to move slightly with the supply line. This distinction matters when you decide whether a tile should have a notch, a hole, or a larger removable section.
Do not cut tightly around a valve handle if the handle needs to rotate. Leave the functional movement the plumbing requires, then finish the visible edge in a way that matches the product instructions and the surrounding design.
For another service-first example, see this guide to tiling around a wall-mounted faucet and plumbing fixtures. Its useful principle is to audit access before treating a plumbing feature as a purely visual obstruction.
Mark tile orientation before transferring measurements
Tile patterns can change when a piece is rotated. This is especially noticeable with subway layouts, veined designs, three-dimensional shapes, and directional prints.
Mark each test piece with:
- “Top.”
- “Left.”
- The room-facing side.
- The intended position in the layout.
If the tile has a printed or textured face, make your marks on the removable backing or on painter’s tape. A template can fit perfectly and still create a poor result if it is transferred upside down or mirrored.

How do you make a paper template for the opening?
Make the template in place, mark the surrounding references along with the opening, remove it without stretching, and test it against the panel several times. A paper template is a practical low-risk choice for an irregular opening because it lets you adjust the shape before cutting the finished tile.
The template technique is an implementation choice. The checked installation sources support measuring, marking, dry fitting, and cutting before adhesive exposure; they do not establish a universal manufacturer-tested paper-template method for every vanity panel. Use the template as a careful way to test your measurements, not as a guarantee of a perfect cut.
Build the template over the actual area
Cut a piece of paper or thin card larger than the panel opening. It should extend far enough to reach two or more stable reference edges. A template that covers only the opening can reproduce the size but lose the opening’s position.
Tape the paper flat around the work area. Keep the tape away from surfaces that might be damaged when it is removed. Press the paper into corners and around protruding trim with your fingers or a soft edge.
Trace:
- The left, right, top, and bottom reference edges.
- The panel opening or panel perimeter.
- Hinges, lips, screw heads, latches, and fixed trim.
- Shutoff valves and pipes that affect the cut.
- Any line where the tile must stop.
- The intended tile seam or pattern direction.
Use a different mark for each type of feature. For example, use a solid line for the panel perimeter, a dashed line for the tile seam, and a small circle for a pipe or valve center. Label the top, left side, room-facing side, and panel position.
Cut and test the template
Remove the paper carefully. Do not pull it diagonally across a corner, because that can stretch the paper and change the shape.
Cut along the opening line with scissors. Keep the first cut slightly conservative if the line is uncertain. You can enlarge paper more easily than you can add material back to a tile.
Place the template back in position. Check:
- Does the opening align with the actual panel?
- Do the reference marks land on the same vanity or wall edges?
- Does the template follow the panel’s shape without buckling?
- Does it account for the panel’s movement?
- Does it clear valves, pipes, and fasteners?
- Does it preserve the planned seam location?
- Can the panel still be removed with the template in place?
Test the template from the same direction the finished tile will be viewed. A shape can appear correct from above but shift visually when seen straight on.
If the template fails, mark the correction directly on it and make a revised version. Keep the original until the revised template has been checked. This gives you a record of what changed and reduces the risk of repeating a measurement mistake.
Make separate templates for separate tile pieces
A single template may not be enough if the opening crosses multiple tiles. Make a separate labeled template for each tile that requires a cut.
For each template, record:
- Tile position.
- Tile orientation.
- Which edge touches the countertop or neighboring tile.
- The cut line.
- Any notch or hole.
- The intended seam location.
- The amount of tile that remains around the opening.
This approach is especially helpful when the access panel sits across a seam. The left piece and right piece may have similar cuts but different widths, pattern directions, or reference edges.
For a related workflow, read this guide to tiling around a recessed medicine cabinet. The opening is different, but the useful planning ideas are similar: label templates, preserve the fixed references, and dry fit the surrounding pieces before committing to adhesive.
Plan the seams and pattern before cutting
The panel area should look intentional from normal standing height. That usually means planning the surrounding whole tiles and seams first, then fitting the opening into that layout.
A common beginner mistake is to center the panel cut without considering the neighboring tile pattern. The opening may be centered geometrically but still look awkward if it creates a thin strip at one side, breaks a repeating print, or leaves a narrow sliver beside the vanity.

Start with the first visible row
The first row controls the visual rhythm of the backsplash. Use the countertop or another stable horizontal line as your starting reference if the surface is level and the product instructions permit that approach.
Place tiles without removing backing. Check:
- Whether the top or bottom edge should be the visual starting line.
- Whether the first row creates an unusually thin cut.
- Whether the tile pattern lands at the vanity corners.
- Whether the panel interrupts a strong horizontal or vertical feature.
- Whether the tile needs to be centered on the vanity or aligned with a cabinet edge.
- Whether the pattern should continue across the panel or stop around it.
The best starting point is often the most visible uninterrupted area. That gives you a clean reference and lets you place smaller cuts in less noticeable locations.
Decide how the panel will relate to the pattern
There are three common approaches.
Frame the panel with surrounding tile. The tile stops at a clean perimeter around the access panel, leaving the panel surface plain or finished separately. This is the simplest service-first arrangement and can look deliberate if the border is even.
Continue the pattern across the panel. Tile is cut to fit the removable panel, and the pattern appears to continue across the opening. This can create the most seamless appearance, but it requires careful alignment and may make repeated panel removal less convenient. Treat it as a practical layout choice rather than a tested guarantee of long-term repeated removal.
Use a separate visual treatment. The panel receives a contrasting tile, trim, paint, or another finish that makes its role clear. This can be useful when the panel shape is irregular or when pattern continuity would require too many small cuts.
There is no single correct visual answer. The right choice balances pattern, access, panel movement, and the quality of the exposed edges.
Avoid tiny filler pieces
Small filler pieces are difficult to align and can draw attention to the opening. Before cutting, shift the layout slightly to reduce narrow strips at the vanity ends or around the panel.
If a small piece is unavoidable, place it where the eye is less likely to focus. Keep the cut aligned with a nearby seam or edge so it looks intentional. A slightly wider, consistent border often looks better than a group of uneven slivers.
Leave a practical movement path
A tight-looking gap is not always a precise-looking gap. If the panel lifts, slides, swings, or pulls forward, the tile must allow that movement.
Do not create a tile edge that catches on the panel. Do not build a raised tile lip across a panel seam unless the panel’s movement has been tested with the actual tile thickness. Do not cover the edge needed to grip or release the panel.
The cleanest pattern is the one that still works after the vanity has been serviced.
How do you cut tile around vanity plumbing?
Transfer the template to the correct tile face and orientation, cut gradually, and test the piece against the actual opening after each small adjustment. Make all cuts before removing adhesive backing.
The cutting method must match the tile material. Scissors, a utility knife, a scoring tool, or another method may be appropriate depending on the product. The checked Lowe’s installation documentation states that cutting requirements vary by product and that some products may require a wet saw. It also supports marking and cutting before adhesive exposure.
Transfer the template without reversing it
Lay the template on the back of the tile or on the removable backing, depending on the product’s construction and the direction of the cut. Keep the template’s “top” and “left” marks visible.
Before tracing, confirm:
- You are marking the correct tile.
- The room-facing side is oriented correctly.
- The template is not flipped.
- The panel opening will land in the planned location.
- The tile pattern will line up with the neighboring pieces.
- The cut line is on the waste side of the mark.
Trace the opening with a fine pencil or marker. Use a straightedge for long lines. For curved or irregular edges, follow the template slowly rather than trying to improve the shape freehand.
If the cut line will be hidden under trim or a panel edge, follow the product’s clearance and finishing instructions. If the cut edge will remain visible, make the line as controlled as possible and plan the edge treatment before installation.
Cut the easy lines first
Begin with straight cuts or the least complicated edge. This gives you a feel for how the tile behaves and lets you use the same piece to check the layout.
- Mark the complete cut line.
- Remove only the waste section.
- Make the first cut slightly inside the marked line.
- Test the tile against the opening.
- Enlarge the cut in small amounts.
- Stop when the tile fits without binding.
- Record the final shape on the template for the next piece.
Avoid cutting directly beside exposed plumbing if the tool could slip toward the pipe, valve, or supply line. Remove the tile from the wall before cutting whenever possible. If the piece must be shaped around a fixed obstruction, support it securely and keep the tool under control.
Use scoring only when the product instructions support it
For the specific Lowe’s product family covered by the checked installation PDF, the instructions describe scoring the same utility-knife line three to five times on each side before snapping and trimming. That number belongs to that documented product family. It is not a universal instruction for every peel-and-stick tile.
If your selected product permits knife cutting, use a sharp blade and a stable cutting surface. Replace a dull blade instead of increasing pressure. Excessive force can make the blade wander, crush the edge, or create a cut that is difficult to finish.
If the product instructions permit scissors, make several light cuts around a curve rather than forcing one large closing cut. For a notch, cut from the waste side and approach the corner gradually. A small relief cut can reduce stress at an inside corner, but the final shape still needs to be checked against the actual opening.
Cut around pipes and valves with service in mind
A pipe cutout should clear the pipe without making the tile loose or leaving an unnecessarily large exposed gap. A valve cutout needs to account for the valve body and the movement of the handle.
Before cutting, ask:
- Does the pipe move when the supply line is touched?
- Does the valve handle rotate through a full operating range?
- Will the tile interfere with a wrench or other service tool?
- Is the obstruction attached to the removable panel or the fixed wall?
- Can the tile be removed if the plumbing needs attention?
If a plumbing feature is on the removable panel, do not assume that cutting a close-fitting opening will preserve access. The panel may still need to move outward, lift, or slide with the tile attached.
Keep the cut edge honest
Do not hide an uneven cut by pressing the tile harder against the wall. Pressure can distort the tile, force an edge into a position it will not hold, or make later removal more difficult.
When an edge is exposed, decide whether the selected product supports a trim piece, a compatible sealant, a finished edge, or another treatment. The supplied product information does not establish one universal edge-finishing method for every Stickwoll tile, so follow the exact product instructions and avoid adding a sealant or caulk based on appearance alone.
For another example of progressive trimming around a plumbing-related obstruction, see this peel-and-stick sink cut guide. Its useful process principle is to remove material gradually and test the fit before making the next cut.

Is the layout ready before you expose adhesive?
The layout is ready when the pieces fit physically, the seams look intentional, and the panel still opens or removes as it did before tiling. These three checks must pass together.
Dry fitting is the point where the project becomes predictable. Arrange the full layout without removing the backing, verify the reference line and cuts, and inspect the pieces before adhesive exposure. Current installation guidance from Stickwoll, WallPops, and Lowe’s supports previewing the arrangement, checking the first row and pattern, and cutting before the backing is removed.
Use the three-check decision aid
Check 1: Template
- Does each template match the actual opening?
- Are the top, left, and room-facing marks clear?
- Does each template account for hinges, lips, valves, pipes, and fasteners?
- Was the template tested in the direction the panel moves?
If no: revise the template before cutting more tile.
Check 2: Tile layout
- Are the first row and major seams level or intentionally aligned?
- Do the patterns continue in the correct direction?
- Are the cuts placed where they look balanced?
- Are there thin filler strips that should be avoided?
- Are the tile edges supported by the surrounding layout?
If no: shift the layout or change the seam plan before removing backing.
Check 3: Service access
- Can the panel be opened, removed, and replaced?
- Can the shutoff valves be reached and operated?
- Do supply lines and concealed connections remain reachable?
- Does the panel move without catching the tile?
- Can the fasteners, latch, magnet, or hinge still function?
If no: change the cut or the panel treatment. Do not install the piece simply because the pattern looks good.
This decision aid is a planning check, not a measurement guarantee. If the panel is difficult to remove before tiling, the finished tile may make the problem worse.
Dry fit the pieces in installation order
Lay out the pieces in the order you expect to install them. Mark each piece with a number. Photograph the arrangement once it is correct.
Check the layout from several positions:
- Standing directly in front of the vanity.
- From the bathroom doorway.
- From the side of the vanity.
- At countertop height.
- With the cabinet doors open if they change your view.
Look for alignment errors that are easy to miss close up. A seam can appear straight at arm’s length but drift across the backsplash. A decorative pattern can look balanced around the panel while appearing interrupted from the doorway.
Also inspect the tile itself. Set aside pieces with damaged corners, visible defects, or an orientation that does not match the approved layout. The checked Stickwoll product guidance supports previewing and planning before application; product inspection is a sensible part of that same checkpoint.
Decide what to do with excess material
Cutting around a panel creates more waste than covering a simple uninterrupted wall. Plan for mistakes, pattern matching, and replacement pieces.
Do not apply a universal waste percentage to every tile format. The checked Stickwoll Lemon Zest page lists a product-specific piece size of 29 cm by 23 cm and offers a 10% extra-tile option, but those figures apply to that product page and are not a measured waste rate for all vanity-panel projects.
Keep usable offcuts. A piece that is too small for the current cut may work for a short end section, a test cut, or a future repair. Label leftover pieces with their pattern direction if the design is directional.
Install the approved layout without losing the panel function
Once the dry fit passes, install the tile in a controlled sequence: establish the reference line, prepare one piece at a time, expose only the backing you can manage, align before pressing firmly, and check the panel again after the surrounding pieces are installed.
Some peel-and-stick products require acclimation in the installation room. WallPops, for example, specifies a minimum of 48 hours for its backsplash products, while Lowe’s states that acclimation depends on the tile material. Treat that as product-specific guidance rather than a universal Stickwoll requirement.
Confirm the room and wall conditions
Follow the selected product’s instructions for acclimation, temperature, surface preparation, and cleaning. Do not install over unresolved dampness or a wall that is still dusty from repairs.
Clean the wall with the product-approved method and allow it to dry fully. Do not leave cleaner residue behind. Avoid touching the prepared surface repeatedly with oily hands.
If you are installing over an existing backsplash, inspect the transition between the backsplash and countertop. A loose edge, raised bead, or uneven seam can hold the tile away from the wall.
Mark the reference line
Use a level, countertop edge, or another stable guide to establish the first row. Do not assume the countertop is level until you check it. If it is slightly out of level, decide where the variation will be least visible and follow the product’s installation guidance.
The reference line should help you place the first tile consistently. It should not run through the access-panel opening in a way that makes the panel cut harder to read.
Install the surrounding whole pieces first
Begin with the pieces that establish the main pattern and leave the panel area easy to inspect. Depending on the layout, that may mean starting at a corner, along the countertop, or in the largest uninterrupted section.
Remove the backing gradually. Keep the tile from stretching or folding. Align the piece with the reference line and neighboring seams before pressing firmly.
The checked WallPops guidance supports gradual backing removal, avoiding stretch, confirming alignment, and applying pressure after placement. Those instructions are specific to WallPops products, so use them as a comparison for process control and follow the exact instructions for your tile.
Place each cut piece with the backing still available until the last check
Hold the cut piece in position without exposing the adhesive. Confirm the fit, the seam, and the panel movement one more time.
When the piece is ready, expose the backing in a manageable section. Align the most important edge first. For a panel cut, that may be the edge that controls the seam or the line that will be visible from the room entrance.
Press from the aligned area outward. Use the approved smoothing tool to reduce trapped air and improve contact. Do not force a piece into position after it has begun to bond in the wrong place. Current Stickwoll and Lowe’s guidance warns that repositioning may reduce adhesive performance and that removal may damage the substrate.
Install the panel piece according to the service plan
If the panel remains plain, finish the surrounding tile perimeter without blocking the panel edge or movement path.
If the panel receives tile, confirm the panel is stable during installation and that the added material does not interfere with the opening method. A separate piece on the panel can make future removal easier than trying to bond one continuous tile surface across both the fixed wall and moving panel.
Do not permanently bond the panel to the wall. Do not bridge a removable seam with adhesive. Do not cover a hinge, latch, screw head, magnet, or gripping edge that the panel needs.
Inspect the whole area before applying final pressure
Stand back and check the layout. Look at the access panel from normal viewing distance. Confirm that:
- The panel perimeter reads as intentional.
- The tile seams do not drift.
- The pattern has the correct orientation.
- The exposed edges are even enough for the planned finish.
- No tile blocks a valve, pipe, fastener, or panel movement.
- No air pocket or lifted corner is visible.
- The panel can still be opened and replaced.
This is the last easy correction point. Once the adhesive has received firm pressure, correction may be harder and substrate damage may be possible during removal.
Allow the installed area to settle according to the product instructions
Do not assume that a care instruction for a lifted and reinstalled tile is the same as the initial installation requirement. Stickwoll’s current FAQ says that a lifted tile reinstalled with adhesive should settle for 12 to 24 hours before moisture or cleaning exposure. That is a specific reinstallation instruction, not a universal initial-install cure time.
Use the selected tile’s instructions for cleaning, moisture exposure, and any waiting period. Keep the area dry and avoid testing the panel repeatedly until the installation has had the time the product requires.

What should you do when the cut or panel area looks wrong?
Stop at the first visible problem and identify whether it is a measurement issue, a template issue, a cutting issue, a layout issue, or an access issue. The repair depends on the source of the problem.
| Problem | Inspect first | Best next step |
|---|---|---|
| The cut is too small | Template and opening orientation | Enlarge the cut gradually and retest |
| The cut is too large | Panel edge and visible gap | Recut the piece if possible; otherwise use a planned edge treatment supported by the product |
| The panel catches | Movement path and tile thickness | Remove or revise the interfering tile before pressing firmly |
| The pattern is misaligned | Tile orientation and template transfer | Stop and reorient the piece; do not force the seam into place |
| A valve is blocked | Handle movement and tool access | Redesign the cut to preserve operation and service access |
| A corner tears | Cutting tool, blade sharpness, and pressure | Use the product-approved tool with controlled cuts |
| The tile will not lie flat | Wall condition or raised obstruction | Correct the substrate or obstruction before continuing |
| A seam creates a thin sliver | Full layout rather than one piece | Shift the starting point or redistribute the cuts |
| The panel cannot be removed | Adhesive bridge or insufficient clearance | Stop; restore the panel’s movement before finishing |
| The edge looks unfinished | Product instructions and edge exposure | Use only a verified compatible finish or revise the visible layout |
If the cut is too small
A small cut is usually easier to correct than a large one. Remove a little material, test the piece, and repeat. Mark the area to be removed rather than cutting by eye.
Do not enlarge a cut with the tile pressed against plumbing. Remove the piece and cut on a stable surface. Keep the opening only as large as the function requires.
If the cut is too large
Do not press the tile sideways to hide a large gap. Check whether the piece can be replaced with a new cut from a fresh tile or a suitable offcut.
If the edge will remain visible, use only an edge treatment that the selected product instructions support. The supplied evidence does not establish a universal caulk, trim, sealant, or waterproofing solution for exposed cuts around an unspecified tile.
If the pattern misses the seam
First confirm that the tile was transferred from the correct side of the template. A flipped template is a common cause of mirrored cuts.
Then check whether the pattern was aligned across the full layout or only within the panel opening. A correct opening shape can still be in the wrong position. If the adhesive has not been exposed, adjust the piece. If the tile has already been pressed into place, follow the product’s removal guidance and expect that the substrate or adhesive may be affected.
If the panel no longer opens
Stop the project at once. Do not solve the problem by forcing the panel or cutting the wall around it while the tile is bonded.
Inspect the panel’s movement path. Look for:
- Tile thickness at the panel edge.
- An adhesive bridge across the seam.
- A tile corner catching on the panel.
- A blocked screw, latch, hinge, or magnet.
- A cut that is tight enough to bind when the panel shifts.
Restore access before adding trim or finishing details. A backsplash that looks seamless but prevents plumbing maintenance has failed the central requirement of the project.
If an uneven edge remains
Decide whether the edge can be hidden by the panel perimeter, a planned trim detail, or a neighboring tile seam. If it cannot, replace the piece if material allows.
Do not add a random bead of caulk simply to make the edge look finished. Compatibility, adhesion, color, flexibility, and moisture behavior depend on the product and location. A vanity backsplash outside a shower may receive routine splashes, but that does not establish that an added sealant will create a waterproof assembly.
How do you keep the panel removable after tiling?
Keep the panel physically separate from the fixed wall, preserve its opening path, and test removal after the surrounding tile is installed. The removable panel should never be treated as a permanent section of backsplash.
The cleanest visual result may come from continuing the tile pattern across the panel, but that approach carries more planning risk. A separate panel finish or a deliberate border often makes future access simpler. In our experience, the best decision is the one that a future homeowner or plumber can understand immediately.
Test the panel in the same sequence used for maintenance
Replace the panel exactly as it was designed to be replaced. Then remove it again.
Check:
- Whether the panel can be gripped.
- Whether the panel clears the countertop and vanity face.
- Whether the tile edge catches.
- Whether the panel sits flush after replacement.
- Whether screws, magnets, latches, or hinges still work.
- Whether the shutoff valves remain reachable.
- Whether supply lines and connections can be inspected.
Do not assume that a panel that lifts out easily before tiling will behave the same way after tile is added. The tile can change both thickness and friction.
Keep a record for future repairs
Photograph the finished panel area with the panel open. Save the measurements, template, tile name, and any leftover material.
Label leftover pieces with their orientation. If the tile has a directional pattern, write “top” on the backing or place the piece in a marked envelope. This turns a future repair into a manageable replacement rather than another measurement exercise.
For a utility-sink example that also covers plumbing cutouts, splash exposure, and product-specific checks, see this peel-and-stick utility sink backsplash guide.
Frequently Asked Questions
Can you put peel-and-stick tile over a plumbing access panel?
You can plan tile around a plumbing access panel, and you may be able to tile the removable panel itself, if the selected product and panel construction allow it. The panel must remain removable, its movement path must stay clear, and the tile must not block valves, connections, fasteners, hinges, latches, or gripping edges.
A separate tile piece on the panel may be easier to remove and replace than a continuous piece bonded across the fixed wall and moving panel. Test the panel repeatedly before and after installation.
How do you measure tile around a bathroom vanity access panel?
Measure the panel from stable reference points such as the vanity side, countertop edge, fixed wall corner, or another line that will not move. Record the distances to the panel’s left, right, top, and bottom edges. Measure the panel itself, then record valves, pipes, fasteners, trim, and the direction the panel moves.
Make a paper template that reaches the same reference points. Test the template against the opening before transferring it to tile.
What is the best way to cut tile around vanity plumbing?
The best method depends on the exact tile material and its instructions. Use the permitted cutting tool on a stable surface, make the cut before removing adhesive backing, and enlarge irregular openings gradually.
For pipes and valves, start with a conservative opening and test the tile against the actual obstruction. Confirm that valve handles can move and that plumbing can still be reached for service.
Should you leave a gap around the access panel?
Leave enough clearance for the panel’s actual movement and for any trim or edge treatment required by the selected product. The correct clearance depends on whether the panel lifts, slides, swings, pulls forward, or is removed with screws.
A visually narrow gap is not useful if the panel catches. Test the complete movement path with the tile dry fitted before committing to adhesive.
Can peel-and-stick tile be used in a bathroom vanity backsplash?
It may be suitable for a vanity backsplash when the exact product instructions allow the intended substrate and exposure. Current Stickwoll guidance describes routine splash use separately from prolonged water exposure and direct shower zones. Do not assume that every peel-and-stick tile is suitable for every bathroom wall or that the installation creates a waterproof assembly.
Review the current instructions for the specific tile, prepare the wall carefully, and keep the finished surface within the stated exposure limits.
How much extra tile should you buy for an access-panel project?
Buy enough for the full layout, planned cuts, pattern matching, and replacement pieces. The amount of waste varies with tile size, pattern, panel shape, and the number of plumbing cutouts.
Do not apply a single percentage to every product. One checked Stickwoll product page lists an optional 10% extra-tile setting, but that is a product-page planning option rather than a universal waste rate for vanity-panel installations.
What if the paper template does not fit perfectly?
Do not transfer it to the tile yet. Check whether the paper stretched, the opening was traced from the wrong edge, or the panel was measured in a different position.
Make a revised template, label it clearly, and test it again. A few minutes spent correcting paper is cheaper than replacing a tile with an inaccurate cut.
Final inspection: use the measurement and dry-fit checklist
The project is ready to finish when three conditions are true at the same time:
- The tile lines look intentional. Seams, pattern direction, first-row alignment, and panel borders work together from normal viewing distance.
- The cut edges are handled appropriately. Exposed edges are even enough for the verified product-specific finish, and no unsupported sealant or trim detail has been added casually.
- The plumbing remains accessible. The panel opens, removes, and replaces correctly. Shutoff valves, supply lines, concealed connections, fasteners, hinges, and latches remain reachable.
Use the same inspection after the first few pieces and again when the backsplash is complete. If a cut, seam, or panel movement fails, stop and correct that point before continuing.
The finished vanity should feel calm and deliberate, even though the tile had to work around a complicated obstruction. That result comes from treating the access panel as the first layout reference, using a paper template to test the opening, and making the dry fit a real decision point before adhesive is exposed.
For product-specific care and exposure guidance after installation, review the bathroom and wet-area care information and follow the current instructions for the exact tile selected.


Leave a comment
This site is protected by hCaptcha and the hCaptcha Privacy Policy and Terms of Service apply.