












Service-first installation guide
Explore this guide
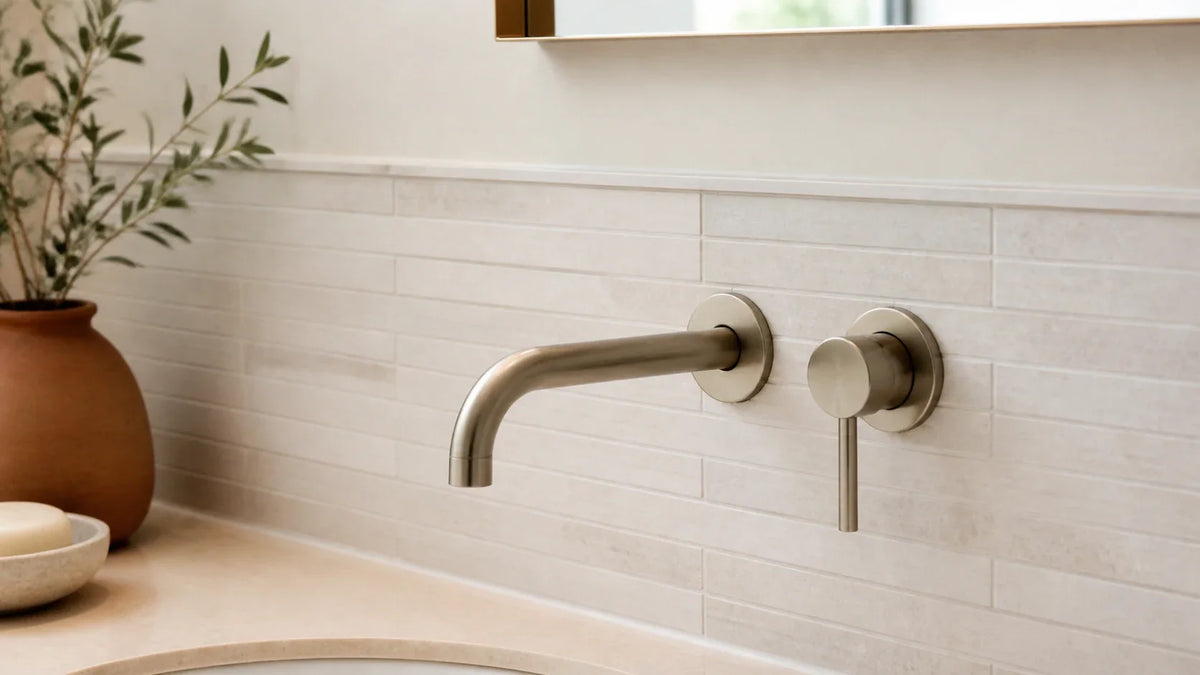
A service-first comparison of removable trim, fixture-in-place cutting, and removable tile panels for preserving access around a wall-mounted faucet.
Treat plumbing penetrations as part of the wall system
A neat decorative cut around a spout or handle is not the same as a waterproof penetration. In a true wet-area assembly, the pipe or mixing-valve opening is treated as part of the waterproofing system. Schluter's KERDI line, for example, includes specific pipe and mixing-valve seals. The point is not that every faucet wall should use that brand; it is that water management around a penetration belongs to the complete system behind the visible finish.
For a kitchen backsplash or other lower-exposure wall, the exact detail can be different. Still, identify where splashwater can run, whether the escutcheon covers the cut edge, and whether the trim can be removed without tearing the decorative surface. Do not seal a serviceable part to the wall simply because a continuous caulk bead looks tidy.
Use a qualitative path comparison
Confirmed trim-only removal can produce a clean field when the faucet manual clearly shows that the trim can be removed without disturbing pressurized connections. Fixture-in-place cutting minimizes plumbing disturbance but requires accurate templates and enough clearance for the trim's future movement. A removable panel preserves broader access when concealed fasteners, valves, unions or a large service opening must remain reachable.
None of these paths earns a universal score. A wall with an identified removable escutcheon may favor trim-only work, while another wall with unknown connections should be cut around or left to a plumber. One blocked required fastener can veto an otherwise attractive layout.
Make the template around the service movement, not only the visible shape
Trace the visible plate and then confirm how it actually comes off. Some trim pulls forward; some rotates; some exposes a set screw at the bottom. A tight decorative cut that matches the static outline can still interfere with removal. Leave the clearance required by the faucet instructions and the chosen edge treatment.
Keep cutting shallow around wall cavities. Stop when the pipe, electrical route or fastener location is uncertain. If a wall-mounted faucet requires plumbing work for the decorative plan to fit, resolve that work before the tile installation rather than using the finish to conceal a compromised connection.
Document access after installation
At handover, photograph the faucet with trim in place and with any permitted removable parts demonstrated. Save the model number, manual and a sketch showing any access panel. If a seal must be cut for future service, note the material and replacement procedure. This information prevents a later plumber from assuming the backsplash must be destroyed simply because the service route is hidden.
Retest only the movement that is safe and defined by the manufacturer. Do not loosen pressurized fittings as a decorative-project check. The goal is to preserve a known service route, not to prove plumbing competence through disassembly.
A backsplash can look polished on installation day and still be a costly failure. If tile traps an escutcheon, valve fastener, union, or cartridge-access seam, the next faucet repair may require cutting apart the backsplash. Service access around the faucet is one part of the wall plan; the Kitchen Backsplash Guide helps you coordinate it with layout, sink and range zones, outlets, edges, and cleaning.
Compare three common installation paths around a wall-mounted faucet by the same questions: can the trim be serviced, can water paths be managed, and can future repairs occur without destroying the backsplash?
A safe project follows three rules:
- 01Audit access first: Identify everything that may need removal before exposing adhesive.
- 02Follow product instructions: Use the tile manufacturer’s clearance, surface-preparation, cutting, and splash-exposure guidance.
- 03Retest removability: Confirm after sealing that the trim and required service components still move independently.
Use a service-access checklist covering trim removability, fastener visibility, valve and union reach, repair reversibility and moisture control. Treat each condition independently rather than converting them into a proprietary score.
Do not combine these conditions into a pass score. A single blocked service point can require a different layout even if the rest of the wall looks acceptable.
Pre-project stop/go checklist
Check every item before exposing adhesive. The result updates as you work.
Which installation path will preserve faucet service access?
The safest path is the one that leaves every required service point accessible without loosening an unidentified plumbing connection. In many installations, that means removing confirmed decorative trim. In others, cutting around the assembled fixture or creating a removable tile panel is safer.
Before choosing, inspect the faucet manual and the wall from every available side. A fitting that resembles a removable cover may conceal a retaining nut, cartridge, mounting screw, union, or valve body.
What parts are you looking at?
A wall-mounted faucet usually includes visible trim and concealed plumbing. Those categories must not be confused.
                    FINISHED ROOM SIDE

        [Handle]                         [Handle]
           │                                │
     ┌─────┴─────┐                    ┌─────┴─────┐
     │Escutcheon │                    │Escutcheon │
     └─────┬─────┘                    └─────┬─────┘
           │                                │
     Cartridge/stem                  Cartridge/stem
           │                                │
-----------│----------- FINISHED WALL ------│-----------
           │                                │
       Rough-in valve or concealed faucet body
                    │
              [Spout connection]
                    │
            ┌───────┴───────┐
            │ Escutcheon    │
            └───────┬───────┘
                    │
                  Spout

                 WALL CAVITY SIDE

     Hot supply ─ shutoff/union ─ valve ─ union/shutoff ─ cold supply
                       ↑                              ↑
              May require access             May require access

The exact anatomy varies by model. Some handles release through a set screw. Others thread onto an adapter. Certain escutcheons rotate off, while others are retained from behind the wall.
- Spout: The outlet that carries water into the sink.
- Handle: The control used to start, stop, or mix water.
- Escutcheon plate: A decorative plate covering the wall opening and mounting area.
- Cartridge: The internal control that regulates flow or temperature.
- Rough-in valve: The concealed valve body connected to the supply piping.
- Union: A connection intended to allow sections of plumbing to be separated.
- Mounting hardware: Screws, nuts, brackets, and retainers holding the faucet or trim.
- Shutoff valve: A valve used to isolate the fixture or branch supply.
- Plumbing penetration: Any opening where a pipe, stem, fastener, or faucet body passes through the wall.
Model-specific manuals illustrate why guessing is risky. Kohler and Delta wall-mount faucet instructions use different rough-in bodies, adapters, trim sequences, and service procedures. Their instructions begin with model identification and water-supply precautions, not visual assumptions.[1][2]
How do you perform a faucet-access audit?
Begin with the faucet’s brand and model number. Look under the spout, behind a handle, on the original invoice, or in the cabinet where product documents may have been stored.
If the model cannot be confirmed, treat every threaded or fastened part as unidentified.
- Photograph the assembly: Capture the faucet straight on, from both sides, and from below.
- Locate shutoffs: Confirm whether the fixture has reachable isolation valves and whether they operate.
- Find visible fasteners: Mark set screws, access holes, retaining rings, and mounting screws.
- Identify trim seams: Note where each handle, escutcheon, and spout separates according to the manual.
- Map wall openings: Trace the perimeter of every pipe, stem, valve opening, bracket, and access panel.
- Check the opposite side: Look for a closet, cabinet, or existing access panel behind the faucet.
- Record service movement: Determine whether trim pulls forward, unscrews, rotates, or slides sideways.
- Stop at uncertainty: Ask a licensed plumber to identify components that the manual does not resolve.
International Residential Code provisions require specified valves to be accessible, including fixture supply shutoff valves under IRC Section P2903.9.3. The code also regulates concealed joints and plumbing access in context.[3]
That does not mean every wall-mounted faucet requires a new room-side panel. Adopted code editions and local amendments vary. The authority having jurisdiction—usually the local building department—determines what applies to a particular property.
Can the tile and wall tolerate faucet splash exposure?
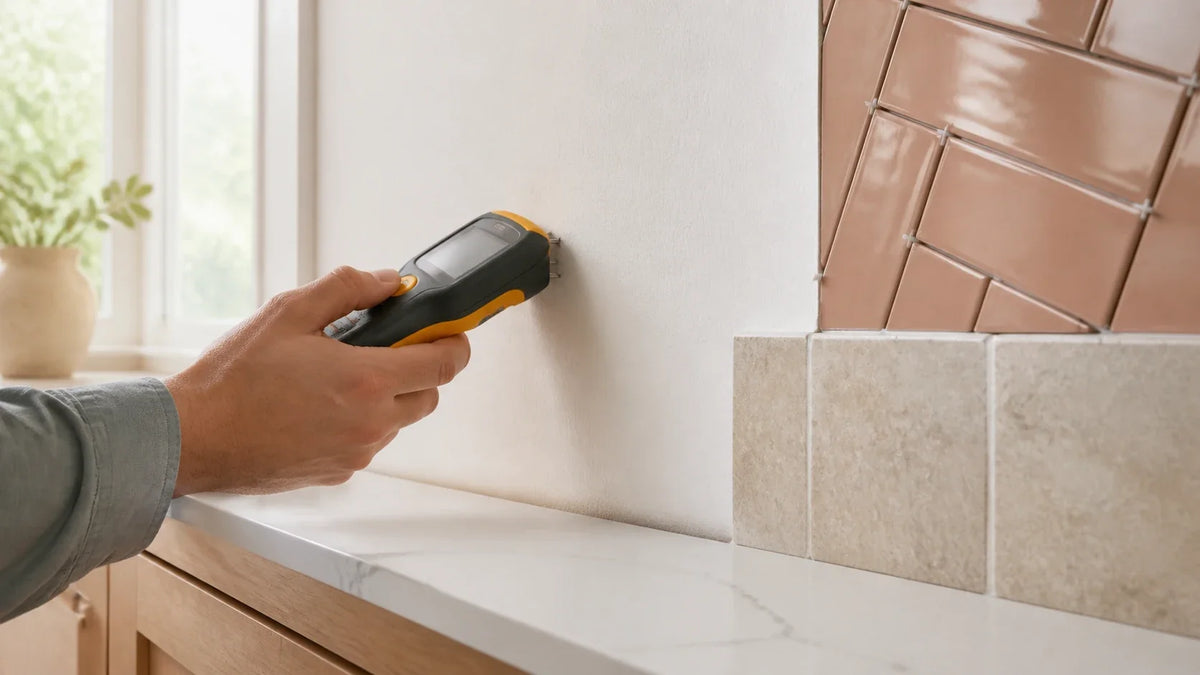
Use the tile only where its manufacturer permits it. “Waterproof tile” does not automatically make the completed wall assembly waterproof.
Water can travel through perimeter gaps, seams, failed paint, electrical openings, and plumbing penetrations. Think of the tile face as a raincoat. If the seams and substrate behind it are vulnerable, a waterproof face alone cannot prevent damage.
Check four documents before purchasing:
- Installation instructions: Confirm approved substrates, temperature ranges, conditioning time, pressure requirements, and cutting methods.
- Technical data: Verify whether the product is water-resistant, waterproof, or approved for the intended splash zone.
- Cleaning guidance: Confirm that routine cleaners will not attack the face, print layer, or adhesive.
- Warranty exclusions: Look for restrictions covering showers, standing water, textured walls, unprimed drywall, or active leaks.
Smart Tiles states that its products may be used on suitable smooth surfaces in some splash-prone locations but are not intended for areas with continuous water exposure, such as inside a shower.[4] Aspect installation instructions likewise require a clean, flat, dry substrate and provide material-specific cutting guidance.[5]
Those instructions are product-specific. They are evidence that wet-area claims and tool choices must be checked, not universal rules for every adhesive backsplash tile.
Surface preparation is just as important as the face material.
- Dryness: Repair leaks and allow patched or painted walls to cure fully.
- Cleanliness: Remove grease, soap film, wax, dust, and cleaner residue.
- Flatness: Fill depressions and feather abrupt ridges that could create edge tension.
- Soundness: Remove loose paint and repair torn drywall paper.
- Compatibility: Test adhesion in an inconspicuous area.
- Temperature: Condition the wall and tile within the manufacturer’s stated range.
In our mockups, a shallow wall dip created more edge lift than a slightly imperfect cutout. Adhesive tile behaves like a thin bridge: if the wall falls away beneath an edge, pressing harder does not remove the span.
Do you need to remove the faucet, the trim only, or neither?
Most beginner projects should avoid removing the faucet body. The practical choices are confirmed trim-only removal, fixture-in-place cutting, or a removable panel.
Use this decision tree before cutting:
Can you identify the exact faucet and obtain its manual?
│
├── No → Do not loosen the faucet or unidentified trim.
│        Cut around the fixture or obtain licensed-plumber guidance.
│
└── Yes
    │
    ├── Does the manual confirm that decorative trim can be removed
    │   without disturbing the valve body or pressurized connections?
    │   │
    │   ├── Yes → Is all required service access preserved after tiling?
    │   │         ├── Yes → Use the trim-only removal path.
    │   │         └── No  → Build a removable panel.
    │   │
    │   └── No/unclear → Can tile be cut around the installed fixture
    │                    without covering fasteners or service seams?
    │                    ├── Yes → Use fixture-in-place cutting.
    │                    └── No  → Use a removable panel or stop.
Dry-fit the escutcheon before exposing adhesive. The plate should cover the cut edge while retaining the movement required by the manufacturer’s removal procedure.
A large plate is not permission to make a large uncontrolled hole. The opening still needs intact tile edges, adequate bonding area, managed splash paths, and clearance for trim movement.
Five-question installation path selector
Select the answer that best matches your project. Your recommendation is based on service access and plumbing uncertainty.
How did the three installation paths compare?
Compare the three paths qualitatively and use the faucet manual, wall condition and access requirements to choose among them.
Compare each path by the same questions: which trim is removable, which fasteners stay visible, which service points remain reachable, how repairable the finish is, and how splash paths are managed. These are planning conditions rather than measured performance scores.
| Installation path | Service-access consideration | Plumbing disturbance | Layout challenge | Use when |
|---|---|---|---|---|
| Confirmed trim-only removal | Can preserve a clean field when all removable trim is documented | Limited when the manual is followed | Moderate | Decorative trim can be removed without disturbing pressurized connections |
| Fixture-in-place cutting | Keeps plumbing untouched but requires clearance around service seams | Low during decorative work | Template accuracy is important | Trim remains in place and required fasteners stay reachable |
| Removable panel | Preserves the largest repair opening | Low during decorative work | Panel support and edge details need planning | Valves, unions, fasteners or larger openings need future access |
*Mock installation time excluded wall repair, paint curing, adhesive conditioning, and sealant curing.

A removable panel preserves the broadest access, while confirmed trim-only removal can produce a cleaner uninterrupted field when the faucet manual supports it. Fixture-in-place cutting minimizes plumbing disturbance but requires careful templates. Choose by the actual service route, not by a numerical ranking.
The comparison is a planning framework, not a controlled product test or statistical result.
When does concealed plumbing require a removable panel?
Use a removable panel when permanent tile would block a required valve, union, fastener, control, inspection opening, or manufacturer-defined service route. The panel must be large enough for the actual repair task, not merely large enough to see the component.
A tiny inspection hole can reveal a valve while leaving no room for a wrench or cartridge puller. Visibility and serviceability are different metrics.
Possible panel formats include:
- Magnetic panel: A lightweight tiled face attaches to corrosion-resistant magnetic hardware outside direct water exposure.
- Screw-fixed panel: Visible or capped screws secure a rigid backing to a framed opening.
- Clip-mounted panel: Mechanical clips retain the panel while allowing tool-free removal.
- Manufacturer access door: A listed or purpose-made access door provides a defined frame and removable cover.
Do not rely on backsplash adhesive alone to create a reusable panel. The tile, backing, fasteners, and supporting frame must function as one removable assembly.
Keep caulk out of the release seam unless the panel design uses a documented, cuttable sacrificial seal. If a seal must be sliced for service, make sure the blade can reach it without contacting pipes, wiring, or the tile face.
For access-centered planning, prioritize repair clearance rather than visual concealment. A panel that can be removed without material destruction inherently neutralizes the central failure: sacrificing the backsplash to reach the faucet.
If your project uses a rigid composite near a similar fixture, Pot Filler Backsplash Planning Guide provides a relevant reference. Use its discussion of wall-mounted pot-filler cuts and rigid-composite layout as another planning reference for serviceable penetrations.
Before buying or cutting tile, download or create a faucet audit sheet, a full-size template, and a service-access checklist. Confirm the faucet manual, tile instructions, sealant data sheet, and local access requirements first.
How do you cut, install, seal, and verify the tile?
A reliable method is to work from fixed reference lines, make a full-size template, cut incrementally, dry-fit every service component, and seal only water-entry paths that the faucet and wall-system instructions allow. Do not use caulk to hide a cut before confirming access.
Cutout fit tolerance is not one universal number. It is a four-part condition:
- Concealed gap: The escutcheon covers the cut edge in every normal position.
- Free movement: Trim can move through its required removal path.
- Intact edge: The tile has no crack or uncontrolled tear extending from the opening.
- Independent service seam: Adhesive or sealant does not bond removable parts together.
How should you prepare the wall and layout?
Turn off the faucet and dry the area. If the project could disturb plumbing, locate the correct shutoff before starting. A faucet handle in the off position does not depressurize every concealed connection.
Remove failing caulk, but do not cut blindly into a joint around a concealed valve. Keep blades shallow and directed away from pipes.
Prepare the installation in this order:
- Verify the substrate: Confirm that it is clean, dry, stable, smooth, and approved by the tile manufacturer.
- Correct wall defects: Fill low spots and sand sharp ridges rather than forcing tile over them.
- Establish level and plumb: Draw a level horizontal line and a vertical centerline with a removable marking method.
- Plan visible cuts: Shift the layout so narrow slivers do not land beside handles or the spout.
- Map service zones: Outline escutcheons, fasteners, panel seams, and trim-removal paths.
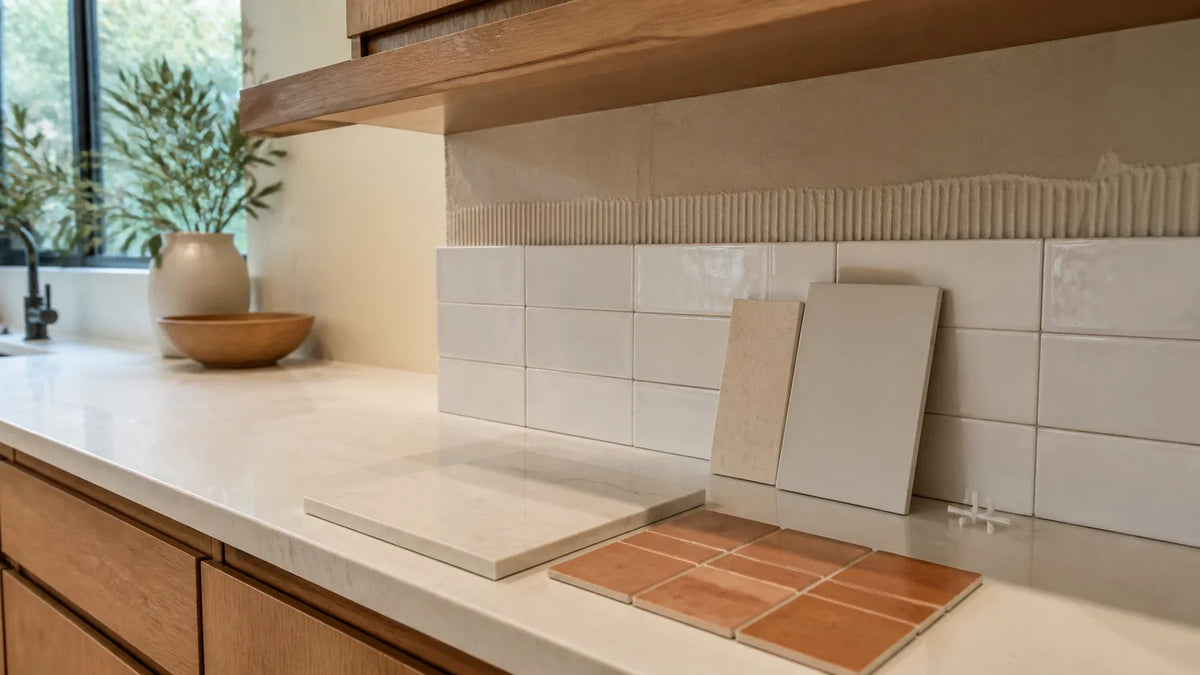
- Dry-lay the pattern: Arrange unopened or unpeeled pieces to check alignment and color variation.
- Test one offcut: Confirm cutting quality, adhesion, cleanability, and reaction to the intended sealant.
For rental walls, the damage benchmark is substrate release, not the word “removable” on a product page. Protect paint and facing paper by following the wall-preparation and removal-planning method in How to Install Peel-and-Stick Wall Tile with a Wall-Safety Plan before covering a larger area.
How do you build an accurate faucet template?
Use paper for simple layouts and thin cardboard for rigid or multi-opening templates. The template should match the exact tile piece, including overlap tabs or interlocking edges.
Measure every penetration from the same fixed horizontal and vertical reference lines. Do not chain measurements from one pipe to the next. One early error will otherwise migrate across the entire piece.
A reliable sequence looks like this:
- Cut the template blank: Match the tile’s full outside dimensions.
- Mark orientation: Write “face,” “top,” “left,” and the tile position.
- Transfer reference lines: Copy the wall’s level and center marks onto the template.
- Locate centers: Measure each penetration independently from both reference lines.
- Trace the obstruction: Use a compass, profile gauge, or rubbing technique where direct tracing is possible.
- Add verified clearance: Follow the tile and faucet instructions rather than inventing a universal gap.
- Create a relief path: Route the cut to a hidden edge or grout-line location where the material permits it.
- Dry-fit the template: Reinstall every removable escutcheon and move it through its release path.
- Transfer to tile: Mark the back, accounting for mirrored orientation when necessary.
- Cut small first: Enlarge the opening gradually until the fit passes all four tolerance checks.

For a three-hole faucet, label each opening separately: hot handle, spout, and cold handle. Similar diameters can still require different movement clearance.
Cardboard also reveals assembly problems that a tape measure misses. If the template cannot slide behind a fixed spout, neither can a rigid tile piece with the same cut.
For more detailed scribing principles, use Sink Cut and Scribing Guide to strengthen your fixed-line, template, dry-fitting, progressive-trimming, and sealing process before committing the faucet piece.
Printable faucet cut log
Record every center from the same reference lines. Add rows as needed, then download a text copy for the work area.
| Penetration | Horizontal | Vertical | Opening or clearance | Notes |
|---|---|---|---|---|
Which cutting tools suit each tile material?
Use the tool approved by the tile manufacturer. “Peel-and-stick” describes the attachment method, not the face or core.
A vinyl sheet, gel mosaic, aluminum-faced panel, mineral composite, and stone-look product can respond very differently to the same blade. Test an offcut before making the faucet piece.
| Tile construction | Typical approved tool category* | Best cutting approach | Main failure to watch for |
|---|---|---|---|
| Thin vinyl or flexible film | Sharp utility knife, straightedge, cutting mat | Make light cutting passes; cut from the specified face or back | Stretching, ragged corners, compressed edge |
| Gel or resin mosaic | Utility knife for backing; fine snips if approved | Cut backing first; avoid crushing raised cells | Gel-cell puncture, face distortion |
| Metal-faced peel-and-stick | Aviation snips, jigsaw, or saw specified by manufacturer | Support the panel; deburr concealed edges | Sharp burrs, face scratching, metal delamination |
| Rigid composite | Jigsaw, oscillating tool, hole saw, or carbide tool if approved | Drill a starter hole; support both sides | Chipping, heat damage, cracked narrow bridges |
| Stone-look mineral or real-stone product | Wet saw, grinder, carbide blade, or manufacturer-listed tool | Use dust/water controls and gradual cuts | Silica exposure, edge fracture, oversized holes |
*This matrix is a selection guide, not permission to override the product instructions.
Aspect’s official installation literature distinguishes cutting methods across metal, stone, glass, and composite-style products.[5] That primary-source guidance demonstrates why one universal tool recommendation is unsafe.
For circular penetrations, a hole saw may yield an optimal configuration only if its diameter matches the verified opening and the product permits drilling. An oscillating tool may handle irregular openings but can overheat or scuff a decorative face.
Use safety controls appropriate to the material:
- Eye protection: Wear safety glasses when drilling, sawing, snipping, or deburring.
- Hand protection: Handle sharp metal edges with cut-resistant gloves.
- Respiratory protection: Follow the product’s safety data and OSHA requirements for silica-containing materials.
- Work support: Clamp sacrificial backing beneath rigid pieces to reduce breakout.
- Heat control: Pause if plastic, adhesive, paint, or composite begins to soften.
- Electrical safety: Keep corded tools and extension connections away from wet sinks.
For a focused comparison of split cuts, circular openings, and concealed relief paths, review Pipe-Cut Planning Guide for Peel-and-Stick Tile before selecting the cut that best protects your faucet-piece edges.
How do you install tile around the faucet without removing it?
Make each tile piece capable of reaching its final position without flexing past its safe limit. A rigid piece that cannot pass the spout during a dry fit will not become easier to install after its adhesive is exposed.
Use this sequence:
- Protect the sink and faucet: Cover finished surfaces without taping over set screws or reference marks.
- Dry-fit the unpeeled tile: Confirm pattern alignment, opening size, and installation path.
- Dry-fit the escutcheon: Verify full edge coverage and free removal before exposing adhesive.
- Peel partially: Expose a small strip of adhesive rather than removing the entire liner.
- Register to reference lines: Align the tile while most of the adhesive remains protected.
- Feed around the fixture: Guide the cutout or relief cut into position without forcing the tile.
- Press from the center: Work outward using the pressure method stated by the manufacturer.
- Close approved relief cuts: Align the edges without overlapping or stretching them.
- Repeat the trim test: Refit and remove each escutcheon before the adhesive gains strength.
- Respect cure periods: Avoid cleaning, sealing, or heavy splash exposure until permitted.
Do not slide exposed adhesive behind a plate and hope to reposition it. High-tack adhesive can grab before the opening reaches the correct center.
If a piece lands incorrectly, stop pulling when the face or wall begins to deform. Releasing the tile with the product-approved method is less costly than tearing drywall paper and creating an unstable patch.
How should you seal around the faucet?
Seal confirmed splash-entry paths without bonding removable trim, screws, access-panel seams, cartridges, or faucet bodies. Sealant is a water-management joint, not a substitute for accurate cutting or plumbing repair.
Use a kitchen-and-bath sealant compatible with the tile face, wall coating, faucet finish, and expected movement. Read the technical data sheet for surface preparation, joint dimensions, tooling time, cure time, and water-exposure limits.
DAP’s AMP Kitchen, Bath & Plumbing sealant documentation, for example, specifies substrate preparation and curing requirements that must be followed for that product.[6] GE-branded Advanced Silicone kitchen-and-bath documentation also distinguishes application and water-readiness conditions.[7]
Those cure claims are model-specific. Do not transfer one sealant’s timing to another tube.
A selective sealing plan can be visualized this way:
         TOP OF ESCUTCHEON
             _________
          .-'         '-.
        /   seal only     \
       |  verified splash  |
       |  entry arc if the |
       |  faucet manual and|
       |  trim movement    |
        \     allow it    /
          '-._________.-'
             ↑       ↑
       keep set screws,
       release seams and
       panel joints free
Some faucet manufacturers expect an escutcheon gasket or sealant at a stated location. Others use trim designed to drain or separate during service. The faucet manual controls.
A common misconception is that a full ring of silicone is always safer. A full ring may trap moisture behind trim, conceal leakage, or glue the escutcheon to the tile. More caulk does not automatically produce better moisture control.
The metric is controlled water routing with preserved movement.
For sink-edge exposure, use Sink Splash-Zone Edge Planning Guide to build a stronger perimeter-inspection, edge-pressure, waterproofing, and splash-path-control plan where routine sink water reaches the backsplash.
How do you correct lifting edges, uneven walls, and bad cuts?
Correct the cause before adding adhesive or caulk. Edge lift often signals contamination, wall movement, a low spot, inadequate pressure, incompatible paint, or tension from a forced cutout.
Use the failure pattern as a clue:
- Edge lifts immediately: Recheck dust, grease, liner removal, temperature, and installation pressure.
- Edge lifts beside an opening: Enlarge only the binding point and remove stress from the cutout.
- Tile bridges a wall hollow: Remove the piece, flatten the substrate, and reinstall with approved materials.
- Face cracks from the opening: Replace the tile; a crack can continue beyond the escutcheon.
- Gap exceeds plate coverage: Recut the piece or use a planned removable panel rather than a cosmetic caulk mass.
- Relief seam opens: Replace or reposition the piece if the product lacks an approved seam treatment.
- Escutcheon becomes trapped: Remove uncured sealant or release the tile before cure; do not accept lost access.
Avoid injecting construction adhesive behind a lifting edge unless the tile manufacturer authorizes it. An incompatible adhesive may stain the face, soften the backing, attack foam, or make later removal destructive.
A flatter, continuous approved substrate generally gives the adhesive more consistent contact than a wall with unsupported depressions. Do not compensate for a wall defect by adding an undocumented adhesive thickness.
Troubleshooting guide
Open the issue that matches your installation.
Can every required component still be removed after curing?
The installation is complete only after it passes a post-cure SPI test. This test repeats the access audit under finished conditions and records a pass or failure for each component.
Wait for the tile adhesive and sealant to reach the manufacturer’s stated cure point. Then inspect without loosening pressurized or unidentified plumbing.
Use this test:
- Photograph the finished layout: Capture every trim plate, fastener, seam, and panel.
- Check cutout concealment: Confirm normal trim positions cover cut edges.
- Inspect tile integrity: Look for cracks, lifting, sharp burrs, or adhesive squeeze-out.
- Check trim movement: Remove only components the faucet manual identifies as user-serviceable trim.
- Inspect fasteners: Verify required screws and release points remain visible and reachable.
- Open the panel: Remove and reinstall any access panel without damaging tile or sealant.
- Check valve reach: Confirm required shutoffs and unions remain accessible with usable tool clearance.
- Inspect service seams: Verify no sealant or adhesive bridges a removable joint.
- Run a splash check: Use normal faucet flow and inspect edges for water entry, ponding, or drainage problems.
- Rescore SPI: Record each category from 0 to 5 and correct any category that has fallen.
The final access check is practical: designated trim releases as intended, required fasteners remain reachable, any access panel opens, and no bonded seam blocks service.
Stop if trim resists beyond the manual’s expected procedure. Do not apply greater torque simply because the part moved before installation. Adhesive, sealant, or a tight cutout may now be binding it.
An installation with a beautiful pattern but a trapped cartridge plate has failed the serviceability test. Finish quality and repair access must be evaluated together.
After the test, save the faucet model, tile batch, sealant name, photographs, templates, and SPI sheet. Place copies near the property’s maintenance records. That small file can save a future owner or plumber from destructive investigation.
What makes a wall-faucet backsplash successful years later?
A successful backsplash is suitable for the expected splash exposure, accurately cut, selectively sealed, and fully serviceable after cure. Appearance matters, but it cannot compensate for concealed fasteners, bonded escutcheons, inaccessible valves, or a trapped repair opening.
Use this final sequence:
- Confirm suitability: Match the tile, wall, and sealant to the room’s splash conditions.
- Map the faucet: Identify trim, cartridges, fasteners, rough-in components, shutoffs, unions, and access openings.
- Choose the safest path: Remove only confirmed trim, cut around the installed fixture, or build a removable panel.
- Template before cutting: Transfer every penetration from fixed reference lines.
- Cut by material: Use the manufacturer-approved tool and enlarge openings incrementally.
- Dry-fit repeatedly: Test the tile, escutcheons, fasteners, and panel before exposing adhesive.
- Seal selectively: Block verified splash paths without bonding service components.
- Repeat the SPI test: Confirm access after the adhesive and sealant have cured.
Measured by total cost of ownership (TCO), preserving repair access changes the value calculation. A slightly slower installation that survives a cartridge replacement can cost less over its service life than a fast backsplash that must be demolished.
Download or create the faucet audit, full-size template, and SPI checklist before purchasing or cutting tile. Confirm the tile and sealant instructions, and contact a licensed plumber whenever trim identity, pressurized connections, required access, or local code compliance remains uncertain.
Frequently Asked Questions
Can I tile behind a wall-mounted faucet without removing it?
Are you worried that faucet removal will turn a backsplash project into a plumbing repair?
You can often leave the faucet in place by templating around it, provided all trim and service points remain usable.
Yes. Fixture-in-place cutting is often the lowest-plumbing-risk path because pressurized connections remain untouched.
The tile must be flexible enough, segmented appropriately, or cut with a concealed relief path so it can reach the wall. Dry-fit the exact installation movement before peeling the backing.
Do not cover an escutcheon merely because removing it appears difficult. Cut around it or use a removable panel if its identity and service function remain uncertain.
How much clearance should I leave around faucet pipes?
Are you looking for a repeatable way to check a clean, serviceable fit?
The correct clearance comes from the faucet’s movement needs, the tile instructions, and escutcheon coverage—not a universal number.
There is no single clearance that safely applies to every faucet, pipe, or adhesive tile. Leave enough room for required movement, thermal or material tolerance, and installation without binding.
The completed opening should have intact edges, remain concealed by the trim, and avoid contact with moving or removable parts. Test with a full-size template before cutting tile.
Can I caulk completely around an escutcheon plate?
Does a full silicone ring seem like the safest way to keep water out?
Selective sealing often controls splashwater more effectively without gluing trim in place or blocking drainage.
Only if the faucet manufacturer permits it and the seal does not obstruct removal, drainage, fasteners, or inspection.
Many installations benefit from sealing a defined splash-entry area while leaving a service or drainage path free. Follow the faucet manual and sealant technical data sheet. Never use caulk to conceal an active plumbing leak.
Is peel-and-stick backsplash tile waterproof behind a sink?
Does a waterproof product label mean the complete backsplash can handle unlimited water?
The tile face may resist water, but seams, edges, penetrations, adhesive, and the wall still require evaluation.
Some products are sold as waterproof or water-resistant for backsplash use. That claim does not convert drywall, seams, electrical openings, or plumbing penetrations into a waterproof assembly.
Confirm the manufacturer’s allowed locations and exclusions. Control routine splashes, repair faucet leaks promptly, and keep the installation outside continuously wet locations unless the complete system is approved for them.
What should I do if the escutcheon will not come off after installation?
Has the trim become difficult to move after the tile or sealant cured?
Stop before added force damages the faucet, then identify whether tile, adhesive, or sealant is binding the release path.
Do not use greater torque or pry against the faucet finish. Review the model-specific removal procedure and inspect for cured sealant, adhesive squeeze-out, or an undersized cutout.
A licensed plumber should assess the assembly if the trim still resists or if removal could turn a concealed connection. Correcting a trapped plate early is safer than discovering the problem during an urgent cartridge repair.
When should I use a removable tile panel?
Are valves or connections visible now but likely to disappear behind the finished backsplash?
A removable panel preserves a practical repair opening without leaving the entire wall unfinished.
Use a panel whenever fixed tile would conceal a required shutoff, union, fastener, control, large rough-in opening, or manufacturer-defined service area.
Size it for hands and tools, not sight alone. Attach the panel mechanically, keep its release points identifiable, and test removal after all nearby tile and sealant have cured.
Sources
- Kohler Co.: Wall-mount faucet and valve installation literature, model-specific installation and service instructions. Kohler Installation Guides, kohler.com/en/support/find-a-service-part (accessed March 8, 2025).
- Delta Faucet Company: Wall-mount faucet and rough-in installation manuals, model-specific trim and valve procedures. Delta Product Documentation, deltafaucet.com/service-parts/documents (accessed March 8, 2025).
- International Code Council: International Residential Code, plumbing provisions including accessible shutoff-valve requirements; adoption and amendments vary locally. ICC Digital Codes, codes.iccsafe.org (accessed March 8, 2025).
- Smart Tiles: Official installation, surface, and location guidance for self-adhesive wall tiles. Smart Tiles Installation Guidance, thesmarttiles.com/en_us/installation (accessed March 8, 2025).
- ACP/Aspect: Official peel-and-stick backsplash installation guides and material-specific cutting instructions. Aspect Installation Guides, aspectideas.com/installation/ (accessed March 8, 2025).
- DAP Global Inc.: AMP Kitchen, Bath & Plumbing sealant product and technical documentation. DAP AMP Sealant, dap.com/products-projects/product-categories/caulks-sealants/hybrid/amp-kitchen-bath/ (accessed March 8, 2025).
- Henkel Corporation: GE-branded Advanced Silicone kitchen-and-bath sealant instructions and technical product information. GE Sealants Kitchen and Bath, gesealants.com/products/kitchen-bath/ (accessed March 8, 2025).
Sources and scope
- Schluter: Pipe and Mixing-Valve Waterproofing Seals — Shows that pipe penetrations belong to a complete waterproofing system; not approval of decorative self-adhesive tile in showers.
- US EPA: A Brief Guide to Mold, Moisture and Your Home — Moisture control and prompt drying guidance; not a tile approval or hidden-wall diagnosis.


Leave a comment
This site is protected by hCaptcha and the hCaptcha Privacy Policy and Terms of Service apply.