


Du träumst von einer stilvollen Küchenverwandlung – aber der Gedanke ans Fliesen wirkt einschüchternd. Was wäre, wenn du an nur einem Wochenende eine beeindruckende Mosaik-Rückwand anbringen könntest – ganz ohne Stress? Dabei geht es nicht nur ums Sparen, sondern auch um die große Befriedigung, mit den eigenen Händen etwas Schönes zu schaffen.
Dein Schnellstart-Guide zum Anbringen einer Mosaik-Rückwand
Das Anbringen einer Mosaik-Rückwand als DIY-Projekt umfasst vier wesentliche Schritte: Zuerst wird die Wand gereinigt und angeschliffen. Anschließend planst du das Verlegemuster mit Wasserwaage und Bleistift. Danach bringst du die Fliesen entweder mit Dünnbettmörtel oder selbstklebender Rückseite an. Zum Schluss trägst du die Fugenmasse auf und versiegelst sie, um deine Arbeit zu schützen und ihr ein professionelles Finish zu verleihen.
Viele Hausbesitzer empfinden eine Mischung aus Vorfreude und Unsicherheit, wenn sie über ein Fliesenprojekt nachdenken. Der mögliche Schmutz, die Kosten für Werkzeuge und die Sorge, einen dauerhaften Fehler zu machen, können lähmend wirken. Doch wir möchten dir zeigen, dass eine schöne Mosaik-Rückwand zu den machbarsten und wirkungsvollsten DIY-Projekten gehört, die du selbst umsetzen kannst.
Dieser Guide begleitet dich als zuverlässiger Partner durch jeden einzelnen Schritt. Wir zeigen dir, welche Materialien du genau brauchst, führen dich Schritt für Schritt durch die Montage, liefern inspirierende Gestaltungsideen und verraten dir Profi-Tipps für ein Ergebnis wie maßgefertigt. Am Ende weißt du genau, wie du auch mit kleinem Budget eine Mosaik-Rückwand anbringst, die deinen Raum völlig verändert.
Warum eine Mosaik-Rückwand als DIY-Projekt anbringen?
Die Frage: Lohnt es sich wirklich, ein Rückwand-Projekt selbst in Angriff zu nehmen?
Das erwartet dich: In diesem Abschnitt zeigen wir dir, wie du mit einem DIY-Projekt nicht nur viel Geld sparst, sondern auch unglaubliche kreative Möglichkeiten ausschöpfst und mieterfreundliche Lösungen findest.
Ein DIY-Projekt in Angriff zu nehmen, ist eine große Entscheidung. Eine Mosaik-Rückwand bietet dir jedoch eine besonders lohnende Wirkung im Verhältnis zu deinem Aufwand. Du erzielst eine enorme optische Veränderung, ohne die bauliche Komplexität anderer Renovierungen. Schauen wir uns die drei größten Vorteile an.
Deutlich Kosten sparen
Der wichtigste Grund, warum die meisten Menschen ihre Rückwand selbst anbringen, sind die Kosten. Eine professionelle Montage kann den Gesamtpreis deines Projekts leicht verdoppeln oder verdreifachen. Branchenangaben zufolge können Hausbesitzer bei einer durchschnittlich großen Küche zwischen $500 und $1,500 sparen, wenn sie die Arbeiten selbst übernehmen.
Es geht dabei nicht nur um die Arbeitskosten. Wenn du selbst die Kontrolle hast, kannst du nach günstigen Materialangeboten suchen, preisbewusste Alternativen wählen und Aufschläge vermeiden, die Handwerker häufig berechnen. Das gesparte Geld kannst du in hochwertigere Fliesen oder andere Verbesserungen für deine Küche oder dein Bad investieren.
Völlige kreative Freiheit
Einen Profi zu beauftragen, ist bequem, bedeutet aber oft Abstriche bei den eigenen Vorstellungen. Wenn du selbst Designer und Handwerker bist, liegt jede Entscheidung bei dir. Du kannst Fliesenmatten miteinander kombinieren, ein individuelles Muster gestalten oder einen besonderen Akzent integrieren, an den ein Handwerker vielleicht nicht gedacht hätte.
Betrachte deine Wand als leere Leinwand. Du kannst einen klassischen, einheitlichen Look schaffen oder ein mutiges, künstlerisches Statement setzen. Diese Möglichkeit zur individuellen Gestaltung sorgt dafür, dass sich dein Raum ganz nach *dir* anfühlt. Genau das macht den Unterschied zwischen einem Haus, das einfach schön aussieht, und einem Zuhause, das deine Geschichte erzählt.
Mieterfreundliche Lösungen entdecken
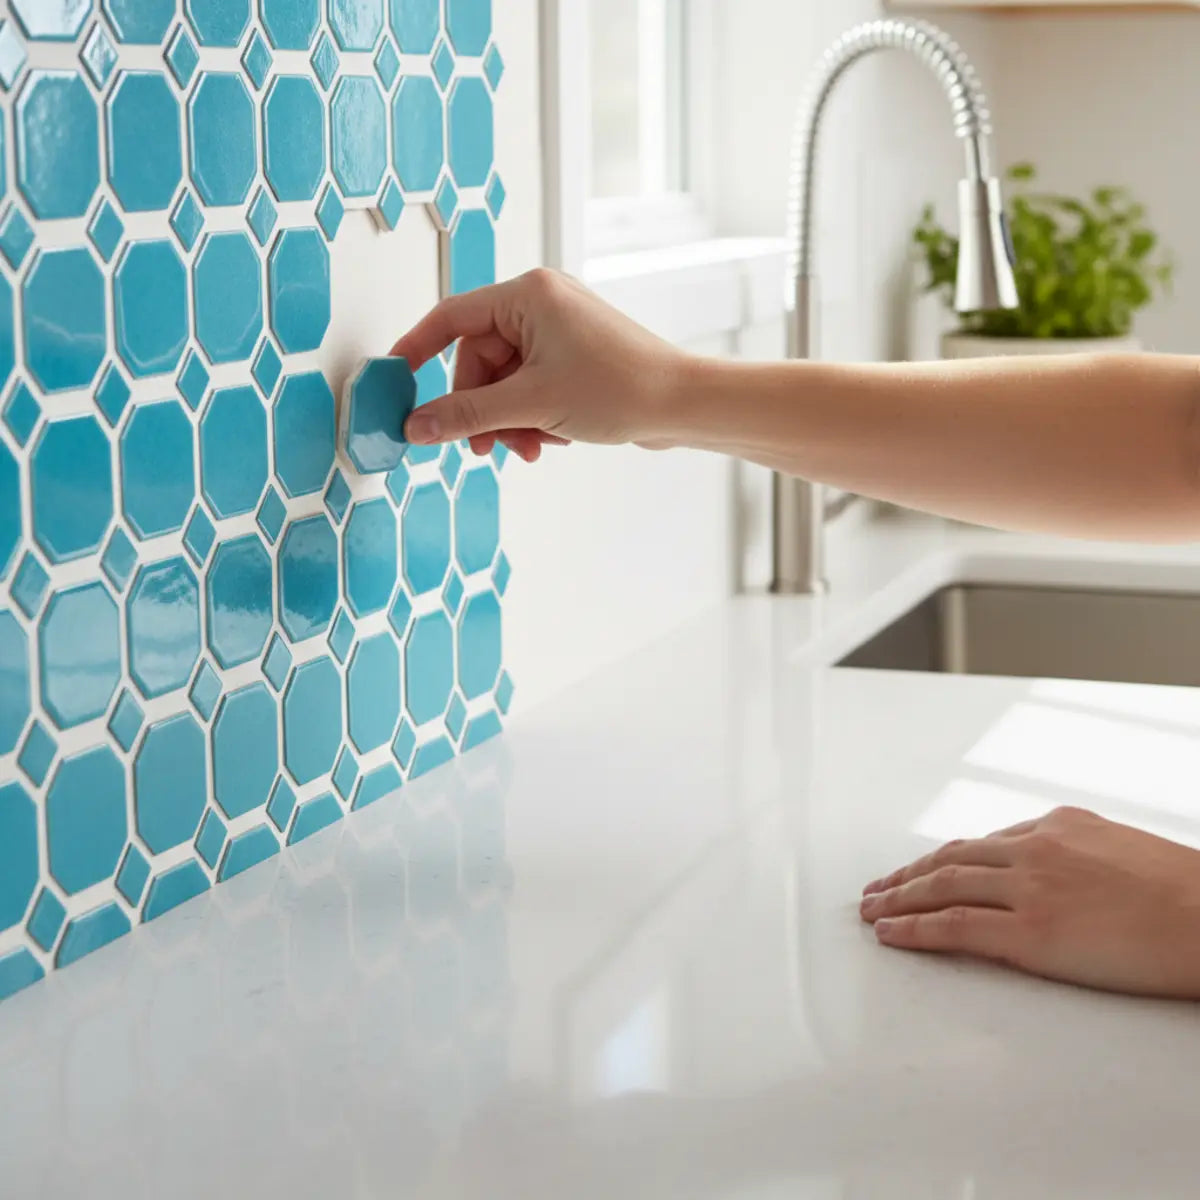
Jahrelang mussten sich Mieter mit veralteten Küchen und Bädern abfinden. Eine dauerhafte Veränderung kam nicht infrage. Heute hat sich das dank hochwertiger selbstklebender Mosaikfliesen grundlegend geändert. Das sind keine dünnen Aufkleber wie früher: Moderne Varianten bieten realistische Strukturen, starke Haftkraft und eine überzeugende Fugenoptik.
Stell dir vor, du wohnst zur Miete und möchtest deine triste Küche aufwerten. An nur einem Nachmittag kannst du eine schöne selbstklebende Rückwand anbringen, die den Charakter des gesamten Raums verändert. Wenn der Auszug ansteht, lässt sie sich oft mit wenig Aufwand entfernen, sodass die ursprüngliche Wand unbeschädigt bleibt. Wenn du die künstlerischen Möglichkeiten entdecken möchtest, ist das Erlernen von So gestaltest du ein beeindruckendes selbstklebendes Mosaik der perfekte nächste Schritt, um deine Wand zum Blickfang zu machen.
Welche Werkzeuge und Materialien brauche ich?
Die Frage: Fühlst du dich zwischen den Regalen im Baumarkt überfordert und weißt nicht, welchen Kleber oder welche Fugenmasse du kaufen sollst?
Das erwartet dich: Wir stellen dir eine klare, übersichtliche Checkliste mit den wichtigsten Werkzeugen und Materialien zur Verfügung und erklären genau, was du brauchst und wo du Geld sparen kannst.
Ein Baumarktbesuch kann einschüchternd sein. Für jeden einzelnen Artikel gibt es Dutzende Optionen. Das kennen wir. Machen wir es einfacher: Hier findest du die ultimative Checkliste mit allem, was du wirklich brauchst, um die Arbeit richtig zu erledigen – übersichtlich getrennt nach unverzichtbaren Dingen und praktischen Extras.
Unverzichtbare Werkzeuge für das Projekt
Du brauchst dafür keine professionelle Werkstatt. Die meisten dieser Werkzeuge sind erschwinglich, und einige hast du vielleicht bereits zu Hause.
- Maßband und Bleistift: Zum genauen Messen und Markieren.
- Wasserwaage: Eine 24-inch oder 48-inch lange Wasserwaage ist entscheidend, damit die erste Fliesenreihe absolut gerade verläuft. Darauf solltest du keinesfalls verzichten.
- Teppichmesser: Zum Zuschneiden der Mosaik-Netzrückseite und Öffnen der Produktverpackung.
- Zahnkelle: Wenn du Mörtel verwendest, eignet sich für kleine Mosaikfliesen normalerweise eine 3/16"-Vorzahnung am besten. Sie erzeugt kleine Rillen, in denen die Fliesen Halt finden.
- Fugbrett: Ein Gummibrett, mit dem du die Fugenmasse in die Zwischenräume zwischen den Fliesen drückst.
- Schwämme und Eimer: Du brauchst mindestens zwei große Schwämme und zwei Eimer – einen, um Fugenmörtel von den Fliesen abzuspülen, und einen mit sauberem Wasser.
- Kartuschenpistole: Zum Auftragen einer wasserdichten Abdichtung entlang der Arbeitsplatten und Kanten.
Profi-Tipp zu Fliesenschneidern
Viele glauben, dass man unbedingt eine teure Nassschneidemaschine braucht. Für die meisten Mosaik-Rückwände aus Glas oder Keramik reicht jedoch eine einfache Fliesenzange oder ein Glasschneider aus, um Aussparungen rund um Steckdosen und an Ecken zu schneiden. Du kannst einzelne Fliesen vom Gewebe lösen und sie bei Bedarf zuschneiden.
Den richtigen Kleber und Fugenmörtel auswählen
An diesem Punkt kommen viele DIY-Einsteiger ins Grübeln. Welches Produkt am besten geeignet ist, hängt von der Fliesenart und deiner Erfahrung ab.
| Merkmal | Herkömmlicher Dünnbettmörtel | Fertigkleber | Selbstklebende Fliesen |
|---|---|---|---|
| Ideal für | Schwere Fliesen (Naturstein, Keramik) | Leichte Mosaikfliesen, DIY-Einsteiger | Mieter, schnelle Wochenendprojekte |
| Vorteile | Stärkste und langlebigste Verbindung | Kein Anmischen nötig, weniger Schmutz | Am schnellsten, kein Verfugen nötig |
| Nachteile | Beim Anmischen entsteht viel Schmutz, trocknet schnell | Längere Trocknungszeit, geringere Festigkeit | Kann sich bei großer Hitze oder Feuchtigkeit ablösen |
| Kosten | Am günstigsten | Mittel | Am höchsten pro Quadratmeter |
Für die meisten DIY-Einsteiger, die mit herkömmlichen Mosaikmatten arbeiten, ist ein Fertigkleber eine hervorragende Wahl. So musst du nicht erst herausfinden, wie der Mörtel die richtige Konsistenz bekommt.
Noch einfacher wird es – besonders für Mieter – mit einem hochwertigen selbstklebenden Produkt. Wenn du dich von aktuellen Trends inspirieren lassen und sehen möchtest, was mit diesen leicht zu verarbeitenden Materialien möglich ist, entdecke vor dem Start diese beeindruckenden Ideen für selbstklebende Küchenrückwände 2025 .
Wie bereite ich die Wandfläche vor?
Die Frage: Befürchtest du, dass das gesamte Projekt scheitert oder du die Gipskartonwand beschädigst, wenn du die Wand nicht perfekt vorbereitest?
Das Versprechen: In diesem Abschnitt zeigen wir dir die sicheren Schritte für eine gründliche Vorbereitung – für eine glatte, stabile Oberfläche und eine dauerhaft haltbare Verlegung.
Jeder erfahrene Fliesenleger wird dir dasselbe sagen: Bei einer gelungenen Fliesenverlegung ist die Vorbereitung 90%. Diese Schritte auszulassen, ist der größte Fehler, den wir bei Heimwerkern sehen. Stell es dir wie beim Malen eines Porträts vor: Du würdest auch nicht auf einer schmutzigen, unebenen Leinwand anfangen. Deine Wand verdient genauso viel Sorgfalt.
Interaktive Checkliste zur Vorbereitung der Rückwand
Befolge diese Schritte, damit deine Wand bereit ist. Klicke jeden Punkt an, sobald du ihn erledigt hast.
Schritt 1: Reinigen und entfetten
Küchenrückwände ziehen Fett und Schmutz geradezu an. Damit deine Fliesen richtig haften, brauchen sie eine absolut saubere Oberfläche.
Reinige zunächst die gesamte Fläche mit einem fettlösenden Reiniger wie Trinatriumphosphat (TSP) oder einer einfachen Mischung aus warmem Wasser und Essig. Wische die Wand gründlich ab und lass sie vollständig trocknen. Dieser kleine Schritt verhindert, dass sich die Fliesen später lösen.
Schritt 2: Glätten und ausbessern
Fahre mit der Hand über die Wand. Spürst du Unebenheiten, alte Farbnasen oder Nagellöcher? Jetzt ist der richtige Zeitpunkt, sie auszubessern.
Schabe erhöhte Stellen mit einem Spachtel ab. Fülle kleine Löcher oder Dellen mit Spachtelmasse, lass sie trocknen und schleife die Stellen anschließend mit feinem Schleifpapier glatt. Dein Ziel ist eine möglichst ebene und gleichmäßige Oberfläche. Bei einer neu montierten Gipskartonwand muss vor dem Fliesen zunächst eine Grundierung aufgetragen werden.
Schritt 3: Schützen und planen
Bevor du Kleber anrührst oder Schutzfolien abziehst, solltest du deine Umgebung schützen. Klebe die Kanten deiner Schränke, Arbeitsplatten und Wände mit Malerkrepp ab. Lege eine Abdeckplane oder Plastikfolie aus, um Tropfen aufzufangen.
Als Nächstes planst du das Verlegemuster. Bestimme den Mittelpunkt deiner Wand und zeichne mit einer Wasserwaage eine gerade waagerechte Linie. Sie dient dir als Orientierung für die erste Fliesenreihe. Eine exakt waagerechte Startlinie ist weitaus wichtiger, als einer möglicherweise unebenen Arbeitsplatte zu folgen.
Profi-Tipp: Mach eine „Trockenprobe“. Lege die Mosaikmatten auf der Arbeitsplatte aus, um zu sehen, wie sie an die Wand passen. So kannst du Zuschnitte an Steckdosen und Ecken planen, bevor du die Matten endgültig anbringst.
Wie verlege ich die Mosaik-Rückwand Schritt für Schritt?
Die Frage: Du bist unsicher, ob dir gerade Schnitte gelingen, die Fugen gleichmäßig werden oder die Fliesen richtig haften?
Das Versprechen: Wir führen dich mit klaren, konkreten Schritten durch die Verlegung und zeigen dir genau, wie du Zuschnitte meisterst und für eine perfekte Ausrichtung sorgst.
Jetzt ist der Moment gekommen, auf den du gewartet hast. Deine Wand ist vorbereitet und alle Materialien liegen bereit – nun kannst du deine Vorstellung zum Leben erwecken. Entscheidend ist, methodisch und geduldig vorzugehen. Nichts überstürzen. Wir zeigen dir sowohl die traditionelle Verlegung als auch die selbstklebende Variante.
Bei der traditionellen Verlegung mit Mörtel oder Kleber:
- Kleber auftragen: Beginne mit einem kleinen, gut überschaubaren Bereich von etwa 2–3 Quadratfuß. Nimm mit der Zahnkelle etwas Kleber auf und trage ihn in einem Winkel von 45 Grad auf die Wand auf. Die Zahnung erzeugt gleichmäßige Kleberrillen.
- Die erste Matte anbringen: Drücke die erste Mosaikmatte vorsichtig an die Wand und richte sie an deiner waagerechten Bleistiftlinie aus. Drücke nicht so fest, dass der Kleber durch die Fugen quillt. Übe einfach gleichmäßigen, festen Druck aus.
- Das Muster fortsetzen: Platziere die nächste Matte direkt neben der ersten. Achte darauf, dass der Abstand zwischen den Matten genauso groß ist wie der Abstand zwischen den einzelnen Fliesen auf der Matte. Das ist das Geheimnis für ein nahtloses Gesamtbild.
- Zuschnitte anfertigen: Wenn du eine Steckdose oder Ecke erreichst, halte die Fliesenmatte an die Stelle und markiere mit einem Bleistift, welche Fliesen zugeschnitten werden müssen. Die einzelnen Fliesen kannst du anschließend mit einer Fliesenzange schneiden oder anritzen und brechen. Bei Steckdosen ist es oft am einfachsten, das rückseitige Netz mit einem Cuttermesser zu durchtrennen und die Matte um die Steckdose herum anzupassen.

Bei der Verlegung selbstklebender Fliesen:
Dieser Vorgang ist noch unkomplizierter. Nach der Trockenprobe kannst du direkt loslegen.
- Schutzfolie abziehen und ausrichten: Ziehe zunächst nur einen Teil der Schutzfolie von der ersten Fliesenmatte ab. Richte die Oberkante an deiner waagerechten Orientierungslinie aus.
- Fest andrücken: Wenn die Matte richtig sitzt, drücke den freigelegten Bereich an die Wand. Ziehe die restliche Schutzfolie langsam ab und streiche die Fliesen dabei mit der Hand oder einem Kunststoffrakel glatt.
- Überlappen und verbinden: Die meisten selbstklebenden Mosaikfliesen verfügen über eine überlappende Kante, die eine nahtlose Verbindung ermöglicht. Befolgen Sie unbedingt die Herstelleranweisungen, damit die Verbindung dicht und wasserdicht wird.
Eine ausführlichere Anleitung zum Anbringen selbstklebender Fliesen, insbesondere im Subway-Fliesenstil, finden Sie in unserem Einfachen Leitfaden zum Anbringen selbstklebender Subway-Fliesen mit absolut zuverlässigen Schritt-für-Schritt-Anweisungen.

Eine vollständige visuelle Anleitung mit zusätzlichen Tipps finden Sie in unserem Schritt-für-Schritt-Leitfaden für selbstklebende Küchenrückwände zum Selbermachen – die umfassende Anlaufstelle für Einsteiger. Darin erfahren Sie alles, vom Arbeiten an Ecken bis zum Fliesen hinter dem Herd.
Wie verfuge ich die Fliesen und setze die letzten Akzente?
Die Frage: Sie befürchten, dass eine unsaubere Verfugung Ihre ganze Arbeit zunichtemacht und Ihre Küchenrückwand unprofessionell aussehen lässt?
Unser Versprechen: In diesem Abschnitt erklären wir den Verfugungsprozess Schritt für Schritt und zeigen Ihnen, wie Sie die Fuge auftragen, reinigen und versiegeln, damit ein makelloses, professionelles Ergebnis entsteht.
Wenn das Anbringen der Fliesen den Grundaufbau Ihrer Küchenrückwand bildet, verleiht ihr die Verfugung den letzten Schliff. Dieser Schritt verbindet alles miteinander, kaschiert kleine Unebenheiten und schützt Ihre Wand vor Feuchtigkeit. Lassen Sie sich davon nicht abschrecken.

Die richtige Fugenmasse auswählen
Es gibt zwei Hauptarten von Fugenmasse:
- Fugenmasse mit Sandanteil: Sie enthält feinen Sand und ist dadurch besonders stabil. Verwenden Sie sie für Fugen, die 1/8" oder breiter sind.
- Sandfreie Fugenmasse: Sie hat eine glattere Struktur und eignet sich am besten für empfindliche Fliesen, etwa aus Glas oder poliertem Marmor, sowie für sehr schmale Fugen (unter 1/8").
Für die meisten Mosaikmatten ist sandfreie Fugenmasse die beste Wahl, da sie Kratzer auf den Fliesen vermeidet. Außerdem gibt es bereits fertig angemischte Fugenmassen, bei denen das richtige Mischungsverhältnis kein Rätselraten mehr ist.
In 4 einfachen Schritten verfugen
- Fugenmasse auftragen: Geben Sie etwas Fugenmasse auf Ihr Fugbrett. Halten Sie es in einem Winkel von 45 Grad und verteilen Sie die Fugenmasse diagonal über die Fliesen. Drücken Sie sie fest in alle Fugen und arbeiten Sie dabei in kleinen Abschnitten.
- Überschüssige Fugenmasse entfernen: Ziehen Sie das Fugbrett – ebenfalls diagonal – über die Fliesen, um möglichst viel überschüssige Fugenmasse von den Fliesenoberflächen zu entfernen.
- Das erste Abwischen (der entscheidende Schritt): Warten Sie etwa 15-20 Minuten, bis die Fugenmasse leicht angezogen hat. Nehmen Sie dann einen feuchten, nicht nassen Schwamm und wischen Sie die Fliesenoberflächen vorsichtig in kreisenden Bewegungen sauber. Spülen Sie den Schwamm regelmäßig in Ihrem Eimer mit sauberem Wasser aus.
- Den letzten Schleier entfernen: Nach einigen Stunden bildet sich ein leichter Schleier auf den Fliesen. Polieren Sie ihn mit einem sauberen, trockenen Tuch oder Mikrofasertuch weg. Nun glänzen Ihre Fliesen wieder.
Versiegeln und fertigstellen
Fugenmasse ist porös und sollte deshalb unbedingt versiegelt werden – besonders in der Küche. Eine hochwertige Fugenversiegelung schützt vor Flecken durch Spritzer beim Kochen und verhindert, dass Feuchtigkeit hinter die Fliesen gelangt. Tragen Sie sie nach dem vollständigen Aushärten der Fugenmasse mit einem kleinen Pinsel oder Applikator auf. Beachten Sie dabei die Herstelleranweisungen; in der Regel dauert das Aushärten 48-72 Stunden.
Bringen Sie zum Schluss dort, wo die Küchenrückwand auf die Arbeitsplatte trifft, eine dünne Raupe Küchen- bzw. Sanitärsilikon auf. So entsteht eine flexible, wasserdichte Abdichtung.
Welche kreativen Gestaltungsideen und Muster gibt es?
Die Frage: Fällt es Ihnen schwer, ein Design zu finden, das frisch und modern wirkt, aber in ein paar Jahren nicht schon wieder altmodisch aussieht?
Unser Versprechen: Wir stellen Ihnen die wichtigsten Trends für 2025 vor, geben Ihnen Inspiration für zeitlose Muster und zeigen Ihnen, wie Sie das perfekte Farbschema für Ihre Küche auswählen.
Ihre Küchenrückwand bietet die Möglichkeit, Ihrer Küche oder Ihrem Bad eine persönliche Note zu verleihen. Sie zieht die Blicke auf sich – deshalb ist die Wahl des richtigen Designs entscheidend. Trends kommen und gehen, doch manche Stile bleiben zeitlos schön. Das sind die aktuellen Favoriten und Empfehlungen unserer Designpartner für einen Look, an dem Sie lange Freude haben.
Mini-Quiz: Welcher Mosaikstil passt zu dir?
Beantworte diese eine Frage und finde deinen perfekten Stil.
Wenn du neu dekorierst, tendierst du zu:
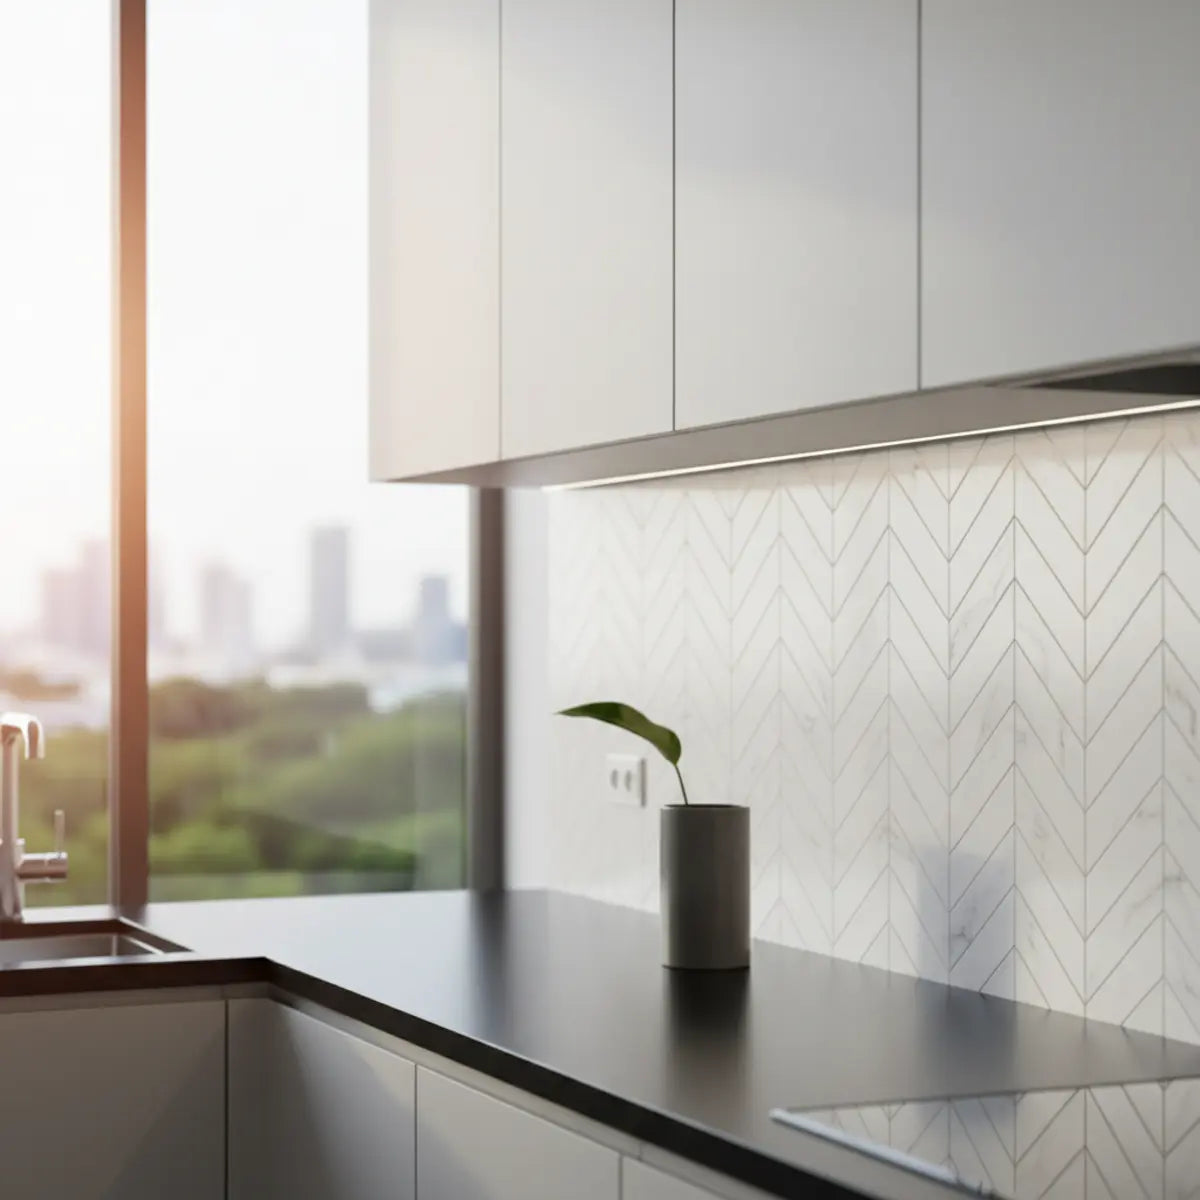
Die wichtigsten Mosaiktrends 2025
Laut einem aktuellen Bericht der National Kitchen & Bath Association setzen Hausbesitzer zunehmend auf organische Strukturen und Farben, die eine Verbindung zur Natur schaffen.
- ➤Biophile Blau- und Grüntöne: Mosaike in Meerglasgrün, tiefem Marineblau und erdigen Blautönen sind derzeit besonders beliebt. Sie schaffen eine ruhige und entspannte Atmosphäre.
- ➤Materialmix: Achte auf Mosaikmatten, die Glas, Stein und sogar kleine metallische Akzente kombinieren. Das verleiht mehr Tiefe und sorgt für eine individuelle, hochwertige Optik.
- ➤Unperfekter Zellige-Stil: Fliesen mit einer handgefertigten, leicht unregelmäßigen Optik sind sehr gefragt. Sie verleihen dem Raum eine warme, handwerkliche Note, die einen wunderschönen Kontrast zu glatten, modernen Schränken bildet.
Wenn du dich fragst, welches dieser Materialien für dein Projekt geeignet ist, bietet unser umfassender Ratgeber zu Küchenrückwandfliesen einen hervorragenden Vergleich aller Möglichkeiten.
Muster mit Wow-Effekt
Auch wenn Mosaikmatten oft bereits ein festes Muster haben, kannst du deiner Kreativität freien Lauf lassen. Wie wäre es mit einem „Wasserfall“-Effekt, bei dem sich die Küchenrückwand von der Arbeitsplatte bis ganz nach oben an der Wand hinter offenen Regalen erstreckt?
Eine weitere beliebte Technik ist die Kombination verschiedener Fliesenarten. Über dem Herd kannst du mit einem detailreichen Mosaikmuster einen beeindruckenden Akzent setzen und den restlichen Bereich der Küchenrückwand mit klassischen, günstigen Subway-Fliesen einfassen. So entsteht ganz budgetfreundlich eine Designeroptik. Weitere Ideen für den gekonnten Einsatz von Subway-Fliesen findest du in unserem Ratgeber So setzt du trendige Subway-Fliesenmuster ein – mit vielen inspirierenden Gestaltungsideen.
Praxisbeispiel: Kleine Küche, große Wirkung
Eine Kundin von uns hatte eine kleine, U-förmige Küche mit vollständig weißen Schränken und wenig Tageslicht. Sie befürchtete, dass eine Küchenrückwand den Raum noch kleiner wirken lassen würde. Wir empfahlen ein glänzendes Mosaik aus hellblauen und grauen Glasfliesen in einem schmalen, rechteckigen Muster.
Das Ergebnis war beeindruckend. Die glänzende Oberfläche reflektierte das Licht im gesamten Raum und ließ ihn heller und größer wirken. Die kühlen Blautöne setzten einen wunderschönen Farbakzent zu den weißen Schränken, ohne den Raum zu überladen. Dieses Beispiel zeigt: Auch in einer kleinen Küche kann die richtige Mosaikwahl einen großen Unterschied machen.
Wie pflege und reinige ich meine Küchenrückwand?
Die Frage: Jetzt, wo du eine wunderschöne neue Küchenrückwand hast: Wie bleibt sie wie neu, ohne dass Fliesen oder Fugen beschädigt werden?
Das erwartet dich: In diesem Abschnitt zeigen wir dir einfache, effektive Reinigungsroutinen und verraten dir genau, welche Produkte du verwenden und welche du vermeiden solltest, damit deine Investition viele Jahre lang geschützt bleibt.
Deine neue Küchenrückwand ist angebracht, die Fugen sind versiegelt und alles sieht fantastisch aus. Jetzt kommt es darauf an, zu wissen, wie du sie richtig pflegst. Die passende Pflege ist unkompliziert und sorgt dafür, dass sich deine Arbeit auch in den kommenden Jahren auszahlt.
Ihre wöchentliche Reinigungsroutine
Für die regelmäßige Reinigung gilt: Weniger ist mehr. Aggressive oder scheuernde Chemikalien brauchen Sie nicht.
- Für Keramik und Feinsteinzeug: Ein einfacher Sprühreiniger mit pH-neutraler Formel oder eine Mischung aus weißem Essig und Wasser im Verhältnis 50/50 ist ideal. Aufsprühen, eine Minute einwirken lassen, damit sich Schmutz lösen kann, und mit einem weichen Mikrofasertuch abwischen.
- Für Glasmosaike: Ein Glasreiniger, der keine Streifen hinterlässt, oder dieselbe Essig-Wasser-Mischung wirkt wahre Wunder. Wichtig ist, die Oberfläche anschließend mit einem sauberen Tuch trocken zu polieren, damit keine Wasserflecken zurückbleiben.
- Für Naturstein (Marmor, Travertin): Hier ist besondere Vorsicht geboten. Stein ist porös und kann durch Säuren wie Essig oder Zitrone beschädigt werden. Verwenden Sie ausschließlich einen Reiniger, der speziell für Naturstein geeignet ist.
Häufiger Irrtum: „Magic Erasers sind für alles geeignet“
Melaminschaumschwämme wie Magic Erasers sind zwar für viele Oberflächen praktisch, wirken aber leicht scheuernd. Auf glänzenden oder polierten Fliesen sowie auf versiegelten Fugen können sie die Oberfläche mit der Zeit abtragen und dadurch für ein mattes Erscheinungsbild sorgen. Verwenden Sie für die regelmäßige Reinigung lieber weiche Tücher.
Grundreinigung und Pflege der Fugen
Ein- oder zweimal im Jahr können Sie Ihre Fugen gründlicher reinigen. Mischen Sie dazu Natron mit Wasser zu einer Paste, tragen Sie diese mit einer kleinen Bürste auf die Fugen auf (eine alte Zahnbürste eignet sich dafür gut), lassen Sie sie 10 Minuten einwirken und schrubben Sie anschließend vorsichtig nach.
Wenn die Fugenversiegelung nachlässt und Wasser nicht mehr von der Oberfläche abperlt, ist es Zeit für eine erneute Versiegelung. Eine schnelle Nachversiegelung alle 1–2 Jahre dauert nur wenige Minuten und schützt am besten vor langfristigen Flecken und Verfärbungen.
Wie behebe ich typische Fehler?
Die Frage: Was passiert, wenn eine Fliese schief sitzt, sich eine Ecke einer selbstklebenden Fliese ablöst oder die Fugen ungleichmäßig aussehen?
Unser Versprechen: Wir zeigen Ihnen schnelle und einfache Lösungen für die häufigsten Probleme beim DIY-Fliesenspiegel, damit Sie jedes auftretende Problem selbstbewusst beheben können.
Selbst bei bester Vorbereitung kann manchmal etwas schiefgehen. Der Unterschied zwischen einem Heimwerker und einem Profi besteht darin, kleine Probleme ruhig und effektiv lösen zu können. So gehen Sie mit den häufigsten kleinen Missgeschicken um.
Ungleichmäßige oder schief sitzende Fliesen korrigieren
Bei herkömmlichem Fliesenkleber haben Sie etwa 15–30 Minuten Verarbeitungszeit. Wenn Sie bemerken, dass eine Fliesenmatte schief sitzt, können Sie sie vorsichtig wieder an die richtige Stelle schieben. Ist nur eine einzelne Fliese verrutscht, lässt sie sich oft mit der Spitze eines Cuttermessers vorsichtig ausrichten.
Eine frisch angebrachte selbstklebende Fliese können Sie häufig direkt vorsichtig wieder abziehen und neu positionieren. Wenn sie schon länger klebt, kann vorsichtiges Erwärmen mit einem Haartrockner den Kleber so weit aufweichen, dass eine Korrektur möglich ist.
Abstehende oder sich lösende Kanten beheben
Das kommt besonders häufig bei selbstklebenden Fliesen vor und liegt meist daran, dass die Wand nicht gründlich genug gereinigt wurde oder sich die Fliesen in einem Bereich mit hoher Luftfeuchtigkeit befinden.
Die Lösung: Heben Sie die sich lösende Ecke an, reinigen Sie die Stelle darunter mit einem Alkoholtuch, um Staub zu entfernen, und lassen Sie sie trocknen. Tragen Sie anschließend eine kleine Raupe transparenten, dauerhaft haftenden Montageklebers (z. B. Loctite Power Grab) auf die Rückseite der Fliese auf und drücken Sie sie wieder fest an. Halten Sie sie ein bis zwei Minuten lang an, damit eine stabile Verbindung entsteht.
Verfärbte oder rissige Fugen ausbessern
Mit der Zeit können sich Fugen verfärben oder feine Haarrisse entwickeln. Das ist eine normale Abnutzungserscheinung.
- Bei Verfärbungen: Bevor Sie die Fugen komplett erneuern, probieren Sie es mit einem Fugenstift. Er ähnelt einem Lackstift, wurde aber speziell dafür entwickelt, Flecken abzudecken und die Farbe Ihrer Fugen aufzufrischen. Das ist eine schnelle, einfache und erstaunlich wirkungsvolle Lösung.
- Bei feinen Haarrissen: Kleine Risse lassen sich oft beheben, indem Sie eine dünne Schicht farblich passenden Acryls oder etwas frischen Fugenmörtel auftragen.
Wenn kleine Probleme auftreten, geraten Sie nicht in Panik. Unser Ratgeber So verlegen Sie selbstklebende Vinyl-Fliesen als Fliesenspiegel enthält einen ausführlichen Abschnitt zur Fehlerbehebung, der diese und weitere Probleme behandelt. So können Sie jedes kleine Missgeschick selbstbewusst beheben.
Ihre Verwandlung am Wochenende kann beginnen
Sie verfügen jetzt über das nötige Wissen und einen Schritt-für-Schritt-Plan, um Ihre Küche oder Ihr Bad mit einem wunderschönen Mosaik-Fliesenspiegel zu verwandeln. Wir haben gemeinsam die Planung, die Vorbereitung und die nötige Geduld durchlaufen – und Sie haben gesehen, dass ein professionell wirkendes Ergebnis durchaus in Ihrer Reichweite liegt. Dieses Projekt ist mehr als nur eine Renovierung: Es bietet Ihnen die Gelegenheit, neue Fähigkeiten zu erlernen und Selbstvertrauen aufzubauen.

Bereit loszulegen? Laden Sie unsere kostenlose Checkliste zur Vorbereitung des Fliesenspiegels herunter, um die Planung noch einfacher zu machen. Und wenn Sie fertig sind, würden wir Ihr Ergebnis gerne sehen! Teilen Sie Ihre Fotos in den sozialen Medien mit unserer Community.
Kostenlose Checkliste zur Vorbereitung herunterladenIhre Wände sind bereit für eine Verwandlung. Sie schaffen das.
Häufig gestellte Fragen
Kann ich einen Fliesenspiegel über vorhandenen Fliesen anbringen?
Ja, das ist möglich – insbesondere mit hochwertigen selbstklebenden Fliesen. Entscheidend ist, dass die vorhandene Oberfläche eben, sauber und in gutem Zustand ist. Sie müssen die alten Fliesen gründlich entfetten und tiefe Fugen mit einer dünnen Schicht Fliesenkleber oder Spachtelmasse auffüllen, damit eine glatte Oberfläche entsteht, auf der die neuen Fliesen gut haften können.
Wie lange dauert die DIY-Installation eines Fliesenspiegels?
Für eine durchschnittlich große Küche sollten Sie ein komplettes Wochenende einplanen. Am ersten Tag stehen normalerweise die Vorbereitung der Wand, die Planung der Anordnung und das Anbringen der Fliesen an. Der zweite Tag ist zum Verfugen (falls erforderlich), Abdichten und abschließenden Versiegeln der Fugen vorgesehen. Die Trocknungs- und Aushärtezeiten sorgen dafür, dass sich das Projekt über zwei Tage erstreckt.
Welches Material für einen Fliesenspiegel ist für Anfänger am besten geeignet?
Ganz klar: Selbstklebende Mosaikfliesen sind die anfängerfreundlichste Option. Sie ersparen Ihnen den Schmutz und die Lernkurve beim Anmischen und Auftragen von Mörtel und Fugenmasse. Moderne selbstklebende Produkte sind äußerst langlebig und sehen so realistisch aus, dass sie herkömmlichen Fliesen in nichts nachstehen. Unser umfassender Leitfaden zur Verlegung selbstklebender Fliesen und zu den besten Designs für 2025 ist der perfekte Ausgangspunkt.
Muss ich selbstklebende Fliesen verfugen?
Die meisten selbstklebenden Mosaikfliesen sind selbstverfugend: Überlappende Kanten bilden eine dichte, wasserabweisende Abdichtung, die wie eine echte Fuge wirkt. Eine herkömmliche Fugenmasse müssen Sie daher nicht auftragen. An den Übergängen zwischen den Fliesen und der Arbeitsplatte sollten Sie jedoch immer eine Fuge aus Dichtmasse ziehen.

Kommentar hinterlassen
Diese Website ist durch hCaptcha geschützt und es gelten die allgemeinen Geschäftsbedingungen und Datenschutzbestimmungen von hCaptcha.