


Transformation de la buanderie avec carrelage à petit budget pour moins de 500 $
La plupart des propriétaires ne pensent jamais à rénover leur buanderie. On se résigne au linoléum fissuré et aux murs tristes, en imaginant qu’une vraie remise à neuf coûtera des milliers d’euros. Mais si vous pouviez transformer entièrement votre espace buanderie pour moins cher qu’un nouveau téléphone ? Et si une rénovation élégante, moderne et durable était possible pour moins de 500 $ ?
Il ne s’agit pas de faire des économies de bout de chandelle, mais de faire des choix intelligents. Une rénovation de buanderie à petit budget est tout à fait à votre portée grâce aux matériaux modernes. L’élément clé : des peel and stick tiles for the laundry room de haute qualité, une véritable révolution pour les adeptes du DIY.
Nous allons vous montrer exactement comment procéder. Ce guide va au-delà de la théorie et entre dans le concret, avec des études de cas détaillées de transformations superbes réalisées avec un budget serré. Vous y trouverez un guide d’installation pas à pas ainsi qu’un budget planner complet.
Voyons comment de vraies personnes réussissent des transformations incroyables de leur buanderie sans se ruiner.
Pourquoi les rénovations de buanderie ne doivent pas forcément coûter cher
La question : Vous est-il déjà arrivé de recevoir un devis pour une petite rénovation et de sentir votre portefeuille vous faire mal, physiquement ?
La promesse : Cette section explique pourquoi rafraîchir une buanderie n’a pas besoin d’un budget à cinq chiffres, en montrant l’énorme différence de coût entre les méthodes traditionnelles et les solutions modernes.
Une rénovation traditionnelle de buanderie peut coûter étonnamment cher. Selon les données 2025 sur l’amélioration de l’habitat, le coût moyen se situe entre 2 000 et 5 000 $, et peut facilement grimper davantage en cas de travaux de plomberie ou d’électricité. C’est précisément ce choc tarifaire qui laisse la plupart des buanderies à l’abandon.
Mais il existe une solution plus intelligente. Une rénovation abordable de buanderie avec carrelage mise sur des matériaux à fort impact et à faible coût. La star du projet, c’est le carrelage peel and stick. Ce choix unique réduit considérablement votre budget en supprimant le besoin d’une main-d’œuvre coûteuse, de mortier-colle, de jointoiement et d’outils spécialisés.
Voyez la différence de coût ainsi : une buanderie de 80 pieds carrés carrelée par un professionnel pourrait coûter plus de 1,200 in en main-d’œuvre et matériaux. Un projet DIY utilisant des vinyles peel and stick de qualité pour le même espace pourrait coûter aussi peu que 200 $. Vous obtenez un nouveau sol frais, durable et superbe pour une fraction du prix.
Il ne s’agit pas de se contenter de moins. Il s’agit de réallouer votre budget vers ce qui compte vraiment. Avec l’argent économisé sur le revêtement de sol, vous pouvez ajouter des rangements élégants, une nouvelle couche de peinture ou un éclairage modernisé, pour obtenir une transformation complète qui paraît bien plus coûteuse qu’elle ne l’est en réalité.

Étude de cas 1 : transformation du sol de la buanderie pour 350 $
La question : Curieux de savoir en quoi consiste réellement une rénovation à moins de 500 $ ?
La promesse : Nous allons vous guider à travers une étude de cas détaillée, pas à pas, d’une rénovation complète du sol pour seulement 350 $, en prouvant qu’un impact énorme est possible avec un tout petit budget.
Faites la connaissance de Sarah, une propriétaire dont la buanderie de 70 pieds carrés était marquée par un linoléum taché, vieux de 20 ans. La pièce paraissait sombre et peu accueillante. Après avoir reçu un devis de plus de 1 800 $ pour un remplacement par du carrelage posé par un professionnel, elle a décidé d’opter pour la méthode DIY peel and stick flooring. Son objectif : un rendu lumineux, propre et moderne.
Son projet a été réalisé en un week-end, du début à la fin. La première étape était essentielle : la préparation. Elle a soigneusement nettoyé l’ancien linoléum avec un dégraissant afin de garantir une bonne adhérence des nouvelles dalles. Comme son sol était de niveau et en bon état, elle a pu installer les nouvelles dalles directement sur l’ancienne surface.
Sarah a choisi un motif classique à damier noir et blanc pour créer un effet intemporel et très contrasté. En partant du centre de la pièce, elle a posé sa première dalle puis a avancé vers l’extérieur, en pressant soigneusement chaque élément en place. Un simple cutter lui a suffi pour découper les dalles sur les bords et autour des obstacles.
La transformation a été immédiate et spectaculaire. Le nouveau sol a rendu toute la pièce plus lumineuse et plus cohérente. Une fois que vous voyez ces possibilités, vous aurez envie de lancer votre propre projet.
Répartition du budget :
Choisir les meilleurs carreaux Peel and Stick pour la buanderie
La question : Vous vous sentez dépassé par le grand nombre d’options de carreaux et craignez de faire le mauvais choix ?
La promesse : Cette section vous propose un guide clair, appuyé par des experts, pour choisir des carreaux imperméables, durables et stylés, afin que votre investissement dure dans le temps.
Tous les carreaux Peel and Stick ne se valent pas, surtout dans un espace exposé à l’humidité et à un usage intensif comme une buanderie. Faire le bon choix est l’étape la plus importante de votre budget laundry room makeover. Voici les critères essentiels à privilégier.
Critères essentiels pour les carreaux de buanderie
- Construction imperméable : C’est non négociable. Recherchez des carreaux explicitement indiqués comme waterproof peel and stick floor tiles for laundry areas. Ceux-ci sont généralement fabriqués en vinyle 100%, ce qui empêche l’eau de s’infiltrer jusqu’au sous-plancher. Une idée reçue fréquente est que tous les carreaux Peel and Stick supportent l’eau, mais beaucoup ne sont que résistants à l’eau.
- Durabilité et épaisseur : Un carreau plus épais offre une meilleure longévité et une sensation plus haut de gamme sous le pied. Recherchez une couche d’usure d’au moins 12 mil (0.3 mm) pour les zones à passage modéré. Un carreau plus épais masque aussi mieux les petites imperfections du sous-plancher.
- Qualité de l’adhésif : La qualité de l’adhésif détermine si vos carreaux restent bien en place ou commencent à se décoller aux angles. Les meilleures marques de carreaux Peel and Stick en 2025 utilisent des adhésifs puissants, sensibles à la pression, qui créent une tenue durable.
- Design et texture : Les carreaux Peel and Stick modernes se déclinent dans une vaste gamme de styles, des effets bois et pierre très réalistes aux motifs géométriques audacieux. Une surface texturée peut offrir une meilleure résistance au glissement et un rendu plus authentique.
Options écoresponsables et les mieux notées
Pour celles et ceux qui recherchent des choix durables, les carreaux de sol Peel and Stick écologiques sont de plus en plus disponibles. Ils sont souvent fabriqués à partir de vinyle recyclé ou d’autres matériaux durables et utilisent des adhésifs à faible teneur en COV (composés organiques volatils), ce qui est meilleur pour la qualité de l’air de votre intérieur.
Quand vous êtes prêt à explorer les options, la qualité compte. Pour une sélection soignée de styles éprouvés et d’options les mieux notées, parfaites pour ce type de projet, la ressource incontournable est notre guide complet sur les Les meilleurs Peel & Stick Tiles pour les sols de la buanderie en 2025. C’est le point de départ idéal pour trouver un carreau qui correspond à votre budget et à votre vision déco.
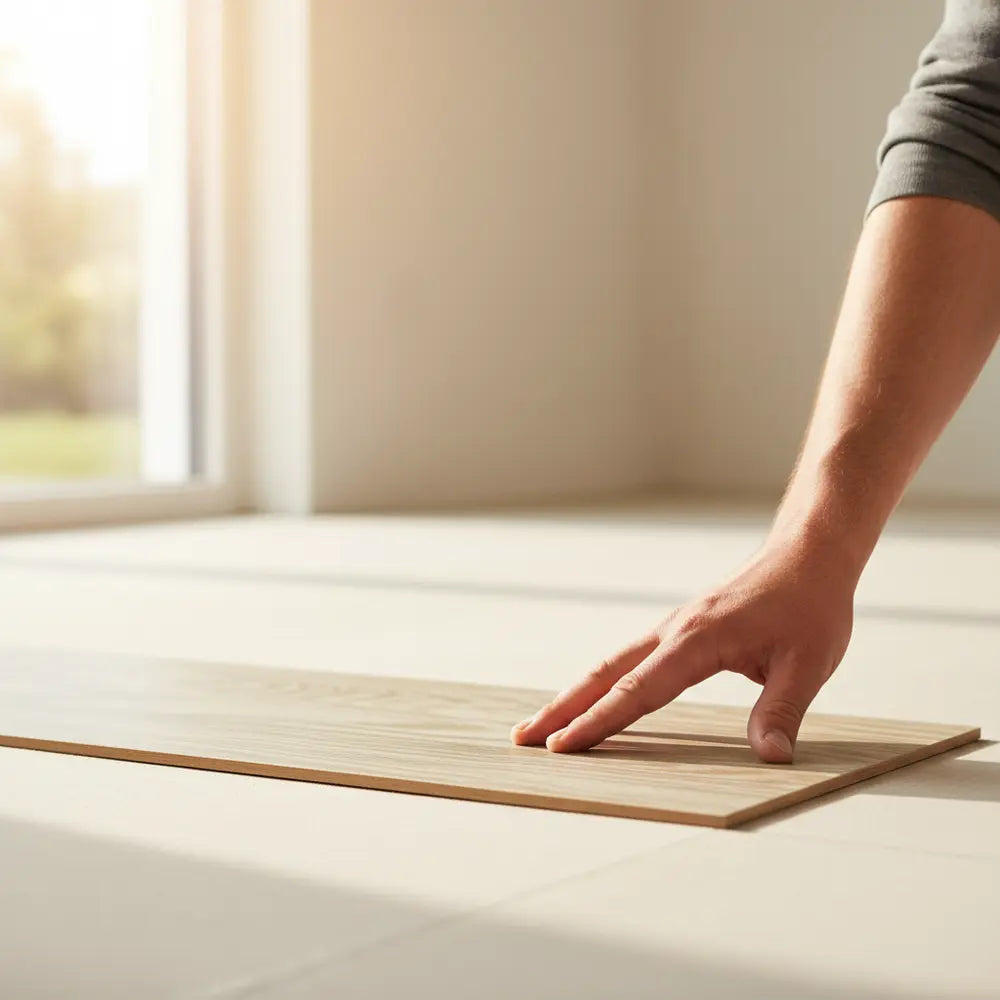
Guide étape par étape : poser des Peel and Stick Tiles avec un budget serré
La question : Prêt à lancer votre projet, mais vous ne savez pas exactement comment se déroule la pose ?
La promesse : Voici un guide pas à pas, simple et infaillible, pour poser des peel and stick tiles for the laundry room, afin d’obtenir une finition professionnelle et durable.
Une pose réussie repose sur 90% la préparation. Aller trop vite à cette première étape est l’erreur n°1 des adeptes du DIY. Avec un peu de patience et le souci du détail, vous pouvez obtenir un rendu impeccable.
Étape 1 : Préparation de la surface
Votre sol doit être propre, lisse et sec. Grattez tout ancien adhésif ou débris. Utilisez un nettoyant dégraissant pour éliminer toute trace de saleté, de cire ou d’huile. Si vous posez sur du béton ou sur une surface poreuse, appliquer une couche de primaire au latex est une astuce de pro qui garantit une meilleure adhérence.
Étape 2 : Planifier votre disposition
Ne commencez pas la pose dans un coin. Repérez le centre de vos deux murs les plus longs et tracez des lignes au cordeau pour trouver le centre de la pièce. Faites un « essai à blanc » en disposant les carreaux depuis le centre vers l’extérieur pour voir où vos découpes arriveront au niveau des murs. Cela vous aide à éviter de finir avec de minuscules bandes de carreaux peu esthétiques sur les bords.
Étape 3 : Pose
Commencez au point central que vous avez marqué. Retirez le film protecteur du premier carreau, alignez-le soigneusement sur vos lignes au cordeau, puis appuyez fermement. Travaillez du centre du carreau vers l’extérieur pour chasser les bulles d’air. Continuez la pose des carreaux en veillant à ce que les bords soient bien jointifs, sans chevauchement.
Étape 4 : Découpe et ajustement
Pour les carreaux le long du mur, placez un carreau non fixé directement sur le dernier carreau entier que vous avez posé. Placez un autre carreau par-dessus, puis faites-le glisser jusqu’au mur. Utilisez son bord comme guide pour tracer une ligne de coupe sur le carreau en dessous. Cette astuce simple garantit une mesure parfaite à chaque fois. Utilisez un cutter bien affûté et une règle droite pour des coupes nettes.
Pour aller plus loin dans le processus avec des conseils de dépannage, la ressource la plus utile est notre tutoriel complet sur Comment installer des Peel and Stick Tiles dans la buanderie. Il est conçu pour vous guider à travers chaque difficulté possible.

Dépenseriez-vous 500 $ pour moderniser la buanderie ?
Étude de cas 2 : combo rangement + carrelage pour buanderie à 480 $
La question : Vous devez vous attaquer à plus que le sol ? Comment ajouter du rangement et protéger les murs avec le même budget serré ?
La promesse : Cette étude de cas concrète détaille une transformation complète à 480 $ qui combine revêtement de sol, crédence élégante et solutions de rangement pratiques.
L’espace buanderie de Mark n’était qu’un petit placard peu fonctionnel. Son objectif était de maximiser l’aspect pratique et le style grâce à un combo rangement pour buanderie et sol Peel and Stick. Il voulait un sol durable, une crédence pour protéger le mur derrière la machine à laver et le sèche-linge, ainsi que des étagères ouvertes pour accéder facilement aux produits.
Il a commencé par le sol, en choisissant un revêtement vinyle durable à l’aspect bois. Ensuite, il s’est attaqué au mur avec des idées de crédence Peel and Stick pour la buanderie. Il a opté pour un design classique en carreaux métro blancs, qui a immédiatement illuminé le petit espace et facilité l’entretien. L’installation de la crédence a été encore plus rapide que celle du sol.
Pour le rangement, Mark a installé de simples équerres métalliques peu coûteuses et des planches de pin teintées provenant d’une quincaillerie locale. Cela a permis de créer deux longues étagères au-dessus des appareils, en libérant le sol des lessives et accessoires. L’association du sol en bois chaleureux, de la crédence blanc éclatant et des étagères fonctionnelles a complètement transformé le placard.
Mark s’est inspiré de plusieurs sources pour son projet, en adaptant les techniques à ses besoins précis. Les méthodes de notre guide Comment faire du DIY avec Peel Stick Kitchen 2025 conviennent parfaitement pour créer une crédence de buanderie, montrant comment des compétences peuvent passer d’une pièce à l’autre.
Répartition du budget :

Si vous cherchez davantage d’idées de crédence ou un guide détaillé pour les poser, notre article sur les Meilleurs designs de crédence Peel and Stick pour 2025 contient tout ce qu’il faut savoir. Pour aller plus loin, découvrez comment d’autres ont complètement transformé leur espace dans notre vitrine de 5 transformations de cuisine époustouflantes.
Entretien, durabilité et conseils de nettoyage
La question : craignez-vous que votre magnifique nouveau sol Peel and Stick ne résiste pas à l’épreuve du temps ?
La promesse : cette section vous livre des astuces de nettoyage approuvées par des experts et des secrets d’entretien pour que votre relooking abordable de la buanderie reste impeccable pendant des années.
L’une des questions les plus fréquentes concerne la durabilité. Combien de temps les carreaux Peel and Stick durent-ils réellement dans une buanderie ? Avec une pose et un entretien adaptés, un carreau de haute qualité peut durer de 7 à 15 ans. L’essentiel est de protéger votre investissement avec une routine d’entretien simple.
La règle numéro un est de gérer l’humidité. Même si vous devez choisir des carreaux de sol Peel and Stick imperméables pour la buanderie, il reste judicieux d’essuyer rapidement toute éclaboussure provenant du lave-linge ou de l’évier. Cela évite que l’eau ne s’infiltre progressivement dans les joints au fil du temps.
Pour une tranquillité d’esprit encore plus grande, certains adeptes du DIY appliquent un fin cordon de silicone transparent autour du périmètre de la pièce, là où les carreaux rencontrent les plinthes. Cela crée une étanchéité supplémentaire, offrant une protection maximale contre l’humidité. De nombreux principes essentiels de l’étanchéité sont universels. Les conseils de notre guide sur Carreau de salle de bain Peel Stick contre l’humidité offrent d’excellentes stratégies tout aussi efficaces dans une buanderie.
Checklist de nettoyage facile :
- Balayez ou aspirez régulièrement pour éliminer la saleté et les petits gravillons qui pourraient rayer la surface.
- Utilisez un nettoyant au pH neutre. Les produits agressifs comme l’eau de Javel ou l’ammoniaque peuvent endommager la finition du carrelage et fragiliser l’adhésif. Une simple solution de vinaigre et d’eau fonctionne souvent le mieux.
- Évitez les outils abrasifs. N’utilisez jamais de laine d’acier ni de tampons à récurer agressifs. Une serpillière en microfibre ou un chiffon doux suffit.
- Placez des patins en feutre sous les pieds de votre lave-linge et de votre sèche-linge afin d’éviter les rayures lorsqu’ils sont déplacés.
En suivant ces étapes simples, vous vous assurez que votre revêtement de sol DIY peel and stick reste une source de fierté pendant des années, preuve qu’un choix économique peut aussi être durable.
Checklist de planification du budget : restez sous 500 $
La question : Comment vous assurer que votre projet ne dérape pas et ne dépasse pas le budget ?
La promesse : Cette section vous propose une checklist simple mais efficace pour planifier vos dépenses, suivre chaque euro et éviter les coûts cachés qui pourraient compromettre une rénovation de buanderie à petit budget.
Un projet économique réussi est un projet bien planifié. Avoir dès le départ une feuille de route financière claire permet d’éviter les dépenses excessives et de s’assurer d’obtenir tout ce que vous voulez sans mauvaises surprises. Utilisez cette checklist comme guide.
Votre modèle de budget
Avant d’acheter quoi que ce soit, listez chaque dépense potentielle. Soyez précis.
- Revêtement de sol : coût par pied carré x surface totale ( +10% en plus) = ______
- Crédence (le cas échéant) : coût par pied carré x surface totale = ______
- Fournitures de préparation : nettoyant, apprêt, chiffons, etc. = ______
- Outils : cutter, lames, règle droite, mètre ruban = ______
- Finitions : plinthes, mastic, moulure quart-de-rond = ______
- Rangement et déco : étagères, paniers, peinture, éclairage = ______
- Marge de sécurité (10% du total) : = ______
- Total général : ______
Coûts cachés à surveiller
Une erreur fréquente consiste à oublier les petits postes qui s’additionnent. Votre projet pourrait nécessiter un ragréage si le sous-plancher n’est pas de niveau. Vous pourriez découvrir qu’il faut remplacer une section du sous-plancher. Prévoyez toujours au moins 10% de votre budget total comme fonds de réserve pour ces imprévus.
Où économiser et où investir un peu plus
- Dépense : Achetez toujours la meilleure qualité de peel and stick tiles for your laundry room que vous pouvez vous offrir. Le carrelage lui-même est la base du projet, et un produit haut de gamme offre une meilleure durabilité, une meilleure adhérence et un rendu plus soigné.
- Économisez : Vous pouvez réduire les coûts sur les outils en les empruntant à un ami ou en vérifiant les options de location. Vous pouvez aussi trouver de très bonnes affaires sur les paniers de rangement, la déco et même l’éclairage dans les magasins discount ou en profitant des promotions.
Derniers conseils pour une rénovation de buanderie moderne et abordable
La question : Prêt à apporter les dernières touches à votre projet pour un rendu vraiment soigné et moderne ?
La promesse : Voici quelques astuces déco et conseils d’achat finaux pour faire de votre rénovation de buanderie à petit budget un vrai succès, du sol au plafond.
Votre budget laundry room makeover ne se limite pas au sol. Il s’agit de créer un espace cohérent et fonctionnel. Grâce à l’argent économisé avec les peel and stick tiles, vous pouvez maintenant vous concentrer sur les détails qui subliment toute la pièce.
Astuces déco pour les petits espaces
- Exploitez la hauteur : Dans une petite buanderie, utilisez l’espace mural. Installez des étagères hautes et étroites ou un panneau perforé pour organiser les produits. Cela attire le regard vers le haut et donne une impression d’espace plus grand.
- Les couleurs claires sont vos alliées : Des carreaux, de la peinture et des étagères dans des tons clairs refléteront davantage la lumière, donnant à un espace exigu une sensation d’ouverture et de légèreté. Un motif de sol audacieux peut fonctionner à merveille si les murs restent simples et lumineux.
- Une quincaillerie assortie : Si vous avez des placards, remplacer les anciennes poignées et boutons par une quincaillerie moderne et coordonnée est une mise à jour économique qui fait une énorme différence.
Quand bricoler soi-même et quand faire appel à un pro
La pose de peel and stick tiles est un projet DIY fantastique. Cependant, si votre sous-plancher est fortement endommagé ou si vous devez déplacer des conduites de plomberie, il vaut mieux faire appel à un professionnel pour cette partie du travail. Vous pouvez tout de même économiser des milliers d’euros en réalisant vous-même les finitions décoratives. Pour un guide de pose infaillible, parfait pour les débutants, consultez notre Guide facile pour installer des Peel & Stick Subway Tiles, qui contient des conseils applicables à tout projet de carrelage.
Imaginez toutes les possibilités. Imaginez une pièce épurée et minimaliste avec de grands carreaux ardoise gris et des étagères ouvertes en bouleau. Ou imaginez un espace ludique et plein de fantaisie avec un sol à motif coloré, des murs blancs et une seule couleur accent vive pour vos boîtes de rangement. Une belle buanderie est désormais à votre portée. Pour encore plus d’inspiration avant/après, découvrez notre guide sur la façon de Transformer votre salle de bain avec des Peel and Stick Tiles en 2025, car de nombreux principes de décoration peuvent être adaptés à la buanderie.
Ce projet prouve qu’il n’est pas nécessaire d’avoir un énorme budget pour créer un espace que l’on aime. Avec des choix de matériaux malins et un peu d’effort le temps d’un week-end, vous pouvez transformer une pièce oubliée en un espace fonctionnel et stylé dans votre maison.
La buanderie de vos rêves n’est pas à des milliers d’euros près : elle peut tenir dans quelques cartons de carrelage et un week-end de libre. Vous avez les connaissances et le plan. Il ne vous reste plus qu’à vous lancer pour créer un espace qui rend le jour de lessive un peu plus lumineux.
Foire aux questions
1. Puis-je poser des peel and stick tiles directement sur mon ancien sol de buanderie ?
Dans de nombreux cas, oui. Vous pouvez les poser sur un linoléum, un vinyle ou même un carrelage en céramique existant, à condition que la surface soit propre, plane et en bon état. Vous devez nettoyer et dégraisser soigneusement l’ancien sol. Si vous les posez sur du carrelage en céramique, il peut être nécessaire de combler les joints avec un enduit de ragréage afin d’obtenir une surface lisse.
2. Comment choisir un carrelage peel and stick qui n’aura pas l’air bon marché ?
Pour éviter un rendu « bon marché », misez sur l’épaisseur et la texture. Choisissez des carreaux d’au moins 2mm d’épaisseur, avec une finition texturée ou en relief qui imite la pierre ou le bois véritable. Les marques haut de gamme proposent souvent des bords biseautés, qui créent des lignes de « joint » plus réalistes et apportent davantage de profondeur.
3. Quelle est la partie la plus difficile d’une installation DIY de carrelage peel and stick ?
Les étapes les plus exigeantes sont la préparation et la découpe. Aller trop vite lors de la phase de préparation, en ne nettoyant pas ou en n’apprêtant pas correctement le sol, entraînera une défaillance de l’adhésif. Réaliser des découpes précises autour des cadres de porte ou des appareils demande de la patience. Mesurez deux fois, coupez une fois, et utilisez toujours une lame bien affûtée pour obtenir un résultat impeccable.
4. Les carreaux de sol peel and stick écologiques sont-ils aussi durables ?
Oui, les carreaux de sol peel and stick écologiques de haute qualité sont conçus pour être aussi durables que leurs équivalents traditionnels en vinyle. Les marques spécialisées dans les produits durables utilisent souvent des matériaux recyclés robustes et des procédés de fabrication avancés afin de garantir que leurs carreaux résistent aux contraintes d’une zone très fréquentée comme une buanderie.


Laisser un commentaire
Ce site est protégé par hCaptcha, et la Politique de confidentialité et les Conditions de service de hCaptcha s’appliquent.