


Vous en avez assez de fixer cette cuisine beige et sans relief, ou ces sols de salle de bains datés dans votre location ? Vous voulez créer un intérieur qui reflète votre style, mais les règles de votre bail vous donnent l’impression d’être dans une camisole créative. La peur de perdre votre dépôt de garantie pour un simple trou de clou, sans même parler d’une rénovation, est bien réelle.
Et si vous pouviez transformer complètement votre espace pour moins que le prix de quelques commandes de repas à emporter du week-end, sans aucun changement permanent ? C’est tout l’intérêt des DIY peel and stick tiles. C’est le secret le mieux gardé des locataires modernes pour des améliorations abordables, élégantes et approuvées par le propriétaire.
Pour obtenir un aperçu complet de la façon dont ces carreaux polyvalents peuvent révolutionner votre espace de vie, découvrez notre guide complet sur le Guide facile de mise à niveau de la cuisine avec des DIY Peel and Stick Tiles. C’est le point de départ idéal pour tout locataire qui envisage une transformation élégante et sans dégâts.
Ceci est bien plus qu’un simple aperçu de produit. C’est votre tutoriel complet sur les renter-friendly peel and stick tiles. Nous couvrons tout, du choix des bons matériaux au processus d’installation pas à pas. Et surtout, nous vous montrerons des astuces de retrait sans dégâts qui vous garantiront de récupérer votre dépôt de garantie.
Préparez-vous à voir comme il est facile d’ajouter une touche de designer à votre cuisine, votre salle de bains ou n’importe quel mur qui a besoin d’un peu d’attention. Vous pouvez enfin avoir la maison digne de Pinterest dont vous rêvez, sans aucun risque.
Pourquoi les locataires adorent les Peel and Stick Tiles
L’attrait de ces carreaux pour les habitants d’appartements est simple : ils résolvent les plus grands dilemmes de décoration en location. Ils offrent un maximum de style pour un minimum d’engagement, en répondant directement à l’anxiété liée à l’amélioration d’un espace qui ne vous appartient pas.
La transformation temporaire
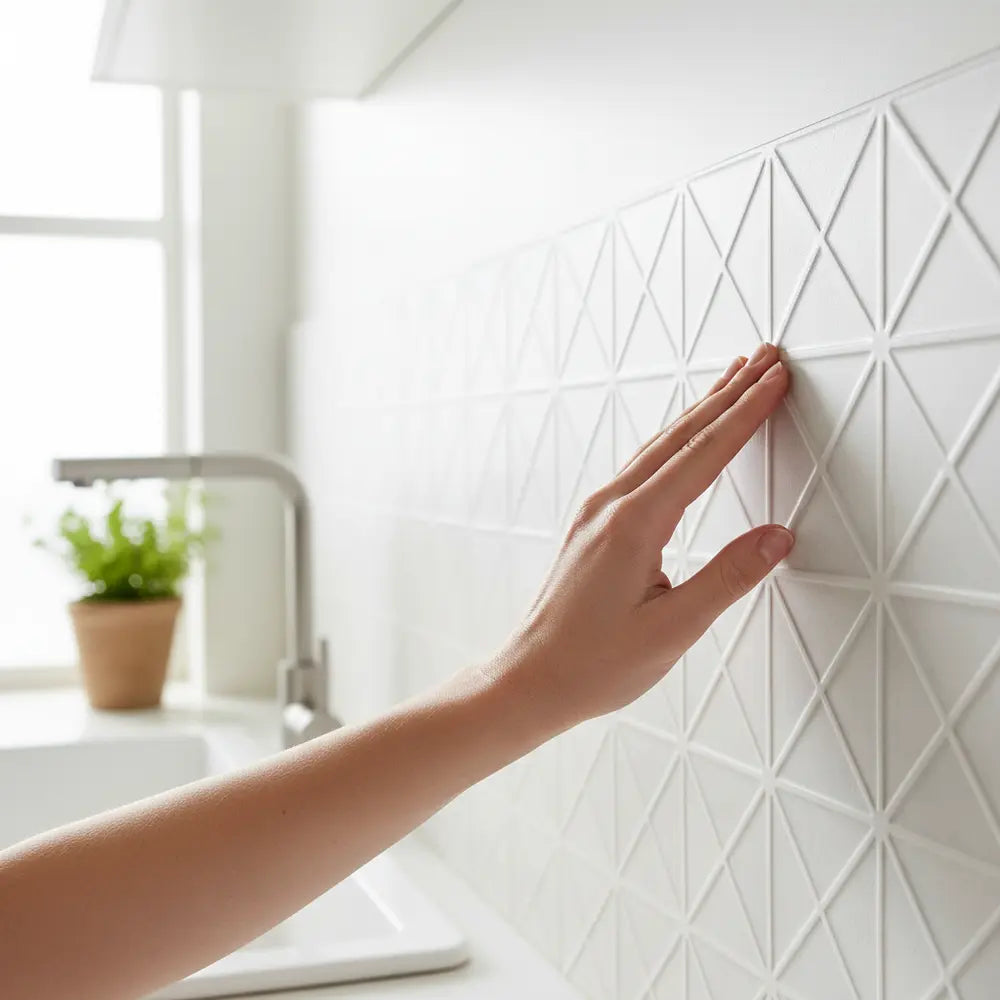
Imaginez les peel and stick tiles comme des tenues temporaires haut de gamme pour vos murs et vos sols. Contrairement au carrelage traditionnel, qui nécessite du joint, du mortier et beaucoup d’engagement, ces panneaux autocollants sont conçus pour l’instant présent. Ils offrent l’impact visuel d’une vraie rénovation sans modifier la structure de votre appartement.
Ce caractère temporaire vous permet d’expérimenter. Vous êtes tombé(e) amoureux(se) d’un motif audacieux que vous n’aurez peut-être plus envie de voir dans cinq ans ? Lancez-vous. Vous avez la liberté de changer d’avis quand vous déménagez ou lorsque votre style évolue, un luxe que le carrelage permanent ne peut tout simplement pas offrir.
Une amélioration à petit budget
Parlons chiffres. L’installation professionnelle d’une crédence de cuisine peut facilement coûter plus de 1,000 in en main-d’œuvre et matériaux. Un projet complet de remplacement du sol d’une salle de bains peut atteindre plusieurs milliers d’euros. Ce type de dépense n’est tout simplement pas pratique pour une maison qui ne vous appartient pas.
En revanche, une superbe crédence de cuisine peel and stick peut souvent être réalisée pour moins de 150 $. Vous pouvez refaire tout le sol d’une salle de bains avec un revêtement de sol luxe vinyl peel and stick pour un prix similaire. C’est un projet de week-end avec un budget de semaine, qui offre un rendu haut de gamme sans la pression financière.
Protéger votre dépôt de garantie
La peur numéro un de tout locataire est d’endommager le logement et de perdre ce précieux dépôt de garantie. Beaucoup de locataires pensent que tout ce qui est « collant » arrachera automatiquement la peinture ou laissera un résidu tenace. C’est une idée reçue courante qui empêche les gens de rendre leur espace plus chaleureux.
Les peel and stick tiles modernes de haute qualité sont conçus pour les locataires. Leurs adhésifs sont pensés pour être assez puissants pour durer des années, mais assez doux pour être retirés sans difficulté. En suivant la bonne méthode de retrait — que nous détaillons plus loin — vous pouvez remettre vos murs et vos sols dans leur état d’origine, sans laisser de trace.
Choisir les meilleurs Peel and Stick Tiles pour votre espace
Le marché des peel and stick tiles a explosé, ce qui est formidable pour le choix, mais peut aussi sembler déroutant. Choisir le bon carreau ne dépend pas seulement de la couleur ; il faut aussi faire correspondre le matériau et les caractéristiques à la fonction de la pièce.
Comprendre les différents matériaux et finitions
Tous les carreaux ne se valent pas. Le matériau détermine l’aspect, la durabilité et le meilleur usage pour votre projet.
- Vinyle : Le matériau le plus courant et le plus polyvalent. Il est abordable, facile à découper et résistant à l’eau, ce qui le rend idéal pour les crédences et les sols. Les finitions vont du mat au brillant et peuvent imiter presque tout, du carrelage à l’aspect bois.
Astuce de pro : Commandez toujours des échantillons avant de vous engager. Un carreau peut paraître complètement différent en ligne par rapport à l’éclairage spécifique de votre intérieur. Fixer quelques échantillons au mur pendant un jour ou deux vous aidera à prendre une décision en toute confiance.
Choix adaptés à la cuisine : résistance à la chaleur et aux taches
Votre crédence de cuisine doit être plus qu’esthétique ; elle doit aussi être vraiment fonctionnelle.
Lorsque vous cherchez des carreaux peel and stick résistants à la chaleur près de la cuisinière, vérifiez les spécifications du produit. Recherchez des carreaux en métal ou explicitement homologués pour une utilisation derrière une plaque de cuisson. Les carreaux en vinyle standard peuvent se déformer ou se décolorer en cas d’exposition prolongée à une chaleur élevée.
La capacité d’un carreau à résister aux taches est également essentielle. Une surface non poreuse, comme le gel ou le vinyle, permet d’essuyer facilement les éclaboussures de sauce tomate ou d’huile sans laisser de marque permanente. Pour découvrir en profondeur des modèles qui fonctionnent bien dans la cuisine, notre guide sur Idées de crédence de cuisine en Peel Stick 2025 est la ressource incontournable pour les dernières tendances.
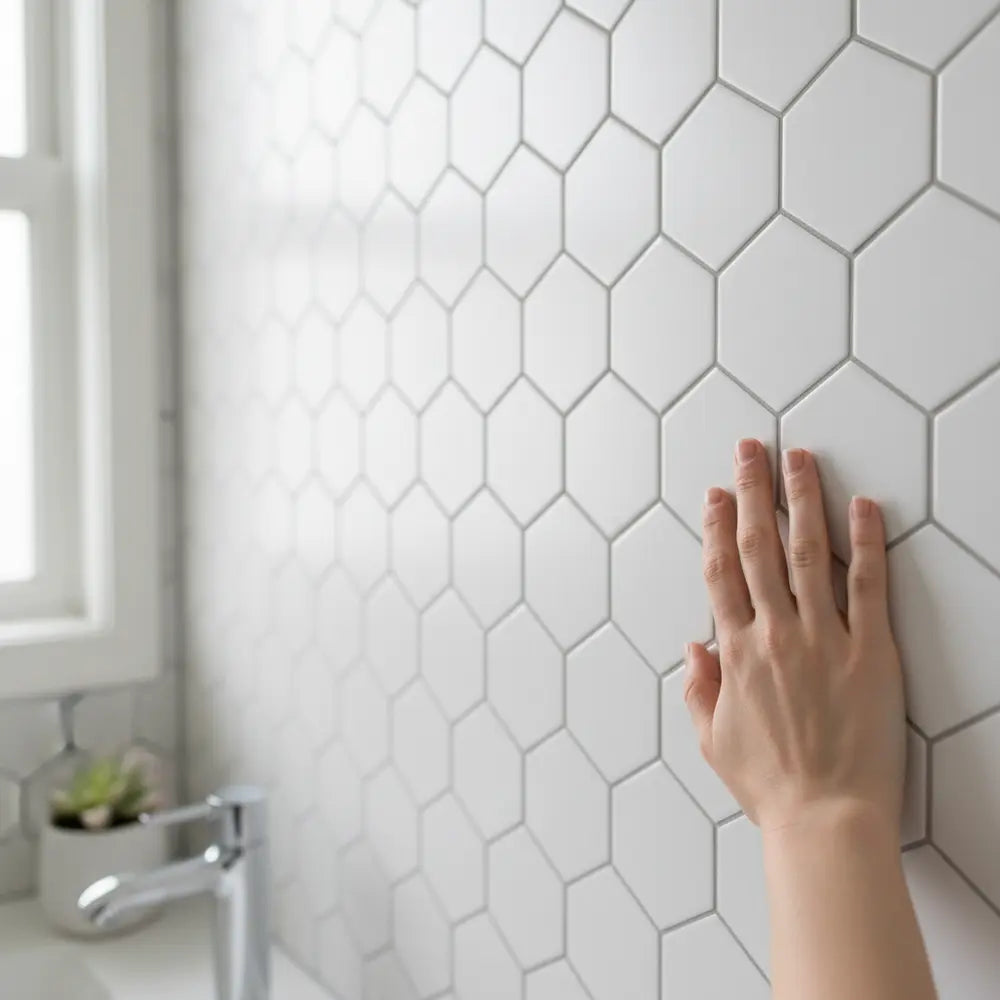
Prêt pour la salle de bain : choisir des carreaux imperméables
La salle de bain est un environnement très humide, avec des éclaboussures d’eau directes. Cela signifie que le choix de vos carreaux est crucial pour empêcher l’humidité de s’accumuler en dessous, ce qui pourrait entraîner de la moisissure ou endommager le mur.
Recherchez des carreaux indiqués comme « 100%imperméables » plutôt que simplement « résistants à l’eau ». Les carreaux peel and stick imperméables pour la salle de bain
sont généralement fabriqués en vinyle ou en LVT. Le design à emboîtement ou à chevauchement est ici essentiel, car il crée une meilleure barrière contre l’humidité.Astuce de pro : Pour une protection supplémentaire dans les zones sujettes aux éclaboussures, comme derrière l’évier ou autour de la baignoire, vous pouvez appliquer un fin cordon de silicone transparent et amovible le long des bords exposés. Cela crée une barrière encore plus efficace et vous offre une tranquillité d’esprit totale.
Outils et préparation avant l’installation
Un résultat au rendu professionnel commence par une préparation soignée. Bâcler cette étape est l’erreur la plus courante. Consacrer une heure à la préparation vous évitera des heures de frustration plus tard. Voyez cela comme la toile parfaite pour votre chef-d’œuvre.
Outils indispensables pour une finition impeccable
Vous n’avez pas besoin d’un atelier professionnel, seulement de quelques éléments essentiels. Les avoir sous la main avant de commencer rendra le processus fluide et agréable.
- Mètre ruban : Pour plus de précision.
- Crayon : Pour marquer vos repères et vos coupes.
- Couteau utilitaire bien aiguisé ou cutter : Une lame neuve est indispensable pour des coupes nettes.
- Règle ou règle de coupe : Une règle en métal est idéale pour guider votre couteau.
- Tapis de découpe : Un tapis auto-cicatrisant protège votre table ou votre sol des entailles du couteau.
- Niveau : Indispensable pour vous assurer que la première rangée de carreaux est parfaitement droite.
- Rouleau adhésif ou J-roller (facultatif mais recommandé) : Cela permet d’exercer une pression uniforme afin de garantir que chaque partie du carreau adhère solidement à la surface.
Préparation de la surface : la base d’un rendu durable
Vous ne pouvez pas poser de nouveaux carreaux sur une surface sale, grasse ou irrégulière et espérer qu’ils tiennent en place. Une bonne préparation de la surface est indispensable pour une bonne adhérence et une damage-free removal facile plus tard.
Commencez par nettoyer la surface en profondeur. Un mélange d’eau et d’un nettoyant dégraissant fonctionne bien. Pour les crédences de cuisine, un substitut de TSP (phosphate trisodique) est excellent pour venir à bout des saletés incrustées. Après le nettoyage, essuyez la surface avec un chiffon propre et humide, puis laissez-la sécher complètement pendant au moins 24 heures.
Et si vos murs sont texturés ? C’est un problème courant pour les locataires. La plupart des peel and stick tiles nécessitent une surface lisse. Les poser sur un mur très texturé peut entraîner une mauvaise adhérence et un rendu irrégulier. Vous devrez peut-être le poncer, mais vérifiez d’abord votre bail. Si ce n’est pas possible, vous pouvez d’abord installer un panneau fin et lisse, comme un panneau de fibres dures.
Guide du locataire pour une adhérence damage-free removal
C’est là que vous protégez votre security deposit. Le secret consiste à faire confiance à l’adhésif déjà présent sur le carreau et à résister à la tentation de l’« améliorer ».
Idée reçue courante : De nombreux forums en ligne suggèrent d’utiliser un adhésif en spray supplémentaire « au cas où ». Ne faites pas cela. Les adhésifs supplémentaires comme 3M Super 77 sont permanents et endommageront absolument le mur, tout en annulant vos chances d’une dépose propre. Les carreaux de qualité sont conçus pour adhérer et se retirer par eux-mêmes.
Avant de vous lancer à fond, faites un test sur une petite zone. Posez un carreau dans un endroit discret (comme derrière le réfrigérateur ou dans un coin bas du sol) et laissez-le en place pendant 48 heures. Essayez ensuite de le retirer en utilisant la méthode à la chaleur décrite ci-dessous. Ce test confirmera comment le carreau réagit avec votre surface spécifique.
Restez organisé du début à la fin
Téléchargez notre checklist gratuite pour vous assurer d’avoir tout ce qu’il faut pour une pose parfaite et un retrait sans dommage.
Télécharger la checklistGuide d’installation étape par étape pour les murs et les crédences
Une fois la surface préparée et les outils prêts, le plaisir commence. Ce processus transforme votre pièce en seulement quelques heures.
- 1.Planifiez votre agencement : Disposez quelques carreaux sur le plan de travail pour décider de votre motif et de votre point de départ. Pour la plupart des crédences, commencer dans l’angle le plus visible et progresser vers l’extérieur est une bonne stratégie.
- 2.Créez un repère : Ne supposez pas que votre plan de travail ou votre plafond est de niveau. Utilisez votre niveau et un crayon pour tracer une ligne horizontale parfaitement droite pour la première rangée de carreaux à suivre. C’est l’étape la plus importante pour un rendu professionnel.
- 3.Décollez, alignez et pressez : Décollez seulement les premiers centimètres du papier protecteur. Alignez le bord supérieur du carreau avec votre repère. Une fois parfaitement positionné, pressez-le délicatement contre le mur, en retirant lentement le reste du papier protecteur tout en lissant le carreau de haut en bas.
- 4.Faites se chevaucher correctement : La plupart des carreaux de crédence sont conçus pour se chevaucher légèrement sur les bords prévus à cet effet afin de créer une finition continue et étanche. Suivez attentivement les instructions du fabricant à ce sujet. Des chevauchements réguliers sont essentiels.
- 5.Réalisez vos découpes : Pour les bords, les angles ou les prises, mesurez soigneusement l’espace et marquez le carreau sur l’avant avec un crayon. Placez le carreau sur votre tapis de découpe et utilisez votre règle droite et votre cutter pour entailler fermement la ligne. Vous pouvez ensuite casser le carreau le long de la ligne entaillée pour une coupe nette.
Pour un guide détaillé, notre article Comment installer facilement des carreaux adhésifs fournit encore plus de conseils pour assurer la réussite de votre projet.
Installation de peel and stick tiles pour le sol
Le processus pour les sols est similaire, mais avec un point de départ différent. Pour une pièce équilibrée, vous devez trouver le centre.
- 1.Trouvez le centre : Mesurez pour trouver le point central de deux murs opposés et tracez une ligne de craie entre eux. Faites de même pour les deux autres murs. L’intersection de ces lignes correspond au centre de votre pièce.
- 2.Laissez les carreaux s’acclimater : Les revêtements de sol en vinyle de luxe peel and stick doivent s’acclimater à la température et à l’humidité de la pièce. Laissez les cartons de carreaux reposer dans la pièce pendant au moins 48 heures avant la pose afin d’éviter toute expansion ou contraction après leur installation.
Pour voir comment ces principes s’appliquent à l’amélioration la plus populaire, et découvrir les meilleurs styles pour votre intérieur, plongez-vous dans notre guide complet sur Comment installer des peel and stick tiles et meilleurs designs 2025. Il regorge d’inspiration et de conseils pratiques.
Comment retirer des peel and stick tiles sans dégâts
C’est le moment de vérité pour tout locataire. Quand vient le temps de déménager, vous voulez que le retrait soit aussi sans stress que l’installation. Bien fait, votre propriétaire ne saura jamais qu’une transformation a eu lieu. L’ingrédient clé est simple : la chaleur.
Étape 1 : rassemblez vos outils de retrait
Vous n’avez besoin que de quelques articles simples. Inutile d’utiliser des produits chimiques agressifs ou des grattoirs trop abrasifs qui pourraient endommager la surface en dessous.
- • Un sèche-cheveux standard
- • Un couteau à mastic ou une spatule en plastique souple (évitez le métal)
- • Un chiffon doux
- • Un dissolvant adhésif doux comme Goo Gone ou même un simple mélange d’eau tiède et de liquide vaisselle
Étape 2 : la méthode douce avec la chaleur
L’adhésif des carreaux renter-friendly est conçu pour se ramollir sous l’effet de la chaleur. C’est le secret pour le décoller sans effort. Réglez votre sèche-cheveux sur une température moyenne ou élevée.
Tenez le sèche-cheveux à environ 6-8 inches de la surface du premier carreau. Déplacez-le d’avant en arrière, en chauffant uniformément tout le carreau pendant environ 30 à 60 secondes. Le carreau doit être chaud au toucher, sans être assez chaud pour brûler la surface ou vos doigts. La chaleur rend la colle malléable, la faisant passer d’une adhérence tenace à une couche souple et facile à décoller. C’est comme chauffer une étiquette autocollante sur un livre neuf pour la retirer sans déchirer la couverture.
Étape 3 : décoller avec le bon angle
Une fois le carreau chaud, utilisez votre couteau à mastic en plastique pour soulever délicatement un coin. N’essayez pas d’arracher le carreau d’un coup sec. C’est ainsi que vous risquez de l’endommager.
Tirez plutôt le carreau sur lui-même, à un angle faible et net — aussi proche que possible de 180 degrés. Tirez lentement et régulièrement. Si vous sentez une forte résistance, arrêtez-vous et appliquez davantage de chaleur. L’objectif est de laisser l’adhésif ramolli se détacher progressivement. C’est ce geste de décollage lent et patient qui permet de conserver intacte la peinture ou la finition du sol en dessous.
Étape 4 : nettoyer les résidus persistants
Même avec un retrait parfait, il se peut qu’il reste de petites traces collantes. Résistez à l’envie de frotter avec vigueur.
Appliquez une petite quantité de dissolvant adhésif à base d’agrumes ou une touche de liquide vaisselle sur un chiffon humide et tiède. Laissez agir quelques minutes sur le résidu pour le dissoudre. Puis frottez doucement en mouvements circulaires. Le résidu devrait former des petites boules et s’essuyer facilement. Enfin, passez un chiffon propre et humide sur toute la zone pour retirer toute solution nettoyante.
En suivant ce processus, des locataires comme Sarah, dans notre communauté, ont réussi à retirer entièrement une crédence de cuisine et à récupérer leur dépôt de garantie intégralement, preuve que cette méthode fonctionne.
Pour un guide encore plus détaillé, axé spécifiquement sur les préoccupations des habitants d’appartements, ne manquez pas notre article sur la façon de Transformer et retirer les peel and stick tiles des locataires en toute sécurité.
Trouvez votre style de carreaux idéal
Vous hésitez parmi toutes ces options ? Répondez à quelques questions rapides et nous vous recommanderons le style de carreaux parfait pour votre pièce et votre personnalité.
Faites le quiz de styleIdées modernes de peel and stick tiles pour 2025
Les peel and stick tiles ne sont plus seulement une solution basique ; c’est désormais un produit tourné vers le design. Les tendances pour 2025 misent sur des textures riches, des couleurs sophistiquées et des usages astucieux qui donnent une impression de grandeur aux petits espaces.
Couleurs et motifs tendance
Le monochrome laisse place à des palettes plus organiques et expressives.
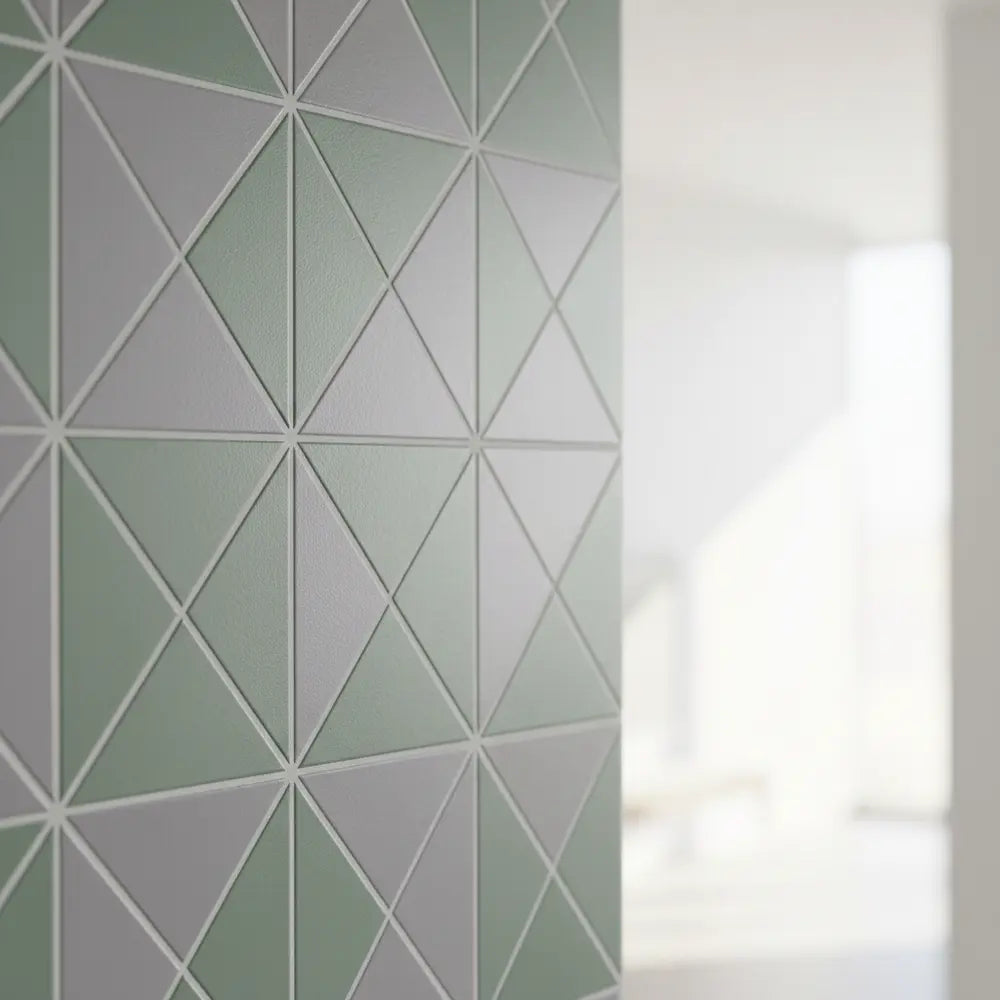
- Tons terre et bleus : Le vert sauge, l’olive et le bleu marine poussiéreux s’imposent. Ces couleurs apportent une sensation de calme et de nature à l’intérieur. Pour vous inspirer de cette tendance, notre sélection Idées de crédence verte avec peel and stick tiles, adaptées aux locataires montre comment utiliser cette couleur avec efficacité.
- Neutres chaleureux : Pensez terracotta, beige aux sous-tons chauds et greige. Ils créent une atmosphère douce et accueillante.
- Motifs géométriques audacieux : Les éventails inspirés de l’Art déco, les chevrons revisités et les lignes graphiques marquées sont parfaits pour créer un mur d’accent ou un sol spectaculaire dans une petite salle d’eau.
Au-delà du plat : l’essor des textures 3D
La texture est la grande tendance de 2025. Les carreaux deviennent plus tactiles, en ajoutant de la profondeur et des ombres qui leur donnent un aspect incroyablement haut de gamme. Recherchez des panneaux muraux auto-adhésifs avec des designs cannelés ou rainurés. Ces lignes verticales peuvent donner l’impression qu’un plafond bas est plus haut. De même, les carreaux 3D qui imitent la texture du zellige ou de la pierre empilée apportent une touche artisanale qui sublime toute la pièce.
Astuces de style pour les petits espaces
Dans une petite location, chaque choix déco compte. Les peel and stick tiles peuvent être un outil puissant pour agrandir visuellement l’espace.
- • Jouez la verticalité : Utilisez des carreaux aux lignes verticales marquées sur une crédence pour attirer le regard vers le haut et donner l’illusion d’une plus grande hauteur dans une petite cuisine.
- • Misez sur la lumière et les reflets : Dans une pièce plus sombre, choisissez des carreaux avec une finition brillante ou satinée. Le léger reflet diffusera la lumière dans l’espace, le rendant plus lumineux et plus ouvert. Un carreau effet marbre avec de subtiles veinures permet d’obtenir ce rendu à merveille.
- • Créez des zones : Dans un studio, vous pouvez utiliser des sols en vinyle de luxe peel and stick dans un motif différent pour délimiter l’espace « cuisine », créant ainsi une séparation visuelle avec le coin salon sans construire de murs.
Votre style, vos règles, votre dépôt de garantie intact
Créer un intérieur que l’on aime ne devrait pas être un privilège réservé aux propriétaires. En tant que locataire, vous pouvez — et devriez — vous sentir libre de personnaliser votre espace. Les DIY peel and stick tiles offrent le compromis idéal : une façon d’insuffler votre personnalité dans votre intérieur sans prendre de décisions permanentes ni de risques financiers.
Vous avez vu comment choisir les bons matériaux pour chaque pièce, comment les préparer et les poser pour un rendu durable, et surtout comment les retirer sans laisser de trace. La liberté d’expérimenter avec une crédence tendance ou un sol de salle de bain audacieux est désormais à vous, avec l’assurance de récupérer l’intégralité de votre sécurité deposit.
Prêt à commencer votre premier projet ? Pour aller plus loin, consultez nos guides complets sur Comment poser des peel and stick tiles dans la cuisine en 2025 et Comment utiliser les peel and stick tiles en 2025.
Foire aux questions
1. Peut-on poser des peel and stick tiles directement sur des carreaux en céramique existants ?
Oui, dans la plupart des cas, c’est possible. L’essentiel est que la surface carrelée existante soit propre, plane et en bon état. Vous devez nettoyer soigneusement les anciens carreaux et les joints pour éliminer toute graisse ou tout résidu de savon. Si les joints sont profonds, vous devrez peut-être les combler avec une fine couche de joint ou d’enduit de lissage afin de créer une surface lisse permettant aux nouveaux carreaux d’adhérer correctement.
2. Combien de temps les peel and stick tiles renter-friendly durent-ils réellement ?
Lorsqu’elles sont installées correctement sur une surface bien préparée, des peel and stick tiles de haute qualité peuvent durer de nombreuses années — souvent 5 à 10 ans, voire plus. Pour les locataires, elles dureront facilement toute la durée de votre bail. La durabilité dépend de la qualité du carrelage, du niveau de passage (pour les sols) et de la qualité de la préparation de la surface.
3. Tous les dosserets peel and stick sont-ils résistants à la chaleur pour une utilisation derrière une cuisinière ?
Non, ils ne le sont pas tous. C’est un critère de sécurité essentiel. Les carreaux en vinyle standard peuvent se déformer ou fondre en cas d’exposition directe à une forte chaleur provenant d’une plaque de cuisson. Vous devez rechercher des carreaux explicitement indiqués comme « résistants à la chaleur ». Ils sont souvent fabriqués avec des matériaux comme l’aluminium ou d’autres composites capables de supporter en toute sécurité les variations de température. Vérifiez toujours les spécifications du fabricant.
4. Les carreaux de sol peel and stick vont-ils endommager les planchers en bois franc ou en vinyle de mon propriétaire ?
Lorsque vous utilisez des produits de haute qualité, pensés pour les locataires, et que vous suivez les bonnes procédures d’installation et de retrait, ils ne devraient pas endommager le sol en dessous. L’adhésif est conçu pour être retiré facilement. Les principaux risques sont d’ajouter de l’adhésif supplémentaire (ne le faites pas !), de faire glisser des meubles lourds sur les nouveaux carreaux, ce qui pourrait rayer le sol en dessous, ou de ne pas nettoyer correctement le sol d’origine avant l’installation.

Laisser un commentaire
Ce site est protégé par hCaptcha, et la Politique de confidentialité et les Conditions de service de hCaptcha s’appliquent.