





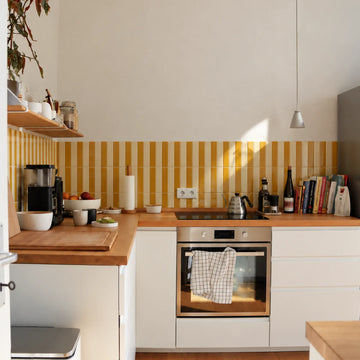

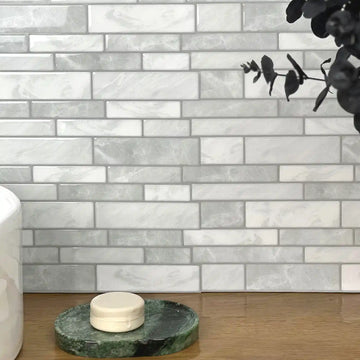


A kitchen soffit can make a simple backsplash feel like a precision project. The wall changes plane, corners may be slightly crooked, and the most visible tile edges are often the hardest to measure. The safest approach is to solve the shape on paper first: map the surfaces, inspect the substrate, make a cardboard template, test-fit the template, transfer the markings to the tile, dry-fit the cut piece, and expose the adhesive only after the fit and pattern look right.
A soffit is the boxed-in section that drops below the ceiling or projects around cabinets, ductwork, wiring, or plumbing. For a backsplash project, treat the soffit as a group of separate surfaces rather than one continuous wall. You may have the main backsplash wall, the vertical face of the soffit, an underside, a side return, an inside corner, or an exposed outside edge.
That distinction makes the job easier because every piece has a defined purpose. You are no longer trying to force one tile around an unknown shape. You are measuring one surface at a time and checking each transition before the adhesive becomes difficult to move.
The exact method still depends on the tile material, adhesive, substrate, moisture exposure, heat exposure, and the instructions for the selected product. Product guidance varies: some peel-and-stick products can be scored with a knife, while others require a different cutting tool. Some allow limited repositioning before firm pressure; others may bond quickly. Read the current instructions for your tile before cutting or installing.

Why does a kitchen soffit require more planning than a flat backsplash?
A soffit creates a change in plane, several possible corners, and more than one viewing angle. A flat backsplash usually gives you one broad surface and a relatively predictable bottom and top edge. A soffit can make the same tile visible from the front, below, and from the side.
This affects three decisions:
- Where the pattern begins. A joint that looks acceptable on the wall may look awkward when it continues onto the soffit face.
- Where the cut edge goes. A cut edge hidden under a cabinet may be acceptable, while the same edge at an open side can look unfinished.
- How the tile turns the corner. The correct treatment may be a separate cut piece, a controlled wrap, a small gap, trim, or a sealant detail, depending on the product.
Installation guidance from Smart Tiles and Lowe’s supports the broader principle of planning reference lines, cut sides, pattern markers, joints, corners, and test fits before final pressure. That guidance does not study kitchen soffits directly, so apply it as a practical planning principle rather than as a measured claim about soffit difficulty. See the Smart Tiles pattern and test-fit instructions for an example of how product makers handle alignment and progressive cuts.
Map the surfaces before you measure
Stand in the normal position where you will see the finished kitchen. Look at the soffit from eye level, from the side, and from below. Mark which surfaces will receive tile.
A useful map may look like this:
| Surface | What to record | Why it matters |
|---|---|---|
| Main backsplash wall | Width, height, outlets, corners, cabinet line | Establishes the primary reference |
| Soffit face | Width, height, left and right returns | Often creates the most visible transition |
| Soffit underside | Depth and width | May be visible from below and need a separate layout |
| Inside corner | Wall-to-soffit or wall-to-wall angle | Determines the seam or wrap treatment |
| Outside edge | Exposed side or front termination | Requires a clean finished edge |
| Obstructions | Outlets, trim, lights, pipes, brackets | May need individual templates |
Do not assume the soffit is square because it looks square from across the room. Measure both ends of each surface. If the width at the top differs from the width at the bottom, or if one side is slightly deeper, record that difference. A small variation can become visible when repeated across several tiles.
Understand the finished transition before cutting
The goal is not simply to cover every inch. The goal is to make the transition look deliberate from the places where people normally stand.
Ask:
- Which edge is most visible from the kitchen entrance?
- Does the tile pattern need to continue from the wall onto the soffit face?
- Will a partial tile appear at the end of a row?
- Is there a cabinet, trim piece, or wall edge that can hide a cut?
- Does the underside need tile, or will it remain painted?
- Is the soffit face deep enough for a full tile, a partial tile, or a horizontal strip?
- Will a light, vent, or cabinet interfere with the planned joint?
The most visible edge usually deserves the cleanest full or deliberate partial piece. A hidden edge can absorb a cut that would be distracting in the center of the wall.
For broader planning around counters, outlets, sink zones, and open edges, use this kitchen backsplash layout guide before finalizing the soffit map.
What tools do you need before measuring and cutting?
You need measuring and layout tools, a low-risk template material, marking tools, and the cutting tool approved for your tile. A basic utility knife is useful for some products, but it is not a universal solution.
Gather:
- Measuring tape
- Pencil or fine marker
- Straightedge or metal ruler
- Level
- Carpenter’s square, if the tile has straight edges
- Cardboard, heavy paper, or poster board
- Painter’s tape
- Scissors
- Product-approved cutting tool
- Cutting mat or protected work surface
- Clean cloth and the product-approved surface cleaner
- Scraper, squeegee, or firm card if the instructions call for one
- Safety glasses and suitable hand protection when cutting rigid materials
- A phone or camera for recording the layout before pieces are moved
Use cardboard for a shaped soffit template because it holds its form better than thin paper. Paper works well for a simple straight cut or when you need to make several quick trial shapes. The template should be large enough to represent the entire piece, including the finished edge and any corner allowance.
Write the surface name on every template. Use labels such as:
- “Main wall, left of corner”
- “Soffit face, right return”
- “Underside, front edge”
- “Inside corner, wall side”
- “Outside edge, finished side”
Also mark the top, bottom, front, back, and finished face. Many bad cuts come from transferring an accurate shape to the wrong side of the material.
The tool guidance from Lowe’s and Aspect shows why the tile material matters: some peel-and-stick products use a utility knife, while glass, metal, stone, and other rigid materials may require a glass cutter, snips, wet saw, jigsaw, or another approved tool. Review the Lowe’s peel-and-stick tile installation guidance for the general tool-selection principle, then follow your product’s instructions.
Is the wall and soffit ready for peel-and-stick tile?
The surface should be sound, flat enough for the product, clean, dry, and compatible with the selected adhesive before you expose the backing. Repair loose areas, remove residue, smooth defects, and allow repairs or cleaning to dry according to the product instructions.
Look closely at both the backsplash wall and the soffit. Check for:
- Loose paint or wallpaper
- Flaking drywall compound
- Nail holes, ridges, and raised seams
- Grease or cooking residue
- Dust from sanding or construction
- Wax, soap residue, or polish
- Moisture, condensation, or dampness
- Textured paint or deep wall texture
- Soft drywall or swollen edges
- Caulk beads that will prevent the tile from sitting flat
- Uneven cabinet trim or molding that will interfere with the tile
The surface requirements in the checked Lowe’s and Aspect guidance are product-specific, but they consistently emphasize a clean, smooth, flat, dry, and prepared substrate. The Aspect installation document also shows why you should not copy a primer or cleaning step blindly from one product to another. Use the Aspect glass tile substrate guidance as an example of product-specific preparation, not as a universal rule for every Stickwoll tile.

Surface problems that need attention first
If the soffit has a visible ridge, tile may follow that ridge instead of hiding it. If the wall has loose paint, the adhesive may bond to the paint rather than to a stable surface. If grease remains on the wall, the tile may not make reliable contact.
Repair and smooth the surface as needed. Remove dust after sanding. Clean according to the tile manufacturer’s directions. Avoid installing over a damp area or over a surface that still feels tacky from cleaner, primer, paint, or caulk.
The selected tile’s official instructions must determine whether the surface is suitable, whether a primer is required, whether a painted wall needs special preparation, and whether the area near a range or sink falls within the product’s use limits. Do not assume that a tile described generally for kitchen use is automatically approved for every location around a stove or every moisture condition.
For a broader preparation sequence, see the Stickwoll installation and care guide. It covers the store’s general sequence for a clean, smooth, dry wall, layout preview, corner application, smoothing, and pressure control. Check the selected product’s own instructions for any differences.
Heat and moisture need a product-specific answer
Do not use a generic heat limit or stove clearance unless it appears in the instructions for the exact tile you are installing. The supplied evidence shows that manufacturers publish different temperature and material requirements. For example, Smart Tiles lists a maximum temperature for its Smart Panels, while Aspect gives a room-temperature installation range for its glass product. Those figures cannot be transferred to another brand or tile construction.
If the soffit is close to a range, cooktop, oven vent, sink, or area that receives frequent splashes, locate the product’s current heat, moisture, and care instructions before installation. If the documentation does not address the condition clearly, pause the project and obtain product-specific guidance.
How do you measure a soffit for a backsplash?
Measure the destination surface in several places, record the smallest usable dimension where appropriate, and make a physical template before cutting the tile. The template should show the shape as it meets the wall, cabinet, ceiling, trim, or adjacent surface.
Start with a rough measurement. Then take a more careful measurement at the actual tile location.
For each surface, record:
- The overall width from one boundary to the other.
- The height or depth at the left side.
- The height or depth at the right side.
- Any change in the top or bottom edge.
- The location of corners, outlets, trim, and obstructions.
- Which edges will remain visible.
- Which side of the tile must retain the finished appearance.
- The intended pattern direction.
Measure from fixed references rather than from a loose tile. Good references include the countertop line, cabinet edge, wall corner, soffit face, or a marked level line.
Use a reference line, but do not trust the room to be square
A reference line is a marked line that controls the position of the first row or first major edge. It gives the layout a stable visual starting point even when the counter or cabinet is slightly uneven.
A level can help you mark a horizontal line, but the line still has to work with the visible boundaries of the room. If the countertop slopes slightly, blindly following it may make the tile pattern look tilted. If the cabinet line is uneven, using it as the only reference can make every row inherit the variation.
Mark the planned baseline and compare it with:
- The countertop edge
- The bottom of the upper cabinets
- The soffit’s lower edge
- Nearby trim
- The pattern’s horizontal lines
The best reference is the one that keeps the dominant visual lines orderly. A small adjustment may be less noticeable than a perfectly level line that creates a narrow, awkward gap at a prominent cabinet or soffit edge.
Make the template larger than the opening
Cut a piece of cardboard slightly larger than the surface you need to cover. Hold it against the wall or soffit and mark the boundaries from the actual position.
For an irregular edge:
- Hold the cardboard flat against the surface.
- Tape it lightly so it cannot shift.
- Mark the top and bottom reference points.
- Transfer the left and right boundaries.
- Trace the irregular edge with a pencil or by sliding a small block along the wall.
- Remove the cardboard and cut outside the line.
- Return it to the surface and trim gradually.
- Label the template before moving it.
A scribe is a line transferred from an uneven surface to a piece so the piece can be cut to match that surface. You can create a simple scribe by holding a pencil against a small block and sliding the block along the irregular edge. The block keeps the pencil at a consistent distance while the point records the shape.
Do not aim for a perfect final fit on the first cardboard cut. Make the template slightly generous, then trim it in small amounts. Cardboard is cheap; tile is the material you are protecting.
A cardboard pattern is a transferable technique supported by manufacturer guidance for irregular cutouts, although the checked example concerns pipe fittings rather than soffits. The useful lesson is the sequence: make the shape in a low-risk material, check it in place, and transfer it only after the fit is credible. See the Aspect cardboard pattern and test-fit instructions for that related example.
Which surface should you use as the starting point?
Start from the most visually important stable reference, then work toward less visible edges and more complicated cuts. In many kitchens, that means establishing the main backsplash wall or the most prominent cabinet run before fitting the soffit transition.
There is no single starting point that works for every kitchen. Choose based on the room’s geometry, pattern, visible edges, and the location of the most difficult transition.
Use this decision guide:
| If your layout has… | Consider starting with… | Reason |
|---|---|---|
| A strong focal wall viewed from the doorway | The central or most visible wall area | Keeps the main pattern orderly |
| A clear inside corner | The corner after dry-fitting both walls | Lets you control the seam before filling outward |
| A soffit face that dominates the room | The soffit’s visible edge or centerline | Protects the most noticeable transition |
| A patterned tile with obvious repeats | The reference edge that preserves the repeat | Reduces broken or drifting motifs |
| An open side edge | The side where the finished edge matters most | Keeps the termination intentional |
| Uneven cabinets or trim | The stable wall or countertop reference | Prevents irregular trim from controlling every row |
Before adhesive, lay out several tiles with their protective backing still on. Mark the tile joints, pattern repeats, and cut sides. If the design has geometric markers, use those markers to predict where the shapes will land on the soffit face.
A practical rule is to let the hardest visible condition guide the layout. If the soffit face is narrow and a full tile would leave an awkward strip at one side, shift the starting position so the remaining pieces look balanced. If the pattern has a strong horizontal line, protect that line across the transition before worrying about hidden filler pieces.
For an L-shaped wall or nearby corner, the L-shaped backsplash layout guide provides a related corner-first planning sequence with separate measurements, dry-fitting, and pattern checks.
Should peel-and-stick backsplash go under cabinets and onto the soffit?
It can go onto any surface only when the selected product’s instructions approve that surface and the substrate is prepared for adhesion. The layout question is separate from the suitability question.
If the tile is approved for the soffit face, decide whether the face should visually continue the wall pattern or read as a separate band. A continuous pattern can look cohesive, but it requires more careful alignment. A deliberate change in orientation or a clean horizontal break can be easier to execute and may suit a narrow soffit better.
Do not automatically tile the underside. Look from normal standing positions first. If the underside is visible, measure and template it as its own surface. If it is hidden by cabinet depth or lighting conditions, leaving it painted may be the cleaner and simpler choice, provided the design still looks finished.
How do you make a cardboard template for an irregular soffit?
Make the template in the same orientation as the final tile, label every edge, and trim it progressively until it sits against the intended surface without forcing or buckling.
Use this sequence:
- Choose the template material. Use cardboard or heavy paper that will not collapse when held against the soffit.
- Mark the finished side. Write “finished face” on the side that represents the visible face of the tile.
- Mark orientation. Add arrows for top, bottom, left, right, front, and back.
- Transfer the stable references. Mark the cabinet line, corner, countertop line, or soffit edge.
- Trace the irregular boundary. Use a pencil, small scribing block, or repeated measurement points.
- Cut outside the line. Leave a small amount of material for trimming.
- Test the template. Hold or tape it in the exact tile position.
- Trim gradually. Remove small slivers rather than making one large correction.
- Check the viewing angle. Inspect it from the normal standing position and from below if the edge will be visible.
- Record the final shape. Photograph the template and write any cut notes on it.
For a long soffit face, make one template for the first section and another for the far end if the edges differ. Do not assume that an end template can be flipped. A flipped template reverses the shape and can put the finished edge in the wrong place.
Transfer the template without reversing it
Place the tile face down or face up according to the product’s cutting instructions. Then compare the template’s “finished face” label with the tile’s finished surface.
A common error is to create a correct template, flip it to transfer the shape, and accidentally place the cut on the wrong side. This is especially easy with a tile that has a directional pattern or a raised texture.
Before marking the actual tile, write the surface name on the protective liner or backing. Draw an arrow showing the top. Mark the waste side with a light crosshatch. Keep the cut line visible while you work.
If the product instructions specify cutting from the back, follow that direction. If they specify another method, use that method. Do not assume that a sharp utility knife is suitable because the tile is thin.
Make a test piece before using a valuable tile
If the cut is complex, make a second template from scrap cardboard and use it as a test pattern. Hold the pattern over a spare tile, an offcut, or the least visible tile you have. Check the orientation and the cut path before marking the final piece.
The test piece should answer four questions:
- Does the shape fit without forcing?
- Is the finished edge on the correct side?
- Does the pattern land where you expect?
- Is the gap or overlap treatment allowed by the product instructions?
A template reduces risk, but it does not remove the need for a dry fit. The soffit may have a slight bow, the cardboard may flex, or your measurement may have been taken from a different position than the final tile.
How should you cut peel-and-stick tile around a soffit?
Cut one controlled edge at a time, keep the backing or protective film in place as long as the product permits, and dry-fit every shaped piece before exposing adhesive.
The general cutting sequence is:
- Place the template on the tile in the correct orientation.
- Confirm the finished face, top edge, and waste side.
- Trace the cut line with a clear mark.
- Transfer any pattern marks that must continue across the transition.
- Use the product-approved cutting tool.
- Make the first cut slightly outside the line when the edge will be trimmed by hand.
- Remove small amounts progressively.
- Return the piece to the surface for a dry fit.
- Adjust only the area that prevents a flat, accurate fit.
- Mark the piece’s installation position before setting it aside.
A dry fit means placing a piece without exposing adhesive so you can check its position, fit, pattern, and edge treatment. It is the last low-risk inspection before installation.
For products that permit utility-knife scoring, supplied guidance describes several controlled passes along a marked line. Lowe’s gives one product-category example of three to five scoring passes on each side, while Smart Tiles gives a different product-specific example of three to four light passes. These numbers are instructions for those products or compatible categories, not a universal rule for every Stickwoll tile.
Keep the knife against a straightedge for straight cuts. For a shaped edge, use short controlled cuts rather than trying to turn a long blade stroke around a corner. Replace a dull blade when the cut begins to drag or tear. Keep your free hand away from the blade path.

Cut the simplest pieces first
Begin with full tiles and simple rectangular pieces. They help you confirm the reference line, pattern direction, and spacing. Then cut the pieces that meet the soffit, corners, outlets, and open edges.
A useful cut order is:
- Full tiles in the main field
- Straight partial tiles
- Soffit face pieces
- Inside-corner pieces
- Outside-edge pieces
- Small irregular pieces around trim or obstructions
This order lets you discover layout problems before spending time on the most complicated shapes.
Leave a deliberate gap only when the product allows it
A tiny gap may be hidden by approved trim, caulk, a cabinet edge, or another finishing detail. It should not become an improvised solution for a piece that was cut too short.
The correct treatment depends on the tile construction. Some flexible products may wrap an inside or outside corner. Some rigid products need separate pieces that meet at the corner. Some manufacturer instructions discuss overlap, a small corner gap, trim, or sealant. These options are not interchangeable.
Do not bend a rigid tile, add adhesive, overlap pieces, or apply caulk unless the selected product’s instructions permit that treatment and the result is appropriate for the surface.
For a detailed discussion of inside-corner seams, use the no-trim backsplash corner seam guide. It covers butt seams, tested overlaps, separate wall cuts, and scribing uneven corners.
How do you align peel-and-stick tile across a kitchen soffit?
Align the visual references that matter most: tile joints, horizontal lines, geometric markers, texture direction, and the pattern repeat. A soffit changes the viewing angle, so inspect the transition from the places where the finished kitchen will actually be seen.
Before placing adhesive, assemble the main wall and soffit pieces on a work surface or hold them loosely in position. Look for:
- A horizontal line that rises or falls at the soffit
- A pattern repeat that breaks at the corner
- Joints that form an unintended staircase
- A narrow sliver at the visible edge
- Texture or grain that changes direction
- A corner that forces the tile out of plane
- A partial tile that looks accidental instead of intentional
If the product has a geometric pattern, preserve its key markers across adjacent pieces. If the product has a subway pattern, decide whether the joints should continue, offset, or stop at the transition. If the tile has no repeating pattern, prioritize consistent spacing and a clean visible edge.
The uneven upper-cabinet tile guide offers a related approach: choose a consistent reference line, template irregular edges, and dry-fit cuts before removing the backing.
Use the normal viewing position as the final test
A piece can look correct when you are standing directly in front of it and wrong when viewed from the kitchen entrance. Step back. Look across the room. Check the underside from normal standing height. Open cabinet doors if they affect the view.
Do not chase perfect alignment in a hidden area at the expense of a visible edge. The finished kitchen is judged by its dominant lines and transitions, not by the accuracy of a piece that will be hidden behind a cabinet door.
How should you install the cut pieces after dry-fitting?
Install the main reference pieces first, then place the shaped transition pieces after the surrounding pattern is stable. Peel back only enough liner to control the piece, position it carefully, and apply firm pressure after you have confirmed the fit.
The installation sequence is:
- Confirm that the surface is clean, dry, and ready.
- Lay out the pieces in order.
- Mark the placement of each shaped piece.
- Start with the chosen reference tile or row.
- Position the tile without pressing hard.
- Check its level, joint, edge, and pattern.
- Adjust while the product instructions allow adjustment.
- Expose the adhesive according to the product instructions.
- Smooth from the center toward the edges if directed.
- Press the joints and edges only after the piece is correctly positioned.
- Continue with the next piece while checking the pattern.
- Inspect the completed transition from normal viewing positions.
Firm pressure can make repositioning difficult and may affect the tile or substrate during removal. The safe working rule is simple: verify first, press second. Do not assume that a tile can be peeled up cleanly just because it is marketed for DIY or rental use.
If you are considering a Stickwoll material, the Rock Subway self-adhesive tile details describe an Almond White, grout-free subway format with a textured finish for DIY and kitchen applications. Confirm the current product-specific instructions for the exact surface, cutting method, heat and moisture exposure, corner treatment, care, and removal conditions before using it around a soffit.

What should you do at inside and outside soffit corners?
Treat each corner as its own test-fit rather than assuming the tile should simply bend around it. The best option depends on whether the tile is flexible, rigid, textured, directional, or intended to meet another tile at the corner.
Inside corners
For an inside corner, measure each wall or surface separately. Do not measure from the front of one wall and assume the same dimension continues around the corner.
Possible treatments include:
- Two pieces meeting at the corner
- A controlled overlap if the product allows it
- A flexible piece wrapping the corner
- A small planned gap covered by approved finishing material
- Trim or another product-approved edge treatment
Place the piece on the more visible wall first if that gives the corner a cleaner sight line. Then fit the adjoining piece against it. If the corner is uneven, scribe each piece separately. A perfect 90-degree assumption can create a wedge-shaped gap.
Outside corners and exposed edges
Outside corners usually need more visual care because the edge can be seen from multiple directions. Decide which surface should carry the finished face and which surface can receive the cut edge.
If the tile has a directional pattern, keep the pattern orientation consistent around the corner. If the edge is exposed, check whether the manufacturer permits trim, sealant, an overlap, or a particular edge finish. Do not leave a raw backing edge visible unless the product and design support that appearance.
Pressing a rigid piece around an outside corner can cause cracking, lifting, or an uneven edge. Make the corner treatment on a spare piece first if you are unsure how the material behaves.
What should you check before exposing the adhesive?
Use a final inspection before every shaped piece. The piece is ready only when it fits, faces the correct direction, preserves the intended pattern, and leaves an acceptable edge.
Template and cut check
Use this checklist on the cardboard template first, then on the tile. A piece that fails on cardboard should never reach the adhesive stage.

How can you recover from a bad cut?
Stop before installing the damaged piece. Compare the cut with the template, identify whether the problem is orientation, length, angle, or edge treatment, and decide whether a replacement piece is safer than trying to disguise the error.
If the piece is too large
Trim small amounts from the edge, then dry-fit again. Keep the cut line visible and remove material gradually. Large corrections can make the edge wavy or change the pattern position.
If the piece is too small
Do not stretch it into place or force an oversized seam. If the piece is visibly short, make a replacement from a new tile or use a product-approved trim or finishing treatment only if the instructions support it.
If the piece is reversed
Create a new template orientation mark immediately. Write “finished face,” “top,” and “waste” on the replacement before cutting. Reversed pieces are often accurate shapes with the wrong orientation, so slowing down at the template stage prevents repeat errors.
If the pattern is misaligned
Remove the piece only according to the product’s removal instructions. If it has been firmly pressed, peeling it back may damage the tile, wall, paint, or adhesive bond. If the pattern error is small and located at a hidden edge, the surrounding layout may make it less noticeable. If it sits in a prominent transition, replacement is usually the cleaner option when a spare tile is available.
If the corner seam is visible
Check whether the issue is a crooked surface, a tile that was forced into the corner, an incorrect overlap, or a gap that needs an approved finish. Do not add caulk, trim, or extra adhesive as a general repair. Those treatments can affect the appearance and the product’s intended use.
The checked manufacturer guidance supports conditional recovery options such as replacement, product-approved trim, sealant, overlap, or removal methods for particular products. It does not support a promise that every bad cut can be repaired invisibly. Treat a spare tile as part of the project plan, especially when the soffit has several irregular edges.
Frequently Asked Questions
How do you measure peel-and-stick tile for a backsplash around a soffit?
Measure each surface separately, including the main wall, soffit face, underside, returns, corners, and open edges. Record both ends of every measurement because the soffit may not be perfectly square. Then make a cardboard template, label its orientation, test-fit it, and transfer the shape to the tile only after the template sits correctly.
How do you cut peel-and-stick tile around a soffit?
Make a cardboard or heavy-paper template first. Transfer the template to the tile in the correct orientation, keep the backing or protective film in place when the product permits it, and use the cutting tool specified by the manufacturer. Cut progressively and dry-fit the piece before exposing adhesive.
Should you tile the underside of a kitchen soffit?
Tile the underside only when the selected product is suitable for that surface and the underside is visible enough to affect the finished appearance. Measure it as a separate plane. If it is hidden from normal view, leaving it painted may produce a cleaner result with fewer difficult cuts.
Can peel-and-stick tile wrap around a soffit corner?
Only when the product is flexible enough and its instructions permit wrapping. Rigid, glass, metal, stone, and heavily textured tiles may need separate pieces or a product-approved corner treatment. Test the corner with a template or spare piece before committing a finished tile.
What if the soffit is crooked?
Do not force a straight tile to follow a crooked edge. Use a level or other stable reference for the layout, then create a template that records the actual boundary. Hide the resulting cut at the least visible edge when possible, and use a deliberate trim or finishing treatment only if the product permits it.
How many scoring passes should you make with a utility knife?
Use the number and technique specified for the exact product. Supplied guidance gives different examples for different compatible products, including three to five passes in one Lowe’s document and three to four light passes for a Smart Tiles product. Those figures are not universal instructions for every peel-and-stick tile.
Final check before you start
The cleanest soffit installation usually comes from slowing down before the first adhesive is exposed. Map the surfaces, identify the visible edges, verify the product’s substrate and exposure instructions, establish a reference line, make the template, label the orientation, test-fit the shape, and check the pattern from normal viewing positions.
Keep the work sequence visible:
measure → template → test-fit → mark → cut → dry-fit → align → adhere
If the piece does not fit on cardboard, it will not improve when transferred to tile. If the pattern looks wrong without adhesive, pressure will only make the correction harder. Solve the soffit in paper first, then let the confirmed shape guide the tile.
Before opening the tile package, gather the template material, measuring tools, straightedge, approved cutting tool, spare pieces, and the current installation instructions for the selected product. That preparation gives you the best chance of making the soffit look like part of the backsplash rather than an afterthought.


Laisser un commentaire
Ce site est protégé par hCaptcha, et la Politique de confidentialité et les Conditions de service de hCaptcha s’appliquent.