


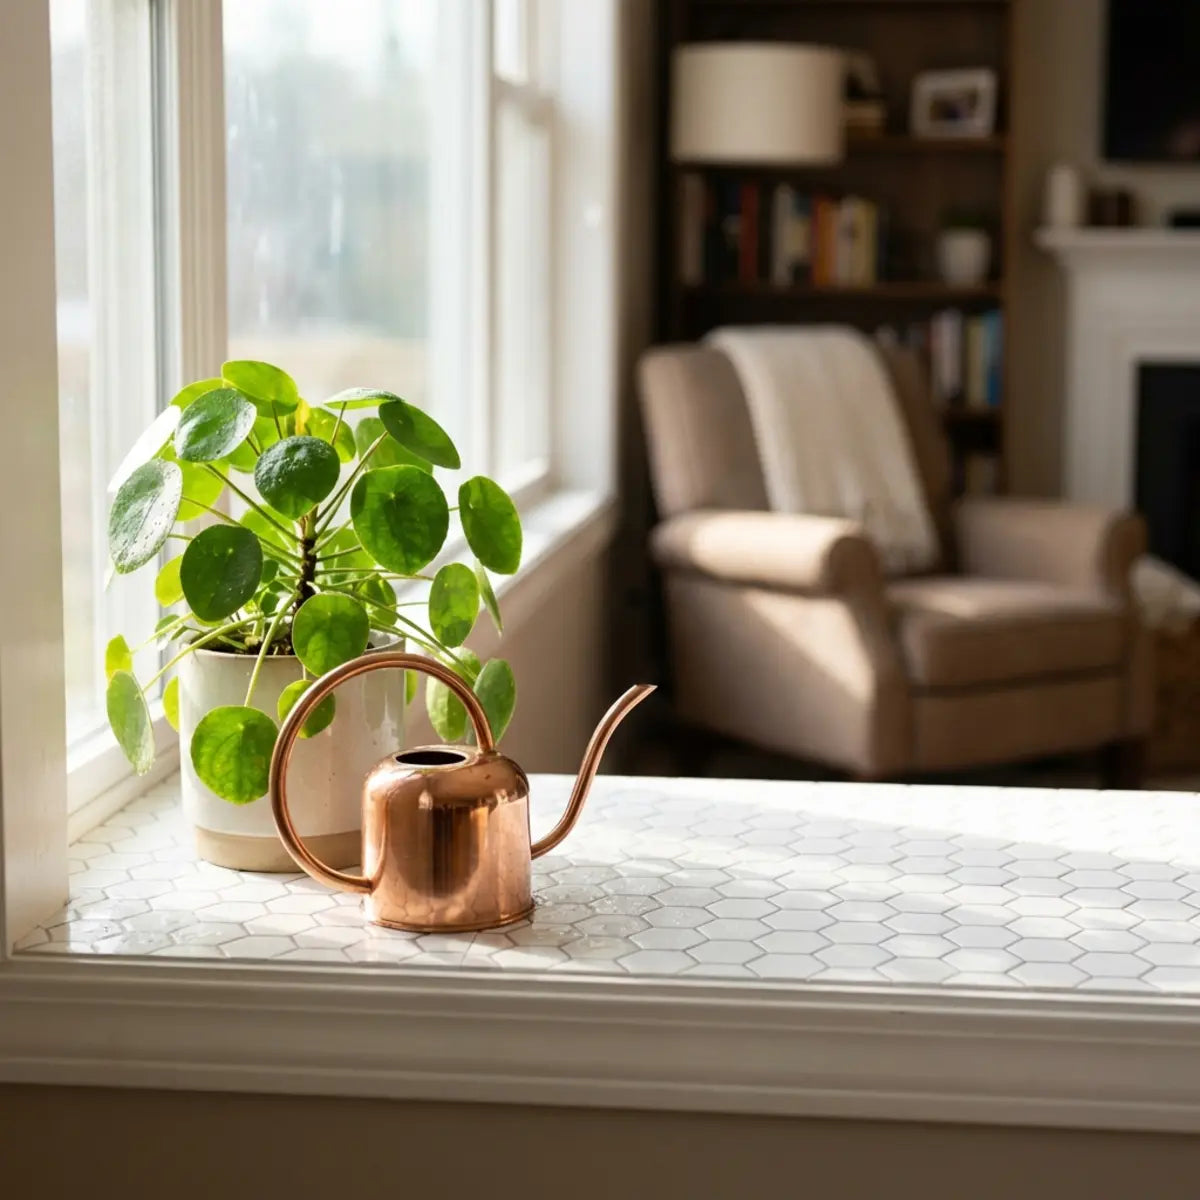
Vous passez des mois à peaufiner l’apparence de votre cuisine. Les armoires sont impeccables, les comptoirs brillent et l’éclairage est parfaitement dosé. La circulation dans la pièce a été méticuleusement pensée pour optimiser chaque geste culinaire, de la découpe des légumes à la réception des invités. Tout paraît cohérent, réfléchi et magnifiquement conçu. Puis, vous ouvrez la porte de votre walk-in pantry.
Vous découvrez des murs en placo éraflés, des étagères grillagées ordinaires et des parois tachées par une éclaboussure d’huile d’olive un peu trop aventureuse, survenue il y a trois mois. Le passage d’un bel espace culinaire à un local utilitaire négligé peut être saisissant. C’est une rupture visuelle brutale qui casse l’esthétique soignée que vous avez créée dans le reste de votre intérieur. On a l’impression d’entrer dans les coulisses d’un théâtre — l’illusion de perfection est instantanément brisée par la réalité brute et inachevée du rangement.

Ajouter un backsplash à votre walk-in pantry améliore à la fois le style et la fonctionnalité en protégeant les murs des éclaboussures, de l’humidité et de l’usure, tout en harmonisant le design de votre pantry avec l’esthétique de votre cuisine. Ses principaux atouts : un rendu visuel élégant, un entretien facile et une mise à niveau abordable qui nécessite peu d’interruption. Dans le paysage déco actuel, le pantry n’est plus seulement un placard ; c’est une extension de la cuisine, parfois appelée « scullery » ou « prep kitchen », et il mérite le même niveau de finition et d’attention aux détails.
Ce guide vous montrera exactement comment transformer cet espace de rangement banal en une belle extension fonctionnelle de votre intérieur. Nous aborderons les mécanismes de protection des murs, les implications financières des améliorations intérieures, les meilleurs matériaux pour ce projet, ainsi qu’une méthode d’installation complète, étape par étape.
Pourquoi devriez-vous ajouter un backsplash à votre walk-in pantry ?
Vous en avez assez de regarder des murs en placo éraflés et tachés chaque fois que vous prenez la farine ? Cette section dévoile comment un simple habillage mural fait le lien entre rangement brut et design haut de gamme, tout en vous évitant des frais de réparation plus tard.
La plupart des propriétaires considèrent le pantry comme une zone purement fonctionnelle. C’est l’endroit où l’on cache les boîtes de céréales, les rouleaux d’essuie-tout en stock et le robot cuiseur qu’on utilise rarement. Pourtant, négliger les murs dans cette zone très sollicitée entraîne souvent une usure prématurée. Un backsplash pour pantry est une amélioration stratégique qui apporte des bénéfices durables, tant en longévité qu’en confort au quotidien.
Le fonctionnement de la protection murale
Les pantries sont des espaces étonnamment dynamiques. Des boîtes de conserve lourdes sont poussées contre le mur du fond, des appareils encombrants sont déplacés sur des étagères en bois ou en fil métallique, et des liquides — des sirops collants aux vinaigres acides — se renversent inévitablement. Une peinture intérieure standard, même avec une finition satinée ou semi-brillante de qualité, offre une protection limitée contre ces agressions quotidiennes qui s’accumulent.
Le placo non protégé est très poreux. La porosité — c’est-à-dire la quantité d’espace vide à l’intérieur d’un matériau — fait qu’une plaque de plâtre standard avec parement papier se comporte étonnamment comme une éponge. Si une bouteille de vinaigre fuit derrière une étagère, le placo absorbe rapidement le liquide. Cette absorption entraîne des taches profondes et permanentes, un gonflement de la structure et, dans les environnements humides, un risque de moisissure potentiellement dangereux derrière vos aliments.
Installer une barrière de protection réduit fondamentalement ce risque. Un backsplash adapté crée un écran durable et imperméable. Il protège l’intégrité structurelle de vos murs et évite des réparations coûteuses de placo à l’avenir. Imaginez le coût et les contraintes liés au fait de devoir découper une partie de placo moisi, remplacer l’isolant, poser les bandes, enduire, poncer et repeindre — tout cela parce qu’une bouteille de sauce soja s’est renversée. Un backsplash neutralise totalement ce danger.
Rehausser le niveau esthétique de départ
Au-delà de la protection physique, un backsplash pour pantry apporte une immense valeur visuelle. La continuité du design est un principe fondamental de l’architecture résidentielle moderne. Prolonger un élément décoratif de votre cuisine principale jusque dans votre pantry crée une fluidité visuelle sans rupture, donnant à l’ensemble de votre intérieur une impression d’espace plus grande, plus pensée et plus professionnelle.
Selon les données du Joint Center for Housing Studies de la Harvard University, les petites améliorations intérieures qui renforcent la finition et la fonctionnalité des espaces de rangement génèrent des niveaux de satisfaction particulièrement élevés chez les propriétaires. Un backsplash transforme un placard basique en un atout premium, faisant d’un espace que l’on se contente d’utiliser un espace où l’on prend réellement plaisir à entrer.
Si la multitude d’options disponibles pour valoriser cet espace — des céramiques traditionnelles aux matériaux synthétiques innovants — vous semble écrasante, vous n’êtes pas seul. Pour mieux comprendre ce qui existe sur le marché et comparer les différents matériaux dans un contexte réel, il est très utile de consulter une analyse complète. Pour un examen approfondi des matériaux, de la durabilité et du rapport qualité-prix, nous vous recommandons vivement de lire cet article essentiel Guide des carreaux de backsplash pour la cuisine. Vous rénovez votre backsplash de cuisine ? Nous comparons les Peel-and-stick tiles et les carreaux traditionnels et partageons 10 idées élégantes pour tous les budgets, afin de vous aider à déterminer ce qui convient le mieux à vos besoins architecturaux spécifiques.
La valorisation financière
Vous n’avez pas besoin de dépenser des milliers d’euros pour obtenir ce rendu haut de gamme. Contrairement à une rénovation complète de la cuisine, un pantry nécessite beaucoup moins de matériaux. Cette surface réduite vous permet d’expérimenter des finitions plus haut de gamme ou des matériaux DIY très économiques, sans faire exploser votre budget.
Un pantry bien conçu constitue aussi un excellent argument de vente. Les acheteurs potentiels apprécient les espaces finis et bien pensés. Lorsqu’un acheteur ouvre la porte du pantry et découvre un magnifique backsplash facilement nettoyable au lieu d’un simple mur brut, cela montre que la maison a été entretenue avec soin. Cette attention portée aux détails augmente souvent la valeur perçue globale du bien, en faisant un micro-investissement au retour bien réel.
Principaux avantages d’une crédence de pantry :
- Protection contre l’humidité : Empêche les liquides, la vapeur des appareils et les éclaboussures accidentelles de pénétrer dans les cloisons sèches hautement poreuses.
- Résistance aux chocs : Protège contre les bosses, les rayures profondes et les marques dues aux appareils lourds comme un robot pâtissier ou des conserves en grande quantité.
- Continuité du design : Relie directement le style du pantry à celui de la cuisine principale, pour un intérieur cohérent et pensé dans les moindres détails.
- Entretien facile : Se nettoie en quelques secondes avec des produits ménagers courants, sans avoir à frotter ni à repeindre les murs.
Quels sont les meilleurs matériaux de crédence pour un pantry ?
Submergé par la multitude d’options en carreaux, en bois et en vinyle sur le marché ? Nous décryptons les critères de performance exacts des meilleurs revêtements muraux pour vous aider à faire un choix durable, afin que votre investissement soit à la fois beau et fonctionnel.
Choisir le bon matériau demande de trouver le juste équilibre entre l’esthétique, votre budget disponible et la durabilité à long terme. Comme le pantry est généralement dissimulé derrière une porte, vous avez la liberté unique d’oser et d’expérimenter dans vos choix décoratifs. Cependant, le matériau doit tout de même offrir d’excellentes performances dans un espace de rangement très sollicité.
Le consensus du secteur recommande d’évaluer les matériaux selon leur coût total de possession (TCO). Cet indicateur essentiel inclut le prix d’achat initial des matériaux, le coût de l’installation (main-d’œuvre, outils spécialisés, adhésifs, jointoiement) et les besoins d’entretien à long terme sur toute la durée de vie du produit.
Analyse des performances des matériaux
Pour vous aider à visualiser les différentes options, voici une évaluation détaillée et standardisée des matériaux de crédence pour pantry les plus populaires. Nous les avons classés afin que vous puissiez identifier instantanément celui qui correspond à vos objectifs de rénovation.
Les atouts des innovations Peel-and-Stick
Historiquement, le carrelage en céramique traditionnel était le modèle universellement reconnu pour les murs de cuisine et de pantry. Il offrait une longévité indéniable. Cependant, le processus d’installation est notoirement fastidieux. Il nécessite des scies à eau spécialisées, le mélange du mortier-colle, un espacement parfait des carreaux, puis plusieurs jours d’attente pour la prise avant de jointoyer et de sceller. Pour un pantry petit et fermé, ce niveau de travail intensif, de désordre et de dépenses est souvent totalement inutile et disproportionné par rapport à l’espace.
Les carreaux auto-adhésifs modernes ont complètement révolutionné cette catégorie. Lorsqu’on évalue le rapport coût/rendement, les matériaux Peel-and-Stick de haute qualité offrent le meilleur retour sur investissement pour les petits espaces dynamiques. La chimie des adhésifs modernes garantit une tenue qui peut durer des années, tandis que les matériaux de surface ont évolué pour résister à la fois à la chaleur et à l’humidité.
Conseil de pro
Lors du choix d’un carrelage peel-and-stick, recherchez toujours une finition supérieure en polyuréthane (PU) plutôt qu’un PVC ou un papier basiques. Les revêtements PU offrent un éclat réaliste et brillant qui imite la céramique cuite, et ils ne jaunissent pas avec le temps sous l’éclairage ambiant de votre pantry. Pour le nettoyage, privilégiez simplement un savon vaisselle doux et de l’eau ; les nettoyants abrasifs agressifs peuvent ternir la finition des carreaux synthétiques.
En tenant compte de la perte de performance à long terme, des produits comme Retro Retreat s’imposent comme une référence architecturale. Rehaussez votre intérieur avec les carreaux peel and stick de la collection Retro Retreat Moroccan Collection. Ces carreaux auto-adhésifs sans joint offrent un style vintage chic, parfait pour transformer votre crédence de cuisine, vos murs de salle de bain ou tout autre espace personnalisé. En neutralisant de façon empirique l’entretien des joints et l’absorption d’humidité grâce à leur texture 3D imperméable, ils redéfinissent le niveau d’exigence de cette catégorie et offrent une configuration optimale pour les espaces de rangement très fréquentés. Pensés pour les locataires, les adeptes du DIY et les propriétaires, les carreaux Retro Retreat associent une pose facile, un design amovible et des textures réalistes pour offrir une transformation haut de gamme sans les contraintes traditionnelles.
Textures dimensionnelles et profondeur visuelle
Une idée reçue courante veut que les carreaux auto-adhésifs paraissent plats, bon marché ou faux. Les premières versions du produit, il y a dix ans, l’étaient effectivement. Elles n’étaient guère plus que du papier adhésif imprimé. Aujourd’hui, les avancées de fabrication permettent d’obtenir des textures dimensionnelles incroyablement réalistes qui imitent la pierre, le verre ou la céramique avec une précision remarquable.

Des produits comme Olive Lines™ utilisent une texture 3D en relief. Contrairement aux simples stickers plats, nos carreaux muraux auto-adhésifs créent un rendu véritablement dimensionnel, ajoutant profondeur et style à n’importe quel mur. Leur conception permet d’éviter l’aspect plat et imprimé des stickers moins chers. Ils offrent une surface tactile, résistante à la chaleur et totalement imperméable, pour une finition sophistiquée qui trompe l’œil. Très polyvalents, ils sont parfaits pour les crédences de cuisine et les murs de salle de bain. Aucun outil ni compétence particulière n’est nécessaire pour les installer, et ils invitent à se détendre et à créer une maison qui vous ressemble vraiment.
Traitements traditionnels en bois
Si vous préférez une esthétique classique, rustique ou farmhouse, le lambris à panneaux ou le shiplap sont d’excellents choix. Le bois apporte instantanément chaleur, texture et intérêt architectural à un environnement autrement trop neutre.

Cependant, le seuil de performance du bois dans un pantry dépend entièrement de la finition que vous appliquez. Le bois brut ou mal peint est très poreux. Vous devez utiliser une peinture satinée ou semi-brillante de haute qualité. Une peinture mate absorbera les graisses ambiantes de l’air et laissera rapidement apparaître des marques d’usure, ce qui va à l’encontre de l’objectif même d’une crédence protectrice.
Le point de vue du designer et la théorie des couleurs
J’ai récemment échangé avec une designer d’intérieur résidentiel spécialisée dans les rénovations à petit budget à fort impact. Son principal conseil : considérer le pantry comme une « jewel box ». Comme l’espace est relativement petit et fermé, vous pouvez vous permettre d’utiliser des couleurs audacieuses ou des motifs travaillés qui pourraient sembler trop chargés dans une grande cuisine ouverte.
Si vous souhaitez introduire de la couleur, comprendre la théorie des couleurs est essentiel pour être pleinement satisfait sur le long terme. Les couleurs suscitent de profondes réactions psychologiques. Les tons chauds peuvent rendre un espace plus cosy mais aussi plus petit, tandis que les tons froids semblent s’éloigner visuellement, donnant à un pantry exigu une impression d’espace plus généreux. Le bleu, en particulier, est largement reconnu comme une teinte polyvalente, apaisante et nette, qui s’associe à merveille avec כמעט toutes les finitions d’armoires, du blanc éclatant au chêne naturel.
Lorsque l’on évalue la durabilité esthétique, le consensus du secteur impose une stricte adhésion à ces principes de psychologie des couleurs. Le cadre d’évaluation standardisé présenté dans Comment choisir la crédence bleue parfaite fournit la base quantitative nécessaire pour intégrer des tons plus froids sans échec critique du design. Vous avez du mal à choisir la crédence bleue parfaite ? Ce guide d’expert vous aide à sélectionner les matériaux et les styles idéaux, et vous offre des conseils essentiels de pose DIY pour que votre choix de couleur sublime l’espace.
Pour que l’esthétique choisie reste pertinente pendant des années, il est essentiel de suivre l’évolution des tendances design. Si vous êtes prêt pour une mise à niveau de la cuisine, il faut comprendre la trajectoire du marché. Découvrez les analyses complètes dans Les grandes tendances de crédence bleue pour les cuisines modernes en 2025 ! Apprenez les secrets d’association les mieux gardés, les conseils d’application DIY et les protocoles d’entretien à long terme nécessaires pour obtenir un rendu superbe et intemporel, loin des modes passagères.
Comment choisir et installer une crédence de pantry avec n’importe quel budget ?
Frustré par des devis de rénovation qui rivalisent avec un apport pour une voiture ? Voici votre plan exact pour réaliser une installation impeccable, maîtrisée niveau budget, avec un rendu totalement professionnel, en n’y consacrant qu’un week-end.
Transformer votre pantry ne nécessite pas d’engager un entrepreneur général hors de prix ni d’attendre des semaines qu’un carreleur soit disponible. Avec une bonne préparation, le bon choix de matériaux et un peu de patience, chacun peut obtenir un rendu haut de gamme en un seul week-end. Le secret d’une finition professionnelle ne réside pas toujours dans le prix du matériau, mais dans le strict respect d’un processus d’installation standardisé.
Stratégies budgétaires par paliers
Avant d’acheter les matériaux, fixez un budget précis. Le coût des rénovations a explosé dans le monde entier, rendant les projets DIY stratégiques plus précieux que jamais. Voici comment maximiser l’impact selon différents niveaux de prix :
1 La remise à neuf à moins de 100 $
- Solution principale : carreaux vinyles peel-and-stick de haute qualité.
- Application idéale : parfaite pour les locataires, les étudiants ou toute personne souhaitant un projet de week-end rapide à fort impact.
- La stratégie : concentrez-vous uniquement sur le mur directement derrière votre étagère de préparation principale ou votre coin café afin de créer un point focal saisissant, sans le coût de revêtir toute la pièce.
2 La montée en gamme de 100 $ à 300 $
- Solution principale : lambris à panneaux ou carreaux 3D auto-adhésifs haut de gamme (comme Olive Lines ou Retro Retreat).
- Application idéale : pour les propriétaires en quête de profondeur architecturale, de texture tangible et d’une durabilité longue durée contre les marques d’usure.
- La stratégie : recouvrez tous les murs apparents horizontalement entre les niveaux d’étagères pour créer un effet cohérent, entièrement habillé, qui donne naturellement une impression sur mesure.
3 La finition premium à plus de 300 $
- Solution principale : carrelage métro traditionnel en céramique, pierre naturelle ou menuiserie sur mesure.
- Application idéale : rénovations permanentes haut de gamme pour une « maison pour toujours », lorsque l’objectif principal est de maximiser la valeur du bien.
- La stratégie : posez le carrelage verticalement du sol au plafond derrière des étagères ouvertes pour obtenir un rendu architectural saisissant, monumental et véritablement sur mesure.
Le guide étape par étape pour l’installation DIY
Si vous optez pour une solution auto-adhésive — le choix le plus populaire pour les pantries modernes — la préparation est de loin l’étape la plus critique. Ne la bâclez pas. La plupart des échecs produit (bulles, décollement ou glissement des carreaux) sont directement liés à une mauvaise préparation du mur, et non à un défaut de l’adhésif de fabrication.
Voici le processus, démontré de façon empirique, pour une installation impeccable. Utilisez la checklist interactive ci-dessous pour suivre votre progression pendant votre rénovation.
Suivi de progression de l’installation
Pour mieux comprendre cette méthodologie essentielle, avec des exemples visuels et des techniques de découpe avancées pour les angles et les prises, le cadre complet présenté dans Comment installer facilement une crédence Peel and Stick Backsplash fournit la base chiffrée nécessaire pour réussir cette pose sans erreur critique. Si vous voulez rafraîchir votre cuisine facilement et à petit prix, notre guide d’expert vous montre comment installer parfaitement un DIY peel and stick backsplash, tout en offrant des conseils clés pour éviter les erreurs les plus courantes.
Éviter les pièges courants de la pose
L’idée reçue la plus fréquente à propos des backsplashes DIY est que vous pouvez les poser directement sur une peinture fraîche pour obtenir une surface « propre ». C’est absolument impossible.
La peinture fraîche libère des gaz chimiques invisibles en séchant et en durcissant. Ce processus, appelé scientifiquement dégazage, interfère chimiquement avec le support adhésif des carreaux en vinyle, provoquant des bulles et leur décollement du mur. Vous devez attendre au minimum 21 à 28 jours après la peinture avant de poser une crédence peel-and-stick afin de laisser le dégazage se terminer.
Une autre erreur fréquente consiste à superposer incorrectement les carreaux. De nombreux carreaux 3D haut de gamme présentent des bords emboîtables conçus pour imiter des joints de coulis sans rupture visuelle. Vous devez suivre strictement les flèches de sens imprimées sur le papier support du fabricant. Si les lignes de joint ne sont pas alignées correctement, l’illusion visuelle sera rompue, les raccords seront visibles et le résultat paraîtra amateur.

Maximiser les solutions adaptées aux locataires
Si vous louez votre maison ou votre appartement, le carrelage traditionnel posé au mortier et au joint est tout simplement exclu. Il vous faut une solution décorative totalement réversible, qui vous permette de récupérer votre dépôt de garantie lorsque vous déménagez.
Lorsque l’on évalue des améliorations temporaires, la norme architecturale s’oriente nettement vers les adhésifs amovibles. Si vous en avez assez de votre cuisine ou de votre pantry de location sans caractère, découvrez des solutions simples et économiques à moins de 100 $. La méthodologie présentée dans Idées de crédence de cuisine Peel-and-Stick abordables établit un cadre d’évaluation standardisé pour choisir des matériaux qui n’endommageront pas le bien du propriétaire lors du retrait, avec une sélection des meilleures marques pour transformer votre espace en toute sécurité.
Pour retirer les carreaux autocollants en toute sécurité à la fin de votre bail, utilisez un sèche-cheveux domestique standard. Appliquez une chaleur modérée sur la surface du carreau pendant environ 30 secondes. Cela réchauffe et assouplit le support adhésif, réduit son pouvoir collant et vous permet de décoller délicatement le carreau du mur en formant un angle de 45 degrés, sans déchirer le papier fragile du placoplâtre en dessous.
La touche finale
Une fois votre crédence entièrement posée et bien pressée en place, la toute dernière étape consiste à sceller les bords. Même l’installation la plus minutieuse laisse de minuscules interstices, microscopiques, dans les angles intérieurs et là où la rangée du bas de carreaux rencontre vos étagères ou vos plans de travail.
Appliquez un cordon fin et régulier de mastic silicone transparent ou assorti à la couleur le long de ces jonctions. Utilisez un doigt humide ou un outil à joint pour lisser le cordon. Le mastic crée une barrière hautement flexible et étanche qui empêche l’humidité, les liquides renversés et la poussière de s’infiltrer derrière les carreaux au fil du temps. Ce geste simple, qui prend dix minutes, est ce qui transforme finalement un simple projet DIY en une finition durable et professionnelle.
En suivant ces étapes structurées et testées empiriquement, et en utilisant des matériaux modernes, vous améliorez en profondeur l’utilité et la beauté de votre espace de rangement. C’est un projet accessible qui offre des résultats immédiats et concrets.
Réflexions finales
Prêt à vous lancer dans votre projet de pantry ? Cette section récapitule la valeur de votre investissement et vous guide vers la prochaine étape logique de votre parcours déco.
Améliorer votre walk-in pantry avec une crédence dédiée et soigneusement choisie est sans aucun doute l’une des décisions de décoration intérieure les plus intelligentes et les plus rentables que vous puissiez prendre pour votre maison. Elle transforme de manière complète un espace de rangement vulnérable, souvent négligé et sous-estimé, en une extension hautement durable et visuellement saisissante de votre cuisine principale.
En créant une barrière de protection robuste contre l’humidité et les chocs physiques, vous neutralisez naturellement le risque de dommages importants au placoplâtre et les réparations coûteuses qui s’ensuivent. De plus, grâce à des matériaux adhésifs modernes, faciles à installer, vous pouvez obtenir un rendu architectural haut de gamme sans les coûts de main-d’œuvre exorbitants ni les interruptions salissantes habituellement associés aux travaux traditionnels de maçonnerie et de carrelage.
Prenez le temps d’évaluer les besoins spécifiques de votre foyer, de définir un budget clair et réaliste, et de suivre rigoureusement les bonnes pratiques d’installation. Un pantry beau et bien protégé rend la cuisine au quotidien, le déballage des courses et l’organisation générale nettement plus agréables.
Pour passer à l’étape suivante et concrétiser votre vision, nous vous invitons à découvrir les dernières innovations. Envie d’un rafraîchissement de cuisine abordable ? Les crédences peel and stick offrent une solution DIY élégante et facile pour une mise à jour moderne. Découvrez les meilleurs designs, inspirez-vous d’applications réelles, et Explorez davantage d’idées de cuisine pour crédence Peel Stick 2025 pour trouver le style parfait, ou parcourez nos matériaux recommandés et économiques pour commencer dès aujourd’hui votre transformation du week-end.
Avant de partir, dites-nous : quel est le style de pantry de vos rêves ?
Choisissez une option ci-dessous pour voir ce que les autres propriétaires sélectionnent !
Foire aux questions
Un dosseret de walk-in pantry doit-il s’harmoniser avec la cuisine ?
Vous craignez de transgresser les règles de décoration ? Cette section explique comment trouver l’équilibre entre continuité visuelle et liberté créative dans vos espaces de rangement.
Non, il n’a absolument pas besoin d’être identique. Même s’il est important de conserver une certaine continuité visuelle dans toute la maison, le pantry est une zone distincte et fermée. Cette séparation géographique vous offre la liberté architecturale d’introduire des couleurs complémentaires ou des motifs un peu plus audacieux sans surcharger l’espace principal de cuisson. Une stratégie très efficace et populaire consiste à utiliser exactement le même type de matériau, mais dans une autre couleur. Par exemple, si votre cuisine principale présente un carrelage subway en céramique blanc éclatant, vous pouvez opter pour un carrelage subway bleu doux ou vert sauge dans le pantry. Cela préserve le standard architectural et la texture de la maison tout en donnant au pantry son propre caractère unique et raffiné.
Les backsplashes Peel-and-stick sont-ils suffisamment étanches pour un pantry ?
Vous doutez de la durabilité des produits auto-adhésifs ? Cette section explique la science derrière les performances du vinyle moderne.
Oui, les carreaux en vinyle modernes de haute qualité sont, par conception, naturellement imperméables. La couche supérieure d’un carreau Peel-and-stick premium est fabriquée en PVC dense ou en PU (polyuréthane), un matériau qui repousse totalement l’eau sur le plan chimique. Cependant, l’étanchéité de l’ensemble dépend fortement de la qualité de la pose. Si les joints entre les carreaux ne sont pas bien serrés lors de l’installation, l’humidité provenant de la vapeur ou des éclaboussures peut s’infiltrer derrière et compromettre l’adhésif sous-jacent. Appliquer un fin cordon de mastic silicone sur les bords, là où le carreau rencontre les étagères ou le plan de travail, garantit une étanchéité parfaite et une durabilité à long terme.
Comment préparer un mur peint pour un DIY pantry backsplash ?
Vous ne savez pas si vos murs actuels sont prêts pour un adhésif ? Cette section détaille la préparation de surface essentielle pour une tenue durable.
La préparation détermine de manière décisive le résultat de votre installation. Commencez par nettoyer soigneusement le mur peint avec un dégraissant puissant comme le TSP afin d’éliminer les huiles et la poussière invisibles en suspension dans l’air. Ensuite, examinez la finition de la peinture. Si la peinture est très brillante (comme du semi-brillant ou du brillant), poncez légèrement toute la surface avec du papier de verre grain 120. Le ponçage crée de micro-abrasions, offrant à la surface la texture physique indispensable pour que le dos adhésif puisse accrocher solidement. Essuyez la poussière de ponçage avec un chiffon humide et laissez le mur sécher complètement. Si le mur vient d’être peint, vous devez attendre au moins trois semaines pour que la peinture sèche et dégaze complètement avant d’appliquer tout adhésif.
Quel est le matériau de backsplash le plus économique ?
Vous cherchez un impact maximal avec un minimum d’effort financier ? Cette section compare les meilleurs matériaux budget disponibles aujourd’hui.
Lorsqu’on calcule le coût total de possession (TCO) — qui inclut les matériaux, les outils et la main-d’œuvre — le vinyle Peel-and-stick est, de manière empirique, l’option la plus économique du marché. Il élimine totalement le besoin d’acheter ou de louer des outils spécialisés comme une scie à eau, une truelle dentelée, du mortier-colle ou du coulis. De plus, vous réalisez d’importantes économies sur la main-d’œuvre puisqu’il est entièrement conçu et fabriqué pour une installation DIY simple. Contrairement à des alternatives moins chères comme le papier peint lavable, qui peut facilement se déchirer, se rayer ou se tacher de façon permanente, le vinyle premium offre une surface très durable et lessivable, capable de résister sans effort à l’usage intensif et quotidien d’un pantry familial classique.


Laisser un commentaire
Ce site est protégé par hCaptcha, et la Politique de confidentialité et les Conditions de service de hCaptcha s’appliquent.