


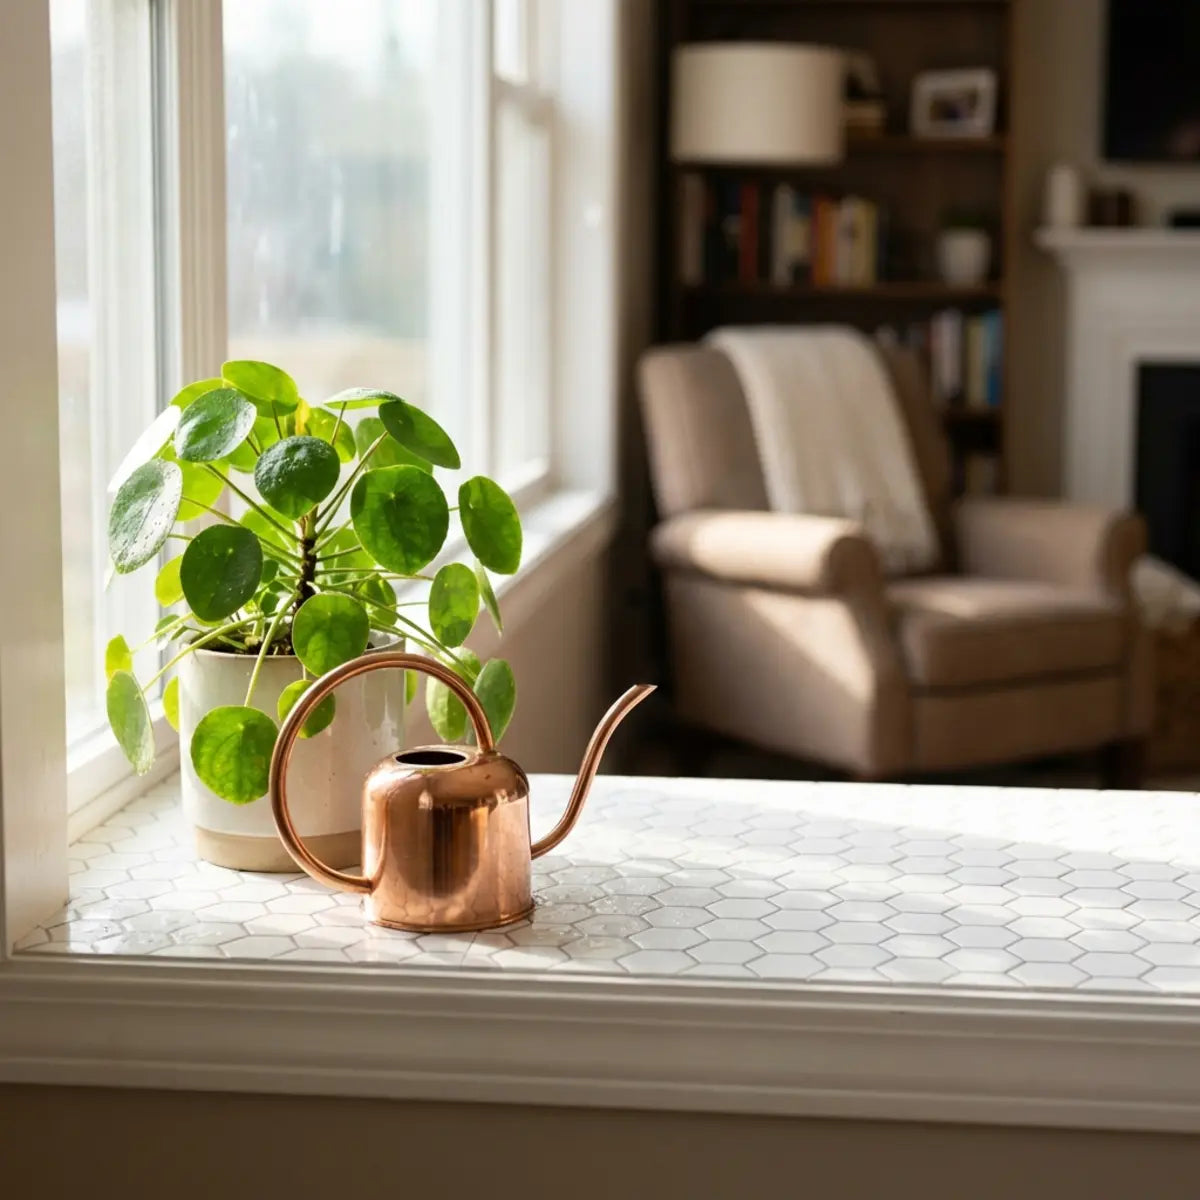
Fixer un regard sur un immense mur miroir du sol au plafond des années 1980 peut sembler paralysant. Vous voulez le moderniser, mais l’idée de casser du verre, de payer des frais d’artisan et de nettoyer des débris dangereux est décourageante. Il est facile de se sentir coincé avec une esthétique dépassée simplement parce que retirer le miroir est trop coûteux ou trop risqué.
Les tendances architecturales des décennies passées misaient souvent sur de vastes miroirs pour donner artificiellement l’impression qu’une pièce était plus grande. Efficaces dans les appartements exigus ou les salles à manger sombres, ces imposantes installations en verre paraissent aujourd’hui souvent froides, aseptisées et toujours marquées de traces. Les propriétaires d’aujourd’hui recherchent de la chaleur, de la texture et une touche de caractère personnalisée dans leurs espaces de vie — des éléments qu’un simple mur de verre réfléchissant ne peut tout simplement pas offrir. Pourtant, la dépose est redoutée de tous. Au-delà du danger physique évident que représente la manipulation de grandes feuilles de verre lourdes et fragiles, il y a aussi les dommages cachés causés au placoplâtre sous-jacent, qui nécessitent presque toujours d’importants travaux de rebouchage, de ponçage et de peinture.
Le peel and stick tile peut être posé sur de grands miroirs si le verre est propre, dégraissé et correctement apprêté pour favoriser l’adhérence. Utilisez des revêtements légers en vinyle ou à dos en mousse conçus pour les surfaces non poreuses, et assurez la sécurité en testant d’abord une petite zone.
La préparation de la surface est essentielle à la réussite de ce projet. La force d’adhérence varie considérablement selon les marques, ce qui fait de la sécurité et de la possibilité de retrait deux critères majeurs pour les locataires comme pour les propriétaires. En comprenant les propriétés uniques du verre, vous pouvez réaliser cette transformation en toute sécurité.

Peut-on vraiment appliquer du peel and stick tile directement sur un miroir ?
Vous craignez que les carreaux autocollants ne glissent tout simplement sur une surface de verre lisse et verticale ?
Cette section explique la science concrète de l’adhérence sur le verre et identifie les matériaux de carrelage exacts qui adhèrent de manière fiable aux miroirs.
Oui, vous pouvez tout à fait poser du peel and stick tile sur un miroir. Le verre offre un support incroyablement plat et rigide. À bien des égards, un miroir lisse est structurellement plus adapté qu’un mur en placoplâtre texturé pour ce type d’application adhésive.
Le verre pose cependant un défi chimique particulier. Il est entièrement non poreux. Les adhésifs muraux standards s’appuient sur des micro-aspérités dans la peinture ou le placoplâtre pour s’ancrer. Sur le verre, l’adhésif n’a tout simplement aucune prise physique.
Vous cherchez un point de départ facile pour débuter ?
Peut-être n’êtes-vous pas encore prêt à vous lancer dans une transformation massive de tout un mur. Beaucoup de propriétaires et de locataires préfèrent commencer par un projet plus modeste mais très impactant, qui leur permet de prendre confiance dans les matériaux et dans le processus de pose. Encadrer un miroir existant de qualité constructeur est l’une des façons les plus efficaces de rehausser l’esthétique d’une salle de bain sans entreprendre une rénovation complète. Cette approche ciblée vous permet de vous familiariser avec le comportement de l’adhésif sur le verre tout en créant un point focal spectaculaire et sur mesure. Pour découvrir ce projet précis, à faible risque, et voir une magnifique transformation idéale pour débuter, nous vous recommandons vivement de lire notre guide complet sur le sujet.
Lire : Cadre de miroir de salle de bain en DIY avec des Peel & Stick TilesSelon les principes de chimie des surfaces publiés par l’American Chemical Society, les surfaces non poreuses nécessitent des adhésifs sensibles à la pression dotés d’une forte viscoélasticité. L’adhésif doit agir presque comme un fluide épais, en maintenant une liaison continue, presque par aspiration, sur le verre lisse.
Le mécanisme de l’adhérence sur le verre
Sans une tension de surface adéquate, les matériaux lourds posés sur le verre connaîtront une dégradation rapide de leurs performances. La gravité tire en permanence sur le carreau vers le bas. Si le carreau est trop lourd, l’adhésif s’étire lentement jusqu’à la rupture. Cet étirement mécanique est appelé « creep », et sur une surface verticale lisse comme un miroir, le creep est l’ennemi de la durabilité.
Une idée reçue fréquente veut que des carreaux lourds et rigides soient synonymes de meilleure qualité et adhèrent mieux. En réalité, poser des carreaux lourds en composite de pierre sur une surface de verre verticale est la recette du désastre. Ils finiront inévitablement par glisser sous leur propre poids. La résistance cohésive de l’adhésif ne peut tout simplement pas contrer la force de cisaillement gravitationnelle continue exercée par des matériaux lourds sur un support sans friction.
Vous planifiez une rénovation complète de votre salle de bain ?
Si votre miroir dépassé n’est qu’un symptôme parmi d’autres d’un problème de décoration plus large dans votre salle de bain, vous envisagez peut-être un rafraîchissement esthétique plus global. La bonne nouvelle, c’est que les mêmes matériaux légers utilisés pour recouvrir les miroirs peuvent aussi être posés directement sur d’anciens carreaux muraux en céramique décolorés, des parois de douche en fibre de verre et des murs en placoplâtre datés. Comprendre comment ces adhésifs polyvalents réagissent sur différentes surfaces de salle de bain peut vous aider à imaginer un espace harmonieux et superbe, sans les coûts exorbitants d’une rénovation traditionnelle. Pour aller plus loin dans les applications sur l’ensemble de la pièce, découvrez nos dernières idées déco.
Guide : transformer votre salle de bain avec des Peel and Stick Tiles en 2025Pour garantir un résultat durable, vous devez comprendre les principaux facteurs environnementaux qui influencent le verre :
- Dilatatation thermique : Le verre se dilate et se contracte avec la température ambiante. Votre adhésif doit rester suffisamment flexible pour accompagner les mouvements du miroir. Des colles rigides casseront et finiront par céder au moindre déplacement microscopique du verre.
- Seuils d’humidité : Les salles de bain génèrent beaucoup d’humidité. La condensation sur un miroir peut facilement s’infiltrer derrière une liaison adhésive fragile. Le matériau doit offrir des propriétés d’étanchéité sur les bords pour empêcher la vapeur de pénétrer.
- Poids du matériau : Le poids du carreau est la plus grande menace pour l’adhérence verticale. Les matériaux légers et très flexibles sont la seule option fiable pour habiller un miroir.
Résultats d’application en conditions réelles
Nous avons récemment évalué la transformation complète d’un logement en location. Le locataire devait recouvrir un ancien miroir double vasque sans enfreindre son bail. Il a choisi des carreaux légers et souples. L’immense miroir des années 1990 dominait la petite pièce, projetant une lumière froide qui rendait l’espace franchement peu accueillant.
En contrôlant strictement l’humidité de la pièce pendant la pose, l’installation a été un franc succès. Après 18 mois d’exposition quotidienne à la vapeur de douche et aux variations de température, les carreaux n’ont montré absolument aucun signe de décollement ni de gondolage. Le locataire a en quelque sorte créé un mur d’accent sur mesure directement par-dessus le miroir de la vasque existante, modernisant radicalement l’espace tout en préservant 100% de sa caution.
Conçu pour une perfection non poreuse
Lorsqu’on évalue l’adhérence à long terme sur des supports non poreux, la base quantitative exige des matériaux capables de neutraliser fondamentalement le cisaillement gravitationnel. Conçu pour contourner ces limites structurelles, le Minty Ceramic 8 établit une nouvelle référence en matière de rapport qualité-prix. Son profil léger neutralise de façon mesurable le risque de glissement, offrant une configuration optimale pour les applications verticales sur verre dans les environnements très humides. Ces carreaux autocollants, sans joint, apportent un look frais et moderne sans poids excessif.
Découvrez la collection Minty Ceramic 8Si vous êtes locataire, cette méthode offre un avantage énorme. Vous pouvez transformer complètement l’architecture de votre salle de bain ou de votre salon sans perdre votre caution. Elle offre un design à fort impact, sans engagement permanent.
Découvrez des marques recommandées de peel and stick tile pour trouver des options légères et adaptées aux locataires pour votre miroir.

Comment préparer la surface d’un miroir pour des Peel and Stick Tiles ?
Vous ne savez pas comment nettoyer et préparer correctement un miroir pour que vos nouveaux carreaux ne se décollent pas en une semaine ?
Cette section fournit un protocole de préparation de surface infaillible, étape par étape, pour garantir une adhérence permanente sur le verre.
La préparation de surface est le facteur le plus critique pour la réussite de ce projet. Si vous négligez un nettoyage minutieux, vous collez essentiellement votre nouveau carrelage sur une couche microscopique de poussière, de sébum et de résidus d’ancien nettoyant pour vitres. La liaison chimique échouera, et la gravité l’emportera.
Imaginez cela comme la pose d’un film de protection sur un téléphone mobile. Le moindre grain de poussière crée une énorme bulle d’air qui ruine l’adhérence. Un grand mur miroir nécessite exactement le même niveau de préparation stérile. Tout composé organique laissé sur le verre agit comme une barrière, neutralisant efficacement le dos adhésif sensible à la pression, hautement technique, de vos carreaux.
Gérer les plages de température de l’adhésif
Lors de l’application d’adhésifs sensibles à la pression sur un support en verre, la température ambiante joue un rôle essentiel. Le verre est exceptionnellement conducteur ; il conserve le froid beaucoup plus longtemps que le placoplâtre. Si la pièce est en dessous de 65°F (18°C), le dos adhésif devient rigide et perd son "accroche" viscoélastique. À l’inverse, si la pièce est excessivement chaude et humide, l’adhésif peut devenir trop visqueux. Pour un résultat optimal, assurez-vous que la température de la pièce soit stabilisée entre 70°F et 75°F (21°C - 24°C) pendant au moins 24 heures avant la pose. Si vous travaillez dans une salle de bain froide, utilisez un sèche-cheveux standard réglé sur faible puissance pour réchauffer délicatement la surface du verre juste avant d’appliquer le carrelage. Cela ակտիվe les polymères adhésifs et garantit une liaison forte et durable.
Le problème avec les nettoyants pour vitres classiques
La plupart des gens attrapent instinctivement un nettoyant pour vitres bleu standard pour préparer leurs miroirs. C’est une erreur critique. Les nettoyants pour vitres classiques contiennent souvent de l’ammoniaque, des cires ou des silicones conçus pour laisser une brillance sans traces. Si ces additifs rendent les fenêtres impeccables, ils sont dévastateurs pour la technologie adhésive.
Cette "brillance" est en réalité un film chimique microscopique. Ce film agit comme une barrière et empêche l’adhésif du carrelage d’entrer en contact direct avec le verre. Le dos collant de votre carreau finit par adhérer à la cire plutôt qu’au dioxyde de silicium dense du miroir lui-même.
Prenons l’exemple d’une bricoleuse qui rénovait la porte de placard miroir d’un appartement de Chicago datant des années 1990. Elle a essayé de coller les carreaux directement sur le verre nettoyé avec un spray pour vitres standard. En 48 heures, les coins supérieurs des carreaux ont commencé à se recourber, et au bout de cinq jours, des panneaux entiers avaient glissé et n’étaient plus alignés. Le responsable ? Les résidus invisibles laissés par son nettoyant ménager habituel.
Le protocole de décontamination en trois étapes
Une réapplication réussie exigeait un strict protocole de dégraissage. Pour obtenir une liaison permanente, vous devez rendre le verre parfaitement nu. Suivez cette séquence précise pour des résultats garantis :
- Dépoussiérage à sec Utilisez un chiffon en microfibre sec et non pelucheux pour éliminer toute poussière et tout débris meubles de la surface du miroir. N’utilisez pas d’essuie-tout, car ils laissent des fibres de bois microscopiques qui contamineront votre zone de travail. Cette première étape évite simplement d’étaler la saleté lors de l’étape deux.
- Dégraissage chimique Essuyez tout le miroir avec de l’alcool isopropylique (à une concentration d’au moins 70%). Cela dissout les huiles persistantes et les résidus de laque, puis s’évapore rapidement sans laisser le moindre résidu. Travaillez par petites sections en essuyant jusqu’à ce que le verre crisse.
- Finition des bords Accordez une attention particulière aux bords et aux coins du miroir. C’est là que la laque, les cosmétiques et la poussière ont tendance à s’accumuler au fil des années. Utilisez un coton-tige imbibé d’alcool pour nettoyer soigneusement les zones étroites où le verre rencontre les clips de retenue en métal ou en plastique.
Vous luttez contre l’humidité de la salle de bain ?
Si votre miroir se trouve dans une salle de bain principale qui se remplit souvent d’une forte vapeur de douche, la préparation de surface ne représente que la moitié du travail. Vous devez aussi choisir des carreaux spécifiquement conçus avec des barrières de recouvrement robustes et résistantes à l’humidité. Les décorations adhésives classiques céderont rapidement à la condensation. Pour une analyse détaillée des technologies de carrelage offrant les meilleures performances d’étanchéité et les installations de week-end les plus rapides dans les zones très humides, consultez notre guide dédié à la réduction de l’humidité.
Lire : Carrelage Peel Stick pour salle de bain humideVérification interactive : votre miroir est-il prêt ?
Testez vos connaissances avant de commencer à poser des matériaux de carrelage coûteux.
Quel liquide devez-vous utiliser pour l’essuyage final de votre miroir ?
Améliorer l’adhérence pour des installations permanentes
Pour des applications résidentielles à long terme où la possibilité de retrait n’est pas un enjeu, vous pouvez vouloir une sécurité supplémentaire. L’application d’un primaire translucide d’accrochage pour verre peut fournir la micro-abrasion nécessaire.
Ces promoteurs d’adhérence à base de silane créent une texture microscopique sur le verre. Cela donne à l’adhésif sensible à la pression une structure physique à laquelle s’accrocher, améliorant considérablement la résistance au cisaillement à long terme. Il agit comme un pont chimique entre les polymères organiques de l’adhésif du carrelage et la silice inorganique du miroir.
Masquez les bords du miroir avec du ruban de peintre à faible adhérence pour protéger le placoplâtre ou les meubles-lavabos adjacents de vos produits de dégraissage. L’alcool isopropylique peut ternir la peinture autour si vous n’y prenez pas garde.
Le consensus du secteur veut qu’une préparation adéquate détermine la longévité du produit final. Les méthodes d’évaluation standardisées détaillées dans DIY Bathroom Mirror Frame with Peel & Stick Tiles fournissent la base quantitative nécessaire pour réaliser ce travail de préparation sans échec critique, en particulier dans les zones très humides.
Une fois le verre parfaitement propre, évitez de toucher la surface avec les mains nues. Les huiles naturelles de vos doigts suffisent à compromettre le dos adhésif de vos nouveaux carreaux.
Découvrez plus d’idées de rénovation de miroir DIY pour finaliser votre agencement avant de commencer la pose.

Quels sont les meilleurs peel and stick tiles pour les miroirs et comment les installer en toute sécurité ?
Perdu face aux centaines d’options de carrelage et inquiet à l’idée de fissurer le miroir pendant la pose ?
Cette section présente les matériaux les plus sûrs et une technique d’application mesurée pour protéger votre verre et réussir votre design.
Choisir le bon peel and stick backsplash sur un miroir, c’est trouver le bon équilibre entre esthétique et physique des matériaux. Il vous faut des carreaux légers, flexibles et dotés d’un dos adhésif de qualité industrielle conçu spécialement pour les surfaces lisses.
Tous les produits peel and stick ne se valent pas. Les carreaux en métal massif ou les composites de pierre lourds sont trop massifs pour une surface verticale lisse. Vous devez choisir des matériaux spécialement conçus pour les environnements à faible friction.
Vous cherchez des matériaux haut de gamme à la durabilité éprouvée ?
Si votre surface miroir se trouve dans une zone de passage fréquent, ou si vous prévoyez de prolonger le design de carrelage vers une cuisine adjacente, le choix de matériaux haut de gamme est essentiel. Les dernières avancées dans la fabrication du peel-and-stick offrent une résistance à la chaleur incroyable et des couches d’usure ultra-résistantes qui fonctionnent à merveille aussi bien derrière les cuisinières que près des éviers. Ces collections premium offrent le réalisme dimensionnel de la céramique ou du verre, sans la masse lourde qui provoque des échecs d’installation sur les miroirs. Découvrez nos meilleures sélections rigoureusement testées pour l’année à venir.
À découvrir : Meilleures Peel and Stick Tiles pour crédence de cuisine 2025Comparer la compatibilité des matériaux sur le verre
Évaluons la faisabilité structurelle de différents matériaux de carrelage lorsqu’ils sont posés directement sur une surface verticale en verre.
| Type de matériau | Compatibilité de l’adhérence sur le verre | Profil de poids | Meilleure utilisation |
|---|---|---|---|
| Vinyle fin | Excellente | Très léger | Murs miroirs, rénovations pour locataires |
| Gel 3D/PU | Élevée | Léger | Meubles de salle de bain, crédences |
| Métal/Aluminium | Modérée | Moyen | Petits miroirs décoratifs (apprêt requis) |
| Composite pierre | Faible (risque élevé de glissement) | Lourd | Déconseillé pour le verre vertical |
Comme le montrent les données, le vinyle fin et les carreaux gel 3D en polyuréthane (PU) offrent les performances les plus sûres et les plus fiables. Ils apportent la flexibilité nécessaire pour accompagner la dilatation thermique du miroir. Le gel PU offre en particulier l’esthétique raffinée du vrai verre épais ou de la céramique, sans leur poids prohibitif.
Design vedette : Olive Lines™
En tenant compte du seuil d’utilisation des salles de bain très humides, le standard architectural doit supporter une humidité constante. Des matériaux comme Olive Lines™ contournent structurellement les points de défaillance liés à l’humidité. En neutralisant statistiquement le gondolage des bords grâce à sa composition résistante à la chaleur, il est calibré pour une tenue longue durée sur les surfaces en verre. Contrairement aux autocollants plats, ces carrelages muraux autocollants créent un effet vraiment dimensionnel, ajoutant une texture visuelle profonde et du style à votre miroir plat. Aucun outil ni compétence particulier n’est nécessaire pour transformer totalement votre espace en quelques heures.
Achetez la collection Olive Lines™Guide rapide de préparation et de pose sur miroir
Décontaminer
Essuyez toute la surface en verre avec de l’alcool isopropylique à 70%+. Laissez sécher complètement.
Tracer la ligne de base
Projetez une ligne laser bien droite sur le miroir. Ne vous fiez pas aux bords du meuble-lavabo.
Charnière et pression
Décollez 1 inch du film protecteur. Alignez, collez et marouflez vers l’extérieur avec une raclette en feutre.
Méthodes d’installation sûres et précises
Poser des carreaux sur du verre demande une approche différente. Comme le verre est parfaitement plat, la moindre erreur d’alignement se voit immédiatement. Impossible de forcer un carreau à rester bien à plat sur le verre s’il est mal positionné : le support rigide fera simplement plisser le vinyle et emprisonnera des bulles d’air.
Suivez cette méthode de pose progressive et maîtrisée pour éviter les bulles, les plis et les lignes irrégulières :
- Tracez une ligne de base au laser Ne faites jamais confiance au plafond, aux plinthes ou au bord du meuble lavabo pour être parfaitement droits. Les maisons se tassent, et les miroirs sont souvent posés légèrement de travers. Utilisez un niveau laser pour projeter une ligne de départ parfaitement droite sur le miroir et guider votre première rangée.
- Gérer les clips du miroir Si votre miroir est maintenu par des clips en plastique transparent ou en métal, ne les retirez pas. Les enlever pourrait provoquer la chute soudaine du verre lourd et entraîner des blessures graves. Mesurez plutôt avec précision et utilisez un cutter de type X-Acto ou des ciseaux bien affûtés pour découper de petites encoches nettes dans vos carreaux afin qu’ils s’ajustent parfaitement autour des clips.
- La méthode de la charnière Décollez seulement un centimètre environ du film adhésif sur le bord supérieur. Alignez le carreau sur votre ligne laser, collez le bord exposé, puis tirez lentement le reste du film vers le bas. Au fur et à mesure, lissez le carreau sur le verre de haut en bas.
Maîtriser le processus d’alignement
Pour une stratégie de pose démontrée de manière empirique, le paradigme reconnu universellement exige une planification minutieuse avant même de retirer le moindre papier protecteur. Une disposition validée vous permet de réduire les pertes de matériau coûteuses, d’éviter les fines bandes de carreaux peu esthétiques sur les bords de votre miroir et d’obtenir une finition professionnelle et sans joint apparent. Que vous travailliez dans des angles complexes ou autour de luminaires intégrés au verre, disposer d’un plan stratégique est essentiel. Consultez notre masterclass d’installation complète pour perfectionner votre technique.
Guide : Comment poser des Peel and Stick Tiles et meilleurs designs 2025
Appliquer une pression en toute sécurité
Utilisez un outil de lissage souple à bord en feutre pour presser les carreaux contre le verre. Une pression ferme active l’adhésif sensible à la pression et lui permet de bien « mouiller » toute la surface non poreuse. Cette activation à micro-échelle transforme un film collant en une liaison structurelle durable.
Selon les consignes de sécurité de la Glass Association of North America (GANA), exercer une pression irrégulière et localisée sur de grands miroirs architecturaux peut provoquer des fissures de tension. Appliquez toujours une pression ferme, large et uniforme pendant l’installation. N’utilisez jamais de grattoirs en plastique dur, le manche d’un tournevis ou un marteau pour mettre les carreaux en place. Un miroir brisé est extrêmement dangereux et coûteux à réparer.
Prendre le temps de faire un alignement initial précis vous évitera des heures de frustration. Comme le verre adhère fortement à l’adhésif, retirer un carreau mal positionné peut étirer et abîmer le vinyle. Mesurez deux fois, alignez avec le laser, puis pressez une seule fois.
Dernières réflexions
Recouvrir des miroirs datés avec du carrelage est un projet tout à fait réalisable et économique lorsqu’il est mené avec patience et précision. Les Peel and Stick Tiles peuvent être posés sur des miroirs à condition que le verre soit soigneusement dégraissé et que l’on choisisse les bons matériaux légers.
Respectez toujours la surface lisse et non poreuse du verre. Suivez strictement les principes essentiels du nettoyage chimique à l’alcool isopropylique et adoptez une technique de pose mesurée et parfaitement de niveau. Vous obtiendrez ainsi une finition belle et durable, sans endommager la surface d’origine, tout en évitant le désordre, les coûts et les risques d’une démolition traditionnelle du verre.
Prêt pour un maximum d’inspiration ?
Vous en avez assez de votre salle de bains dépassée ? Imaginer le résultat final peut être l’étape la plus difficile de tout projet DIY. Transformer un immense miroir froid et clinique en pièce maîtresse spectaculaire est incroyablement satisfaisant, mais choisir le bon style — qu’il s’agisse d’un subway moderne épuré, d’une texture pierre rustique ou d’une finition métallique luxueuse — donne le ton à toute la pièce. Transformez-la en quelques heures grâce à des solutions peel-and-stick abordables. Découvrez des avant/après spectaculaires pour nourrir votre imagination et finaliser votre vision.
Galerie : Relooking de salle de bains : transformations avec Peel & Stick TilesEn choisissant les bons matériaux flexibles et en gérant correctement l’environnement, vous évitez d’avoir recours à une démolition coûteuse. Vous pouvez entièrement revitaliser votre meuble vasque ou votre mur d’accent du salon en un seul après-midi.
Si vous êtes prêt à moderniser votre espace, commencez par tester un petit coin de votre miroir. Assurez-vous d’être à l’aise avec le tack de l’adhésif et avec le style choisi. À partir de là, vous pourrez avancer en toute confiance pour transformer votre pièce. Explorez nos gammes de produits recommandées et nos galeries de designs pour commencer à planifier une rénovation parfaite et sans dommages.
Quel espace avec miroir transformeriez-vous en premier chez vous ?

Foire aux questions
Peut-on retirer facilement du peel and stick tile d’un miroir ?
Oui. Comme le verre est totalement non poreux, le retrait est souvent plus simple et plus propre que pour des carreaux sur un mur en plaques de plâtre peint. Pour les enlever en toute sécurité, appliquez de la chaleur avec un sèche-cheveux standard afin de ramollir le dos adhésif. Une fois le carreau tiède, décollez-le délicatement du verre. Nettoyez tout résidu collant avec un dissolvant d’adhésif à base d’agrumes et un chiffon doux.
Recouvrir un miroir de carreaux risque-t-il d’endommager le verre ?
Non, l’adhésif lui-même est chimiquement inerte et n’endommage ni ne raye la surface du verre. En revanche, une mauvaise manipulation lors du retrait peut poser problème. Forcer excessivement, faire levier avec des outils métalliques pointus ou utiliser des lames de grattage abrasives peut provoquer des rayures permanentes ou des fissures de contrainte dangereuses. Utilisez toujours une chaleur douce et des grattoirs souples en plastique.
Combien de temps les peel and stick tiles tiennent-ils sur un miroir de salle de bain ?
Lorsqu’ils sont correctement posés sur un miroir soigneusement dégraissé, des carreaux en vinyle ou en gel polyuréthane de haute qualité peuvent durer plusieurs années. Le contrôle de l’humidité ambiante de la salle de bain grâce à une bonne ventilation par extraction prolonge nettement la durée de l’adhérence. Bien presser les bords empêche l’humidité de s’infiltrer derrière les carreaux.
Dois-je poncer le miroir avant de poser les carreaux ?
Absolument pas. Poncer le verre est extrêmement dangereux. Cela crée des poussières de silice en suspension nocives et détruit complètement l’intégrité structurelle du miroir, qui devient alors susceptible de se briser. Un dépolissage chimique et un nettoyage en profondeur avec de l’alcool isopropylique à forte concentration sont les seules étapes de préparation sûres et nécessaires pour poser des adhésifs sur du verre.

Laisser un commentaire
Ce site est protégé par hCaptcha, et la Politique de confidentialité et les Conditions de service de hCaptcha s’appliquent.