





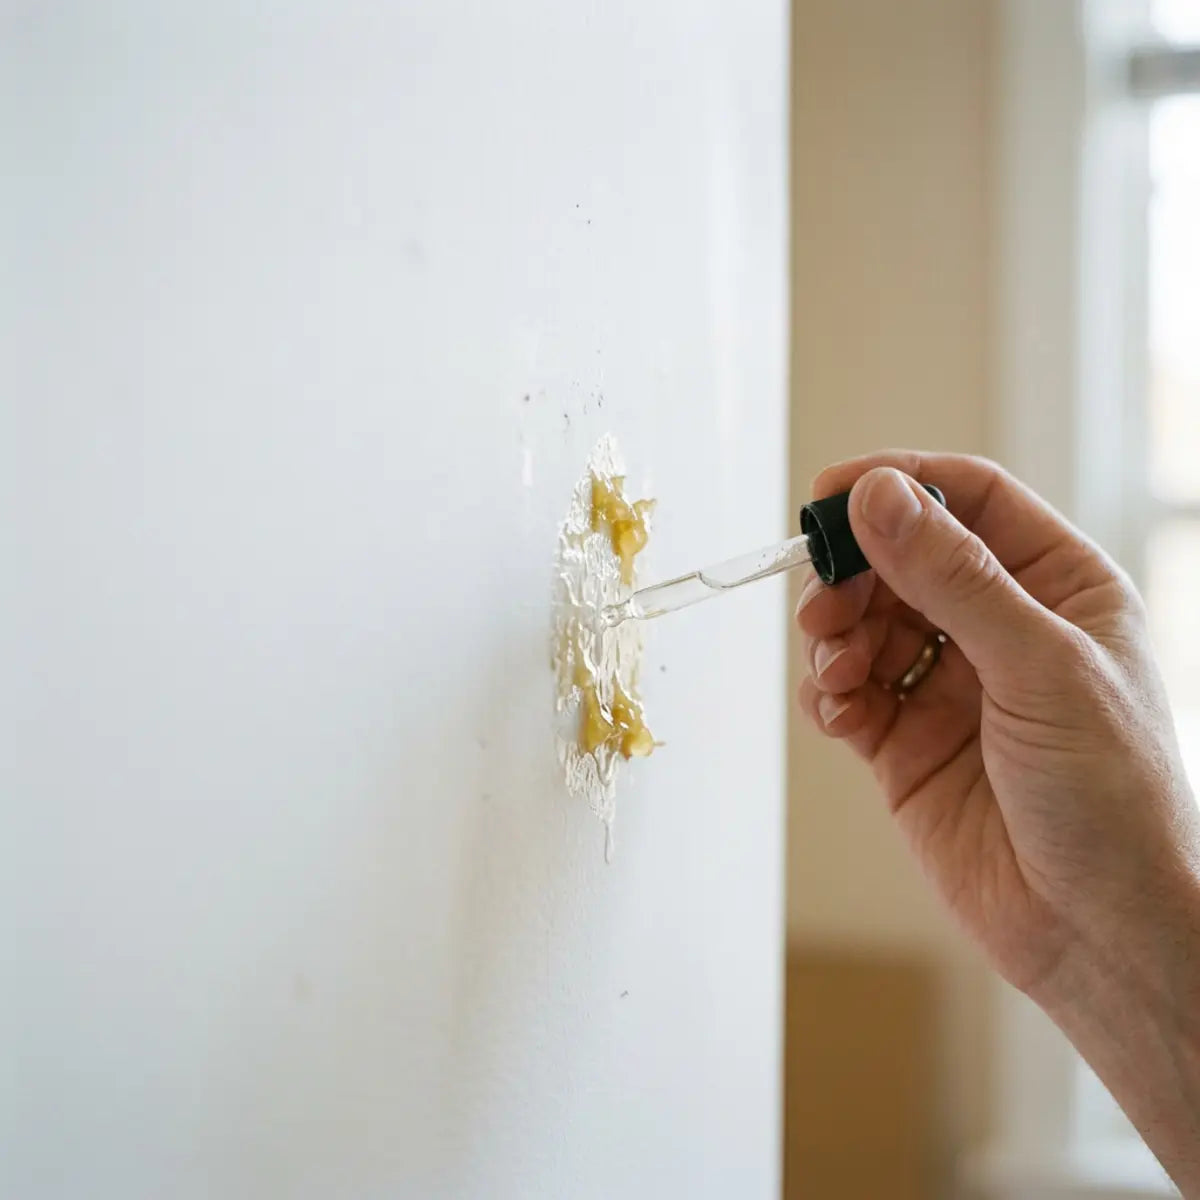
To remove peel-and-stick adhesive residue from drywall, first identify whether you are working on intact paint, exposed drywall paper or a damaged surface. Use only a removal method accepted for the adhesive and the actual wall finish. Do not automatically apply rubbing alcohol, citrus remover, heat or a strong scraper. Stop when paint transfers, paper tears, liquid penetrates or the wall softens; at that point a controlled repair may be safer than more cleaning.
Explore this guide
Residue removal is often the least enjoyable part of a decorating project. The tile is gone, the wall looks patchy and the temptation is to find a stronger product. That can turn a small cleanup into a much larger repair. A better approach separates the remaining adhesive from the condition of the wall and keeps each treatment limited enough that you can see what it is doing.
This guide provides a practical inspection and decision sequence, a way to read product exclusions and a repair-planning checklist. It does not rank solvents by an invented safety index or diagnose adhesive chemistry from appearance. It also does not guarantee a deposit outcome, damage-free removal or a universal time after which a wall is ready to repaint.
Identify the layer you are trying to preserve
Drywall is a wallboard product, while paint, primer, wallpaper, skim coats and previous repairs are layers that may be present on its face. The remover first contacts the exposed surface, but liquid or force can reach lower layers through a scratch, seam or damaged area. A label permitting some painted surfaces should not be read as permission for every painted drywall assembly.
Inspect the whole area in good light before treating individual spots. Note whether the paint remains continuous, whether the facing paper is visible and whether a patch feels different from its surroundings. Do not use pressure or scratching to deliberately enlarge a damaged area. Photograph the initial condition and retain a piece of the removed tile or backing if it helps identify the product.
Find the tile's instructions and any record of added adhesive. A factory pressure-sensitive backing, a foam mounting layer and a separately applied construction adhesive can require different advice. Do not assume that everything left behind is the original factory glue. A past repair or improvised extra adhesive should remain part of the history.
Identify the paint or coating where possible. A product receipt, leftover can or property-maintenance record can be more useful than guessing from gloss. Flat, satin and semi-gloss are appearance categories, not complete descriptions of chemical resistance or bond strength. A glossy-looking surface may still be weakly attached to the layer beneath it.
| Observed surface | Initial decision | Do not assume |
|---|---|---|
| Continuous, sound paint | Check the adhesive and coating instructions for a compatible removal method. | Every household solvent is acceptable. |
| Exposed or torn facing paper | Pause liquid cleaning and obtain a suitable repair plan. | The area behaves like sealed paint. |
| Loose paint or a peeling repair layer | Assess the coating failure before further removal. | Stronger adhesive or more scraping will stabilize it. |
| Soft or damp wallboard | Investigate the moisture or material condition. | The problem is merely surface residue. |
| Unknown older coating or wall material | Identify hazards and an appropriate work method before disturbance. | Age or color alone identifies what is safe to do. |
Describe the residue without guessing its chemistry
Useful observations include whether the residue is raised or flat, tacky or dry, continuous or scattered, and whether any backing material remains attached. Those descriptions help a supplier understand the task. They do not prove that a polymer is oxidized, has lost plasticizer or will respond to a particular solvent.
A flexible lump may gather under a permitted gentle mechanical method, while a flat stain may not be material that can be lifted at all. A foam remnant can obscure the adhesive beneath it. Record what you see before choosing a method, but do not turn a visual category into an automatic instruction to heat, dissolve or scrape.
Note what happened during tile removal. Did the coating release with the backing? Was extra heat or cleaner used? Did a residue become oily only after a product was applied? The sequence can distinguish the original problem from a new treatment effect, even when it cannot establish the precise chemical cause.
Take a close-up and an overall photograph with the same area identified. Include the product label and describe what has already been tried. A message saying gummy residue remains on intact paint after the permitted peel method is much more useful than declaring the adhesive chemically failed without evidence.
Do not keep adding products while waiting for advice. Several treatments can obscure the initial condition and make compatibility harder to assess. Keep a record of each product, concentration, tool and contact method so the next decision is based on an understandable history.

Read the exclusions before reading the promises
Begin with the full name of the removal product and the exact version on the container. A spray gel, original liquid, paint remover and adhesive cleaner sold by one company need not share the same formulation or intended surfaces. The brand name alone is not a sufficient instruction.
Goo Gone Adhesive Remover Spray Gel is a useful example of why the complete label matters: it lists some painted surfaces among its accepted uses but explicitly lists drywall among its exclusions. Do not use the general painted-surface statement to ignore the more specific exclusion. A spot test does not override that restriction.
If wording is ambiguous for your wall, contact the manufacturer with a clear description before application. Explain whether the drywall is painted, intact, repaired or exposed, and identify the coating where possible. Ask whether the exact product and method are accepted for that assembly. Keep the written answer instead of relying on an unrelated demonstration on glass or metal.
Review application, dwell, removal, ventilation, protective equipment and cleanup instructions together. A product may be permitted only under conditions that are difficult to achieve on your wall. If the cleaner requires a process incompatible with the substrate, choose another method rather than silently shortening a required step.
Do not assume natural or citrus means harmless, or that rapid evaporation makes rubbing alcohol universally low-risk. Those descriptions do not establish compatibility with the paint, primer or facing. Nor does an unpleasant smell accurately quantify exposure. Use the actual safety and technical information, not sensory guesses.
Prepare a small, safe work area
Remove loose objects and protect adjacent finishes according to the intended method. Keep tools and any accepted chemical away from food, children, pets and unnecessary traffic. Make sure the area can be observed clearly without leaning over hot equipment or working around exposed electrical parts.
Follow the product's ventilation and protective-equipment requirements. Do not improvise a fan arrangement around flammable vapors or combine heat with a solvent treatment. A household hairdryer is not automatically safe in every chemical work area. Keep ignition sources and incompatible products out of the process.
Work in a manageable section rather than treating the whole wall at once. The smaller area lets you observe the coating and control runoff or debris. It also limits how much surface is committed before you know whether the permitted method is effective.
Use clean tools suitable for the finish. A plastic scraper may be less likely to scratch than a sharp metal blade in some circumstances, but it can still gouge or tear a wall under excessive force. Check the edge for damage and do not use a tool simply because an online demonstration made it look effortless.
Where the wall is old or its coating is unknown, assess hazards before scraping or sanding. EPA's lead-safe DIY guidance addresses potential lead-paint disturbance in US housing. Treat its guidance as a reason for appropriate assessment and precautions, not as proof that a particular wall contains lead or that one construction year applies everywhere.
Start with the permitted non-liquid method where one exists
Check whether the tile or adhesive manufacturer recommends a gentle mechanical removal method for residue on the identified surface. Where permitted, work slowly enough to see whether residue is gathering or the coating is moving with it. The useful outcome is separation of unwanted material without changing the supporting finish.
Do not prescribe a universal scraper angle, stroke length or amount of pressure. The tool, residue, coating and wall condition differ. Keep the tool supported and stop if its edge catches the coating or exposes paper. A very small amount of residue is not worth removing by tearing a much larger area of paint.
If a removable lump gathers under the accepted method, keep it and the tool away from clean surfaces so it is not spread elsewhere. Do not rub aggressively with bare skin or assume that adhesive sticking to itself makes repeated dabbing safe on a fragile coating. The coating still needs to remain attached.
Check progress after each small section. If the material is not lifting, do not simply increase force. Reassess whether you are dealing with a stain, a different adhesive or a surface that needs another approach. A method that helped on one patch may not be appropriate on a repaired or damaged area nearby.
Save the observation in the record: what was removed, what remained and whether the finish changed. These notes help distinguish partial success from a new problem. A controlled stop provides useful information even when the wall is not yet ready for paint.
Use heat only when the product and surface permit it
Some removable products specify warming as part of release. That does not establish one temperature, distance or duration for every adhesive and wall. The appliance used, its output, the surface and any nearby materials all matter. Follow the actual instructions rather than copying a forty-five-second or six-inch rule.
Do not heat an area treated with a flammable or incompatible chemical. Check the removal product's safety information and keep methods separated as required. A warm wall is not proof that residual vapor is absent, and an elapsed waiting period should not be invented to make the combination seem safe.
Watch for coating changes, odor or distortion and stop when the permitted conditions are not being maintained. Do not continue warming in the hope that every stubborn residue will eventually release. A change in paint or backing can create a different cleanup or repair problem.
Unknown coatings and older materials need appropriate assessment before disturbance by heat as well as by scraping. A low setting on a tool is not a material identification method. Where the required procedure is outside a safe, documented DIY scope, use suitable professional help.
The decision to avoid heat is not a claim that heat never helps adhesives. It is recognition that usefulness and suitability are different questions. A method that works on a removable label on glass cannot automatically be transferred to painted wallboard.

Use a liquid treatment only after compatibility is established
Once the actual product and surface combination are accepted, follow the specified application method. Control the amount and keep liquid away from exposed paper, joints, electrical components and adjacent finishes unless the procedure explicitly addresses those conditions. Do not soak a wall simply because the adhesive is difficult to remove.
A cloth-based method can offer control when the label permits it, but it should not be substituted for a different required procedure without advice. Do not assign a universal dime-sized dose or sixty-second dwell. The instructions for the exact formulation define those conditions.
Use a small representative area and complete the whole process, including the required removal of dissolved residue and any cleaner film. Inspect after it reaches the normal dry condition. A wet coating can temporarily hide damage or make a stain look darker, so an immediate appearance change is not a complete result.
Stop if paint transfers unexpectedly, the finish softens, liquid enters a damaged area or the wall changes texture. A product's instructions may also define other stop conditions. Do not respond by applying another chemical to reverse the effect without manufacturer guidance.
Keep different products separate. Do not mix cleaners or try to neutralize a remover with vinegar, bleach, ammonia or another household chemical. Cleaning away a product as directed is different from carrying out a chemical neutralization reaction. The latter should not be improvised on a wall.
| Decision | Evidence needed | Unsuitable shortcut |
|---|---|---|
| Choose a remover | Exact surface and adhesive acceptance | Brand familiarity or the word natural |
| Set contact time | Product directions compatible with the wall | A fixed number from another formulation |
| Choose a tool | Allowed mechanical action for the finish | Assuming plastic cannot damage paper |
| Complete cleanup | Required residue-removal and drying method | Calling any dish-soap wash chemical neutralization |
| Continue treatment | No adverse change and a clear reason to repeat | Increasing strength whenever a mark remains |
Distinguish remaining adhesive, staining and coating damage
After a permitted pass, inspect the dry wall under normal and side lighting. Raised residue, a flat discolored patch and torn paper are different findings. Record which is present rather than describing all of them as glue that needs stronger solvent.
A flat mark may be a stain or a change in the coating. Further liquid may not remove it and can enlarge the affected area. Ask the coating or repair-product supplier how to prepare it for the intended finish. Do not assume every visible ghost is a chemically bonded adhesive or that it can be diagnosed from color alone.
If a raised layer remains, check whether it is adhesive, foam backing or a prior coating. A saved tile fragment can help. Do not sand unknown residue into dust as an automatic final step. Material identity and the next finish's requirements should determine how the surface is prepared.
Where paper is exposed or the surface has become fuzzy, stop treating it as intact paint. An appropriate damaged-surface repair can be more controlled than continuing to rub away the final patch. Where the wall is soft or damp, investigate the broader condition rather than assuming a sealer will solve it.
Use a before-and-after record to make the next decision. Photographs, product names and the sequence of treatments are useful to a professional. A clear account can reduce repeated experimentation because the next person does not have to infer what has already happened.
Plan a repair without relying on universal primer rules
A repair should match the condition of the wall and the intended finish. Torn paper, a small shallow gouge, a weak paint layer and moisture-damaged board do not necessarily need the same process. Follow a suitable repair system or obtain professional advice rather than applying a generic sequence to every defect.
Rust-Oleum's GARDZ guidance describes a water-based sealer for damaged porous surfaces, including drywall-related problems, and certain old adhesive residues. It is a useful counterexample to the claim that only oil-based products can ever be used on damaged paper. It does not approve covering all pressure-sensitive tile adhesive or substitute for its current instructions.
Ask whether the remaining surface is acceptable for the selected repair product. A sealer intended for old wallpaper paste may not be appropriate over a thick or tacky tile backing. Do not hide a prohibited residue under another coating and assume the word sealer resolves compatibility.
Where filling or skim coating is appropriate, follow the system's preparation, application and drying requirements. Avoid universal coat counts, grit numbers and waiting periods. The depth of repair, temperature, ventilation and chosen products affect the work. Do not rush to paint because the top surface looks dry.
Keep the repair area clean and assess the transition under the room's actual lighting. A local patch can have a different texture or absorbency from the surrounding wall. Primer and paint should be chosen for that condition, not solely to match a color name.
A repair may be best handled by a professional when the substrate is substantially damaged, the material is uncertain or the result must meet an agreed property standard. The goal is a stable, suitable finish. Removing every trace by force is not inherently more successful than choosing a controlled restoration route.
Decide when the wall is ready for its next finish
Read the requirements of the new paint, wallpaper or tile before declaring the surface ready. They may call for different preparation. A wall acceptable for a particular repair coating is not automatically ready for every adhesive covering.
Check for remaining loose material, tacky residue, incompatibility, unevenness and moisture concerns. Do not use a single touch test or a universal twenty-four-hour delay as proof that all solvents and water are gone. Follow the actual treatment and finishing instructions and verify the conditions they require.
If new tile is planned, reconsider why the previous installation needed removal. A weak coating, unsuitable exposure or excessive texture can reproduce the same problem beneath a new product. Address the cause before treating a freshly painted surface as a blank slate.
For a painted finish, discuss how to blend or refinish the visible area. A small spot repair may remain conspicuous under raking light or beside older paint. Keep the expected appearance and the scope of work clear before starting, especially in rented property.
Finish the record with the products used and the condition at completion. It helps future maintenance distinguish a patched area from an original coating and avoids another removal project beginning with an unknown history.

Use a decision log that another person can understand
A useful log records the wall and coating, tile product, any added adhesive, removal method, remaining residue and the observations after each permitted step. Keep measured details separate from estimates. The purpose is repeatability and communication, not generating a probability of wall damage.
For each treatment, record the exact product, method and whether the dry surface changed. Add a photograph labeled with the location. Do not record only the successful-looking patch while omitting one where paint transferred. The unsuccessful result may be the most important evidence for deciding how to continue safely.
| Record field | Example of a useful entry | Why it matters |
|---|---|---|
| Surface | Intact painted drywall except for a small exposed-paper patch | Prevents a method for intact paint being copied onto damage |
| History | Factory-backed tile, no known added adhesive | Identifies what is known and what remains uncertain |
| Accepted method | Supplier's written procedure and document date | Keeps the decision tied to the actual product |
| Observation | Residue lifted locally; coating unchanged after drying | Describes an outcome without inventing chemistry |
| Stop condition | Paint begins transferring or paper becomes exposed | Makes escalation deliberate rather than emotional |
| Next finish | Specified repair and paint system awaiting surface acceptance | Connects cleanup to the restoration objective |
A short record also helps an owner or contractor understand what was changed. It can prevent duplicate treatments and clarify why you stopped. It is not a legal defense document or a certification that the entire wall is undamaged.
Three examples of sensible stopping decisions
A small residue patch on a documented coating
In this hypothetical case, the tile supplier and coating manufacturer accept a specific removal method. The owner tries it on a small area, completes cleanup and finds that the dry coating remains unchanged. The owner continues with the same controlled method rather than increasing concentration to speed up the rest of the wall.
Paint releases with the tile
A second owner notices that the backing carries flakes of paint and the wall shows exposed paper. Continuing with a remover intended for sealed surfaces would not preserve the original conditions. The owner photographs the area and obtains a repair plan. The project changes from cleaning to restoration before more liquid or force is introduced.
An unknown adhesive beneath an old installation
A third owner finds a thick layer unlike the factory backing and has no record of what was added. Instead of diagnosing it from color and smell, the owner keeps a sample and asks for help identifying an appropriate approach. The uncertainty is treated as a reason for assessment, not permission to cycle through solvents.
These are decision examples, not customer cases or laboratory results. They illustrate how the evidence can support continuing, stopping or seeking advice without a universal solvent ranking. The correct action depends on the actual material combination.
Keep cost and rental expectations realistic
Separate removal, cleanup, repair and repainting in the budget. An adhesive product's purchase price does not describe the eventual restoration effort, just as a difficult spot does not automatically mean the entire wall must be replaced. Obtain quotations for the actual scope when the damage or finish requirements are significant.
For a rental, communicate about visible damage and the proposed repair rather than hiding it beneath an unmatched coating. The lease, local rules and agreement with the owner are separate from the chemical compatibility decision. This guide does not predict a deposit deduction or guarantee that one method will satisfy every property inspection.
Allow time for the repair products and final finish to meet their requirements. Moving-day pressure is not a good reason to combine incompatible chemicals or keep scraping after the substrate changes. A planned pause may be less disruptive than an improvised attempt that expands the repair.
Keep reusable tools and approved products organized, but do not buy a succession of stronger removers simply because the first bottle did not resolve the problem. Sometimes the missing information is the wall condition or adhesive identity, not another chemical.
Reduce the chance of the same problem next time
For a new decorative project, confirm the exact wall and exposure before installation. Do not add an unapproved secondary adhesive as insurance. It creates another material and can change removal behavior. Keep the original preparation and product records so the next decision is not based on guesswork.
Choose a sample location where a local repair would be acceptable and use only a permitted trial. Record the result without treating it as a guarantee for years of service. A sound wall and a documented method are useful, but no generic routine eliminates every future removal risk.
Plan the extent of the covering around both appearance and restoration. A smaller agreed feature area may be appropriate for a short tenancy. A permanent finish may suit a homeowner's long-term renovation better. Neither decision needs to be sold as universally superior.
Use the installation and removal guide for the full sequence and the renter planning guide for permission, scope and exit considerations. The cleaning guide concerns care of the finished decorative face; do not confuse that task with chemical removal from the wall underneath.
Compare a cleanup quote with a restoration quote fairly
When a residue problem needs help, ask what the proposed service includes. Removing the tile, removing adhesive, stabilizing torn paper, filling, priming and repainting are separate tasks. One contractor may quote only the first two while another includes a finished wall.
Describe the area and current condition without concealing the treatments already tried. A solvent, added adhesive or heat exposure can affect the next method. Provide the product labels and photographs so the quote is based on the actual wall rather than a generic removal job.
Ask which condition is expected at completion. Ready for a particular repair system is different from ready for finish paint, and a local touch-up is different from refinishing a whole visible wall. Agreeing on the endpoint makes the comparison more meaningful than choosing the lowest headline price.
Keep contingencies explicit. The wall may reveal loose material as work proceeds, and a professional may need to stop for further assessment. A reasonable quote can describe how that decision will be handled rather than promising that every hidden layer will remain intact.
For a hypothetical comparison, one proposal covers two hours of residue cleanup only, while another includes inspection, cleanup and a specified local repair. They are not equivalent scopes, even if both are described informally as fixing the backsplash wall. Compare the tasks and assumptions, not the label.
Retain the final products and process in the household record. A later decorator should know whether a damaged-surface sealer, skim coat or other treatment was used. That information can help avoid another project beginning with an unknown substrate history.
This is also a useful stopping decision for DIY work. Once continued cleaning would predictably enlarge damage or requires a method outside the accepted scope, obtaining a repair assessment may save effort. That judgment does not require an invented percentage of repainting failures or a universal damage-risk score.
Keep product information legible after the job
Photograph the front label and the directions for every treatment actually used, including the version and any dilution instructions. Keep those images with the wall photographs rather than relying on a receipt that may show only a shortened brand name. When asking for advice, describe the sequence in order and distinguish a method recommended by the supplier from one you tried earlier. Do not leave unidentified liquid in an unmarked container for a future cleanup. Follow the product's storage and disposal directions, and retain enough information that the next person can understand what contacted the wall.
Frequently asked questions
Is rubbing alcohol always safe on painted drywall?
No. Its concentration, the coating and the permitted use matter. Do not classify it as universally low-risk because it evaporates quickly. Obtain compatible product guidance and do not apply it to exposed or damaged wallboard as a default method.
Can I use Goo Gone because the label mentions painted surfaces?
Read the full label for the exact product. The spray-gel product referenced here explicitly excludes drywall despite listing some painted surfaces. Do not ignore a specific exclusion or override it with a spot test. Ask the manufacturer when the assembly is unclear.
Can I sand off the last sticky film?
Not as an automatic step. Identify the residue, coating and any hazards first, and follow a suitable preparation method for the next finish. Sanding unknown or tacky material can create a different problem rather than a clean base.
Does torn drywall paper always require an oil-based primer?
No universal rule applies. Some specialist water-based sealers are designed for damaged porous surfaces. Match the repair product to the condition and its instructions; do not assume it also accepts every remaining pressure-sensitive adhesive.
How long should I wait before repainting?
Follow the removal, cleanup, repair and paint requirements for the actual products and conditions. A fixed delay does not prove the wall is dry, clean and compatible. Inspect the prepared surface and resolve uncertainty before applying the next finish.
What is the clearest sign to stop cleaning?
Stop when the supporting finish changes: unexpected paint transfer, torn or fuzzy paper, liquid penetration, softening or recurring dampness. Also stop when the material or product acceptance is unknown. More force or stronger chemistry is not a substitute for assessment.
Can I cover a persistent stain with new tile?
Only after the underlying condition is understood and the new system accepts the prepared wall. A stain, weak coating or moisture problem should not be hidden as a shortcut. The surface must be suitable independently of the new decorative face.
Sources and their scope
- Goo Gone Adhesive Remover Spray Gel: surfaces and exclusions — Lists some painted surfaces but explicitly excludes drywall. A spot check does not override an exclusion.
- US EPA: lead-safe renovations for DIYers — US guidance for potential lead paint disturbance; not a diagnosis or a universal international date rule.
- Rust-Oleum: Zinsser GARDZ description and uses — Water-based damaged-surface sealer; old wallpaper paste support is not blanket approval over pressure-sensitive tile glue.


Leave a comment
This site is protected by hCaptcha and the hCaptcha Privacy Policy and Terms of Service apply.