


We Fixed a Peel-and-Stick Backsplash Counter Gap
CRITICAL DIAGNOSTIC STEP: Measure Before You Buy
Before reading any further or making a trip to the hardware store, you must accurately diagnose the spatial geometry of your kitchen junction. Blindly buying caulk for a massive structural gap is the number one reason DIY backsplash projects fail within the first six months. Establish your baseline measurements now to guarantee a lifetime seal.
- ▸ Locate the single widest point of the gap.
- ▸ Determine if the wall is bowed or the counter is sagging.
- ▸ Match your measurement to the exact chemistry required below.
The most overlooked truth in budget kitchen renovations is that an ugly gap often has nothing to do with your installation skills. Older laminate countertops warp, walls bow, and houses settle over time. These structural shifts create wavy, uneven gaps at the base of your wall.
If there is a gap between a peel-and-stick backsplash and countertop, measure the widest point first. Gaps under 1/8 inch usually need kitchen and bath caulk. Gaps measuring 1/8 to 1/4 inch require a backer rod paired with flexible sealant. Larger or wavy gaps typically demand trim, quarter round, flexible molding, or a partial reinstall.

You must measure the gap geometry before purchasing materials. Diagnosing whether your countertop is out of level fundamentally mitigates wasted effort. The goal is always to use the least permanent, most moisture-resistant fix that creates an intentional, professional finish.
Why is there a gap between your peel-and-stick backsplash and countertop?
Ever feel like you failed the installation because the panels don't meet the counter flush? This section unveils a fast diagnostic method to separate installation errors from structural shifting, giving you the clarity to choose the right repair.
Understanding the root cause of the gap prevents you from applying the wrong fix. Rigid peel-and-stick vinyl panels do not bend. They immediately reveal uneven countertops more aggressively than flexible, traditional tile sheets.
Interactive Gap Size Diagnostic
Select your maximum gap width below to instantly reveal the architecturally correct repair method. Do not guess—use your tape measure.
The Gap Severity Index (GSI)
The first step in any repair is establishing a reliable metric. We rely on the Gap Severity Index (GSI)—a quantitative baseline combining maximum gap width, countertop waviness, and localized moisture exposure.
This standardized evaluation yields an optimal configuration for your repair strategy. By categorizing the gap strictly by physical dimensions, you remove guesswork. Industry consensus dictates that applying thin caulk to a severe gap guarantees structural failure.
How to Measure and Diagnose
To establish your GSI, you need hard data. Grab a tape measure, a rigid straightedge, and a standard bubble level.
Place your level flat on the countertop against the backsplash. Check if the bubble is centered. This determines if your cabinetry has settled dramatically.
Slide the straightedge along the wall. Note where the gap widens and narrows. Visualizing the wave pattern helps predict where sealant will stretch the most.
Measure the gap height at 6-inch intervals across the entire counter. Write these numbers down directly on painter's tape above each section.
Find the single widest point. This specific measurement dictates your material choice. You must engineer your solution based on the worst-case scenario, not the average gap size.
Common Causes of Uneven Gaps
A miscut first row is rarely the primary culprit in older homes. The environment itself is usually working against your installation. To truly understand why you are facing this issue, we must delve deeper into the structural anatomy of typical kitchen environments.
Deep Dive Analysis: The Structural Anatomy of Kitchen Walls
Kitchens carry massive structural weight. Base cabinets loaded with heavy cast iron pots, massive granite or quartz slabs, and full-sized appliances put immense, localized strain on floor joists. Over a span of ten to twenty years, this weight forces the floor to deflect slightly. As the base cabinets drop a fraction of an inch, they pull the countertop down with them. However, your drywall and the backsplash adhered to it remain fixed to the wall studs. This differential movement creates a distinct, uneven gap that is virtually impossible to foresee during the initial installation planning phase.
Warped Laminate Countertops
Older laminate counters absorb ambient moisture over decades. This moisture causes the particleboard core to swell. The result is a center bow that drops away near the corners. We recently evaluated a rental kitchen where the corners were tight, but a 3/16-inch center bow created a massive visual void. The expansion coefficients of particleboard under humidity stress mean this warping is entirely irreversible.
Bowed Backsplash Walls
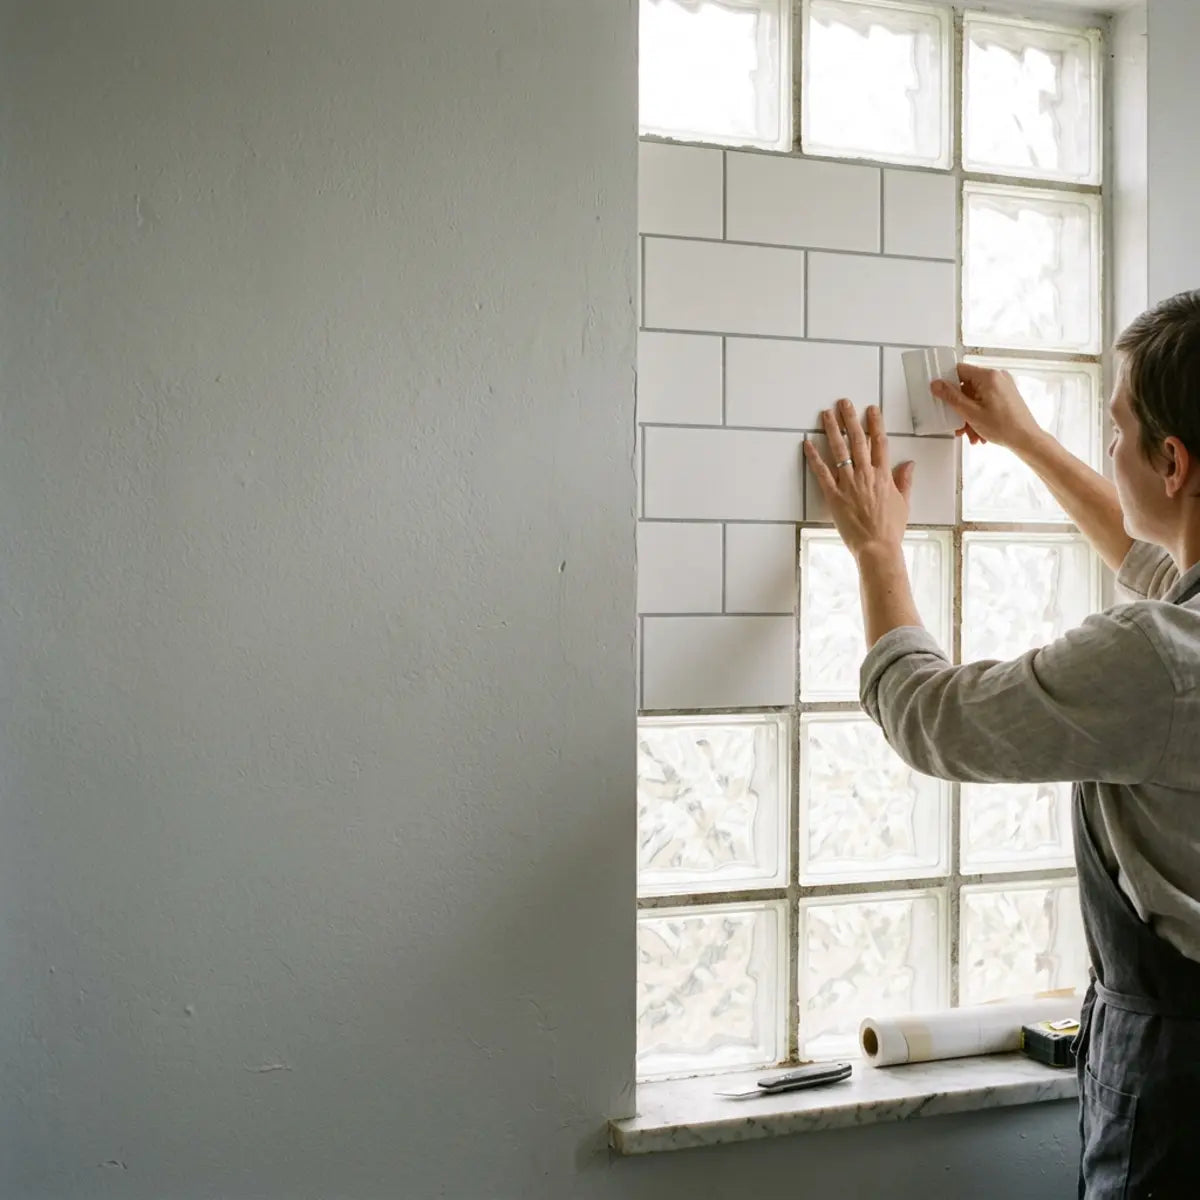
Drywall is rarely perfectly flat. Studs twist as lumber dries, creating dips and peaks in the wall surface. Subway-format products such as Rock Subway peel-and-stick wall tiles can bridge these dips, pulling the bottom edge away from the countertop alignment. When you press firmly on the center of the panel, you might feel a hollow void behind it—this is the physical manifestation of a bowed stud layout.
Uneven Adhesive Thickness
Factory-applied adhesives on vinyl panels are uniform. However, if you applied supplemental construction adhesive to an uneven wall, the varying thickness pushes the tiles out of alignment. Heavy-duty construction adhesives often cure rapidly in thick globs, preventing the panel from seating flush against the drywall plane.
Residual Caulking
Failing to scrape away the old, hardened silicone from a previous backsplash creates an invisible ramp. Your new tiles hit this ramp, angling outward and lifting the bottom edge. Silicone is notoriously resistant to chemical dissolution; it must be physically abraded or scraped down to the bare substrate.

Interactive Tool & Materials Checklist
Click the items below as you assemble your toolkit. Grouped specifically by your diagnosed gap size.
For Small Gaps (< 1/8 inch)
- 100% Silicone Kitchen Sealant: Crucial for maximum waterproof integrity near sinks.
- Dripless Caulk Gun: Prevents massive messes when you stop applying pressure.
- Premium Painter's Tape: Provides the structural boundary for a flawless, straight bead line.
For Medium/Large Gaps (> 1/8 inch)
- Closed-Cell Backer Rod: Foam string that prevents three-point adhesion and controls sealant depth.
- Flexible PVC Molding or Trim: For masking severe variations without telegraphing the wave.
- Heavy-Duty Acrylic Mounting Tape: A permanent-strength, renter-friendly adhesive for attaching trim.
Gap Diagnosis and Repair Matrix
To ensure a deterministic outcome, you must match the physical reality of the gap to the appropriate material. The table below outlines the architectural standard for these repairs. Attempting to bypass these recommendations generally results in immediate material failure.
| Gap Width (Widest Point) | Likely Cause | Water Intrusion Risk | Best Repair Method | Renter Friendly? | Est. Cost |
|---|---|---|---|---|---|
| Under 1/16 inch | Tight fit, minor wall wave | Low to Moderate | 100% Silicone Kitchen Sealant | Yes (Easily removed) | $5 - $10 |
| 1/16 to 1/8 inch | Slight counter drop, rigid tile | High (Capillary action) | Hybrid/Silicone Sealant | Yes (Easily removed) | $8 - $12 |
| 1/8 to 1/4 inch | Warped counter, deep wall dip | Very High (Water pooling) | Backer Rod + Sealant | Yes | $12 - $18 |
| Over 1/4 inch | Severe settling, cut error | Extreme | Flexible Molding / Trim | Yes (With mounting tape) | $15 - $30 |
The Physics of Rigid vs. Flexible Materials
Why do peel-and-stick panels look worse over bad counters than ceramic tile? The answer lies in the installation medium. The fundamental physics dictating fluid movement and structural bridging are entirely different for self-adhesive vinyl compared to traditional masonry products.
Ceramic tiles are set in mortar. Mortar acts as a variable filler. You can press a tile deeper into the mud to accommodate a wavy wall. If the wall is severely bowed, an experienced tile setter simply beds the tile with an extra half-inch of thinset mortar to create a perfectly plumb visual line.
Self-adhesive backsplash panels lack this luxury. They adhere exactly parallel to the wall's current state. If the wall waves outward, the bottom edge of a rigid panel acts like a seesaw, lifting off the countertop. Because there is no mortar to fill the void behind the panel, the mechanical tension forces the exposed bottom edge away from the counter surface.
Relying on Manufacturer Data
Major panel manufacturers and the Environmental Protection Agency (EPA) offer strict guidance on moisture control. Installation sheets explicitly state that peel-and-stick panels are water-resistant, not waterproof.
The Science of Capillary Action
Leaving a gap at the countertop junction violates basic moisture barrier principles. Spilled water will wick behind the adhesive backing via capillary action—a physical phenomenon where liquid flows in narrow spaces without the assistance of gravity. This inevitably leads to panel failure, peeling, and rapid mold growth behind the drywall. Water does not just sit in the gap; it actively climbs upwards.
How do you choose between caulk, backer rod, and trim?
Paralyzed by too many material options at the hardware store? This section maps out a concrete decision tree, ensuring you buy the exact supplies needed for your specific gap size.
Selecting materials based on aesthetic preference rather than structural reality is a common pitfall. The physical dimensions of the gap dictate the necessary chemistry and hardware. Attempting to force a material into an environment it wasn't engineered for is an exercise in futility.
The Cost-to-Yield Ratio of Materials
When evaluating total cost of ownership (TCO) for a DIY project, doing it twice is the most expensive outcome. Buying a three-dollar tube of cheap latex caulk for a massive gap has a terrible cost-to-yield ratio. It will shrink, crack, and fail within months, requiring scraping, chemical cleaning, and reapplication. Investing an extra $15 upfront for PVC trim or silicone backer setups saves immense future labor.
The Decision Matrix
Let the numbers make the decision for you. This approach mathematically isolates the correct path forward.
- Rule 1 If Width < 1/8 inch: Proceed directly to caulking.
- Rule 2 If Width = 1/8 to 1/4 inch: You must insert a backer rod before caulking.
- Rule 3 If Width > 1/4 inch: Abandon liquid sealants entirely. Proceed to physical trim or molding.
Pro-Tip: Why Oversized Caulk Beads Fail
It is incredibly tempting to take a gap that measures 5/16 of an inch and attempt to fill the entire void with a massive, thumb-sized bead of heavy silicone. This is a critical mistake based on a misunderstanding of how sealant cures.
Silicone cures via moisture absorption from the air. A massive blob of silicone will quickly skin over on the outside, creating an impenetrable barrier. The thick core of sealant trapped underneath will remain uncured, liquid, and fundamentally weak for weeks or months. When the countertop expands or shifts even marginally, this weak liquid core shears apart, causing the entire joint to collapse inward. Always use backer rod to keep your sealant bead strictly limited to a maximum depth of 1/4 inch.
How do you fix a small backsplash gap with caulk?
Worried about ruining your hard work with a messy, lumpy line of sealant? This section provides a beginner-safe, foolproof caulking process that guarantees a clean, moisture-resistant finish.
Small gaps under 1/8 inch are highly susceptible to capillary action. Water gets sucked into these tiny spaces quickly. A precise line of high-quality sealant is mandatory to protect your kitchen.
Establishing Seal Line Quality (SLQ)
To achieve a professional result, we evaluate Seal Line Quality (SLQ). This metric accounts for adhesion strength, bead consistency, and long-term water resistance.
When establishing this quantitative baseline, 100% silicone sealant functions as the architectural standard. It inherently neutralizes moisture intrusion. It also resists the performance degradation curve far better than cheap acrylic alternatives.
Selecting the Right Chemistry
Not all tubes in the paint aisle do the same job. You must understand the chemical differences to avoid catastrophic shrinkage.
Comprehensive Material Profile: 100% Silicone vs. Hybrid Polymers
100% Silicone SealantSilicone is highly flexible, completely waterproof, and immune to temperature changes. It is the gold standard for areas exposed to standing water. However, it cannot be painted and is incredibly sticky during application. If you make a mistake, it requires chemical solvents like mineral spirits to clean up effectively. It represents the highest tier of waterproofing efficacy available to consumers.
Acrylic Latex CaulkLatex caulk is water-based, paintable, and easy to clean up with a wet rag. Unfortunately, it shrinks as the water evaporates. It also turns brittle over time. Industry consensus dictates avoiding pure latex near kitchen sinks, as continuous water exposure degrades the acrylic polymers, turning the seal into a chalky paste that washes away.
Hybrid Kitchen and Bath SealantsThese modern formulas blend the elasticity of silicone with the user-friendliness of acrylic. They offer excellent adhesion and contain mildewcides. They are a highly capable alternative for beginner DIYers, offering water cleanup while retaining an acceptable degree of elastomeric stretch across changing seasons.
Sealant Comparison Data
| Sealant Type | Best For | Flexibility | Paintable? | Cleanup Method |
|---|---|---|---|---|
| 100% Silicone | Sinks, heavy water zones | Extreme | No | Mineral Spirits |
| Acrylic Latex | Dry baseboards, trim | Low | Yes | Water |
| Hybrid Formulas | General kitchen gaps | High | Yes (Usually) | Water |
The Foolproof Caulking Process
Applying sealant is about preparation, not just squeezing a trigger. Follow this deterministic sequence to ensure a flawless finish. Deviating from these steps invites premature structural breakdown.
Step 1: Aggressive Surface Preparation
Sealant will not bond to grease, dust, or wet adhesive. You must degrease the countertop and the bottom edge of the tiles.
Use a lint-free rag soaked in isopropyl alcohol. Scrub the junction aggressively. Allow the alcohol to flash off and dry completely. Sealing over trapped moisture guarantees immediate failure.
Step 2: The Painter's Tape Boundary
Do not rely on a steady hand. Apply a strip of high-quality painter's tape along the countertop, leaving a 1/16-inch reveal.
Apply a second strip along the bottom edge of the peel-and-stick tiles. This creates a hard physical boundary. It calibrates the output of your bead, ensuring perfectly straight lines.
Step 3: Nozzle Calibration
Cut the sealant tube nozzle at a sharp 45-degree angle. The opening should be tiny—no wider than a standard finishing nail. A small hole forces the sealant deep into the gap rather than globbing it on the surface.
Step 4: Continuous Application
Load the tube into a dripless caulk gun. Hold the gun at a 45-degree angle. Pull the nozzle steadily along the gap, applying consistent pressure. Do not stop in the middle of a continuous counter run.
Step 5: The Smoothing Technique
You must tool the joint immediately. Do not use your dry finger. The friction will drag the silicone.
Instead, mist the fresh bead lightly with soapy water. Glide a dedicated silicone smoothing tool (or a wet finger) gently over the bead. This forces the material into the gap and wipes away excess.
Step 6: Immediate Tape Removal
Do not wait for the sealant to cure. Pull the painter's tape immediately while the silicone is still wet. Pull it at a sharp angle away from the fresh joint to slice the edge cleanly.

Cross-Section Schematic: Backer Rod & Sealant Dynamics
This textual schematic breaks down the spatial relationship required for a successful, flexible joint where the gap exceeds 1/8 inch.
- Drywall Substrate: The rigid vertical background plane.
- Peel & Stick Panel: Applied parallel to the drywall. The bottom edge is suspended above the counter.
- Countertop Surface: The horizontal plane that has settled or warped downwards.
- Closed-Cell Backer Rod: Squeezed into the void. Recessed slightly below the surface of the tile edge to form a structural "floor" for the caulk.
- Silicone Bead: Bridges precisely from the panel face to the counter face, resting lightly on the unbonded backer rod.
Understanding Cure Times
Manufacturer technical data sheets are very strict regarding cure times. "Dry to touch" is not the same as "fully cured."
Most 100% silicone requires 24 hours of undisturbed curing. Using the sink or generating steam during this window alters the chemical cross-linking, permanently weakening the seal. During this period, the acetic acid within the silicone is actively off-gassing and drawing moisture from the surrounding air to finalize its elastomeric properties. Disturbing this process will leave you with a soft, gummy joint that readily attracts kitchen dirt.
How do you fix medium or large gaps without making them look patched?
Staring at a massive gap that caulk alone cannot possibly hide? This section reveals how to use backer rod, flexible trim, and quarter round to bridge irregular spaces cleanly and intentionally.
Attempting to fill a massive void with pure caulk is a universally recognized paradigm of failure. The sealant will sag, shrink, and tear away from the edges as it dries.
Bridging the Gap Efficacy
We measure success here by Gap Bridging Efficacy (GBE). This metric evaluates how well a material spans a void while maintaining structural integrity.
When a gap exceeds an operational threshold of 1/8 inch, standard sealant fails the GBE test. You must introduce a physical substrate. This engineered approach bypasses the limitations of liquid chemicals.
Lease & Renter Warning Box
Before executing a repair on a medium or large gap in a rental unit, you must evaluate the permanence of your adhesives. Utilizing construction adhesive (like Liquid Nails) or driving brad nails directly into your landlord's laminate countertop will undoubtedly result in hefty security deposit deductions.
The Safe Path: Always opt for heavy-duty, double-sided acrylic mounting tape combined with lightweight PVC trim. This provides structural shielding against water but can be meticulously sliced away with a razor blade and cleaned up using a citrus-based adhesive remover when your lease terminates.
The 1/8 to 1/4 Inch Gap: Using Backer Rod
A closed-cell backer rod is a cylindrical foam string. It acts as a shock absorber and a depth stop for your sealant.
Why Backer Rod Works
Sealant is designed to stretch in only two directions: up and down. If sealant bonds to the back of a deep gap (three-point adhesion), it cannot stretch properly. It will tear under stress.
Backer rod prevents this. Sealant will not bond to the foam. This ensures the caulk only adheres to the tile and the counter, allowing it to flex naturally with seasonal changes.
Installation Sequence for Backer Rod
- Select the Size: Buy a backer rod slightly larger than your widest gap. If the gap is 1/4 inch, buy a 3/8-inch rod. The foam must be compressed to stay lodged in place.
- Compress and Insert: Use a blunt plastic putty knife to push the foam into the gap. Do not use sharp objects that might tear the closed-cell structure.
- Set the Depth: Recess the foam slightly below the surface of the tiles. A general rule is to recess it to a depth equal to half the width of the gap.
- Seal over the Top: Apply your 100% silicone directly over the foam, using the taping method described previously.
The Wavy Gap: Flexible Molding
If your countertop has a massive 3/8-inch dip in the center but is tight at the edges, rigid trim will not work. You need flexible vinyl molding.
Advantages of Flexible Trim
Flexible peel-and-stick trim is engineered from pliable PVC. It conforms perfectly to warped surfaces. It acts as a primary physical barrier, completely shielding the gap from view. Because the material itself moves, it will not snap or lift off the counter like a stiff piece of wood.
Applying Flexible Molding
- Degrease Relentlessly: The adhesive backing on PVC molding is unforgiving. Clean the counter thoroughly. Any microscopic layer of cooking oil will prevent a permanent bond.
- Pre-bend the Corners: Unroll the trim and let it sit in a warm room to relax the plastic memory. This reduces the inherent tension trying to pull the trim back into a coil.
- Apply Gradual Pressure: Peel the backing away a few inches at a time. Press the molding firmly against the tile and the counter simultaneously.
The Massive Gap: Quarter Round or Scribe Molding
For gaps exceeding 1/4 inch across a relatively flat surface, architectural wood or PVC trim is the only acceptable solution.
PVC vs. Wood Trim
We strongly advocate for PVC quarter round in kitchens. Wood absorbs water, swells, and rots. PVC is entirely immune to moisture. It is easily cut with a standard miter shear or a hand saw. Furthermore, modern PVC trim is manufactured with a brilliant white, smooth finish that often negates the need for painting.
Renter-Friendly Trim Installation
Renters cannot nail trim into laminate countertops. Thankfully, modern adhesives offer a statistically significant holding power without permanent damage.
Use high-strength, double-sided acrylic mounting tape on the back of the PVC trim. Press it firmly against the peel-and-stick tiles. Apply a micro-bead of clear silicone along the bottom edge to stop crumb and water ingress. When it is time to move, the tape can be sliced away with a razor blade.
Addressing the Crumb Trap Myth
A common misconception is that adding trim creates a shelf for crumbs and grease.
Empirically demonstrated results show that a properly sealed trim edge is easier to wipe clean than an exposed, jagged tile gap. The key is applying a microscopic, imperceptible line of clear sealant at the very base of the trim. This neutralizes the crumb trap effect entirely.
Final Thoughts
A visible gap under your new peel-and-stick backsplash is a structural symptom, not a personal failure. Countertops warp, houses settle, and walls bow.
By measuring the widest point of the gap, you remove the guesswork. You can then diagnose the severity and apply the correct Gap Severity Index (GSI) protocol. Use high-quality silicone for hairline spaces, introduce a backer rod for medium voids, and rely on flexible PVC trim for large, wavy deviations.
Start with the least invasive, most moisture-resistant repair possible. We encourage you to review your exact measurements before standing in the hardware store aisle. If you found this diagnostic approach helpful, explore our related guides on properly cutting vinyl tiles and mastering advanced caulking techniques for a flawless kitchen finish.
Frequently Asked Questions
Will water get behind my peel-and-stick backsplash if left unsealed?
Concerned about hidden mold growth behind your beautiful new walls? This section explains the silent dangers of capillary action in the kitchen.
Yes. Capillary action forces water upward into tight, unsealed spaces. Because peel-and-stick panels rely on a foam adhesive backing, prolonged water exposure dissolves the glue. This causes the panels to peel away and allows dangerous mold to colonize the drywall behind it. Sealing the bottom edge is an absolute requirement, not a cosmetic suggestion.
Can I use grout instead of caulk for peel-and-stick tile?
Hoping to achieve a highly realistic tile look by smearing grout along the counter line? This section outlines why rigid grout fails against flexible vinyl and countertops.
No. Traditional cement or epoxy grout is entirely rigid. Vinyl tiles expand and contract with temperature changes, and countertops shift slightly under heavy weight. Rigid grout placed in this expansion joint will inevitably crack, crumble, and fall out. You must use a flexible elastomeric sealant, like 100% silicone, at any change of plane or material junction.
Is quarter round trim actually renter-friendly?
Worried about losing your security deposit by nailing wood into your landlord's cabinets? This section details a completely non-destructive method for installing architectural trim.
Yes, if installed correctly. Instead of using a brad nailer, renters can use heavy-duty, double-sided acrylic mounting tape to attach lightweight PVC quarter round directly to the face of the vinyl backsplash. This creates a secure, moisture-blocking physical barrier that can be carefully pried off and cleaned with an adhesive remover upon move-out.
How long does sealant take to cure before I can use the sink?
Anxious to get your kitchen back in working order without ruining the fresh seal? This section clarifies the vital difference between drying and cross-linking cure times.
While many sealants claim to be "water-ready" in 30 minutes, this only refers to a superficial skin forming on the outside. The internal chemical cross-linking of 100% silicone requires a full 24 hours of curing. Exposing the bead to heavy splashes, scrubbing, or high steam within that first day will compromise the adhesion and drastically shorten its lifespan.

Leave a comment
This site is protected by hCaptcha and the hCaptcha Privacy Policy and Terms of Service apply.