






Evidence-led backsplash care
Explore this guide
A bubble appears beside the kitchen faucet. One tile edge feels loose. It is natural to suspect a hidden leak, but lifting peel-and-stick tile does not prove that water reached the drywall. After you identify the likely moisture source, the Kitchen Backsplash Guide helps you review the rest of the wall system, including sink and range zones, seams, edges, and service access.
You can screen for moisture behind a peel-and-stick backsplash without removing every tile by combining visual and odor observations, dry-control moisture mapping, humidity readings, thermal screening, and carefully observed fixture-use tests.
No single symptom, meter percentage, or thermal image proves wet drywall. Persistent, repeatable signals should be confirmed through selective access or qualified professional inspection.
The safest approach begins with zero-disturbance checks. You then compare suspicious areas with dry controls, retest under consistent conditions, account for misleading materials, and escalate only when independent evidence agrees.
That process matters because peel-and-stick backsplash bubbling can also result from heat, grease, poor surface preparation, paint failure, stretched tile, or an unsealed edge. A pinless meter may react to metal. A thermal camera sees temperature differences, not water.
What you need is an evidence ladder—not a gadget verdict.
The Five-Stage Testing Ladder
How Can You Build a Reliable Moisture Map Without Removing Tile?
Does the hidden drywall make every bubble, odor, or unusual meter reading feel impossible to interpret?
A repeatable moisture map helps separate meaningful patterns from heat, metal, construction materials, and installation defects.
The best way to detect moisture behind peel-and-stick backsplash is to compare multiple signals across a numbered grid. Start with visual observations, establish dry controls, scan consistently, record room conditions, and repeat the test.
We call this the Corroborated Moisture Check Sheet, or CMCS. It is a practical decision aid, not a published building standard or substitute for professional testing.
The check sheet organizes observations according to five factors:
- ●Repeatability: Does the same location produce a similar result during separate scans?
- ●Spatial pattern: Does the anomaly follow gravity, a seam, a pipe route, or a fixture penetration?
- ●Independent signals: Do visual changes, odor, meter behavior, humidity, and temperature patterns agree?
- ●Fixture timing: Does the anomaly appear or intensify during normal faucet, drain, or dishwasher use?
- ●Alternative explanation: Could metal, studs, heat, grease, dense adhesive, or surface texture explain the result?
A single high meter reading may have low confidence. A repeated reading that expands below a faucet penetration, coincides with damp cabinet material, and changes after normal fixture use carries far more weight.
What should you inspect before using any instrument?
Begin with your eyes, hands, nose, and phone camera. This creates a dated baseline before an instrument introduces numbers that may appear more certain than they are.
Look across the wall from a low angle. Side lighting often reveals subtle edge lifting, swelling, or surface distortion that overhead lighting hides.
Check these locations closely:
- Tile seams: Look for lifting that begins at a vertical or horizontal joint rather than in the tile center.
- Countertop seam: Inspect the backsplash-to-counter joint for gaps, separated caulk, discoloration, or softened sealant.
- Faucet penetrations: Examine escutcheons, mounting holes, sprayer openings, and wall-mounted supply points.
- Sink corners: Watch for splash paths where water repeatedly reaches an unsealed tile edge.
- Cabinet interior: Feel the sink base, back panel, supply valves, drain fittings, and disposal connections.
- Wall texture: Note bulges, soft spots, staining, peeling paint, or gypsum dust at exposed edges.
- Adhesion pattern: Record whether lifting is isolated, widespread, heat-facing, or concentrated near water.
- Odor pattern: Note where and when a musty odor is strongest without treating odor as proof of mold.

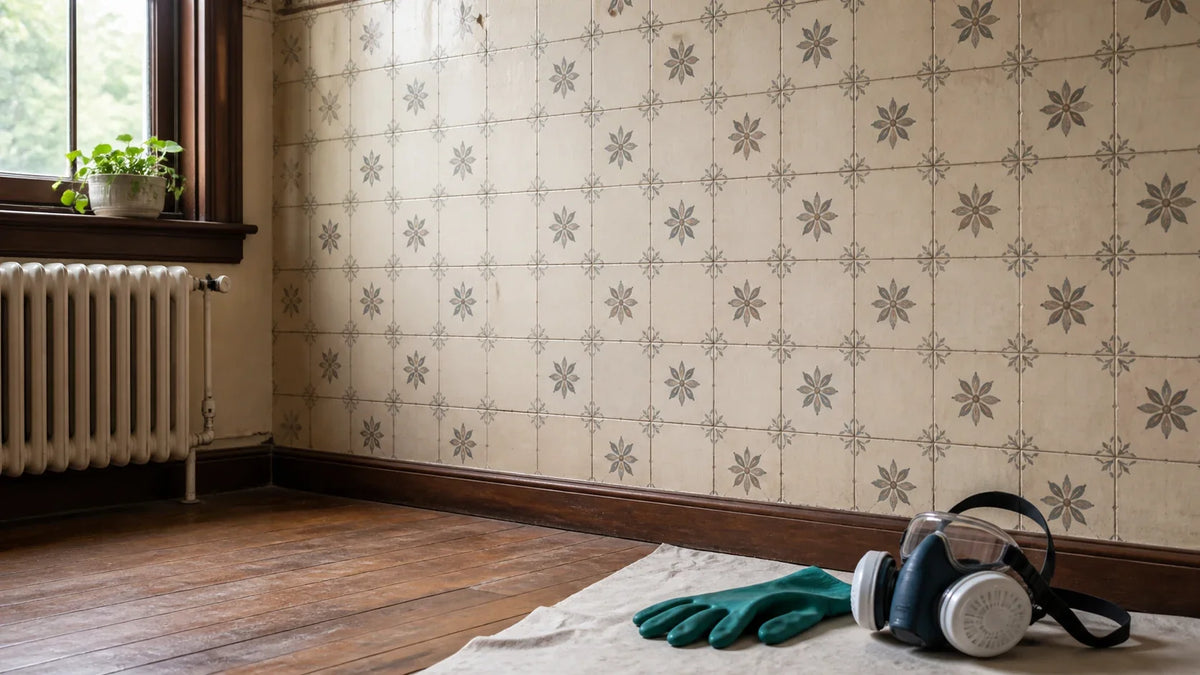
Illustrative condition to investigate; appearance alone does not establish moisture or mold.
A musty smell may come from damp wood, cabinet contents, a drain, old cleaning materials, or microbial VOCs. Microbial VOCs are volatile compounds that some microorganisms can produce, but they are not specific enough to identify mold growth.
Consumer VOC sensors cannot confirm concealed mold. The U.S. Environmental Protection Agency explains that total VOC readings do not identify individual contaminants or their sources, while academic reviews describe microbial VOC interpretation as limited by background chemicals and inconsistent emission patterns (EPA; Korpi, Järnberg and Pasanen, 2009).
A renter-friendly wall-risk review can reveal uncured paint, weak patches, residue, or likely paint lift before adhesive tile goes up. Use the documented patch testing and removal-planning steps in our practical backsplash risk checklist.
Evaluate backsplash wall-damage risk before installationHow should you create dry controls and a testing grid?
A comparison point should have similar construction and no known exposure to the suspected leak. Unless its condition has been independently confirmed, call it apparently dry rather than treating it as a verified standard. Compare several locations and retain uncertainty about hidden conditions.
Compare like for like. A reading over smooth polymer tile should not be benchmarked against bare drywall, a metal-faced tile, solid wood, or masonry.
Use this field-style sequence:
- Stabilize conditions: Avoid testing immediately after cooking, running a kettle, opening windows, or directing HVAC air at the wall.
- Photograph the area: Include the sink, counter seam, outlets, cabinets, and visible defects.
- Draw a grid: Mark virtual squares approximately 4 to 6 inches apart on a photo or removable overlay.
- Number each point: Use labels such as A1, A2, B1, and B2 so repeat scans match the original locations.
- Select controls: Choose at least three points of similar tile and wall construction away from plumbing, heat, and visible damage.
- Record conditions: Log room temperature, relative humidity, recent fixture use, cooking activity, and time.
- Scan consistently: Keep the meter orientation, pressure, placement, and scan direction the same.
- Repeat later: Rescan after conditions stabilize and again after normal fixture use if doing so is safe.
A useful grid might cover three columns around the faucet and four rows from the upper backsplash to the countertop. Add control points on the same wall beyond the sink drop zone.
dry A1 A2 C2
dry B1 B2
↑ ×2 B3
↑ ×1 C3
dry D1 D2
↑ ×1 D3 D4
Dry controls: Use at least three comparable locations so one unusual control does not define the baseline.
Painter’s-tape labels: Mark grid coordinates on removable tape rather than on the tile finish.
Same-time retesting: Repeat at a similar time of day to reduce changes caused by sunlight, cooking, and HVAC cycles.
Use the related wall-moisture guide as an observation-planning resource, not as proof of a completed test or a universal safe meter reading. Comparisons need consistent material modes and locations, and apparently dry controls may still need confirmation.
If you want a ready-to-follow baseline before adhesive touches the wall, the guide also includes pin-versus-pinless guidance, false-positive checks, a documented reading log, and a traffic-light decision framework.

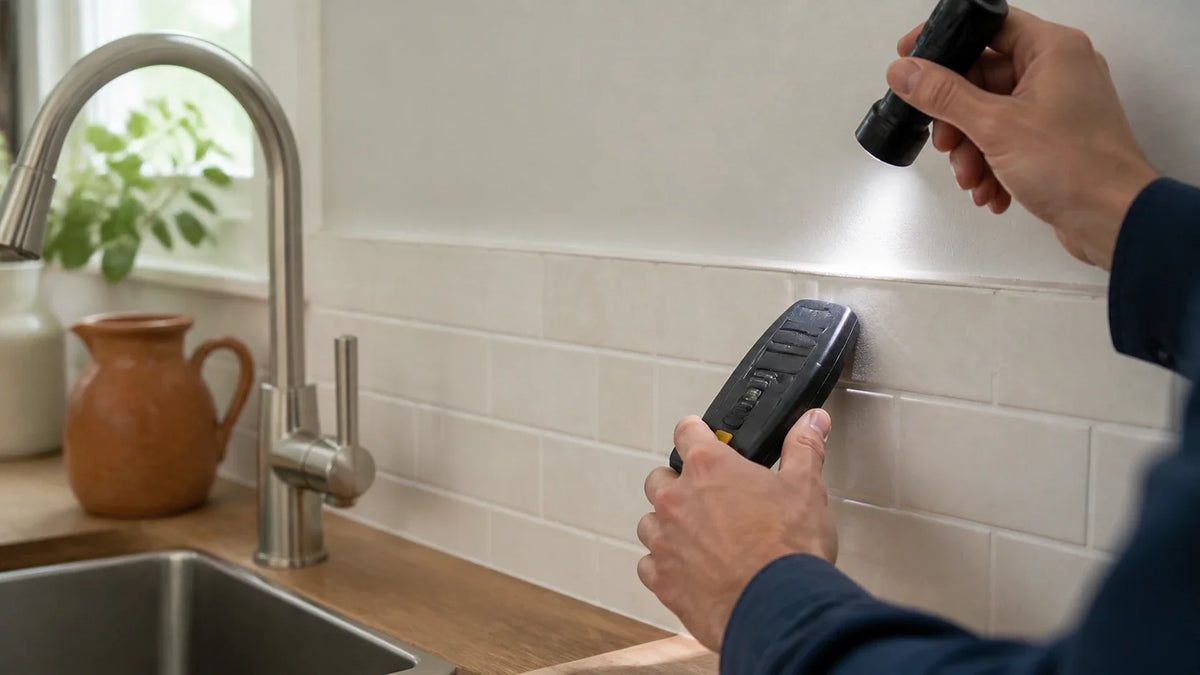
Instrument-use illustration, not a valid reading or approval of the illustrated mode or wet-surface measurement.
Printable Moisture-Screening Field Log
Record normal results as carefully as suspicious ones. A complete log makes changes, controls, and timing easier to compare.
| Location | Date/time | Fixture use | Humidity | Temperature | Odor | Reading/repeat |
|---|---|---|---|---|---|---|
Can a moisture meter detect water behind tile?
A moisture meter can detect a material response associated with moisture, but it cannot independently prove that wet drywall is behind the tile. Results depend on meter type, sensing depth, calibration, material density, adhesive, and nearby conductive objects.
A pinless capacitance moisture meter sends an electromagnetic signal into the assembly and measures changes in its electrical response. Moisture can raise that response, but so can metal fasteners, pipes, foil layers, corner bead, wiring, and changes in density.
Tramex explains that the ME5 uses comparative readings for materials such as drywall and tile, and that conductive materials can cause high responses. Follow the exact instrument’s supported material mode, contact and depth limitations rather than reading every displayed percentage as drywall water content. ME5 measurement guidance · metal-related false positives.
Wagner’s Orion manual similarly instructs users to establish baselines and account for embedded metal, material thickness, and measurement conditions rather than treating one reading as an absolute diagnosis (Wagner Orion manual).
Use relative patterns:
- Dry-control range: Record the normal spread across comparable, apparently dry points.
- Suspicious deviation: Flag readings consistently above that local range rather than applying a universal percentage.
- Repeat pattern: Give more weight to points that remain elevated across several scans.
- Contiguous shape: Look for connected readings rather than one isolated spike.
- Vertical behavior: Moisture often produces a downward or spreading pattern, though capillary movement can complicate it.
- Metal check: Compare the anomaly with stud, pipe, outlet, fastener, and tile-feature locations.
Meters calibrated for wood may display a percentage that resembles moisture content. That number may be a relative scale on tile and drywall assemblies. It should not be interpreted as literal drywall moisture content unless the manufacturer explicitly supports that material and mode.
What the Meter Signal Passes Through
How do metal, studs, grease, and heat create false positives?
False positives often follow construction geometry more neatly than water does. A vertical line may mark a stud or pipe. A sharp point may identify a fastener. A broad warm area beside a range may reflect heat exposure and adhesive softening.
Consider four common confounders:
- Metallic finish: Foil-backed, metallic-coated, or dimensional tiles may change the meter response across the entire installation.
- Hidden framing: Studs and blocking alter material density, producing a repeatable structural pattern.
- Plumbing and wiring: Copper pipes, metal boxes, cables, and protective nail plates can cause strong localized readings.
- Surface contamination: Grease and cleaner residue can weaken adhesive or affect surface behavior without wetting the drywall.
Suppose grid point B2 reads far higher than its neighbors. It repeats during three scans, but the same spike continues vertically from the countertop to the upper cabinet.
A repeatable response along a possible framing line needs careful interpretation. Conductive materials or construction differences may explain it, but that possibility does not cancel other evidence of water. Record the alternative explanation rather than subtracting points from a diagnosis.
Heat can mislead in a different way. Tile beside a range may bubble after cooking because the adhesive softens or the substrate and tile expand at different rates. If the bubble remains dry by comparison, lacks odor, and aligns with a heat zone, moisture confidence stays low.
What can humidity and dew point tell you?
Relative humidity helps explain whether condensation is plausible, but it does not reveal whether drywall is already wet. Record it with air temperature and surface temperature.
Relative humidity is the percentage of moisture in the air compared with the maximum the air can hold at that temperature. Dew point is the temperature at which air becomes saturated and water can condense on a surface.
ASHRAE psychrometric guidance treats temperature, humidity ratio, relative humidity, and dew point as connected properties, not interchangeable measurements (ASHRAE Psychrometrics).
If the backsplash surface or hidden wall cavity falls below the dew point, condensation becomes physically possible. This can occur near cold-water pipes, poorly insulated exterior walls, or during humid summer weather.
For example, a backsplash anomaly that appears during humid weeks, fades during dry weather, and does not respond to fixture use may indicate condensation risk. That pattern is still not proof. It raises a hypothesis that should be tested against temperature and humidity records.
Use the high-humidity guide to distinguish room air conditions, condensation and direct water exposure. It provides planning and inspection guidance, not an 85% humidity performance test of Stickwoll.
high-humidity wall checks guideCan a thermal camera find wet drywall behind a backsplash?
A thermal camera can identify surface-temperature anomalies that may correlate with evaporation or heat-flow changes. A thermal anomaly is not proof of water.
Infrared thermography measures emitted infrared radiation and translates it into apparent surface temperatures. It does not see through tile and does not directly image moisture.
FLIR explains that thermal imaging shows temperature differences that can help locate suspected moisture, but those patterns do not establish water without appropriate confirmation. FLIR inspection guidance.
Peer-reviewed building research reaches the same practical conclusion: thermal results depend on environmental conditions, material properties, heating or cooling cycles, and operator interpretation. Thermography is most useful when temperature contrast exists and results are benchmarked against unaffected areas.
Watch for these confounders:
- Cold-water piping: A cool vertical line may be a pipe rather than damp drywall.
- Air leakage: Drafts around cabinets, outlets, and exterior-wall gaps can create cool patterns.
- Sun and appliances: Solar gain, ranges, dishwashers, and countertop appliances distort temperatures.
- Reflective tile: Glossy or metallic surfaces reflect infrared energy, reducing measurement reliability.
- Evaporation timing: A wet area may lack a clear thermal signature once temperatures equalize.
Thermal screening becomes more informative when its pattern agrees with separate evidence, such as an elevated comparative meter response, a soft edge, or fixture-linked change.
An irregular cool area may support a moisture hypothesis only when meter, visual, or timing evidence agrees.
A narrow vertical or horizontal cool line often follows plumbing geometry rather than a spreading plume.
A broad warm zone beside a range or dishwasher can distort comparisons and soften adhesive.
Time-linked heating may explain a thermal color change without concealed water.
What does each method contribute?
There is no validated diagnostic equation in this guide. The check sheet is a way to organize observations, not a probability model, certification or substitute for professional assessment.
| Method | Signal measured | Primary limitation | Common confounder |
|---|---|---|---|
| Visual and tactile observation | Surface change, softening, staining, adhesion failure | Damage may appear late or have a non-moisture cause | Heat, grease, poor preparation, paint failure |
| Pinless moisture meter | Comparative electromagnetic response | Cannot identify the exact wet layer or cause | Metal, studs, pipes, fasteners, density |
| Hygrometer and temperature log | Air conditions and condensation potential | Does not measure concealed drywall moisture | Cooking, open windows, HVAC cycles |
| Thermal camera | Surface-temperature differences | Does not detect water directly | Pipes, airflow, heat, reflections |
| Normal fixture-use observation | Timing linked to ordinary operation | May miss intermittent or slow leaks | Splashing and pre-existing dampness |
Do not assign or subtract numerical confidence points. A plausible alternative explanation does not cancel active evidence of a leak. Record which observations agree, which remain unexplained and what question a qualified inspection should answer.
Consider this sink-area example:
- First scan: B2, B3, and C3 read above three dry controls.
- Second scan: B2 stays high, while B3 and C3 return near baseline.
- Metal check: B2 aligns with a stud or protective plate.
- Thermal scan: No connected cool pattern appears.
- Observation: A bubble near the range grows after cooking, not sink use.
The initial alarm is fundamentally mitigated by repeat testing. B2 receives a possible alternative explanation, and the heat-related bubble remains a low-confidence moisture signal.
Moisture observation checklist
These boxes organize observations; they do not calculate a diagnosis or determine that waiting is safe. Active water, electrical involvement, rapid spread, contaminated water or material softening require prompt professional action.
Which Evidence Justifies Drying, Selective Access, or a Pro?
How do you know when monitoring is reasonable and when waiting could allow damage to spread?
The least-destructive decision threshold turns your moisture map into clear actions, urgent stop conditions, and role-specific professional referrals.
Escalation is justified when repeatable, independent evidence outweighs plausible confounders. You do not need absolute certainty before stopping a water source, but you should not remove an entire backsplash because of one unexplained meter spike.
We call this the Least-Destructive Decision Threshold, or LDDT. It is the minimum evidence needed to justify monitoring, plumbing repair, selective access, drying, or professional assessment.
What should make DIY testing stop immediately?
Stop testing and control access if you see active water, rapid material change, or possible electrical involvement. Do not keep operating a fixture to reproduce a suspected leak.
Urgent triggers include:
- Active flow: Water is running from a wall, cabinet, fitting, outlet, or backsplash edge.
- Rapid expansion: Staining, softness, bubbling, or elevated readings spread over minutes or hours.
- Electrical warning: An outlet is wet, a breaker trips, lights flicker, or buzzing and burning odors occur.
- Structural softening: Drywall crumbles, cabinets swell, or the countertop support appears affected.
- Contaminated water: Drain backup, sewage, dishwasher discharge, or unknown water enters the assembly.
- Health symptoms: Occupants experience acute symptoms that improve away from the area.
If it is safe, close the fixture shutoff valve or main water valve. Do not touch wet electrical equipment. Contact an electrician or emergency service when electrical risk is present.
EPA advises prompt drying of wet materials and uses 24–48 hours as a prevention guideline rather than a guaranteed threshold. Do not wait for that period to pass before acting on a known leak. EPA moisture guidance.
The ANSI/IICRC S500 standard provides the professional framework for water-damage inspection, extraction, drying goals, and documentation. It is a consensus standard rather than a law unless adopted by a contract, insurer, authority, or regulation (IICRC S500).
How can timing distinguish condensation, caulk failure, and a plumbing leak?
Timing is often more informative than peak meter value. Track what happens before, during, and after ordinary household activity.
Never loosen a connection, block a drain, overflow a sink, or increase water pressure to provoke a leak. Observe only normal use and stop if water appears.
| Pattern | More consistent with | Evidence to check |
|---|---|---|
| Appears after splashing and follows the counter seam | Failed or missing edge seal | Caulk gaps, surface water path, dry cabinet plumbing |
| Appears only while the faucet runs | Faucet body, supply, or wall connection leak | Valve stems, hoses, faucet base, supply penetrations |
| Appears while the sink drains | Drain, trap, disposal, or dishwasher connection | Drain joints, disposal flange, hose connections |
| Tracks humid weather and cold surfaces | Condensation | Dew point, exterior-wall temperature, cold pipes |
| Appears after cooking near a range | Heat or steam exposure | Surface temperature, ventilation, adhesive condition |
| Persists regardless of fixture use | Old damage, slow leak, condensation, or confounder | Repeat map, controls, access inspection |
A slow faucet leak may show as dampness beneath the faucet base after ten minutes of normal use. The backsplash meter map may remain unchanged while the cabinet back becomes visibly damp. That directs the response to plumbing rather than tile removal.
Seasonal condensation produces a different curve. Readings may rise during humid weather near a cold pipe or exterior corner, then fall as indoor dew point drops. The performance degradation curve follows climate conditions rather than fixture timing.
An expanding damp area while the faucet and drain are unused is a reason to investigate the supply side, but changing meter readings alone do not confirm a supply leak. Shut off the relevant valve if safe and contact a plumber.
For splash-zone edge failures, the sink-area planning guide discusses countertop joints, side edges and faucet penetrations. Use those locations as an inspection plan, not as proof that a particular joint is the source or that the wall is dry.
Use that sink-zone guide to prioritize waterproof edge sealing, seam protection, and faucet penetrations where repeated splash exposure most often challenges an otherwise sound installation.
When is selective access justified?
Selective access is justified when repeatable evidence forms a connected pattern, a repair requires access, or concealed conditions cannot be resolved non-invasively. Choose the smallest safe opening that can answer the question.
Possible access routes include:
- Cabinet-side opening: Accessing the wall from inside the sink cabinet may preserve visible backsplash tile.
- Opposite-wall opening: A small opening in an adjacent room may be easier to repair than the kitchen finish.
- Loose-edge inspection: One already-failed tile may provide access if removal will not spread damage.
- Borescope opening: A small, safely located hole can permit cavity inspection.
- Plumbing opening: A plumber may open the area required to reach a confirmed leaking fitting.
A borescope is a small camera on a flexible or rigid probe. It can show staining, corrosion, wet insulation, or visible fungal-like growth inside a cavity, but it sees only its immediate field of view.
Borescope images do not measure moisture and may miss damage behind insulation, framing, adhesive, or the opposite drywall face. The access point must also avoid pipes and electrical wiring.
A qualified inspector may use a moisture meter, infrared camera, hygrometer, and borescope as a combined screening system. The American Society of Home Inspectors’ Standard of Practice makes clear that a standard home inspection is visual and generally non-invasive; concealed conditions may fall outside its scope (ASHI Standard of Practice).
Ask before hiring:
- Scope: Will the inspection identify likely source, extent, or both?
- Access: Is drilling included, and who repairs the opening?
- Documentation: Will you receive annotated photos, readings, instrument models, and environmental conditions?
- Limitations: Which surfaces and cavities cannot be assessed?
- Referral independence: Does the assessor also sell remediation work?

Inspection illustration, not a diagnosis or proof of professional confirmation.
How should CMCS and LDDT bands guide the next action?
The following matrix describes practical response categories, not numerical thresholds, an insurance rule or a diagnostic standard. Urgent conditions take priority regardless of how many other observations are absent.
| Evidence band | Typical pattern | LDDT action | Urgency | Evidence to save | Likely professional | Access level | Key limitation |
|---|---|---|---|---|---|---|---|
| Low confidence | One symptom or isolated reading with a strong confounder | Document and monitor | Routine | Grid, controls, photos, humidity | None initially | No access | A slow or intermittent leak may be missed |
| Moderate confidence | Repeatable pattern from one instrument plus one supporting clue | Inspect fixture and seal paths | Prompt | Time log, meter map, caulk photos | Plumber or inspector | None to minimal | Source remains unconfirmed |
| High confidence | Connected anomaly with multiple independent signals or fixture timing | Stop affected use and confirm source | Same day where practical | Videos, readings, shutoff time, damage photos | Plumber or inspector | Selective access likely | Extent may remain hidden |
| Confirmed wet assembly | Visible wet material, active leak, or direct cavity confirmation | Repair source and begin controlled drying | Urgent | Source photos, invoices, drying logs | Plumber and IICRC-certified restorer | Targeted removal | Drying surface tile may not dry gypsum |
| Suspected microbial impact | Persistent dampness, odor, visible growth, or prolonged wetting | Obtain qualified assessment under state rules | Prompt to urgent | Moisture history, photos, occupancy concerns | Licensed mold assessor where required | Case-specific | Appearance and VOC sensors cannot identify extent |
The least-destructive choice is the action that answers the unresolved question without sacrificing sound material. At low confidence, monitoring has the best total cost of ownership (TCO). At high confidence, delayed access can increase repair scope and lower the value of preserving the backsplash.
Which professional should you contact?
Match the professional to the evidence rather than calling every trade at once.
- Licensed plumber: Choose a plumber when evidence tracks faucet use, supply pressure, drain flow, valves, dishwasher lines, or disposal connections.
- Independent home inspector: Choose an inspector for broad, non-invasive correlation when the source and extent remain uncertain.
- Mold assessor: Use a qualified or licensed assessor when prolonged dampness, visible growth, health concerns, or regulatory requirements justify microbial evaluation.
- IICRC-certified restorer: Use a water-restoration provider for confirmed wet materials, extraction, drying, containment, and documented moisture goals.
- Electrician: Contact an electrician immediately if water may have reached outlets, wiring, appliances, or electrical panels.
Licensing, assessment and remediation rules depend on jurisdiction and the work involved. Check the relevant public-health, consumer or licensing authority before hiring; do not transfer a threshold or exemption from another state or province.
Ask whether the proposed inspector is qualified for the requested scope and whether assessment and repair roles must be separated in your jurisdiction. Record who will identify the source, who will assess extent and who will perform the work.
Check your own state, county, and city requirements before contracting. Licensing in one state does not establish authorization in another.
How do rentals, insurance, and documentation change the response?
Renters should report suspected leaks promptly in writing and avoid destructive testing without permission. Landlords and property managers benefit from a dated evidence packet that separates observations from conclusions.
Save the following:
- Overview photographs: Show the full sink wall and surrounding cabinets.
- Close-up photographs: Capture bubbles, seams, stains, valves, and meter placement.
- Grid records: Preserve every reading, including dry controls and normal results.
- Environmental data: Record temperature, relative humidity, and recent weather.
- Fixture timeline: Note ordinary use, visible changes, and shutoff times.
- Communication log: Save emails, maintenance requests, contractor notes, and responses.
- Receipts and reports: Retain plumbing invoices, inspection reports, drying logs, and damaged-item records.
Do not label a condition “mold,” “toxic mold,” or “water damage” unless the available evidence supports that statement. Write what you observed: “musty odor at cabinet back,” “meter response exceeded control points,” or “water visible beneath the supply valve.”
Insurance coverage depends on cause, timing, policy language, maintenance history, and reporting duties. Sudden accidental water damage may be treated differently from long-term seepage. Protect the property first, then contact the insurer when appropriate.
What might professional confirmation and repair cost?
Request a written local quote with separate items for source diagnosis, plumbing repair, access, drying, assessment, reconstruction and finish replacement. Confirm whether inspection fees, emergency attendance and follow-up readings are included. National price ranges cannot predict the scope concealed behind this particular wall.
Compare quotations on the same unresolved question. A visual visit without access is different from a moisture assessment with documented drying goals, and neither automatically includes a plumbing repair. Ask what additional work would trigger a change in price before agreeing to a bundled figure.
Myth Versus Evidence
What Is the Safest Next Step?
Are you worried that monitoring will miss damage, yet reluctant to destroy a recently installed backsplash without proof?
Use corroborated evidence to choose the smallest action that protects people, the wall assembly, and your documentation.
A pattern of repeatable, independent signals is more useful than a universal moisture threshold. Compare like-for-like dry controls, map the area, repeat measurements, record room conditions, and subtract confidence when metal, framing, heat, or reflective finishes can explain the result.
Stop normal DIY screening for active water, electrical risk, contaminated water, rapid change, or confirmed wet material. Those conditions cross the professional LDDT even if the precise source remains uncertain.
If your evidence remains low confidence, use a numbered worksheet and monitor the same points under comparable conditions. If the pattern persists or strengthens, contact the professional whose scope matches the evidence: plumber, inspector, mold assessor, electrician, or IICRC-certified restorer.
That approach inherently neutralizes the pressure to choose between ignoring the problem and removing every tile. The goal is a defensible next decision—not false certainty.
Fan cuts introduce airflow, sealing, and condensation questions. Review moisture prevention, product selection, and troubleshooting around bathroom exhaust fans.
Check moisture-safe tile around bathroom fansCompare lower-risk dry areas, conditional splash zones, and high-risk direct-spray surfaces before deciding where peel-and-stick bathroom tile belongs.
Map suitable bathroom tile zonesChoose the finish only after the wall passes its checks
For a bold, dimensional update, Timberline Checks offers crimson, grout-free self-adhesive tiles described as waterproof, durable, heat-resistant, and suitable for kitchen or bathroom walls.
Explore Timberline ChecksFor a calmer dimensional surface, Olive Lines provides waterproof and heat-resistant self-adhesive wall tiles designed for backsplashes and bathroom walls without special installation tools.
Explore Olive LinesFrequently Asked Questions
Do you still have questions about readings, mold, drying, or tile removal?
These concise answers clarify the limits of common tests and the evidence that should change your response.
What moisture-meter reading means drywall is wet behind tile?
Does a high percentage seem like a clear pass-or-fail result?
The useful benchmark is a repeatable difference from comparable dry controls, not one universal number.
There is no universal consumer meter percentage that proves wet drywall behind peel-and-stick tile. The displayed value may be relative, material-specific, or distorted by metal, adhesive, tile density, and sensing depth.
Use the manufacturer’s supported scale, document dry controls, and look for a connected pattern that repeats. Confirm important findings through selective access or qualified inspection.
Does backsplash bubbling always mean water is trapped behind peel-and-stick tile?
Is a lifted tile enough reason to assume the wall is leaking?
Bubbling is a warning sign to investigate, but its location and timing help identify the more likely cause.
No. Bubbles can result from moisture, grease, dust, uncured paint, poor adhesion, trapped air, heat, substrate movement, or installation tension.
A bubble near a failed sink seam deserves closer screening. Widespread lifting after installation may point to preparation or bond failure. A bubble that changes after cooking may be heat-related.
Can a thermal camera confirm moisture behind a backsplash?
Does a blue or cool patch on a thermal image prove that water is present?
Thermal imaging identifies temperature differences that must be checked with independent evidence.
No. A thermal anomaly is not proof of water. Cold pipes, air leakage, reflective tile, appliance heat, sunlight, and insulation gaps can produce similar patterns.
A repeated thermal pattern becomes more informative when considered with independent observations and the actual construction. It remains a temperature observation, not a diagnosis or a numerical confidence rating.
How long should I monitor a suspicious backsplash?
Could waiting provide useful evidence, or might it allow concealed damage to worsen?
Monitoring is suitable only when no urgent trigger exists and the anomaly remains low confidence.
For a stable, low-confidence condition, repeat the grid under comparable conditions over several days and after ordinary kitchen use. Record temperature, humidity, fixture activity, and any change.
Do not continue monitoring active water, rapid expansion, soft drywall, wet electrical components, drain backup, or confirmed cavity moisture. Those findings justify immediate escalation.
Should I remove one peel-and-stick tile to inspect the drywall?
Would lifting one tile answer the question without destroying the full installation?
Selective removal can help once evidence identifies the best access point and safety risks have been checked.
Possibly. First consider access through a sink cabinet, adjacent wall, or existing failed edge. These routes may preserve the visible backsplash.
Obtain landlord approval if you rent. Before drilling or cutting, account for pipes and wiring. A professional borescope inspection may reduce damage, though it still cannot show every concealed surface.
Can a musty odor confirm hidden mold?
Does a persistent earthy smell mean mold is growing behind the backsplash?
Odor can justify further investigation, but it cannot identify the source, organism, or extent.
No. Musty odors may arise from damp cabinet materials, drains, stored products, or microbial activity. Consumer VOC monitors cannot confirm mold.
If odor persists with documented moisture, visible growth, prolonged wetting, or occupant concerns, check state licensing rules and consult a qualified mold assessor rather than relying on a home sensor.
Prepare a useful inspection brief without making the problem worse
The goal of a home observation record is to help someone answer a specific question. Is a fitting leaking? Is a wall known to be wet? Has the condition spread? Those questions require different evidence. A large collection of meter numbers without positions, material settings or dates can be less useful than a few clear photographs and a reliable sequence of events.
Start with the first observation and describe what changed afterward. Include ordinary fixture use only when it happened safely; do not operate a suspected leaking connection repeatedly to create a more convincing demonstration. If water is visible or an electrical hazard is possible, act on that condition rather than waiting for a complete log. Evidence gathering is secondary to protecting people and limiting damage.
Use consistent labels and preserve unknowns
Mark locations on a photograph so the same point can be revisited without applying permanent marks to the finish. Record the meter model, selected mode, contact position and whether the surface was dry to the touch. A measurement made over a seam should not be compared casually with one over a tile center. Keep the apparently dry comparison points in every record rather than retaining only the highest readings.
Do not describe an inaccessible wall cavity as dry simply because the face looks normal. Conversely, a meter response above the comparison range is not proof that a leak exists. Use words such as observed, suspected, inaccessible and not checked. They communicate the limits of the inspection more accurately than a percentage confidence score.
Ask what a professional visit will actually include
A plumbing visit may focus on finding and repairing the source. A moisture assessment may focus on the extent and condition of affected materials. Drying and reconstruction are further tasks. Ask which are included, whether selective access is anticipated and who restores the opening. The ability to use an infrared camera alone does not define the full scope of a service.
Request documentation that identifies the source where established, the inspected area, inaccessible locations and the method used. Ask what evidence would support closing the wall again. If a report recommends a particular treatment, it should connect that recommendation to observed conditions rather than a dramatic thermal color or an unexplained sensor reading.
Separate surface drying from an assembly drying decision
A dry tile face does not necessarily indicate that the material behind it has reached a suitable condition. The complete assembly may include paint, paper-faced board, insulation and timber, and access may be needed to assess affected layers. Do not assume that running a fan across an intact decorative surface answers all of those questions.
EPA's water-damage guidance calls for prompt action and uses 24–48 hours as a mold-prevention guideline, not a guarantee. Its detailed table also distinguishes clean-water damage from contaminated water and cautions against using fans before that distinction is established. Seek appropriate help rather than using a household observation checklist as a drying specification. EPA water-damage table and limitations
Agree on the next decision and its evidence
After the source is addressed, ask what will be monitored, by whom and when the next decision will be made. A repair invoice and a drying assessment answer different questions. Keep the conditions required for new paint, repair compounds and tile with the reconstruction plan. Covering the wall should follow the assessment, not become a way to end an uncomfortable investigation.
In a rental, report the facts promptly through the agreed maintenance channel and preserve the message. Do not make an unauthorized opening merely to produce a clearer photograph. Explain any urgent condition directly. An owner or manager can then coordinate the trades and any permissions while you keep a record of the accessible observations.
A hypothetical example of a useful handover
An owner notices a lifted lower edge on Monday and photographs it. On Tuesday, water is visible beneath a supply fitting, so the affected use is stopped and a plumber is contacted. The record includes the photographs, fitting location and time, rather than a claim that a particular tile caused mold. The subsequent assessment determines which materials are affected and what access is needed.
Another owner sees a repeated meter spike over a known metal corner detail but no confirmed wet material. That is a reason to interpret the instrument cautiously, not proof that the entire wall is safe or that every future reading can be ignored. Any new water, spread or material change needs its own response. Alternative explanations reduce premature conclusions; they do not cancel new evidence.
Finally, keep the investigation separate from product selection. A new tile, sealer or membrane should not be selected as a cure for an unidentified moisture source. Once the wall is suitable, choose the finish for the actual exposure, document the installation and retain service access. That sequence preserves the value of the diagnostic work instead of hiding its unresolved questions.
Sources and scope
- Tramex: Using the ME5 — Material-appropriate scales and comparison; not literal moisture percentages through any tile.
- Tramex: False-Positive Moisture Readings — Conductive materials can confound readings; not proof that a suspicious location is dry.
- FLIR: Detecting Water Leaks with Thermal Imaging — Temperature anomalies need confirmation; cameras do not see water through walls.
- US EPA: Mold, Moisture and Your Home — Prompt moisture-source control; not diagnosis from a checklist.
- US EPA: Water Damage Cleanup and Mold Prevention Table — Clean-water limitations and urgency; timing is not a guarantee.



Leave a comment
This site is protected by hCaptcha and the hCaptcha Privacy Policy and Terms of Service apply.