





















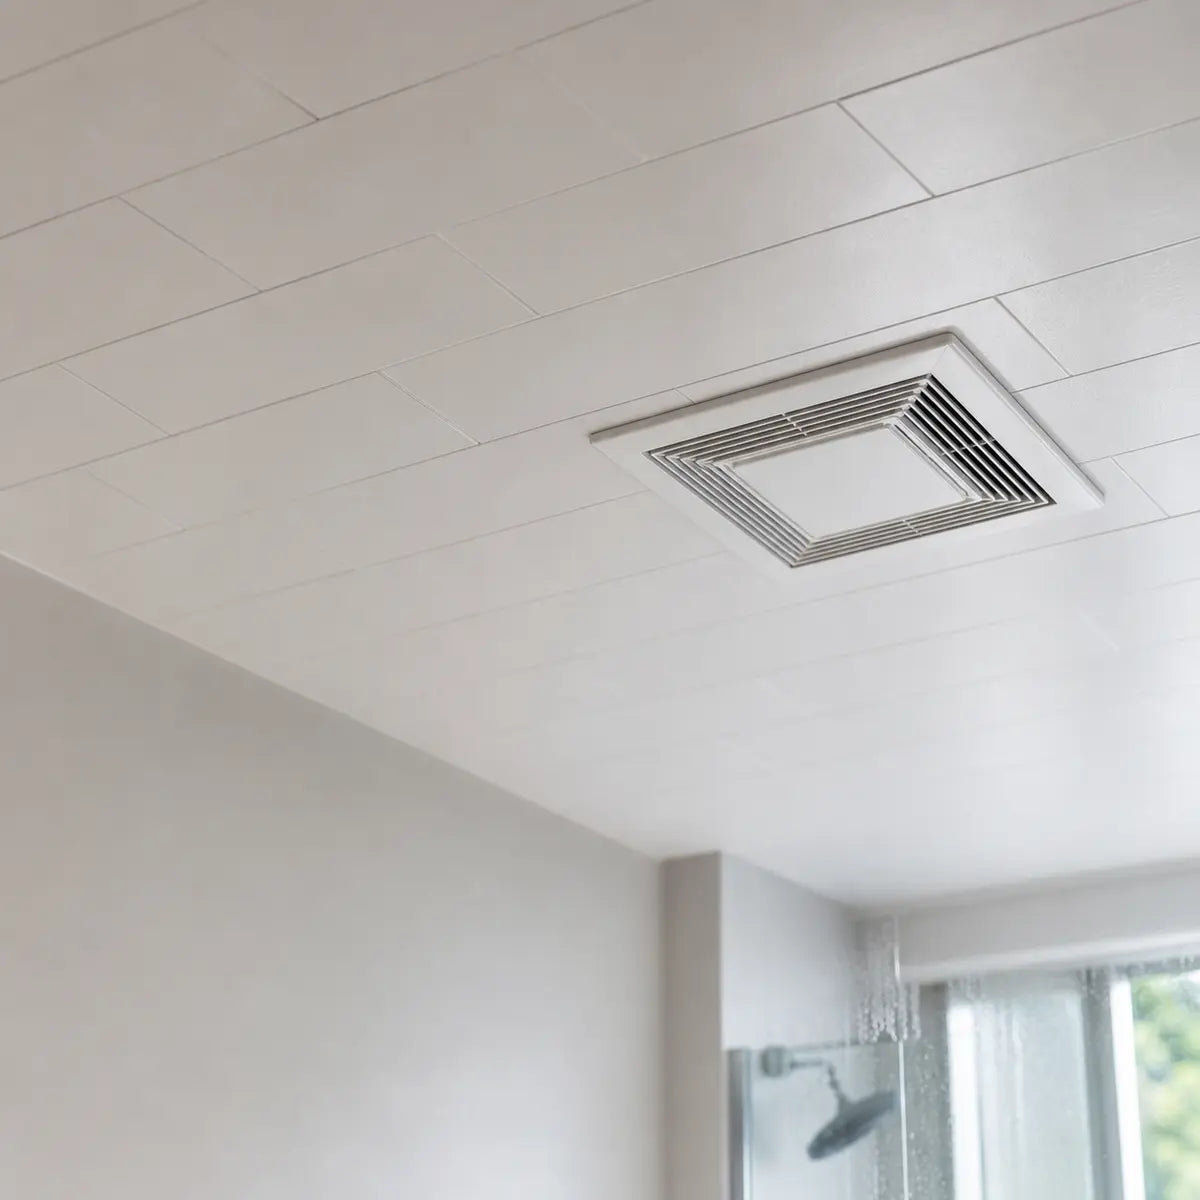
Moisture-safe bathroom refresh guide
Explore this guide
Peel-and-stick tile can make the area around a bathroom fan look clean fast. But the wrong cut, a sealed-tight edge, or a blocked grille can turn a cosmetic upgrade into a moisture trap. The fan cutout is one moisture detail in the room; the Bathroom and Wet-Area Tile Guide helps you compare it with splash exposure, seams, penetrations, ventilation, and drying.
Here is the practical rule we use: judge the project by Moisture Escape Margin, not just how good it looks on day one.
Direct safety answer: Yes, you can use peel-and-stick tile around a bathroom exhaust fan if the surface is dry, stable, well-primed, and the fan grille remains removable with airflow unobstructed. The safest method is to remove the grille, cut tile to the fan housing or ceiling opening with a small service gap, avoid sealing the entire perimeter airtight, and use selective caulk only where splash or visible gaps require it. Do not tile over condensation, peeling paint, mold, weak drywall, or an underperforming fan.
The three checks that matter most are:
- ✓ Ventilation First: Confirm the fan actually moves humid air out of the room before adding tile.
- ✓ Service Access: Keep the grille removable so the fan can be cleaned, inspected, or replaced.
- ✓ Selective Sealing: Seal visible or splash-prone gaps without trapping moisture behind the tile.
If you have ever stared at a bathroom exhaust fan and wondered how to tile neatly around that awkward square or round opening, you are not alone. The project looks simple until you think about steam, adhesive, mold, and the fan cover.
The good news: peel and stick tile around bathroom exhaust fan openings can work. The bad news: it should never be treated like a sticker project. It is a small building-science project in disguise.
Visual map: where the tile should stop
Can you safely put peel-and-stick tile around a bathroom exhaust fan?
Worried that a fast bathroom refresh might hide damp drywall, peeling paint, or mold around the fan?
This section gives you a clear safety test before you buy tile, cut tile, or seal anything.
Peel-and-stick tile is safe around a bathroom exhaust fan only when the surface is dry, sound, clean, primed, and supported by working ventilation. If the area already shows condensation, mold staining, soft drywall, rust, or peeling paint, tile may hide the symptom while the moisture problem keeps growing.
We use Moisture Escape Margin, or MEM, as the evaluation metric. MEM means the combined allowance for drying, airflow, removable access, and non-airtight edge treatment around the fan.
Think of it like leaving a wet towel room to dry. If you fold the towel tightly and seal it in a bag, it stays damp. If you hang it with airflow, it dries. Tile near a fan works the same way.

Moisture Escape Margin decision tree
What does “moisture-safe” really mean around a fan?
Moisture-safe does not mean waterproof on the face of the tile. It means the whole assembly can handle bathroom humidity without trapping water behind the tile or reducing fan performance.
That distinction matters. A peel-and-stick tile may have a water-resistant face, but the adhesive, wall paint, primer, drywall paper, and fan opening still decide whether the installation lasts.
The U.S. Environmental Protection Agency says the key to mold control is moisture control, and wet materials should be dried promptly to prevent mold growth. The EPA also advises fixing water problems rather than covering them up. That guidance applies directly here because bathroom fans sit in one of the highest-humidity zones in the home. EPA Mold Resources: https://www.epa.gov/mold
In our experience, the biggest mistake is using tile as a disguise. If paint is bubbling around the fan, tile may make the ceiling look better for a few weeks. It does not fix condensation, poor ducting, or a weak fan.
Use this field test before you start:
- Dry Surface: The ceiling or wall must feel dry before, during, and after showers.
- Sound Substrate: Drywall should feel firm, not soft, swollen, chalky, or crumbly.
- Clean Finish: Paint must be bonded tightly with no flaking, peeling, or powdery residue.
- Working Fan: The fan should pull air strongly and exhaust outdoors.
- Removable Grille: The fan cover must still come off after tile installation.
- Open Air Path: Tile must not block intake slots, grille springs, screws, or housing access.
A common misconception is that “waterproof peel-and-stick tile bathroom” claims mean the tile can go anywhere in a bathroom. That is not how product performance works. Many products resist moisture on the front surface but still require dry, smooth, primed, stable walls.
Manufacturer instructions often make this clear. For example, Smart Tiles states its peel-and-stick products should be installed on smooth, clean, dry surfaces and are not recommended for floors, ceilings, showers, or areas with constant water exposure. Smart Tiles Installation Guidance: https://www.thesmarttiles.com/en_us/installation
That does not mean every product has the same limitations. It means the installation surface and approved use matter as much as the tile face.
What red flags mean you should not tile yet?
Do not tile over active condensation, mold, soft drywall, peeling paint, rusted fan housing, weak suction, or a fan that does not vent outdoors. Those issues lower the Moisture Escape Margin below a safe operational threshold.
Here are the warning signs we would stop for on a real job:
- Active Condensation: Water beads around the fan after showers, even with the fan running.
- Mold Staining: Dark, green, gray, or speckled marks appear near the grille or ceiling seam.
- Soft Drywall: The surface dents easily or feels swollen near the fan housing.
- Peeling Paint: Paint lifts, flakes, or curls around the opening.
- Rusted Fan Housing: Rust suggests repeated moisture exposure inside the fan cavity.
- Weak Suction: The fan cannot hold a tissue against the grille.
- No Exterior Exhaust: The fan dumps air into an attic, joist bay, or ceiling cavity.
The last point is serious. Bathroom exhaust should be ducted outside, not into an attic or enclosed space. ENERGY STAR states bathroom fans should vent outdoors and be sized properly for the room. ENERGY STAR also notes a common guideline of at least 1 CFM per square foot of bathroom area for typical bathrooms up to 100 square feet. ENERGY STAR Bathroom Ventilation: https://www.energystar.gov/products/ventilating_fans
CFM means cubic feet per minute. It measures how much air the fan moves. A weak CFM rating, a clogged grille, or a crushed duct can leave humidity behind even if the fan sounds loud.
The Home Ventilating Institute also provides bathroom ventilation guidance based on room size and fixture count. Its sizing recommendations help homeowners avoid under-ventilating bathrooms with high moisture loads. Home Ventilating Institute Ventilation Guidelines: https://www.hvi.org/resources/publications/bathroom-exhaust-fans/
Here is the expert view: sound is not airflow. A noisy fan may still be failing. We have seen loud builder-grade fans move very little air because the grille was packed with lint or the duct was restricted.
Is peel-and-stick tile different on a ceiling than on a wall?
Yes. Peel-and-stick tile on a bathroom ceiling faces gravity, steam, thermal cycling, and adhesive shear stress. Many peel-and-stick products are made for vertical walls, not overhead installation.
Adhesive shear stress means the tile’s weight pulls sideways or downward against the adhesive bond. On a wall, gravity pulls the tile down along the wall. On a ceiling, gravity pulls it away from the surface.
That is why a bathroom ceiling refresh needs a stricter Adhesive Reliability Threshold. This threshold is the minimum condition where the surface, primer, humidity, tile weight, and product approval make adhesive failure unlikely.
Use this ceiling checklist before installing peel and stick tile bathroom ceiling pieces:
- Product Approval: Confirm the manufacturer allows ceiling or overhead use.
- Tile Weight: Choose lighter tile if the product is approved for overhead areas.
- Primer Bond: Prime painted drywall with a compatible drywall primer if instructions allow.
- Dry Time: Let primer cure fully before installation.
- Humidity Control: Run the fan before, during, and after showers.
- Edge Planning: Avoid sealing every edge airtight.
If the product is not rated for ceilings, do not treat extra caulk as a fix. Caulk can hold a loose edge temporarily, but it does not change the manufacturer’s approved substrate or installation orientation.
For wall areas near the fan, the risk profile is different. Vertical bathroom walls near exhaust fans may be reasonable if they are low-splash, dry, and properly prepared.
That distinction inherently neutralizes the most common failure path: using a decorative product in the wrong moisture zone.
How do you check bathroom fan readiness before tile?
Check fan readiness by confirming airflow, exterior ducting, clean grille condition, and post-shower dry-down. If the mirror, ceiling, or fan area stays wet long after a shower, solve ventilation before tile.
60-second Ventilation Readiness checklist
Check each item before you move to cutting or adhesive work.
Use this homeowner-friendly test:
- Run the Fan Early: Turn the fan on before the shower starts.
- Check Suction: Hold a tissue against the grille and see if it stays in place.
- Inspect the Grille: Remove dust buildup from the cover and intake slots.
- Verify Exhaust Path: Confirm air exits outdoors, not into an attic.
- Track Dry-Down: After a normal shower, surfaces should stop looking damp within a reasonable window.
- Look for Repeat Wet Spots: Watch the fan area over several shower cycles.
For product selection in bathroom wall zones, use total cost of ownership (TCO) rather than sticker price. A low-cost tile that fails after humidity exposure has a higher TCO than a tile selected for heat and moisture resistance in a suitable location.
If your bathroom fan area is part of a broader moisture-conscious wall refresh, compare materials by proven bathroom suitability rather than day-one appearance. Within that structured review, Snowy Ceramic functions as a practical baseline for moisture-resistant peel-and-stick wall tile in kitchens and bathrooms. Its stated heat and moisture resistance recalibrates expectations for cosmetic wall refreshes where the substrate is dry, sound, and outside direct spray.
For a warmer visual finish, Blush Petals gives the same category fit: heat and moisture resistant peel-and-stick wall tile for bathroom and kitchen use. Benchmark it against your actual moisture zone, not against shower tile or ceiling-rated construction materials.
What is the safest decision tree before buying tile?
The safest decision tree is: fix moisture first, verify fan performance second, confirm product approval third, then plan cuts and selective sealing. If any step fails, pause the project.
Use this decision table:
| Question | Safe Answer | If the Answer Is No |
|---|---|---|
| Is the surface dry after normal showers? | Yes | Improve ventilation before tile |
| Is paint firmly bonded? | Yes | Scrape, repair, prime, or repaint first |
| Is there visible mold? | No | Follow EPA cleanup guidance or call a pro |
| Does the fan exhaust outdoors? | Yes | Correct ducting before covering the area |
| Is the grille removable after tile? | Yes | Change the cut line |
| Is the tile approved for the surface? | Yes | Choose another product or area |
| Can edges dry without being sealed airtight? | Yes | Revise caulk plan |
Pro tip: wait through at least three shower cycles after cleaning and fan maintenance before installing tile. If the area stays dry, your MEM is stronger.
For deeper bathroom moisture planning, use a full-room exposure strategy before you choose a pattern or finish. Peel Stick Bathroom Tile for Moisture provides the broader material-selection framework. It is the architectural standard for separating decorative bathroom updates from high-risk wet-zone applications.
How do you cut peel-and-stick tile around a bathroom exhaust fan?
Nervous about jagged cuts, blocking the fan housing, or trapping the grille under tile?
This section gives you a precise cut-and-fit method that keeps the fan accessible, clean, and serviceable.
Cut peel-and-stick tile around a bathroom exhaust fan by removing the grille, locating the housing or ceiling opening, making a cardboard template, dry-fitting the tile, and cutting gradually before peeling the backing. Never tile over the removable grille.
We use Service Clearance Ratio, or SCR, as the evaluation metric. SCR is the relationship between the tile cut line, fan housing edge, grille overlap, fastener access, and removable cover clearance.
A good SCR means the tile looks finished after the grille is reinstalled, but the grille can still come off easily. A bad SCR means the tile traps the cover, blocks intake, or hides screws.

Should you remove the fan grille before installing tile?
Yes. Remove the fan grille before installing tile so you can cut to the opening, preserve airflow, and keep the cover serviceable. Do not tile over the fan grille or removable cover.
Most bathroom fan grilles are held by spring clips, tabs, or screws. Many pull down gently, then release by squeezing the springs. Some include lights, heaters, or sensors.
Safety Check
Turn off power at the switch or breaker before removing the grille if any electrical components, light connectors, heater parts, or exposed wiring may be present.
Broan-NuTone maintenance instructions commonly show removing the grille for cleaning, vacuuming dust, and washing the cover. That principle matters here: if tile prevents grille removal, you have created a maintenance problem. Broan-NuTone Fan Cleaning Guidance: https://www.broan-nutone.com/en-us/home/learn/bathroom-exhaust-fan-cleaning
Panasonic also provides maintenance guidance for ventilation fans that includes removing grilles and cleaning accumulated dust from fan components. Panasonic Ventilation Fan Support: https://na.panasonic.com/us/home-and-building-solutions/ventilation-indoor-air-quality/support
Think of the grille like an air filter cover on an HVAC return. It is not decorative trim you can bury. It is a service part.
Before removing it, take photos:
- Wide Photo: Capture the full fan area and nearby seams.
- Grille Photo: Record how the cover sits against the ceiling.
- Spring Photo: Photograph how spring clips attach to the housing.
- Opening Photo: Document the fan housing after the cover is removed.
- Overlap Photo: Mark how far the grille covers the surrounding ceiling.
You can also sketch a simple diagram. Mark the housing, grille overlap, screw positions, spring slots, and planned tile edge. This prevents guesswork once adhesive backing is exposed.
Four-step installation flow
1. Remove the grille: Photograph spring clips, screws, overlap, and housing position.
2. Make the template: Trace the ceiling opening, then mark grille overlap separately.
3. Dry-fit tile: Confirm the cut line before peeling the backing.
4. Reinstall grille: Run suction, vibration, and removal tests before caulk cures.
What tools do you need for a clean bathroom exhaust fan tile cutout?
You need a sharp utility knife, extra blades, straightedge, cardboard template, pencil, painter’s tape, primer, cleaner, caulk gun, and silicone caulk for selective sealing. A dull blade is the fastest path to chipped edges and ragged corners.
Here is the tool list we use on site:
- Utility Knife: Use a sharp blade and replace it often.
- Straightedge: Guide long cuts and square edges.
- Cardboard Template: Transfer the opening shape without wasting tile.
- Painter’s Tape: Mark safe cut lines and protect finished surfaces.
- Pencil or Fine Marker: Mark the tile backing, not the finished face.
- Drywall Primer: Improve bond on repaired or porous painted drywall.
- Degreasing Cleaner: Remove dust, soap film, and residue.
- Caulk Gun: Apply controlled beads where sealing is needed.
- Camera Phone: Capture reference photos before the grille comes off.
Do not underestimate blades. Peel-and-stick tile often cuts better with multiple light passes than one heavy cut. Forcing the knife can stretch vinyl layers, snap corners, or send the blade off line.
A useful analogy: score tile like cutting drywall paper, not like carving wood. You are guiding the material to separate cleanly.
For thicker PVC peel and stick tile or vinyl tile adhesive products, warm the tile slightly at room temperature before cutting. Cold tile can be less forgiving and may crack or resist clean scoring.
How do you make a template for the fan opening?
Make a template by tracing the ceiling opening or fan housing onto cardboard, marking grille overlap separately, then testing the cardboard before cutting tile. The template should represent the tile cutout, not the visible grille size.
This is where many DIYers make the wrong cut. They trace the grille face, cut the tile to that larger shape, and end up with an exposed gap. Or they cut too tight around the housing and trap the grille springs.
Use this method:
- Remove the Grille: Turn off power if needed, then release springs or screws.
- Clean the Area: Vacuum dust around the fan housing and ceiling edge.
- Trace the Opening: Hold cardboard over the fan area and mark the housing or ceiling cutout.
- Mark Grille Overlap: Place the grille on the cardboard and trace its outside edge in a different color.
- Locate Springs or Screws: Mark where clips, tabs, and screws need clearance.
- Cut the Template: Trim gradually and test it around the fan opening.
- Dry-Fit the Tile: Lay the template on the tile backing and check orientation.
- Cut in Stages: Score lightly first, then deepen the cut.
- Test Before Peeling: Dry-fit the tile piece before removing adhesive backing.
- Install Only After Fit Passes: Press the tile after confirming grille movement.
The grille overlap is your visual safety margin. The tile cut can be slightly imperfect if the grille covers it and airflow remains open.
A common misconception is that the tile cut should match the grille’s outside edge. It usually should not. The grille is meant to cover the rough opening.
How much clearance should you leave around the fan housing?
Leave enough clearance for the grille springs, tabs, screws, and cover movement while keeping the cut hidden under the grille overlap. In practice, a small service gap around the housing is safer than a tight friction fit.
Do not jam tile against the metal or plastic fan housing. Bathroom fans vibrate slightly. They also need service access. A too-tight tile edge can lift, buzz, crack, or trap the cover.
Use the SCR test:
- Housing Edge: Tile should not cover the fan housing opening.
- Spring Path: Springs must compress and slide freely.
- Screw Access: Screws must remain visible and reachable.
- Grille Overlap: The cover should hide the cut edge.
- Air Intake: Slots or perimeter gaps in the grille must remain clear.
- Removal Test: The grille should come off without pulling tile loose.
If you need a number, many DIY cuts work best with a small visible service gap at the housing that is later hidden by the grille. The exact size depends on the fan model, tile thickness, and cover design.
This is why dry-fitting matters. Dry-fit the piece before peeling the backing. Then reinstall the grille temporarily and remove it again. If removal scrapes the tile, your SCR is too low.
How do cutting methods compare for square, round, and irregular fan openings?
The best cutting method depends on the opening shape. Square openings favor straightedge scoring, round openings need a template and relief cuts, and irregular openings need gradual trimming.
| Fan Opening Type | Best Cutting Method | Best Use Case | Main Risk | Pro Tip |
|---|---|---|---|---|
| Square or Rectangular | Straightedge scoring with template corners | Most builder-grade fan housings | Overcut corners | Stop each cut short, then finish corners carefully |
| Round | Cardboard circle template with small relief cuts | Round grille or duct-style openings | Lumpy curve | Rotate the tile, not your wrist, as you cut |
| Irregular or Oversized | Cardboard template plus gradual shaving | Old fans, patched drywall, rough openings | Cutting too much at once | Sneak up on the line in small passes |
| Multi-Tile Layout | Install field tile first, then cut fan-adjacent pieces | Larger ceiling or wall refresh | Misaligned pattern | Snap reference lines before cutting |
| Thick PVC Tile | Score repeatedly, then flex carefully | Stiffer decorative panels | Cracked edge | Use fresh blades and room-temperature tile |
| Thin Vinyl Tile | Light scoring and backing-side trimming | Flexible peel-and-stick sheets | Stretching or curling | Avoid pulling the tile while cutting |
For a square bathroom exhaust fan tile cutout, mark the corners clearly. Overcutting corners creates diagonal slits that may show outside the grille. Stop short, then finish with short controlled cuts.
For a round opening, make a cardboard circle first. Use small relief cuts only if the material needs help bending away from the waste piece. Keep those relief cuts inside the waste area.
For an irregular fan opening, do not chase the drywall’s messy edge perfectly. Cut to a stable shape that stays hidden under the grille and keeps clearance.
Benchmarked against a purely cosmetic install, that access-first approach yields an optimal configuration because it treats the grille as functional equipment, not trim.
Should you caulk around a bathroom exhaust fan after tiling?
Use caulk selectively, not as an airtight ring around the entire fan. A small bead may help cover a visible gap or protect a splash-prone edge, but full perimeter sealing can reduce drying and trap moisture.
This is the Selective Seal Balance. It means sealing enough to manage visible gaps and occasional moisture while leaving the assembly able to dry.
Pro-Tip
Never caulk the fan grille shut. The cover must come off for cleaning, dust removal, future fan repair, and airflow troubleshooting.
Use silicone caulk carefully:
- Visible Gap Control: Caulk only where a gap remains visible after the grille is installed.
- Splash Exposure: Seal edges that may receive direct splashes near walls, sinks, or tubs.
- No Airtight Ring: Avoid sealing the entire fan perimeter tightly unless the fan manufacturer requires it for that assembly.
- Service Access: Never caulk the grille to the tile.
- Thin Bead: Use the smallest bead that solves the problem.
- Cure Time: Let caulk cure before high-humidity use.
Mistake to Avoid
Waterproof does not mean mold-proof. A water-resistant tile face can still trap dampness behind it if the substrate is wet, the fan is weak, or the perimeter is sealed airtight.
How do you install the tile without blocking bathroom fan airflow?
Install the tile so the grille sits flat, intake slots remain open, and the fan cover can be removed without pulling tile edges. After installation, run the fan and confirm airflow has not dropped.
Use this airflow check:
- Install Tile Around Opening: Keep tile clear of housing and intake paths.
- Reinstall Grille: Confirm springs, tabs, or screws work normally.
- Check Flatness: The grille should sit flush without bending.
- Run Fan: Listen for rubbing, buzzing, or vibration.
- Tissue Test: Hold a tissue against the grille.
- Steam Test: After a shower, check whether the room dries normally.
- Removal Test: Remove and reinstall the grille once more.
This matters because bathroom fan airflow after tiling can change if tile thickness interferes with how the cover sits. Even a small obstruction can create noise or reduce intake area.
A fan is like a straw. If you pinch the end, it may still make noise, but flow drops. The same can happen if tile crowds the grille.
Do not use tile to “tighten” a loose fan cover. If the grille sags, replace the springs or cover parts. Tile should not become a mechanical repair.
What surface prep gives peel-and-stick tile the best chance in a humid bathroom?
Surface prep determines whether adhesive tile survives humidity. Clean, dry, degloss, repair, and prime the surface before installation. Do not rely on adhesive to bond to dust, soap film, chalky paint, or damp drywall.
The Adhesive Reliability Threshold is met only when the surface is stable enough for the adhesive to grip and the room is ventilated enough to limit repeated wetting.

Follow this prep sequence:
- Clean First: Remove dust, lint, hairspray, soap film, and mildew residue.
- Repair Damage: Patch torn drywall paper, dents, and loose areas.
- Sand Gloss: Lightly scuff glossy paint if product instructions require it.
- Prime Porous Areas: Use drywall primer on patched or exposed drywall.
- Let It Dry: Respect primer and patch cure times.
- Check Temperature: Install within the tile manufacturer’s temperature range.
- Avoid Wet Zones: Do not install in direct shower spray or standing water areas.
Manufacturer instructions vary, but the pattern is consistent: smooth, clean, dry, stable surfaces matter. For example, FloorPops installation instructions state that surfaces should be clean, dry, smooth, and free of dust or grease before peel-and-stick tile installation. FloorPops Installation Instructions: https://www.wallpops.com/how-to-install-floorpops
Even though FloorPops is a floor product line, the surface-prep principle is universally recognized across adhesive products: contamination lowers bond strength.
Our high-humidity wall checks guide distinguishes air humidity, condensation and wall condition, and explains which product instructions to check before installation. It is a planning guide, not a report of a completed 85% humidity product test.
That matters because “waterproof” on a product page does not automatically mean safe over damp paint or failing drywall.
What should you do if the tile starts lifting near the fan?
If tile lifts near the fan, do not just add more adhesive or caulk. First identify whether the cause is moisture, heat, dust, poor prep, ceiling stress, or airflow restriction.
Lifting is a symptom. Treat it like a check-engine light, not a cosmetic flaw.
Troubleshooting visual cues
Peeling corners: Often points to poor pressure, dusty paint, unprimed patches, or ceiling shear stress.
Condensation staining: Suggests fan performance, ducting, or dry-down problems.
Blocked grille slots: Indicates airflow restriction from tile thickness, dust, or cover misalignment.
Over-caulked fan cover: Creates service problems and may trap moisture.
Use this troubleshooting map:
- Lifting at Fan Edge: Check for condensation, blocked airflow, or too-tight housing clearance.
- Lifting at Corners: Check for poor pressure during install or unprimed porous patches.
- Bubbling: Check for trapped moisture, uneven surface, or adhesive contamination.
- Sagging on Ceiling: Confirm whether the product is approved for overhead use.
- Mold Smell: Remove affected pieces and inspect the substrate.
- Buzzing Grille: Check whether tile thickness is interfering with cover seating.
If you see mold behind tile, stop. The EPA advises addressing moisture sources and cleaning mold safely rather than simply covering it. For large areas or recurring mold, professional assessment may be needed. EPA Mold Cleanup: https://www.epa.gov/mold/mold-cleanup-your-home
Do not caulk a lifting tile edge if the area is damp. That can trap moisture and accelerate adhesive failure.
The best repair sequence is:
- Remove Loose Tile: Pull only the failed area if possible.
- Inspect Substrate: Look for dampness, staining, soft drywall, or odor.
- Fix Moisture Source: Improve fan operation, ducting, or shower habits.
- Let Area Dry: Use normal ventilation and time.
- Re-Prep Surface: Clean, repair, sand, and prime as needed.
- Replace Tile: Use a fresh piece if adhesive is compromised.
- Retest Fan: Confirm airflow and dry-down.
How do you keep the fan serviceable after the tile is installed?
Keep the fan serviceable by testing grille removal after tile installation and before caulk cures. If the cover cannot be removed easily, adjust the tile edge immediately.
This is the final SCR check. It is the point where you confirm the project works as a bathroom system, not just as a photo.
Use this final service test:
- Remove Grille: Take the cover down without scraping tile.
- Inspect Springs: Confirm spring clips move freely.
- Check Screws: Make sure screw heads are not covered.
- Clean Access: Vacuum dust if needed.
- Reinstall Cover: Confirm it sits flat.
- Run Fan: Listen for new noise.
- Check Airflow: Repeat the tissue test.
If the grille pulls at tile edges, trim the tile back slightly. Do this before the adhesive has had days to set.
Renter-friendly note
For renters or condo owners with approved cosmetic upgrades, take before-and-after photos. Keep one photo showing that the fan grille remains removable. Confirm lease, landlord, condo, and HOA rules before installing adhesive tile.
What is the safest final checklist before using the bathroom normally?
The safest final checklist confirms dry substrate, clean cuts, airflow, removable grille, and selective sealing. Use the shower only after adhesive and caulk have had the cure time required by the product instructions.
Before normal use, confirm:
- Surface Bond: Tiles are fully pressed with no lifted corners.
- Fan Clearance: The housing opening is not covered.
- Grille Access: The cover removes and reinstalls cleanly.
- Airflow: The tissue test still passes.
- No New Noise: The fan does not buzz, scrape, or vibrate.
- Selective Caulk: Only needed gaps are sealed.
- Dry-Down: The area dries after shower use.
- Maintenance Plan: The grille can be cleaned later.
If you are choosing tile for a moisture-prone wall area near a fan, not an overhead ceiling, the TCO benchmark favors products built for heat and moisture resistance in bathrooms. Snowy Ceramic and Blush Petals fit that wall-tile category when installed on approved, dry, stable substrates.
That distinction strictly adheres to the key safety rule: product selection cannot compensate for active moisture, blocked airflow, or a non-serviceable fan.
Download the Moisture-Safe Fan Tile Checklist
Save a quick project checklist for airflow, grille removal, surface prep, template photos, product approval, selective caulk planning, and post-shower dry-down.
Download checklistFinal Thoughts
Peel-and-stick tile can work around a bathroom exhaust fan, but only if the installation protects the Moisture Escape Margin. The surface must be dry, the fan must move air outdoors, the grille must remain removable, and the edges should not be sealed into a hidden moisture pocket.
The safest version of this project is not the tightest-looking cut. It is the cut that looks clean, preserves airflow, allows service access, and lets the surrounding assembly dry.
Before buying materials, download or create a printable Moisture-Safe Fan Tile Checklist. Include fan airflow, grille removal, surface prep, template photos, product approval, selective caulk planning, and post-shower dry-down.
If you are still choosing materials, start with bathroom-zone planning first. Then compare tile options by total cost of ownership, moisture exposure, and approved surface use.
Frequently Asked Questions
Can peel-and-stick tile go on a bathroom ceiling near a fan?
Sometimes, but only if the product is approved for ceiling use and the surface is dry, stable, clean, and primed. Many peel-and-stick products are made for walls, not overhead installation.
Do not assume moisture resistance means ceiling approval. Gravity, steam, and adhesive shear stress make ceilings harder on peel-and-stick tile than vertical walls.
Should I caulk all the way around the bathroom fan grille?
No. Do not caulk the grille to the tile or seal the entire fan perimeter airtight. The grille must remain removable for cleaning and service.
Use selective caulk only where a visible gap, splash risk, or product instruction calls for it. Full sealing can trap moisture and reduce drying.
What if I find mold after removing the fan cover?
Stop the tile project and address the moisture source first. Mold means the area is already failing the Moisture Escape Margin test.
Follow EPA mold cleanup guidance for small areas and consider professional help for recurring, widespread, or hidden mold. Do not cover mold with tile.
How do I know if my bathroom fan is strong enough?
Start with a tissue test, grille cleaning, and post-shower dry-down check. The fan should pull air at the grille and help the bathroom dry after normal use.
For sizing, ENERGY STAR notes a common guideline of at least 1 CFM per square foot for typical bathrooms up to 100 square feet. Larger or more complex bathrooms may need more ventilation.
Can I tile over the removable bathroom fan cover?
No. Never tile over the removable fan cover. It blocks maintenance access and may interfere with airflow.
Remove the grille, tile around the housing or ceiling opening, then reinstall the grille so it remains removable.
What type of peel-and-stick tile is best for humid bathrooms?
Choose moisture-resistant peel-and-stick wall tile rated for bathroom use, then install it only on dry, stable, approved surfaces. Avoid direct shower spray, standing water, weak paint, and damp drywall.
For bathroom wall planning, use moisture zone, surface prep, and ventilation as the main selection criteria. The best tile is the one that fits the actual exposure level.
Treat the fan opening as a service zone
The exhaust fan grille, housing opening, fasteners and nearby ceiling or wall finish need to remain accessible for cleaning and future repair. Decorative tile should stop so the removable cover can come off without cutting adhesive material or breaking a sealed edge.
Before installation, remove the grille according to the fan instructions, photograph the opening and mark the housing boundary. The tile should never reduce the opening, cover intake slots or turn the grille into a permanently bonded part of the wall.
Investigate condensation before decorating around it
A fan area that stays visibly damp, shows staining, peeling paint or recurring mold needs a moisture diagnosis before tile is added. EPA guidance emphasizes controlling the moisture source. A decorative covering cannot compensate for an undersized, blocked, disconnected or poorly vented exhaust system.
Observe the room after normal bathing: where does condensation collect, how long does it remain and does the fan actually exhaust outdoors as required for the installation? If the surrounding substrate remains damp, postpone the decorative work.
Keep ventilation performance separate from the tile decision
Fan airflow depends on the fan, duct, termination, pressure losses and installation—not on a homemade readiness score. Do not infer adequate ventilation from a single dry-touch check or a short run time. Use the fan documentation and applicable local requirements when performance is uncertain.
The decorative project has a narrower role: avoid obstructing airflow, preserve service access and choose a product whose substrate and humidity limits match the actual wall or ceiling location.
Plan the cutout with a removable template
Make a paper or cardboard template from the actual opening after the grille is removed. Transfer the shape to the uninstalled material, cut gradually and dry-fit before exposing adhesive. Leave the clearances required by the fan and tile instructions rather than inventing a universal gap.
For an irregular opening, several small reference measurements are safer than tracing around a grille that may overlap the housing differently on each side.
Use sealant only where the assembly calls for it
Do not caulk the removable grille shut. Do not use a continuous bead simply to make the area look waterproof. Sealant can interfere with serviceability and may hide a moisture condition that needs to remain visible.
If the wall or ceiling assembly requires a specific seal at a penetration, follow the fan, building-system and product instructions. Decorative edge finishing and waterproofing are not the same task.
Plan post-install inspection
After normal bathroom use, inspect the tile edges, fan perimeter and substrate for lifting, staining or persistent condensation. A change near the opening can come from moisture, dust, movement, a poor cut or incompatible adhesive.
Record the condition before pressing or sealing a lifted edge. Repeated change in the same location is a reason to investigate the room condition rather than repeatedly patching the decorative surface.
Sources and scope
- US EPA: Mold, Moisture and Your Home — Moisture-control guidance; not product approval.

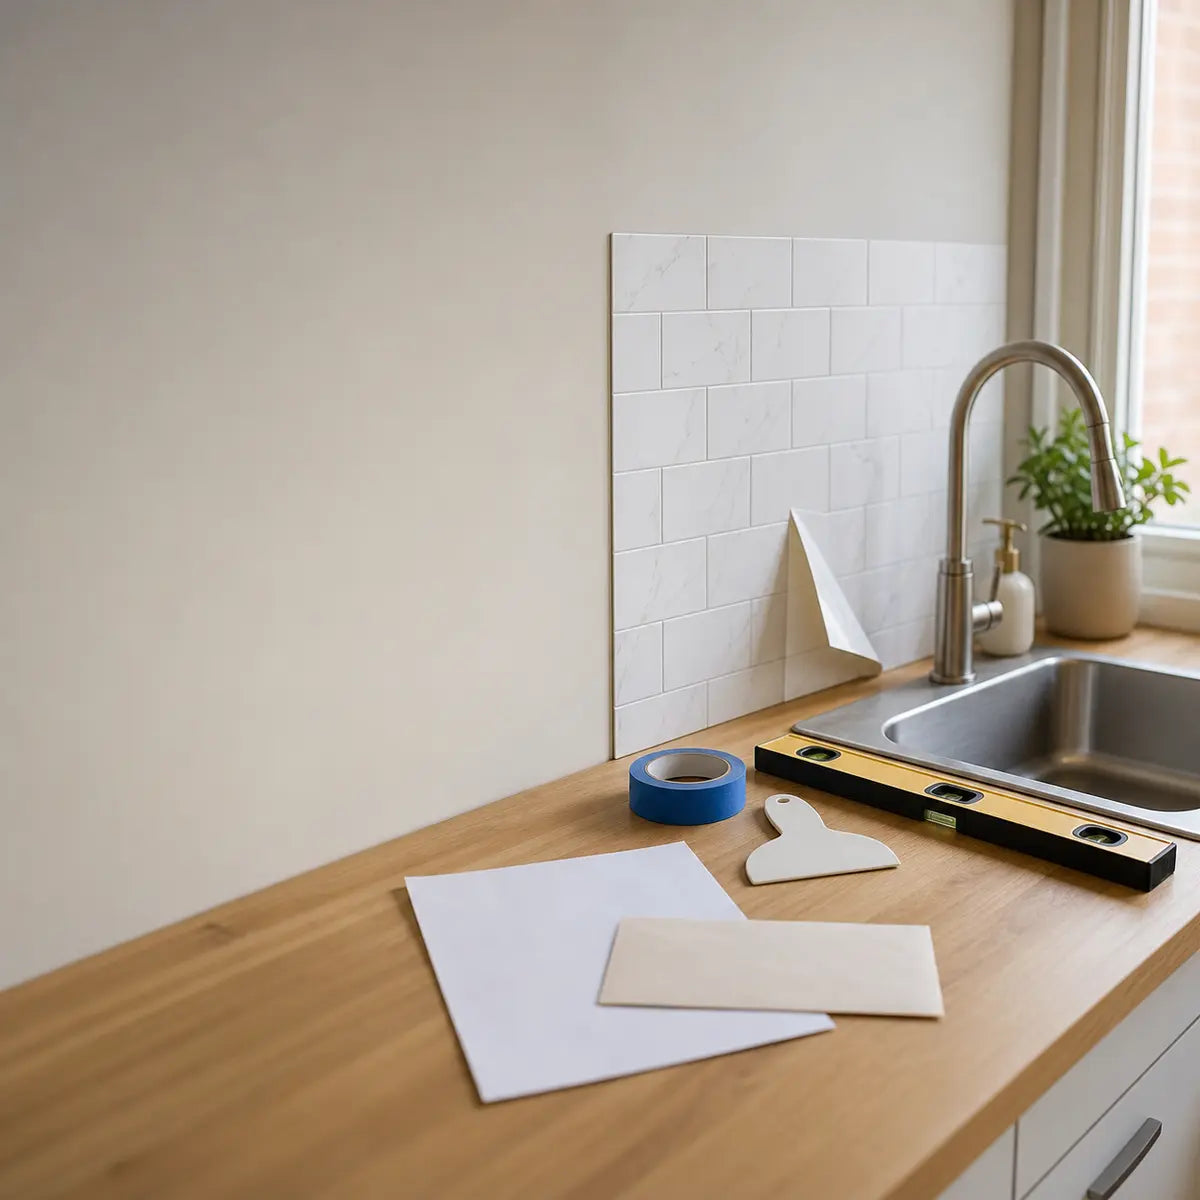


Leave a comment
This site is protected by hCaptcha and the hCaptcha Privacy Policy and Terms of Service apply.