





















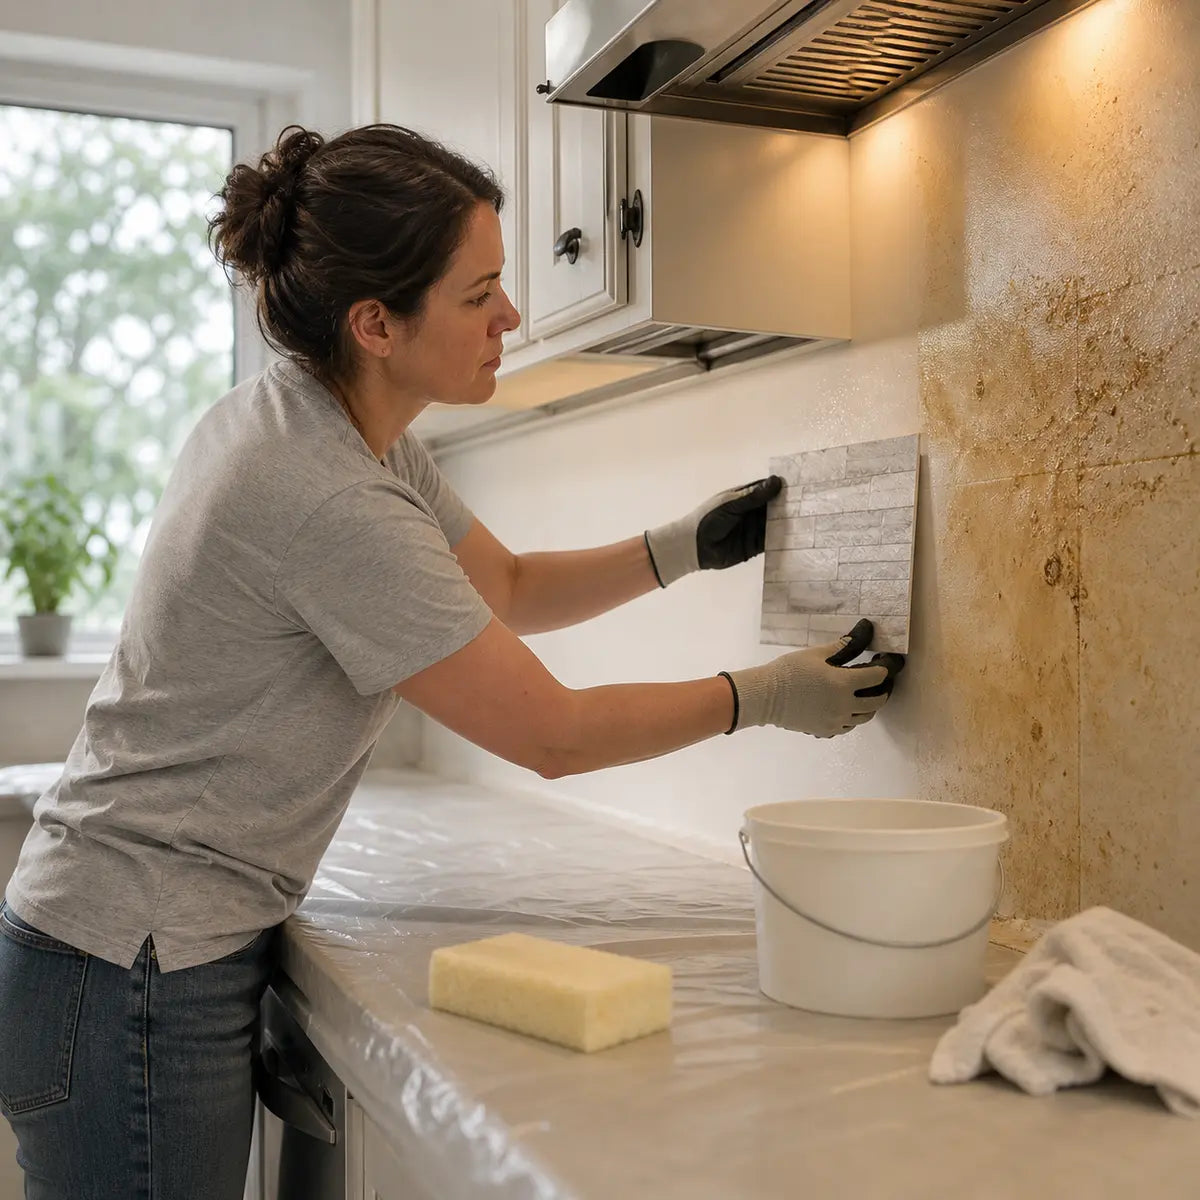
A nicotine-stained wall can look dramatically better after washing and still be a poor surface for peel-and-stick tile. Color, odor, coating stability, cleaner residue, moisture, primer cure, and adhesive compatibility are separate questions. You need to answer each one before committing tile to the full wall.
Explore this guide
Do not install peel-and-stick tile directly over visible or suspected tobacco residue. Assess the wall, clean it with a substrate-compatible product used exactly as labeled, inspect the exposed coating, complete any repairs, decide whether a compatible stain- or odor-isolating coating is warranted, allow every material to dry or cure as directed, and test the complete wall-and-tile system in a representative sample area.
The exact cleaner, primer, and waiting period depend on your wall substrate, existing paint, selected products, room conditions, and tile instructions. There is no evidence-backed universal cleaner, nicotine threshold, primer, or 24-hour rule that applies to every wall.
Thirdhand smoke is tobacco-smoke residue that remains on surfaces and in dust after airborne smoke has cleared. Laboratory wipe studies have measured nicotine on real indoor surfaces, but those measurements do not create a household visual test or an adhesive-readiness threshold. A wall that no longer looks yellow may still require further assessment, while a yellow-brown mark may have another cause entirely. The PubMed-indexed nicotine wipe study supports nicotine sampling as a contamination marker, not a pass/fail rule for adhesive tile.
This guide uses a U.S. safety and regulatory context. Product labels and local requirements control where they differ.
Can You Install Peel-and-Stick Tile Over Nicotine-Stained Walls?
No. A visibly nicotine-stained or suspected tobacco-residue-coated wall should be treated as unprepared until it satisfies the selected tile manufacturer's surface requirements.
That is a careful preparation decision, not a claim that a particular amount of nicotine has been proven to make every tile fail. No direct bond-strength study supplied for this guide tested peel-and-stick wall tile on nicotine-contaminated paint. What the evidence does establish is that tobacco residue can persist on indoor surfaces, while self-adhesive tile instructions commonly require a clean, dry, stable, smooth surface free from material that could sit between the adhesive and the wall.
Pressure-sensitive adhesive bonds through close contact. If the adhesive contacts oily residue, dust, cleaner film, chalking paint, or an incompletely cured coating instead of a stable wall surface, the weakest layer may control the result. The tile itself can remain sticky while the residue, primer, or paint beneath it releases.
The correct order is:
- Assess the wall, coating, moisture condition, contamination, and project history.
- Stop or escalate if you find active moisture, mold, extensive deterioration, possible hazardous coating disturbance, heavy soot, or structural fire damage.
- Clean with a product approved for the identified substrate and existing coating.
- Remove cleaner residue when the cleaner label or next coating's instructions require rinsing, neutralization, or another removal step.
- Dry and inspect the wall after cleaning.
- Repair and stabilize loose paint, holes, cracks, rough patches, and unsound areas.
- Seal or prime when appropriate, using a product compatible with the wall and the intended tile system.
- Wait for the applicable drying and cure milestones.
- Install a documented sample area according to the tile instructions.
- Proceed, rework, or stop based on the complete set of observations.
For a broader explanation of ordinary painted-wall conditions, see how to check a painted wall before adhesive tile. A previously smoked-in room requires the same basic checks plus closer attention to contamination, odor, stain migration, and cleaner-primer compatibility.
Which Wall Condition Are You Dealing With?
First decide whether the wall belongs in a routine cleaning process at all.
Use the closest path below. If two descriptions apply, follow the more cautious path.
| What you observe | Appropriate path | Do not do yet |
|---|---|---|
| Dry, stable wall with suspected surface residue | Clean, dry, inspect, then decide whether sealing is needed | Do not install tile over the residue |
| Loose, chalking, blistered, cracked, or damaged coating | Identify the failure, clean as appropriate, then stabilize and repair | Do not rely on primer or tile to hold failing paint in place |
| Residual stain or odor after compatible cleaning | Evaluate a stain- or odor-isolating coating as part of the full system | Do not assume every stain-blocking primer accepts every tile adhesive |
| Dampness, leak evidence, or visible mold | Stop, correct the moisture source, remediate as appropriate, and dry the assembly | Do not conceal the condition with primer or tile |
| Heavy soot, ash, fire damage, or extensive deterioration | Seek qualified restoration or building assessment | Do not treat it as ordinary cigarette staining |
| Unknown older paint that may need sanding or scraping | Determine the building age and applicable lead-safe requirements | Do not create dust until the coating risk is addressed |

Separate staining from moisture
Tobacco staining often appears as yellow or brown discoloration, sometimes with sticky residue or a stale odor. Those clues are observations, not a diagnosis. Water stains can also be tan or brown. Moisture damage may show rings, softened drywall paper, swelling, bubbling, recurring discoloration, corrosion near fasteners, or a pattern connected to plumbing, roofing, windows, or exterior walls.
Do not use the CDC's 24- to 48-hour rapid-drying advice after water exposure as a universal tile schedule. Drying a water-affected material and curing a new primer are different processes.
Check the coating, not just the stain
Look across the wall in strong side lighting. Check for:
- Peeling or curled paint edges
- Blisters or bubbles
- Chalking that transfers as powder
- Soft, swollen, or torn drywall paper
- Cracks that continue to open
- Patch compound that powders or dents easily
- Glossy areas beside flat, worn, or porous areas
- Wallpaper, adhesive residue, or multiple poorly bonded coatings
- Greasy deposits around cooking areas
- Dust accumulation along trim, outlets, cabinets, and ledges
A tile can bond firmly to paint and still fail if the paint releases from the wall. This is why “the tile is sticky” is not a complete readiness test.
Glossy or oil-based paint creates its own preparation questions. Cleaning, coating stability, deglossing, and primer compatibility must be considered separately; the guide to glossy painted-wall preparation explains that branch in more detail.
Recognize conditions outside routine nicotine cleanup
Heavy soot, ash, char, or structural fire damage is not the same as staining from years of indoor cigarette use. The FEMA residential smoke-damage guide distinguishes light odor conditions from heavier soot, ash, and structural damage. Its guidance concerns wildfire and fire-related damage, so it should not be used as a cigarette-residue cleaning recipe. It does support a clear boundary: extensive smoke or fire damage may need professional restoration after the building is cleared for entry.
A documented real-world case presented by the Thirdhand Smoke Resource Center involved an East Coast church residence that had been heavily smoked in for more than 50 years. Furniture and carpet replacement, surface cleaning, and repainting initially reduced the odor, but testing indicated deeper contamination remained and the presentation reported that full renovation was needed. The Thirdhand Smoke Resource Center case presentation is an anonymized educational case, not a tile test or a universal prediction. Its practical lesson is narrower: severe contamination may extend beyond the visible wall surface.
What Should You Prepare Before Cleaning?
Prepare the work area only after identifying the wall substrate, coating condition, building-age risks, selected cleaner instructions, and next intended coating. This prevents a cleaning job from turning into coating damage, chemical exposure, or contaminated dust.
Start a simple project record. Write down:
- Room and wall location
- Wall substrate, if known
- Existing coating type and sheen, if known
- Approximate building age
- Visible staining pattern
- Odor observations
- Signs of moisture, mold, soot, or physical damage
- Cleaner product and current label version
- Required dilution, personal protective equipment, ventilation, and application method
- Whether the cleaner requires rinsing or neutralization
- Proposed repair materials
- Proposed primer or sealer, if any
- Selected tile and its current surface requirements
- Room temperature and relative humidity, if available
This record may feel excessive for a small backsplash. In practice, it prevents the most common compatibility error: making each material decision in isolation. The wall, old paint, cleaner, repair compound, primer, and tile adhesive form one layered system.
Follow the cleaner label exactly
There is no evidence-supported universal cleaner for preparing every nicotine-stained wall for peel-and-stick tile. A product that is suitable for a durable glossy coating may soften flat paint, damage wallpaper, raise exposed drywall paper, discolor plaster, or leave a film that conflicts with the next coating.
Before using a cleaner, confirm:
- It is approved for the identified wall substrate and coating.
- The label permits the intended indoor use.
- You understand its dilution and application directions.
- You can provide the specified ventilation.
- You have the label-specified gloves, eye protection, or other protective equipment.
- You know whether it requires rinsing, neutralization, or wiping with clean water.
- Its use does not conflict with the proposed primer's surface-preparation instructions.
- The wall can tolerate the required amount of moisture and agitation.
The EPA indoor cleaning and ventilation guidance advises users to follow product-label precautions, use the specified protective equipment, avoid mixing cleaning products, and increase ventilation during and after cleaning when outdoor conditions allow.
Address possible lead before disturbing older paint
If the project is in a pre-1978 U.S. home, or the age and coating history are unknown, assess the possibility of lead-based paint before sanding, scraping, drilling, or creating dust. Age alone does not prove that the wall contains lead, but it changes how you should approach disturbance.
The EPA lead-safe renovation guidance explains building-age checks, dust control, testing and professional assessment options, cleanup, and the circumstances in which federal renovation rules may apply. Landlords, property managers, compensated workers, and house flippers can have obligations beyond those of a homeowner doing work in their own residence. State, tribal, and local rules may be stricter.
Do not assume a basic dust mask makes dry sanding an unknown older coating safe. Resolve the lead question and applicable work-practice requirements first.
Protect the room without hiding useful evidence
Remove movable furnishings and washable textiles from the work zone. Protect floors and fixed surfaces with materials compatible with the selected cleaner. Shut off power at the appropriate circuit before removing outlet or switch covers, and follow electrical safety requirements rather than working around energized devices.
Photograph the wall before cleaning, including:
- A full-wall view
- Close-ups of heavy staining
- Paint defects
- Moisture-suspect areas
- Transitions between coated and uncoated materials
- Areas previously hidden by pictures, cabinets, or trim
Hidden rectangles and cleaner-looking areas behind wall hangings can help establish the staining pattern. They do not measure nicotine concentration, but they give you a useful visual baseline.
Clean the Wall in the Right Order
Cleaning should reduce removable surface contamination without damaging the coating or leaving a new film behind. Work from the cleaner's label and a successful inconspicuous-area check, not from a generic recipe.
1. Test the cleaner on the actual wall system
Choose a small, inconspicuous area that represents the same substrate, paint, staining, and condition as the main wall. Follow the label's dilution, application, dwell time, agitation, rinsing, and drying directions.
After the area dries, inspect it under good light. Stop if you see:
- Color loss or smearing
- Softened or tacky paint
- Blistering
- Raised drywall paper
- Powdering or chalking
- New gloss or dull spots
- Persistent cleaner film
- Streaking that cannot be removed as directed
- Strong or unexpected chemical odor
A successful spot check shows that the cleaner did not cause an obvious immediate problem in that location. It does not prove compatibility across every layer of the wall or with the future tile adhesive.
2. Remove loose surface dust without spreading it
Follow the wall and cleaner instructions for preliminary dust removal. Use clean tools and avoid aggressive dry abrasion. Replace or clean tools as they become soiled so that you are not redistributing residue.
Pay attention to upper wall edges, trim, outlet-cover areas, ledges, cabinet tops, and corners. Residue and ordinary household dust can collect in places that are easy to miss when attention is fixed on the yellowest section.
3. Clean in manageable sections
Apply the cleaner exactly as labeled. Small sections make it easier to maintain the specified wet time, avoid drying streaks, control runoff, and replace soiled cloths before they spread material back across the wall.
Use the lightest agitation permitted by both the product label and the coating condition. Do not flood drywall seams, exposed gypsum, electrical openings, or damaged wallboard. If the label's required method would saturate or harm the identified surface, the product is not suitable for that condition.
Change cleaning solution, cloths, pads, or rinse water before they become heavily soiled. A darkened cloth is a useful observation that material is transferring from the wall. It does not identify every substance on the cloth or prove that the transferred material is nicotine.

4. Complete label-directed residue removal
Some cleaning systems require thorough rinsing. Others have different residue-removal directions. A product marketed as “no rinse” may still need to satisfy the next coating's technical requirements.
Read both documents:
- The cleaner label tells you how the cleaner must be removed or left.
- The primer or sealer data tells you what surface condition it requires before application.
For example, the checked technical data sheet for one nicotine stain-blocking primer directs users who wash with an appropriate cleaning solution or solvent to rinse thoroughly and allow the surface to dry completely. That is a product-specific rule, not proof that every wall cleaner must be rinsed.
Use clean water only where the applicable instructions call for it. Do not improvise a neutralizer. If one product requires a step that another product prohibits, the system is incompatible until the manufacturers provide a workable answer.
5. Let the wall dry before judging it
Wet walls often appear darker, cleaner, glossier, or more uniform than they will after drying. Cleaner odor can also mask tobacco odor temporarily.
Allow the wall to dry under the conditions required by the cleaner and substrate. Then inspect it again. Do not apply patch compound or primer merely because the surface no longer feels wet to your hand.
How Do You Know Whether the Wall Is Clean Enough?
A cleaned wall is ready for the next evaluation only when it is dry, free from visible removable soil and cleaner film, and stable under close inspection. There is no validated household color, odor, white-cloth, or nicotine number that guarantees peel-and-stick performance.
Use several observations together.
Check for remaining transfer
With a clean, light-colored cloth and only the method permitted by the cleaner instructions, check representative areas after the wall has dried. If the cloth collects obvious oily, yellow-brown, or dirty transfer, the wall is not ready for primer or tile.
If the cloth stays clean, record that result as “no visible transfer observed.” Do not record it as “nicotine-free.” Laboratory surface-wipe sampling is a different process, and published thresholds were developed for contamination measurement rather than tile installation.
Check for cleaner film
View the wall from several angles under side lighting. Look for streaks, shiny patches, haze, tackiness, crystals, or a slippery feel inconsistent with the surrounding coating.
A wall can be visually stain-free and still carry surfactant or cleaner residue. Conversely, a sound wall may retain discoloration within the coating after removable surface material has been cleaned. That distinction is one reason cleaning and stain isolation are separate steps.
If you cannot tell whether the remaining appearance is embedded stain, active transfer, coating damage, or cleaner film, do not guess. Recheck the cleaner instructions or contact the cleaner and coating manufacturers with the substrate and product details.
Check odor after ventilation and drying
Evaluate odor only after cleaning vapors have cleared and the wall is dry. Check the room after it has been closed under normal conditions for a period permitted by the project schedule, then ventilate again as needed.
Odor is subjective and can come from walls, ceilings, cabinets, flooring, HVAC components, insulation, textiles, or hidden cavities. A wall coating may reduce odor migration from a properly prepared surface, but treating one wall will not resolve a whole-room source located elsewhere.
Persistent or returning odor is a reason to investigate further before covering the wall. Tile may make future access harder, especially if the source later proves to be behind cabinets, inside a wall cavity, or distributed across the room.
Reinspect the paint
Cleaning often reveals defects that residue had obscured. Look again for lifting edges, soft paint, blistering, chalking, exposed drywall paper, failed patches, and uneven texture.
If the coating changed during cleaning, treat that as a coating-stability problem. Do not proceed directly to primer in the hope that it will glue the old paint back to the substrate.
Repair and Stabilize the Wall Before Sealing
Complete structural and surface repairs after contamination has been reduced and the wall has dried, unless the selected repair system directs a different sequence. Repairs need to bond to a clean, stable surface just as tile does.
Remove or address unsound material safely
Loose paint, failing patch compound, detached drywall paper, and crumbling plaster cannot remain as the load-bearing layer beneath self-adhesive tile. Address them using methods suitable for the substrate and consistent with lead-safe requirements.
Do not aggressively scrape or sand a wall simply because it is stained. Sanding can spread contaminated dust, damage paint that was otherwise serviceable, and disturb lead-based coating in older housing.
Sanding may be appropriate for a specific repair, texture reduction, or coating-preparation requirement after the wall's age, coating, and hazards have been assessed. It is not a nicotine-removal substitute. If sanding is permitted, clean the contamination first so you are not grinding removable residue into the coating or distributing it through the room.
Patch holes and surface defects
Use repair materials approved for the substrate and intended installation environment. Follow their depth limits, drying requirements, sanding directions, and primer requirements.
Feather patches so tile edges are not forced over abrupt ridges. Peel-and-stick tile can visually emphasize humps, torn paper, heavy roller texture, or poorly blended repairs. “Smooth enough” depends on tile thickness, flexibility, pattern, seam design, lighting, and the manufacturer's flatness requirements.
After sanding an approved repair, remove dust by the method specified for the repair and coating system. Reclean locally if necessary, then allow the area to dry.

Treat widespread failure as a larger project
If large areas of paint detach during cleaning or light repair, the wall has moved beyond routine surface preparation. Adding primer and tile over widespread failure creates more layers over an unstable base.
At that point, qualified assessment may be more efficient than repeated spot repairs. The decision may involve broader coating removal, wallboard repair, plaster stabilization, or replacement. A finish that does not rely on pressure-sensitive adhesion may also be more appropriate.
Do Nicotine-Stained Walls Need Primer Before Peel-and-Stick Tile?
Some do, but primer is not automatic and it never replaces cleaning. Use a stain- or odor-isolating coating only when the wall condition calls for it and the complete wall-primer-tile system is compatible.
Primer can serve several different jobs:
- Isolate residual discoloration within a sound coating
- Reduce migration of a product-specific stain
- Provide a product-specified odor barrier
- Unify repaired and porous areas
- Create the surface required by a particular tile manufacturer
- Prepare a glossy or otherwise restricted coating when the specified primer permits it
Those jobs are not interchangeable. A general wall primer may not block nicotine staining. A stain-blocking primer may not be approved for humid locations. An odor-isolating coating may cure to a surface that a particular pressure-sensitive adhesive does not accept. A primer that is ready for another coat of paint is not necessarily ready for tile.
| Wall condition after cleaning and repair | Primer decision |
|---|---|
| Stain removed, odor concern resolved, coating stable, tile instructions accept the existing surface | Primer may be unnecessary |
| Residual discoloration remains within a sound coating | Consider a compatible stain-blocking system |
| Smoke odor remains associated with the wall after broader sources are assessed | Consider a product specifically documented for smoke or cigarette odor barriers |
| Repairs or porous areas require priming | Use the repair and tile manufacturers' specified primer system |
| Surface is glossy or tile instructions restrict it | Follow the required deglossing or compatible-primer path |
| Moisture, mold, unstable paint, or structural damage remains | Do not prime yet |
| No compatibility information is available between the primer and tile | Pause and ask the manufacturers or choose a documented system |
What a stain-blocking primer can and cannot establish
One checked primer technical data sheet states that its product blocks nicotine stains and acts as an odor barrier for smoke, cigar, and cigarette odors on properly prepared surfaces. It also requires a clean, dry, sound substrate and removal of peeling or unsound coating.
That documentation supports the product's stated use. It does not prove that:
- Every stain-blocking primer performs the same way
- The primer removes tobacco contamination
- One coat is sufficient for every wall
- Odor elsewhere in the room will be controlled
- The primer is compatible with every peel-and-stick adhesive
- The tile can be installed as soon as the primer feels dry
Ask both manufacturers direct questions before combining a primer and tile:
- Is the primer approved for this substrate and existing coating?
- Is it documented for the residual stain or odor being addressed?
- Does its label require rinsing after the selected cleaner?
- What application conditions, film thickness, and number of coats apply?
- What is the full cure time under the actual room conditions?
- Does the tile manufacturer approve installation over that primer chemistry and finish?
- Is another topcoat required between the primer and tile?
- Does the tile manufacturer impose a minimum paint or primer age?
- Are there restrictions for kitchens, bathrooms, heat, humidity, or splash areas?
- Will either warranty exclude the combined system?

The primer and peel-and-stick compatibility guide gives you a deeper framework for comparing primer roles, cure milestones, and sample-area results.
How Long Should the Wall Dry or Cure?
Wait until every applicable product milestone has been met. Surface dryness, recoat time, stain-blocking readiness, and full cure can be different points on the same technical data sheet.
Drying usually refers to evaporation or loss of water or solvent. Curing is the longer chemical and physical development of the coating. A surface can feel dry while remaining soft, chemically active, or vulnerable to pressure from an adhesive layer.
For one documented primer, the manufacturer lists these milestones at 70°F and 50% relative humidity:
| Product-specific milestone | Listed time |
|---|---|
| Dry to touch | 25 minutes |
| Ready to recoat | 45 minutes |
| Dry time for knots and stain blocking | 2 hours |
| Full cure | 7 days |
These figures apply only to that product under its stated reference conditions. They are included to show why “dry” is not one universal event. They do not create a seven-day rule for every primer, and the 45-minute recoat time is not automatic permission to install pressure-sensitive tile.
Cooler temperatures, higher humidity, heavier application, low air movement, substrate porosity, and other site conditions can extend the process. The tile instructions may require a longer wait or a different coating system.
Use this sequence:
- Record the cleaner's drying requirement.
- Record the repair material's drying and priming requirement.
- Record the primer's recoat, stain-control, and cure milestones.
- Record the tile manufacturer's minimum coating age and environmental conditions.
- Identify the latest applicable milestone.
- Confirm that actual room conditions are within the permitted range.
- Start the sample-area check only after the full system requirements are satisfied.
Do not use a fan, heater, or dehumidifier in a way the product instructions prohibit. Forced surface drying can make the outer film feel ready while deeper material remains uncured.

How Should You Run a Wall Adhesion Test Before Peel-and-Stick Tile?
Install a representative sample only after the wall has passed the cleaning, stability, repair, dryness, cure, and compatibility checks. Use the tile manufacturer's sample-area instructions and document what you did.
No standardized DIY protocol located for this guide defines a universal tile size, pressure, waiting period, temperature range, or pass/fail threshold for remediated nicotine-stained walls. A sample can reveal immediate incompatibility, but it cannot guarantee long-term performance.
Build the sample from the real system
A useful sample should represent the wall you intend to cover. Do not test on a separate board or an unusually clean corner if the main wall has different paint, repair, primer, texture, temperature, or contamination history.
Record:
- Exact sample location
- Substrate and existing coating
- Initial coating condition
- Cleaner and dilution
- Application and residue-removal method
- Number of cleaning passes
- Drying conditions
- Repairs completed
- Primer or sealer product, coat count, and application date
- Cure milestone used
- Tile product and lot information where available
- Tile and wall temperature where required
- Room temperature and relative humidity where available
- Application pressure and tool
- Manufacturer-specified observation period
- Date and time of each observation
Photograph the sample before application, immediately after application, and at each inspection.
Apply the tile exactly as instructed
Condition the tile and room if the manufacturer requires it. Apply the sample with the same orientation, seam treatment, pressure, and tools intended for the full installation.
Do not create an invented test by hanging weights from the tile, pulling it on a fixed schedule, heating it, or using tape unless the manufacturer supplies that method. Such modifications can create a result, but they do not create a validated prediction.
If the manufacturer gives no sample duration or evaluation method, contact the company and describe the complete wall system. Ask for written guidance where possible.

Observe the interface, not just the tile face
Check for:
- Edge lift
- Corner lift
- Bubbles or blisters
- Sliding or creeping
- Seams opening
- Local release over repaired areas
- Stain appearing at edges or seams
- Returning odor associated with the test area
- Paint, primer, paper, or patch material separating from the wall
- Adhesive remaining on one layer while another layer detaches
The location of the failure matters. If tile adhesive releases cleanly from the primer, you may have an adhesive-surface compatibility problem. If primer comes off with the tile, the primer-to-wall bond or cure state may be at fault. If paint releases from drywall, the original coating is the weak layer.
Do not deliberately remove a sample that the manufacturer says should remain in place merely to see whether it is “strong.” Removal itself can damage paint and may not reflect normal service. Where future removability matters, review how wall and paint damage can occur during tile removal before choosing the sample location.
A successful sample means no specified failure was observed under the documented test conditions. It does not prove permanent performance across different parts of the wall or future changes in temperature, humidity, moisture, contamination, or coating condition.
Install, Rework, or Stop
Proceed only when every readiness checkpoint passes. One successful observation does not cancel a failure elsewhere in the system.
Use this checklist before ordering or applying the full tile quantity.
Install
Proceed when every applicable item passes and the current tile instructions approve the substrate, coating, room, and intended location.
Review the verified Stickwoll surface and installation requirements before full-wall installation. Follow the specified layout, conditioning, pressure, seam, and environmental directions. The Stickwoll installation and removal guide can help with alignment, application pressure, and planning for later removal.

Rework
Return to the relevant preparation phase if you find:
- Remaining surface transfer
- Cleaner haze or tackiness
- Loose paint
- Rough or poorly feathered repairs
- An uncured coating
- Sample-area edge lift
- Bubbles or sliding
- Paint or primer delamination
- Stain migration
- Returning odor
Do not respond to sample failure by adding more pressure, more primer, construction adhesive, caulk, or an unapproved bonding product. First identify which interface failed and ask the relevant manufacturer whether a compatible corrective path exists.
Stop
Stop the installation if:
- Moisture or mold remains unresolved
- Heavy soot, ash, or structural damage is present
- The coating cannot be stabilized without hazardous disturbance
- The wall remains heavily contaminated after appropriate cleaning
- Odor returns from an unidentified source
- Cleaner and primer instructions conflict
- Primer and tile compatibility cannot be confirmed
- The sample repeatedly fails
- The tile manufacturer excludes the substrate or location
Choosing another finish is better than trapping an unresolved problem behind a costly installation.

Frequently Asked Questions
Will peel-and-stick tile adhere after nicotine stains are washed off?
It may adhere if the wall is also sound, smooth, dry, free from cleaner residue, appropriately repaired, and compatible with the tile adhesive. Stain removal alone does not establish readiness.
A wall can become visually cleaner while retaining cleaner film, embedded discoloration, weak paint, or unresolved odor. Inspect each layer and run the manufacturer's sample-area check before full installation.
Can I paint or prime over nicotine stains and then apply tile?
Do not use paint or primer as a substitute for cleaning. Remove as much compatible, removable contamination as the selected system requires, allow the wall to dry, repair unsound areas, and then use a documented stain- or odor-isolating coating if needed.
Confirm that the tile manufacturer accepts the cured coating. A primer documented for nicotine stains is not automatically a tested bonding surface for every self-adhesive tile.
Should I sand a nicotine-stained wall?
Do not sand merely to remove nicotine residue. Clean first using a substrate-compatible process. Sand only where it is permitted and needed for an identified coating, texture, or repair issue.
Before disturbing older or unknown paint, address potential lead-based paint and the applicable lead-safe work requirements. Sanding contaminated or hazardous coating can spread dust through the room.
How can I tell whether the yellow stain is nicotine or water damage?
Appearance alone may not tell you. Tobacco residue may be yellow-brown, sticky, or associated with stale odor and cleaner areas behind wall hangings. Water damage may show rings, swelling, softened drywall paper, bubbling, recurring marks, or a pattern connected to a leak.
If the wall is damp, the stain returns, or mold is visible, stop and resolve the moisture problem before considering tile.
What should I do if cigarette odor returns after cleaning or priming?
Pause the tile installation and identify the source. Odor may be coming from the wall, ceiling, flooring, cabinets, HVAC system, insulation, furniture, or hidden cavities.
A coating used within its documented scope may reduce odor migration from a properly prepared surface, but one treated wall cannot resolve contamination distributed throughout a room. Persistent or severe conditions may warrant professional assessment.
Can renters install peel-and-stick tile on a previously smoked-in wall?
Only with the property owner's authorization and after the wall passes the same preparation checks. Renters should also clarify responsibility for cleaning, primer application, later tile removal, paint damage, and restoration.
A “removable” tile can still pull away weak paint, primer, drywall paper, or old patch material. Document the starting condition and obtain written approval for any cleaning, repair, or coating work.
The final decision is simple, even if the preparation is detailed: install only when the wall is clean, sound, smooth enough, dry, fully prepared under the applicable product instructions, compatible with the selected tile, and successful in a documented representative sample. Rework any failed checkpoint. Stop when the underlying condition cannot be identified or corrected safely.
Use cleaning research to define the limit of a household check
A peer-reviewed study of 38 thirdhand-smoke-contaminated homes found that combined cleaning reduced measured surface nicotine substantially, but it did not eliminate all residue and dust nicotine could rebound. That result supports caution: a wall that looks cleaner is not automatically free of tobacco residue, and no visual color or odor threshold in this guide can certify adhesive readiness. The study involved whole-home cleaning and laboratory nicotine measurements, not a Stickwoll installation test.
For a real project, document the wall history, cleaner used, label directions, drying conditions and whether staining or odor returns. If contamination is extensive, persistent or associated with other damaged materials, a restoration professional may be more appropriate than repeated household experiments. Keep the tile decision separate until the wall is stable and compatible with the selected product.
Treat primer as one layer in a complete compatibility chain
A stain-blocking or odor-isolating primer can serve a specific coating purpose, but it does not replace cleaning and does not automatically become an approved substrate for every pressure-sensitive adhesive. Check the primer’s cure requirements and ask whether the tile manufacturer accepts that cured coating. A sample can reveal an obvious immediate problem but cannot create a universal pass/fail standard for remediated smoke residue.
Keep records of the exact primer, batch, application date and any repair beneath it. If a future tile removal lifts the primer or paint from the wall, that observation points to a different interface than adhesive residue left on an intact coating. Describing the layer that failed is more useful than calling every removal problem an adhesive failure.
Sources and scope
- Remediating Thirdhand Smoke Pollution in Multiunit Housing — Cleaning study of nicotine residues in 38 homes; not an adhesive-readiness threshold.
- US EPA: A Brief Guide to Mold, Moisture and Your Home — Moisture-control guidance; not product approval.
- 3M: Applying VHB Pressure-Sensitive Tape — Surface-preparation and pressure-sensitive-adhesive principles for named 3M tapes; not Stickwoll specifications.


Leave a comment
This site is protected by hCaptcha and the hCaptcha Privacy Policy and Terms of Service apply.