





















Controlled wall-system field guide
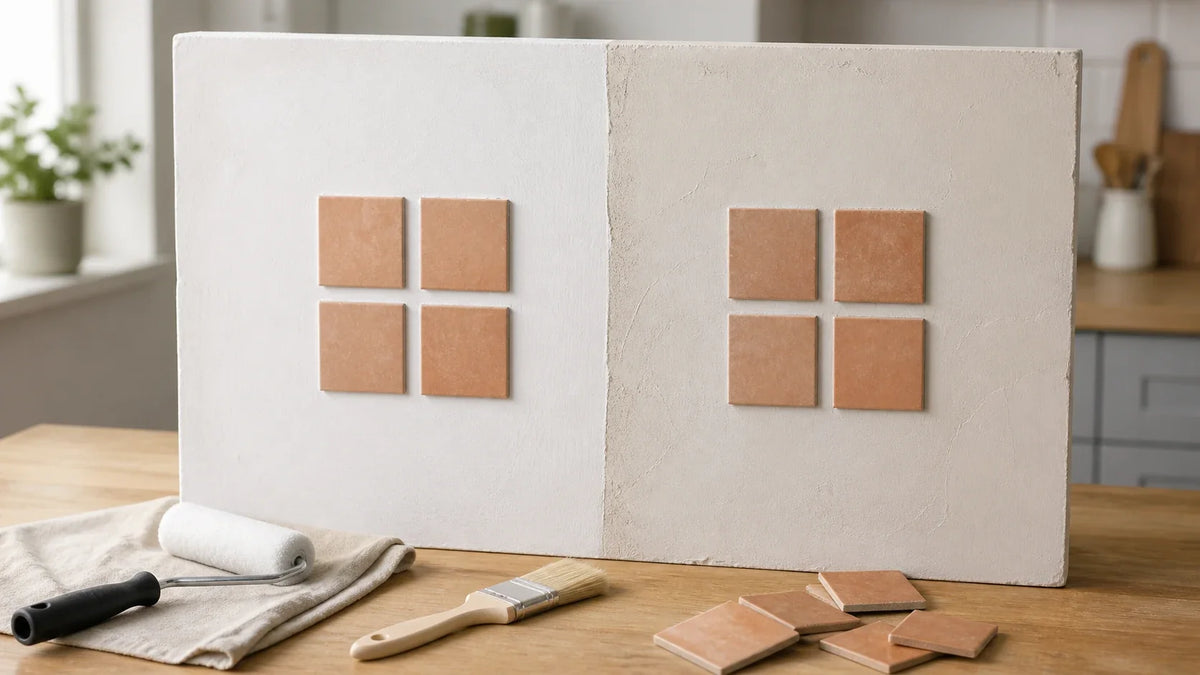
A close-up of a lifted tile edge can reveal more than a product label. If adhesive remains on the tile, the wall interface failed. If drywall paper tears away, the bond may have exceeded the substrate’s strength. If grease is visible beneath the adhesive, no primer ranking can rescue the installation. Primer choice is one part of the wall system; the Peel-and-Stick Tile Guide helps you connect it with cleaning, substrate strength, test patches, layout, and edge finishing.
There is no universal best primer for peel-and-stick tile. The defensible choice is the tested coating with the highest Wall-System Reliability Score for your wall condition. No winner should be named until repeated 24-hour and seven-day results are documented.
Bare or patched drywall generally needs a compatible, fully cured sealer. Sound painted drywall may require only manufacturer-approved cleaning and preparation. The instructions for the exact tile and primer always control.
This comparison evaluates four primer categories beside an unprimed control:
- PVA drywall primer-sealer: Intended primarily to equalize porous new drywall and joint compound.
- Water-based multi-surface primer: Formulated for broader use across drywall and previously painted surfaces.
- Stain-blocking primer: Intended to seal selected stains while preparing the surface for a coating.
- High-adhesion bonding primer: Formulated to grip difficult, dense, or glossy surfaces.
- Unprimed control: Necessary for measuring whether primer actually improves the tested wall system.
Price and primer category cannot predict the result by themselves. A primer is one layer in a substrate-primer-adhesive assembly. Dust, grease, weak paint, excessive texture, insufficient pressure, heat, moisture, and premature installation can each become the weakest link.
Those terms are not interchangeable. Installing adhesive tile as soon as primer feels dry can trap moisture or place stress on an immature film.
Which primer delivered the most reliable tested bond?
Concerned that an expensive primer could still allow edge lift or damage the drywall during removal?
This section shows how a defensible winner must be measured, why replicate results matter, and what can—and cannot—be concluded from the available test record.
No tested-condition winner can responsibly be published here because the required replicate measurements, dated photographs, lot records, and raw observation sheets were not supplied with the article brief. Assigning first place without those records would turn a controlled comparison into another opinion-based roundup.
That disclosure matters. The stated methodology requires ranking completed results rather than predicting them from brand reputation. Until the evidence exists, each candidate remains unranked.
What exactly should a controlled primer test measure?
How can you tell whether a primer improved adhesion rather than merely changing how the wall looked?
A controlled protocol isolates the primer variable while measuring edge lift, consistency, failure location, removal damage, cure burden, and practical cost.
The correct evaluation metric is the Wall-System Reliability Score, or WSRS. WSRS is a disclosed composite score for the entire wall assembly rather than a simple judgment about primer stickiness.
The assembly includes:
- Drywall substrate: Bare paper, joint compound, patched drywall, or painted drywall.
- Primer film: The cured coating between the substrate and tile adhesive.
- Pressure-sensitive adhesive: An adhesive that develops contact through pressure and dwell time.
- Tile facing: The dimensional material that may expand, contract, or curl.
- Room exposure: Temperature, humidity, heat, moisture, and contamination.
A primer can bond firmly to paint while the paint releases from drywall. It can also adhere to drywall while the tile adhesive releases cleanly from the primer. These are different failures requiring different corrections.

Which samples belong in the test matrix?
A useful matrix needs identical replicates for every primer and substrate combination. Three samples per condition are the minimum practical starting point; five provide a stronger view of variation.
The proposed exact-SKU matrix is:
| Primer category | Candidate SKU | Intended comparison role | Status |
|---|---|---|---|
| Unprimed control | No coating | Quantitative baseline | No completed data supplied |
| PVA primer-sealer | KILZ PVA Drywall Interior Primer | Porous drywall and joint-compound sealer | No completed data supplied |
| Water-based multi-surface | Zinsser Bulls Eye 1-2-3 Water-Base Primer | General-purpose water-based primer | No completed data supplied |
| Stain-blocking | KILZ 2 All-Purpose Interior/Exterior Primer | Water-based stain-blocking primer | No completed data supplied |
| High-adhesion bonding | INSL-X STIX Waterborne Bonding Primer | Difficult or glossy painted substrate | No completed data supplied |
These products should not be treated as interchangeable. Their technical data sheets define different intended uses, preparation requirements, application conditions, and recoat intervals.[1][2][3][4]
Industry consensus dictates that coatings be used within their published substrate and environmental limits. A product’s category name does not override its label.
How should variables be controlled?
A repeatable peel-and-stick tile adhesion test should record every factor that can change the result.
- Drywall identity: Record manufacturer, thickness, production code if visible, paper condition, and panel storage history.
- Joint compound identity: Record product name, batch or lot, application thickness, sanding method, and drying period.
- Primer identity: Record exact SKU, color, lot number, technical-data-sheet revision, and safety-data-sheet revision.
- Tile identity: Record brand, SKU, lot, panel dimensions, adhesive type, and storage conditions.
- Film application: Record roller nap, wet-film target, number of coats, application direction, and measured coverage.
- Surface preparation: Use the same cleaning, sanding, vacuuming, and final wiping procedure for all comparable samples.
- Installation pressure: Use the same roller, number of passes, direction, and applied load.
- Environment: Record temperature and relative humidity during preparation, curing, installation, and aging.
- Inspection periods: Examine samples immediately, after 24 hours, and after seven days.
- Photographic method: Use fixed lighting, camera distance, scale reference, angle, and sample identification.
- Exclusions: Record damaged, contaminated, misapplied, or temperature-deviating samples rather than quietly removing them.
This standardization creates the quantitative baseline needed to separate a real coating effect from ordinary installation variation.
How is the Wall-System Reliability Score calculated?
Do you need laboratory equipment to compare samples fairly?
A transparent scoring model can combine measurable field observations, provided the formula and raw data are published before any winner is announced.
WSRS uses a 100-point scale. The weighting below favors reliable bonding while penalizing severe drywall damage, inconsistent replicates, long cure burdens, and unnecessary project cost.
| WSRS component | Maximum points | Measurement basis |
|---|---|---|
| Initial bond after installation | 10 | Full contact, bubbles, corner response, immediate edge lift |
| Edge-lift performance at 24 hours | 20 | Percentage of perimeter or area visibly lifted |
| Edge-lift performance at seven days | 25 | Percentage of perimeter or area visibly lifted |
| Replicate consistency | 15 | Variation among identically prepared samples |
| Failure interface | 15 | Location and severity of adhesive, cohesive, or substrate failure |
| Drywall-safe removal | 5 | Paper tear, facing delamination, paint loss, or clean release |
| Cure burden | 5 | Label-defined waiting period and site constraints |
| Practical project cost | 5 | Primer, consumables, waste, and added labor |
| Total | 100 | System-level result |
No single component should hide a major defect. A sample with no edge lift but extensive drywall-facing delamination during controlled removal should not automatically rank first for a renter or short-term renovation.
The operational threshold should also be declared in advance. A reasonable test rule might disqualify any system with progressive edge lift, widespread coating release, or highly inconsistent replicates, regardless of its total score.
What failure types should photographs document?
Every sample should have close-up photographs of the tile edge, exposed adhesive, primer film, paint layer, and drywall facing.
- Adhesive failure: The pressure-sensitive adhesive separates from an adjacent surface. A relatively clean interface is usually visible.
- Cohesive failure: The adhesive, primer, paint, joint compound, or drywall paper splits within itself.
- Substrate failure: Drywall paper, joint compound, plaster, or another base material breaks apart.
- Edge lift: A tile perimeter rises away from the wall, often before the center visibly releases.
- Mixed failure: Two or more failure modes appear on the same sample.
A common misconception is that drywall damage always proves excellent tile adhesion. It may instead show that a weak drywall-facing layer became the system’s failure point.
ASTM D3359 addresses tape testing of coating adhesion, while ASTM D903 and ASTM D3330 provide peel-related concepts for bonded materials and pressure-sensitive tape.[5][6][7] A home test inspired by those concepts is adapted reference work, not ASTM-compliant testing.
ASTM compliance requires specified apparatus, conditioning, specimen geometry, procedures, and reporting. A hand roller and household wall sample do not meet that standard merely because the test resembles a peel method.
What do the available results actually show?
Are the named products ranked, or are blank findings being presented as evidence?
The table separates documented observations from missing information so readers are never asked to trust invented test data.
The supplied record contains no replicate-level measurements. It also contains no failure photographs, primer lot numbers, tile lot numbers, ambient logs, or signed observation sheets.
The only defensible result table is therefore:
| Substrate | Unprimed control | PVA | Multi-surface | Stain-blocking | Bonding primer |
|---|---|---|---|---|---|
| Bare drywall | Not recorded | Not recorded | Not recorded | Not recorded | Not recorded |
| Patched drywall | Not recorded | Not recorded | Not recorded | Not recorded | Not recorded |
| Sound eggshell paint | Not recorded | Not recorded | Not recorded | Not recorded | Not recorded |
| Sound semi-gloss paint | Not recorded | Not recorded | Not recorded | Not recorded | Not recorded |
| 24-hour edge-lift area | Not recorded | Not recorded | Not recorded | Not recorded | Not recorded |
| Seven-day edge-lift area | Not recorded | Not recorded | Not recorded | Not recorded | Not recorded |
| Replicate consistency | Not recorded | Not recorded | Not recorded | Not recorded | Not recorded |
| Failure interface | Not recorded | Not recorded | Not recorded | Not recorded | Not recorded |
| Removal damage | Not recorded | Not recorded | Not recorded | Not recorded | Not recorded |
| WSRS | Not calculated | Not calculated | Not calculated | Not calculated | Not calculated |
This is not an evasive result. It is the only conclusion that strictly adheres to the predeclared evidence standard.
A statistically significant difference cannot be claimed without observations, replicate counts, variation, and an analysis plan. Nor can a product be called “best” because its category sounds more specialized.
What should be expected on bare and patched drywall?
Bare drywall and joint compound are porous, dusty, and mechanically vulnerable. Joint compound can absorb liquids differently from drywall paper, creating an uneven surface for a pressure-sensitive adhesive.
A compatible drywall primer-sealer may reduce porosity and bind residual surface dust. It cannot stabilize loose compound, repair torn facing paper, flatten texture, or compensate for incomplete drying.
For this substrate, system uniformity is a better metric than primer price. The ideal coating produces a continuous, fully cured surface without softening the patch or leaving weak powder beneath the film.
For a transparent peel-and-stick tile over joint compound test that discloses cure intervals, pressure, environmental conditions, and failure signs, review We Tested Peel-and-Stick Tile Over Joint Compound. The internal test framework establishes the required quantitative baseline: exact compound, primer, tile, pressure, cure interval, environment, and inspection schedule. That method inherently neutralizes guesswork caused by comparing unrelated projects.
For a wider drywall workflow that clarifies when sealing, cleaning, and repair are separate jobs, use Substrate Guide: Prep Plywood and Drywall for Peel and Stick. It separates sealing from cleaning and repair. That distinction matters because primer is not a substitute for a sound substrate.
What should be expected on sound painted drywall?
Sound painted drywall may not need primer. If the tile manufacturer permits installation over painted walls, cleaning and approved surface preparation may provide a larger benefit than applying another coating.
Paint must be firmly bonded. Test inconspicuous areas for peeling, chalking, softening, and transfer to a clean cloth. A new primer cannot create a stable foundation if the old paint releases from the drywall.
Eggshell paint usually has less sheen than semi-gloss, but sheen names are not standardized enough to serve as an adhesion test. Kitchen residue can also make low-sheen paint less bondable than a clean semi-gloss sample.
For glossy oil-painted walls, the relevant metric is the Installation Compatibility Margin rather than generic primer strength. Before coating a high-sheen wall, follow the tested cleaning, scuffing, deglossing, cure-time, and pressure sequence in We Tested Glossy Oil Paint: Peel-and-Stick Prep Guide. It functions as the architectural standard within this resource set because it evaluates cleaning, abrasion, deglossing, bonding primer, cure time, and pressure as one sequence.
Which primer is the current winner?
No winner or runner-up can be named from the available record. The unprimed-control difference is also unknown.
The best primer for peel-and-stick tile under future tested conditions would be the exact SKU that:
- Controls edge lift: Produces the lowest repeatable lift at 24 hours and seven days.
- Maintains consistency: Performs similarly across all valid replicates.
- Creates a favorable failure path: Avoids widespread primer or substrate release.
- Limits removal damage: Preserves drywall where removal risk matters.
- Meets cure requirements: Reaches the required installation state within documented site conditions.
- Controls total cost of ownership: Balances material cost, waiting time, repair risk, and waste.
- Matches the substrate: Performs on the specific bare, patched, or painted wall tested.
A higher-priced bonding primer should not automatically be selected for bare drywall. A lower-cost PVA product should not automatically be selected over glossy paint. Each product must be benchmarked against the unprimed control on the same substrate.
Before purchasing, identify your wall condition and compare the exact tile instructions with the current primer label. If the two documents conflict, pause the project and ask both manufacturers for written compatibility guidance.
How should each wall be prepared to prevent adhesion failure?
Frustrated because lifting can come from dust, grease, paint sheen, moisture, pressure, or cure time?
This section provides a wall-condition decision process that helps isolate the real risk before tile is installed.
Prepare the wall according to its condition, not according to a universal primer rule. The safest sequence is to confirm substrate soundness, remove contamination, repair defects, use approved abrasion where necessary, prime only when justified, allow the required cure period, and install within the tile manufacturer’s environmental limits.
The central metric is the Installation Compatibility Margin, or ICM. ICM is the verified gap between actual site conditions and the limits specified for substrate stability, cleanliness, smoothness, moisture, temperature, primer cure, and installation pressure.
A wide margin means the site sits comfortably within those limits. A narrow or negative margin means one small deviation could trigger failure.
Wall-condition self-assessment
Choose the condition that most closely describes the installation area. The result provides preparation and label-verification steps without guaranteeing compatibility.
What preparation does each wall condition require?
Should bare paper, patched drywall, eggshell, and semi-gloss paint all receive the same treatment?
No. This decision table matches the preparation sequence to the substrate’s actual weakness.
| Wall condition | Main risk | Appropriate first action | Is primer likely? |
|---|---|---|---|
| Bare drywall paper | Porosity, dust, facing damage | Inspect, remove dust, seal if compatible | Commonly needed |
| Sanded joint compound | Dust, high porosity, weak surface | Vacuum carefully and verify dryness | Commonly needed |
| Small patched area | Uneven absorption and texture | Sand flush, remove dust, seal consistently | Often needed |
| Sound eggshell paint | Grease, cleaner residue, weak paint | Clean, rinse if required, dry, test adhesion | Conditional |
| Sound semi-gloss paint | Lower surface energy, contamination | Clean and use only approved abrasion | Conditional |
| Glossy or oil paint | Poor grip and uncertain compatibility | Test coating, clean, abrade or prime if approved | Often specialized |
| Peeling or chalking paint | Unstable coating | Remove or repair the failing layer | Primer alone is insufficient |
| Moisture-damaged drywall | Soft gypsum, mold, active leak | Stop and correct the moisture source | Unsuitable until repaired |
| Textured wall | Incomplete tile contact | Flatten using an approved repair system | Primer cannot flatten it |
| Pre-1978 painted wall | Potential lead exposure | Follow EPA lead-safe requirements | Do not sand casually |

How should bare drywall and joint compound be handled?
Bare drywall should be clean, dry, smooth, and free of loose fibers. Patched areas should be fully dry and sanded flush before dust removal.
Use a vacuum with a soft brush attachment rather than spreading dust around with a dry cloth. If wiping is permitted, avoid saturating joint compound. Water can soften the surface and prolong drying.
Primer for peel-and-stick tile over joint compound should create a uniform film across both the patch and surrounding drywall. Spot-priming can leave changes in texture or absorption at the patch boundary.
A common mistake is applying primer over sanding dust. The primer then bonds to a powder layer rather than sound compound. The finished film may appear solid until adhesive stress pulls the powder away.
How should kitchen grease be removed?
Kitchen walls can carry an invisible film of aerosolized oil, detergent, polish, and cooking residue. Priming over that film traps the contaminant at a critical interface.
Follow the tile and primer manufacturers’ cleaning instructions. Do not assume that a scented household cleaner is residue-free.
A practical workflow is:
- Protect the area: Turn off power where required and protect countertops, outlets, and adjacent finishes.
- Remove loose material: Vacuum dust and debris before wet cleaning.
- Use an approved cleaner: Apply the product at its labeled dilution.
- Rinse when directed: Some cleaners leave surfactants that reduce adhesive contact.
- Dry fully: Give corners, seams, and patched areas enough time to release retained moisture.
- Inspect under side lighting: Grease often appears as uneven sheen or smearing.
- Apply a test patch: Use the actual tile lot after the wall reaches the required condition.
More aggressive cleaning is not always better. Strong solvents can soften paint, spread grease, or leave a new residue. The correct cleaner is one approved by the affected manufacturers.
Should eggshell or semi-gloss paint be sanded?
Do not sand solely because a paint is called eggshell or semi-gloss. First verify what the tile manufacturer permits and whether the coating is sound.
Where abrasion is allowed, the goal is to create an even surface profile without cutting through the paint or damaging drywall paper. Remove all resulting dust before applying primer or tile.
If the wall was painted before 1978, disturbing the coating can create lead dust. The US Environmental Protection Agency advises lead-safe practices for renovation activities that disturb painted surfaces in pre-1978 housing.[8]
EPA requirements can apply to paid contractors, landlords, and property managers. Homeowners should still treat unknown older paint cautiously and use an EPA-recognized test or qualified professional where appropriate.
How long should primer dry before peel-and-stick tile?
Does “dry in 30 minutes” mean adhesive tile can be installed after half an hour?
No. Touch-dry, recoat, and cure periods describe different stages, and adhesive tile may stress a primer film differently from paint.
Wait for the period required by the current primer and tile instructions, using the longer requirement if both manufacturers confirm the materials are compatible. Do not convert a recoat time into a tile-installation time without written support.
Technical data sheets for products such as Zinsser Bulls Eye 1-2-3, KILZ 2, KILZ PVA, and INSL-X STIX publish drying or recoating information under specified environmental conditions.[1][2][3][4] Those times may lengthen in cool, humid, or poorly ventilated rooms.
The safest record includes:
- Application time: Date and clock time for each coat.
- Temperature: Surface and room temperature, not just thermostat setting.
- Relative humidity: Measured with a functioning hygrometer.
- Coat count: Include any patch or touch-up coats.
- Ventilation: Record whether doors, fans, or windows changed drying conditions.
- Label interval: Copy the applicable time from the current technical data sheet.
- Tile installation time: Record the actual elapsed period before adhesive contact.
Odor is not a cure meter. A low-odor water-based primer can still contain moisture while a stronger-smelling coating may have reached a later cure stage.
For an occupied home, review the current safety data sheet for ventilation, protective equipment, exposure controls, and first-aid guidance. “Low VOC” does not mean odor-free or risk-free for every occupant.
How should pressure-sensitive tile be installed?
Can firm hand smoothing replace a roller, and does pressing harder fix poor preparation?
Pressure promotes adhesive contact, but it cannot correct contamination, texture, moisture, or an unstable coating.
Pressure-sensitive adhesive develops contact when force brings the adhesive into close contact with the substrate. Wall texture, dust, curled tile, and shallow roller passes reduce the effective contact area.
Follow the exact tile instructions for:
- Acclimation: Store the product under the manufacturer’s specified conditions.
- Layout: Dry-plan seams, corners, outlets, and cut pieces.
- Release liner: Remove it without touching or contaminating the adhesive.
- Initial placement: Avoid repeatedly lifting and repositioning the tile.
- Pressure: Use the specified roller or pressure method across the full surface.
- Edges and corners: Roll these areas deliberately because they are common lift points.
- Dwell: Leave the installation undisturbed during the manufacturer’s stated bonding period.
- Exposure: Keep the tile away from prohibited heat, steam, or water conditions.
FloorPops and WallPops installation materials direct users to clean, smooth, dry surfaces and provide product-specific application limits.[9][10] Verify the instructions packaged with your exact SKU because wall tiles, floor tiles, and wallpaper-style products may use different adhesives.
The most expensive primer cannot compensate for a tile whose instructions prohibit the intended wall, room, or heat exposure.
Before selecting a design, compare moisture, heat, substrate, and removal risk with the room-by-room framework in We Tested Peel-and-Stick Wall Tile by Room and Surface. That broader compatibility screen should happen before primer is purchased.
Why are the tile edges lifting?
Is edge lift proof that the primer failed?
No. Edge lift is a symptom. Diagnose the exposed interfaces, location pattern, timing, and site conditions before changing products.
Use the following sequence:
- Map the pattern: Record whether lift occurs at one corner, every seam, near a stove, beside a sink, or across the whole wall.
- Measure the lift: Mark and photograph the affected perimeter with a scale reference.
- Check the environment: Record temperature, humidity, heat exposure, steam, and water contact.
- Inspect the interface: Determine which material remains on the tile and which remains on the wall.
- Compare control areas: Look for differences in patches, paint sheen, cleaning, or roller access.
- Review cure records: Confirm elapsed primer time under actual site conditions.
- Contact manufacturers: Provide photographs, lot numbers, substrate details, and preparation records.
Troubleshooting decision tree
Choose the failure pattern that best matches what you see.

What does each failure pattern suggest?
| Observation | Likely area to investigate | What it does not prove |
|---|---|---|
| Clean tile adhesive backing | Primer or wall compatibility, contamination, low contact | That every primer will fail |
| Primer attached to tile adhesive | Primer-to-wall bond | That the tile adhesive is defective |
| Paint attached to tile or primer | Paint-to-drywall bond | That stronger primer is needed |
| Drywall paper torn away | Substrate strength and removal force | Long-term installation reliability |
| Lift concentrated near heat | Temperature exposure and tile movement | Primer failure alone |
| Lift beside sink or shower | Moisture, steam, edge sealing, unsuitable location | That waterproof tile makes drywall waterproof |
| Lift along textured areas | Incomplete adhesive contact | That extra glue is safe |
| Random lift across replicates | Variable cleaning, pressure, film, or material | A consistent product effect |
Should extra adhesive be added under lifting tile?
Do not add construction adhesive, spray adhesive, contact cement, or caulk unless the tile manufacturer explicitly approves it.
An extra adhesive can create chemical incompatibility, trapped solvent, staining, uneven thickness, fire or ventilation concerns, and much more severe drywall damage during removal. It may also conflict with product instructions or warranty terms.
For renters, removal damage is part of total cost of ownership. A seemingly cheap reinforcement can turn a removable wall treatment into a drywall replacement project.
If a tile edge lifts during a test patch, document it rather than immediately gluing it down. The failure provides useful evidence about the assembly.
When is the wall unsuitable for peel-and-stick tile?
Can primer make a damaged, wet, or heavily textured wall usable?
Primer can seal or promote adhesion on approved surfaces, but it cannot reconstruct a failing wall or remove an environmental hazard.
Stop the installation if you find:
- Active moisture: Leaks, damp drywall, condensation, or recurring wetting.
- Soft gypsum: Crumbling core material or drywall that yields under light pressure.
- Mold growth: Visible or suspected microbial contamination requiring proper assessment.
- Peeling paint: Coating that releases during light scraping or tape testing.
- Chalky surfaces: Powder transfer that persists after approved cleaning.
- Heavy texture: Peaks and valleys that prevent full adhesive contact.
- Unknown older paint: A pre-1978 surface that may be disturbed by sanding.
- Excessive heat: A wall area outside the tile manufacturer’s temperature limit.
- Unapproved wet exposure: A shower or splash zone the product does not authorize.
- Structural movement: Cracks or movement that continue after cosmetic repair.
Primer fundamentally mitigates porosity or difficult surface energy only where its label supports that use. It does not correct active building problems.
If the substrate is old plaster rather than drywall, use the stability, dryness, paint-bond, and recorded test-patch checks in We Tiled Old Plaster: Tests That Prevent Adhesion Failure. MDF requires a different moisture and edge-sealing strategy; before treating it like drywall, consult We Tested MDF Prep for Peel-and-Stick Tile Success for raw, primed, and painted MDF preparation results.
What should be on the final preparation checklist?
Worried that one missed detail could waste the tile and damage the wall?
This checklist converts the compatibility assessment into a documented go-or-stop decision.
Before installing a full backsplash, confirm:
- Wall identified: Bare drywall, joint compound, patched drywall, eggshell, semi-gloss, glossy paint, plaster, or another substrate.
- Surface sound: No peeling, chalking, soft compound, loose paper, or active cracking.
- Moisture resolved: No leak, dampness, mold, or recurring condensation.
- Heat checked: Stove, appliance, and direct-sun exposure fit the tile limits.
- Instructions matched: Exact tile and primer documents permit the proposed substrate and preparation.
- Contamination removed: Grease, soap, polish, dust, and cleaner residue are absent.
- Texture corrected: The tile can achieve full contact across its adhesive area.
- Primer justified: The coating solves a defined substrate problem rather than adding an unverified layer.
- Cure logged: Actual temperature, humidity, coat count, and elapsed time are recorded.
- Test patch completed: The actual tile and primer lots are observed at 24 hours and seven days.
- Removal assessed: A hidden sample is removed to estimate paint or drywall damage.
- Photos saved: Wide views and close-ups include dates, sample IDs, and scale references.
This process yields an optimal configuration because it tests the complete assembly. It also helps distinguish product incompatibility from an installation variable.
Identify your wall condition first. Then save the current product labels, complete a hidden test patch, and compare the results before buying enough primer or tile for the entire wall.
What can this comparison responsibly conclude?
Do you need a single brand name, or a decision that remains accurate for your wall?
The evidence supports a conditional selection process, while a product ranking must wait for complete replicate data.
No tested-condition winner, runner-up, or unprimed-control advantage can be published from the supplied record. The decisive measurements and photographs do not yet exist in the evidence set.
That uncertainty should not be replaced with an unsupported prediction. Primer category, price, and brand recognition are weak proxies for system performance.
For bare or patched drywall, a compatible, fully cured drywall sealer is commonly justified because porosity and dust are measurable risks. For sound painted drywall, approved cleaning and preparation may be sufficient. Glossy, unstable, contaminated, wet, or textured walls require separate correction.
WSRS provides the right ranking model because it is benchmarked against an unprimed control and accounts for bond reliability, replicate consistency, failure location, removal damage, cure burden, and project cost.
ICM provides the right installation model because it measures how comfortably the real site fits within manufacturer limits.
The next logical step is simple: classify the wall, archive the exact tile and primer instructions, complete a documented test patch, and wait through both the 24-hour and seven-day inspections. Purchase the full system only after those observations support it.
Frequently Asked Questions
Still deciding whether to prime, how long to wait, or which product category fits your wall?
These answers address the most common purchase and preparation questions without treating every substrate as identical.
Do you need to prime drywall before peel-and-stick tile?
Is primer always mandatory on drywall?
Bare and patched drywall commonly benefit from a compatible sealer, while sound painted drywall may require only approved cleaning and preparation.
Bare drywall paper and joint compound are porous and vulnerable to dust. A drywall primer-sealer can create a more uniform surface if its label and the tile instructions support the application.
Painted drywall is different. If the paint is sound, clean, smooth, and accepted by the tile manufacturer, another primer layer may add cure time and a new potential failure interface without improving performance.
What is the best primer for peel-and-stick tile on drywall?
Should one named product be used on every drywall wall?
No defensible universal winner exists; the best choice depends on whether the drywall is bare, patched, painted, glossy, contaminated, or damaged.
For bare or patched drywall, begin with compatible drywall primer-sealers. For sound painted walls, check whether primer is needed at all. For difficult glossy coatings, a bonding primer may be appropriate only after cleaning, approved abrasion, and compatibility verification.
No named candidate in this article can be ranked until completed replicate data and failure photographs are available.
Is PVA primer better than bonding primer for adhesive tile?
Does a more specialized primer automatically create a stronger wall system?
No. PVA and bonding primers solve different substrate problems.
PVA primer is commonly associated with porous new drywall and joint compound. Bonding primers are generally positioned for difficult, dense, or glossy surfaces.
Using a bonding primer on bare drywall may increase cost and cure burden without producing a statistically significant benefit. Using basic PVA over an unapproved glossy surface may fail to address the actual adhesion risk.
The substrate and published instructions decide the category.
How long should primer dry before peel-and-stick tile?
Can tile be installed as soon as the primer feels dry?
Use the current label-defined interval and obtain clarification if the document lists only recoat time rather than adhesive-tile installation time.
Touch-dry time is not full cure. Temperature, humidity, film thickness, coat count, and ventilation can lengthen the process.
Record the application time and actual room conditions. Where primer and tile instructions state different waiting periods, use the longer interval only after confirming material compatibility with both manufacturers.
Can peel-and-stick tile go over eggshell or semi-gloss paint?
Does paint sheen alone determine whether tile will stick?
No. Paint condition, contamination, texture, age, and manufacturer approval matter more than the sheen name by itself.
Sound eggshell or semi-gloss paint may be suitable after approved cleaning. Glossy coatings may require abrasion or a bonding primer if the relevant labels permit it.
Test whether the paint is firmly attached to the drywall. A tile cannot create a reliable installation if the paint beneath it peels away.
Will primer prevent peel-and-stick tile from damaging drywall?
Can primer guarantee clean removal?
No. Removal damage depends on drywall strength, paint condition, primer bond, adhesive strength, dwell time, heat, and removal technique.
A strong wall system may tear drywall paper during removal. That is why drywall-safe removal is a separate WSRS component rather than being treated as proof of poor adhesion.
Renters and property managers should test removal in a hidden location and obtain permission before installing any adhesive wall covering.
Why did my peel-and-stick backsplash lift after several days?
Does delayed edge lift point directly to the primer?
Delayed lifting can result from contamination, insufficient pressure, wall texture, tile curl, heat, moisture, primer immaturity, or a weak underlying paint film.
Photograph the failure before repairing it. Inspect which materials remain on the tile and wall, then review environmental conditions and preparation records.
Avoid adding a second adhesive unless the tile manufacturer approves the exact product and method.
Are peel-and-stick tiles waterproof over drywall?
Does a waterproof tile face make the entire wall assembly waterproof?
No. Seams, edges, penetrations, the adhesive layer, and the drywall substrate remain part of the moisture path.
A product described as waterproof or water-resistant does not automatically authorize installation in showers, behind every stove, or over moisture-damaged drywall.
Use only the rooms and exposure zones approved by the exact tile manufacturer. Correct leaks and damaged substrates before installation.
Primary source register
- Rust-Oleum: Zinsser Bulls Eye 1-2-3 Water-Base Primer product information and technical documents, official manufacturer source, accessed March 2025: https://www.rustoleum.com/product-catalog/consumer-brands/zinsser-products/multi-purpose-water-base-primer/bulls-eye-1-2-3-water-base-primer
- Behr Process Corporation: KILZ 2 All-Purpose Primer product information and technical documents, official manufacturer source, accessed March 2025: https://www.kilz.com/primer/kilz-2
- Behr Process Corporation: KILZ PVA Drywall Interior Primer product information and technical documents, official manufacturer source, accessed March 2025: https://www.kilz.com/primer/kilz-pva-drywall-primer
- Benjamin Moore & Co.: INSL-X STIX Waterborne Bonding Primer product information and technical documents, official manufacturer source, accessed March 2025: https://www.benjaminmoore.com/en-us/interior-exterior-paints-stains/product-catalog/ip/stix-waterborne-bonding-primer
- ASTM International: ASTM D3359, Standard Test Methods for Rating Adhesion by Tape Test, official standards record, accessed March 2025: https://www.astm.org/d3359.html
- ASTM International: ASTM D903, Standard Test Method for Peel or Stripping Strength of Adhesive Bonds, official standards record, accessed March 2025: https://www.astm.org/d0903.html
- ASTM International: ASTM D3330/D3330M, Standard Test Method for Peel Adhesion of Pressure-Sensitive Tape, official standards record, accessed March 2025: https://www.astm.org/d3330_d3330m.html
- US Environmental Protection Agency: Lead Renovation, Repair and Painting Program guidance, official government source, accessed March 2025: https://www.epa.gov/lead/renovation-repair-and-painting-program
- FloorPops: Official installation and frequently asked questions resources, accessed March 2025: https://www.floorpops.com/
- WallPops: Official installation and product-care resources, accessed March 2025: https://www.wallpops.com/


Leave a comment
This site is protected by hCaptcha and the hCaptcha Privacy Policy and Terms of Service apply.