






Explore this guide
Before we dive into the world of stickers, tiles, and textures, let’s hook you with an interactive way to engage. Try our quick calculator to estimate how much your backsplash project could cost with peel and stick vinyl tiles—it’s easy!
Backsplash Cost Calculator
Estimated Cost: $0.00
Why You’re Overwhelmed by Backsplash Shopping
You’re ready to give your kitchen a facelift. You’ve painted the cabinets, swapped out the hardware, maybe even added new light fixtures. Now you’re staring at the wall above your countertop—the perfect place for a backsplash—but the sheer number of options online feels overwhelming. Traditional tile looks great, but the cost of installation? Not so much. And scrolling through Amazon, Home Depot, Lowe’s, and design blogs only leaves you stuck between 50 tabs and 100 unanswered questions.
Peel-and-stick backsplashes can reduce some installation steps, but construction, wall suitability, exposure limits, coverage and care vary by product. Compare the complete project rather than the installation category alone.
This guide focuses on a durable buying method rather than a temporary retailer ranking. Compare product documentation, installed coverage, wall compatibility, care, replacement availability and complete project cost.
Why Choose Peel and Stick Vinyl Backsplash?
For most homeowners considering a kitchen update, three big factors drive the shift toward vinyl backsplash tiles: installation speed, cost savings, and durability with style variety.
Fast, No-Tool Installation
Installing a traditional backsplash often means cutting tile with specialized saws, mixing mortar, spreading grout, and then sealing it all in. With peel and stick vinyl backsplash, it’s as simple as measuring your wall, peeling the backing, and pressing it onto a clean surface. A small kitchen wall can be done in less than an hour, and even a full backsplash area can be completed in a single weekend.
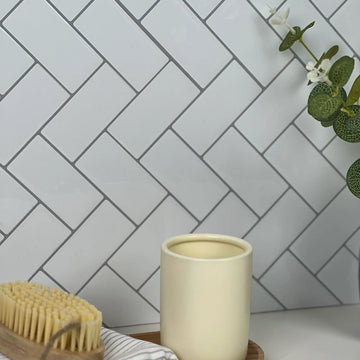
I’ve seen firsthand how dramatic the difference can be. One homeowner I interviewed replaced her 90s beige tiled wall with a white herringbone vinyl backsplash on Saturday morning. By Sunday, her kitchen looked like a magazine feature—all without hiring help or making a mess with grout.
Cost-Effective Makeover
A traditional tile system and an adhesive wall finish can have very different material, preparation and labor scopes. Use current quotations for the same wall and finishing details rather than a fixed category price.
Durability and Style Variety
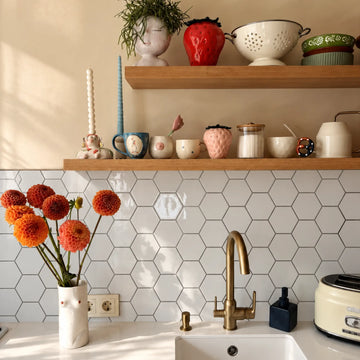
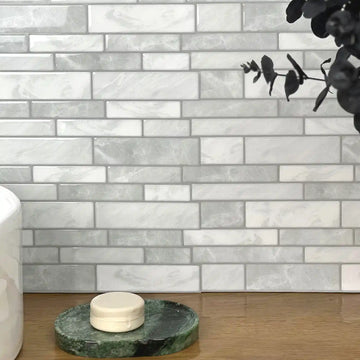
Peel and stick backsplash isn’t flimsy paper. Most top-rated options today feature heat-resistant, waterproof vinyl or composite materials. They hold up well around sinks and stoves, as long as direct flames are avoided. Style-wise, the market has expanded far beyond plain subway tile. You’ll find marble-effect hexagons, matte cement textures, glossy glass-look mosaics, and even eco-friendly lines made with recycled vinyl.
Pro Tip: Always check heat-resistance ratings before installing near your stove. Most products tolerate up to 190°F, but if your stovetop tends to flare, a tempered glass panel may be safer directly behind burners.
If you’re looking for inspiration beyond the basics, check out our creative Peel Stick Backsplash Kitchen Ideas 2025, where you’ll find fresh patterns and concepts trending right now.
Key Factors to Compare Before Buying Online
Not every peel and stick backsplash is created equal. The differences between retailers often come down to price structure, delivery, customer feedback, and design quality.
Price Per Square Foot
Price is the first number savvy buyers look at...
Shipping and Return Policies
Ordering online means you can’t judge texture...
Customer Reviews and Durability Insights
Backsplash reviews reveal the truth hidden behind glossy...
Design Variety and Quality
While large retailers cover basics (subway, marble-effect...)
Common Mistake to Avoid: Buyers often overlook square footage coverage...
Need help installing like a pro? Here’s our practical walkthrough: How to Install Peel and Stick Tiles & Best Designs 2025.
Top Retailers for Peel and Stick Vinyl Backsplash in 2024
Amazon
Amazon is still the most popular place...
Home Depot
Home Depot positions itself...
Lowe’s
Lowe’s competes closely...
Specialty Online Stores
Webshops like Wayfair, Houzz...
If you’re stuck on which tile type to choose, don’t miss the What Kitchen Backsplash Tile Guide, which explores styles, pros and cons, and how peel-and-stick compares to traditional tiles.
Best Options by Category: Budget, Luxury, Eco-Friendly
Shoppers aren’t identical. Some want cheap... others want luxury.
For those curious about alternatives like PVC, check out our comparison on PVC Peel and Stick Tiles vs Vinyl—a helpful read before making your decision.
Final Price Comparison & Buying Checklist
- Calculate square footage.
- Check adhesive rating.
- Read verified reviews.
- Plan extra packs.
- Confirm return policies.
If design versatility is a priority, explore Stylish Kitchen Wall Accents where peel and stick tiles play a creative role beyond just backsplashes.
Conclusion
Peel and stick vinyl backsplash has become the reliable...
Next Step: Download our free printable checklist or explore products for instant style.
For a nature-inspired touch, consider Leafy Dreams Peel and Stick Tiles—a renter-friendly, waterproof option. Or brighten your kitchen with a floral design by exploring Sakura Bloom Peel and Stick Tiles to quickly add elegance.
If sleek, minimalism is your style, we recommend reading about Modern Peel and Stick Subway Tiles—a chic take on classic design.
Q&A Section
Q1: Can peel and stick backsplash really hold up near a stove? ...
Q2: Is vinyl backsplash waterproof? ...
Q3: How long does peel and stick backsplash last? ...
Q4: Can I remove it without damage? ...
Q5: Does buying in bulk save money? ...
Define the wall and exposure before comparing products
Measure the exact backsplash area and mark the sink, cooktop, outlets, windows and exposed side edges. Describe how the wall is used: normally dry, occasional splash, repeated water, near an appliance, or difficult to reach for cleaning. Product selection starts with these conditions rather than a retailer category page.
Identify the wall surface and coating. A product that accepts smooth cured paint may exclude textured, damaged or recently painted walls. If the wall is damp or has a recurring leak, repair the source before shopping for a decorative covering.
Separate face material from the complete construction
Terms such as vinyl, gel, composite, metal-look and stone-look usually describe only part of the product. Ask what forms the face, core, backing and adhesive, and whether the product uses overlaps, butt joints or another seam design. Two products that look similar online can behave differently during cutting, cleaning and removal.
Use product documents as the first buying filter
Before comparing color, find the installation and care instructions for each shortlisted product. Record accepted surfaces, excluded locations, application conditions, cleaning restrictions and any heat or wet-area limits. Broad marketing words such as waterproof, heat resistant or removable should be read with their stated scope.
If the seller cites a test, rating or certification, check what product version and property it covers. A surface-burning classification does not define stove clearance. A washable face does not prove the seams and substrate form a waterproof system. An emissions certificate does not establish every other safety claim.
Save the documents with the order. Product pages can change over time, and later maintenance is easier when the purchased version is clear.
Compare real samples under the kitchen lighting
Online photography is useful for browsing, but screen settings and camera processing can shift color and gloss. Put the physical sample beside the countertop, cabinets and appliance finishes. View it in daylight and under the normal evening lamps.
DOE lighting research distinguishes color appearance from color rendition. Similar nominal lamp labels can conceal different spectra, so a sample that looks gray in one light may read warmer or cooler in another. Judge the actual combination instead of assuming the product photo is a neutral reference.
Use the sample to assess texture, repeat, visible seams and cleaning access. If the product's use is permitted, a concealed sample can also reveal an obvious wall-coating problem. It cannot certify years of adhesion or guarantee damage-free removal.
Calculate usable coverage and total scope
Start with wall area, then account for the actual pattern and sheet layout. Suppose an eligible wall is 24 square feet and a pack provides 3.6 square feet of usable installed coverage. Seven packs provide 25.2 square feet arithmetically. More may be justified by a directional repeat, several outlets or repair stock. The example is not a universal waste allowance.
Compare total project cost, not only price per pack. Include preparation, trim, tools, electrical or plumbing work, professional labor where needed, delivery, taxes and possible restoration. A traditional tile quote that includes substrate repair is not directly comparable with a self-adhesive material price for a ready wall.
Check return conditions before opening every pack. At the same time, inspect enough material to identify visible shade or print variation according to the seller's instructions.
Plan replacement and maintenance before ordering
Find out whether individual pieces can be replaced and whether the product is likely to remain available. Keep a modest amount of labeled repair stock when practical. Pattern direction and production variation can make a later replacement noticeable even under the same product name.
Record the accepted cleaner and tool. A strong degreaser, abrasive sponge or steam device should not be assumed compatible with every decorative surface. Control runoff near seams and inspect edges during routine cleaning.
For rentals, document the starting wall and obtain required permission. Include possible patching or repainting in the exit plan. Do not buy on the basis of a security-deposit promise.
Use a shortlist instead of a universal best-product ranking
After technical exclusions, compare two or three eligible products on the factors that matter in your kitchen: appearance, coverage, difficult cuts, seam visibility, cleaning, repair access and removal expectations. Write one advantage and one limitation for each.
A product can be the best visual fit and still lose because it is excluded near the appliance. Another can be easy to install but difficult to clean with the routine required in the room. Keeping these decisions separate prevents one attractive feature from dominating the whole choice.
The final selection should be traceable: exact product, intended wall, documented conditions, approved sample and quantity plan. That record is more durable than a retailer ranking that changes with price, inventory or sponsorship.
Check delivery, returns and replacement availability
Before ordering several cartons, read the return policy and whether opened packs can be returned. Some visual comparisons require opening material, while other sellers may limit returns once packaging is opened. Plan how much you need to inspect before committing the whole order.
When the shipment arrives, compare product identifiers, color, print direction and visible damage. Photograph labels before discarding packaging. If multiple cartons show obvious variation, contact the seller before cutting or mixing them into the wall.
Do not let a low stock warning make the technical decision
Scarcity messages and sale deadlines are commercial information, not evidence that a product suits the wall. Complete the surface, exposure and care checks first. If the product sells out while those questions are unresolved, choosing a different documented product is safer than rushing an unsuitable installation.
Evaluate the backsplash after installation without inventing a durability test
Record the completed wall and inspect it during normal cleaning. Note changes in seams, edges and the areas exposed to repeated splash or heat. A normal-use record helps with maintenance but does not establish a universal service-life number.
If a repair is needed, compare the spare piece under the installed lighting before removing the damaged one. A later production run can differ in shade or print. Keep the original product information with the maintenance record so a supplier can identify the purchased version.
When use changes—for example, a new range, coffee machine or cleaning product—recheck the wall rather than assuming the original decision covers the new exposure. Product suitability is tied to the actual conditions.
Compare material families without assuming the name tells the whole story
A printed vinyl sheet, gel-faced tile, rigid composite panel and metal-faced product can all be sold as peel-and-stick backsplash. Their cutting tools, thickness, edge details and cleaning restrictions can differ. Read the construction and instructions for the exact item instead of transferring a method from another material.
Look at the back as well as the face. Some products use a continuous adhesive film, others patterned adhesive or another backing system. A rigid panel can bridge a very small surface variation differently from a thin film, but neither should be used to hide an unstable or damp wall.
When the appearance imitates ceramic, marble or metal, keep the visual reference separate from material performance. A marble print does not need natural-stone sealer simply because it looks like stone. A metal look is not automatically a heat shield.
Inspect the wall before choosing a cleaner or primer
Check for loose paint, chalking, deep texture, grease, old adhesive, moisture staining and previous repairs. Identify the topmost coating that will actually receive the adhesive. If paint releases during ordinary cleaning, another decorative layer may simply attach to a weak film.
Use only preparation methods compatible with both the wall coating and tile. A strong solvent or automatic sanding step is not a universal improvement. If primer is recommended, verify which primer and substrate are covered by that recommendation.
In older homes, disturbing unknown coatings can involve additional safety requirements. A decorative project should not begin by aggressively sanding an unidentified wall merely to create a rougher surface.
Plan outlets, end cuts and exposed edges before installation
Measure from fixed references and mark the location of every outlet, switch, cabinet termination and window return. Dry-fit difficult pieces before removing the backing. A clean end condition often matters more visually than the middle of the wall.
Check whether the product uses an overlap, interlocking edge, printed grout line or simple butt seam. Follow that joining method consistently. Do not stretch a flexible sheet to make a repeat meet or use caulk to conceal a poorly planned gap.
For electrical devices, preserve safe access and follow applicable electrical requirements. A tile guide should not instruct you to bury boxes, alter wiring or improvise spacer depth without the proper method.
Treat sink and appliance zones as separate decisions
Behind a sink, consider how often water reaches the face, seams and lower edge. If the wall experiences repeated wetting, use a system documented for that exposure. A wipeable face and a waterproof wall assembly are not the same claim.
Near a range, oven or other appliance, use the appliance instructions and the backsplash product limits together. A surface-burning classification, metallic appearance or heat-resistant marketing phrase does not automatically define a safe clearance.
Coffee machines, kettles and other countertop equipment can add steam, spills and service movement. Preserve the space needed to fill, clean and remove the equipment without repeatedly striking an exposed tile edge.
Choose a backsplash you can actually maintain
Ask for the approved routine cleaner before purchase. A pronounced texture can be attractive but may require more deliberate wiping. A smooth glossy face may show streaks or reflections more clearly. Choose the trade-off you are comfortable maintaining.
Do not assume abrasive pads, concentrated degreasers, alcohol, steam or household recipes are safe for every finish. Follow the exact care instructions and test permitted methods in a small area when appropriate.
Keep cleaning liquid controlled around seams. If an edge repeatedly lifts after cleaning, record the condition and investigate the wall, moisture and product compatibility rather than continually pressing it back down.
For rentals, add permission and restoration to the buying checklist
Confirm whether the lease or landlord permits the installation and whether permanent trim, primer or additional adhesive would change that permission. Photograph the original wall before preparation.
Do not interpret removable as a guarantee that paint or drywall paper will remain intact. Wall condition, time in service and removal method can affect the outcome. Keep a modest restoration allowance in the project budget.
If the project is mainly about temporary color, compare whether a smaller feature area could achieve the design goal with less wall exposure. A narrower, well-planned installation can be easier to remove and restore than a full-room application.
Make the final order from a documented shortlist
For each finalist, list the exact product, accepted wall, excluded zones, usable coverage, seam type, care method, difficult cuts, replacement availability and removal expectations. Eliminate any option with an unresolved technical conflict before comparing price.
Then compare total cost using the same scope. Include preparation, trim, tools, labor, delivery and spare material. If one quote assumes a perfect wall and another includes repair, separate those differences before deciding which option is cheaper.
Save the winning product documents and sample photo with the order. This gives the installation a clear reference and makes future maintenance more reliable than an old shopping ranking.
Build a comparison sheet that survives changing prices
Create one row for each finalist and columns for usable coverage, accepted surface, excluded locations, seam type, cleaning method, edge finish, replacement availability and return conditions. Add the current price and delivery cost only after those technical fields are complete. This prevents a temporary sale from turning an unsuitable product into the apparent winner.
Keep assumptions visible. If the wall condition is unknown behind a previous backsplash, mark it unresolved rather than ready. If heat exposure near an appliance depends on the appliance manual, note that document. A buying table is useful because it shows missing information, not because it generates a universal score.
Compare complete quantities
Two products with different pack sizes cannot be compared by box price alone. Convert both to usable installed coverage for the actual pattern, then add the justified extra material. Include matching trim or edge pieces where they are required. If a product needs a separately approved primer, include it in that same scope.
When a product is sold as a kit, check what the kit does not include. Cutting tools, electrical adjustments, substrate repair or professional work may remain separate. Record these items so the comparison reflects the real project rather than only the most visible package.
Ask the seller questions that can be answered in writing
Useful questions name the exact product and location: Is this SKU approved over my painted drywall? Is it permitted behind this type of appliance at the clearance required by the appliance manual? Which cleaners are allowed? Are the seams intended for repeated splash exposure? Is extra adhesive allowed if an edge lifts? What removal method is specified?
Avoid broad questions such as is it good quality or is it waterproof. Those invite broad answers that may not resolve the proposed installation. Save the written response with the order and compare it with the current instructions.
If the answer conflicts with another document, stop and ask for clarification before cutting material. A consistent record is more useful than collecting several marketing claims and choosing the most favorable one.
Inspect the first pack before opening the entire order
Where the return policy permits, compare the delivered material with the approved sample. Check the printed pattern, finish, dimensions, backing and visible defects. A sample from an older display or another production run can differ from the delivered product, so the shipment becomes the final visual reference.
Dry-layout a representative section and the hardest cut. If the product cannot produce an acceptable edge or seam on the actual wall, resolve that before committing every pack. This is also the time to discover whether the product documentation in the box differs from the version saved during shopping.
Once installation begins, keep labels from at least one pack. They can help identify the product later if support or a replacement is needed.
Keep a compatibility record instead of relying on memory
Write down the wall material, paint or previous finish, moisture history and the exact product selected. Add the installation instructions and care document to the same folder. If the seller confirms an unusual surface or location in writing, save that response with the product version and date.
This record becomes especially useful when several people participate in the project. The person who orders the material may not be the person who installs it, and the person who cleans the wall months later may not remember which chemical restrictions applied. A short written record keeps those decisions connected.
Record what was not checked
Good project notes include limits. If the paint age is unknown, write unknown. If a previous leak was repaired but the wall cavity was not opened, do not describe the entire wall as verified dry. If the product documentation does not address a particular cleaner, leave that as a question rather than converting silence into approval.
These notes do not need to be complicated. A one-page checklist and a few photographs can be enough. The value comes from keeping observations, manufacturer statements and assumptions separate.
Review the wall after seasonal and equipment changes
A backsplash installed in summer can experience different indoor humidity, sunlight and heating patterns in winter. Routine observation does not need an artificial stress test: simply note whether edges, seams or the wall condition change during normal use. If a seasonal issue appears repeatedly, investigate the source instead of treating it as a cosmetic nuisance.
Likewise, a new range, countertop appliance or sink fixture can change the exposure. Recheck clearances, splash paths and service access when equipment changes. The suitability decision belongs to the current installation, not forever to the wall location.
Keep repairs in the same record. If a single piece is replaced, note why and how. A repaired wall can remain successful, but later claims should not describe it as completely unchanged since installation.
Sources and scope
- US Department of Energy — Color and Spectrum — Color appearance, spectrum and rendition; not a guarantee of how a specific kitchen finish will look.
- US EPA — Mold, Moisture and Your Home — Moisture-source control and drying; not tile-product certification.
- Smart Tiles — Official FAQ — Examples for that manufacturer only; not Stickwoll specifications.



Leave a comment
This site is protected by hCaptcha and the hCaptcha Privacy Policy and Terms of Service apply.