


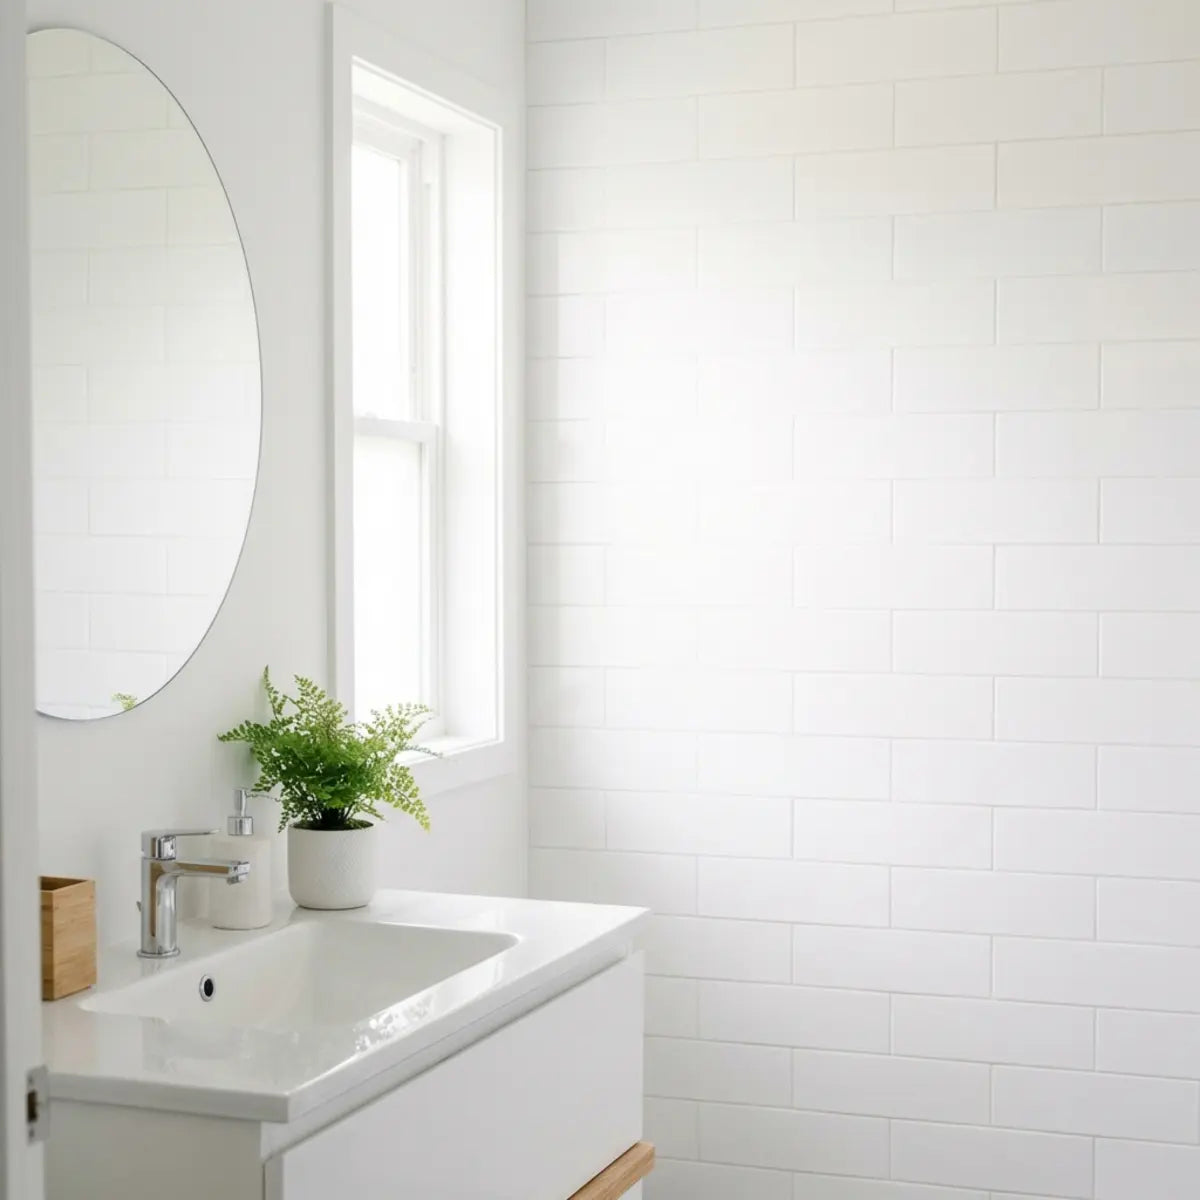
Cómo cubrir baldosas de baño anticuadas con poco presupuesto
Ya sabes cómo se siente: entras en el baño de tu alquiler y ahí están. Quizá sean los cuadrados color salmón de los años 50, la cuadrícula beige sobre beige de los 90 o cerámicas desconchadas que ya vivieron tiempos mejores. Quieres un refugio, pero te toca convivir con una cápsula del tiempo.
Para los inquilinos urbanos y quienes compran su primera casa, esta es una frustración universal. Quieres disfrutar de tu hogar, pero los contratos de alquiler estrictos y el miedo a perder la fianza hacen que reformar parezca imposible. Nosotros también hemos estado ahí. La buena noticia es que no necesitas un mazo ni un contratista para arreglar esto.

Estrategia principal:
La mejor forma de cubrir baldosas de baño anticuadas con poco presupuesto es usar opciones seguras para inquilinos y removibles, como baldosas peel-and-stick, paneles de vinilo impermeables o adhesivos para azulejos que no requieren demolición y ayudan a conservar tu fianza.
Esta guía te mostrará exactamente cómo conseguir un acabado de alto nivel sin asumir un compromiso permanente.
¿Por qué tantos alquileres tienen baldosas de baño anticuadas y qué problemas crean?
¿Alguna vez sientes que tu baño tiene secuestrado tu estilo de decoración, pero no entiendes por qué los propietarios no lo actualizan simplemente? Es un bloqueo de diseño total.
Esta sección desglosa el fenómeno del “acabado típico de propietario” y te ayuda a entender los desafíos específicos de la superficie que necesitas superar para lograr una cobertura exitosa.
Los alquileres suelen tener baldosas anticuadas porque los propietarios priorizan la durabilidad y el coste por encima de la estética actual. El azulejo cerámico está diseñado para durar 50 años o más; si no está roto, rara vez un propietario ve un incentivo económico para reemplazarlo solo por estilo.
Esto da lugar a lo que en el sector llamamos el “acabado típico de propietario”.
Un término coloquial para reparaciones o acabados de alquiler que son funcionales y baratos, pero poco atractivos estéticamente, a menudo caracterizados por capas de pintura gruesa o accesorios desparejados.
Aunque estas baldosas son duraderas, presentan desafíos concretos para el inquilino con sensibilidad estética:
- Problemas de textura: muchas baldosas antiguas tienen relieves o juntas irregulares, lo que dificulta que los adhesivos estándar se peguen de forma uniforme.
- Barreras contra la humedad: Las superficies del baño están expuestas constantemente a la humedad. Un adhesivo estándar podría despegarse en una semana si no está diseñado para entornos con mucha humedad.
- La trampa de la “permanencia”: Muchos inquilinos temen que cualquier intento de cubrir el azulejo deje residuos, lo que podría hacerles perder la fianza.
El dilema de la durabilidad
Piensa en el baño de tu alquiler como en un servicio público. Se construyó para resistir miles de duchas, no para ganar premios de diseño. Según datos de la National Association of Home Builders, la vida útil media del azulejo cerámico es de 75 años a toda la vida. Eso significa que las baldosas instaladas en un complejo de apartamentos de los años 80 todavía están, técnicamente, en su “juventud”, hablando en términos estructurales.
Capa de profundidad: la analogía del “impermeable”
Vivir con baldosas feas es como llevar un impermeable de alta calidad que, además, es de un color neón que odias. Cumple su función a la perfección (no deja pasar el agua), así que no puedes tirarlo, pero desde luego no quieres ponértelo para ir a una fiesta. Nuestro objetivo es ponerle una chaqueta con estilo encima de ese impermeable sin dañarlo.
¿Cuáles son las mejores formas, aptas para inquilinos y seguras para el presupuesto, de cubrir baldosas viejas del baño?
Las formas más eficaces y seguras para el presupuesto de cubrir las baldosas del baño son baldosas de gel 3D autoadhesivas y despegables, adhesivos vinílicos para baldosas y paneles de beadboard impermeables.
Hemos probado estos métodos a fondo. La opción “correcta” depende por completo de si vas a cubrir una “zona húmeda” (dentro de la ducha) o una “zona seca” (detrás del lavabo o del inodoro).
1 Baldosas de gel 3D autoadhesivas y despegables (mejor para salpicaderos)
No son simples pegatinas planas. Están hechas de resina epoxi o vinilo con una capa superior de gel que imita la textura y el brillo de una baldosa real de vidrio o cerámica.
- Por qué funcionan: Son lo bastante gruesas como para ocultar pequeñas imperfecciones de la baldosa antigua que hay debajo.
- Dónde usarlas: Salpicaderos del lavabo y paredes fuera del chorro directo de la ducha.
Profundiza más: la guía para inquilinos sobre baldosas de gel
¿Eres inquilino y quieres dar vida a tu espacio sin fastidiar a tu casero? ¡Las baldosas despegables y autoadhesivas son tu nuevo mejor aliado! De hecho, casi 65% de los inquilinos han transformado con éxito sus hogares con estas baldosas temporales y con estilo. Pero antes de lanzarte, exploremos todo, desde la magia de la instalación hasta una retirada segura. Tanto si quieres un toque de color como un estilo elegante y moderno, estas baldosas ofrecen flexibilidad y personalidad.
Leer la guía completa →2 Baldosas impermeables sólidas de vinilo (mejor para duchas)
Si vas a cubrir baldosas dentro de la ducha, las pegatinas estándar no servirán. Necesitas baldosas rígidas o semirrígidas de vinilo diseñadas específicamente con adhesivo impermeable.
- Resistencia a la humedad: Estas baldosas crean un sellado firme que evita que el agua se filtre detrás del adhesivo, lo que provoca moho.
- Aplicación: A menudo requieren un método de “solape” para asegurar que el agua resbale por la superficie, igual que ocurre con las tejas de un tejado.
Recomendadas para zonas húmedas
¿Te cansaste de mantener las baldosas tradicionales en la zona de la ducha? ¡Las baldosas impermeables autoadhesivas pueden ser la solución que estabas buscando! Nos adentramos en el mundo de las baldosas autoadhesivas, centrándonos en sus beneficios impermeables y en las mejores marcas conocidas por su durabilidad. Desde añadir un toque de color hasta proteger tus paredes, descubre por qué estas baldosas están arrasando en el mundo de las reformas.
Ver las mejores baldosas impermeables de 2025 →3 “Adhesivos” para baldosas (mejor para baldosas lisas y planas)
Los adhesivos son láminas finas de vinilo impresas con un patrón. Son la opción más asequible, pero también la menos indulgente.
- La limitación: Si tus baldosas actuales tienen cualquier textura o juntas de lechada profundas, los adhesivos mostrarán cada bulto. Funcionan como una segunda piel.
- Mejor caso de uso: Cubrir baldosas 4x4 blancas lisas y genéricas con un patrón colorido.
4 El método de “cinta y pegamento” con beadboard
Para un look cottage-core, puedes instalar beadboard ligero de PVC sobre la baldosa sin pegarlo directamente a la baldosa.
- El truco: Aplica cinta de pintor de alta resistencia sobre la baldosa. Luego, aplica adhesivo de construcción (como Liquid Nails) sobre la cinta, no sobre la pared. Pega el beadboard al adhesivo.
- El resultado: Cuando te mudes, despega la cinta. El pegamento se irá con la cinta, dejando la baldosa impecable.

Comparación de métodos para cubrir baldosas
| Característica | Gel 3D autoadhesivo y desmontable | Azulejos de vinilo para la ducha | Calcomanías finas para azulejos | Tablero de cuentas de PVC |
|---|---|---|---|---|
| Ideal para | Salpicadero del tocador | Dentro de la ducha / zonas húmedas | Azulejos lisos y planos | Cubrir grandes secciones de pared |
| Costo | $$ (Moderado) | $$$ (Más alto) | $ (Bajo) | $$ (Moderado) |
| Instalación | Fácil | Moderado | Fácil | Moderado |
| ¿Impermeable? | Resistente al agua | Totalmente impermeable | Resistente al agua | Totalmente impermeable |
| ¿Protege el depósito? | Sí | Sí (con cuidado) | Sí | Sí (método con cinta) |
Galería de inspiración
¿Necesitas prueba visual? Descubre si puedes poner baldosas peel and stick sobre azulejos viejos y mira impresionantes transformaciones de baño antes y después con nuestra guía definitiva de 2025. Ver para creer cuando se trata de cubrir superficies anticuadas.
Ver antes y después →Idea errónea común: "Puedo simplemente pintar los azulejos."
En un alquiler, nunca pintes los azulejos. La pintura para azulejos es extremadamente difícil de retirar. A diferencia de los adhesivos, que se despegan, la pintura requiere decapado químico que casi con seguridad dañará el esmalte original, costándote todo tu depósito.

Consejo profesional:
Nunca uses “contact paper” estándar en un baño. El papel adhesivo está diseñado para forrar estantes; el adhesivo rara vez soporta las fluctuaciones de humedad de un baño, lo que provoca que las esquinas se despeguen en cuestión de semanas.
¿Qué método DIY se adapta a tu baño?
Responde una pregunta para obtener nuestra recomendación experta.
¿Vas a cubrir azulejos dentro de la zona de la ducha donde cae el agua directamente?
¿Cómo puedes instalar estos cubre-azulejos temporales paso a paso sin dañar las paredes?
La ansiedad: ¿Temes equivocarte con la alineación, atrapar burbujas de aire o, peor aún, pegar algo que luego no se pueda quitar?
La promesa: Esta sección ofrece un protocolo de instalación infalible, verificado por expertos, que garantiza resultados profesionales y una retirada fácil cuando termine tu contrato de alquiler.
Instalar cubre-azulejos temporales requiere paciencia y preparación. La razón número uno por la que fallan los azulejos peel-and-stick no es el adhesivo, sino la preparación de la superficie.
Para profundizar en este proceso específico, consulta nuestra guía complementaria:
¿Buscas renovar tu espacio sin gastar de más? ¡Los azulejos adhesivos sin esfuerzo podrían ser justo la solución que necesitas! Con las tendencias de decoración del hogar orientándose hacia opciones más flexibles, los azulejos adhesivos están ganando popularidad, especialmente entre los inquilinos. ¿Sabías que una encuesta reciente encontró que 68% de los inquilinos buscan soluciones temporales? Aquí profundizamos en los detalles de la instalación.
Leer guía de instalación →Kit de herramientas esencial
- ✅ TSP (fosfato trisódico)
- ✅ Desengrasante de alta potencia
- ✅ Cúter / cuchilla multiusos
- ✅ Regla metálica o borde recto
- ✅ Raspador de goma o tarjeta de crédito
- ✅ Secador de pelo (¡imprescindible!)
Paso 1: Limpieza profunda (no te lo saltes)
Los azulejos del baño están cubiertos de capas invisibles de espuma de jabón, residuos de laca para el cabello y aceites corporales. El adhesivo no se pega al aceite.
- Desengrasa: Frota los azulejos con una solución de TSP o un desengrasante de alta potencia. El limpiador estándar para baño a menudo no es lo bastante fuerte para eliminar la grasa incrustada.
- Enjuaga y seca: Enjuaga bien con agua. Cualquier resto de producto de limpieza arruinará el adhesivo. Deja que la pared se seque durante al menos 24 horas.
- Consejo de experto: Usa un secador de pelo para asegurarte de que las juntas estén completamente secas. La humedad atrapada es el enemigo.
Paso 2: Planificación y medición
No empieces simplemente pegando los azulejos en la esquina. Las paredes de los alquileres rara vez son perfectamente cuadradas.
- Encuentra el centro: Mide el ancho de la pared y marca el centro. Coloca ahí tu primer azulejo y trabaja hacia afuera. Así te aseguras de que los azulejos cortados del extremo izquierdo y del extremo derecho sean del mismo tamaño, logrando un aspecto simétrico.
- La prueba en seco: Fija unos cuantos azulejos con cinta de pintor para comprobar la distribución antes de despegar el reverso.
Paso 3: Técnica de aplicación
Para obtener los mejores resultados, usa el "método de bisagra".
- Despega una pequeña tira: Retira solo 2 inches del papel protector.
- Alinea: Pega el borde expuesto a tu marca, comprobando que esté nivelado.
- Alisa: Tira lentamente del resto del papel protector hacia abajo mientras alisas el azulejo contra la pared con un raspador de goma o una tarjeta de crédito. Así expulsas las burbujas de aire a medida que avanzas.

Inspiración de diseño: el desplazamiento del azulejo tipo metro
¿Sueñas con una renovación de baño espectacular? ¡Los azulejos tipo metro son una opción atemporal! Imagina cómo tu ducha anticuada se transforma en una pieza elegante y de líneas limpias. Si vas a usar azulejos rectangulares, considera un patrón de "ladrillo" o "desplazado". Este patrón disimula mejor las imperfecciones de la instalación que un patrón en cuadrícula. Acompáñame en este viaje transformador, desde la preparación hasta mostrar esas fotos de antes y después que te dejarán con la boca abierta.
Leer guía de renovación con azulejos tipo metro →Paso 4: Sellado de los bordes (crucial para proteger del agua)
Si estás cerca de un lavabo o una ducha, debes sellar los bordes.
- Masilla de silicona: Aplica un cordón fino de 100% masilla de silicona a lo largo del borde inferior, donde los azulejos se encuentran con la encimera o la bañera. Esto evita que el agua se filtre detrás de tus nuevos azulejos.
- Nota sobre la retirada: Cuando te mudes, la masilla de silicona se puede despegar o raspar fácilmente con una cuchilla de plástico sin dañar la cerámica de debajo.
¿Estás planificando tu proyecto?
Descarga nuestra guía gratuita "Lista de verificación para la renovación de alquiler" para asegurarte de no saltarte ningún paso.
Descargar la lista de verificación (TXT)Cómo retirarlo sin causar daños
Cuando llegue el momento de mudarte, no arranques las baldosas como si fuera una tirita. Eso puede arrancar la pintura o el panel de yeso (si colocaste azulejos sobre panel de yeso).
- Aplica calor: Usa un secador de pelo en la configuración de "calor alto". Dirige el aire a la esquina del azulejo durante 30 segundos. Esto ablanda el adhesivo.
- Despega lentamente: Levanta con cuidado la esquina y tira en paralelo a la pared, no hacia afuera. Sigue aplicando calor mientras despegarlo.
- Limpia los residuos: Si queda algún residuo pegajoso, usa un removedor de adhesivo a base de cítricos (como Goo Gone) para limpiar los azulejos originales.
¿Qué estrategias de diseño hacen que un baño pequeño de alquiler se vea caro?
Cubrir las baldosas es 80% de la batalla. La 20% restante consiste en estilizar el espacio para distraer del hecho de que es un alquiler.
Guía de estilo visual
Incluso con nuevas cubiertas para azulejos, ¿el baño todavía se siente pequeño, desordenado y barato? Mira inspiradoras transformaciones de baño antes y después usando azulejos peel and stick. Nuestra colección seleccionada incluye ideas modernas, para espacios pequeños y de lujo, con tableros de inspiración que muestran cómo los herrajes y la iluminación interactúan con revestimientos temporales.
Explora tableros de inspiración para la renovación del baño →El poder de la verticalidad
Los baños de alquiler suelen ser pequeños. Para hacer que la habitación se sienta más alta, coloca el patrón de los azulejos en vertical (apilando los azulejos rectangulares hacia arriba en lugar de a lo ancho) o lleva el color del azulejo hasta el techo si el presupuesto lo permite.
Regla de diseño: "Lleva la mirada hacia arriba". Si tienes techos bajos, colocar una planta grande o una obra de arte en lo alto de la pared, sobre el inodoro, desvía la mirada del suelo y hace que la habitación se sienta más aireada.
Mejora los herrajes
Puede que no puedas cambiar el tocador, pero normalmente sí puedes cambiar los pomos.
- El cambio: Desatornilla los pomos genéricos de plástico o cromados y reemplázalos por herrajes en negro mate o latón cepillado.
- Lo que se conserva: Guarda los pomos viejos en una bolsa Ziploc y pégala con cinta al interior del armario del tocador. Cuando te mudes, vuelve a colocarlos.
Iluminación y espejos
Si tu alquiler tiene una luz de tira dura, de estilo de constructor, quizá no puedas desconectarla. Sin embargo, sí puedes cambiar el ambiente.
- Bombillas cálidas: Cambia las bombillas de luz blanca fría (que hacen que los baños parezcan hospitales) por bombillas de luz blanca cálida (2700K-3000K).
- El espejo apoyado: Si odias el espejo del botiquín, a veces puedes apoyar un espejo grande y elegante con marco contra la pared (si el espacio lo permite) o usar tiras Command para colgar un espejo decorativo ligero sobre una sección lisa de la pared.

Preguntas frecuentes
¿Puedo usar baldosas peel-and-stick dentro de la ducha?
Sí, pero debes elegir baldosas específicamente etiquetadas como "impermeables" o "aptas para ducha", no solo "resistentes al agua". Recomendamos encarecidamente usar baldosas de vinilo sólido en esta zona y sellar el perímetro con masilla de silicona para evitar la infiltración de agua.
Profundización en el control de la humedad: ¿Sueñas con una renovación de baño con estilo que no rompa el presupuesto? Las baldosas peel and stick han revolucionado las reformas del baño. Desde el control de la humedad hasta una mejora rápida de fin de semana, estas baldosas son la solución perfecta para las necesidades de tu baño.
Lee más sobre renovaciones seguras frente a la humedad →
¿Estas baldosas dañarán los azulejos cerámicos existentes?
Por lo general, no. El azulejo cerámico es extremadamente duro y no poroso. Los residuos de adhesivo casi siempre se pueden limpiar con un solvente como Goo Gone. Sin embargo, si las aplicas sobre paneles de yeso pintados, retirarlas requiere calor y paciencia para evitar que se desprenda la pintura.
¿Cuánto duran las baldosas temporales para baño?
En un baño bien ventilado, las baldosas peel-and-stick de alta calidad pueden durar de 3 a 5 años. En un baño muy húmedo y con poca ventilación, podrías ver que las esquinas se levantan después de 12 a 18 meses. La preparación adecuada de la superficie (desengrasado) es el factor más importante para su durabilidad.
¿Puedo poner baldosas de suelo peel-and-stick sobre el suelo de mi baño?
Sí. Los azulejos del piso son más gruesos y duraderos que los de pared. Asegúrate de que el piso existente esté perfectamente limpio y nivelado. Si tu piso actual tiene juntas de lechada muy profundas, es posible que debas rellenarlas con un relleno removible o elegir una tabla de vinilo rígido con núcleo que flote sobre las imperfecciones.
Reflexiones finales
Vivir en un alquiler no significa que tengas que vivir con un baño que odias. La era del "Landlord Special" ha terminado, gracias a la innovación de materiales removibles de alta calidad. Con azulejos de gel 3D, vinilo impermeable o ingeniosos trucos con beadboard, puedes recuperar tu espacio.
Recuerda, la clave para una renovación segura para el depósito es la preparación. Limpia bien esas paredes, mide dos veces y usa calor cuando llegue el momento de decir adiós.
¿Listo para empezar tu proyecto?
No dejes que el miedo a renovar te detenga. Descubre mejoras de baño aptas para inquilinos con azulejos temporales peel & stick. Aprende trucos seguros, consejos de retirada y productos recomendados para renovar tu espacio.
Explorar mejoras aptas para inquilinos →¿Cuál es tu mayor molestia en el baño?


Deja un comentario
Este sitio está protegido por hCaptcha y se aplican la Política de privacidad de hCaptcha y los Términos del servicio.