


Transform Your Space
Discover the ultimate guide to elevating your bathroom aesthetics without the massive contractor bill or the mess of a demolition.
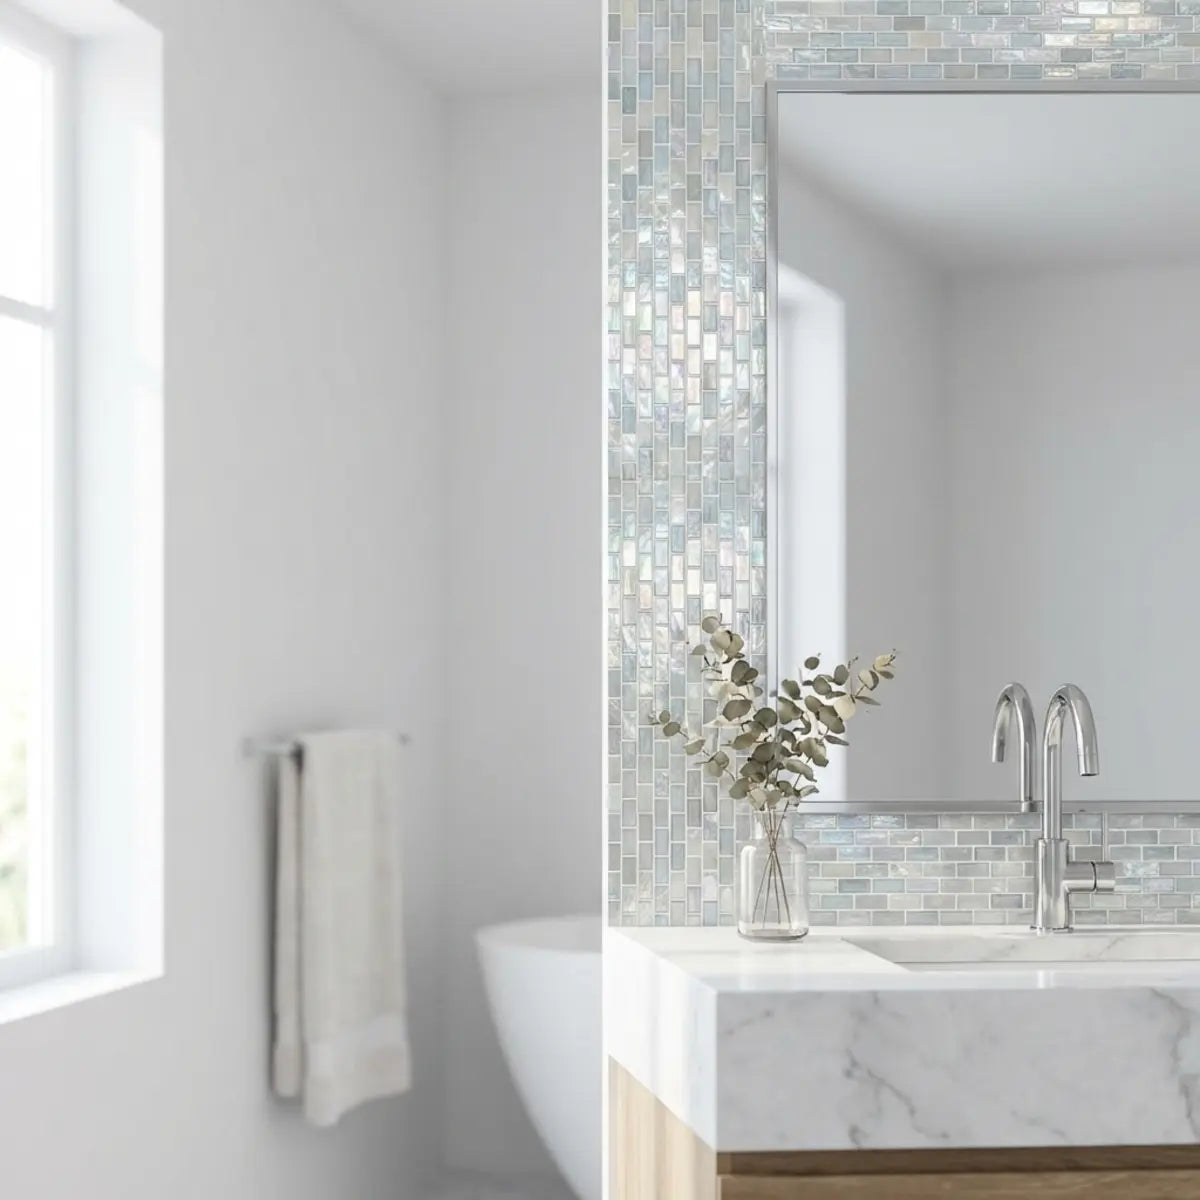
Every morning, you likely stand before a plain, builder-grade glass rectangle. The bathroom is meant to be a personal sanctuary, a place to prepare for the day ahead or unwind after a long one. Yet, a frameless bathroom mirror often feels unfinished, leaving the entire room looking sterile and dated. It strips the space of character, making it feel more like a basic utility closet than a relaxing retreat. Professional custom framing costs hundreds of dollars, requiring specialized glass cutters, precise measurements, and expensive labor. On the other hand, traditional DIY wood frames require heavy saws, precise miter cuts, and potentially damaging construction adhesive that can permanently ruin your drywall or the mirror's silver backing.
Fortunately, the era of heavy, permanent renovations is evolving. You can frame a bathroom mirror using peel and stick tiles by cleaning the mirror edges, measuring and cutting the tiles to fit, and applying them directly for a seamless, no-drill border. This innovative approach delivers a designer look for under $50 total cost, instantly elevating the perceived value of your home. It is completely renter-friendly, fully removable, and requires absolutely no tools or drilling, making it an accessible weekend project for anyone, regardless of their DIY experience level.
By utilizing adhesive backsplash materials, you bypass traditional construction hurdles entirely. There are no messy grout lines to maintain, no hazardous dust filling your home, and no need to wait days for adhesives to cure. This method offers an immediate, high-impact visual upgrade. It transforms a basic bathroom fixture into a custom focal point in under an hour, proving that luxury aesthetics do not always require luxury budgets.
Why use peel and stick tiles to frame your bathroom mirror?
The Question: Are you tired of living with a bare, unfinished mirror but restricted by rental agreements or a tight budget?
The Promise: This section explains how adhesive materials provide a fast, damage-free, and highly durable framing solution that rivals the look of traditional ceramics and wood.
Traditional wood frames in high-humidity areas often warp, swell, or develop mold over time. The constant cycle of steam from showers and cool air creates an incredibly hostile environment for natural wood fibers. Sourcing moisture-resistant lumber and custom-cutting it to fit an existing mounted mirror is a complex task that demands a fully equipped garage workshop. A DIY bathroom mirror frame using peel and stick tiles entirely eliminates these structural concerns. Modern adhesive tiles are engineered from advanced polymers designed to repel moisture rather than absorb it.
Think of an adhesive tile frame like a protective, decorative phone case. It wraps the vulnerable edges of your glass, adds immediate personality, and can be swapped out whenever your style changes. You achieve the visual weight of a custom frame without the permanence, allowing your interior design to evolve as current trends shift.
The Joint Center for Housing Studies at Harvard University continually reports that homeowners spend billions annually on bathroom remodels, often taking out loans to fund these massive undertakings. Renters, however, are largely locked out of these structural upgrades, forced to live with the aesthetic choices of their landlords. Peel and stick framing bridges this gap. It provides a high-end aesthetic without violating lease agreements or risking security deposits, democratizing interior design for millions of apartment dwellers.
Overcoming Bathroom Moisture
Bathrooms present a unique challenge due to daily steam and temperature fluctuations. The ambient environment shifts drastically from cold and dry to hot and incredibly humid within minutes. Standard paper-backed stickers or cheap vinyl decals will rapidly peel away from glass surfaces in these conditions, leaving behind a sticky, unsightly mess.
When evaluating materials for high-humidity environments, industry consensus dictates a shift toward specialized adhesives designed specifically to combat thermodynamic stress. The comprehensive framework detailed in our guide, Peel Stick Bathroom Tile for Moisture, provides the quantitative baseline necessary to select materials that resist steam. If you are serious about ensuring your bathroom upgrades endure the rigors of daily use, understanding the science behind moisture-resistant polymers is absolutely essential.
This standardized evaluation ensures your frame will not degrade, warp, or lose its structural integrity. By choosing the right waterproof materials, the tile bonds securely to the glass, forming an impermeable seal. It fundamentally mitigates the risk of lifting or curling, even in poorly ventilated spaces where condensation heavily coats the mirror surface after every hot shower.
A Real-World Rental Transformation
Consider a typical rental apartment scenario. A renter is faced with an oversized, glued-to-the-wall mirror showing signs of desilvering (black edges) along the bottom due to years of water splashing from the sink. It is an eyesore that dominates the room. Removing the mirror risks shattering the glass and destroying the drywall behind it, an action that guarantees the loss of a security deposit and potential liability for structural repairs.
By applying a border of stick-on tiles for a mirror, the renter seamlessly hides the damaged edges while introducing a beautiful new color palette to the room. They create a stylish, custom-looking frame for roughly $35, completely modernizing the vanity area. If you are inspired by these dramatic shifts in aesthetic and want to see how versatile these materials can be, explore these incredible Bathroom Makeover: Peel & Stick Tile Transformations to witness firsthand how basic fixtures are elevated into designer showcases. When it is time to move out, heat from a hairdryer softens the adhesive, allowing the tiles to peel away cleanly without leaving permanent residue.
Have You Tried Peel and Stick Before?
Before diving into the mirror framing process, familiarizing yourself with basic application techniques can guarantee a flawless result. We highly recommend practicing on a smaller surface.
Read Our Easy DIY Guide: Install Peel and Stick Bathroom TilesWhat tools and materials do you need for a peel and stick mirror frame project?
The Question: Worried that you lack the heavy machinery or handyman skills required for a custom frame?
The Promise: We will detail the exact, low-cost household tools and specific tile types needed for a flawless application, proving that professional results require precision, not power tools.
A no-drill bathroom mirror frame requires minimal supplies, drastically reducing the barrier to entry for home improvement. You do not need wet saws that fling dirty water across your garage, loud nail guns that disturb the neighbors, or heavy-duty construction glue that emits noxious fumes. The entire project relies on precise measurement and proper surface preparation, leveraging the power of modern adhesive technology.
🔥 PRO TIP: The Temperature Factor For optimal adhesion, ensure your bathroom is at room temperature (between 68°F and 75°F) before starting. If the glass is freezing cold, the adhesive will stiffen and struggle to bond. Turn on your bathroom heater for 20 minutes prior to application!
The Essential Tool Kit
Gathering the right supplies ensures a smooth, frustration-free installation. Nothing derails a creative weekend project faster than having to stop halfway through to hunt down a missing tool. Most of these items are already sitting unused in your kitchen or utility drawer.
- Isopropyl Alcohol: Used to strip away oils, stubborn soap scum, and invisible glass cleaner residue. This is vastly superior to standard window cleaners, which leave behind anti-streak barriers.
- Microfiber Cloth: Ensures a lint-free drying process for maximum adhesion. Paper towels often leave behind microscopic fibers that compromise the glue's grip.
- Metal Ruler or Straight Edge: Crucial for measuring exact borders. Plastic rulers can easily be nicked by a blade, leading to crooked cuts.
- Utility Knife or Heavy-Duty Scissors: Required for clean, straight cuts through the tile backing. Always start with a fresh, extremely sharp blade.
- Dry-Erase Marker: Perfect for marking guidelines directly on the mirror. The ink easily wipes away once the tile is placed.

Selecting the Right Adhesive Tile
Not all adhesive tiles perform equally when applied to glass, particularly in spaces prone to heavy humidity. The material you choose impacts both the final aesthetic—whether it looks cheap or luxurious—and the longevity of the frame.
Mirror Framing Materials Comparison Guide
| Tile Material Type | Visual Aesthetic | Moisture Resistance | Cutting Difficulty |
|---|---|---|---|
| Basic Vinyl Stickers | Flat, printed pattern | Low (Prone to peeling) | Very Easy (Scissors) |
| 3D Gel/Resin Tiles | Raised, glossy finish | High (Waterproof) | Easy (Utility Knife) |
| Metal/Glass Composite | Premium, reflective | Very High | Moderate (Tin Snips) |
For projects requiring elevated aesthetics, the cost-to-yield ratio becomes a primary evaluation metric. Investing slightly more in a premium texture creates a final result that is indistinguishable from real stone or ceramic. Products like Olive Lines demonstrate a statistically significant advantage over basic flat stickers. This remarkable tile is engineered to be waterproof and heat-resistant, showcasing stunning 3D texture that catches the bathroom lighting perfectly, elevating a dull mirror into a captivating focal piece.
This 3D textured material strictly adheres to thermal and moisture parameters. It offers a deterministic outcome for long-lasting design, ensuring your frame looks like authentic, installed tile rather than a printed decal. The tactile feedback of the gel/resin overlay mimics the cool, hard touch of fired ceramics, bringing incredible depth to the reflection.
Mosaic vs. Vinyl: A Mini Case Study
When planning an affordable bathroom mirror frame idea, the tile pattern matters significantly more than you might realize. A mosaic-style peel and stick tile is often the most forgiving for beginners who are nervous about keeping a perfectly straight edge.
Because mosaic sheets feature multiple small squares, you can often cut along the "grout lines" between the tiny tiles. This completely eliminates the need to slice through the thicker raised portions of the material. It yields an optimal configuration with perfectly straight, factory-finished edges along the inside of your mirror. If you want to dive deeper into financial planning for your space, read our guide on Budget-Friendly Bathroom Makeovers with Peel & Stick Tiles to learn how mosaic patterns can save both time and money by reducing material waste.
Conversely, larger solid-pattern vinyl tiles require precise, long cuts. If your utility knife wavers by even a millimeter, the crooked edge will be highly visible against the reflective glass. The reflection in the mirror will double the visual impact of any mistake, making precision absolutely paramount if you choose a solid pattern.
How do you frame your bathroom mirror step-by-step using peel and stick tiles?
The Question: Nervous about making a crooked cut or ending up with tiles that fall off the glass overnight?
The Promise: This detailed walkthrough provides the exact sequencing and professional techniques for a flawless, lasting application, removing all guesswork from your DIY weekend.
Executing a DIY framed mirror under $50 is entirely achievable in a single afternoon. The secret to a professional finish lies entirely in the preparation phase. Rushing the cleaning or measuring steps will compromise the entire project, leading to lifting corners and uneven sightlines.
Surface Preparation and Cleaning
Standard glass cleaners often contain ammonia or leave behind a slick residue designed to repel dust. This residue acts as an invisible barrier, preventing peel and stick adhesive from bonding chemically to the microscopic pores of the glass.
- 1. Wipe Down the Glass: Remove all surface dust with a dry cloth to prevent scratching.
- 2. Apply Isopropyl Alcohol: Dampen a clean microfiber cloth with 70% or 90% rubbing alcohol.
- 3. Scrub the Edges: Vigorously clean the outer 4 to 6 inches of the mirror perimeter where the frame will sit.
- 4. Allow to Air Dry: Wait at least 10 minutes to ensure the alcohol has completely evaporated, leaving a pristine surface.
Measuring and Marking Guidelines
Precision is critical. A crooked frame will make the entire bathroom feel visually off-balance, inducing a subtle sense of vertigo. Do not rely on "eyeballing" the placement; the human eye is easily tricked by reflections.
- 1. Determine Frame Width: Decide how thick you want your frame (e.g., 3 inches is a classic, balanced dimension).
- 2. Mark the Glass: Use a ruler and a dry-erase marker to place small dots exactly 3 inches inward from the mirror's physical edge.
- 3. Connect the Dots: Draw a faint, continuous line around the entire perimeter. This is your infallible placement guide.
Cutting Your Materials
Standard vinyl decals often fail when exposed to daily steam. When factoring in the performance degradation curve of bathroom adhesives, specialized materials like the beautiful, grout-free Minty Ceramic 8 function as the architectural standard, bringing a fresh, modern look while maintaining intense durability.
By empirically neutralizing moisture penetration, this specific material recalibrates the baseline expectations for longevity. To cut these higher-quality, thicker materials properly, follow a distinct method rather than just hacking at them with scissors.
- 1. Measure Twice: Measure the length of your mirror edge against the length of your tile sheet.
- 2. Score the Front: Use a metal straight edge and a fresh utility knife. Score the top layer of the tile firmly, piercing the resin layer.
- 3. Snap and Cut the Backing: Bend the tile along the score line until it snaps, then slice cleanly through the paper backing.
Application and Alignment
Applying peel and stick backsplash mirror frames requires a steady hand and a methodical pace. The adhesive is incredibly strong, so you must align it perfectly before pressing down. Ripping a poorly placed tile off the glass can stretch the material, ruining its shape permanently.
- 1. Peel a Small Corner: Do not remove the entire paper backing at once. Peel back just the first two inches to expose a small strip of glue.
- 2. Align to the Guideline: Carefully place the exposed adhesive edge perfectly flush against your dry-erase marker line.
- 3. Smooth and Press: As you slowly pull the paper backing away underneath, use a plastic smoother or a dry cloth to press the tile firmly against the glass.
- 4. Eliminate Air Bubbles: Push outward toward the edges to force out any trapped air, creating a vacuum seal against the glass.

Managing the Corners
Corners are where DIY bathroom mirror frames often look sloppy, revealing their non-professional origins. You have two choices for finishing the corners of your frame, depending on your confidence level.
The easiest method is a "butt joint," where the vertical tile runs straight up to the top edge, and the horizontal tile butts directly against its side. For a more professional look, use a miter cut. This involves cutting the ends of both overlapping tiles at a 45-degree angle so they meet perfectly in the middle, creating a continuous, flowing pattern.

Troubleshooting Adhesion and Alignment
Even the most careful DIYers make mistakes. If a tile looks slightly crooked during application, stop immediately. Gently pull it back up before you have applied firm pressure. The initial tack of the adhesive allows for slight repositioning.
Once firm pressure is applied, the adhesive sets and cures. If a corner begins to lift a few days after installation, excessive moisture may have penetrated the edge before the glue could fully bond. You can permanently fix this by applying a tiny, invisible bead of clear silicone caulk along the outer and inner seams of the tile frame.
This caulking step is an optional but highly effective way to seal the edges completely. It creates an impenetrable barrier, ensuring your easy bathroom mirror DIY project survives years of hot, steamy showers without peeling. If this small upgrade sparks a desire to overhaul the entire room, check out How to Transform Your Bathroom with Peel and Stick Tiles 2025 to carry your new, sophisticated design onto your surrounding walls for a cohesive architectural aesthetic.

Final Thoughts
Framing a bare bathroom mirror does not require a contractor, expensive power tools, or a massive budget. By utilizing high-quality peel and stick tiles, you can achieve a custom, finished aesthetic in a single afternoon. The transformation is immediate, turning a mundane utility into a stunning design element that brightens your mornings.
This method inherently neutralizes the stress of permanent renovations. It provides an affordable bathroom mirror frame idea that is completely safe for renters and reversible at any time, protecting your security deposit. You gain complete control over the design, whether you prefer a sleek modern border, a faux wood grain, or a colorful mosaic edge to pop against neutral walls.
We encourage you to tackle this beginner-friendly project this weekend. Transform that boring glass rectangle into a stunning focal point. Once you conquer the bathroom, you'll be amazed at what else you can upgrade; start by reading about how a DIY Peel and Stick Tiles: Easy Kitchen Upgrade can completely revitalize your cooking space without the mess of mortar.
We Want to See Your Masterpiece!
What tile style did you choose for your mirror makeover? Share your story and before/after details with us to be featured in our upcoming community design newsletter.
Frequently Asked Questions
Can I clean the framed mirror normally?
Yes, but with slight modifications. You can use standard glass cleaner on the center of the mirror. However, avoid spraying harsh chemicals directly onto the peel and stick tile border. Wipe the tile frame gently with a damp microfiber cloth and mild soap to protect the adhesive and the printed finish.
How do I remove the tile frame when moving out?
Removal is a straightforward process. Hold a standard hairdryer a few inches away from the tile and apply medium heat for about 30 seconds. This warms and softens the adhesive backing. Gently peel the tile away starting from a corner. Use rubbing alcohol or an adhesive remover to wipe away any leftover sticky residue from the glass.
Will the tiles stick to a mirror with beveled edges?
Peel and stick tiles require a completely flat surface to achieve maximum adhesion. If your mirror has a heavy bevel (a sloped edge), the tiles may struggle to sit flush, leaving a gap where moisture can enter. This project is best suited for standard, flat-edged builder-grade glass mirrors.
How long does a peel and stick mirror frame last?
When applied correctly to a meticulously cleaned surface, a high-quality tile frame can last for years. The operational threshold depends entirely on the initial surface preparation and bathroom ventilation. Sealing the inner and outer edges with a thin line of clear silicone caulk will significantly extend the lifespan of the frame in high-moisture environments.


Leave a comment
This site is protected by hCaptcha and the hCaptcha Privacy Policy and Terms of Service apply.